Embed Size (px)
Citation preview

1
System User Guide
Contents
Login and Welcome
Creating your booking:
Availability Search
Availability response
Filters
Selecting your Flights
Quote Confirmation
Book
Reminders
Pre-ticket Amendments
Pay & Ticket
GDS Ticketing
To Do List
User Account Management:
Basics
Enable/Disable User & Change Booking Ownership
Add User
Contact Us
2
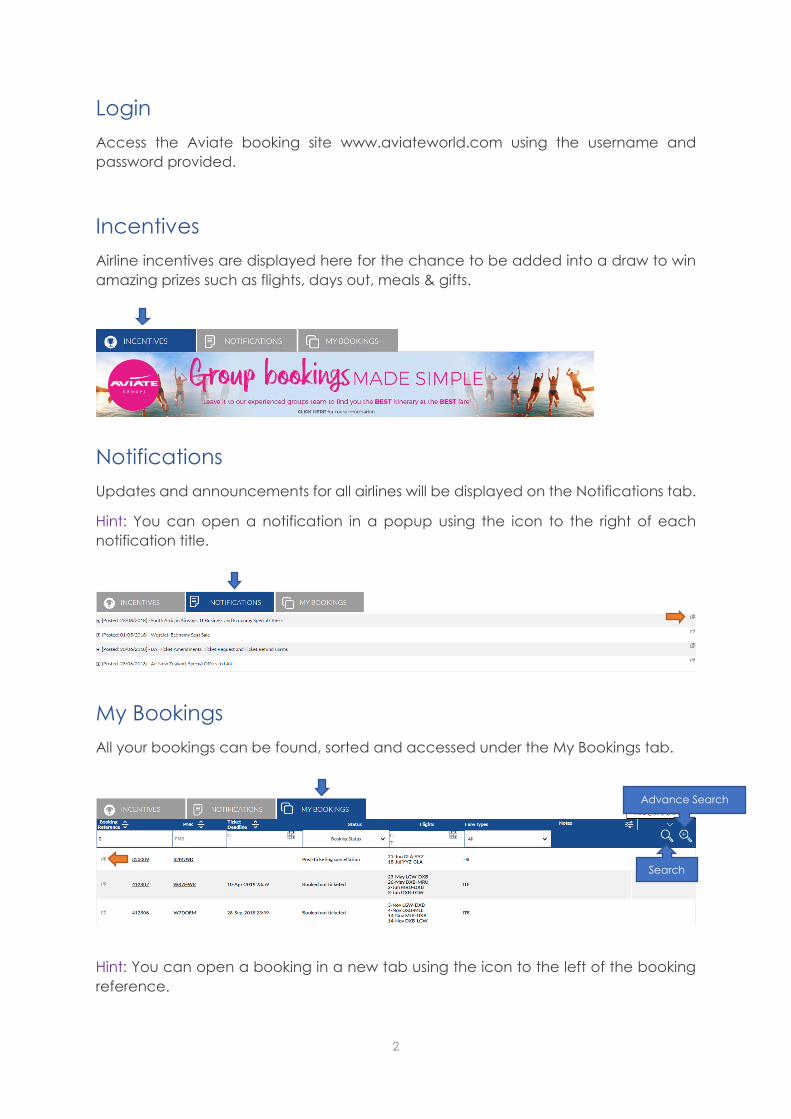
Login
Access the Aviate booking site www.aviateworld.com using the username and
password provided.
Incentives
Airline incentives are displayed here for the chance to be added into a draw to win
amazing prizes such as flights, days out, meals & gifts.
Notifications
Updates and announcements for all airlines will be displayed on the Notifications tab.
Hint: You can open a notification in a popup using the icon to the right of each
notification title.
My Bookings
All your bookings can be found, sorted and accessed under the My Bookings tab.
Hint: You can open a booking in a new tab using the icon to the left of the booking
reference.
Search
Advance Search

3
Searching My Bookings – Clicking the down arrow gives the option to search by
Booking Reference, PNR, Ticket Deadline, Status, Flights and Revenue Stream.
Advance search options are also available by Booked date, Ticket Numbers or
Passenger name.
Customizing your search – The My Bookings Tab can show a maximum of 7 columns
which can be customized depending on the information you want to see. When
clicking the customize icon the filters Booking Reference, Status, PNR and Notes are
mandatory fields but the remaining filters are optional.

4
Creating your booking
Availability search
Search for flights using the search box located on the homepage. Here you can
specify an Airline and Fare Type, or simply search across all our partner airlines.
Hint: Unsure of an airport? Click to search by country.
Quick Tip: You can pin routes to your favourites by clicking from your recent
itineraries. To remove them simply click again.

5
Availability response
When searching your itinerary through the system, Branded fares view will be the
default but you can untick this box if you prefer to use the old view.
Fast Track
Most popular shortcut offers the cheapest and shortest option available from one of
our most popular airline partners.
Simply click the shortcut option to select the applicable flights
When the recommendations appear, you will need to select the downwards arrow to
show the different route options.
This displays the different routes available with costs and via point if applicable and
further information on this fare including Rules, Fare Type and Ticketing Deadline.
You can view the fare rules by clicking the clipboard icon. If you hover over the flight
number more flight details will appear.
Shortcuts Filters Routes & Fares

6
The 3 main indicators will show as a quick view for each option (Baggage, Meals,
Seating) then clicking the 3 dots will display additional details of what fare families are
offered. If the airline does not return this information these indicators will be greyed
out with a hover over showing Not Returned.
This will display a list of attributes for this Economy Saver fare. (At a charge, included
or not offered) default will show what is included but if the package did have things
not offered you can view these by clicking the purple button.
Filters
You can filter your search results by Fare Types, Price, Airlines, Ticketing Deadline, Flight
Duration, Aircraft Type, Cabins, Branded Fares, Departure Points, and Arrival Points &
Stops. These filters are displayed as sliders or lists, which can all be reset with Reset All
displaying the original availability.
Alternatively, to hide the filters click the arrow.

7
Note: The system can offer an alternative route in your availability search. This will only
happen if you specify the airline and there is a departure airport with a cheaper fare.
For example, if you specify Edinburgh as your departure point but Glasgow is cheaper
it will still give you fares for Edinburgh but also offer Glasgow (as below).
From this page you can also upsell by clicking the Upsell button, a list of FF upsell
options will appear next to your route option as below, you can flick through these
and choose which Fare Family suits you.
At this stage once you are happy with the fare and attributes, select your flight, click
on the Review & Continue button, a tab will show to display your selected flights, fare
and ticket deadline details. If you Continue from here, this will progress to the pricing
stage with those selected flights.

8
APD
Passengers aged 2-15 are exempt from paying Air Passenger Duty tax. When pricing,
the system needs to know the age of these passengers in order to apply the correct
pricing entry.
After the availability response page when the flights have been selected a pop up
appears for you to specify the passenger ages.
Note: If an adult passenger is over 15 you can confirm past this stage without an age
specified.
If there is a booking created with youths only, the booking will automatically change
to Awaiting Manual Pricing status and will need to be looked at by Aviate.
Quote Summary
From the Summary page you can review the details of the flights you have selected,
and view alternative fares if available, some flights may give you the option to upsell
into the next cabin.
Abandon Booking will take you back to the homepage and Abandon the quote,
alternatively you can email yourself the quote or print a copy if needed.
Hit Continue to proceed to add passenger details and complete you’re booking.
Note: Pricing policies appear on the quote page, passenger name page and display
booking page.

9
Book
This page allows you to insert your passenger details, add a personal reference if you
desire & amend emergency contact details. Once you are happy, accept the Terms
and Conditions after reading through them (via the link) and click Book – no deposit
to create your PNR.
Note: DOB and Gender are always required to be entered together. DOB and Gender
are mandatory for Children, Youths and Infant passengers.
If you are ready to ticket instantly, you can use Pay & Ticket to proceed straight to
your ticketing options.
Display Booking Page
On the pre-ticketing booking screen, you can:
1. View the Airline Locator
2. Add a new booking reference
3. View emails that have been sent for the booking
4. View the Booking Status
5. Cancel Booking
6. Pay & Ticket
7. View the Fare Rules
8. Amend emergency contact details
9. Split passengers from the PNR
10. Add/amend APIS details
11. Add/view notes
12. View/Set Reminders
13. Pre-ticket Amendment
6 1
5
8
7
2
9
3
4
10
11
12
13

10
Reminders
Once you have created a PNR through Aviate, a ticket deadline reminder will have
automatically been generated to send the day prior to the ticket deadline. You can
view this, and create additional reminders for the booking by clicking Reminders.
Pre-ticket Amendments
After creating a booking, you are able to make a pre-ticket amendment through the
system. Select (by ticking the box) which flights you would like to amend then click
Amend selected flight(s). A pop up will appear giving you the option to amend the
date, airport, cabin & connection point. Once you have chosen your changes click
Check Availability. As per screenshot below we have selected to change the
inbound flight departure date.
Hint: Married sectors are highlighted, and can only be changed together. The website
will automatically select any married flights together.
The results are displayed similar to an availability search by showing each flight
available on that date and also alternative routes. Select the flight you would like then
click Review & Continue, this will then give you a summary. From here you can
Abandon changes or Update booking. The amendment will then be made and the
flights will update on the display booking page.

11
Updated flights shown below:

12
Pay & Ticket
Retrieve your booking
To retrieve your booking at a later date, enter the PNR / booking reference or
passenger name into the search box in the top left corner, select which search item
this is from the dropdown and click Display.
You will then be directed to the confirmation screen above, when you can Pay &
Ticket.
Pay & Ticket
Selecting Pay & Ticket from the display booking page will re-direct you to a secure
payment screen.
Select your payment method from the Payment Method drop down. These will be
displayed depending on the payment options you have agreed with Aviate.

13
Card Payment –
Select Credit Card from the Payment Method drop down.
Select the card type from the next drop down box.
Check the box to confirm the amount that will be taken from the payment card.
Enter the card details as instructed on the screen, and click Confirm Order.
When the payment has been authorised you will be redirected to a confirmation
screen that will display your itinerary, fare and e-ticket numbers.
An email will also be sent containing these details and other travel information.
Direct Debit –
Select Direct Debit from the Payment Method drop down.
Check the box to confirm the amount that will be taken by Direct Debit.
The status of your booking will now change to Ticket Request Awaiting Authorization
and an email will be sent to confirm the request.
Once the payment has been taken and cleared by Aviate Accounts, Aviate will issue
your booking and email an Itinerary Receipt with ticket numbers.
Bank Transfer –
Select Bank Transfer from the Payment Method drop down.
Check the box to confirm the amount that will be transferred to Aviate.
The status of your booking will now change to Ticket Request Awaiting Authorization
and an email will be sent to confirm the request.
Once Aviate accounts receive the Bank Transfer made by yourselves, Aviate will issue
your booking and email an Itinerary Receipt with ticket numbers.

14
Credit Allowance –
Select Credit Allowance from the Payment Method drop down.
Check the box to confirm the amount that deducted from your Credit Allowance
agreement with Aviate and read and accept the Terms and Conditions.
When the payment has been authorised you will be redirected to a confirmation
screen that will display your itinerary, fare and e-ticket numbers.
An email will also be sent containing these details and other travel information.
Note: If a fare is no longer available at the time of ticketing the system will do a Best
Buy and offer the lowest available fare. A message will appear for you to confirm the
new details.

15
GDS Ticketing
For Aviate GDS bookers –
Amadeus: Once you are ready to ticket, transfer booking ownership using the
following entries:
RP/MANU126AM/ALL
RF NAME; ER
*This entry will transfer all linked PNR’s. If you only wish to transfer the PNR you are
working on, the transaction code is RPS, e.g. RPS/MANU126AM/ALL
Aviate World: The GDS Ticketing option can be found both under My Account in the
top right corner, and the left hand quick-link tabs.
Select your airline and fare type, enter your PNR reference and click Grab PNR.
You will then be directed to a page where you can amend the airline / fare type /
passenger type if necessary, confirm the child ages, and add a reference if desired.
From this page you will need to select the pricing date (either today or a date in the
past when the booking was priced) then continue to Price and then proceed to
Ticket, using your preferred payment method.

16
Read-only access will be given so that you can view your PNR in your GDS. For all post-
ticketing amendments, please contact Aviate.
Grab & Store
Grab using GDS Ticketing as normal, then once the PNR is priced through the website
an additional option shows Grab Only.
Once saved using Grab Only the booking sits in the system as a normal booking and
can be managed in the same way as a booking made through the system:

17
To Do List
The To Do List Quick-link Tab is an easy way to manage your online bookings. The
categories with the list are:
Ticketing Deadline – Lists your bookings with deadlines from today’s date to 14 days’
time
Requires Cancellation – Lists your bookings which have passed the ticket deadline so
can no longer be issued and need to be cancelled down
Awaiting Ticket Deadline – Un-priced bookings will not have a ticket deadline stored
and will show here. Contact Aviate to price manually if required
Ticket Request Awaiting Authorization – Lists your bookings for which you have
requested tickets from Aviate through the system via Direct Debit or Bank Transfer
Note: The To Do List will display all your agency bookings if your user account privileges
are set to My Operator, and will display only user bookings if your user account
privileges are set to My Bookings. See User Account Management section for more
details.
Hint: Click the arrow to refresh the list

18
User Account Management
Account management options can be found under the My Account drop down list
located at the top right of the screen.
Change Password
To change your password, click on Change Password and follow the instructions on
screen.
Note: Password must be equal to or greater than 8 characters and must include 1
capital and 1 number
Manage Users
Click on Manage Users and a list of all user accounts for your agency will be displayed.
You can search for a specific user by clicking on the chosen operator and then on
the header bar labelled Search For Users which will display additional search fields.
A range of quick management options are available next to each user account –
Edit: update contact details and system access
Password Change Request: send a password reset email to the user email
Bookings: display all bookings created by the user

19
Further management options are available from the Select User Action(s) drop down
list –
Enable User(s)
Disable User(s)
Change Booking Ownership
Add User
Enable/Disable User & Change Booking Ownership
To disable a user account for example if an employee has left the company select
the user account and choose Disable User(s) from the dropdown.
A pop-up box will appear to ask you which user account you would like the bookings
created by that user to be assigned to. Select the user from the dropdown and click
Lock User(s)
20
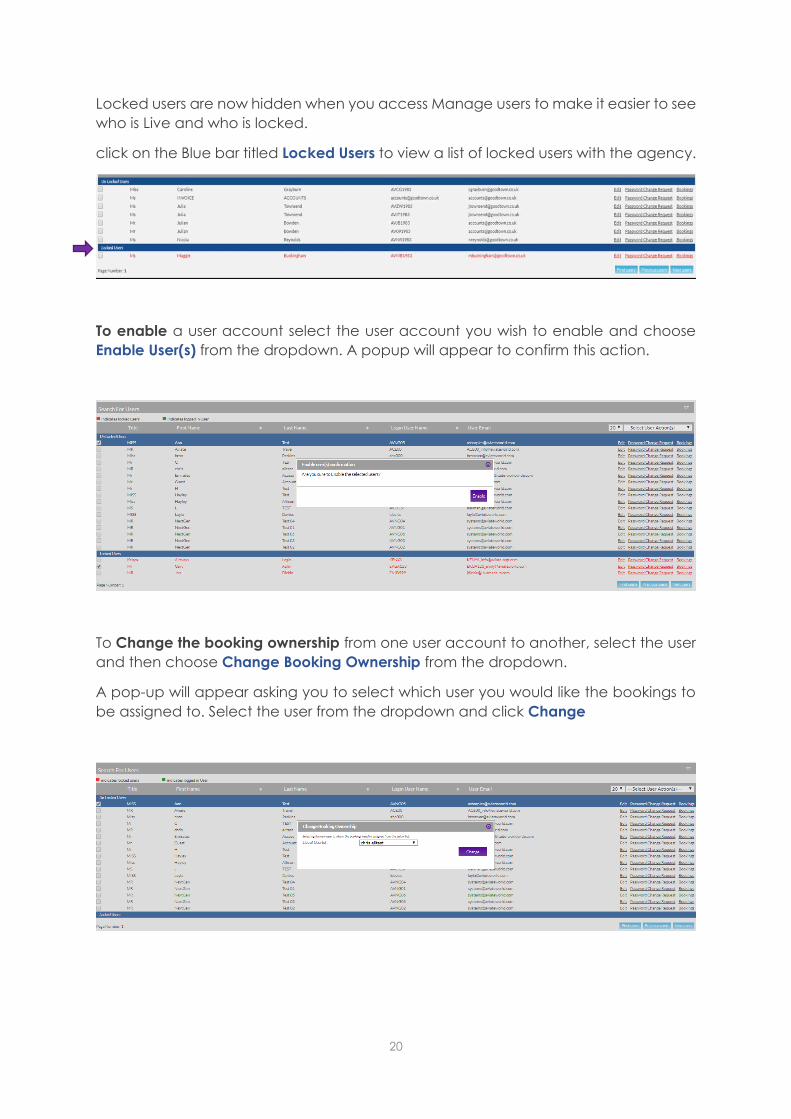
Locked users are now hidden when you access Manage users to make it easier to see
who is Live and who is locked.
click on the Blue bar titled Locked Users to view a list of locked users with the agency.
To enable a user account select the user account you wish to enable and choose
Enable User(s) from the dropdown. A popup will appear to confirm this action.
To Change the booking ownership from one user account to another, select the user
and then choose Change Booking Ownership from the dropdown.
A pop-up will appear asking you to select which user you would like the bookings to
be assigned to. Select the user from the dropdown and click Change

21
Add User
To add a new user select Add User from the Select User Actions dropdown. The below
Add User pop-up will display.
Add all the required contact information.
Check the box next to each required airline to enable access.
User Type – Select the option from the dropdown list.
My Booking: allows the user to see only their own bookings
My Operator: allows the user to see all bookings made by the agency
Permissions – check the boxes next to the required permission settings.
Agency Administrator: allows the user to manage other user accounts
Book: allows the user create bookings
Amend: allows the user to amend bookings
Ticket: allows the user to ticket bookings
Click Add User
An email will be sent to the user for them to set up a password and complete the
process.
22
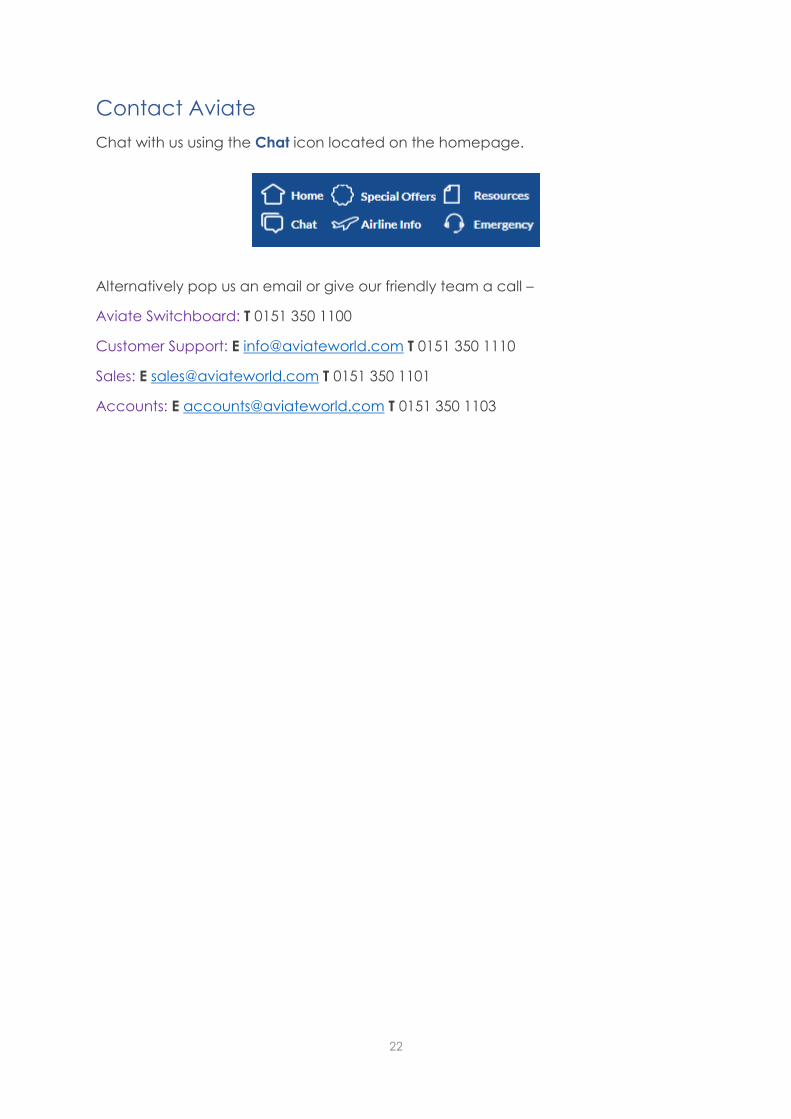
Contact Aviate
Chat with us using the Chat icon located on the homepage.
Alternatively pop us an email or give our friendly team a call –
Aviate Switchboard: T 0151 350 1100
Customer Support: E [email protected] T 0151 350 1110
Sales: E [email protected] T 0151 350 1101
Accounts: E [email protected] T 0151 350 1103