Embed Size (px)
Citation preview
Course StatementThis course will serve as a foundation course to introduce funda-mental concepts, materials, processes, and vocabulary that are used in two-dimensional design. Assignments, lectures, demon-strations, and critiques will expose students to the topics of com-position, figure and ground, color theory, scale, contrast, form and function, progression, and transformation. Students will work with a variety of materials to create projects such as photography, painting/ drawing, cut paper, and collage.
This course is not geared towards a particular medium. Concen-tration within one medium would undermine the intent of the course. We will investigate the formal and communicative aspects of two-dimensional form and develop the visual language skills necessary for success in any artistic endeavor.
OverviewOur objective is to create portfolio quality Fine Art, with a focus to develop the skills necessary for the professional and artistic studio. Course investigations will centrally focus on creative de-sign solutions for a wide range of visual problems. We also want to expand our understanding of design philosophy and create aesthetically interesting and skillfully designed artistic expres-sion. The level of effort required for successful completion of this course is HIGH.
Studio Projects are given by the studio instructor and executed by students in class or as homework. You are puzzle solvers. The projects are puzzles. You are artists. The projects are art.
Lectures will occur before or during studio projects and provide students with the important conceptual and historical information necessary for the comprehension and completion of each studio project. Taking notes during lectures are recommended.
Demonstrations are given by the instructor on the uses of tools, techniques, materials needed for successful completion of each studio project. Taking notes during demonstrations are recom-mended.
Critiques are held with the entire class, small groups or individu-ally to discuss the process and final solution of each studio proj-ect. Taking notes during critiques are recommended.
The studio assignments, lectures, demonstrations and critiques will introduce students to a visual vocabulary that will provide the entire class with a common language which is necessary for meaningful and comprehensible class discussions. In addition, conceptual , formal, and mechanical skills learned in 2D Design can be applied to any advanced class within the fine, artisanry, and design arts.
Syllabus ART 1305 Two-Dimensional Design
Book: Design Language - Tim McCreighta staple for artists of any kind, at any levelUTA bookstore, Amazon, Borders, Barnes and Noble etc
This book is designed with elegance, filled with quotes from the greatest creative think-ers, and has excellent definitions and explanations of all basic art and design terms; i.e. texture, form, pattern, depth, shape, contrast, line, hierarchy, gestalt, critique, color, hue, harmony, balance, positive/negative, etc.
Design Basics - David Lauer
Preparation and StudioShowing up on time with materials, disks, projects, sketchbook and whatever else you need to make effective use of the class time, and a good attitude are mandatory. This course will require a good deal of work OUTSIDE of class time, so plan your time effi-ciently and use it effectively. The work load is heavy, difficult, and interesting.
Materials Hobby Lobby, JoAnne’s, AC Moore, Michaels, Asel Art, Walmart, Office Depot, Charrette, DickBlick, online, etc.Sketchbook (any NON -Lined paper bound in a single book)Something safe, dry and sturdy for transporting work, i.e. portfolio (may be self-made)Xacto knife and replacement blades (scissors are recommended as well)metal rulerscrapbooking / doublesided tape, sticky dotsgluesticktracing paperpencilregular and fine-tip sharpie markerssmooth/non textured cardstock paper (multicolor pack, the more colors, the better)inexpensive colored pencils inexpensive acrylic paints (Black, White, and primary colors (Yellow, Blue, Red)black writing/illustration ink ( India ink, Higgins, Calligraphy ink, Dr. PH Martin) small size2 Fine tip liner brushes for ink illustrationwhite ink or liquid acrylic - small sizecutting board /self healing cutting boardPaper for wet media, i.e. ink, light washes, paints (small packet)disposable camera or digital cameraVariety of inexpensive paint brushesOther minor materials may be required, so budget some extra money.
Matte/ Illustration/ Foam Core (preferably Matte or Illustration Board)Project 1 two 24 X 30 inch black or grayProject 2 one 12 X 15 inch grayProject 3 one 14 X 30 inch blackProject 4 six 12 X 12 inch grayProject 5 one 18 X 24 inch black, white, OR gray (appropriate to image)Project 6 three 10 X 24 inch black
To lower expenses, shop around, split costs with classmates or other art majors. Many of these items you probably already own. Often you can purchase single sheets of paper rather buying the entire book. Most of these items you will use in future semesters and for the rest of your career so treat them as an investment.
Syllabus ART 1305 Two-Dimensional Design
required
suggested
$55-100464231412410-1244 - 84877 plus prints3-55-10
Matte board total
$ 30-40
roughly $120 -150+$10 book
Drop Policy: Students may drop or swap (adding and dropping a class concurrently) classes through self-service in My-Mav from the beginning of the registration period through the late registration period. After the late registration period, students must see their academic advisor to drop a class or withdraw. Undeclared students must see an advisor in the University Advising Center . Drops can continue through a point two-thirds of the way through the term or session. It is the student’s responsibility to officially withdraw if they do not plan to attend after registering. Students will not be automati-cally dropped for non-attendance. Repayment of certain types of financial aid administered through the University may be required as the result of dropping classes or withdrawing. Contact the Financial Aid Office for more information.
Americans with Disabilities Act: The University of Texas at Arlington is on record as being committed to both the spirit and letter of all federal equal opportunity legislation, including the Americans with Disabilities Act (ADA). All instructors at UT Arlington are required by law to provide “reasonable accommodations” to students with disabilities, so as not to discrimi-nate on the basis of that disability. Any student requiring an accommodation for this course must provide the instructor with official documentation in the form of a letter certified by the staff in the Office for Students with Disabilities, University Hall 102. Only those students who have officially documented a need for an accommodation will have their request hon-ored. Information regarding diagnostic criteria and policies for obtaining disability-based academic accommodations can be found at www.uta.edu/disability or by calling the Office for Students with Disabilities at (817) 272-3364.
Academic Integrity: It is the philosophy of The University of Texas at Arlington that academic dishonesty is a completely unacceptable mode of conduct and will not be tolerated in any form. All persons involved in academic dishonesty will be disciplined in accordance with University regulations and procedures. Discipline may include suspension or expulsion from the University. According to the UT System Regents’ Rule 50101, §2.2, “Scholastic dishonesty includes but is not limited to cheating, plagiarism, collusion, the submission for credit of any work or materials that are attributable in whole or in part to another person, taking an examination for another person, any act designed to give unfair advantage to a student or the attempt to commit such acts.”
Student Support Services Available: The University of Texas at Arlington has established a variety of programs to help stu-dents meet the challenges of college life. Support to students includes advising, counseling, mentoring, tutoring, supple-mental instruction, and writing assistance. For a complete list of academic support services, visit the Academic Assistance resource page of the Office of Student Success Programs, www.uta.edu/uac/studentsuccess/academic-assistance. To help students address personal, academic and career concerns, individual counseling is also available. For more information, students are encouraged to contact Counseling Services www.counseling.uta.edu at (817) 272-3671 or visit a counselor in 216 Davis Hall.
Electronic Communication Policy: The University of Texas at Arlington has adopted the University “MavMail” address as the sole official means of communication with students. MavMail is used to remind students of important deadlines, advertise events and activities, and permit the University to conduct official transactions exclusively by electronic means. For example, important information concerning registration, financial aid, payment of bills, and graduation are now sent to students through the MavMail system. All students are assigned a MavMail account. Students are responsible for checking their MavMail regularly. Information about activating and using MavMail is available at http://www.uta.edu/oit/email/. There is no additional charge to students for using this account, and it remains active even after they graduate from UT Arlington.
Syllabus ART 1305 Two-Dimensional Design
Evaluation and Expectations
AttendanceWe will follow a tight schedule and you should attend all classes.3 absences - 1 letter grade drop from final grade4 absences - 2 letter grade drop from final grade5 absences or more - failure
Tardiness & Leaving EarlyTardiness and leaving early will count as half an absence. I keep very strict attendance records, be warned.
ParticipationIn order to communicate with other artists and non-artists regarding the large and complex issues surrounding the visual arts and design, you will need to develop conceptual and verbal skills. In the class room we can develop these skills by sharing our ideas with each other through discussion and critiques. Sharing your point of view, questions, and knowledge will help everyone in the class to develop more sophisticated ideas about the visual arts, and enhance your ability to present those ideas. Therefore, participation in class is an essential part of your grade. Don’t be afraid to participate in class. Your opinion is an important part of the studio experience.
CraftsmanshipAttention to detail and presentation is essential to all studio projects given in this class. Each assignment should be well crafted and pre-sented with pride. If the work is not well crafted you will be asked to do it over, or receive a poor grade.
ThoughtfulnessWhen form and content are married there is poetry. Careful attention to the relationship between content and form are an important part of your grade. We are not looking for pretty pictures. We are looking for thought-ful work.
EffortFinal grades are the total of all projects grades, attendance, and partici-pation. Coming to class, and finishing the assignments does not guaran-tee a good grade - effort does. Lap tops, cell phones and text messaging devices are not to be used during class time. DO NOT SEND OR READ TEXT MESSAGES DURING CLASS TIME. MP3 players are allowed during studio work sessions and surfing the internet via phone, iPad, PDA or laptop is not allowed.
Most importantly. HAVE FUN AND TAKE PRIDE IN WHAT YOU CREATE!
Syllabus ART 1305 Two-Dimensional Design
Syllabus ART 1305 Two-Dimensional Design
GradingYour sketches, class participation, attendance, craftsmanship, project execution,development, thoughtfulness, timeliness, and effort will all factor into your individual project and final semes-ter grade. Only a display of excellence in all the ‘Evaluation and Expectations’ areas will earn student an ‘A’
Final grades will be an average of all of the above - not just grades on individual assignments.
A %100-90B % 89-80C % 79-70D %69-60Failure 59 or below
UTA only records full grades (A, B, etc.) If your grade averages to a C+...expect a C for your final grade. I do not round up.
Student Learning Outcomes+The student will be able to identify basic 2-D design elements and principles.
+The student will demonstrate the ability to critically analyze and discuss 2D design and art forms.
+The student will demonstrate the ability to conceive, develop and construct 2-D design solutions from prescribed conceptual and/or formal guidelines to aesthetically finished pieces.
+The student will be introduced to the basic visual language skills, process, vocabulary and begin to develop the visual sensitivity necessary for the creation of successful upper level and profes-sional design solutions.
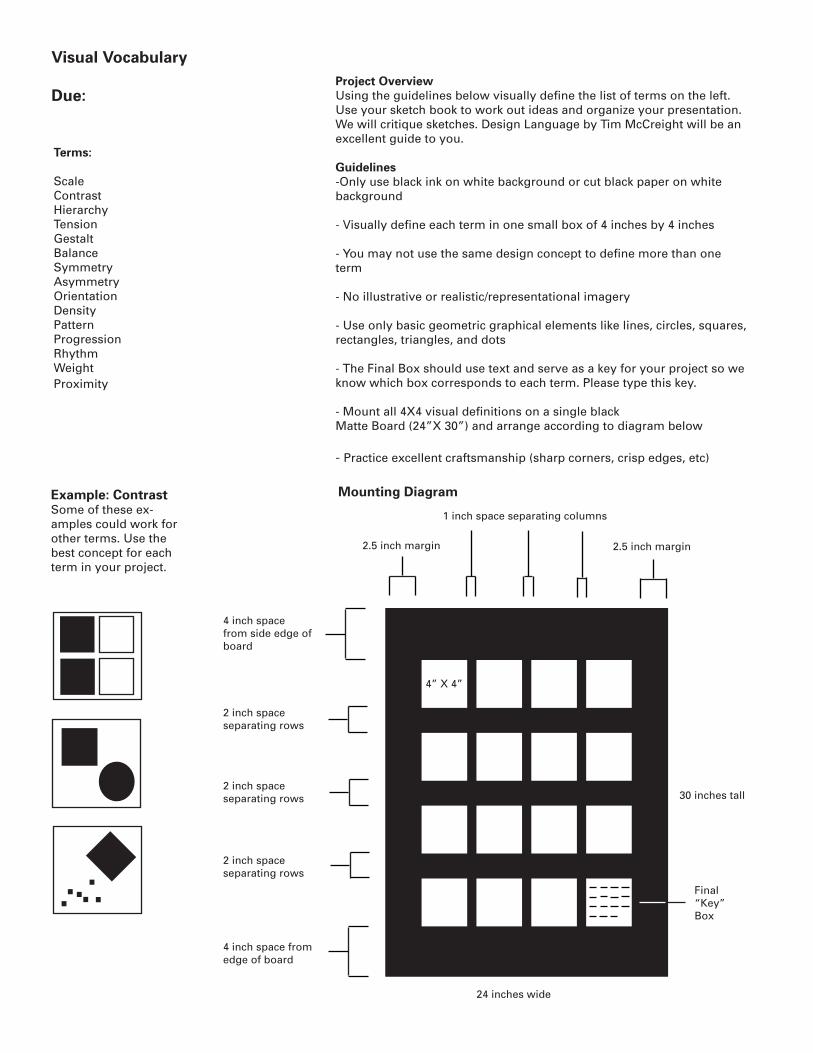
Visual Vocabulary
Due:Project OverviewUsing the guidelines below visually define the list of terms on the left. Use your sketch book to work out ideas and organize your presentation. We will critique sketches. Design Language by Tim McCreight will be an excellent guide to you.
Guidelines-Only use black ink on white background or cut black paper on white background
- Visually define each term in one small box of 4 inches by 4 inches
- You may not use the same design concept to define more than one term
- No illustrative or realistic/representational imagery
- Use only basic geometric graphical elements like lines, circles, squares, rectangles, triangles, and dots
- The Final Box should use text and serve as a key for your project so we know which box corresponds to each term. Please type this key.
- Mount all 4X4 visual definitions on a single blackMatte Board (24”X 30”) and arrange according to diagram below
- Practice excellent craftsmanship (sharp corners, crisp edges, etc)
Terms:
ScaleContrastHierarchyTensionGestaltBalanceSymmetryAsymmetryOrientationDensityPatternProgressionRhythmWeightProximity
Mounting Diagram
24 inches wide
30 inches tall
4” X 4”
2 inch space separating rows
4 inch space from edge of board
4 inch space from side edge of board
2 inch space separating rows
2 inch space separating rows
1 inch space separating columns
2.5 inch margin2.5 inch margin
Final “Key”Box
Example: ContrastSome of these ex-amples could work for other terms. Use the best concept for each term in your project.
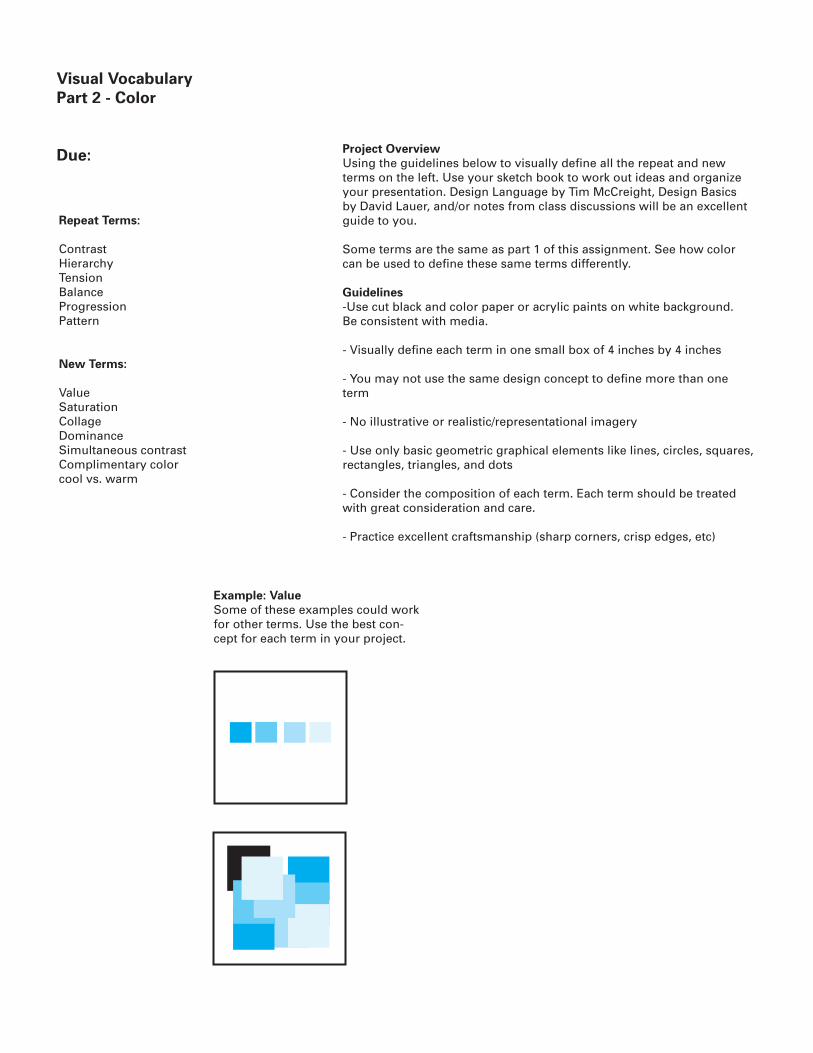
Visual VocabularyPart 2 - Color
Due: Project OverviewUsing the guidelines below to visually define all the repeat and new terms on the left. Use your sketch book to work out ideas and organize your presentation. Design Language by Tim McCreight, Design Basics by David Lauer, and/or notes from class discussions will be an excellent guide to you.
Some terms are the same as part 1 of this assignment. See how color can be used to define these same terms differently.
Guidelines-Use cut black and color paper or acrylic paints on white background. Be consistent with media.
- Visually define each term in one small box of 4 inches by 4 inches
- You may not use the same design concept to define more than one term
- No illustrative or realistic/representational imagery
- Use only basic geometric graphical elements like lines, circles, squares, rectangles, triangles, and dots
- Consider the composition of each term. Each term should be treated with great consideration and care.
- Practice excellent craftsmanship (sharp corners, crisp edges, etc)
Repeat Terms:
ContrastHierarchyTensionBalanceProgressionPattern
New Terms:
ValueSaturationCollageDominanceSimultaneous contrastComplimentary colorcool vs. warm
Example: ValueSome of these examples could work for other terms. Use the best con-cept for each term in your project.
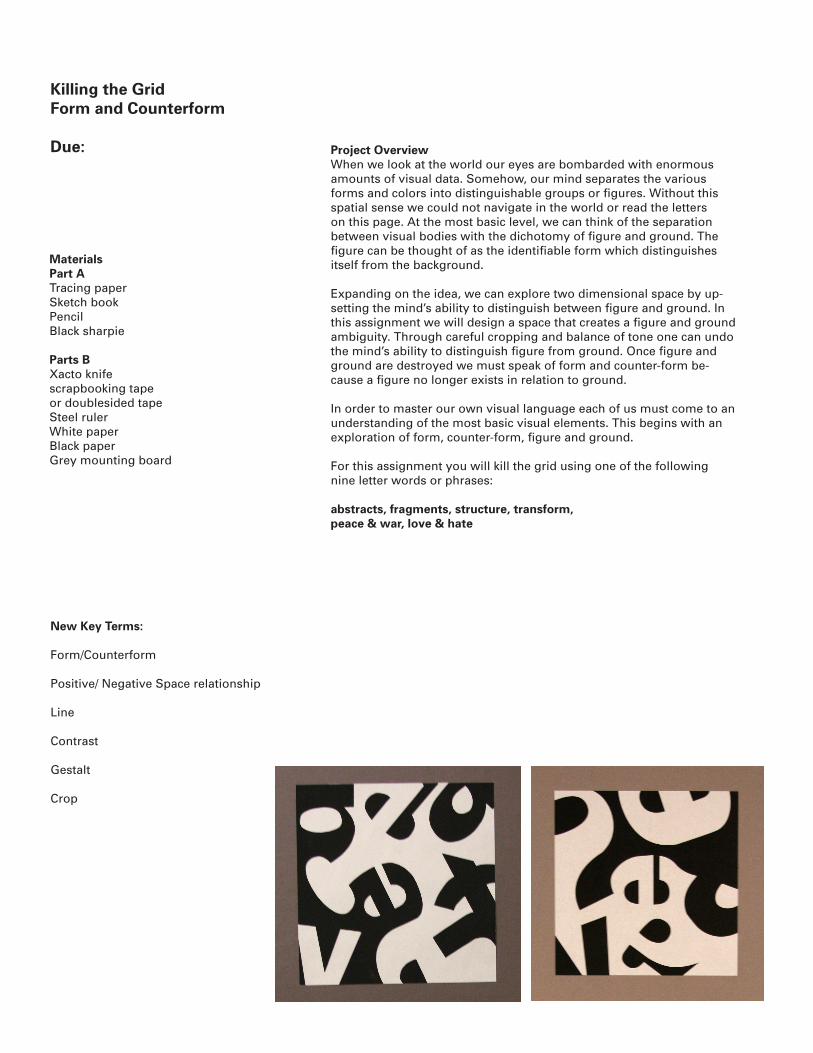
Killing the GridForm and Counterform
Due:
New Key Terms:
Form/Counterform
Positive/ Negative Space relationship
Line
Contrast
Gestalt
Crop
Project OverviewWhen we look at the world our eyes are bombarded with enormous amounts of visual data. Somehow, our mind separates the various forms and colors into distinguishable groups or figures. Without this spatial sense we could not navigate in the world or read the letters on this page. At the most basic level, we can think of the separation between visual bodies with the dichotomy of figure and ground. The figure can be thought of as the identifiable form which distinguishes itself from the background.
Expanding on the idea, we can explore two dimensional space by up-setting the mind’s ability to distinguish between figure and ground. In this assignment we will design a space that creates a figure and ground ambiguity. Through careful cropping and balance of tone one can undo the mind’s ability to distinguish figure from ground. Once figure and ground are destroyed we must speak of form and counter-form be-cause a figure no longer exists in relation to ground.
In order to master our own visual language each of us must come to an understanding of the most basic visual elements. This begins with an exploration of form, counter-form, figure and ground.
For this assignment you will kill the grid using one of the following nine letter words or phrases:
abstracts, fragments, structure, transform,peace & war, love & hate
Materials Part ATracing paperSketch bookPencilBlack sharpie
Parts BXacto knifescrapbooking tape or doublesided tapeSteel rulerWhite paperBlack paperGrey mounting board

Before you begin Before you begin, create a crop window. One at 2.5 inches X 2.5 inches to help you visualize your crops.
You must photocopy several enlarged variations of the letters found in your term (letters provided). You will need several sizes to successfully complete the assignment. Photocopy at %200 of original size, then %250, etc until you are satisfied with the scale for your crops. You may need some very large scale copies to complete the work.
Part ADraw a nine square grid in your sketch book. Each square should be 2.5 x 2.5 inches. Arrange the word from left to right and top to bottom so we may read it more easily. Trace the letter-forms into the squares. Do not trace the entire letter into each square. Crop the letters.
Larger photocopies tend to yield more successful transitions however you MUST retain the identifiable features of the letter-forms so that they retain legibility.
Sketch the letters until they flow into one another. The grid will become invisible when the letters flow. Reverse the tone of the figure and ground so that some time the ground is black and sometimes it is white. This will help you create a composition that flows. A minimum of 10 sketches are due. You may use a black shapie or white ink to help connect up your let-terforms and create super smooth transitions from one letter to another across the grid. These touch-ups MUST be minor - in other words the initial crops and rotations should do 95% of the work.
Part BUse all 9 letters and crop each letter retaining legibility (use part A to guide you). Apply those letters with adhesive onto grey board. Use a nine square grid to arrange your word. Each square will be 2.5 x 2.5 inches. The total square will be 7.5 x 7.5 inches and mounted on a 12 x 15 inch grey board. Figure and ground should become ambiguous and fluid. The grid should be destroyed. 1 composition is due. Use Photocopy machine to get a CLEAN rendering of your final 9 square grid. Use sharpie mark-ers to fill in tiny odd gaps, create super smooth transitions from shape to shape, then photocopy entire composition again to get 1 single smooth print out. High Quality Photocopying will eliminate seams between 2.5 inch squares and odd blotches from Sharpie Marker to give a very clean, sharp White and sharp Black composition to be mounted.
Final sizePart A10 – 7.5 x 7.5 inch sketches of nine square grid on tracing paper
Part B7.5 x 7.5 inch square grid made of nine 2.5 inch squares mounted on 12 x 15 inch Grey mounting board.
Killing the GridForm and Counterform


a b c de f g hi j a bc d e fg h i j
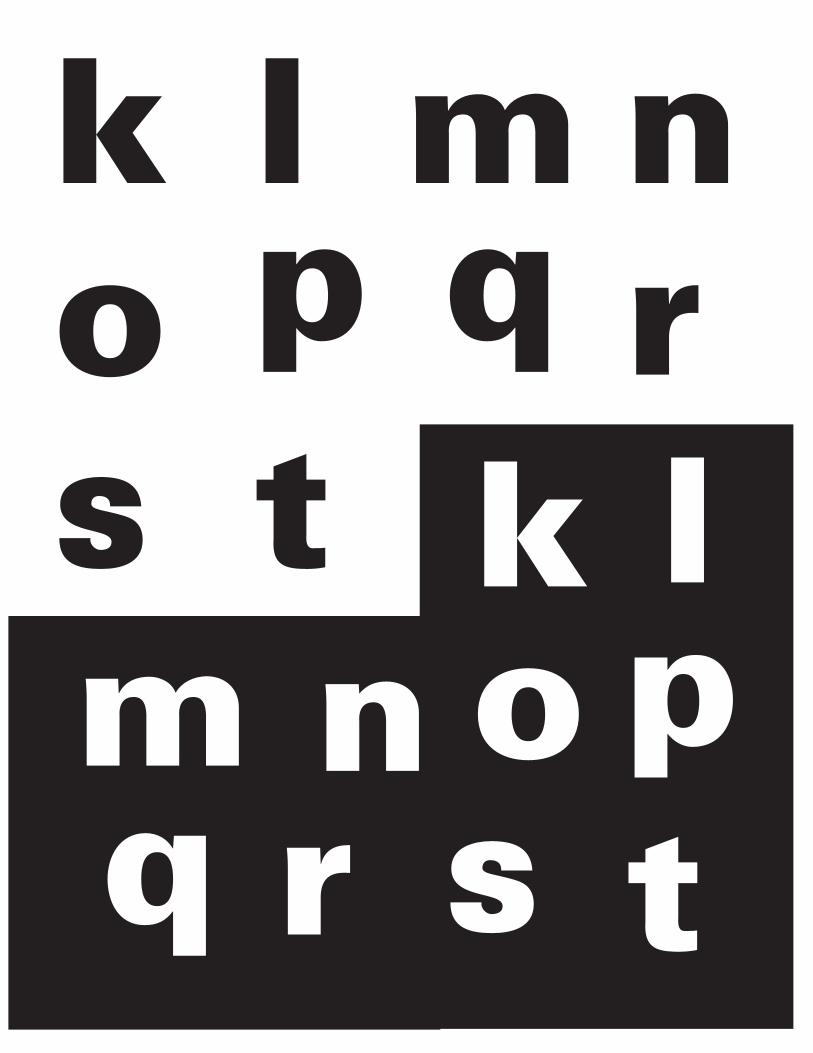
k l m no p q rs t k lm n o pq r s t

l
u v wx y z
u v wx y z &
&

Tangram Transformational Study
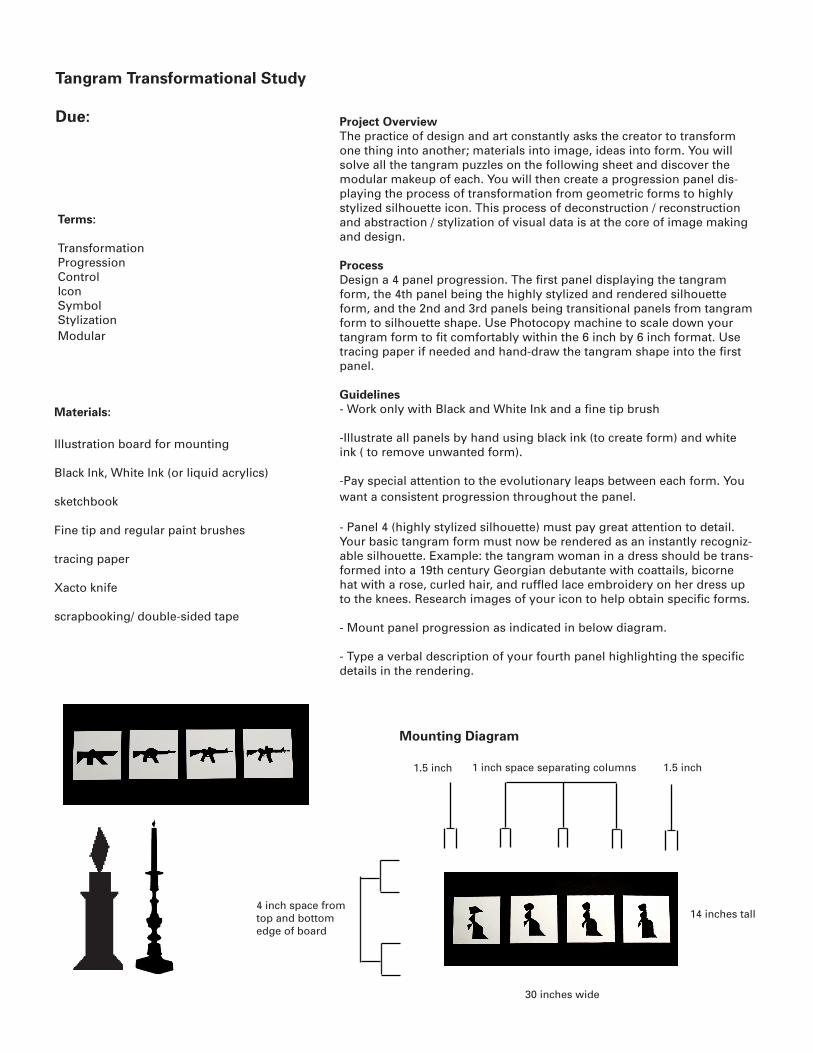
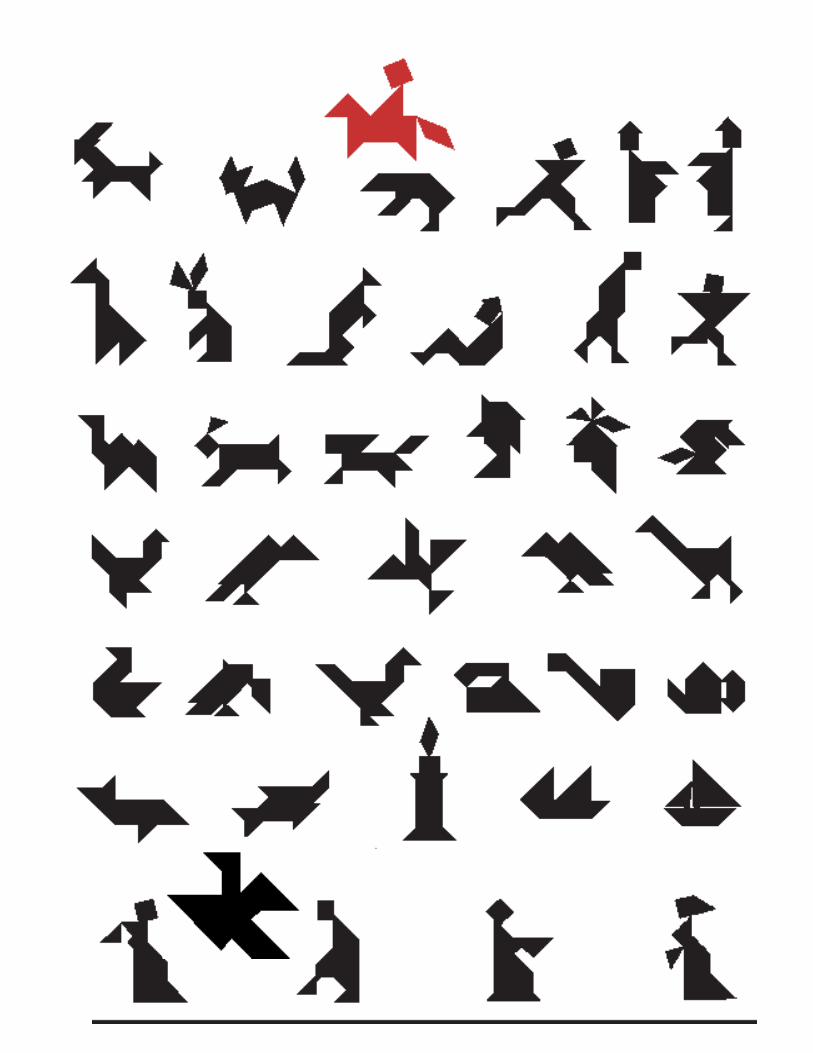
Due: Project OverviewThe practice of design and art constantly asks the creator to transform one thing into another; materials into image, ideas into form. You will solve all the tangram puzzles on the following sheet and discover the modular makeup of each. You will then create a progression panel dis-playing the process of transformation from geometric forms to highly stylized silhouette icon. This process of deconstruction / reconstruction and abstraction / stylization of visual data is at the core of image making and design.
ProcessDesign a 4 panel progression. The first panel displaying the tangram form, the 4th panel being the highly stylized and rendered silhouette form, and the 2nd and 3rd panels being transitional panels from tangram form to silhouette shape. Use Photocopy machine to scale down your tangram form to fit comfortably within the 6 inch by 6 inch format. Use tracing paper if needed and hand-draw the tangram shape into the first panel.
Guidelines- Work only with Black and White Ink and a fine tip brush
-Illustrate all panels by hand using black ink (to create form) and white ink ( to remove unwanted form).
-Pay special attention to the evolutionary leaps between each form. You want a consistent progression throughout the panel.
- Panel 4 (highly stylized silhouette) must pay great attention to detail. Your basic tangram form must now be rendered as an instantly recogniz-able silhouette. Example: the tangram woman in a dress should be trans-formed into a 19th century Georgian debutante with coattails, bicorne hat with a rose, curled hair, and ruffled lace embroidery on her dress up to the knees. Research images of your icon to help obtain specific forms.
- Mount panel progression as indicated in below diagram.
- Type a verbal description of your fourth panel highlighting the specific details in the rendering.
Terms:
TransformationProgressionControlIconSymbolStylizationModular
Mounting Diagram
4 inch space from top and bottom edge of board
1 inch space separating columns
30 inches wide
14 inches tall
1.5 inch 1.5 inch
Materials:
Illustration board for mounting
Black Ink, White Ink (or liquid acrylics)
sketchbook
Fine tip and regular paint brushes
tracing paper
Xacto knife
scrapbooking/ double-sided tape
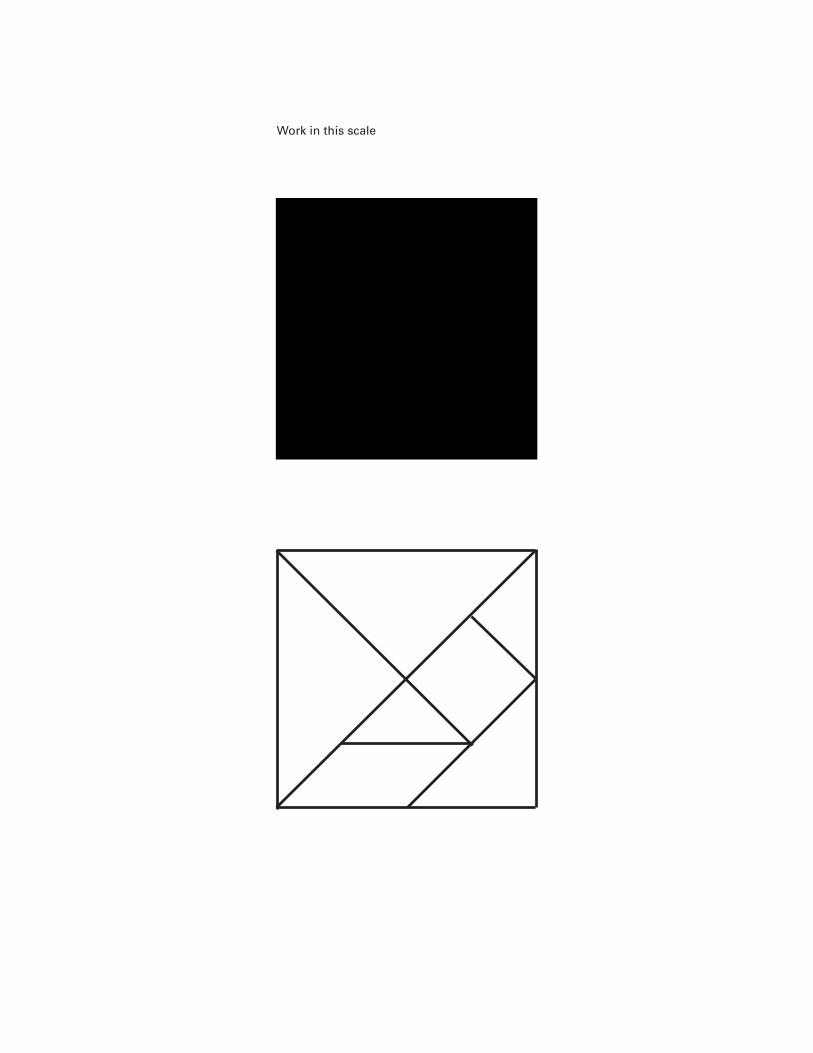
Work in this scale
Color Grid
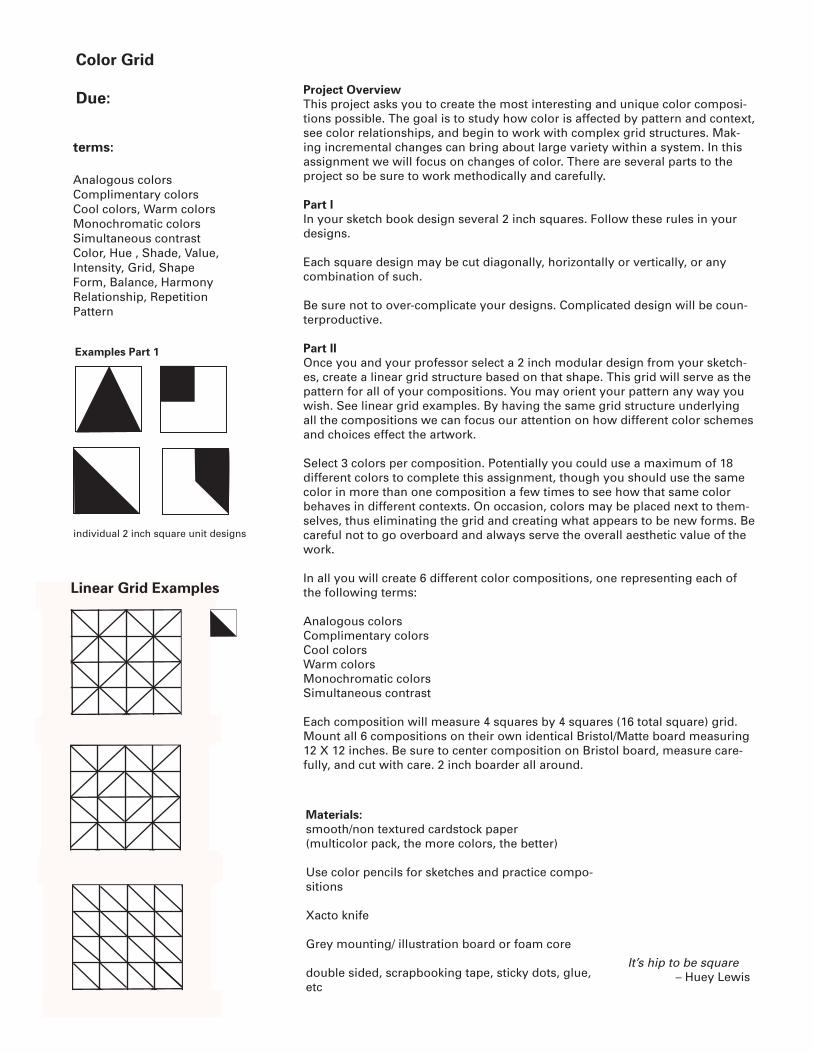
Due: Project OverviewThis project asks you to create the most interesting and unique color composi-tions possible. The goal is to study how color is affected by pattern and context, see color relationships, and begin to work with complex grid structures. Mak-ing incremental changes can bring about large variety within a system. In this assignment we will focus on changes of color. There are several parts to the project so be sure to work methodically and carefully.
Part IIn your sketch book design several 2 inch squares. Follow these rules in your designs.
Each square design may be cut diagonally, horizontally or vertically, or any combination of such.
Be sure not to over-complicate your designs. Complicated design will be coun-terproductive.
Part IIOnce you and your professor select a 2 inch modular design from your sketch-es, create a linear grid structure based on that shape. This grid will serve as the pattern for all of your compositions. You may orient your pattern any way you wish. See linear grid examples. By having the same grid structure underlying all the compositions we can focus our attention on how different color schemes and choices effect the artwork.
Select 3 colors per composition. Potentially you could use a maximum of 18 different colors to complete this assignment, though you should use the same color in more than one composition a few times to see how that same color behaves in different contexts. On occasion, colors may be placed next to them-selves, thus eliminating the grid and creating what appears to be new forms. Be careful not to go overboard and always serve the overall aesthetic value of the work.
In all you will create 6 different color compositions, one representing each of the following terms:
Analogous colorsComplimentary colorsCool colorsWarm colorsMonochromatic colorsSimultaneous contrast
Each composition will measure 4 squares by 4 squares (16 total square) grid. Mount all 6 compositions on their own identical Bristol/Matte board measuring 12 X 12 inches. Be sure to center composition on Bristol board, measure care-fully, and cut with care. 2 inch boarder all around.
It’s hip to be square – Huey Lewis
terms:
Analogous colorsComplimentary colorsCool colors, Warm colorsMonochromatic colorsSimultaneous contrastColor, Hue , Shade, Value, Intensity, Grid, ShapeForm, Balance, HarmonyRelationship, RepetitionPattern
Materials:smooth/non textured cardstock paper (multicolor pack, the more colors, the better)
Use color pencils for sketches and practice compo-sitions
Xacto knife
Grey mounting/ illustration board or foam core
double sided, scrapbooking tape, sticky dots, glue, etc
individual 2 inch square unit designs
Examples Part 1
Linear Grid Examples


Photographic Self Portrait
Due:
New key terms:
CompositionUnityMetaphorConstraintScaleCraftsmanshipHierarchy
Project OverviewYou will sketch, direct, and create a photographic self portrait. You are the director and the actor. As director you need a partner or assistant to work with. That person does not have to be from this class, but a person in this class will probably understand the process better than someone who is not. Your assistant will be your camera person who follows your direc-tions. You, as the actor, will play the part of yourself and reveal something about your personality or inner thoughts through the photographic col-lage.
This self portrait has a few restrictions:
- First, you must photograph yourself in a place or setting that you feel is significant to you in some way. Be prepared to explain why you have chosen that particular place or setting.
-Second, you must be in the portrait. Be creative with this requirement. Think about how you can represent yourself.
-Third, your portrait must be a composite of many photographs, not just one. The minimum number of photos allowed is 5 - though you will prob-ably use between 8 and 14. Be careful not to have too many images.
- Fourth, you may not cut, fold, or manipulate the photographs in any way, however you may overlap. You must use the full frame photos, vertical or horizontal, created by the camera.
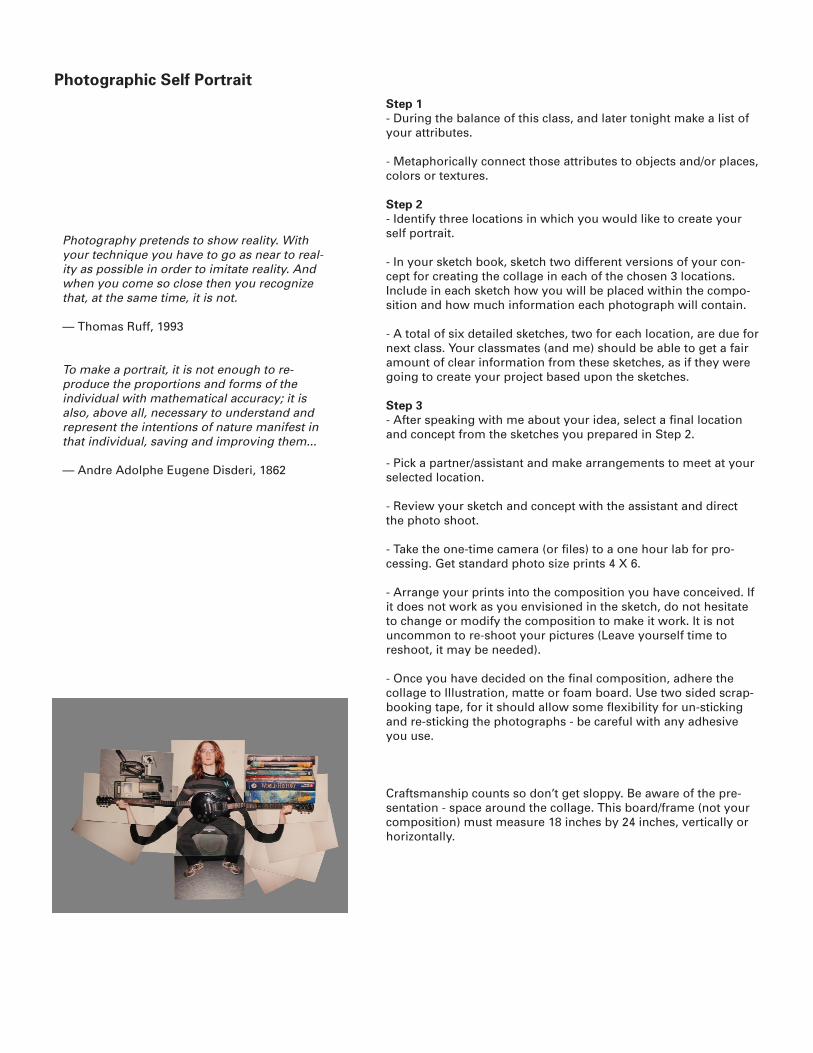
- Fifth, you are to create your collage using the photographs on a single piece of black, white, or gray matte board or a piece of foam core, not flim-sy poster board. This board/frame (not your composition) must measure 18 inches by 24 inches, vertically or horizontally. You will need to overlap pictures, so plan and shoot your pictures accordingly.
Step 1- During the balance of this class, and later tonight make a list of your attributes.
- Metaphorically connect those attributes to objects and/or places, colors or textures.
Step 2- Identify three locations in which you would like to create your self portrait.
- In your sketch book, sketch two different versions of your con-cept for creating the collage in each of the chosen 3 locations. Include in each sketch how you will be placed within the compo-sition and how much information each photograph will contain.
- A total of six detailed sketches, two for each location, are due for next class. Your classmates (and me) should be able to get a fair amount of clear information from these sketches, as if they were going to create your project based upon the sketches.
Step 3- After speaking with me about your idea, select a final location and concept from the sketches you prepared in Step 2.
- Pick a partner/assistant and make arrangements to meet at your selected location.
- Review your sketch and concept with the assistant and direct the photo shoot.
- Take the one-time camera (or files) to a one hour lab for pro-cessing. Get standard photo size prints 4 X 6.
- Arrange your prints into the composition you have conceived. If it does not work as you envisioned in the sketch, do not hesitate to change or modify the composition to make it work. It is not uncommon to re-shoot your pictures (Leave yourself time to reshoot, it may be needed).
- Once you have decided on the final composition, adhere the collage to Illustration, matte or foam board. Use two sided scrap-booking tape, for it should allow some flexibility for un-sticking and re-sticking the photographs - be careful with any adhesive you use.
Craftsmanship counts so don’t get sloppy. Be aware of the pre-sentation - space around the collage. This board/frame (not your composition) must measure 18 inches by 24 inches, vertically or horizontally.
Photography pretends to show reality. With your technique you have to go as near to real-ity as possible in order to imitate reality. And when you come so close then you recognize that, at the same time, it is not.
— Thomas Ruff, 1993
To make a portrait, it is not enough to re-produce the proportions and forms of the individual with mathematical accuracy; it is also, above all, necessary to understand and represent the intentions of nature manifest in that individual, saving and improving them...
— Andre Adolphe Eugene Disderi, 1862
Photographic Self Portrait
Project OverviewClose your eyes and pay special attention to the SOUNDS. What does your brain see when it hears the music? More specifically, what does your mind conjure up when individual instruments are isolated from the rest of the composition? You must think metaphorically and abstractly.
Notes:It will take several renderings of each sound before you find the right match. Listen carefully and open your minds. I think you will find more connections between sound and sight than you initially thought.
Within any given sound there is a form. Visual forms have volume, color and texture. Audible forms also have volume, color and texture. We dis-tinguish visual forms from one another by their contrast and placement in relation to other visual forms. Audible forms work the same way. Both forms can be subtle, both can be intense. Both can be ‘warm’ or ‘cool’.
Any given sound can be as simple or as complex as any vision.
This project is not necessarily asking you to solve a visual problem. It is asking you to solve a sensory problem, an information problem, a com-munication problem. You must translate data perceived by one sense and articulate it so it may be understood through another.
Select a song of your choosing. Be sure to select an appropriate song (no excessive vulgarity). Also be sure you can distinguish between sounds fairly easily.
Bring a file of your song via burned CD or flash drive with MP3 to class next week. I will collect and listen to each song. I can not take songs from iPods. I need the file.
Synaesthesia- sound symbols
Due
Key Terms:
ColorTexture (audible and visual)TempoRhythmIntensityValueSynthesize
Materials:
Matte / Illustration board for mounting
Fine Art paper (Strathmore) capable of light washes and wet media
Higgins (or other brand) Drawing/ calligra-phy Ink - Black
White out pen or white ink
Acrylic paint sent
sketchbook
brushes - fine tip, hairline tip brushes and other smaller size brushes for working at intimate scales.
Fantasiahttp://www.youtube.com/watch?v=NTM48pwoXAo&NR=1http://www.youtube.com/watch?v=L5kUViNYZHM
Mute Mathhttp://www.youtube.com/watch?v=tUqSUiSolvQ

synaesthesia is a neurological condition which mixes up the senses. For example; sounds have taste or tactile textures have odor.
What sound does the Nike logo make?How about the Nickelodeon splat?The Target target?
What you’re going to see on the screen are the designs and pictures and stories that music in-spired in the minds and imaginations of a group of artists. In other words, these are not going to be the interpretations of trained musicians, which I think is all to the good. — Narrator, Fantasia
Synaesthesia- sound symbols
Part A - 2 panels
Step IListen intently to the individual sounds. Experience it. Allow for your imagination to float freely. Consider how this sound makes you feel or what emotion it evokes.
-Create a brief list of emotions, images, and thoughts each sound conjures up. Select 4-6 sounds/ instruments for this project.
Step IIDevelop a shape that best relates to each sound you have isolated and chosen. Consider why you have chosen this shape. What characteristics of the shape are shared with the sound? What characteristics does your shape lack that is present in the sound? Go back, listen the sound again - create a new shape, a shape that is more appropriate to the sound. Control your edge. Use tools of precision such as a ruler or compass to create exactness. These should not be gestural, they should be designed. Black ink only. Use your list of words to help guide you.
-Keep and present all shape variations for your sound.Write out an explanation of how your shape relates to your sound.
Step IIIReproduce your shape in a single color. Question why you se-lected this color. What connections have you made between the sound and color? Listen to the sound again. Refine your color selection....perhaps your BLUE would work better as an AQUA BLUE. Lighter color choices (such as yellow) may use a thin dark outline to define the shape.
- Write out an explanation of how your color relates to your sound.
Step IVRepeat this process for the other sounds within your song.
Step VConsider the ‘visual sounds’ as a group. Do the visual representa-tions of the sounds hold the same shared and contrasting rela-tionships as the audible representations of the sounds? Are they distinguishable from one another? What marks these distinctions? What traits (if any) do they share? Go back and make any changes you feel are necessary to sync up the ‘visual sound icons’ rela-tionships to the audible sounds relationships.
-Type a brief summary of how these ‘visual sounds’ relate to one another, how they differ and why. How they share commonalities and why? Use the previous written explanations to guide you. You will hand in these written summaries.
Step VIUsing the final black only rendering of each sound, design a panel in which all sound shapes are presented one next to the other.
Design a second panel in which all color and texture visual repre-sentations of the sounds are presented one next to the other.
These panels must measure 8 inches tall by 20 inches wide, white paper. Then mount using scrap-booking tape on black Illustration / Matte board measuring 10 inches tall by 24 inches wide.
You will hand in the two panels from Step VI and the typed page from Step V for part A of this assign-ment.

Synaesthesia- sound symbols
Part B - 1 panel
Step IAgain, refer back to the original sounds. This time listen to the entire musical score. Recognize the relationships between the sounds. Is one sound dominant over the others? Is one sound isolated from the oth-ers? Are sounds constant or sporadic? How do the sounds meander throughout the composition? How may these relationships be visually represented?
- Write a detailed summary of how you see all the sounds back into the context of the musical score / song.
Step IIWork at a size of 8 inches by 20 inches (mounted 10 in .X 24 in.) verti-cally or horizontally. Work out your compositions in your sketchbook first to distinguish scale and placement of each element.
Recreate your color sound logos from Part I and place them back into context. Allow for the sounds to yet again interact with one another. Discover how the visual representations of each sound may alter as they interact with each other? Consider orientation, rhythm, tempo and the physical interactions of sound as you reassemble the music. Now that each sound is in context, you may slightly alter their scale, inten-sity and orientation so each part relates to the whole.
You may select any part of your chosen song; as little as 5 seconds, as much as the entire song. Write down what part of the song you are representing and write down these specifics (time code, title of song, artist) in pencil in the lower right corner of your work. You must capture the essence of your song selection, you may be structured or organic. You may design a sheet of music to be read temporally or a design a snapshot, a moment in time that captures the qualities of your musical selection.
DUE:
Part A2 panels-black sound shapes-color sound shapes
-well written and organized typed expla-nation of design choices (shape, color, texture) for part A
Part B1 composition- recontextualized music
-well written and organized typed ex-planation of design choices (orientation, scale, density, etc) for part B

Presentation OverviewEach student will give an 8 minute oral presentation on one of the listed art-ists/designers. One artist/designer per student. The presentation should briefly give an overview of the artist’s life, the place and times they worked in and how it shaped their art, discuss why this artist is important or influential, show a variety of the artists creative work, and highlight and discuss 1 specific work that intrigues you and why. Be sure to use terms covered this semester to discuss your artist/designer.
This list of artists/designers/composers/creative people come from the worlds of Painting, Drawing, Illustration, Music, Graphic Design, and Architecture. This list was designed to expose you to artists you may not already be aware of and hopefully your research into these names will lead you to discover other artists and designers of interest. Whereas some of these names you have heard, many you have not. This is by no means a comprehensive list, but merely a sampling. Rest assured you should not have difficulty finding information or collecting imagery regarding any of these artists. Research several of these names and select the ones that interest you. Be sure to have several artists selected because your first choice may be taken by a classmate. Order of selection draft will be random and provided by the professor. You are strongly encouraged to select an artist whom is new to you. You are also strongly encouraged to research all of these names at some point in your life.
Out of respect for the other students researching the same artists I ask you do not check out books on these people. Please photocopy or write your notes and leave the books in the library for other students. Thank you.
Presentation Notes+visual aids+notes are ok, but reading a document is not+using quotations from notable people can enhance your message+feel free to inject humor or audience participation if appropriate+try make your topic relevant to current times+keep the pace moving so not to bore your audience+reiterate the most important facts+have a clear opening and conclusion to the presentation+time your speech before you give it+practice like you play - give your presentation the night before to a roommate or even yourself. Pretend it is the real deal+do any public (or publicly in the classroom) speaking to alleviate performance anxiety+remember, you are the expert on this topic. Your audience wants to hear what you have to say because they don’t have this information
Typical Presentation Outline
First minute - brief biography of artist, from birth to death
Second minute - brief overview of time period, what was happening in the art-ists’ world socially, economically, scientifically, politically, etc.
Third minute - how did above events influence the artist, his/her work, and art in general during this time period
Fourth and fifth minute - exhibit some of the artists work and briefly discuss it
Final 2-3 minutes, focus on a single work and discuss it
Oral Presentation

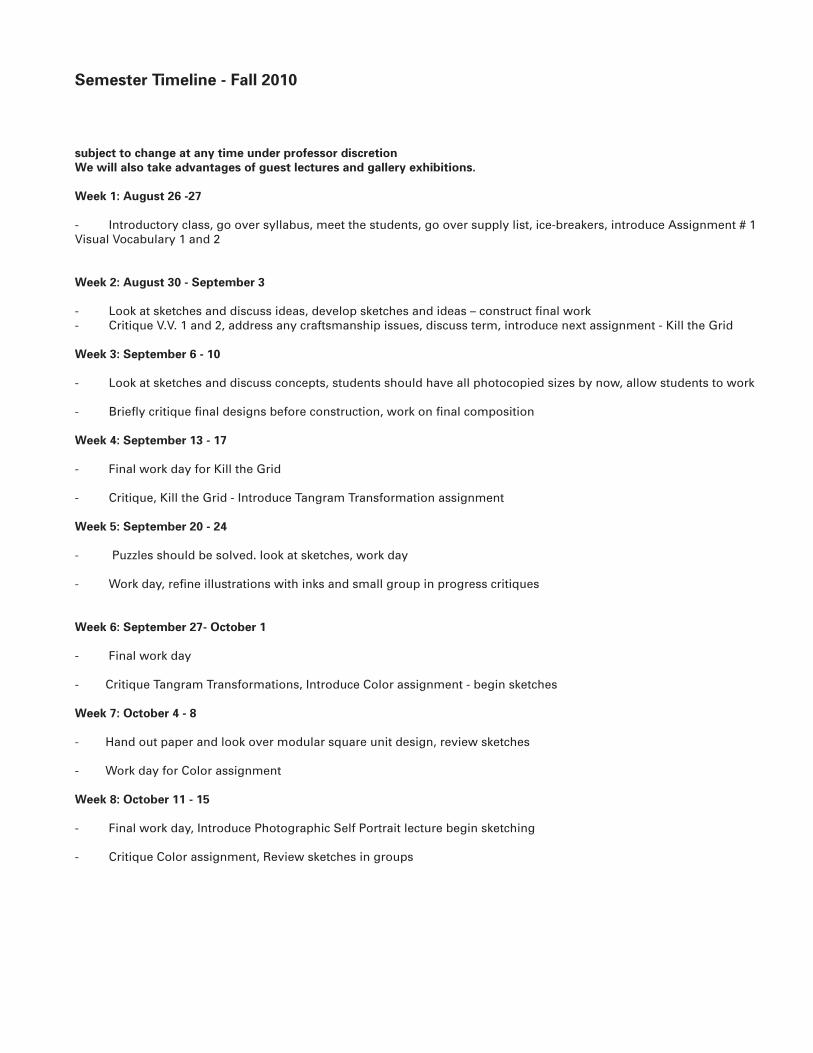
Semester Timeline - Fall 2010
subject to change at any time under professor discretionWe will also take advantages of guest lectures and gallery exhibitions.
Week 1: August 26 -27
- Introductory class, go over syllabus, meet the students, go over supply list, ice-breakers, introduce Assignment # 1 Visual Vocabulary 1 and 2
Week 2: August 30 - September 3
- Look at sketches and discuss ideas, develop sketches and ideas – construct final work- Critique V.V. 1 and 2, address any craftsmanship issues, discuss term, introduce next assignment - Kill the Grid
Week 3: September 6 - 10
- Look at sketches and discuss concepts, students should have all photocopied sizes by now, allow students to work
- Briefly critique final designs before construction, work on final composition
Week 4: September 13 - 17
- Final work day for Kill the Grid
- Critique, Kill the Grid - Introduce Tangram Transformation assignment
Week 5: September 20 - 24
- Puzzles should be solved. look at sketches, work day
- Work day, refine illustrations with inks and small group in progress critiques
Week 6: September 27- October 1
- Final work day
- Critique Tangram Transformations, Introduce Color assignment - begin sketches
Week 7: October 4 - 8
- Hand out paper and look over modular square unit design, review sketches
- Work day for Color assignment
Week 8: October 11 - 15
- Final work day, Introduce Photographic Self Portrait lecture begin sketching
- Critique Color assignment, Review sketches in groups
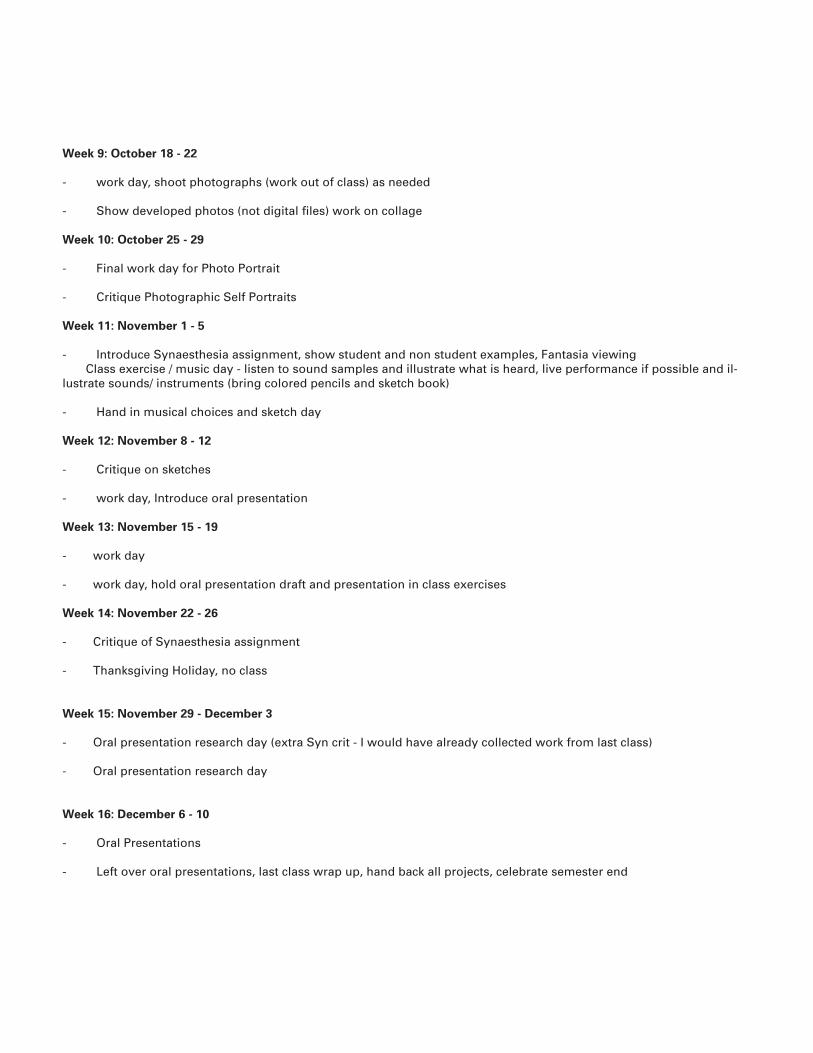
Week 9: October 18 - 22
- work day, shoot photographs (work out of class) as needed
- Show developed photos (not digital files) work on collage
Week 10: October 25 - 29
- Final work day for Photo Portrait
- Critique Photographic Self Portraits
Week 11: November 1 - 5
- Introduce Synaesthesia assignment, show student and non student examples, Fantasia viewing Class exercise / music day - listen to sound samples and illustrate what is heard, live performance if possible and il-lustrate sounds/ instruments (bring colored pencils and sketch book)
- Hand in musical choices and sketch day
Week 12: November 8 - 12
- Critique on sketches
- work day, Introduce oral presentation
Week 13: November 15 - 19
- work day
- work day, hold oral presentation draft and presentation in class exercises
Week 14: November 22 - 26
- Critique of Synaesthesia assignment
- Thanksgiving Holiday, no class
Week 15: November 29 - December 3
- Oral presentation research day (extra Syn crit - I would have already collected work from last class)
- Oral presentation research day
Week 16: December 6 - 10
- Oral Presentations
- Left over oral presentations, last class wrap up, hand back all projects, celebrate semester end