Embed Size (px)
Citation preview
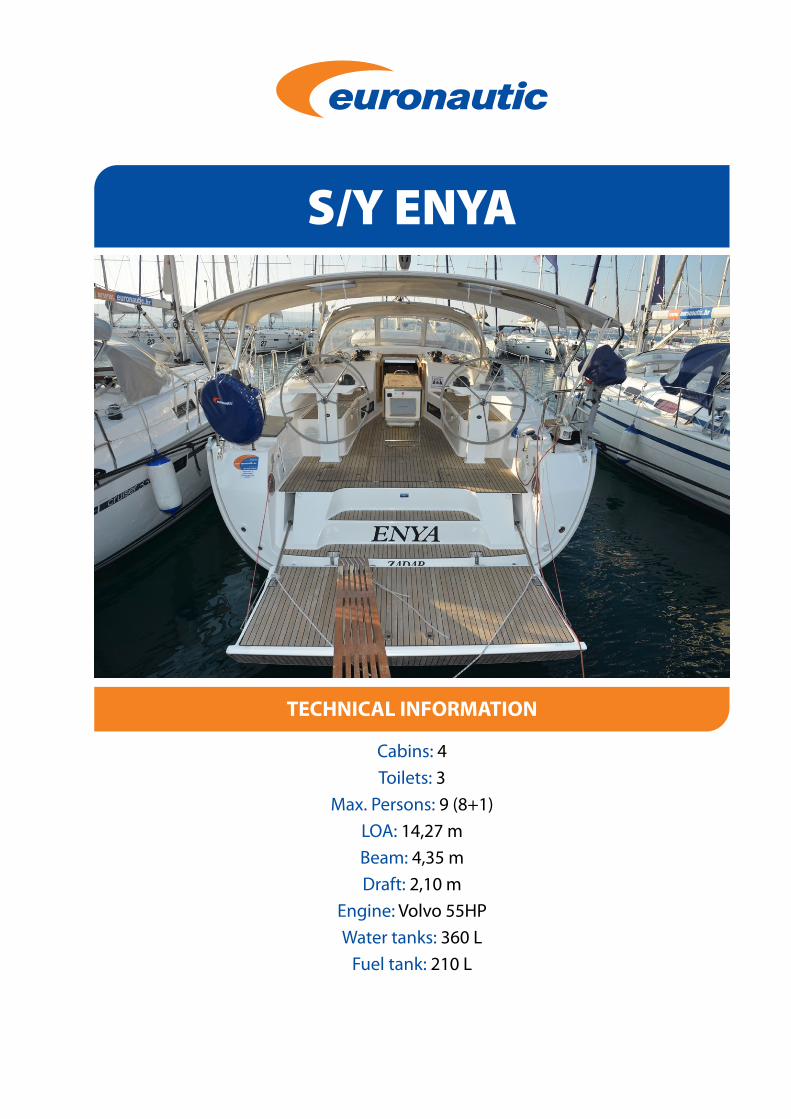
S/Y ENYA
TECHNICAL INFORMATION
Cabins: 4Toilets: 3
Max. Persons: 9 (8+1)LOA: 14,27 mBeam: 4,35 mDraft: 2,10 m
Engine: Volvo 55HPWater tanks: 360 L
Fuel tank: 210 L
2
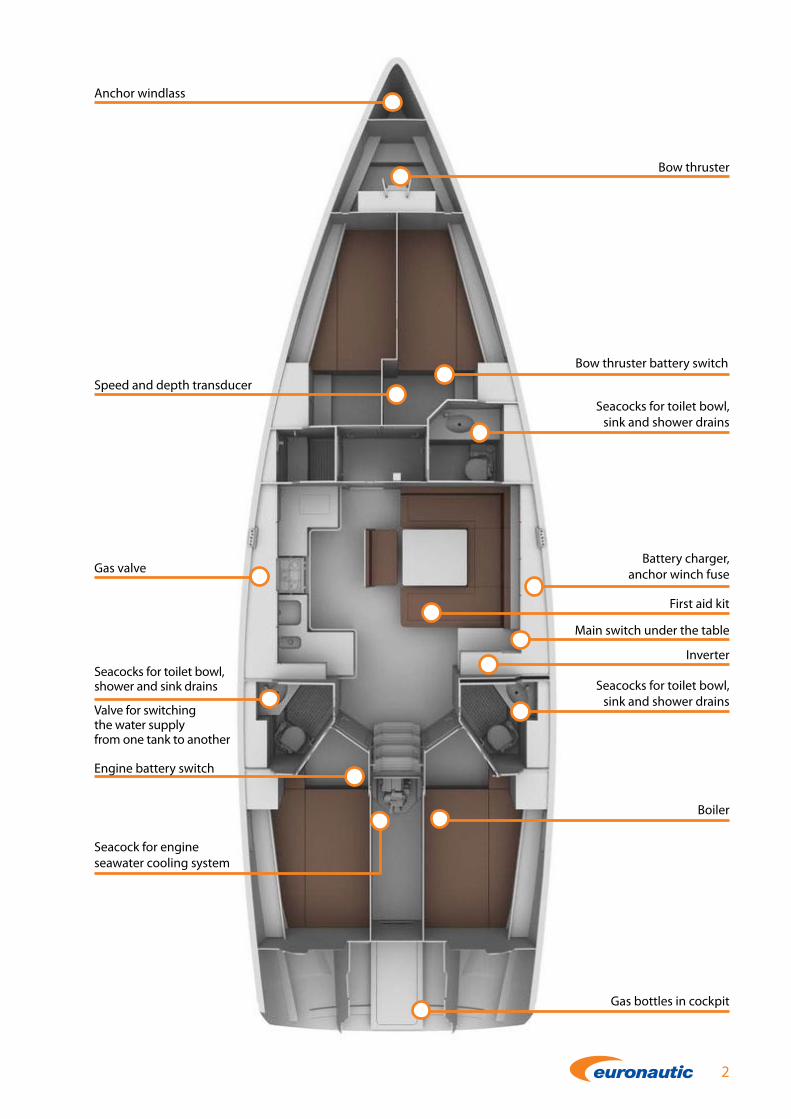
Bow thruster
Bow thruster battery switch
Battery charger, anchor winch fuse
Inverter
Seacock for engine seawater cooling system
Seacocks for toilet bowl, sink and shower drains
Seacocks for toilet bowl, sink and shower drains
First aid kit
Boiler
Gas bottles in cockpit
Anchor windlass
Speed and depth transducer
Seacocks for toilet bowl, shower and sink drains
Valve for switching the water supply from one tank to another
Main switch under the table
Gas valve
Engine battery switch
3
CONTENT
1 ELECTRIC PANEL1.1 Control panel
1.2 Fuses and shore power indicator
1.3 Windlass fuse
1.4 Inverter / Main switch
2 VALVES2.1 Emergency fuel cutoff valve
2.2 Gas valve in the galley
2.3 Gas valve in the cockpit
3 SANITATION3.1 Toilet
3.2 Seacocks
3.3 Water supply switching lever
4 ENGINE AND ENGINE CONTROL PANEL4.1 Engine compartment
4.2 Engine control panel: engine start / stop, gear lever, fuel level indicator, hour meter
4.3 Bow thruster
5 NAVIGATION INSTRUMENTS5.1 Exterior instruments
5.2 Chartplotter
6 ANCHOR6.1 Anchor and chain compartment
6.2 Electric windlass
7 DECK AND DINGHY7.1 Cockpit shower
7.2 Dinghy
7.3 Outboard engine
8 BILGE8.1 Bilge pump
9 SAFETY EQUIPMENT9.1 Lifejackets and liferaft
10 TIPS
4
1 ELECTRIC PANEL
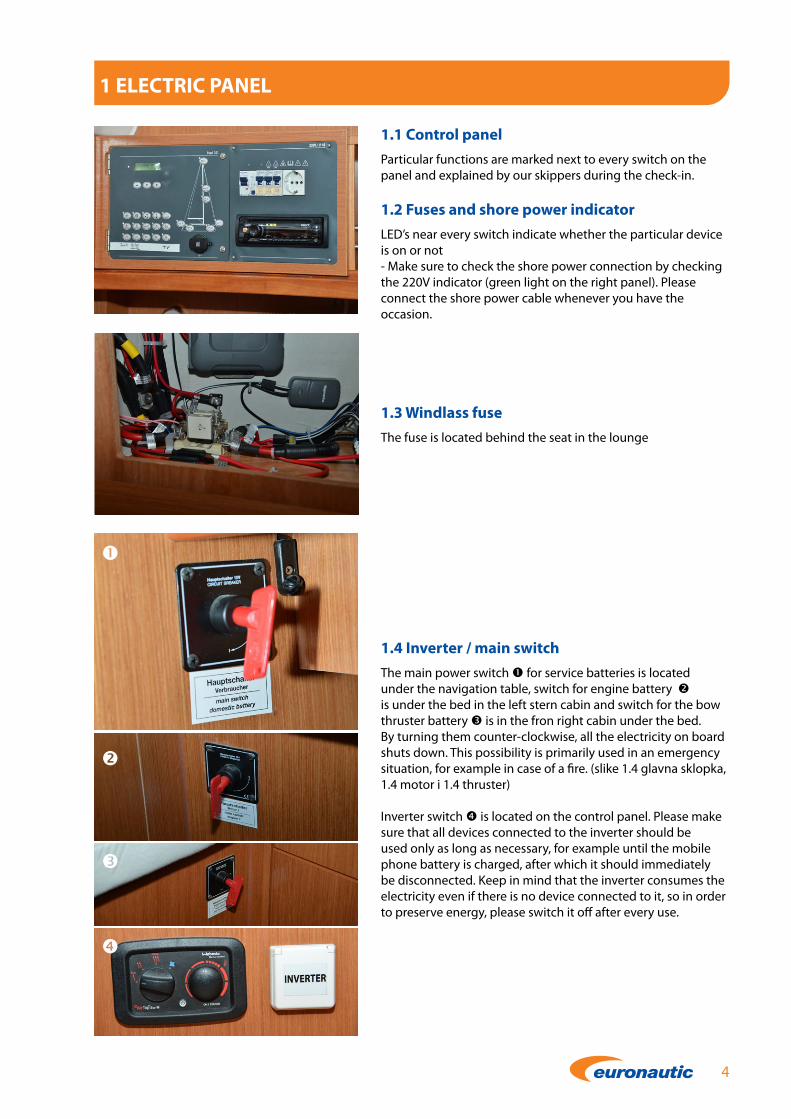
1.1 Control panelParticular functions are marked next to every switch on the panel and explained by our skippers during the check-in.
1.2 Fuses and shore power indicatorLED’s near every switch indicate whether the particular device is on or not- Make sure to check the shore power connection by checking the 220V indicator (green light on the right panel). Please connect the shore power cable whenever you have the occasion.
1.3 Windlass fuseThe fuse is located behind the seat in the lounge
1.4 Inverter / main switchThe main power switch for service batteries is located under the navigation table, switch for engine battery is under the bed in the left stern cabin and switch for the bow thruster battery is in the fron right cabin under the bed. By turning them counter-clockwise, all the electricity on board shuts down. This possibility is primarily used in an emergency situation, for example in case of a fire. (slike 1.4 glavna sklopka, 1.4 motor i 1.4 thruster)
Inverter switch is located on the control panel. Please make sure that all devices connected to the inverter should be used only as long as necessary, for example until the mobile phone battery is charged, after which it should immediately be disconnected. Keep in mind that the inverter consumes the electricity even if there is no device connected to it, so in order to preserve energy, please switch it off after every use.
5
2 VALVES
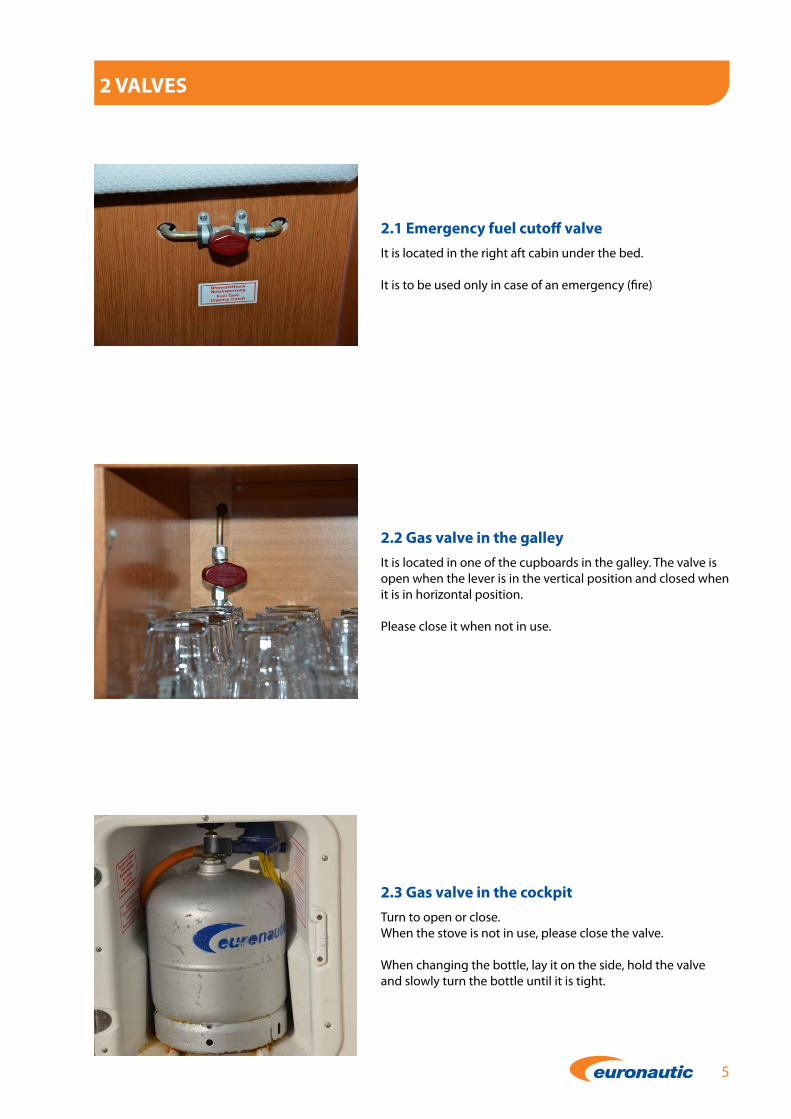
2.1 Emergency fuel cutoff valveIt is located in the right aft cabin under the bed.
It is to be used only in case of an emergency (fire)
2.2 Gas valve in the galleyIt is located in one of the cupboards in the galley. The valve is open when the lever is in the vertical position and closed when it is in horizontal position.
Please close it when not in use.
2.3 Gas valve in the cockpitTurn to open or close. When the stove is not in use, please close the valve.
When changing the bottle, lay it on the side, hold the valve and slowly turn the bottle until it is tight.
6
3 SANITATION
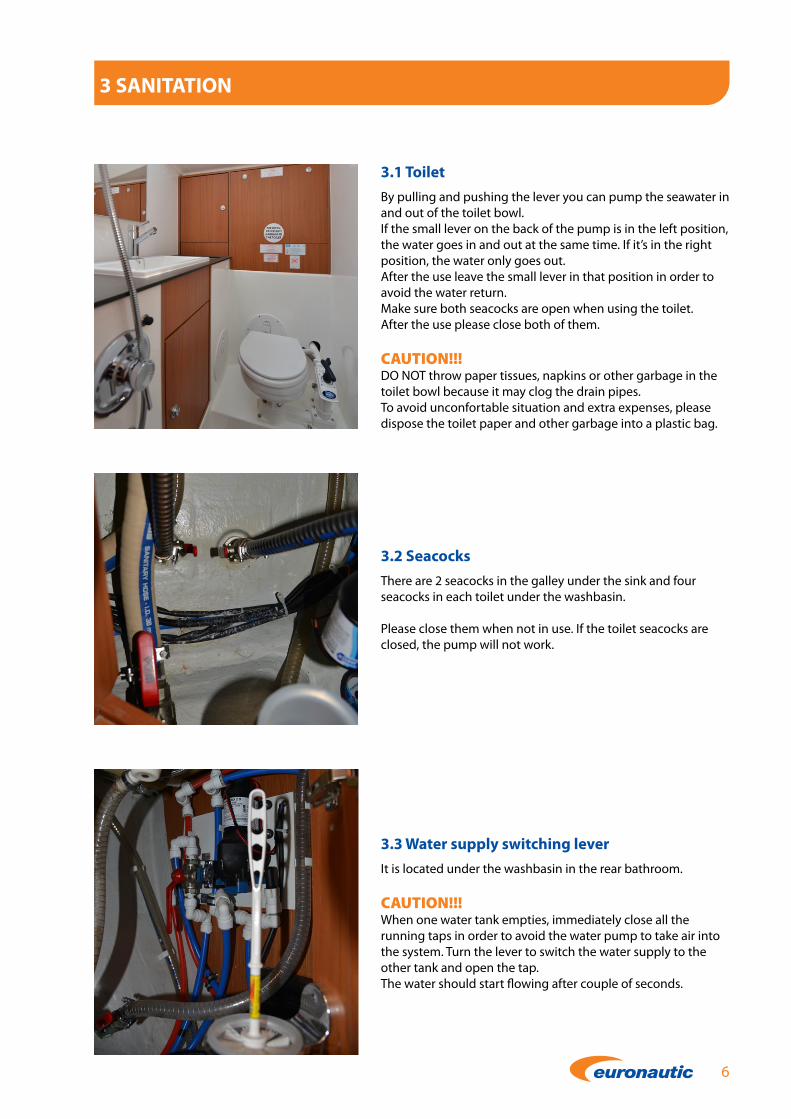
3.1 ToiletBy pulling and pushing the lever you can pump the seawater in and out of the toilet bowl. If the small lever on the back of the pump is in the left position, the water goes in and out at the same time. If it’s in the right position, the water only goes out. After the use leave the small lever in that position in order to avoid the water return. Make sure both seacocks are open when using the toilet. After the use please close both of them.
CAUTION!!!DO NOT throw paper tissues, napkins or other garbage in the toilet bowl because it may clog the drain pipes. To avoid unconfortable situation and extra expenses, please dispose the toilet paper and other garbage into a plastic bag.
3.2 SeacocksThere are 2 seacocks in the galley under the sink and four seacocks in each toilet under the washbasin.
Please close them when not in use. If the toilet seacocks are closed, the pump will not work.
3.3 Water supply switching leverIt is located under the washbasin in the rear bathroom.
CAUTION!!!When one water tank empties, immediately close all the running taps in order to avoid the water pump to take air into the system. Turn the lever to switch the water supply to the other tank and open the tap. The water should start flowing after couple of seconds.
7
4 ENGINE AND ENGINE CONTROL PANEL
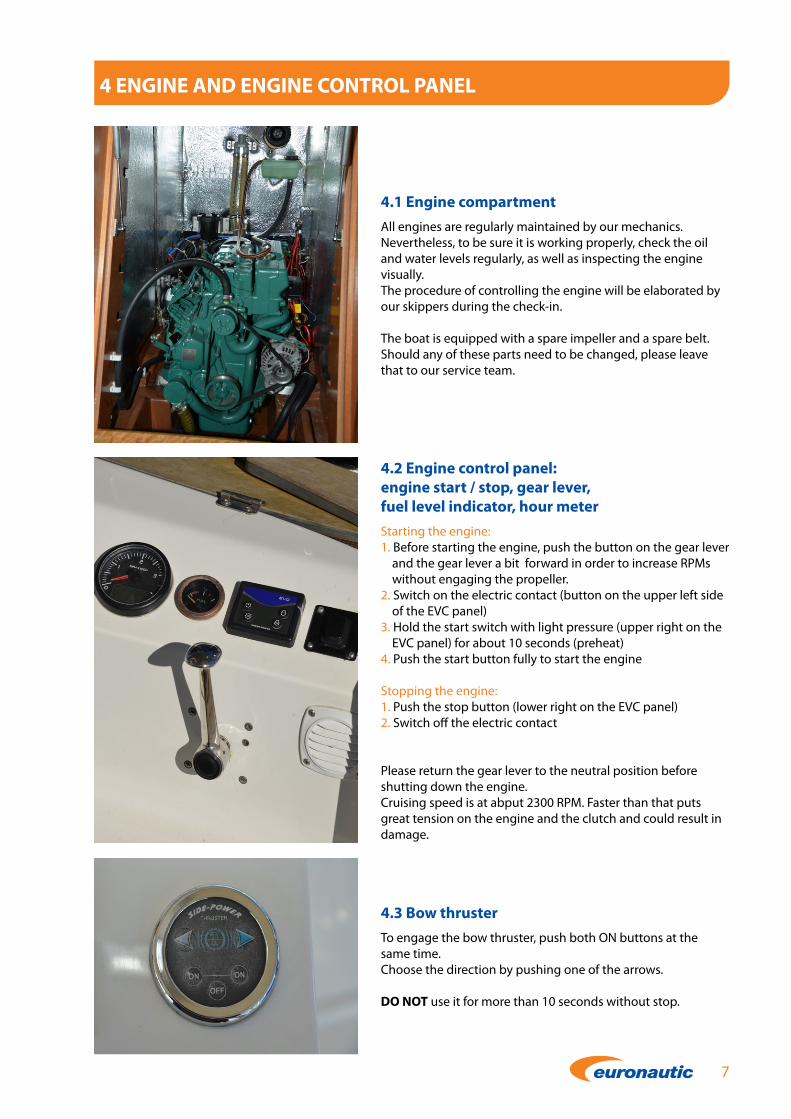
4.1 Engine compartmentAll engines are regularly maintained by our mechanics. Nevertheless, to be sure it is working properly, check the oil and water levels regularly, as well as inspecting the engine visually.The procedure of controlling the engine will be elaborated by our skippers during the check-in.
The boat is equipped with a spare impeller and a spare belt. Should any of these parts need to be changed, please leave that to our service team.
4.3 Bow thrusterTo engage the bow thruster, push both ON buttons at the same time. Choose the direction by pushing one of the arrows.
DO NOT use it for more than 10 seconds without stop.
4.2 Engine control panel: engine start / stop, gear lever, fuel level indicator, hour meterStarting the engine:1. Before starting the engine, push the button on the gear lever
and the gear lever a bit forward in order to increase RPMs without engaging the propeller.
2. Switch on the electric contact (button on the upper left side of the EVC panel)
3. Hold the start switch with light pressure (upper right on the EVC panel) for about 10 seconds (preheat)
4. Push the start button fully to start the engine
Stopping the engine:1. Push the stop button (lower right on the EVC panel)2. Switch off the electric contact
Please return the gear lever to the neutral position before shutting down the engine.Cruising speed is at abput 2300 RPM. Faster than that puts great tension on the engine and the clutch and could result in damage.
8
5 NAVIGATION INSTRUMENTS
5.1 Exterior instrumentsDuring the check-in, our skippers will explain the basic functions of all instruments. For more in-depth information You can consult the user manual which is located in one of the cupboards by the navigation table.
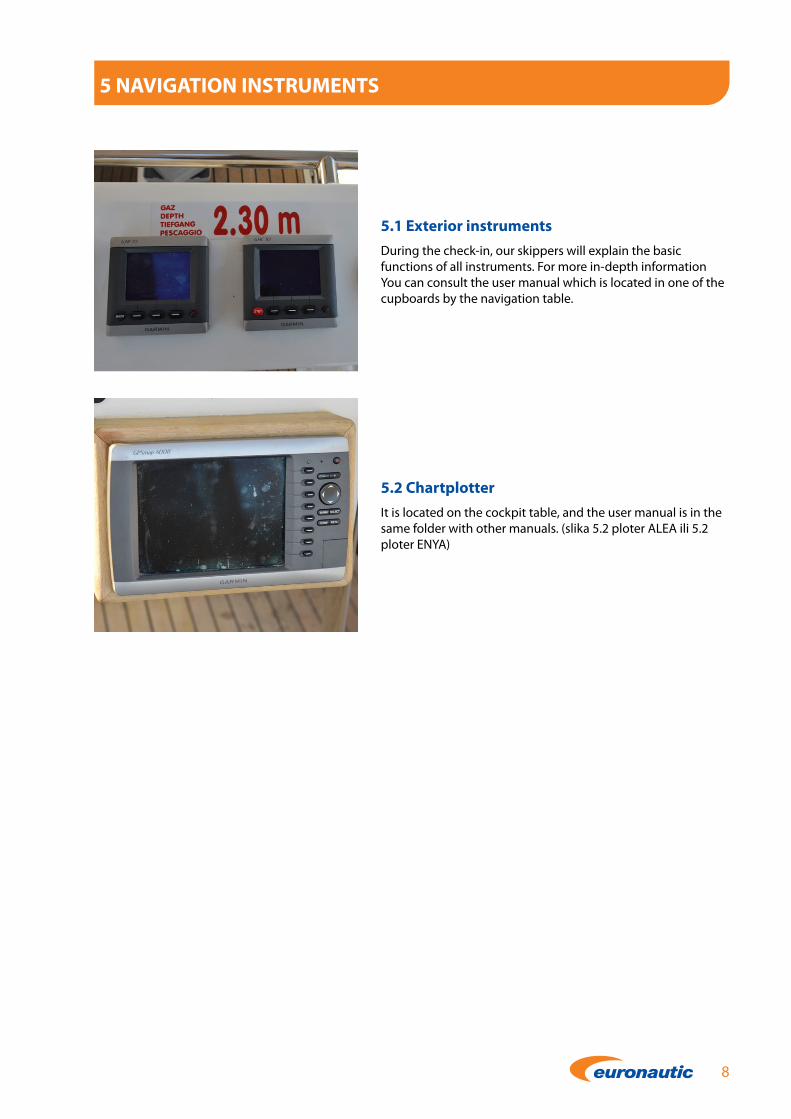
5.2 ChartplotterIt is located on the cockpit table, and the user manual is in the same folder with other manuals. (slika 5.2 ploter ALEA ili 5.2 ploter ENYA)
9
6 ANCHOR
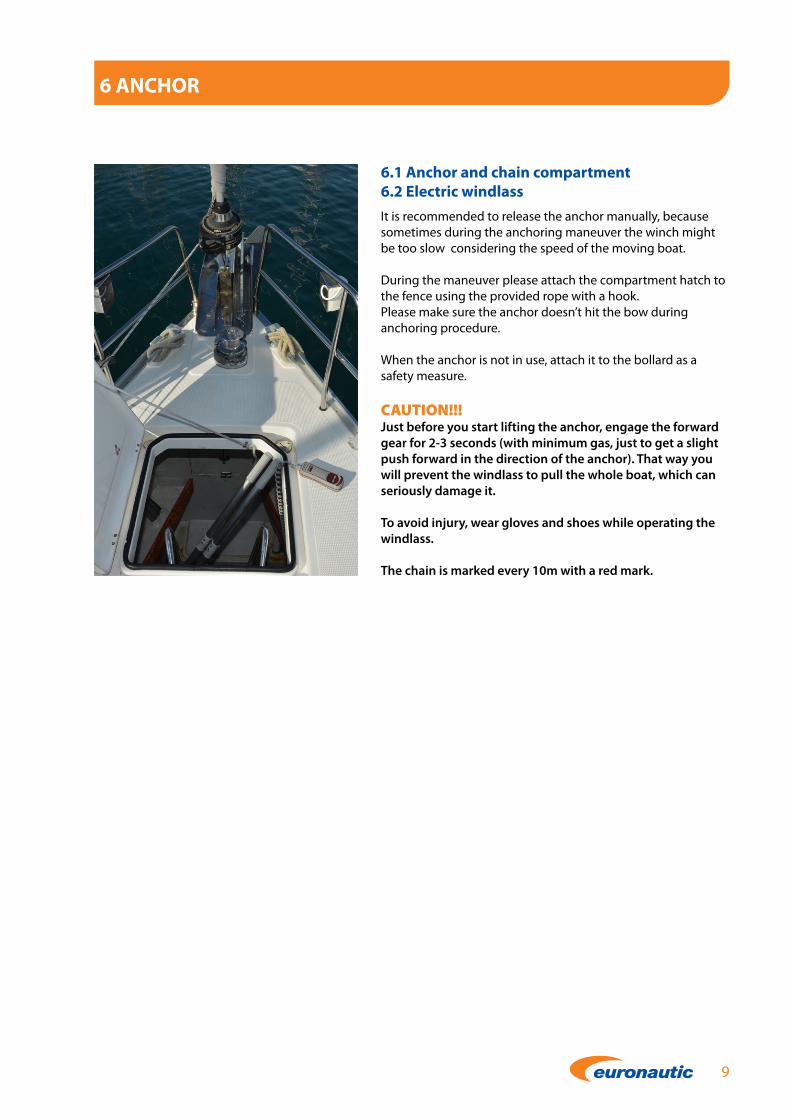
6.1 Anchor and chain compartment 6.2 Electric windlassIt is recommended to release the anchor manually, because sometimes during the anchoring maneuver the winch might be too slow considering the speed of the moving boat.
During the maneuver please attach the compartment hatch to the fence using the provided rope with a hook. Please make sure the anchor doesn’t hit the bow during anchoring procedure.
When the anchor is not in use, attach it to the bollard as a safety measure.
CAUTION!!!Just before you start lifting the anchor, engage the forward gear for 2-3 seconds (with minimum gas, just to get a slight push forward in the direction of the anchor). That way you will prevent the windlass to pull the whole boat, which can seriously damage it.
To avoid injury, wear gloves and shoes while operating the windlass.
The chain is marked every 10m with a red mark.
10
7 DECK AND DINGHY
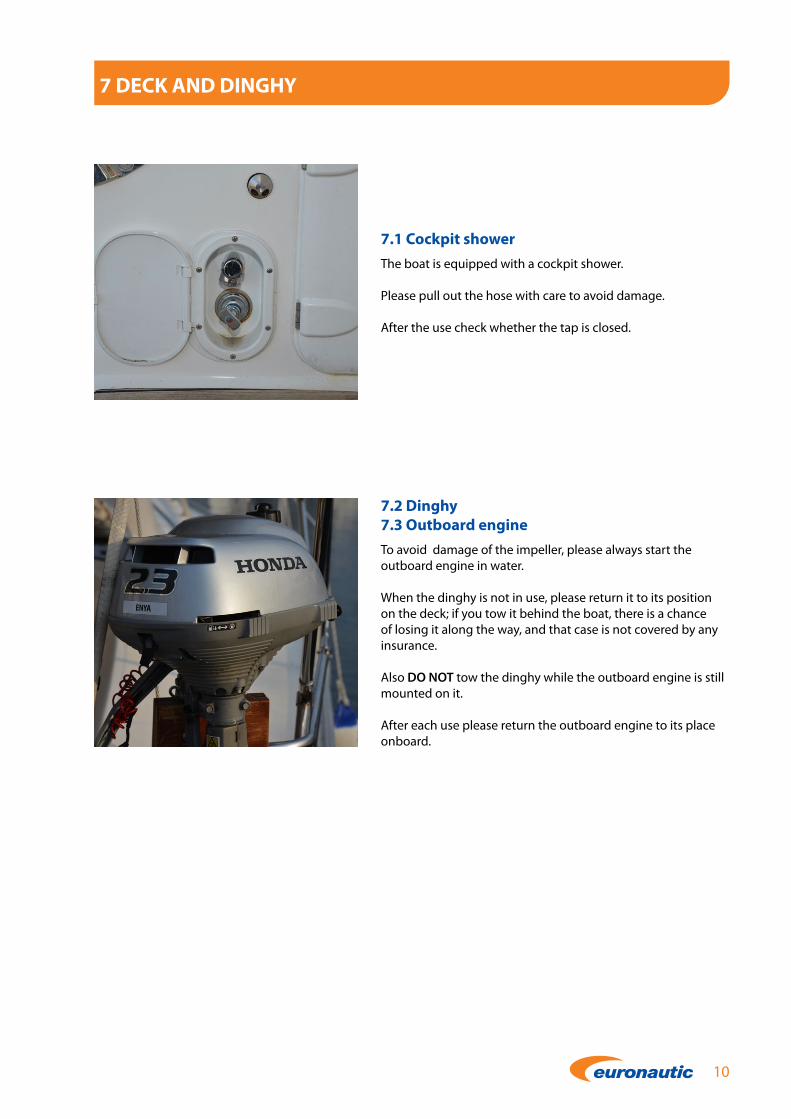
7.1 Cockpit showerThe boat is equipped with a cockpit shower.
Please pull out the hose with care to avoid damage.
After the use check whether the tap is closed.
7.2 Dinghy 7.3 Outboard engineTo avoid damage of the impeller, please always start the outboard engine in water.
When the dinghy is not in use, please return it to its position on the deck; if you tow it behind the boat, there is a chance of losing it along the way, and that case is not covered by any insurance.
Also DO NOT tow the dinghy while the outboard engine is still mounted on it.
After each use please return the outboard engine to its place onboard.

11
8 BILGE
9 SAFETY EQUIPMENT
8.1 Bilge pumpAutomatic bilge pump is located under the floorings, near the navigation table.
If there is water in the bilge, the floating switch starts the pump.
9.1 Lifejackets and liferaftAll lifejackets will be in the sallon during the check-in ready for your inspection, so please during the check-out leave them in the same place so we can check them. Liferaft is located under the flooring in the cockpit.

12
10 TIPS
In case of any damage that can be repaired on spot by yourself or with a help from a third person, please immediately contact our base in order to arrange eventual expense coverage if needed.
When returning to our base, please enter between the piers in reverse gear because the space between them is rahter narrow.