Embed Size (px)
Citation preview
Swapping heads in photos 1
Swapping heads in photos
Just for fun, have you ever wanted to copy a head in one photo and place it into another photo? It’s actually quite easy to do, and this tutorial will show you how.
In this tutorial, you’ll become familiar with• The Learning Center palette, and how to use it to open multiple photos• The Smart Edge mode of the Freehand Selection tool• Copying a selection and pasting it as a separate layer into another photo• Using the Pick tool to resize and rotate a layer
Open the photos1 From the Learning Center palette’s Home page, choose Get Photos, and then
choose Browse.
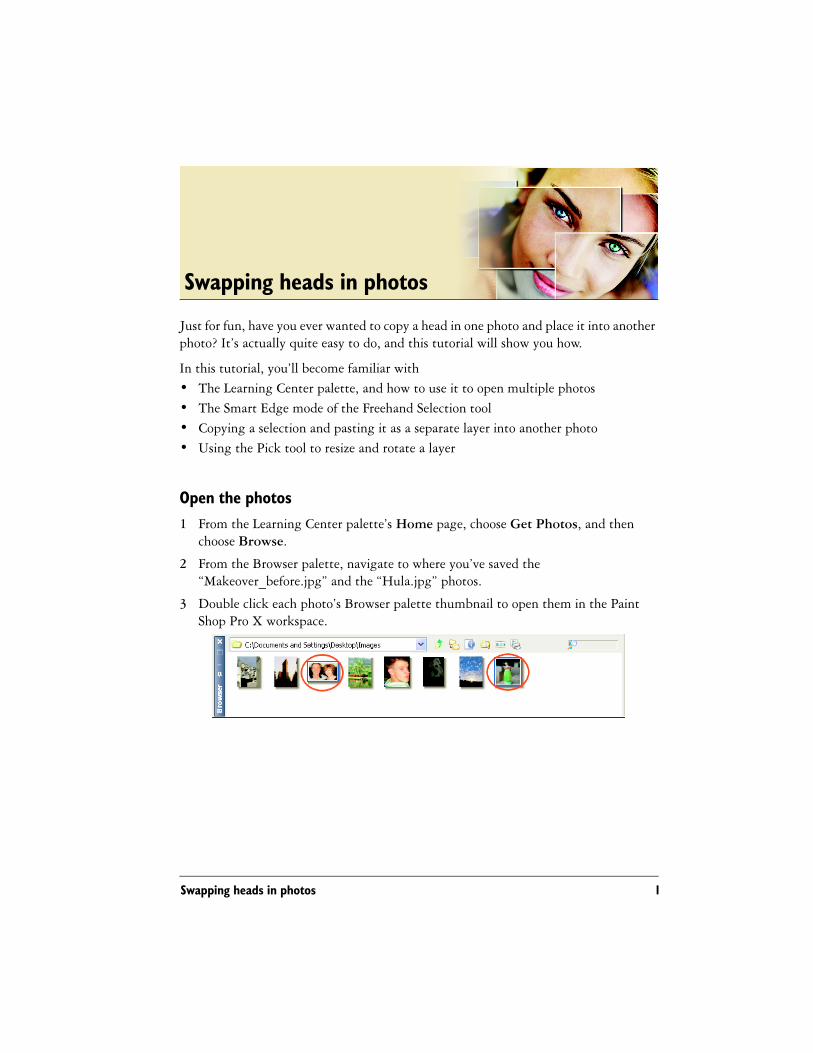
2 From the Browser palette, navigate to where you’ve saved the “Makeover_before.jpg” and the “Hula.jpg” photos.
3 Double click each photo’s Browser palette thumbnail to open them in the Paint Shop Pro X workspace.
2 Corel Paint Shop Pro X
Display the Layers palette4 If it isn’t already displayed, display the Layers palette by choosing it from the
Palettes drop-list in the Standard toolbar, or by pressing F8. Having the Layers palette open will help you later on in this tutorial.
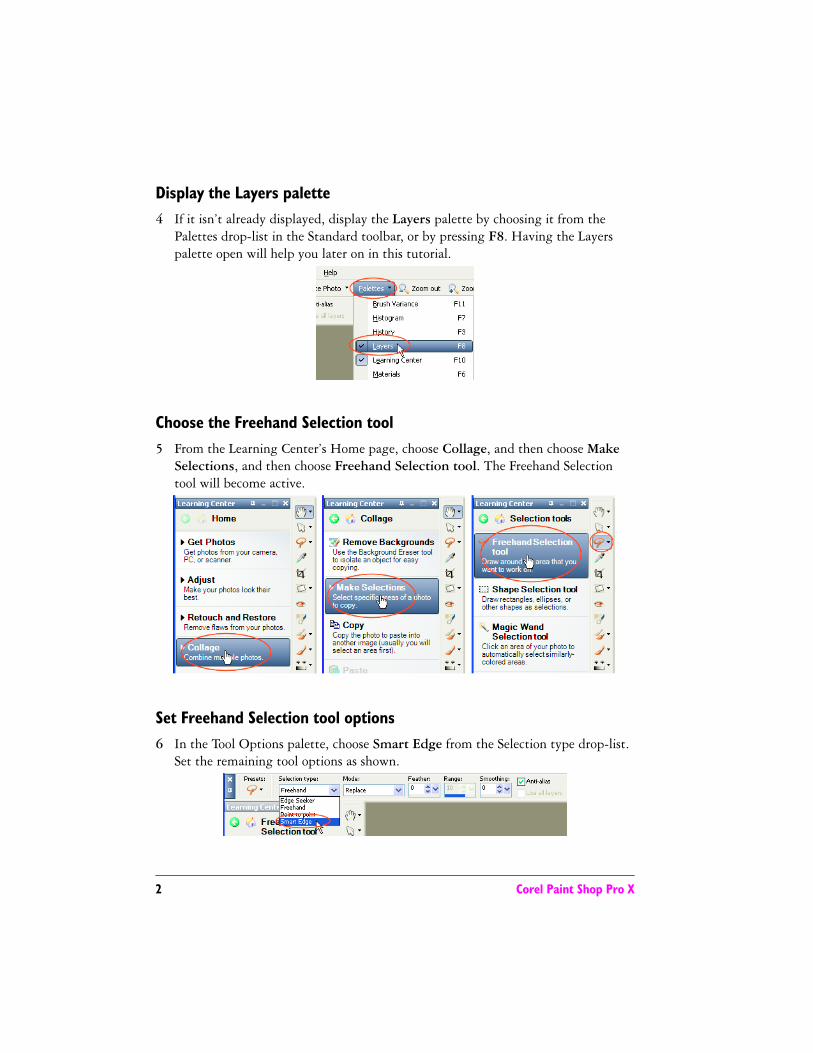
Choose the Freehand Selection tool5 From the Learning Center’s Home page, choose Collage, and then choose Make
Selections, and then choose Freehand Selection tool. The Freehand Selection tool will become active.
Set Freehand Selection tool options6 In the Tool Options palette, choose Smart Edge from the Selection type drop-list.
Set the remaining tool options as shown.
Swapping heads in photos 3
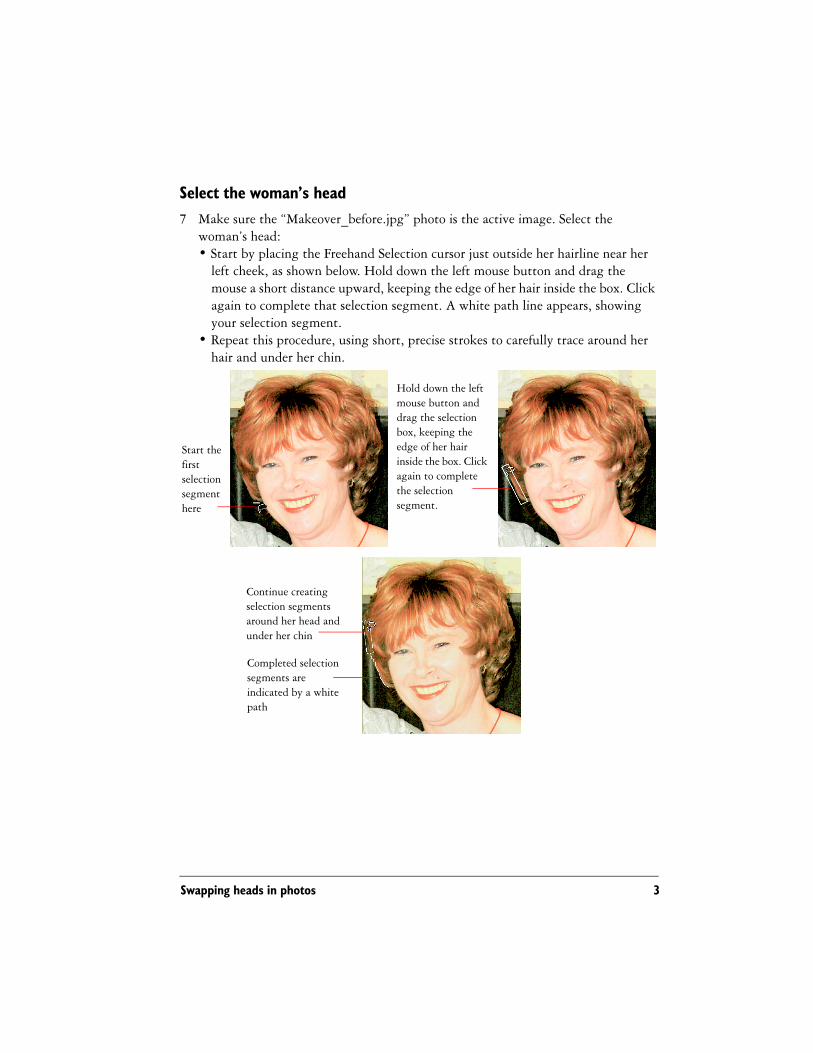
Select the woman’s head7 Make sure the “Makeover_before.jpg” photo is the active image. Select the
woman’s head:• Start by placing the Freehand Selection cursor just outside her hairline near her
left cheek, as shown below. Hold down the left mouse button and drag the mouse a short distance upward, keeping the edge of her hair inside the box. Click again to complete that selection segment. A white path line appears, showing your selection segment.
• Repeat this procedure, using short, precise strokes to carefully trace around her hair and under her chin.
Start the first selection segment here
Hold down the left mouse button and drag the selection box, keeping the edge of her hair inside the box. Click again to complete the selection segment.
Continue creating selection segments around her head and under her chin
Completed selection segments are indicated by a white path
4 Corel Paint Shop Pro X
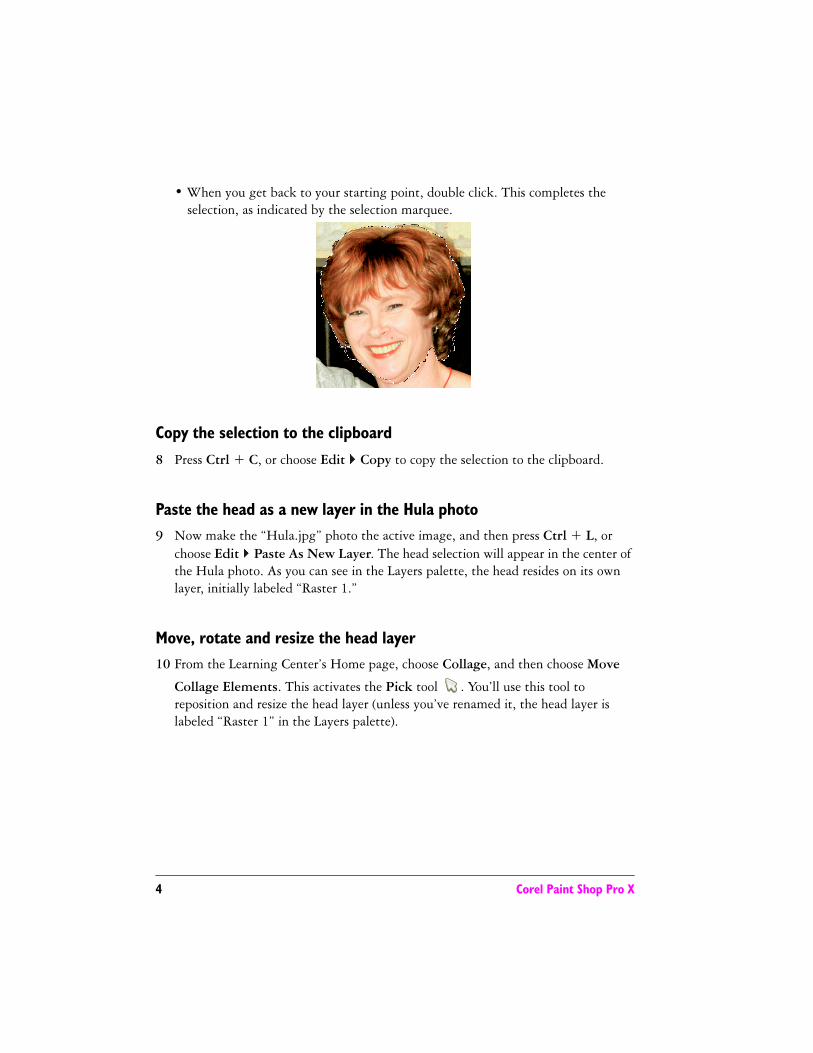
• When you get back to your starting point, double click. This completes the selection, as indicated by the selection marquee.
Copy the selection to the clipboard8 Press Ctrl + C, or choose Edit Copy to copy the selection to the clipboard.
Paste the head as a new layer in the Hula photo9 Now make the “Hula.jpg” photo the active image, and then press Ctrl + L, or
choose Edit Paste As New Layer. The head selection will appear in the center of the Hula photo. As you can see in the Layers palette, the head resides on its own layer, initially labeled “Raster 1.”
Move, rotate and resize the head layer10 From the Learning Center’s Home page, choose Collage, and then choose Move
Collage Elements. This activates the Pick tool . You’ll use this tool to reposition and resize the head layer (unless you’ve renamed it, the head layer is labeled “Raster 1” in the Layers palette).
Swapping heads in photos 5
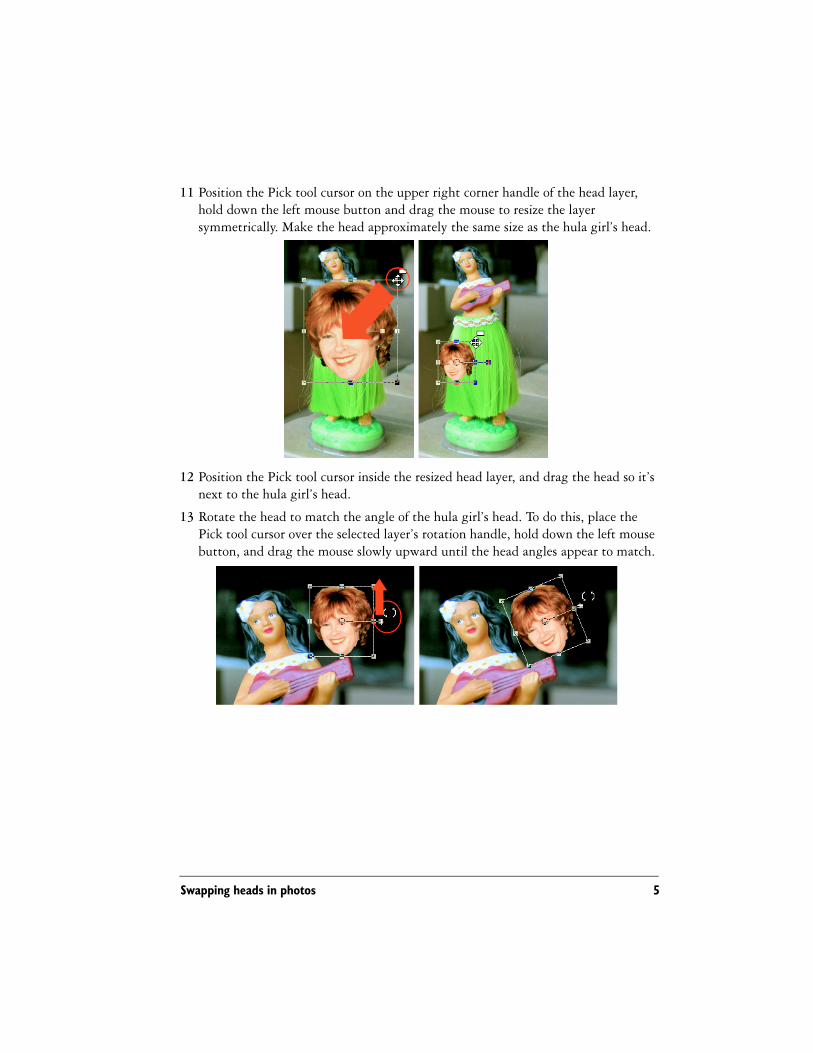
11 Position the Pick tool cursor on the upper right corner handle of the head layer, hold down the left mouse button and drag the mouse to resize the layer symmetrically. Make the head approximately the same size as the hula girl’s head.
12 Position the Pick tool cursor inside the resized head layer, and drag the head so it’s next to the hula girl’s head.
13 Rotate the head to match the angle of the hula girl’s head. To do this, place the Pick tool cursor over the selected layer’s rotation handle, hold down the left mouse button, and drag the mouse slowly upward until the head angles appear to match.
6 Corel Paint Shop Pro X
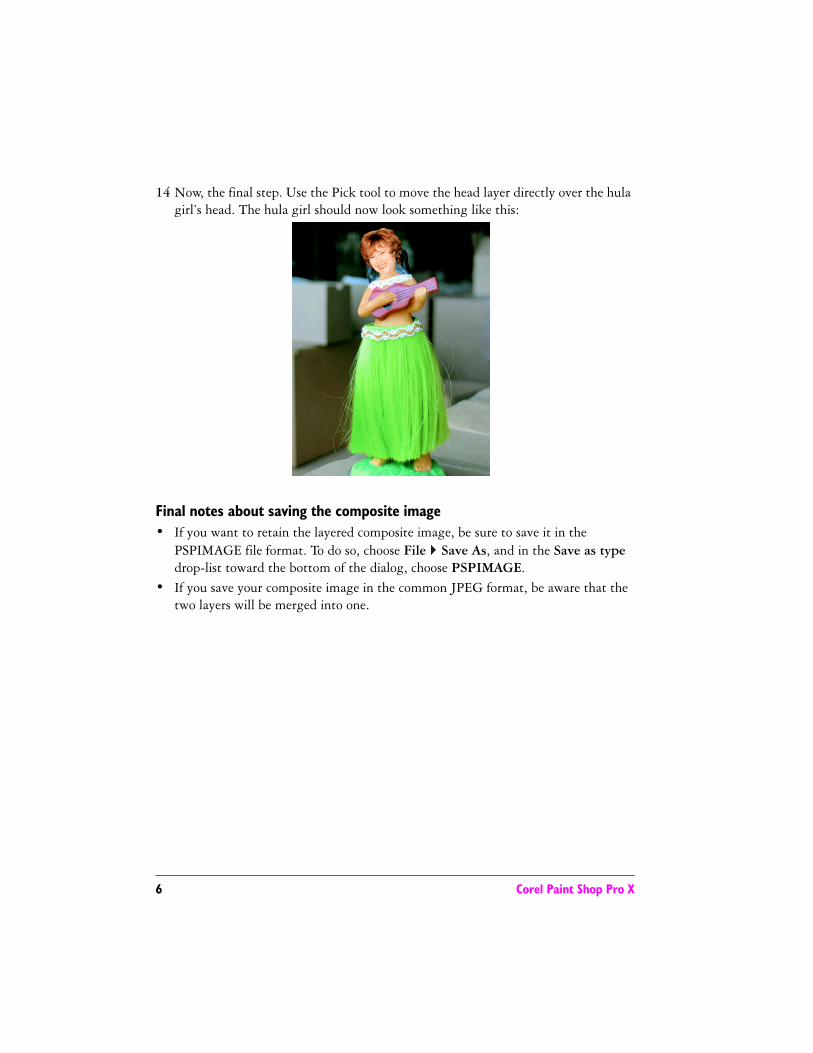
14 Now, the final step. Use the Pick tool to move the head layer directly over the hula girl’s head. The hula girl should now look something like this:
Final notes about saving the composite image• If you want to retain the layered composite image, be sure to save it in the
PSPIMAGE file format. To do so, choose File Save As, and in the Save as type drop-list toward the bottom of the dialog, choose PSPIMAGE.
• If you save your composite image in the common JPEG format, be aware that the two layers will be merged into one.