Embed Size (px)
Citation preview
Please read and follow all manufacturers’ instructions for all tools and materials used.Provide adult supervision if children participate in this project.©2009 Jo-Ann Stores, Inc. All rights reserved.
P051-844
Project courtesy ofJo-Ann Fabric and Craft Stores®
SUPPLIES & TOOLS:
• 1/2 yd Bottomweight fabric in color that contrasts with pillow• 1/4 yd Organza • Water-erasable marking pen• Curtain grommets• Basic sewing supplies• Sewing machine• 16" Pillow• Iron & ironing surface• Long-stemmed flower
DIRECTIONS:
1. Measure pillow top (ours is 16") and use that measurement to cut the bottomweight fabric by the width of thefabric (ours is 16"x60"). Cut the length of the rectangle double the pillow measurement plus 4" (ours is 36").
2. Fold fabric in half lengthwise, right sides together, and sew the 3 sides leaving an opening on one short endfor turning.
3. Turn, press and topstitch opening closed.
4. Following the manufacturer’s directions in the grommet package, mark the circles for 4 or 5 grommets alongthe non-topstitched end of the fabric. Install the grommets.
5. Place wrap around pillow with the grommeted end on top overlapping the other end. Using the marking pen,draw the grommet inside circles on the back fabric.
6. Tear the organza in 2 or 3 strips, 2" wide by the entire width of the organza, then cut each in half. Fold eachshort strip in half and place the fold on the topstitch edge of the back fabric, draping over the circles markedon the fabric. Sew the folded edges down near the topstitching and sew across marked circle edge to neatlysecure organza.
7. Place wrap on pillow and pull up a small loop of organza through each of the grommets, enough to feed theflower stem down through. Place the stem in the loops and pull the loose organza tails to tighten the loops.Trim organza strips to desired length.
Skill Level 2: Some sewing experience needed Approximate Crafting Time: 2 hours
grommeted pillow wrap
more projects, tips & techniques at Joann.com®
free2 skill level
Please read and follow all manufacturers’ instructions for all tools and materials used.Provide adult supervision if children participate in this project.©2009 Jo-Ann Stores, Inc. All rights reserved.
P051-843
Project courtesy ofJo-Ann Fabric and Craft Stores®
Designed by Rita Pasquinucci
SUPPLIES & TOOLS:
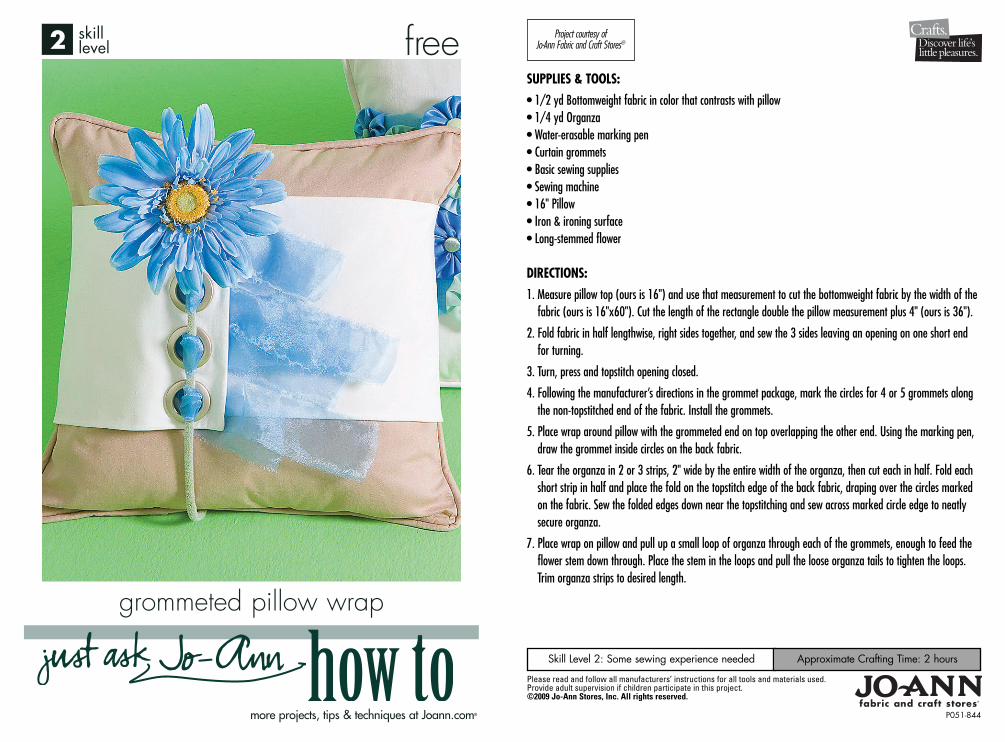
• 1/3 yd Heavy cotton fabric similar to pillow color• 1/8 yd each Organza in various colors• Black embroidery thread• Black thread for bobbin• Light-colored threads to match organza• Water-erasable marking pen• Basic sewing supplies• Sewing machine• Free-motion foot• 16" Pillow• Iron & ironing surface
DIRECTIONS:
1. Trim and straighten cotton fabric raw edges. Sew a small hem along one long edge.
2. Measure pillow top and cut the cotton fabric for the pocket double the length of the measurement plus 1"(ours is 33").
3. Using water-erasable pen, draw desired design on right side of the fabric.
4. Cut narrow strips of organza 2"-3" wide and place on pocket top overlapping the sheer fabric for addedinterest. Line up one end of each strip with unhemmed long edge and extend it beyond the hemmed edge atvarious lengths, ranging from 1 to 3 inches. Pin in place.
5. Using coordinating thread colors, sew the long edges of the organza down with a straight stitch.
6. With black embroidery thread on top, black thread in the bobbin, and using the free-motion foot, free motionsew following the markings on the fabric. Keep the lines light and sketchy for a casual pencil sketched look.
7. When “thread sketching” is complete, fold fabric, right sides together, in half short ends together and sewusing a 1/2" seam allowance.
8. Fold flat with seam in the middle then sew along the unhemmed edge, forming a pocket. Turn right side out.
9. Place pocket on pillow.
Skill Level 2: Free-motion sewing experience needed Approximate Crafting Time: 2 hours
thread-sketched pillow pocket
more projects, tips & techniques at Joann.com®
free2 skill level
Please read and follow all manufacturers’ instructions for all tools and materials used.Provide adult supervision if children participate in this project.©2009 Jo-Ann Stores, Inc. All rights reserved.
P051-845
Project courtesy ofJo-Ann Fabric and Craft Stores®
Designed by Debra Kinzel
SUPPLIES & TOOLS:
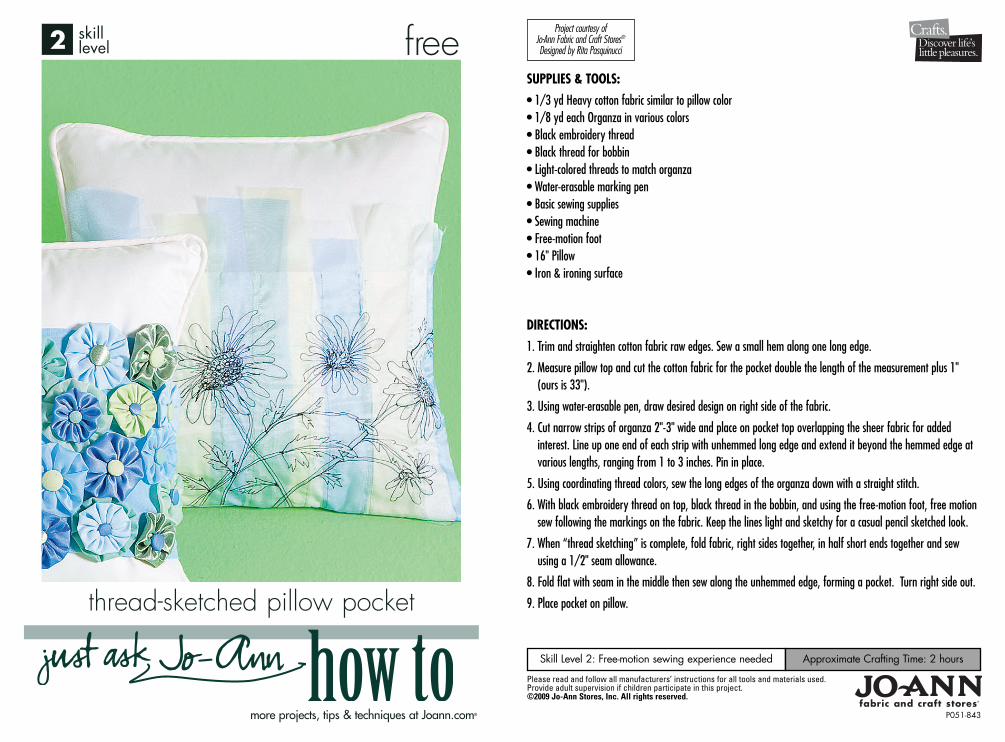
• 1/2 yd each Fabric in 6-8 coordinating colors for yo-yos• 1/2 yd Fabric for sleeve• Ready-to-cover buttons: sizes 18, 24 & 30• Basic sewing supplies• Cardstock to make patterns • Fabri-Tac® glue• 16" Pillow• Iron & ironing surface• Compass
DIRECTIONS:
For Sleeve:
1. Cut fabric for sleeve 17"x33".
2. Fold in half lengthwise with right sides together using a 1/2" seam, sew the long edge together.
3. Press seam open and turn right side out.
4. With seam in the center back, press sleeve flat.
5. With right sides together using a 1/2” seam, sew the short edges together.
6. Finish edge, if desired, then press flat.
For Yo-Yos:
1. With compass, trace circle patterns onto cardstock in the following sizes: 4", 41⁄2", 5" 51⁄2"; feature flower is an 8" circle and 61⁄2" circle. Cut out patterns.
2. Trace circles onto fabrics; cut out. You will need approximately 75 yo-yos to cover entire sleeve.
3. Using a needle with matching thread, stitch a short running stitch entirely around a fabric circle.
4. Pull thread tightly to center and secure; flatten to make yo-yo. Set aside.
5. Continue until all yo-yos are made.
6. Follow manufacturer’s directions to cover buttons in coordinating fabric.
7. Sew button to center of yo-yo to create flowers. Two yo-yos can be stacked to make a variety of flowers.
8. Lay out flowers on sleeve in desired arrangement, glue in place. When glue is dry, slide sleeve over pillow.
Skill Level 2: Sewing experience helpful Approximate Crafting Time: Weekend project
yo-yo pillow sleeve
more projects, tips & techniques at Joann.com®
free2 skill level