Embed Size (px)
Citation preview
Expl
orin
g S
tudyi
ng
Inve
stig
atin
g Ex
perim
enting W
orking Discovering Understanding Researching
Studying the Development and Reproduction of Organisms
Science and Technology concepTS™

Tab 2: Unit Overview and Goals i
Contents
Studying the Development and Reproduction of Organisms Unit overview ..................................................................... 2
Concept storyline: Studying the Development and Reproduction of Organisms ................................................ 6
suggested Pacing Guide: Studying the Development and Reproduction of Organisms ................................................ 7
Studying the Development and Reproduction of Organisms Unit Goals ........................................................................... 8

Unit overview and Goals
2 STC Unit: Studying the Development and Reproduction of Organisms
StuDying the DevelOpment anD RepRODuctiOn Of ORganiSmS Unit overviewStudying the Development and Reproduction of Organisms gives students the opportunity for hands-on study of organisms from two of the most important taxonomic groups scientists currently recognize as kingdoms: plants and animals. While students will study several representative organisms, the unit focuses on the life cycles and processes of two organisms in particular—Wisconsin Fast Plants® and the cabbage white butterfly.
Students discover that the life cycles of these two interesting organisms are linked in important ways. They find that neither can survive without the other. Students also learn that humans are organisms—members of the kingdom Animalia. They discover that, like Fast Plants and the cabbage white butterfly, humans are made of cells that must divide in order for growth to occur. Students also learn that a unique form of cell division—called meiosis—enables organisms to carry traits to the next generation.
Students of all ages, but particularly those of secondary school age, have a natural curiosity about living things and how they function. Studying the Development and Reproduction of Organisms taps this curiosity by first helping students clarify what they already know about growth and reproduction, and then having them perform a series of engaging, hands-on, thought-provoking activities that will enable them to expand their knowledge.
Studying the Development and Reproduction of Organisms addresses the skills and concepts deemed appropriate for grades 5–8 by the National Science Education Standards. Through this unit, students become more acquainted with a variety of living organisms—including themselves. One of the major strengths of this unit is that it raises questions that invite further investigation. While suggestions for further study and inquiry are explored through reading selections and extensions, the NSRC encourages
teachers to allow students time for further exploration, either individually or in groups.
Suggestions for the integration of technology—specifically, the use of the Internet for research and the application of computer technology —are included where appropriate and economically feasible.
Part 1: tHe BeGinninG
Studying the Development and Reproduction of Organisms is divided into two parts: Part 1: The Beginning and Part 2: Continuing the Cycle. Part 1 consists of six lessons that set the stage for the entire unit. Lesson 1 is a pre-assessment. It gives students an opportunity to share what they already know about organisms as well as to demonstrate their skill level at making observations. Students begin filling out their organism photo cards, which they will revisit and revise throughout the unit. After reading a selection about taxonomy, they use a list of Latin and Greek terms to assign genus and species names to the organisms on the photo cards.
In Lesson 2, students set up growing systems for Wisconsin Fast Plants seeds. They will follow the progress of these plants, from seed to seed (and, if your class schedule allows, to sprouts once more), over a period of about 40 days. Students cross-pollinate their Fast Plants, and when the resulting seeds mature, they can harvest them and set them up for germination. (If you do not wish to wait for the seeds to mature, you can supply seeds to your students.) Students also observe the germination of corn seeds (monocots) and bean seeds (dicots) and their development into young plants.
Lesson 3 serves as an introduction to the compound light microscope, which students use to study the structures and products of reproduction. Students learn and hone microscope skills while performing authentic

Tab 2: Unit Overview and Goals 3
scientific tasks—preparing slides of a live organism, observing the organism through the microscope under different magnifications, drawing the organism while following a set of guidelines, and peer-evaluating drawings of other group members. Students learn how to recognize several different types of cells—algal, plant, and animal—and their components.
In Lesson 4, students begin to follow the development of cabbage white butterflies from eggs to adults. They conduct three inquiries over several weeks to discover more about this organism and how its life cycle is intertwined with that of Wisconsin Fast Plants.
Lesson 5 finds students participating in a simulation of the steps of cell division, using pipe cleaners and a set of student sheets. They prepare a model of those steps and compare cell division in plant and animal cells. The inquiries in this lesson prepare students for studying sexual reproduction in flowering plants (Lesson 7) and inheritance in Fast Plants and humans (Lesson 10).
Part 2: ContinUinG tHe CYCle
In Lesson 6, students read an introductory passage contrasting asexual and sexual reproduction. This sets the stage for an inquiry in which students dissect a flower to observe its male and female reproductive structures. They use cotton swabs to cross-pollinate their Wisconsin Fast Plants flowers. They also record information about the pigmentation of their plants—a characteristic whose importance will become apparent in a later lesson.
Lesson 7 introduces the Exploration Activity, a group research project on which students continue to work for the remainder of the unit. In this activity, students research an endangered or vulnerable species, learning its characteristics, its geographic range, and the reasons why its numbers have declined. Several class periods are scheduled near the conclusion of the unit for students to practice and present their Exploration Activities.
In Lesson 8, students use their Wisconsin Fast Plants growing systems to investigate an important process in plants called transpiration. They also learn about photosynthesis.
In Lesson 9, students can harvest their Wisconsin Fast Plants seeds, if the schedule allows. Students can then set up 36 harvested seeds (or seeds that you have supplied) for germination in a petri dish. They observe the germinated sprouts in Lesson 10 and discover that the purple-pigmented parents have yielded a 3:1 ratio of purple-pigmented to green sprouts. From there, students engage in several follow-up inquiries to learn more about genetics in both plants and animals.
In Lesson 11, the first part of a final assessment, students use the information on their organism photo cards, which they have revised and updated during the unit, to construct a graphical dichotomous key. From the graphical key, they produce a written key. Appendix F provides an alternative to Part 2 of this assessment, which consists of a set of multiple-choice items.
Appendices B through D include detailed instructions for the preparation of various items of equipment that are used in the unit. Appendix E is the assessment for Part 1 of the unit—Lessons 1–5. Appendix F is the assessment for Lessons 6–10, and provides an optional alternative to the cumulative multiple-choice questions provided in Lesson 11. Appendix G presents an optional inquiry design challenge that may be helpful in assessing students at the end of the unit.

Unit overview and Goals
4 STC Unit: Studying the Development and Reproduction of Organisms
readinG seleCtions
The STC Program™ incorporates two types of reading selections into each unit to enhance and extend the lesson material. The first type is embedded directly into the procedure of the lesson. Called “Building Your Understanding,” these reading selections provide background information or further explanation of concepts that are critical to a student’s understanding of the inquiry at hand. A second type, “Extending Your Knowledge,” appears at the end of the lessons, extending the concepts of the lesson to the real world, highlighting the application of the concepts in such contexts as science and technology careers, current events, and the history of science and technology. Each of these reading selections is followed by two open-ended questions designed to help students apply the information from the text and extend their thinking.
sCienCe noteBooks
Students should have a science notebook in which to record their observations, data, conclusions, and answers to questions as well as their own ideas and thoughts as they progress through the inquiries in the unit. Students should come to view their science notebook as a resource that they can use throughout the unit. Reviewing observations, data, and information will help them refine their understanding of key concepts and conceptual models. Teachers will find the science notebook to be a valuable assessment tool in tracking student progress in both content knowledge and inquiry skills.
UsinG tHe annotated teaCHer’s edition for stC–seCondarY
The Teacher’s Edition for STC–Secondary was developed to support the teacher in every aspect of the unit. Imagine having everything right at your fingertips, yet in an organized and intuitive design. In each lesson, you will find two types of content—pages that support the teacher, and pages that help the teacher support the students.
Teacher-only Content Pages: These pages have no Student Guide correlation, and appear at the beginning and end of each lesson. Here you will find overview and background information, planning and preparation, common misconceptions, homework and extension activities, and assessment guidelines. These pages guide teachers to obtain and prepare materials and highlight the concepts of the lesson.
Annotated Student Pages: These pages include inset full-color Student Guide pages right in the Teacher’s Edition. This way, you’ll always have the student instructions and reading selections right in front of you. The step numbers for each inquiry correspond one-to-one between the Student Guide step and the annotated wrap of the Teacher’s Edition. The notes in the wrap provide anticipated or best responses, guide teachers in informal assessment, and offer classroom management tips. It is important to remember that the Student Guide explains the procedure while the annotation in the Teacher’s Edition wrap-around supports what is presented there.
teaCHer’s tools Cd
The CD included with the kit includes all the reproducible sheets needed to teach this unit in PDF format. Blackline masters are grouped by lesson, so finding exactly what you need is fast and simple. If your unit uses chemicals, you’ll also find PDFs of all the MSDS to print and have on hand in your classroom or the main office. Additional items include English and Spanish versions of the safety contract and any images or diagrams that need to be printed for use with overhead projectors or document cameras.
GlossarY
A glossary is included at the back of the Student Guide. It expresses scientific terms and concepts in a more formal language than students may initially use when they talk about or reflect on the inquiries and their observations. Before you introduce students to and have them use the more formal scientific terms, allow them to develop explanations and express their understanding in their own words.
Unit overview and Goals

Tab 2: Unit Overview and Goals 5
workinG witH livinG orGanisms
This unit is designed to correspond with the life cycles of the organisms being studied. However, the life cycles of organisms may vary due to external factors, such as temperature and humidity. If the organisms are a bit ahead or behind in their life cycles relative to the pacing of the unit, you may need to complete some lessons out of sequence.
Several documents are provided to help you manage the organisms and plan the unit. When planning, look to the following documents for helpful information on the typical life cycles of the organisms used in this unit. You may need to move lessons forward or backward in time based on the readiness of the organisms and your classroom situation:
•Suggested Pacing Guide (on page 6 of this section)
•Student Sheet 2.3: Wisconsin Fast Plants Maintenance Calendar (on the Teacher’s Tools CD)
•Inquiry Master 4.1a: Cabbage White Butterfly—Inquiry, Care, Preparation, and Maintenance Calendar and Inquiry Master 4.1b: Cabbage White Butterfly—Inquiry, Care, and Maintenance Calendar (on the Teacher’s Tools CD)
To help make planning easier, each maintenance calendar includes a reference to the inquiry on the Pacing Guide that aligns with its Day 1. For example, Day 1 of the Fast Plants life cycle begins with Inquiry 2.3, which takes place on Day 4 of the unit’s Pacing Guide. In addition, notes are included throughout the Teacher’s Edition about ordering living materials, setting up growing systems, and developmental checkpoints that are necessary before moving to a particular inquiry.
TEACHER’S NOTES
Tab 2: Unit Overview and Goals 5

6 STC Unit: Studying the Development and Reproduction of Organisms
Grade-level ConCePtsUnit ConCePtsUnifYinG tHeme
Subconcept 1organisms have unique scientific names. Scientists name and classify organisms.
Lesson 1: What Are organisms?Students list traits that are common to living things. Students learn how to assign each organism a genus and a species name.
Subconcept 2Living things must be able to grow. organisms have a life cycle that begins with birth or germination.
Lesson 2: Wisconsin Fast plants: beginning the cycleStudents prepare equipment and sow F1-generation Fast Plants® seeds. They compare development of monocot and dicot plants from seeds.
Subconcept 3the structures of cells are suited to their functions. Animal cells differ from plant cells.
Lesson 3: exploring cellsStudents investigate the form and function of various cells: plant, animal, and algal.
Lesson 4: the cabbage White—From egg to butterfly
Students observe a cabbage white butterfly egg and larva at the beginning of its life cycle.
Subconcept 4cell division enables organisms to increase in size.
Lesson 5: cell Division: Multiplying by DividingStudents explore cell division through manipulation of materials and preparation of a model.
Subconcept 5A species’ habitat is essential for its survival.
Lesson 7: exploration Activity: endangered SpeciesStudents research an endangered or a vulnerable species to discover its characteristics, its habitat, and reasons why its numbers have declined.
Subconcept 6Living things must be able to reproduce. organisms pass traits from one generation to the next.
Lesson 6: Sexual Reproduction in Flowering plantsStudents examine flowers to learn about their structures and functions. Students cross-pollinate Fast Plants flowers.
Lesson 8: Leaf Structure and transpirationStudents explore how the structure of Fast Plants facilitates transpiration and photosynthesis.
Lesson 9: the next Generation: part 1Students plant F2-generation Fast Plants seeds.
Lesson 10: the next Generation: part 2—Secrets Revealed
Students examine patterns of inheritance in Fast Plants and humans.
Lesson 11: the Key to organisms—An AssessmentStudents design a dichotomous key for several of the organisms in the unit. Students also answer a series of multiple-choice items to demonstrate their knowledge of the concepts of the unit.
Concept storyline: Studying the Development and Reproduction of Organisms
• Organisms share common traits. • Living things must be able to grow and reproduce.
• Cells perform specific tasks in living things. • Cell division enables an organism to grow.• A species needs a particular habitat in order to survive.
• Living things must be able to reproduce. Organisms pass characteristics, or traits, from one generation to the next.
Unit overview and Goals

Tab 2: Unit Overview and Goals 7
1 Getting Started
Inquiry 1.1
2 Inquiry 1.1 continued
Reflecting on What You’ve Done
3 Getting Started
Inquiry 2.1 Inquiry 2.2
Reading Selection
4 Inquiry 2.3
5 Getting Started
Inquiry 3.1 Reading Selection
6 Inquiry 3.2
7 Inquiry 3.3
Reflecting on What You’ve Done Reading Selection
8 Getting Started
Inquiry 4.1** Reading Selection
9 Inquiry 2.4*
Reflecting on What You’ve Done
Reading Selections
10 Getting Started
Inquiry 5.1 Reading Selection
11 Inquiry 5.2
Reflecting on What You’ve Done
12 Assessment—Lessons 1–5
(Appendix E) (Optional)
13 Getting Started
Inquiry 6.1 Reading Selection
14 Inquiry 6.2
Reflecting on What You’ve Done Reading Selection
15 exPloration
aCtivitY Getting Started Part 1
Reading Selections
16 exPloration
aCtivitY Part 2
Reading Selection
17 Inquiry 4.2
Reading Selection
18 exPloration
aCtivitY Part 2 continued
19 exPloration
aCtivitY Part 2 continued
20 open
21 Getting Started
Inquiry 8.1
22 Inquiry 8.2
23 Inquiry 8.3
Reflecting on What You’ve Done Reading Selection
24 exPloration
aCtivitY Part 2 continued
25 open
26 open 27 open 28 Inquiry 4.3
Reflecting on What You’ve Done
Reading Selections
29 exPloration
aCtivitY Part 3
30 exPloration
aCtivitY Part 3 continued
31 Getting Started
Inquiry 9.1
32 Inquiry 9.2
Reflecting on What You’ve Done
Reading Selections
33 exPloration
aCtivitY Part 3 continued
Reflecting on What You’ve Done
34 open 35 Getting Started
Inquiry 10.1 Reading Selection
36 Inquiry 10.2
Reading Selection
37 Inquiry 10.3
Reflecting on What You’ve Done
Reading Selections
38 Review for Unit
Assessment
39 Getting Started
Data Analysis
40 Data Analysis
continued
41 Data Analysis continued
Multiple-Choice Questions
(or Assessment—Lessons 6–10, Appendix F)
42 Multiple-Choice
Questions (or Assessment—Lessons
6–10, Appendix F) Reading Selections
43 Reflecting on
What You’ve Done Results
44 Inquiry Design
Challenge (Appendix G) (Optional)
45 open
lesson 6 lesson 7
lesson 7
lesson 7
lesson 9
lesson 11
lesson 7
lesson 7 lesson 10
lesson 8
lesson 5lesson 4
lesson 2 lesson 3lesson 1
suggested Pacing Guide: Studying the Development and Reproduction of OrganismsPacing Guide is based on 40- to 50-minute class periods.
* Repeat observations and sketches every three days for the next two weeks.** Measure body length of larva every three days until the pupal stage.
lesson 2
lesson 4
lesson 4

Unit overview and Goals
8 STC Unit: Studying the Development and Reproduction of Organisms
StuDying the DevelOpment anD RepRODuctiOn Of ORganiSmS Unit Goals
An organism is a complete living thing.
Living things share certain characteristics.
Organisms are composed of one or more cells.
All living things undergo fundamental life processes.
Scientists name and classify organisms for identification and organizational purposes.
A seed, which contains stored energy, nourishes the growing embryo of a plant.
Plant growing systems can be set up to provide the right conditions for growth.
Plants need specific nutrients (minerals), in specific quantities, to grow.
Seeds will germinate when provided with soil, nutrients, and water.
Monocotyledons (monocots), such as corn, have one cotyledon in the seed and parallel veins in the leaves.
Dicotyledons (dicots), such as lima beans, have two cotyledons in the seed and a network of branching veins in the leaves.
A compound light microscope uses two convex lenses to produce a clear, magnified image that is upside down and backward.
Different combinations of lenses provide a range of magnifications.
The cell is the basic unit of life and has a characteristic structure.
An organelle is a well-defined structure found in a cell.
All cells have a cell membrane, a nucleus, and cytoplasm.
There are basic differences between plant and animal cells. Plant cells have a nonliving cell wall; animal cells do not.
Some plant cells contain chloroplasts, which are the organelles responsible for photosynthesis.
Butterflies belong to a class of arthropods called insects.
Butterflies undergo four life stages: egg, larva, pupa, and adult.
The process by which a butterfly changes in body structure as it transitions to a new life stage is called metamorphosis.
Many organisms eat only specific food types.
Narrow food preferences can limit habitat options for an organism.
The excrement of animals often reveals information about the food they eat.
Cell division, which includes mitosis and cytokinesis, is necessary for growth and reproduction.
Cytokinesis follows mitosis and is the process by which one cell splits into two.
Interphase is the period between the formation of daughter cells and cell division.
In this unit, students investigate growth and reproduction as they follow the complete life cycles of Wisconsin Fast Plants® and the cabbage white butterfly. Their experiences introduce them to the following concepts, skills, and attitudes.
ConCePts

Tab 2: Unit Overview and Goals 9
Mitosis is the segregation of duplicated chromosomes into two daughter cells.
Mitosis is a continuous process but may be divided into distinct phases by specific events occurring within the cell.
The result of cell division is that every body cell in an organism contains identical sets of DNA.
The flower is the sexual reproductive organ of a flowering plant.
Each part of a flower plays a specific reproductive role.
Perfect flowers contain both male and female reproductive structures, while imperfect flowers contain one or the other.
A seed forms when fertilization occurs, i.e. when a sperm nucleus from a pollen grain unites with the egg nucleus of an ovule.
Pollination is the transfer of pollen from anther to stigma.
Organisms require habitats that meet their needs for resources.
Human activities can cause a species to become vulnerable or endangered.
Extinction is the death of all members of a species.
Every organism is part of a food web.
Communities of organisms transfer energy through the web of feeding relationships.
Species characteristics such as slow birth rates or highly unique diets may increase the risk of extinction.
Habitat alteration and loss are major factors in the decline of species.
The science of conservation works to protect populations of target species.
Water escapes from plant leaves through openings called stomata, which are formed by a pair of guard cells.
Guard cells regulate the amount of water leaving the leaf by changing shape in response to concentrations of water and solutes in neighboring cells.
Guard cells swell and become turgid when water enters them by osmosis, yielding an open stomata.
Transpiration is the process by which water evaporates from plants, drawing more water up from the roots to the leaves.
The number of leaves on a plant influences the amount of water that passes through it in a given period of time.
In nature, seeds are dispersed in a variety of ways that are made possible by how the seed is encased.
Many types of plant seeds are encased in pods, which mature, dry, and split apart to release the seeds.
Seeds vary in number per pod depending on how many eggs were fertilized by the sperm nuclei.
Seeds may germinate and grow under the proper conditions, but viability varies.
Offspring inherit characteristics, or traits, from their parents and thus tend to resemble them.
Pairs of genes determine inherited traits, with each parent contributing one gene to the pair.
Different forms of a gene may be dominant or recessive.
Genes of a pair may be alike (homozygous) or unlike (heterozygous).
The gene combination for a trait is its genotype, while the expression of the trait is its phenotype.
Meiosis produces sex cells with half the normal complement of chromosomes.
A Punnett square is a graphic device that shows all the possible combinations of genes in a cross between two parents.
Scientists communicate through scientific drawings that incorporate clear labels, magnification scale, and perspective.
Communicating procedures and explanations is an important part of the scientific process.

Unit overview and Goals
10 STC Unit: Studying the Development and Reproduction of Organisms
Developing a list of characteristics common to all living things.
Assigning genus and species names to organisms.
Planning, organizing, and carrying out long-term care of living plants and animals.
Comparing and contrasting monocots and dicots.
Learning the parts of a microscope, and practicing manipulating them to obtain the best image.
Preparing scientific drawings that incorporate clear labels, magnification scale, and perspective.
Devising data tables.
Making and recording observations.
Observing, drawing, labeling, and measuring cells.
Observing and identifying plant and animal cell organelles.
Reading to obtain more information about cell division, reproduction, heredity, and ecology.
Observing, measuring, and recording stages of the cabbage white butterfly life cycle.
Designing and performing an inquiry.
Constructing models to demonstrate the steps of cell division.
Comparing and contrasting cytokinesis in plant and animal cells.
Researching a vulnerable or an endangered species.
Working collaboratively and sharing information.
Recognizing the ensuing risks and benefits when human consumption of natural resources threatens an endangered species.
Designing and creating an effective method to show research results.
Sharing the results of research with the class.
Recognizing and naming the parts of the flower.
Cross-pollinating Wisconsin Fast Plants®.
Making and operating a model of a stoma.
Exploring the loss of water from a plant through transpiration.
Recognizing the difference between genotype and phenotype.
Understanding how genes interact in pairs.
Recognizing the advantage of using large sample sizes when conducting an inquiry.
Creating dichotomous keys to identify organisms.
Developing an interest in investigating growth and development in representative organisms from two kingdoms.
Acknowledging that each species has an intrinsic worth that is independent from its economic value or its attractiveness.
Recognizing that all organisms are ultimately connected to one another through food chains and food webs.
Developing a willingness to think creatively and logically to form scientific explanations.
attitUdes
skills

PART 1 THE BEGINNING
Lesson 1 What Are Organisms?
Lesson at a Glance ..................................................................... 1-A
Inquiry 1.1 Describing and Naming Organisms ............... 4-B
That’s Life! ...................................................................................... 7What’s in an Organism’s Name? ..................................................... 10
Taxonomy Taken a Step Further .................................................... 16
Lesson 2 Wisconsin Fast Plants: Beginning the Cycle
Lesson at a Glance ..................................................................... 19-A
Inquiry 2.1 Preparing Your Growing System .................... 23
Inquiry 2.2 Preparing Your Nutrient Solution .................. 24
Nutritional Needs of Plants ........................................................... 25
Inquiry 2.3 Sowing the Fast Plants Seeds .......................... 28
Inquiry 2.4 Observing the Germination and
Development of Corn and Bean Seeds .......... 31
Wisconsin Fast Plants: Sprouting Up All Over ............................... 32
From Seed to Adult Plant—and Back ............................................ 36
CONTENTs
STC Life Science Strand: Life on Earth i

Studying the development and RepRoduction of oRganiSmS
Lesson 3 Exploring Cells
Lesson at a Glance ..................................................................... 39-A
Through the Compound Eye .......................................................... 42
Plant and Animal Cells: The Same, but Different ........................... 45
Inquiry 3.1 Observing, Drawing, and Measuring
an Algal Cell ....................................................... 48
Inquiry 3.2 Observing, Drawing, and Measuring
Elodea Leaf Cells ................................................ 51
Inquiry 3.3 Exploring Animal Cells ..................................... 52
Microscope Pioneers ...................................................................... 54
Lesson 4 The Cabbage White—From Egg to Butterfly
Lesson at a Glance ..................................................................... 57-A
Introducing the Cabbage White Butterfly ..................................... 60
Inquiry 4.1 Observing and Measuring a Cabbage White
Butterfly Egg and Larva .................................... 61
What Do Cabbage White Butterfly Larvae Like to Eat? .................. 64
Inquiry 4.2 Food Preferences of a Cabbage White
Butterfly Larva ................................................... 64-B
Picky Eaters .................................................................................... 68
Is Color a Factor in Attracting Cabbage Whites to a Food Source? .................................................. 70
Inquiry 4.3 Exploring Food Color Preferences of the
Cabbage White Butterfly .................................. 72-A
Jostling for Niches: Predators, Prey, and Pests .............................. 74
Gypsy Moths—From Invited Guests to Major Pests ...................... 77
Lesson 5 Cell Division: Multiplying by Dividing
Lesson at a Glance ..................................................................... 79-A
Inquiry 5.1 Simulating Interphase, Mitosis,
and Cytokinesis ................................................. 82-A
Inquiry 5.2 Creating a Model of Interphase and
the Stages of Mitosis ........................................ 82-D
Multiply, Divide, & Survive ............................................................ 86
ii STC Unit: Studying the Development and Reproduction of Organisms

PART 2 CONTINUING THE CYCLE
Lesson 6 sexual Reproduction in Flowering Plants
Lesson at a Glance ..................................................................... 91-A
Inquiry 6.1 Dissecting a Perfect Flower ............................. 95
Inquiry 6.2 Pollinating the Fast Plants Flowers ............... 98-A
Methods of Reproduction ............................................................. 100
The Wonder of Flowering Plants ................................................... 104
Lesson 7 Exploration Activity: Endangered species
Lesson at a Glance ..................................................................... 109-A
Part 1: Beginning the Exploration Activity ............................ 112-A
Part 2: Conducting Your Research ......................................... 112-B
Part 3: Sharing What You’ve Learned .................................... 114
Food Webs: Distributing the Sun’s Energy .................................... 116
Extinction: Rivet by Rivet .............................................................. 120
What’s Happening with Habitats? ................................................. 125
Lesson 8 Leaf structure and Transpiration
Lesson at a Glance ..................................................................... 129-A
Inquiry 8.1 Observing and Drawing a Stomatal Unit
From the Epidermis of a Lettuce Leaf .......... 133
Inquiry 8.2 Preparing a Model of a Stomatal Unit ........... 135
Inquiry 8.3 Exploring Transpiration in Wisconsin
Fast Plants .......................................................... 138
Looking at Leaves .......................................................................... 140
STC Life Science Strand: Life on Earth iii
Studying the development and RepRoduction of oRganiSmS
Lesson 9 The Next Generation: Part 1
Lesson at a Glance ..................................................................... 143-A
Inquiry 9.1 Harvesting Your Seeds ..................................... 147
Inquiry 9.2 Preparing Fast Plants Seeds for
Germination ....................................................... 149
Growing Seedless Fruits ................................................................ 152
The Cabbage White Butterfly ........................................................ 155
Lesson 10 The Next Generation: Part 2—secrets Revealed
Lesson at a Glance ..................................................................... 159-A
Inquiry 10.1 Observing the New Sprouts .......................... 163
Inquiry 10.2 Making It More Personal ................................ 164-D
Inquiry 10.3 Introducing Clyde and Claire ....................... 169
Mendel’s Discoveries ..................................................................... 172
Heredity—Passing It On ................................................................ 175
What Are the Chances? .................................................................. 177
Hello, Dolly! ................................................................................... 178
Lesson 11 The Key to Organisms—An Assessment
Lesson at a Glance ..................................................................... 181-A
Data Analysis Part 1: Creating Dichotomous Keys ............. 184-B
Data Analysis Part 2: Creating a Dichotomous Key
for Your Organism Photo Cards ...... 186-A
Multiple-Choice Questions ....................................................... 188-A
One of the Buggiest Places on Earth ............................................. 189
The Population Explosion ............................................................. 192
iv STC Unit: Studying the Development and Reproduction of Organisms
lessonThe NexT GeNeraTioN: ParT 1
GettinG Started inquiry 9.1 Harvesting Your Seeds
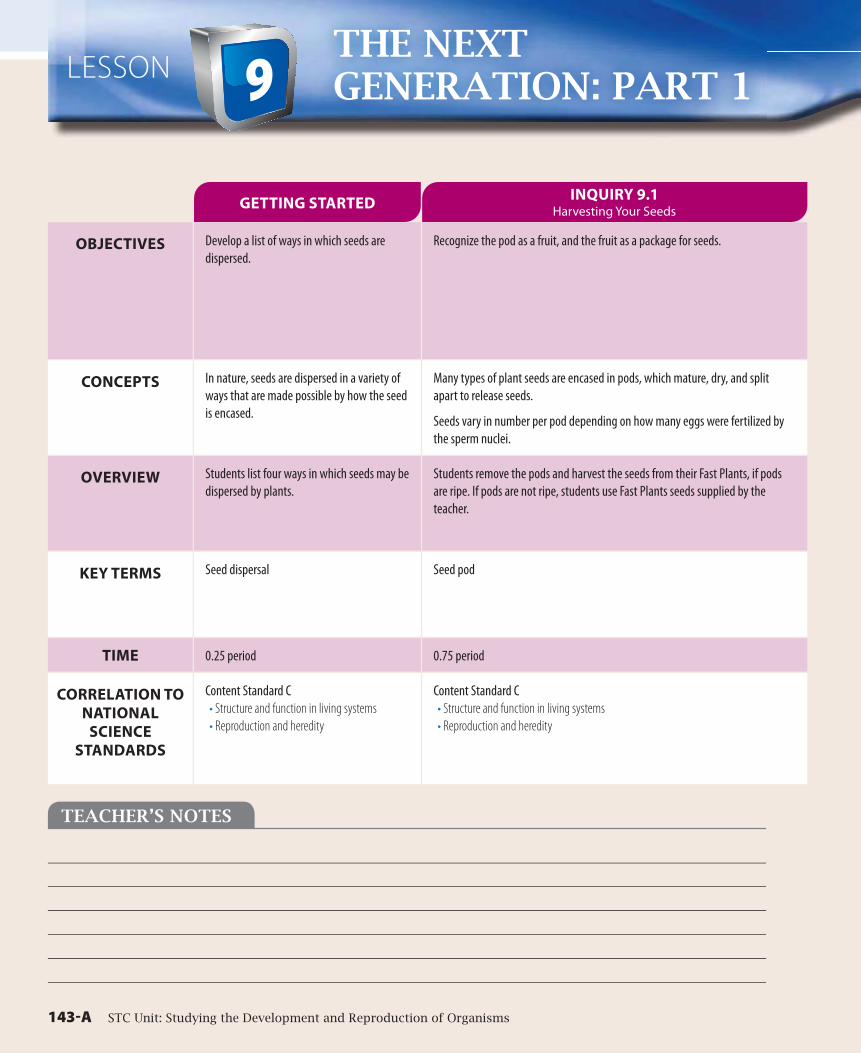
ObjectiveS Develop a list of ways in which seeds are dispersed.
Recognize the pod as a fruit, and the fruit as a package for seeds.
cOnceptS In nature, seeds are dispersed in a variety of ways that are made possible by how the seed is encased.
Many types of plant seeds are encased in pods, which mature, dry, and split apart to release seeds.
Seeds vary in number per pod depending on how many eggs were fertilized by the sperm nuclei.
Overview Students list four ways in which seeds may be dispersed by plants.
Students remove the pods and harvest the seeds from their Fast Plants, if pods are ripe. If pods are not ripe, students use Fast Plants seeds supplied by the teacher.
Key termS Seed dispersal Seed pod
time 0.25 period 0.75 period
cOrrelatiOn tO natiOnal
Science StandardS
Content Standard C• Structure and function in living systems• Reproduction and heredity
Content Standard C• Structure and function in living systems• Reproduction and heredity
TeaCher’S NoTeS
143-A STC Unit: Studying the Development and Reproduction of Organisms

leSSOn at a Glance
inquiry 9.2Preparing Fast Plants Seeds for Germination readinG SelectiOnS
Plant F2-generation Wisconsin Fast Plants seeds and predict the number of purple-pigmented offspring.
Review the relationship between the life cycles of Wisconsin Fast Plants and cabbage white butterflies.
Update the organism photo cards for Wisconsin Fast Plants and cabbage white butterflies.
Growing Seedless Fruits Discover how people use grafting to grow new fruit plants.
The Cabbage White Butterfly Learn about the life cycle of the cabbage white butterfly.
Seeds may germinate and grow under the proper conditions, but viability varies.
Grafting, a method of joining two plant parts, is used to produce most fruit plants, including some that are seedless.
During its lifetime, a cabbage white butterfly completes five larval stages, becomes a chrysalis, and emerges as a butterfly.
Students set up a growing system to prepare their Fast Plants seeds for germination.
“Growing Seedless Fruits” explains how fruit growers can graft a portion of a seedless fruit tree onto the rootstock of a second tree to produce a new plant.
“The Cabbage White Butterfly” describes the events that occur during the cabbage white’s three-week life span.
Germination Botany
Chrysalis
Diapause
Grafting
Metamorphosis
Rootstock
Scion
Understock
0.75 period 0.25 period
Content Standard A• Abilities necessary to do scientific inquiry
Content Standard C• Structure and function in living systems• Reproduction and heredity
Content Standard C• Structure and function in living systems• Reproduction and heredity
STC Life Science Strand: Life on Earth 143-B

the next GeneratiOn: part 1
Overview
Students begin this lesson by observing a photo of a dandelion dispersing its seeds. They then develop a list of ways in which plants disperse their seeds. In inquiry 9.1, students harvest their Fast Plants® seeds (if the seed pods are mature) and determine the average number of seeds per pod. In inquiry 9.2, students set up these F2
-generation seeds for germination (or, if time does not permit you to wait for their seed pods to ripen, you may use the F
2-generation
Wisconsin Fast Plants seeds included in the kit). Students then predict how many of the sprouted seeds will display a purple pigment. In Lesson 10, students determine the ratio of purple-pigmented sprouts to those without the purple pigment and work backward from there to determine the genetic makeup of the parents. This serves as an introduction to several inquiries about genetics.
bacKGrOund
After students pollinated their Fast Plants for the last time, they pinched off the remaining flower buds. This directed the resources of their plants to the developing seed pods. The seed pod is a fruit—a ripened, mature ovary containing seeds. The pod protects the seeds as they develop. In Fast Plants, the embryos in the developing seeds mature about 20 days after pollination. At that time, students should remove the nutrient supply to the plants, according to the Fast Plants Maintenance Chart (Student Sheet 2.3). During days 21–25 after fertilization, the seed pods will dry and begin to crack along a seam that runs the length of the pod. At that point, it will become very easy to remove the seeds. The pod will eventually split open along its seam, releasing its seeds naturally. If scheduling requires this lesson to occur before the seed pods are mature, you may have students use Fast Plants seeds that are genetically similar to those that students will harvest later.
Different varieties of plants have unique ways of ensuring that their seeds are dispersed. Many fruits that are familiar to us as food sources—such as apples, oranges, watermelons, and cucumbers—contain large numbers of seeds. After humans and other animals eat these fruits, they often spit out these seeds and many of them germinate under the appropriate conditions. Many smaller seeds that animals swallow and then void through defecation also germinate. Without animal intervention, fruits eventually rot and their seeds are left behind. Some familiar foods that may not be thought of as fruit include tomatoes, peanuts, green beans, walnuts, and squash.
When a dandelion flower withers, it leaves behind about 200 simple, dry, one-seeded fruits, each with its own miniature parachute. These simple fruits are called achenes, and the wind can carry them for miles. The thin seed coat wears away, leaving the seeds free to germinate.
Some species of trees, such as maples, box elders, and ash, produce seeds with extensions that allow them to spin like helicopters when released from the trees (see Figure 9.1).
SeedS WiTh exTenSionS For SpinninG in The airFiGure 9.1 PHOTO: Eric Hunt/creativecommons.org
lesson
143-C STC Unit: Studying the Development and Reproduction of Organisms

reaDiNG SeLeCTioNS
“Growing Seedless Fruits” explains how plants develop fruits without seeds. It also explains a method by which part of one plant is grafted onto another. “The Cabbage White Butterfly” reviews the life cycle of the organism. It was placed after the inquiries dealing with the cabbage white to avoid giving students too much advance information.
Seed oF The aSian ClimBinG GourdFiGure 9.2 PHOTO: © 2007 Thomas C. Andres
TheSe CoCkleBurS aWaiT a hoST To BruSh aGainST Them. FiGure 9.3 PHOTO: Robert H. Mohlenbrock @ USDA-NRCS PLANTS Database/USDA SCS. 1989. Midwest wetland flora: Field office illustrated guide to plant species. Midwest National Technical Center, Lincoln
Other seeds are adapted for gliding. The seed of the Asian climbing gourd, shown in Figure 9.2, has a “wing span” of about 125 cm and can glide remarkable distances before landing. Some believe that this seed was the inspiration for the design of early gliders.
Cocklebur plants (Xanthium strumarium), common in fields, woods, and pastures, produce hundreds of football-shaped seeds about 2.5 cm in length. Each bur has hundreds of hooklike extensions that enable it to cling tightly to hair, fur, or clothing. These burs literally hitchhike their way to other locations. Many surmise that these burs were the inspiration for the popular Velcro® products. Figure 9.3 shows an example of cockleburs.
Rodents such as chipmunks and field mice are dispersal agents for seeds of many nonfleshy fruits. They may hoard seeds. Bats, fish, and ants also are other agents for seed dispersal.
nOte Since it will take about 48 hours for the F2 seeds to germinate, it is a good idea for you to use part of that time to review with
students how the life cycles of the two organisms—cabbage whites and Fast Plants—interrelate. in the remaining time, students can finish giving their exploration Activity presentations.
nOte Consider having students use any remaining seeds (or seeds that are harvested later) to do one or more of the extensions
suggested at the end of this lesson.
STC Life Science Strand: Life on Earth 143-D

lesson
144 STC Unit: Studying the Development and Reproduction of Organisms
In nature, some plants, lIke thIs dandelIon, have unIque ways of dIspersIng theIr seeds.PHOTO: gadgetdude/creativecommons.org
INTRODUCTION
Since you last pollinated your Fast Plants® flowers, the seeds have been developing. If the seed pods have dried and the enclosed seeds have turned brown, the seeds have matured. In this lesson, you will sow seeds that you harvest from your Fast Plants flowers, if they are ready for harvest, or you will sow seeds from similar Fast Plants. Your teacher will ask you to prepare the seeds for germination in a manner that allows you to observe certain inherited traits in the sprouts. (In Lesson 10, you will observe one of your sprouts’ traits that will give clues to the genetic makeup of its parents.) You will complete this lesson by reading about grafting, and about the cabbage white butterfly and how its life cycle interacts with those of plants from the cabbage family.
The NexT GeNeraTioN: ParT 1
preparatiOn
1. Title a transparency or piece of newsprint “Methods of Seed Dispersal.”
2. Put the organism photo cards in a place convenient for students.
3. Set out the remaining materials in a distribution center.
4. If students will be harvesting their own seeds, use a marker to label one 4-oz plastic cup “F
2-Generation FP Seeds” and
another cup “Unhealthy Fast Plants Seeds.”
nOte Nutrient solution is not necessary for the germination process. Tap water is
sufficient.
nOte Lessons 10 and 11 require some advance preparation. refer to page 151-B
for additional information.
lesson
144 STC Unit: Studying the Development and Reproduction of Organisms
STC Life Science Strand: Life on Earth 145
MATERIALS FOR LESSON 9
For your group 1 set of organism photo cards 1 Fast Plants growing system or
Fast Plants seeds 1 plastic cup, 24 oz 1 plastic cup, 4 oz 1 plastic lid, 4 oz 1 petri dish with lid 1 pair of forceps 1 pair of scissors 2 paper towels 1 black marker
OBJECTIVES FOR THIS LESSON
Develop a list of ways in which seeds are dispersed.
Update your organism photo cards for Wisconsin Fast Plants and cabbage white butterflies.
Plant F₂-generation Wisconsin Fast Plants seeds and predict the number of purple-pigmented offspring.
Recognize the pod as a fruit and the fruit as a package for seeds.
Review the relationship between the life cycles of Wisconsin Fast Plants and cabbage white butterflies.
MATERIALS FOR LESSON 9For the teacher 1 piece of newsprint or a
transparency* 1 black marker* 2 clear plastic cups, 4 oz 2 clear plastic lids, 4 oz Paper towels*
For each group of 4 students 1 set of organism photo
cards 1 Fast Plants® growing
system or F2-generation Wisconsin Fast Plants seeds (non-purple stem hairless) (optional)
1 clear plastic cup, 24 oz 1 plastic cup, 4 oz 1 plastic lid, 4 oz 1 petri dish with lid 1 pair of forceps 1 pair of scissors* 2 paper towels* 1 black marker* *Needed but not supplied
STC Life Science Strand: Life on Earth 145

because of their strength and durability. Point out the difference between a fruit like a peach and one like the coconut. explain that the fleshy, edible part of a peach is outside of the seed. it is
juicy and succulent, enticing animals to eat it. Animals either discard the hard peach pit without eating it or eat it and then eliminate it during defecation. The digestive process may weaken the
seed coat, hastening germination. explain that the edible part of the coconut is actually within the large seed. it consists of both solid and liquid endosperm, which provides nourishment and
energy for the developing embryo.
GeTTiNG STarTed
1
Look at the photo on page 144. The dandelion has an effective way of making sure its seeds get dispersed, or transported, to other places. Work with your group to list four ways in which seeds may be dispersed by plants.
2
Discuss your list with the class.
Coconut palms have an interesting method of dispersing their seeds. The palm’s fruit consists of a fibrous husk that encloses a large seed. The husk has enough air inside to allow it to float. Sitting high in the water, the husk acts as a sailboat, moving long distances with the wind’s assistance! This coconut has washed up on a sandy shore and germinated. Because of the coconut’s ability to float, coconut trees populate almost all of the Pacific islands.
PHOTO: Wikimedia Commons
146 STC Unit: Studying the Development and Reproduction of Organisms
The NexT GeNeraTioN: ParT 1lessoN 9
GeTTiNG STarTeD
1–2. Have students discuss their responses while you record them on the newsprint or transparency you prepared.
nOte extension 1 of this lesson is an activity about seed dispersal.
because of their strength
you prepared.
nOte Direct students’ attention to the sidebar about the fruit of coconut
palms. Mention that the fibers of the coconut husks are used to make floor mats
lesson
146 STC Unit: Studying the Development and Reproduction of Organisms

iNQUirY 9.1
HaRVESTINg YOuR SEEdSPROCEDURE
1
Examine your Fast Plants® to determine if your seed pods are mature. (If the seeds from your Fast Plants flowers are not yet ready to harvest, you will use seeds from similar Fast Plants.) Follow the steps below to remove and count the pods from your Fast Plants:
A. Use your scissors to snip the pods from each of the plants in your growing system, as shown in Figure 9.1.
B. Count the total number of pods and record it in your science notebook.
C. Dispose of the remains of your growing system as directed by your teacher.
Be careful to cut Below the seed pod’s Base to avoId damagIng the seeds.FigURe 9.1
STC Life Science Strand: Life on Earth 147 heterozygous for purple pigment and proceed to inquiry 9.2.
heterozygous for purple
nOte if students’ seed pods are not yet ready to harvest, use the F2-generation
Wisconsin Fast Plants® seeds (non-purple stem hairless, included in the kit) that are
iNQUirY 9.1
prOcedure
1. If seed pods will be mature in time for this inquiry, have students work in their groups to prepare to begin Step 1 in the Student Guide. Have a student volunteer from each group pick up the group’s growing system. Go over the procedure for this inquiry in the Student Guide. Ask students to examine the external surface of one pod before removing the rest of the pods from the plants. They should see a seam along which the pod will crack when it matures.
STC Life Science Strand: Life on Earth 147

2
Follow these steps to remove the seeds from the pods:
A. gently squeeze and roll the pod back and forth between your thumb and forefinger while holding it over a paper towel, as shown in Figure 9.2. This will crack the pod open at its seam and release the seeds.
B. Separate the seeds from the pieces of dried pods.
C. Count and record the number of seeds. Leave the seeds on the paper towel until you need them in inquiry 9.2.
Inquiry 9.1 continued
D. Calculate the average number of seeds per pod, using the data in your notebook. Record your answer and discuss with your partner what you think determines how many of the seeds in the pods will be viable (able to germinate).
E. Discuss with your partner what distinguishes a healthy seed from an unhealthy seed. Separate from the pile any seeds that appear underdeveloped or unhealthy. Place these seeds in the 4-oz cup labeled “Unhealthy Fast Plants Seeds” provided by your teacher. Keep the healthy seeds in a separate 4-oz cup and secure the lid. Label your group’s cup, and give it to your teacher for storage. You will plant these seeds in inquiry 9.2.
hold the seed pod just aBove the paper towel so that no seeds get lost when they fall.FigURe 9.2
148 STC Unit: Studying the Development and Reproduction of Organisms
The NexT GeNeraTioN: ParT 1lessoN 9
2. Demonstrate how to snip a seed pod from a Fast Plant® and roll it between your thumb and first two fingers to crack it open and release the seeds. Explain that eventually the pod would crack open by itself along its seam.
Elicit from students how they might identify seeds that are underdeveloped or unhealthy. (These seeds are likely to be extremely small and misshapen compared to normal seeds.) Emphasize that students should use their own judgment when separating healthy from unhealthy seeds. Point out the container into which students should place unhealthy seeds. Direct groups to save their healthy seeds in a 4-oz cup with a lid, and to label the cup with their group’s name. They will plant these seeds in inquiry 9.2.
lesson
148 STC Unit: Studying the Development and Reproduction of Organisms

iNQUirY 9.2
PREPaRINg FaST PLaNTS SEEdS FOR gERmINaTION
PROCEDURE
1
Use a petri dish bottom to trace three circles on a paper towel. Use the scissors to cut out the three circles.
2
Fill the 24-oz plastic cup about halfway with tap water.
3
Follow your teacher’s directions to adjust the height of the light in your light house.
4
Stack the three paper towel circles on one another. Pick up the stack of towel circles with forceps and dip them into the water in your cup. Lift them out of the water and drag them over the rim of the cup to drain the extra water. Place the stack of moist towel circles in the lid of the petri dish.
5
Arrange 36 seeds in several rows on the upper three-quarters of the stack of paper towel circles. Space the seeds approximately 1 cm apart. Press gently on the seeds to make them stick to the moist paper towels.
STC Life Science Strand: Life on Earth 149
iNQUirY 9.2
prOcedure
1–2. Go over the procedure for this inquiry in the Student Guide. Explain to students that they are setting up Fast Plants seeds for germination and that they will examine them in the next lesson to make some important observations about the new sprouts. Suggest that students use Figure 9.3 in the Student Guide as a reference for setting up their seeds.
3–7. If students set up their seeds and place them in the plant light house before they adjust the height of the light, they may hit the petri dish with the light and dislodge the seeds. To avoid this, have them first place an empty petri dish vertically in the 24-oz plastic cup, set it in the light house, and adjust the height of the light so that it is about 5 cm from the top of the petri dish. Then have them arrange their seeds on the stack of moist paper towels in a petri dish as shown in the illustrations, set the dish in the reservoir, add water to the reservoir, and place it in the light house.
nOte if your class is using the F2-generation seeds included in the kit rather than harvesting seeds from its own plants,
divide the 250 seeds provided evenly among groups.
STC Life Science Strand: Life on Earth 149
supplement their harvest with the F2-generation Wisconsin Fast Plants seeds (non-purple stem hairless) that are provided in the kit.
supplement their harvest
placing extras in the cup you prepared, labeled F2-Generation FP Seeds. if your class does not harvest the needed 288 healthy seeds in inquiry 9.1,
6
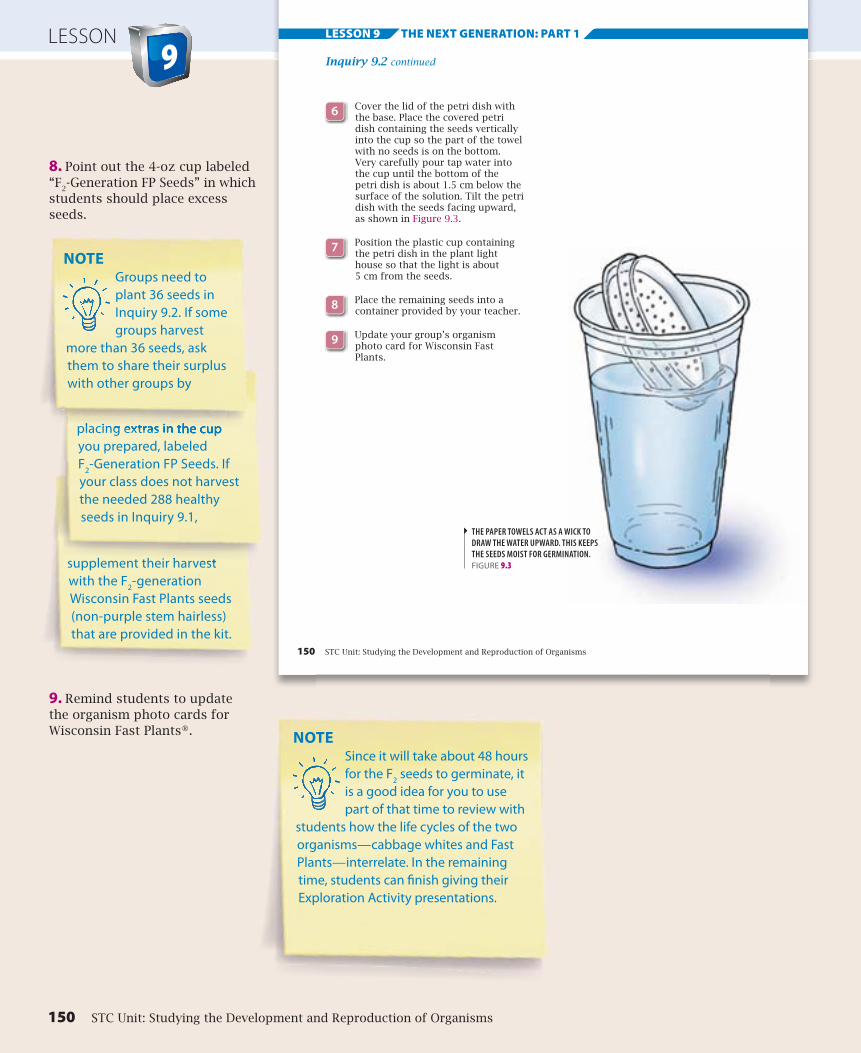
Cover the lid of the petri dish with the base. Place the covered petri dish containing the seeds vertically into the cup so the part of the towel with no seeds is on the bottom. Very carefully pour tap water into the cup until the bottom of the petri dish is about 1.5 cm below the surface of the solution. Tilt the petri dish with the seeds facing upward, as shown in Figure 9.3.
7
Position the plastic cup containing the petri dish in the plant light house so that the light is about 5 cm from the seeds.
8
Place the remaining seeds into a container provided by your teacher.
9
Update your group’s organism photo card for Wisconsin Fast Plants.
the paper towels act as a wIck to draw the water upward. thIs keeps the seeds moIst for germInatIon. FigURe 9.3
Inquiry 9.2 continued
150 STC Unit: Studying the Development and Reproduction of Organisms
The NexT GeNeraTioN: ParT 1lessoN 9
8. Point out the 4-oz cup labeled “F
2-Generation FP Seeds” in which
students should place excess seeds.
9. Remind students to update the organism photo cards for Wisconsin Fast Plants®. nOte
Since it will take about 48 hours for the F2 seeds to germinate, it is a good idea for you to use part of that time to review with
students how the life cycles of the two organisms—cabbage whites and Fast Plants—interrelate. in the remaining time, students can finish giving their exploration Activity presentations.
placing extras in the cup placing extras in the cup
nOte Groups need to plant 36 seeds in inquiry 9.2. if some groups harvest
more than 36 seeds, ask them to share their surplus with other groups by
lesson
150 STC Unit: Studying the Development and Reproduction of Organisms

reFleCTiNG ON WHAT YOU’Ve DONe
1 Based on what you learned in this lesson, respond to the following in your science notebook:
A. What initiated the formation of the seed pods?
B. What do you think determines the number of seeds found in each pod?
C. Was it more than mere luck that the seeds came out of the pods so easily? explain.
D. in Lesson 6, you counted and recorded the number of Fast Plants that displayed a purple pigment in their stem and leaves. You pollinated these plants and harvested their seeds or, instead, planted commercially available seeds from similar plants. in inquiry 9.2, you chose 36 seeds and set them up for germination in your group’s petri dish. if all of the seeds germinate, predict how many will display the purple pigment. explain your prediction.
e. Luther Burbank, a California plant breeder, grafted branches from many kinds of fruit—pears, plums, peaches, and different varieties of apples—onto one apple tree. if seeds produced by one of the apple blossoms germinated and grew into a tree, how many kinds of fruit would you expect to find on the new tree and why?
F. Why do you think some species of plants produce only one seed in a fruit, while others produce thousands of seeds?
g. Of what importance to the plant is the dispersal of seeds?
STC Life Science Strand: Life on Earth 151
REFLECTING ON WHAT YOU’VE DONE1. Discuss students’ answers to Questions A through G, which they recorded in their science notebooks:
a. When the eggs were fertilized and became developing embryonic plants, or embryos, the flowers withered and the ovaries developed into pods containing the developing seeds.
d. Answers will vary. Students probably have little knowledge at this point about genetics. Hopefully, they will speculate that the purple pigment is something that is inherited. This would be sufficient at this time.
e. Since the new tree was formed from a seed that resulted from the fertilization of an egg in an apple blossom, the new tree should bear only apples.
F. When a plant produces a single seed, that seed generally has a much greater chance of survival than each of the seeds produced by other plants in great numbers. Single seeds are often larger and more protected by a tough seed coat. A peach seed is a good example of a large, protected seed.
G. it is important to the survival of a plant species that its seeds are dispersed.
b. The number of seeds in a pod is determined by the number of eggs that were fertilized by sperm nuclei.
c. As the pod dries, a natural seam develops. The pod breaks open along this seam and the seeds are released. When students roll the pod between their thumb and fingers, it facilitates the break along the seam.
STC Life Science Strand: Life on Earth 151

the next GeneratiOn: part 1
hOmewOrK
period 1Have students read “Growing Seedless Fruits” on pages 152–154.
period 2Have students read “The Cabbage White Butterfly” on pages 155-159. When students come to class after completing the reading selection, allow time for groups to update the photo card for cabbage whites.
extenSiOnS
Science/technology1. Have students design and construct a model of a seed that has unique adaptations for dispersal by wind. Bring in a fan and have each group release its seeds in front of it. Have them discuss why those seeds that traveled the greatest distance were able to do so.
Science2. Have students design and conduct an inquiry to discover what percentage of the seeds that they determined not viable during inquiry 9.1 would actually germinate. Have them submit their findings in the form of a laboratory report.
mathematics3. Ask students to determine the ratio of the number of Fast Plants® seeds that they planted in their growing systems to the number of seeds they harvested from those plants. Have them submit their results along with
the answer to the question “Why isn’t the world covered with Fast Plants?”
Science4. Design an experiment in which students determine how a pollutant (salt solution) affects the germination of Wisconsin Fast Plants®. Have one group be the “control” group while the others use various concentrations of salt solution instead of tap water. Have them submit their results in the form of a laboratory report.
Science5. Have students conduct research to find other insects that have close relationships with a particular family or species of plant, such as the monarch butterfly and the milkweed plant. Have them submit their findings in paragraph form.
Science6. Have students design an experiment to determine whether Wisconsin Fast Plants seeds are better adapted to move into a desert area or a temperate area. They would need to decide how to simulate the two environments; for example, the desert environment could be an incubator set at 43°C, and a refrigerator could simulate the cold climate. Have students include a control growing system under ideal conditions, as they did during the unit. Have them submit their results in the form of a laboratory report.
Science7. Have students repeat inquiry 9.2, but set up three petri dishes, each with 12 F
2-generation seeds. Place
the dishes in the light house at different distances from the light to discover whether the intensity of light affects the production of purple pigment. Ask students to share with the class the three petri dishes containing the sprouts along with an oral presentation of their findings.
lesson
151-A STC Unit: Studying the Development and Reproduction of Organisms

preparatiOn FOr leSSOn 10
Students will need calculators for Lesson 10. At the end of this lesson, ask those who have calculators at home to bring them in the next time their class meets.
preparatiOn FOr leSSOn 11
Each group will need a piece of 24 in × 36 in construction or poster paper. Either provide the poster paper for students or request that they bring it in themselves.
aSSeSSment
Assessment for this lesson should be based on the student’s ability to:
• Participate in the inquiries and adhere to directions.
• Explain that the fruit (seed pod) is a package for seeds.
• List ways that seeds are dispersed in nature.
• Determine and record the average number of seed pods produced by his or her Wisconsin Fast Plants, if their seed pods are mature.
• Determine and record the average number of seeds per pod from his or her Wisconsin Fast Plants, if their seed pods are ready for harvesting.
• Harvest and set up Wisconsin Fast Plants seeds for germination.
• Explain the relationship between the life cycles of Wisconsin Fast Plants and cabbage white butterflies.
STC Life Science Strand: Life on Earth 151-B

readiNG SeLeCTioN exTeNdiNG your kNowledGe
You are at a summer picnic at a friend’s house. You bite into a juicy slice of
watermelon. But what do you do with the seeds? Should you spit them on the ground or perhaps into a napkin?
Well, your seed-spitting days may be over. That’s because now you can buy seedless watermelons. In fact, there are many kinds of seedless fruits, including grapes and oranges. But if there are no seeds, how do people grow more seedless fruits?
TwO PLANTS MAkE ONE If you’ve ever had a garden, you know how to plant seeds in soil to create new plants. But fruit plants are not always grown from seeds. A process called grafting—a method of joining two plants together—is used to produce most fruit plants, including some seedless ones.
The lower part of a graft is called the “understock.” After grafting is completed, the understock is referred to as the “rootstock.” It provides a root system for the new plant. The upper part of a graft is called a “scion.” It normally consists of a part of the plant’s previous year’s growth, along with one or more buds. Eventually, the rootstock and scion fuse to form a single plant.
One of the main reasons for grafting is to improve the
thIs varIety of seedless grapes Is called crImson seedless.PHOTO: Bob Nichols, Agricultural Research Service/U.S. Department of Agriculture
Growing Seedless Fruits
152 STC Unit: Studying the Development and Reproduction of Organisms
The NexT GeNeraTioN: ParT 1lessoN 9
lesson
152 STC Unit: Studying the Development and Reproduction of Organisms
exTeNdiNG your kNowledGe
1. Could a grape you are eating today have the same genetic make-up as a grape fed to an ancient egyptian pharaoh? explain.
2. How have crops besides grapes been modified over time to be better for people to eat?
1.
disCussioN QuesTioNs
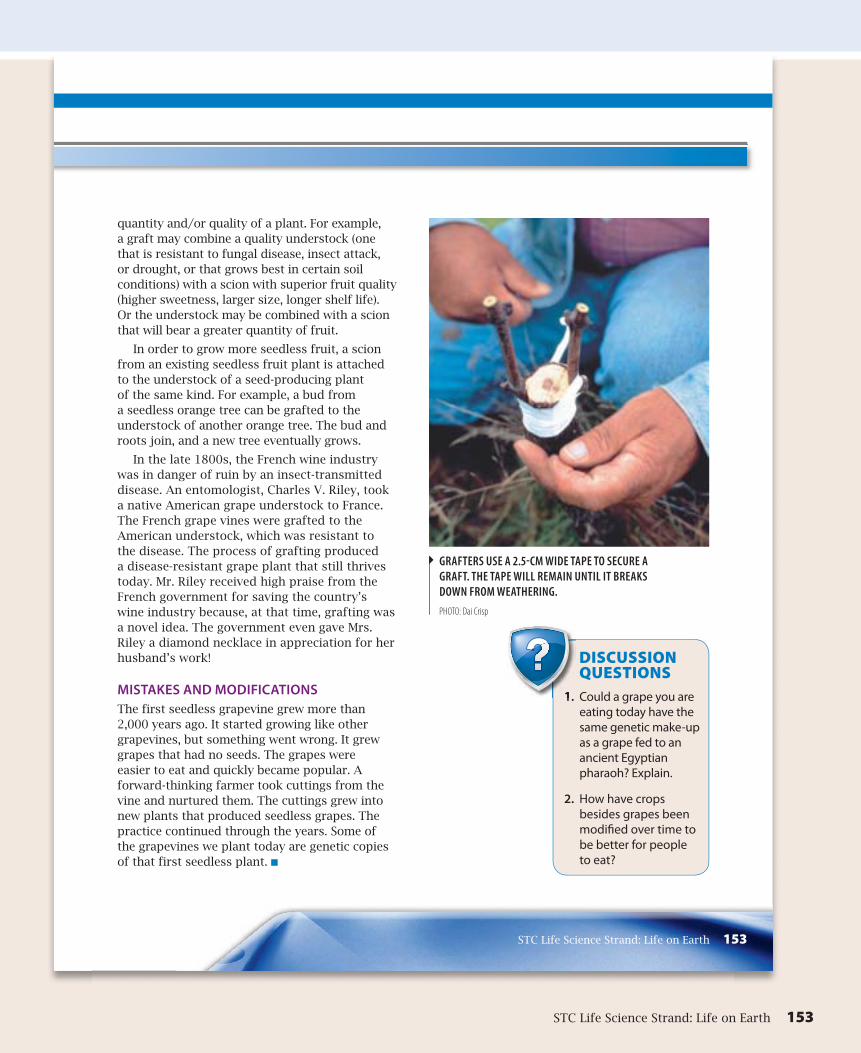
grafters use a 2.5-cm wIde tape to secure a graft. the tape wIll remaIn untIl It Breaks down from weatherIng.PHOTO: Dai Crisp
quantity and/or quality of a plant. For example, a graft may combine a quality understock (one that is resistant to fungal disease, insect attack, or drought, or that grows best in certain soil conditions) with a scion with superior fruit quality (higher sweetness, larger size, longer shelf life). Or the understock may be combined with a scion that will bear a greater quantity of fruit.
In order to grow more seedless fruit, a scion from an existing seedless fruit plant is attached to the understock of a seed-producing plant of the same kind. For example, a bud from a seedless orange tree can be grafted to the understock of another orange tree. The bud and roots join, and a new tree eventually grows.
In the late 1800s, the French wine industry was in danger of ruin by an insect-transmitted disease. An entomologist, Charles V. Riley, took a native American grape understock to France. The French grape vines were grafted to the American understock, which was resistant to the disease. The process of grafting produced a disease-resistant grape plant that still thrives today. Mr. Riley received high praise from the French government for saving the country’s wine industry because, at that time, grafting was a novel idea. The government even gave Mrs. Riley a diamond necklace in appreciation for her husband’s work!
MISTAkES AND MODIFICATIONS The first seedless grapevine grew more than 2,000 years ago. It started growing like other grapevines, but something went wrong. It grew grapes that had no seeds. The grapes were easier to eat and quickly became popular. A forward-thinking farmer took cuttings from the vine and nurtured them. The cuttings grew into new plants that produced seedless grapes. The practice continued through the years. Some of the grapevines we plant today are genetic copies of that first seedless plant. n
STC Life Science Strand: Life on Earth 153
STC Life Science Strand: Life on Earth 153

BoTaNY’S FaTher
You know that the thickest part of a tree is called the trunk and that many trees have parts called leaves, which change color and fall off during autumn. You also know that you can eat certain plants, such as vegetables, that usually grow from seeds, and that these plants need water and sunlight to survive.
But you may not know who first named the parts of trees and plants in an organized way. It was Theophrastus, a Greek philosopher who was born around the year 372 BC.
Theophrastus was a pupil of Aristotle, one of the most famous philosophers who ever lived. Like Aristotle, Theophrastus was a popular teacher. At one time, his school in the city of Lyceum had more than 2,000 pupils.
Although Theophrastus wrote about many subjects, his first love was plants. He studied them for most of his life. His books, The Natural History of Plants and About the Reasons of Vegetable Growth, were the first ever written about botany, the science of plants. For nearly 2,000 years, these two books were considered the best sources of information on the subject. For that reason, Theophrastus is called the “father of botany.”
theophrastus, the father of BotanyPHOTO: Courtesy of the National Library of Medicine
154 STC Unit: Studying the Development and Reproduction of Organisms
The NexT GeNeraTioN: ParT 1lessoN 9
lesson
154 STC Unit: Studying the Development and Reproduction of Organisms

readiNG SeLeCTioN exTeNdiNG your kNowledGe
Chances are you’ve seen cabbage white butterflies flitting about in your neighborhood. They are one of the most common butterfly species in
the world. From city gardens to country fields, from coasts to deserts, cabbage whites are found nearly everywhere.
Like all butterflies, the cabbage white goes through metamorphosis. It starts out as an egg, completes five larval stages, becomes a chrysalis, and emerges as a butterfly. As a larva, it feeds on a number of plants of the mustard family, including cabbage, cauliflower, radish, Wisconsin Fast Plants®, and many other cultivated and wild species.
the leaf shows Both eggs and newly hatched larvae, whIch have only just Begun theIr feedIng frenzy.PHOTO: Wisconsin Fast Plants Program, University of Wisconsin–Madison
FROM EGG TO CATERPILLAR Deposited on the underside of a leaf of a host plant, such as a Wisconsin Fast Plant, the creamy yellow egg of a cabbage white butterfly begins to develop. After two to four days, a larva chews its way through the top of the egg. Like the head of a human baby, a newly hatched larva’s head is quite large compared with its body. The larva often eats its shell; it might even feed on some of the nearby eggs that have not hatched.
Cabbage whites have five larval stages, or instars. The first instar begins when the larva emerges from the egg. Each of the next four instars is defined by a new molt, or shedding
STC Life Science Strand: Life on Earth 155
STC Life Science Strand: Life on Earth 155

lIfe cycle of the caBBage whIte Butterfly
Adults mating
Adult
Chrysalis Larva forming chrysalis
Adult emerging from chrysalis
1 cm
1 cm
1 cm
1 mm
1 mm
egg
L1—1st instar
L2—2nd instar
L3—3rd instar
L4—4th instar
L5—5th instar
readiNG SeLeCTioN exTeNdiNG your kNowledGe
Female laying eggs
156 STC Unit: Studying the Development and Reproduction of Organisms
The NexT GeNeraTioN: ParT 1lessoN 9
lesson
156 STC Unit: Studying the Development and Reproduction of Organisms

of the skin. When ready to molt, the larva seeks a dry site and weaves a fine pad of silk from a silk gland located in its head. The larva clings to the pad with its legs and rests quietly. In a short while, its skin cracks, and a larger larva crawls out. A larva grows quickly, molting two or three times during its first week.
By the fourth and fifth instars, larvae have begun to feed voraciously and can be quite destructive. They devour their favorite plants, leaving only stems and large leaf veins. By now, the larvae are up to 3 centimeters (1.2 inches) long. They are bright green with pale yellow stripes running the length of their bodies on their back and sides. Their color provides a good camouflage. Because the larvae often feed on the
exTeNdiNG your kNowledGe
as you can see, thIs larva’s color helps hIde It from predators.PHOTO: Wisconsin Fast Plants Program, University of Wisconsin–Madison
upper surfaces of leaves in broad daylight, their color probably helps keep them from becoming a meal for a hungry bird.
FROM CHRYSALIS TO BUTTERFLY By the time it has fed for 10 to 12 days, the fifth instar caterpillar is fully grown. At this time, it begins to search for a sheltered place to pupate, or form a chrysalis. At first, the chrysalis is green. But it can change color, depending on how much light it gets and on the color of the surface to which it is attached. For example, a chrysalis on a dark surface can turn dark brown. This color is produced by melanin, the same pigment that colors human skin and hair.
STC Life Science Strand: Life on Earth 157
STC Life Science Strand: Life on Earth 157

Inside the chrysalis, important changes take place. And because the chrysalis is somewhat transparent, it is easy to watch the development of various features of the butterfly. In about two to three days, the outlines of the wings appear. During the next two days, one or two dark spots appear in the center of the wings. Finally, a dark spot appears at the tip of the wings. The butterfly emerges about 24 hours after these spots appear.
Once it begins to emerge, the cabbage white butterfly takes less than a minute to get out of its chrysalis. The wobbly new butterfly walks to a high location, hangs quietly, and allows its wings to expand and harden. This process takes about two hours. And then it’s off to find food.
FEEDING, MATING, AND REPRODUCINGThe cabbage white butterfly feeds on sugar, water, minerals, and other nutrients from the nectar of various flowers. The butterfly’s mouth, or proboscis, works like a straw. When the butterfly detects nectar, it uncoils its proboscis and sips it. When the butterfly finishes feeding, it rolls up its proboscis.
You might think the cabbage white butterfly, which feeds continuously, will grow big and fat. Actually, butterflies do not grow bigger, no matter how much food they consume. They use the sugar obtained from nectar as their energy source.
The adult butterfly’s life is devoted solely to reproduction. During the day, males search for
readiNG SeLeCTioN exTeNdiNG your kNowledGe
thIs Is a sIde vIew of sIx chrysalIses from early to late stages of development. notIce the appearance of the dark wIng spots.PHOTO: Wisconsin Fast Plants Program, University of Wisconsin–Madison
thIs Is a top vIew of chrysalIses from early to late stages of development. a Butterfly soon wIll emerge from the chrysalIs on the rIght.PHOTO: Wisconsin Fast Plants Program, University of Wisconsin–Madison
158 STC Unit: Studying the Development and Reproduction of Organisms
The NexT GeNeraTioN: ParT 1lessoN 9
lesson
158 STC Unit: Studying the Development and Reproduction of Organisms

1. if a butterfly does not grow from eating, what is it doing with all that energy from food?
2. An elephant is long-lived, has one baby at a time, and waits several years between births. How is this different from the butterfly’s life cycle?
1.
disCussioN QuesTioNs
thIs Is the normal matIng posItIon of caBBage whItes. If dIsturBed durIng matIng, they can maIntaIn thIs posItIon even durIng a fIght.PHOTO: Wisconsin Fast Plants Program, University of Wisconsin–Madison
exTeNdiNG your kNowledGe
females with which to mate. Females signal their readiness to mate by releasing a special odor, or pheromone, that is very attractive to searching males. After mating, females look for host plants on which to lay their eggs.
Cabbage whites, like most other butterflies, have a short life span. They live only about three weeks. During this time females lay up to 300 eggs, enough to provide for the survival to adulthood of a new generation. Over a summer, your garden may be home to two or three generations of cabbage whites. In the fall, as the daylight hours decrease, chrysalises enter a resting state, called diapause, that permits them to withstand the harsh environment of winter. Warm spring temperatures stimulate the emergence of adults from the chrysalises, and the cycle of life continues. n
male caBBage whItes usually have one central Black spot on theIr forewIngs; females have two.
Male
Female
STC Life Science Strand: Life on Earth 159
STC Life Science Strand: Life on Earth 159