Embed Size (px)
Citation preview

Stormwater Wetland Construction GuidanceStormwater wetlands perform well in reducing peak flows and pollutant removal when properly designed and constructed. These wetland construction guidelines are based on experience gained at more than 30 sites across North Carolina.
Developers and community planners increasingly use stormwater wetlands to reduce stormwater peak runoff and pol-lutant loads. Research continues to show that wetlands can remove many contami-nants from stormwater. Designs continue to improve, increasing the potential for stormwater wetlands to provide efficient pollutant treatment. In addition, prop-erly designed systems can also provide aesthetic and environmental education amenities to local communities. Without proper construction planning, equipment, sequencing, and techniques, however, even a properly designed stormwater wetland is likely to fall short of providing maximum benefits and being embraced by a community. Mistakes dur-ing construction can also be costly. Since the mid-1990s, N.C. State University researchers and Cooperative Extension teams have installed more than 30 stormwater wetlands. From this expe-rience, we have developed techniques that can help guide wetland planning and construction. A properly managed con-struction project is critical to ensuring that the wetland will develop properly and maximize environmental benefits. In fact, the construction process may be more important to wetland development than the site design details. Unlike some other commonly engineered projects,
stormwater wetlands are both physical and biological systems. Envisioning wet-lands in this way will help designers and construction managers make informed decisions and build effective projects. Creating stormwater wetlands as thriving ecosystems will translate into improved downstream water quality for streams, rivers, and estuaries. This fact sheet is a companion to Stormwater Wetland Design Update (Extension publication AGW-588-12). It was created to provide general guidance in the aspects of construction that should be considered for stormwater wetland projects because designs for these sys-
Stormwater wetlands are thriving ecosystems.
2 Urban Waterways
tems often vary considerably. Specifically, we will focus on the importance of construction:• Planning• Oversight• Sequencing• Practices — including site layout, inlet and outlet
installation, excavation techniques, erosion control and bank stability, and wetland planting and establishment
CONSTRUCTION PLANNINGProper planning will help to get your stormwater wet-land construction project off to a smooth start. Apply early for local permits (such as erosion control permits) that may be required to prevent delays in beginning construction. When scheduling construction, keep in mind that the success of any wetland construction will be measured by the establishment and growth of the vegetative community. Think of wetland construction as building a large garden, and coordinate construction with planting in mind. Therefore, take the time during the design phase to set a target construction completion date that will maximize plant growth at the site during the first growing season. Planting early in the growing season will help to protect the new wetland plants from periods of extreme heat and drought, and allow for a full season of growth. For small wetland sites (less than 1 acre), mid-spring to early summer is the ideal time for completing construction and planting. Larger sites that may require longer timetables or a phased planting approach should be planned with greater consideration. In North Carolina, construction during the early fall can be an advantage in coastal areas with shallow water tables. Winter construction can be managed for more complex sites where extra time may be needed to com-plete earthwork or outlet construction, or both. Outline the specifics of construction in a guidance document for the project that includes design plans, construction guidelines, existing infrastructure, required construction materials, equipment required, and task sequences. Providing this document to potential contrac-tors and construction staff, coupled with a site meeting to discuss the details of the project, can be very benefi-cial. This helps to ensure that all partners understand the importance of required tasks, techniques, and sequencing to project success and cost-effectiveness. Meeting on site also gives both the designer or project manager and the contractors the opportunity to ask questions and exchange ideas about the logistical challenges of the proposed stormwater wetland site. Explain carefully that you are not building a typical engineered pond. Making it clear that your intentions are focused on creating a garden-like
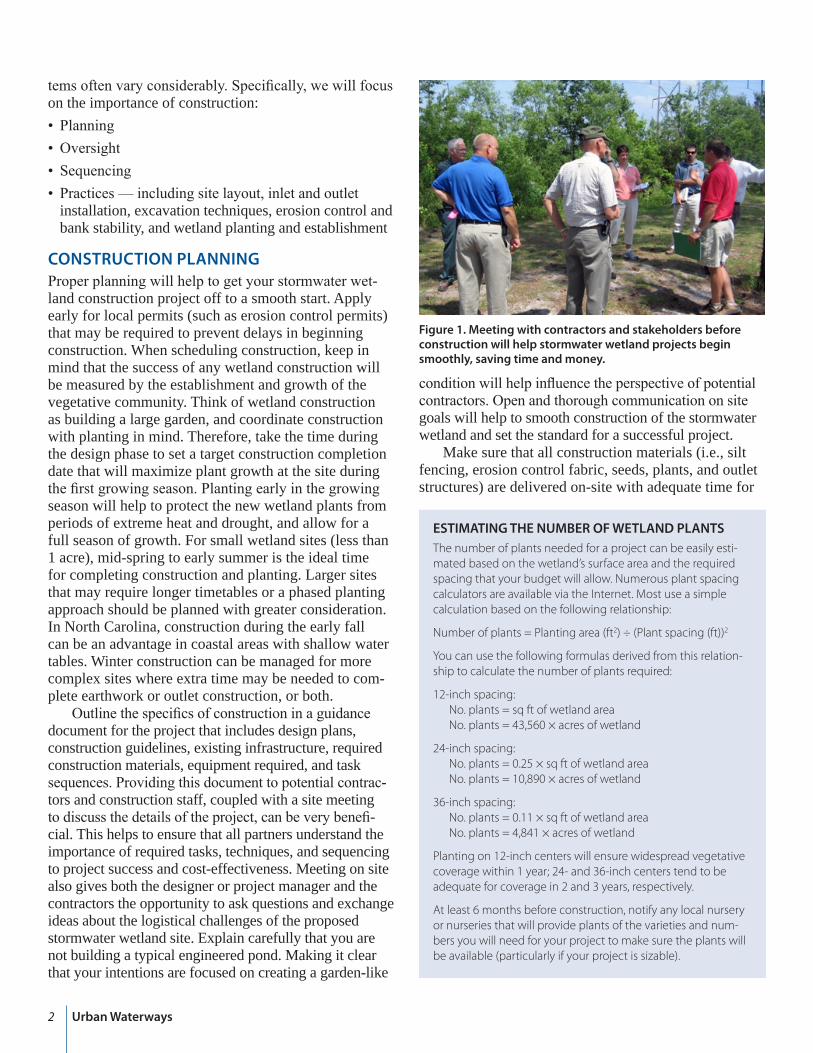
condition will help influence the perspective of potential contractors. Open and thorough communication on site goals will help to smooth construction of the stormwater wetland and set the standard for a successful project. Make sure that all construction materials (i.e., silt fencing, erosion control fabric, seeds, plants, and outlet structures) are delivered on-site with adequate time for
Figure 1. Meeting with contractors and stakeholders before construction will help stormwater wetland projects begin smoothly, saving time and money.
ESTIMATING THE NUMBER OF WETLAND PLANTS The number of plants needed for a project can be easily esti-mated based on the wetland’s surface area and the required spacing that your budget will allow. Numerous plant spacing calculators are available via the Internet. Most use a simple calculation based on the following relationship:
Number of plants = Planting area (ft2) ÷ (Plant spacing (ft))2
You can use the following formulas derived from this relation-ship to calculate the number of plants required:
12-inch spacing:No. plants = sq ft of wetland areaNo. plants = 43,560 × acres of wetland
24-inch spacing:No. plants = 0.25 × sq ft of wetland areaNo. plants = 10,890 × acres of wetland
36-inch spacing:No. plants = 0.11 × sq ft of wetland areaNo. plants = 4,841 × acres of wetland
Planting on 12-inch centers will ensure widespread vegetative coverage within 1 year; 24- and 36-inch centers tend to be adequate for coverage in 2 and 3 years, respectively.
At least 6 months before construction, notify any local nursery or nurseries that will provide plants of the varieties and num-bers you will need for your project to make sure the plants will be available (particularly if your project is sizable).

3Stormwater Wetland Construction Guidance
inspection prior to installation. Costly delays can occur if unsuitable materials need to be replaced. Also consid-er how material excavated during construction will be handled—will it be kept on-site or transported off-site?
CONSTRUCTION OVERSIGHTThe most detailed construction document cannot replace on-site guidance by the stormwater wetland designer or project manager. Constructing a stormwa-ter wetland is a relatively new practice compared to constructing a stormwater detention pond. A storm-water wetland includes plants and zones with mul-tiple elevations, which make wetlands more complex biological treatment systems than detention ponds. What may be viewed as a minor construction mistake in a detention pond could have severe consequences in a wetland. Either the designer and/or project manager must be on-site to work with contractors to ensure that the stormwater wetland is constructed within specified tolerances. For example, the designer and/or project manager should routinely check the elevations of the internal wetland zones to prevent areas in the wetland from being dryer or wetter than designed. A differ-ence of a few inches can make a significant impact on the type of vegetation that will be established. The condition of wetland subsoils must also be checked frequently during excavation to ensure that compaction matches the design: not overly compacted if the design calls for the wetland to partially infiltrate, or properly compacted if low infiltration is desired. Additionally, contractors and equipment operators often develop ideas during construction that can save the project time.
Having the designer and/or project manager on-site can facilitate these discussions and implementation of any changes that are beneficial to the project’s timetable and success.
CONSTRUCTION SEQUENCINGA plan that outlines the most efficient sequence for con-structing the stormwater wetland can save both time and money. In general, a wetlands construction sequence involves the following steps:
1. Site layoutThis involves staking out the important features of a wetland on the site based on design drawings. More complex wetlands may require site surveying to estab-lish grade stakes, a wetland perimeter, and the location of internal wetland features (such as pools and shallow water). Large wetlands that involve deep excavations may require multiple stakeouts throughout construction. All existing utilities at the site must be identified and marked before any construction activities.
Figure 2. Get to know your contractors, and listen to their sug-gestions. Doing so will be beneficial to your project.
Figure 3. Stake out the wetland perimeter, internal wetland fea-tures, and locations of structures prior to excavation. Make sure all existing utilities at the site are located and marked.
2. Erosion control measuresIn North Carolina, sites that disturb less than 1 acre are not required to have a sediment and erosion control plan. However, site managers are still required to take measures that will prevent soil from leaving the site, such as installing silt fences and rock check dams at appropriate locations. If you are required to follow an erosion and sediment control plan, put the measures in place at the beginning of the project prior to excava-tion. Erosion control measures may need to be installed in phases, and a detailed installation schedule will be a

4 Urban Waterways
part of an erosion control plan. In general, all erosion control measures must be inspected and maintained regularly and after each rainfall.
Figure 4. Installation of a silt fence along a stream bank near a new stormwater wetland construction site
3. Outlet constructionSeveral outlet designs are recommended in Stormwater Wetland Design Update (AG-588-12) that offer flex-ibility for maintaining water depth in a stormwater wetland. If inflows can be diverted around the proposed wetland during construction, outlets can be installed at any time. If the proposed wetland has been designed to be “in-line” with stormwater flow, outlet structures should be installed before any other major excavation. Establishing the outlet will give the structure more time to stabilize, and contractors will be able to control site drainage if groundwater seepage or rainfall occurs dur-ing construction.
4. Excavation and wetland soil preparationAfter the site layout has been staked, erosion control measures put in place, and the outlet installed, excava-tion of the site can commence. Excavation of the storm-water wetland should begin near the outlet and progress towards the proposed inlet(s) (generally from down-stream to upstream). Many stormwater wetlands will require preparation of subsurface soils by compaction or soil additions (such as bentonite) to reduce infiltra-tion. In addition, most sites will require at least topsoil addition, while others may require the incorporation of organic matter to improve vegetation growth.
5. Bank stabilizationAs excavation of the site progresses, the banks should be stabilized by seeding with fast-germinating grasses native to your location. Installing lightweight erosion
Figure 5. Stabilize the banks each day following excavation of a stormwater wetland.
control fabric at the end of each day will reduce bank erosion after rainfall events.
6. Inlet stabilization After site excavation and stabilization, the areas sur-rounding the inlet and the forebay should be armored to dissipate the stormwater’s energy as it enters the wetland. Energy can be dissipated in several ways. The most popular, effective method is to stabilize the inlet with riprap underlain with geotextile fabric. Some stormwater wetlands may have multiple inlets, so be sure to stabilize all of the inlets appropriately.
7. Final surface preparation If the wetland surface becomes compacted through unavoidable construction traffic or crusted during extended hot, dry weather, tilling or scarifying the surface prior to planting will encourage plant growth. It is important to avoid compaction of the surface while still maintaining proposed grades, so lightweight equip-ment will be needed to till or scarify. Strict oversight of grading in this phase is critical to successful wetland development.
8. PlantingWetland plants should be planted at the end of construc-tion (ideally in an appropriate season) in the recom-mended internal wetland zones. Shrubs for wetland banks also are often planted at this time.
9. Water management The adjustable outlet should be set to maintain an appro-priate water level for early vegetation establishment within the wetland, and to provide a source of water during extended droughts.
5Stormwater Wetland Construction Guidance
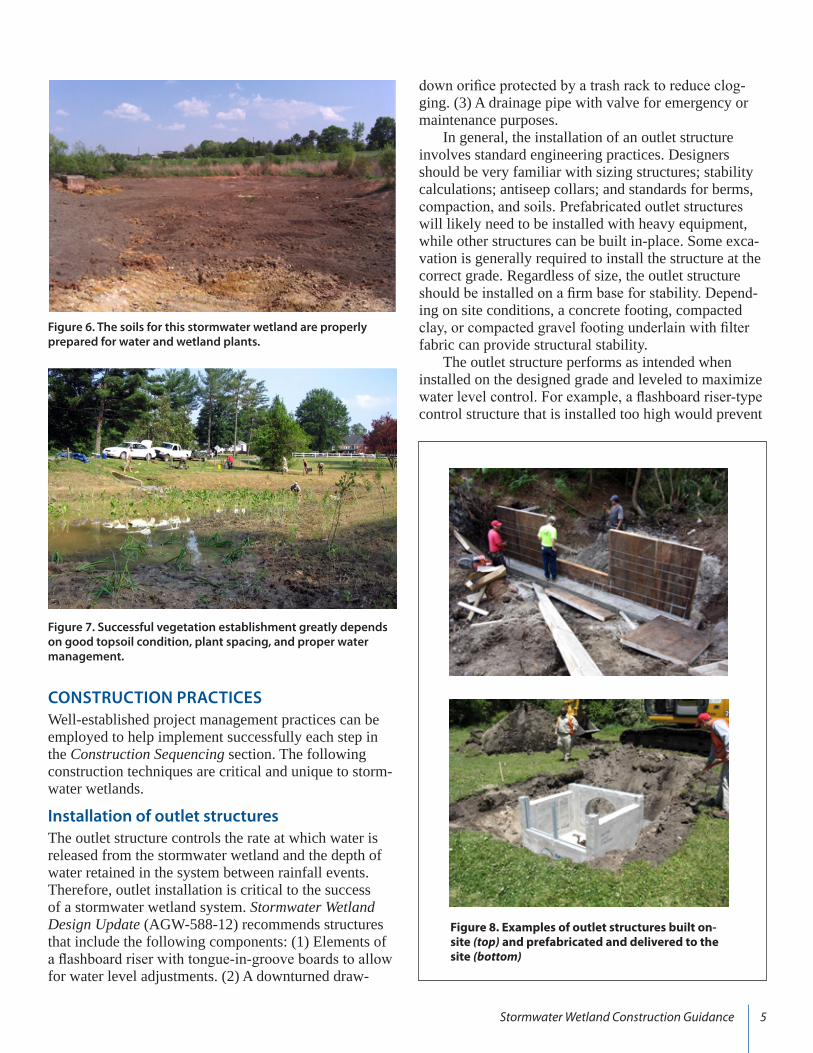
Figure 8. Examples of outlet structures built on-site (top) and prefabricated and delivered to the site (bottom)
Figure 6. The soils for this stormwater wetland are properly prepared for water and wetland plants.
Figure 7. Successful vegetation establishment greatly depends on good topsoil condition, plant spacing, and proper water management.
CONSTRUCTION PRACTICESWell-established project management practices can be employed to help implement successfully each step in the Construction Sequencing section. The following construction techniques are critical and unique to storm-water wetlands.
Installation of outlet structuresThe outlet structure controls the rate at which water is released from the stormwater wetland and the depth of water retained in the system between rainfall events. Therefore, outlet installation is critical to the success of a stormwater wetland system. Stormwater Wetland Design Update (AGW-588-12) recommends structures that include the following components: (1) Elements of a flashboard riser with tongue-in-groove boards to allow for water level adjustments. (2) A downturned draw-
down orifice protected by a trash rack to reduce clog-ging. (3) A drainage pipe with valve for emergency or maintenance purposes. In general, the installation of an outlet structure involves standard engineering practices. Designers should be very familiar with sizing structures; stability calculations; antiseep collars; and standards for berms, compaction, and soils. Prefabricated outlet structures will likely need to be installed with heavy equipment, while other structures can be built in-place. Some exca-vation is generally required to install the structure at the correct grade. Regardless of size, the outlet structure should be installed on a firm base for stability. Depend-ing on site conditions, a concrete footing, compacted clay, or compacted gravel footing underlain with filter fabric can provide structural stability. The outlet structure performs as intended when installed on the designed grade and leveled to maximize water level control. For example, a flashboard riser-type control structure that is installed too high would prevent

6 Urban Waterways
complete drainage of the wetland if needed for mainte-nance, and one installed too low could experience back-water conditions. An outlet that is not level will lead to preferential flow of water over one side of the structure and reduce the intended accuracy of water level control within the wetland. The areas and berms surrounding the outlet must be stabilized to prevent erosion and unintended loss of water from the wetlands. Following placement of the outlet structure, soils with low hydraulic conductivity or high clay content should be compacted around the structure to prevent seepage or piping of water around the outlets. Follow engineering standards for soils and mechanical compaction when at all possible. Another option is to pour concrete around the outlet pipes as an antiseep collar. This is an inexpensive way to add
security to your outlet pipe installation. All berm areas should be planted immediately to stabilize the surround-ing soils near the outlet. Downstream of the outlet structure, use riprap to dissipate energy from the stormwater wetland outflow. Riprap will help protect against downstream erosion or back-cuts that might form and threaten the stability of the outlet structure.
Excavation and wetland soil preparation techniquesTechniques employed during excavation of stormwater wetlands can make or break a project from both success and budget standpoints. Problems generally occur when improper equipment is used, excavated soils are handled multiple times, or when the wetland’s internal features or banks become too steep or compacted for vegeta-tion establishment. Survey equipment should be avail-able and regularly used during excavation. Laser-level systems are commonly utilized for construction grading
Figure 10. Armoring downstream of the outlet structure will reduce the potential for erosion that could threaten stability.
Figure 9. Installation of a large flashboard riser outlet structure
Figure 11. Keep dump trucks moving for off-site transport of soil (top), and keep the excavator opera-tor updated on correct grade to speed construction (bottom).
7Stormwater Wetland Construction Guidance
and can be operated by one person. It is critical to verify that the design elevations for the wetland are being achieved during excavation. Checking the elevation frequently and relaying them to the equipment operator will help keep the wetland on grade. Surveying as the grading progresses will limit traffic in the wetland, and prevent possible damage to other areas from regrading. Tracked excavators are preferred over rubber-tired vehicles. This is particularly important on wetter sites. Toothed buckets with a hydraulic thumb are preferred attachments because they can help prevent smearing, which causes excessive compaction, and can also be used to scarify or prep the wetland surface and side-slopes. A hydraulic thumb is most advantageous for removing debris and placing structures. Excavators with swiveling buckets can tilt 45 degrees right or left, help-ing the operator quickly carve out the wetland’s internal features and shape side-slopes. On projects where major excavation is required, using multiple dump trucks to move the soil offsite will minimize the time the equip-ment operator is idle. Excavation should begin at the outlet end and con-tinue in the upstream direction. Many sites have good topsoil that is excellent for growing wetland plants. Often, however, designed soil cuts for the wetland expose nutrient deficient subsoil. Therefore, during excavation, the good topsoil should be stockpiled. Where topsoil must be added, the subsurface should be graded to accommodate the intended depth of topsoil addition. Once the subsurface elevations have been finalized, the topsoil can then be added or replaced. To reduce compaction in small wetlands in the coastal plain designed to interact with groundwater, or at
sites intended to infiltrate some stormwater, the operator should minimize the number of times machinery travels within the excavated wetland area. Plan excavation stra-tegically so that the equipment’s weight does not com-pact the soils where plants will be added. Deep pools are designed to hold water, so compaction in deep-pool areas supports performance. It is best to complete mass excavation, topsoil stockpiling, carving of wetland features (pools and shallow water areas), and topsoil replacement on the first pass with the excavator on high ground, if possible, to avoid putting equipment into the wetland later to finish these tasks. Several excavation practices help ensure that soils will be suitable for plant establishment. A common technique used in building stormwater ponds is using
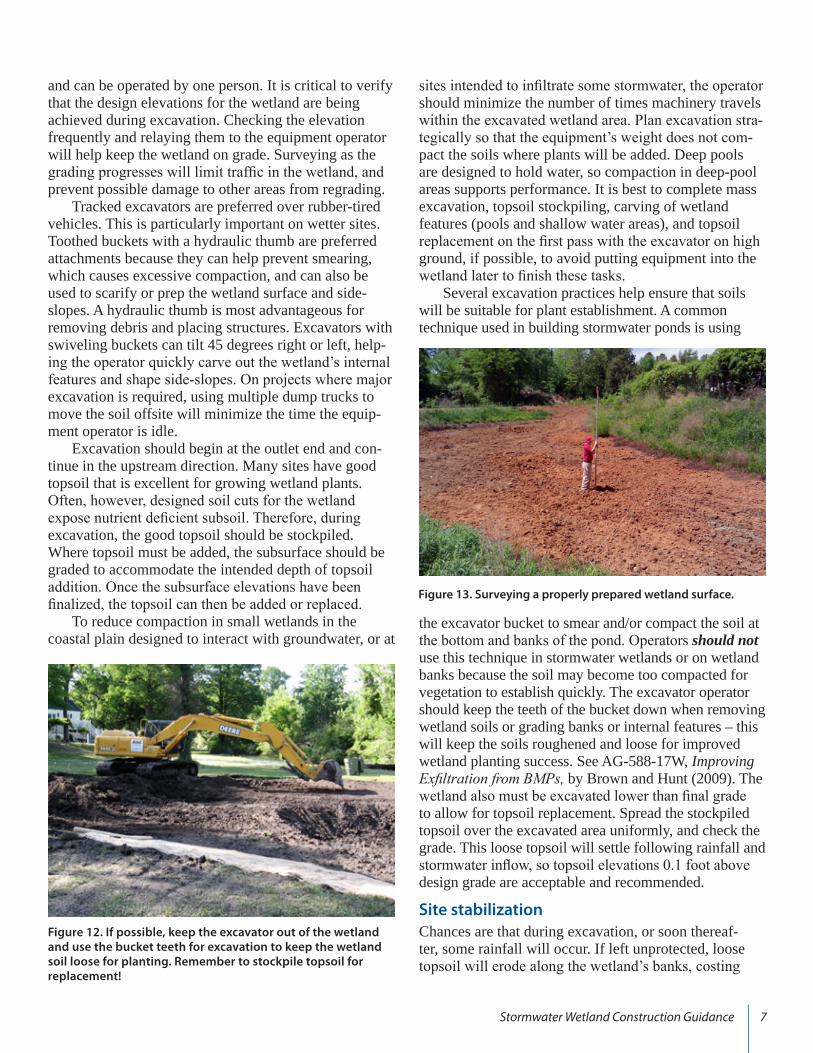
Figure 12. If possible, keep the excavator out of the wetland and use the bucket teeth for excavation to keep the wetland soil loose for planting. Remember to stockpile topsoil for replacement!
the excavator bucket to smear and/or compact the soil at the bottom and banks of the pond. Operators should not use this technique in stormwater wetlands or on wetland banks because the soil may become too compacted for vegetation to establish quickly. The excavator operator should keep the teeth of the bucket down when removing wetland soils or grading banks or internal features – this will keep the soils roughened and loose for improved wetland planting success. See AG-588-17W, Improving Exfiltration from BMPs, by Brown and Hunt (2009). The wetland also must be excavated lower than final grade to allow for topsoil replacement. Spread the stockpiled topsoil over the excavated area uniformly, and check the grade. This loose topsoil will settle following rainfall and stormwater inflow, so topsoil elevations 0.1 foot above design grade are acceptable and recommended.
Site stabilizationChances are that during excavation, or soon thereaf-ter, some rainfall will occur. If left unprotected, loose topsoil will erode along the wetland’s banks, costing
Figure 13. Surveying a properly prepared wetland surface.

8 Urban Waterways
time and money to repair. Therefore, newly constructed wetland banks should be stabilized at the end of each day for best protection against erosion. Smooth by hand-raking, and then seed with a quickly germinating grass or other groundcover appropriate for the local climate and season. Cover the banks with a lightweight ero-sion control fabric (examples include straw and coconut
fibers with biodegradable mesh). This fabric is very inexpensive, easy to install, will allow germination of grass through the fibers, and will degrade quickly.
Wetland banks should be no steeper than a 3H:1V slope. Certain stormwater wetland retrofits require that bank slopes be steeper than recommended to maximize the actual wetland treatment area. For projects with steeper banks, consider tucking the erosion control fab-ric underneath a berm running along the wetland perim-eter, and diverting the runoff into the wetland through a
series of adjacent catch basins connected to slope drains. Slope drains can be 4 to 8 inches in diameter and made of corrugated plastic drainpipe. As water is diverted into the catch basins, the water will flow within the plastic slope drains instead of flowing down the steep banks, significantly reducing erosion. As the banks become vegetated, these slope drains may be removed.
Inlet structuresStormwater wetland designs include a forebay, or large, deep pool near the wetland entrance that slows inflow and allows for sediment deposition. The area surround-ing the inlet and the entrance to the forebay should be reinforced with riprap of granite or marl big enough to prevent severe erosion and instability in these areas. Line the target location with a geotextile fabric for addi-tional soil stability before adding the riprap. It is also beneficial to plant vegetation near the inlet, but outside the forebay, at close spacings (i.e., on 12-inch centers)
Figure 14. Stabilize banks daily with lightweight fab-ric and seeding to reduce the chance of erosion while the wetland develops.
Figure 15. Two examples of using slope drains for bank stabilization. Surface water generated during larger storms flowing into the wetland is directed into the drains. The drainage reduces erosion that would result from concentrated flow down the banks.
9Stormwater Wetland Construction Guidance
to encourage fast dense growth that will improve soil stability. If the wetland also receives inflow from other secondary sources, such as subsurface drains, slope drains, or surface water swales, make sure these areas are also protected against erosion.
PlantingStormwater Wetland Design Update (AG-588-12) gives a comprehensive list of plants that researchers have found to be successful in the various stormwater wetland zones. Planting on 24-inch centers is recom-mended, although coverage in 1 year can be ensured if the wetland is planted on 12-inch centers. Planting on 36-inch centers is not recommended. Skimping on plants will certainly result in a stormwater wetland that will not perform as designed, particularly in the early years. If the budget for your stormwater wetland project allows, planting at higher densities will improve wet-land appearance and performance.
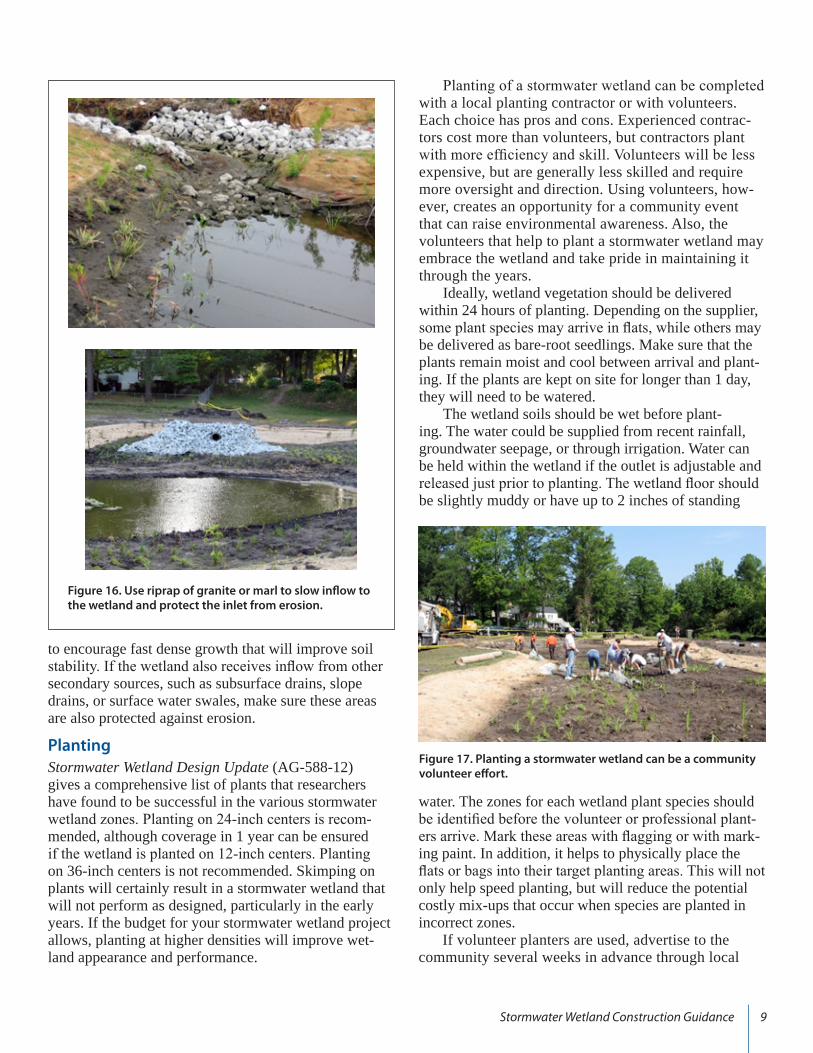
Planting of a stormwater wetland can be completed with a local planting contractor or with volunteers. Each choice has pros and cons. Experienced contrac-tors cost more than volunteers, but contractors plant with more efficiency and skill. Volunteers will be less expensive, but are generally less skilled and require more oversight and direction. Using volunteers, how-ever, creates an opportunity for a community event that can raise environmental awareness. Also, the volunteers that help to plant a stormwater wetland may embrace the wetland and take pride in maintaining it through the years. Ideally, wetland vegetation should be delivered within 24 hours of planting. Depending on the supplier, some plant species may arrive in flats, while others may be delivered as bare-root seedlings. Make sure that the plants remain moist and cool between arrival and plant-ing. If the plants are kept on site for longer than 1 day, they will need to be watered. The wetland soils should be wet before plant-ing. The water could be supplied from recent rainfall, groundwater seepage, or through irrigation. Water can be held within the wetland if the outlet is adjustable and released just prior to planting. The wetland floor should be slightly muddy or have up to 2 inches of standing
Figure 16. Use riprap of granite or marl to slow inflow to the wetland and protect the inlet from erosion.
water. The zones for each wetland plant species should be identified before the volunteer or professional plant-ers arrive. Mark these areas with flagging or with mark-ing paint. In addition, it helps to physically place the flats or bags into their target planting areas. This will not only help speed planting, but will reduce the potential costly mix-ups that occur when species are planted in incorrect zones. If volunteer planters are used, advertise to the community several weeks in advance through local
Figure 17. Planting a stormwater wetland can be a community volunteer effort.
10 Urban Waterways
environmental groups, community postings, or local schools. A crew of 10 to 15 volunteer planters can plant a ¼- to ½-acre stormwater wetland over the course of a day with proper oversight and direction. It is a good idea to supply the volunteers with plant-ing tools (shovels, sharp-shooter shovels, dibbles) and disposable work gloves, and have plenty of drink-ing water on hand. Orient the volunteers to the loca-tion and target spacing requirements for the different species of wetland plants. Wetland plants come in a variety of sizes. All plants should be planted with their leaves sticking out of the water. Wetland vegetation should be planted just deep enough to give the plants stability – planting too deep can stress new wetland vegetation in wet conditions. Shallow planting encour-ages better root growth when the wetland has plenty of water.
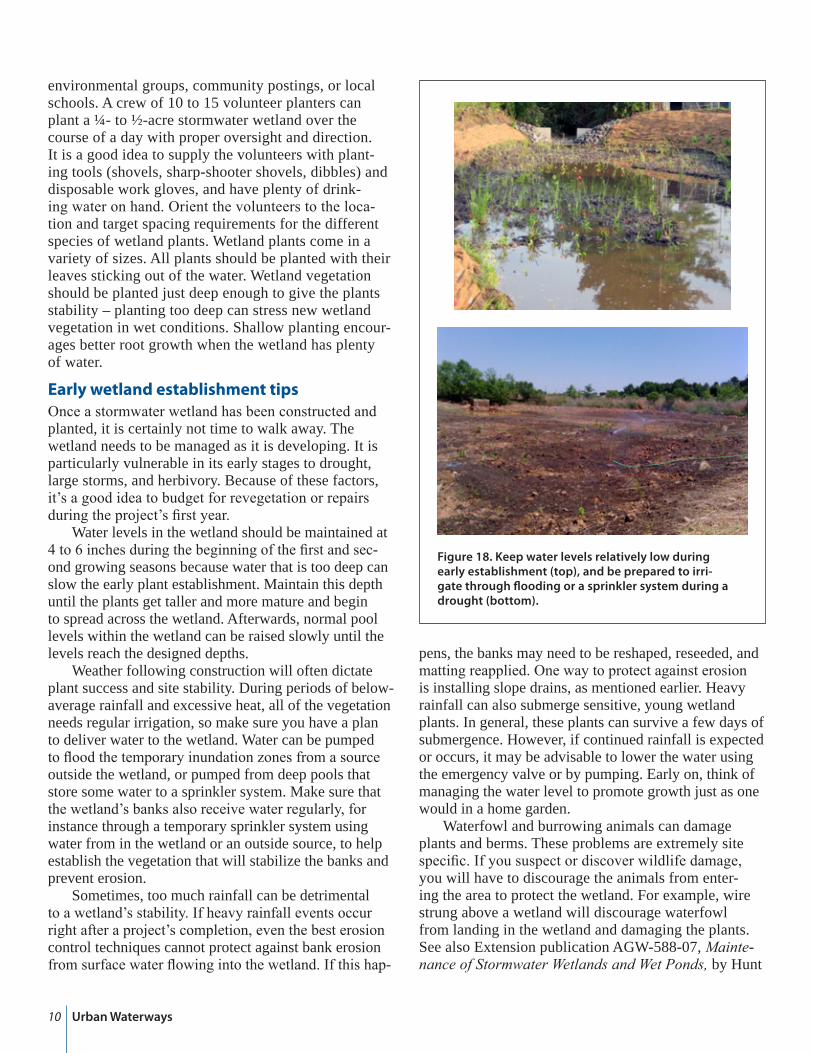
Early wetland establishment tips Once a stormwater wetland has been constructed and planted, it is certainly not time to walk away. The wetland needs to be managed as it is developing. It is particularly vulnerable in its early stages to drought, large storms, and herbivory. Because of these factors, it’s a good idea to budget for revegetation or repairs during the project’s first year. Water levels in the wetland should be maintained at 4 to 6 inches during the beginning of the first and sec-ond growing seasons because water that is too deep can slow the early plant establishment. Maintain this depth until the plants get taller and more mature and begin to spread across the wetland. Afterwards, normal pool levels within the wetland can be raised slowly until the levels reach the designed depths. Weather following construction will often dictate plant success and site stability. During periods of below-average rainfall and excessive heat, all of the vegetation needs regular irrigation, so make sure you have a plan to deliver water to the wetland. Water can be pumped to flood the temporary inundation zones from a source outside the wetland, or pumped from deep pools that store some water to a sprinkler system. Make sure that the wetland’s banks also receive water regularly, for instance through a temporary sprinkler system using water from in the wetland or an outside source, to help establish the vegetation that will stabilize the banks and prevent erosion. Sometimes, too much rainfall can be detrimental to a wetland’s stability. If heavy rainfall events occur right after a project’s completion, even the best erosion control techniques cannot protect against bank erosion from surface water flowing into the wetland. If this hap-
pens, the banks may need to be reshaped, reseeded, and matting reapplied. One way to protect against erosion is installing slope drains, as mentioned earlier. Heavy rainfall can also submerge sensitive, young wetland plants. In general, these plants can survive a few days of submergence. However, if continued rainfall is expected or occurs, it may be advisable to lower the water using the emergency valve or by pumping. Early on, think of managing the water level to promote growth just as one would in a home garden. Waterfowl and burrowing animals can damage plants and berms. These problems are extremely site specific. If you suspect or discover wildlife damage, you will have to discourage the animals from enter-ing the area to protect the wetland. For example, wire strung above a wetland will discourage waterfowl from landing in the wetland and damaging the plants. See also Extension publication AGW-588-07, Mainte-nance of Stormwater Wetlands and Wet Ponds, by Hunt
Figure 18. Keep water levels relatively low during early establishment (top), and be prepared to irri-gate through flooding or a sprinkler system during a drought (bottom).

11Stormwater Wetland Construction Guidance
ners across North Carolina. For a successful stormwater wetland project, it is important to be firm in sticking with the design plan and construction sequencing – short cuts may save time but compromise wetland perfor-mance. It is important, however, to consider suggestions from construction contractors, who are usually more familiar with both the potential and the limitations of their equipment and crews, and often have very useful ideas that can also benefit project success.
RESOURCESRelated fact sheets in the Urban Waterways series (AG-
588), North Carolina Cooperative Extension Service, N.C. State University:
Hunt, W. F., M. R. Burchell, J. D. Wright, and K. L. Bass. Stormwater Wetland Design Update (AGW-588-12). Online: http://www.bae.ncsu.edu/stormwa-ter/PublicationFiles/WetlandDesignUpdate2007.pdf
Hunt, W. F. and W.G. Lord. 2006. Stormwater Wetland and Wet Pond Maintenance (AGW-588-7). Online: http://www.bae.ncsu.edu/stormwater/Publication-Files/WetlandMaintenance2006.pdf
Hunt, W. F. and B. A. Doll. 2000. Designing Stormwater Wetlands for Small Watersheds (AG-588-2). Online: http://www.bae.ncsu.edu/storm¬water/Publication-Files/SWwetlands2000.pdf
BAE Stormwater Team website: http://www.bae.ncsu.edu/stormwater N.C. State University’s clearinghouse for stormwater BMP guidance, including design, con-struction, and maintenance of stormwater wetlands, bioretention, permeable pavements, water harvesting, and level spreaders.
Figure 19. Adding features and topsoil in a large wetland. Side-slopes have already been prepped, and grass is coming up (top). After 1 year, vegetation is successfully established (bottom).
Mature plants beautify a stormwater wetland.
and Lord (2006). If a dense vegetative community is established in the first growing season, plant growth will typically outpace losses from wildlife browsing. In addition, a dense stand or border of tall grasses will help discourage certain waterfowl from making your wetland a permanent home. If you find that wildlife control is necessary, contact your local wildlife control agencies to discuss management of burrowing animals, such as trapping and relocation.
CONCLUSIONSStormwater wetlands are important stormwater BMPs that protect water quality. These systems are successful, however, only when properly designed and implemented with care. Proper construction planning saves time and money. Practices discussed and recommended in this factsheet are based on experiences gained through implementing stormwater wetlands with various part-

NC STATE UNIVERSITY
Distributed in furtherance of the acts of Congress of May 8 and June 30, 1914. North Carolina State University and North Carolina A&T State University commit themselves to positive action to secure equal opportunity regardless of race, color, creed, national origin, religion, sex, age, veteran status or disability. In addition, the two Universities welcome all persons without regard to sexual orientation. North Carolina State University, North Carolina A&T State University, U.S. Department of Agriculture, and local governments cooperating.
Published by NORTH CAROLINA COOPERATIVE EXTENSION
11-CALS-2218 AGW-588-1311/10—BS/KEL
Prepared byMichael R. Burchell II, Assistant Professor and Extension Specialist
William F. Hunt, P.E., Associate Professor and Extension Specialist
Kristopher L. Bass, P.E., Extension Associate
Department of Biological and Agricultural EngineeringNorth Carolina State University
Jason Wright, P.E., Water Resources Engineer, TetraTech, San Diego, Calif.
250 copies of this public document were printed at a cost of $595 or $2.38 per copy.