Embed Size (px)
Citation preview
StorageTek Automated Cartridge System Library SoftwareInstallation Guide
Release 8.3
E48579-06
July 2014

StorageTek Automated Cartridge System Library Software Installation Guide, Release 8.3
E48579-06
Copyright © 2013, 2014, Oracle and/or its affiliates. All rights reserved.
This software and related documentation are provided under a license agreement containing restrictions on use and disclosure and are protected by intellectual property laws. Except as expressly permitted in your license agreement or allowed by law, you may not use, copy, reproduce, translate, broadcast, modify, license, transmit, distribute, exhibit, perform, publish, or display any part, in any form, or by any means. Reverse engineering, disassembly, or decompilation of this software, unless required by law for interoperability, is prohibited.
The information contained herein is subject to change without notice and is not warranted to be error-free. If you find any errors, please report them to us in writing.
If this is software or related documentation that is delivered to the U.S. Government or anyone licensing it on behalf of the U.S. Government, the following notice is applicable:
U.S. GOVERNMENT END USERS: Oracle programs, including any operating system, integrated software, any programs installed on the hardware, and/or documentation, delivered to U.S. Government end users are "commercial computer software" pursuant to the applicable Federal Acquisition Regulation and agency-specific supplemental regulations. As such, use, duplication, disclosure, modification, and adaptation of the programs, including any operating system, integrated software, any programs installed on the hardware, and/or documentation, shall be subject to license terms and license restrictions applicable to the programs. No other rights are granted to the U.S. Government.
This software or hardware is developed for general use in a variety of information management applications. It is not developed or intended for use in any inherently dangerous applications, including applications that may create a risk of personal injury. If you use this software or hardware in dangerous applications, then you shall be responsible to take all appropriate fail-safe, backup, redundancy, and other measures to ensure its safe use. Oracle Corporation and its affiliates disclaim any liability for any damages caused by use of this software or hardware in dangerous applications.
Oracle and Java are registered trademarks of Oracle and/or its affiliates. Other names may be trademarks of their respective owners.
Intel and Intel Xeon are trademarks or registered trademarks of Intel Corporation. All SPARC trademarks are used under license and are trademarks or registered trademarks of SPARC International, Inc. AMD, Opteron, the AMD logo, and the AMD Opteron logo are trademarks or registered trademarks of Advanced Micro Devices. UNIX is a registered trademark of The Open Group.
This software or hardware and documentation may provide access to or information on content, products, and services from third parties. Oracle Corporation and its affiliates are not responsible for and expressly disclaim all warranties of any kind with respect to third-party content, products, and services. Oracle Corporation and its affiliates will not be responsible for any loss, costs, or damages incurred due to your access to or use of third-party content, products, or services.
iii
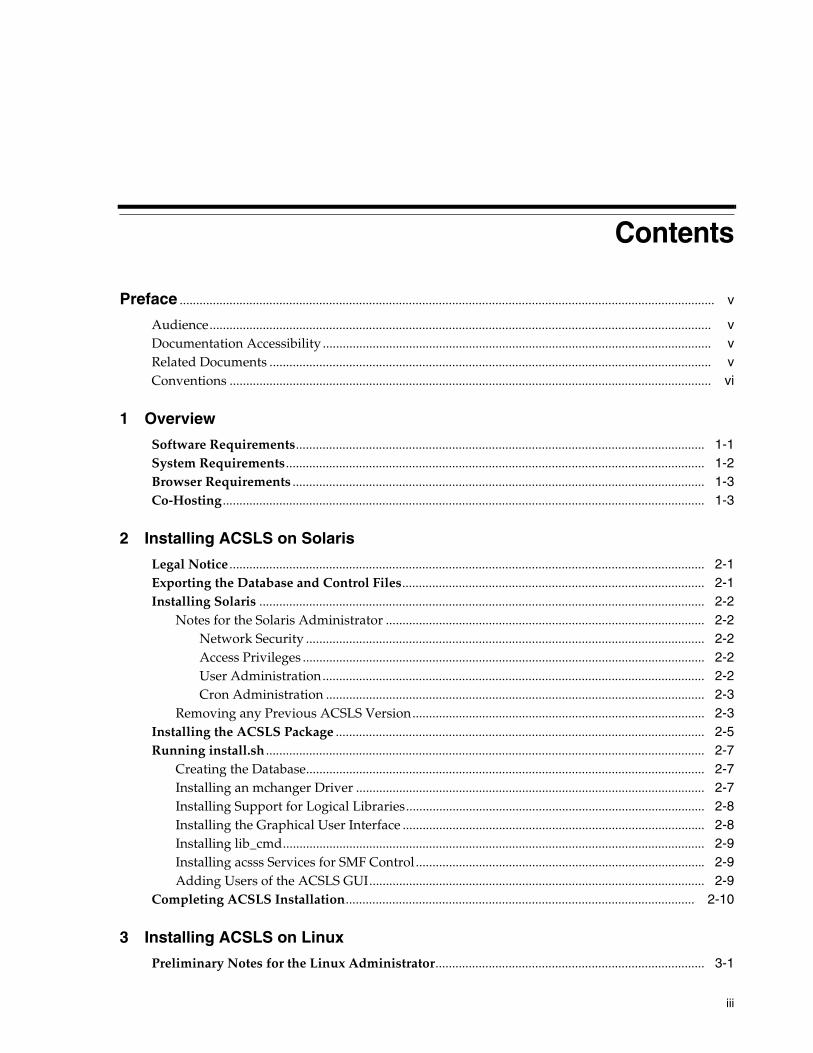
Contents
Preface ................................................................................................................................................................. v
Audience....................................................................................................................................................... vDocumentation Accessibility ..................................................................................................................... vRelated Documents ..................................................................................................................................... vConventions ................................................................................................................................................. vi
1 Overview
Software Requirements........................................................................................................................... 1-1System Requirements.............................................................................................................................. 1-2Browser Requirements ............................................................................................................................ 1-3Co-Hosting................................................................................................................................................. 1-3
2 Installing ACSLS on Solaris
Legal Notice ............................................................................................................................................... 2-1Exporting the Database and Control Files........................................................................................... 2-1Installing Solaris ...................................................................................................................................... 2-2
Notes for the Solaris Administrator ................................................................................................ 2-2Network Security ........................................................................................................................ 2-2Access Privileges ......................................................................................................................... 2-2User Administration................................................................................................................... 2-2Cron Administration .................................................................................................................. 2-3
Removing any Previous ACSLS Version........................................................................................ 2-3Installing the ACSLS Package ............................................................................................................... 2-5Running install.sh .................................................................................................................................... 2-7
Creating the Database........................................................................................................................ 2-7Installing an mchanger Driver ......................................................................................................... 2-7Installing Support for Logical Libraries.......................................................................................... 2-8Installing the Graphical User Interface ........................................................................................... 2-8Installing lib_cmd............................................................................................................................... 2-9Installing acsss Services for SMF Control....................................................................................... 2-9Adding Users of the ACSLS GUI..................................................................................................... 2-9
Completing ACSLS Installation......................................................................................................... 2-10
3 Installing ACSLS on Linux
Preliminary Notes for the Linux Administrator................................................................................. 3-1
iv
User Administration .......................................................................................................................... 3-1Cron Administration ......................................................................................................................... 3-2Access Privileges ................................................................................................................................ 3-2SELinux Security ................................................................................................................................ 3-3Before Installing Linux ...................................................................................................................... 3-3
Exporting the Database and Control Files........................................................................................... 3-4Installation Media .................................................................................................................................... 3-4
Downloading the Linux Media Pack............................................................................................... 3-5Installing Linux ........................................................................................................................................ 3-5
Installing ACSLS Prerequisites ........................................................................................................ 3-5Linux Installation Tips....................................................................................................................... 3-6
Installing the ACSLS Package ............................................................................................................... 3-6Running install.sh .................................................................................................................................... 3-7
Creating the Database........................................................................................................................ 3-8Installing an mchanger Driver ......................................................................................................... 3-8
Removing mchanger Device Links........................................................................................... 3-9Installing the Graphical User Interface ........................................................................................... 3-9Installing lib_cmd............................................................................................................................ 3-10Installing acsss Services for SMF Control .................................................................................... 3-10Adding Users of the ACSLS GUI.................................................................................................. 3-10
Completing ACSLS Installation......................................................................................................... 3-11
4 Getting Started
Importing the Database and Control Files .......................................................................................... 4-1Configuring your Library Hardware .................................................................................................... 4-1Verifying the ACSLS Installation ......................................................................................................... 4-2Auditing Your Libraries .......................................................................................................................... 4-3
5 Uninstalling ACSLS
Uninstalling ACSLS 8.3 on Solaris ....................................................................................................... 5-1Uninstalling any SCSI Media Changer Drivers ............................................................................. 5-2
Uninstalling ACSLS 8.3 on Linux ......................................................................................................... 5-2
A Configuring an SSL Encryption Key
Index
v
Preface
Automated Cartridge System Library Software (ACSLS) is Oracle’s StorageTek's server software that controls StorageTek automated tape libraries. The StorageTek ACS family of products consists of fully automated, tape cartridge-based data storage and retrieval systems. StorageTek ACSLS supports network access to different client systems that can range from workstations to mainframes to supercomputers running on a variety of operating systems.
AudienceThis guide is for the individual responsible for administering StorageTek ACSLS. It is expected that you already have a working knowledge of the following:
■ UNIX file and directory structure
■ How to use UNIX commands and utilities for your platform
■ UNIX system files
■ How to do typical UNIX system administrator tasks, such as logging on as root and setting up user accesses to a UNIX application
Documentation AccessibilityFor information about Oracle's commitment to accessibility, visit the Oracle Accessibility Program website at http://www.oracle.com/pls/topic/lookup?ctx=acc&id=docacc.
Access to Oracle SupportOracle customers have access to electronic support through My Oracle Support. For information, visit http://www.oracle.com/pls/topic/lookup?ctx=acc&id=info or visit http://www.oracle.com/pls/topic/lookup?ctx=acc&id=trs if you are hearing impaired.
Related DocumentsFor more information, see the following documents in the ACSLS, Release 8.3 documentation set:
■ ACSLS 8.3 Security Guide
■ ACSLS 8.3 Third Party Licenses and Notices
■ ACSLS 8.3 Release Notes
■ ACSLS 8.3 Product Information
vi
■ ACSLS 8.3 Administrator’s Guide
■ ACSLS 8.3 Messages
■ ACSLS 8.3 Quick Reference
■ ACSLS HA 8.2.1 Cluster Installation, Configuration, and Operation
■ ACSLS 8.3 Interface Reference
■ ACSLS SNMP Agent 2.1.1 Release Notes
■ ACSLS SNMP Agent 2.1.1 Installation and User’s Guide for Solaris
ConventionsThe following text conventions are used in this document:
Convention Meaning
boldface Boldface type indicates graphical user interface elements associated with an action, or terms defined in text or the glossary.
italic Italic type indicates book titles, emphasis, or placeholder variables for which you supply particular values.
monospace Monospace type indicates commands within a paragraph, URLs, code in examples, text that appears on the screen, or text that you enter.
1
Overview 1-1
1Overview
Automated Cartridge System Library Software (ACSLS) is Oracle’s StorageTek server software that controls StorageTek automated tape libraries. An Automated Cartridge System (ACS) is a group of tape libraries connected through pass-thru-ports (PTPs). ACSLS accesses and manages information stored in one or more ACSs through command processing across a network. The software includes a system administration component and interfaces to client system applications, and library management facilities.
■ ACSLS 8.3 uses the relational database PostgreSQL. The PostgreSQL packages are bundled with Solaris 10. On Solaris 11 the PostgreSQL packages are available from the Oracle edelivery site in the same location where you find the STKacsls package. The Linux installation procedure described in this document explains the process of adding PostgreSQL packages from the Oracle yum repository after installing the Linux 6.3 or 6.4 Product Pack.
■ ACSLS 8.3 is bundled with WebLogic 10.3.5.
■ Special device drivers are provided in ACSLS for use with logical libraries and with fibre-attached libraries, such as the SL500 and SL150. Because such device drivers are attached to the system kernel, they must reside in the global zone. In cases where such drivers are used, ACSLS cannot be installed in the local zoned environment.
■ ACSLS 8.3 HA systems must be installed on their own dedicated platform pair.
Software Requirements■ Oracle’s Sun SPARC and X86 platforms running Solaris 10 Update 10 and 11.
■ Oracle’s Sun SPARC and X86 platforms running Solaris 11 Update 1.
■ Oracle Linux 6.3 and Linux 6.4.
Oracle Linux testing was done in environments using Oracle’s Unbreakable Enterprise Kernel and the Red Hat Compatible Kernel. Oracle provides full system support on these systems.
■ Red Hat Enterprise Linux 6.3 or 6.4
Oracle provides ACSLS 8.3 application support for customers running Red Hat Enterprise Linux 6.3 or 6.4.
■ Other operating systems, including AIX and virtual environments, are not tested or supported.
System Requirements
1-2 StorageTek Automated Cartridge System Library Software Installation Guide
System Requirements■ Memory: 2GB minimum
To show system memory:
– Solaris
prtconf | grep Mem
– Linux
grep MemTotal /proc/meminfo
■ Swap: A minimum of 2GB swap is required. For systems configured with more than 6GB of memory, the rule of thumb for swap is approximately 30% of physical memory.
– Solaris
swap -l
(shows 512 byte blocks)
a. Take the number of blocks and divide by 2.
b. Now, divide this number by 1024.
c. This gives you the swap space in MBs.
– Linux
free -m
(reveals allocated swap space in Megabytes)
■ File systems and required databases:
ACSLS 8.3 enables you to install in any file system. You need to define the following directories before installing ACSLS.
– A base directory where the ACSLS components will be installed.
– A default directory for ACSLS backups. It is recommended (but not required) to place the ACSLS backup directory in a separate file system from the ACSLS base directory.
Although you can install ACSLS in any directory, the default directories used for ACSLS are:
– /export/home - default ACSLS base directory
– /export/backup - default ACSLS backup directory
The ACSLS base directory file system should have a minimum of 5GB free. An additional 5GB free should be reserved for ACSLS backups. To show filesystem sizes:
df -h
■ Fibre card (optional): a suitable HBA is required for Fibre Channel operations.
– For target mode operation, supporting the Logical Library feature, this HBA must be a contemporary QLogic fibre card (4Gb or higher).
Co-Hosting
Overview 1-3
– For initiator mode operation, supporting a fibre-connected library such as the SL500 or SL150, ACSLS 8.3 is fully tested and certified with QLogic and Emulex HBAs.
Browser RequirementsACSLS 8.3 was tested using Firefox version 22.0 and Chrome version 28.0.
Co-HostingTo ensure uninterrupted library service and to avoid unanticipated problems due to resource contention, it is generally recommended that ACSLS run in a stand-alone environment on a dedicated server. However, some systems are specifically designed to allow multiple applications to run in co-hosted fashion as though they are completely isolated from one another. For example, Solaris Containers and Oracle Solaris VM Server for SPARC enable conditional co-hosting possibilities for use with ACSLS.
The following details the conditions and limitations associated with the various co-hosting options for an ACSLS application.
■ Solaris Zones (containers)
Solaris zones enable a system administrator to partition a standard, low cost server into four independent Solaris systems, each with its own isolated file system, and its own instance of Solaris. You can assign network resources to each zone and you can reboot any local (non-global) zone without affecting applications in other zones on the same platform.
However, the ability to share kernel resources (such as device drivers) across multiple zones is tenuous at best. Ideally, an application that requires kernel drivers would reside in the global zone. However, it is generally not good practice to install an application in the global zone since any fatal condition with the application could impact all other applications running in the other zones.
ACSLS 8.3 can reside in a Solaris zone only if it does not require drivers beyond the network interface. Any use of Logical Libraries requires a target-mode fibre-channel driver, and any connection to an SL500 or SL150 library requires an initiator-mode fibre-channel driver. Either of these configurations dictates that ACSLS must be installed in the global zone.
There are no version of ACSLS-HA that are supported for use in Solaris zones.
■ Oracle VM Server for SPARC
Oracle VM Server for SPARC (formerly Logical Domains or LDOMs) is technology available on SPARC T-series servers with Chip Multithreading (CMT) technology. This technology offers significant advantages over Solaris Containers to the extent that each domain is in control of its own Solaris kernel.
A Solaris administrator can partition hardware resources across the system, assigning a specific resource to a specific domain. Network resources on this virtual machine can easily be shared across any of up to 128 guest domains on the server. But applications that require access to I/O devices through the PCIe bus must be installed in special I/O domains. The number of I/O domains that you can create on the VM Server depends on the number of discrete PCIe buses on the SPARC platform. On a system with a single PCIe bus, you can have two I/O domains, and one of these must be the control domain.
Co-Hosting
1-4 StorageTek Automated Cartridge System Library Software Installation Guide
Any ACSLS application that relies solely on network connectivity to the library and for client applications can be installed in a guest domain on this server. The virtual network set-up procedure is described in the document, Oracle VM Server for SPARC 2.1 Administration Guide in the section, entitled "Using Virtual Networks".
If your ACSLS 8.x application is intended for use with logical libraries, or if you intend to connect to a fibre-channel library such as the SL500 or L700, then ACSLS must be installed in an I/O domain. Refer to the section "Setting up I/O Domains" in the Oracle VM Server for SPARC 2.1 Administration Guide.
Solaris Cluster Software is supported on the Oracle VM Server for SPARC and this platform can be employed in an ACSLS-HA application. Refer to the Oracle Solaris Cluster Data Service for Oracle VM Server for SPARC Guide.
2
Installing ACSLS on Solaris 2-1
2Installing ACSLS on Solaris
ACSLS 8.3 is supported to run on Solaris 10, Updates 10 and 11, and Solaris 11, Update 1.
This chapter describes procedures for installing ACSLS 8.3. Topics include:
■ "Legal Notice" on page 2-1
■ "Exporting the Database and Control Files" on page 2-1
■ "Installing Solaris" on page 2-2
■ "Installing the ACSLS Package" on page 2-5
■ "Running install.sh" on page 2-7
Legal NoticeIn addition to the Oracle Right to Use License for ACSLS, this product contains numerous third-party software components, each with its own license criteria. Read the THIRDPARTYLICENSEREADME.txt agreement located in the ACSLS_8.3.0 installation directory. For software components whose license requires re-distribution of the source code, you can find that source code under the initial package installation directory, ACSLS_8.3.0 (typically under /opt). Look in the subdirectory, acsls_thirdPartySoftware/.
Exporting the Database and Control FilesIf you are upgrading from a prior release, you need to export the database and control files. As user acsss, run the command:
db_export.sh -f myExport
In the example above, myExport is the name you assign to your export file. You should save myExport and myExport.misc to a non-volatile location. If you are updating your OS, then transfer these files to a remote machine for safe keeping.
For more information and procedures, refer to Exporting the Database in the “Database Administration” chapter of the StorageTek ACSLS 8.3 Administrator’s Guide.
If you have created additional ACSLS GUI users on ACSLS 8.1 or later releases, record those user IDs so you can re-add them after installing the new version of ACSLS. To do this:
1. As user acsss:
cd $ACS_HOME/install
Installing Solaris
2-2 StorageTek Automated Cartridge System Library Software Installation Guide
2. Type su root.
Do not type su - root if you want to retain your acsss environment.
3. Run userAdmin.sh to get a list of existing users of the ACSLS GUI:
./userAdmin.sh
Select the List Users option and then the Exit option when you have finished.
4. Record the user IDs so you can re-add them later as described in "Adding Users of the ACSLS GUI" on page 2-9.
Installing SolarisThis section describes the steps to install Solaris.
Notes for the Solaris AdministratorFor installation procedures, please refer to the Solaris Installation instructions.
ACSLS 8.3 was tested using the Entire Distribution selection for the Solaris install. Oracle does not provide a minimum list of required packages for ACSLS, but the Entire Distribution is recommended.
Network SecurityYour Solaris installation should "Enable remote services" to ensure that network client applications are able to communicate with the ACSLS server.
If you select the Solaris "Secure by Default" installation option, then it is necessary to alter a network configuration property for rpc-bind. To do this:
1. Check the property setting:
# svccfg -s rpc/bind listprop config/local_only
2. If the local_only property setting is true, you must set it to false.
# svccfg -s rpc/bind setprop config/local_only=false
Access Privileges■ ACSLS 8.3 may be installed in any file system. The ACSLS base and the ACSLS
backup directories (for example, /export/home and /export/backup) must be mounted to allow SETUID so user acsss can run as root. Super user access is required for scripts that start and stop ACSLS services and for scripts that collect diagnostic information for a support call.
■ The acsss umask is set to 027 during installation.
■ Network services, specifically rpcbind, must be enabled to allow ACSLS client communication unless the firewall security on ACSLS and all ACSAPI clients is configured without the need for the portmapper. For more information, see the ACSLS Administrator’s Guide, "Firewall Security Option" for details.
User Administration■ Three ACSLS user accounts, (acsss, acssa, acsdb) are added automatically when
you install the ACSLS package.
■ The package install creates an acsls group and assigns all three users to this group. It also adds root to the acsls group.
Installing Solaris
Installing ACSLS on Solaris 2-3
■ If user accounts for the three acsls users already exist, the user home directory and group id will be adjusted automatically (if necessary) by the package install routine.
■ ACSLS 8.3 allows for a user-defined home directory for the ACSLS application. The parent directory of each user home directory is referenced by the variable, $installDir. The user home directories for ACSLS are:
acsss $installDir/ACSSSacssa $installDir/ACSSAacsdb $installDir/acsdb/ACSDB1.0
■ If user accounts already exist for these users and you are changing the $installDir, then these users must be logged out of the system during the installation since their home directory will change.
■ If the user accounts already exist and they are locked, they must be unlocked before you install the package.
To check if the acsss account is locked:
# passwd -s acsssacsss LK
The "LK" tells you that the account is locked. To unlock the account:
# passwd -u acsss
Do this for each user account.
■ If these user accounts exist on an LDAP or NIS server and the root user on the local machine lacks usermod authority on the LDAP or NIS server, then manual intervention by the system administrator is needed to complete the ACSLS installation. Make sure the users are re assigned to the acsls group and their home directories conform as stated in the fourth bullet. The user shell should be: /bin/bash
Cron Administration■ Specific automated schedules known as crontabs are created for users acsss, and
acsdb when you run the install.sh utility. These crontabs are provided for ACSLS database maintenance backup activities.
■ An optional file /etc/cron.d/cron.allow may exist on the system. This file controls which users are allowed to run the crontab command. If cron.allow exists, then user IDs for acsss and acsdb must be included in that file before you run install.sh. Otherwise, crontab creation for these users fail.
The file cron.deny exists by default on most systems. Any users listed in this file are explicitly denied access to the crontab command. Make sure that acsss and acsdb are not contained in the cron.deny file.
Removing any Previous ACSLS Version1. Is this a new installation?
■ YES - go to "Installing the ACSLS Package" on page 2-5
■ NO - make sure you exported the database by using the db_export.sh utility command.
2. Shut down ACSLS:
Installing Solaris
2-4 StorageTek Automated Cartridge System Library Software Installation Guide
You need to be logged in as acsss to do this.
acsss shutdown
Remove any acsss and acsdb crontab entries:
crontab -r acssscrontab -r acsdb
3. If you are migrating from a release prior to 8.1, remove these user accounts.
A change was introduced in ACSLS 8.1 that affects the group association for users acsss, acsdb, and acssa. If you are installing from a release prior to 8.1, there are steps you should take before installing the STKacsls package for 8.3. First remove the ACSLS user accounts as explained in the steps below. These accounts are re-created when you install the new STKacsls package for ACSLS 8.3.
# userdel acsss# userdel acsdb# userdel acssa
4. su to root and perform the following:
cd /var/tmprm -rf acslscd /var/mailrm -f acsss acsdb acssa
5. Remove ACSLS, backup and other files:
■ ACSLS 6.0 or 6.0.1
cd /export/homerm -rf ACSSS informixcd /export/backuprm -rf informix misc
■ ACSLS 6.0 or 6.0.1 and the server_to_server directory exists
cd /export/homerm -rf informix misc server_to_servercd /rm -rf INFORMIXTMP nsr
■ ACSLS 6.1 to 7.1
cd /export/homepkgrm STKacslscd /export/backuprm -rf informix misc server_to_servercd /rm -rf INFORMIXTMPrm -rf /nsrd /var/tmprm -rf acsls
■ ACSLS 7.2 to 7.3.1
cd /export/homepkgrm STKacslsrm -rf ACSSS ACSSA acsdbcd /export/backuprm -rf *
Installing the ACSLS Package
Installing ACSLS on Solaris 2-5
(this removes all contents of the backup directory)
■ ACSLS 8.0 to 8.0.2
cd /export/homepkgrm STKacslsrm -rf ACSSS ACSSA acsdb SSLMcd /export/backuprm -rf *
■ ACSLS 8.1 to ACSLS 8.3
cd /export/homepkgrm STKacslsrm -rf ACSSS ACSSA acsdb SSLM wlinstall Oraclecd /export/backuprm -rf *
If pkgrm STKacsls fails because the database server is running, you may need to kill postmaster processes. To do this:
a. Run: ps -rf | grep post
b. Kill the parent postmaster process.
c. Run pkgrm STKacsls again.
6. For ACSLS releases before 7.2, remove files under second disk (if installed).
cd /second_disk
If you installed the second disk in another directory other than /second_disk, cd to that directory.
rm -rf datacd /second_disk/backup
If you installed the second disk in another directory other than /second_disk/backup, cd to that directory.
For ACSLS 6.0 - 7.1, enter:
rm -rf informix misc
7. Verify that no database processes are running before you begin the install. If in doubt, reboot.
Note: If you are removing ACSLS (and not installing a new version), remove the ACSLS user IDs from /etc/cron.d/cron.allow.
Installing the ACSLS PackageACSLS 8.3 installs in any directory. Determine the base install directory where the ACSLS application should reside. If that directory does not exist, you should create it before installing the STKacsls package. The directory must be owned by root with permissions set to 755.
Note: Unless otherwise specified by the user, ACSLS will be installed in /export/home.
Installing the ACSLS Package
2-6 StorageTek Automated Cartridge System Library Software Installation Guide
To follow the default installation procedure:
1. Go to the Oracle Software Delivery Cloud website, and find the ACSLS_8.3.0 software bundle available for both SPARC and X86 platforms.
ACSLS_8.3.0_SPARC.zip
ACSLS_8.3.0_X86.zip
a. Download the appropriate software bundle to a common installation directory, typically /opt, and unzip the compressed file. The extracted package set is found in the resulting ACSLS_8.3.0 subdirectory.
b. Go into the ACSLS_8.3.0 directory and run the command:
./pkg_install.sh
The pkg_install script first prompts you to confirm your intent to install ACSLS 8.3.
A number of packages are included with the ACSLS 8.3 installation bundle. They include STKacsls and five SUNW packages that support PostgreSQL. The SUNW packages typically reside already on Solaris 10, but if not, they are installed automatically by the pkg_install.sh routine.
On Solaris 11 the specific SUNW packages are not already installed, so they are installed automatically when you run the pkg_install script. Review the license for each package and respond y to accept the package.
c. Before installing the STKacsls package, the script prompts you (y/n) whether to accept /export/home as the default base directory for the ACSLS application.
If you answer n, the script asks you to enter the desired path to the package base directory. If the directory you specify does not exist, the script prompts for permission create the directory.
When the package installation is complete, you find that the packages in ACSLS_8.3.0 have been moved to /var/spool/pkg. They remain there for ease of re-installation until they are manually removed. What remains in ACSLS_8.3.0 is pkg_install.sh, pkg_uninstall.sh, and README.txt. You can use these scripts to uninstall or re-install ACSLS at any time.
2. The package installation utility creates user and group IDs for the following users: acsss, acssa, and acsdb. It assigns home directories for these users and places them in the acsls group. The root user is also added to the acsls group.
On systems where users acsss, acssa, and acsdb may already exist, advise those users to log out before you install the package. The package install fails if the user is logged in while it should be necessary to change the user's home directory. This will happen in upgrade contexts where you have defined a different install directory from the previous ACSLS installation.
Note: Secure administration practices recommend that you to set initial passwords for these users immediately after the package installation.
3. Once the ACSLS packages are installed, root needs to inherit the ACSLS environmental attributes. To do this, log out and log back in, or simply su - to inherit the acsls group identity. Verify with the groups command.
Running install.sh
Installing ACSLS on Solaris 2-7
su -# groups root acsls(other groups may be listed)
4. To set your shell to the ACSLS installation environment, source the.acsls_env file:
. /var/tmp/acsls/.acsls_env
This step enables you to refer to $ACS_HOME during subsequent installation operations.
5. Proceed to "Running install.sh" on page 2-7.
Running install.shThe install.sh utility enables you to select from the extracted ACSLS 8.3 package the specific features required for your unique Oracle StorageTek library environment. Flexibility has been added in ACSLS 8.3, allowing you to choose whether to install options including the Graphical User Interface (GUI) and fibre library support. You can run this utility to install the entire product, any portion of the product, or to alter an already-installed product without the need for a full installation.
While you are still logged in as root, run the commands:
cd $ACS_HOME/install./install.sh
Creating the DatabaseDatabase creation is first step in the install.sh routine. This step is necessary if you are installing the package for the first time. If your ACSLS database already exists and you do not want to rebuild it, then you have the option to skip this step. This step creates a new database under PostgreSQL and establishes an automated schedule for database backups.
Determine the directory where you intend for the database to reside. If that directory does not exist, then you must first create the directory. The directory must be owned by root with permissions set to 755. Unless you specify otherwise, the backup directory will be placed directly under your base directory. See step-1(c) in "Installing the ACSLS Package" on page 2-5.
The install.sh routine asks:
Which file system will be used to store database backups?[/export/backup]
Click Return to select the suggested directory, or specify a different directory. If you assign a relative path, it is placed directly under the desired path that you assigned in step-2 in the previous section, "Installing the ACSLS Package" on page 2-5.
The install routine proceeds to load policy modules. These allow the ACSLS application to freely access its PostgreSQL database.
Installing an mchanger DriverThe mchanger driver is relevant only to fibre-attached or SCSI-attached library configurations. The install.sh routine asks:
Shall we install the mchanger driver for fibre-attached libraries? (y/n)
Running install.sh
2-8 StorageTek Automated Cartridge System Library Software Installation Guide
Respond with y or n whether your library environment includes a fibre-attached library such as the SL500 or SL150 library.
If you enter y, the routine scans the attached SAN environment, looking for any StorageTek library devices. It reports the devices it finds and prompts whether any additional libraries are attached. If you have an older SCSI attached L700 or L180 library, respond y to the prompt.
For SCSI attached libraries, simply enter the target:lun address for each library, separating them by a space. For example:
==> 4:0 5:0 5:1
Installing Support for Logical LibrariesACSLS can present logical libraries to client applications over a fibre connection. Any portion of an attached physical library can be represented as a (SCSI) fibre-attached library with a fibre target port. To implement this capability, you must have a QLogic fibre HBA. This step converts one or more QLogic HBA ports from their default initiator mode to target mode.
The install.sh routine probes the system for qualified HBAs, and then lists the ports it finds with the following prompt:
Please select the HBA port you intend for Target-mode operation:1) HBA Port WWN xxxyyyzzz Not connected2) HBA Port WWN aaabbbccc Connected to a remote HBA
Select the desired port by the corresponding number. The port you choose must be connected to a remote HBA.
Installing the Graphical User InterfaceIf you are installing logical libraries, then the ACSLS GUI is a required feature. Simply proceed with the GUI installation procedure described below.
If you chose not to install support for Logical Libraries, then the GUI installation is an option. To install the GUI:
1. Enter y at the following prompt:
Do you want to install the ACSLS Graphical User Interface? (y/n)
2. If this is a minor update or configuration change (not a new installation) your ACSLS GUI may already be installed.
In this case, you will have the option to re-install the GUI or to skip this section and retain the current ACSLS GUI domain. The install routine prompts:
The Acsls GUI Domain exists. Do you want to re-install it? (y/n
3. Select one of the following:
■ Enter y if you are installing a new ACSLS release.
The WebLogic server package is extracted and the default GUI admin user account is created with the user name, acsls_admin.
You are then asked to assign a password for the admin user. The password must be between eight and sixteen characters using both alpha and numeric characters.
Running install.sh
Installing ACSLS on Solaris 2-9
The install procedure unpacks and deploys the ACSLS GUI application and then creates the Acsls user group. At a later time, you can add GUI users to this group using the administrative tool, userAdmin.sh.
■ If you enter n, you have the option (y/n) whether to remove the existing GUI configuration.
When you install WebLogic on your ACSLS server, a simple 512-bit public key is automatically available to support basic https exchanges with client browsers. Normally, no further configuration should be necessary. However, some browsers, notably the Microsoft Internet Explorer, require a lengthier key of no less than 1024 bits. Refer to "Configuring an SSL Encryption Key" on page A-1 for a description of and procedures for configuring an SSL encryption key.
Installing lib_cmdThe lib_cmd feature is a command-line interface that performs many of the same operations that can be performed in the ACSLS GUI. This tool is installed automatically if you choose to install the GUI. While many lib_cmd operations apply to logical library functions, this feature is also useful for displaying the status of physical libraries, volumes and drives. The option to install lib_cmd is presented when support for logical libraries was not selected.
Shall we install the optional lib_cmd interface (y or n):
Installing acsss Services for SMF ControlDepending on the set of features that you have selected in the above installation dialog, this final step installs Solaris SMF services to control the automatic start, stop, and status functions for each selected ACSLS feature.
The service list includes any subset of the following:
acsdbacslssmcermi-registrysurrogatestmfweblogic
Adding Users of the ACSLS GUIDuring install.sh, you created the acsls_admin user. This user can now create accounts and assign passwords for other users of the ACSLS Web-based GUI application. You can refer to the list of GUI users that you saved earlier. To add a user, follow this procedure:
1. As root, go to the /export/home/ACSSS/install directory.
2. Run ./userAdmin.sh.
3. Enter the acsls_admin password that you assigned in "Installing the Graphical User Interface" on page 2-8.
4. From the menu, select (1) to add a new user.
5. Enter the ID of the user you want to add.
6. Assign a password for that user.
Completing ACSLS Installation
2-10 StorageTek Automated Cartridge System Library Software Installation Guide
Passwords must contain eight characters with a combination of alpha and numeric or special characters.
You can use the userAdmin.sh utility at any time to add or delete users or to change passwords for all ACSLS GUI users. See userAdmin.sh in the Utilities chapter of the StorageTek ACSLS 8.3 Administrator’s Guide.
Completing ACSLS InstallationTo complete ACSLS installation continue with "Getting Started" on page 4-1. This chapter provides information on importing the database or configuring your library hardware and verifying your ACSLS Installation.
3
Installing ACSLS on Linux 3-1
3Installing ACSLS on Linux
ACSLS 8.3 has been designed and tested to run under Oracle Linux Release 6 Update 3 and Oracle Linux Release 6 Update 4. The Oracle Linux Product Pack can be obtained from the Oracle E-Delivery site:
https://edelivery.oracle.com/linux
The procedures described in this chapter conform to a Linux 6.3 and 6.4 environments that include the specific packages detailed in the section, "Installing Linux" on page 3-5. By closely following that section and "Linux Installation Tips" on page 3-6, your installation should proceed smoothly and you can avoid issues of software incompatibility or unresolved package dependencies. Deviation from the prescribed set of packages is recommended only for experienced Linux administrators.
This chapter includes the following topics:
■ "Preliminary Notes for the Linux Administrator" on page 3-1
■ "Exporting the Database and Control Files" on page 3-4
■ "Installation Media" on page 3-4
■ "Installing Linux" on page 3-5
■ "Installing the ACSLS Package" on page 3-6
■ "Running install.sh" on page 3-7
Preliminary Notes for the Linux AdministratorThis section includes the following topics:
■ "User Administration" on page 3-1
■ "Cron Administration" on page 3-2
■ "Access Privileges" on page 3-2
■ "SELinux Security" on page 3-3
■ "Before Installing Linux" on page 3-3
User Administration■ Three ACSLS user accounts, (acsss, acssa, acsdb) are added automatically when
you install the ACSLS package.
■ The package install creates an acsls group and assigns all three users to this group. It also adds root to the acsls group.
Preliminary Notes for the Linux Administrator
3-2 StorageTek Automated Cartridge System Library Software Installation Guide
■ If user accounts for the three acsls users already exist, the user home directory and group id will be adjusted automatically (if necessary) by the package install routine.
■ ACSLS 8.3 allows for a user-defined home directory for the ACSLS application. The parent directory of each user home directory is referenced by the variable, $installDir. The user home directories for ACSLS are:
acsss $installDir/ACSSSacssa $installDir/ACSSAacsdb $installDir/acsdb/ACSDB1.0
■ If user accounts already exist for these users and you are changing the $installDir, then these users must be logged out of the system during the installation since their home directory will change.
■ If the user accounts already exist and they are locked, they must be unlocked before you install the package. To check if the acsss account is locked:
# passwd -s acsssacsss LK
The "LK" tells you that the account is locked. To unlock the account:
# passwd -u acsss
Do this for each user account.
■ If these user accounts exist on an LDAP or NIS server and the root user on the local machine lacks usermod authority on the LDAP or NIS server, then manual intervention by the system administrator is needed to complete the ACSLS installation. Make sure the users are re assigned to the acsls group and their home directories conform to the guidelines in this section. The user shell should be /bin/bash.
Cron Administration■ Specific automated schedules known as crontabs are created for users acsss, and
acsdb when you run the install.sh utility. These crontabs are provided for ACSLS database maintenance backup activities.
■ An optional file /etc/cron.d/cron.allow may exist on the system. This file controls which users are allowed to run the crontab command. If cron.allow exists, then user IDs for acsss and acsdb must be included in that file before you run install.sh. Otherwise, crontab creation for these users fail.
The file cron.deny exists by default on most systems. Any users listed in this file are explicitly denied access to the crontab command. Make sure that acsss and acsdb are not contained in the cron.deny file.
Access Privileges■ ACSLS 8.3 may be installed in any file system. The ACSLS base and the ACSLS
backup directories (example: /export/home and /export/backup) must be mounted to allow SETUID so user acsss can run as root. Super user access is required for scripts that start and stop ACSLS services and for scripts that collect diagnostic information for a support call.
■ The acsss umask is set to 027 during installation.
Preliminary Notes for the Linux Administrator
Installing ACSLS on Linux 3-3
■ Network services, specifically rpcbind, must be enabled to allow ACSLS client communication unless the firewall security on ACSLS and all ACSAPI clients is configured without the need for the portmapper. For more information, see the ACSLS Administrator’s Guide, "Firewall Security Option" for details.
SELinux SecurityACSLS 8.3 is designed to run in optional Security Enhanced Linux environments. SELinux was merged into the Linux 2.6.0 kernel in 2003 in response to initiatives by the US National Security Agency. It provides access control to files, directories, and other system resources that go beyond the traditional protection found standard in Unix environments. In addition to owner-group-public permission access, SELinux includes access control based on user role, domain, and context. The agent that enforces access control over all system resources is the Linux kernel.
The root user on a Linux system can set enforcement on or off with the setenforce command.
setenforce [Enforcing | Permissive | 1 | 0 ]
Use Enforcing or 1 to put SELinux in enforcing mode. Use Permissive or 0 to put SELinux in permissive mode.
Note: To view the current system enforcement status, use the command getenforce.
Three SELinux policy modules are loaded into the kernel when you install ACSLS: allowPostgr, acsdb, and acsdb1. These modules provide the definitions and enforcement exceptions that are necessary for ACSLS to access its own database and other system resources while SELinux enforcement is active. With these modules installed, you should be able to run normal ACSLS operations, including database operations such as bdb.acsss, rdb.acsss, db_export.sh and db_import.sh without the need to disable SELinux enforcement.
For more information, refer to the “Troubleshooting” Appendix in the StorageTek ACSLS 8.3 Administrator’s Guide.
Before Installing LinuxBefore you begin installing Linux, check with your IT system administrator to obtain the following information. The graphical installer requires the kdelibs package, which is included in the Linux Installer Media Pack.
■ Hostname and IP address for the ACSLS server.
■ Gateway IP address and netmask for your network, as well as the primary and secondary DNS.
■ IP address.
■ Network proxy information, if available.
In this procedure, you install key software components, including the following:
■ GNOME desktop environment.
■ Internet support.
■ X Windows.
Exporting the Database and Control Files
3-4 StorageTek Automated Cartridge System Library Software Installation Guide
■ Resource Package Manager (RPM), Yellowdog Updater, and Modified (yum).
■ Java.
Do not install (or enable) the following:
■ Software Development
■ Web Server
■ Database
■ Dial-up network
Exporting the Database and Control FilesIf you are porting an earlier release of ACSLS from a Solaris or AIX machine, be sure to export your database and control files from that machine. The control files include those files in the data/external directory that have been customized to your local library environment. If you are moving the database and control files to the ACSLS 8.3 Linux platform, you need to export the database and control files. As user acsss, run the command:
db_export.sh -f myExport
In the example above, myExport is the name you assign to your export file. You should save myExport and myExport.misc to a non-volatile location. If you are updating your OS, then transfer these files to a remote machine for safe keeping.
For more information and procedures, refer to Exporting the Database in the “Database Administration” chapter of the StorageTek ACSLS 8.3 Administrator’s Guide.
If you have created additional ACSLS GUI users on ACSLS 8.1 or later releases, record those user IDs so you can re-add them after installing the new version of ACSLS. To do this:
1. As user acsss:
cd $ACS_HOME/install
2. Login in as root.
3. Use userAdmin.sh to list your existing users:
./userAdmin.sh
Select the List Users option and then the Exit option when you have finished.
4. Record the user IDs so you can re-add them later as described in "Adding Users of the ACSLS GUI" on page 3-10.
Installation MediaYou may install Oracle Linux from DVD media, from a jump-start server, or from an ISO image that resides on a remote server. Most contemporary Oracle Sun X86 servers are equipped with an advanced service processor using Integrated Lights Out Manager (ILOM). The ILOM enables you to install the Linux operating system on the same machine using remotely mounted media. Consult your Sun server documentation for details how to use the Oracle ILOM.
Installing Linux
Installing ACSLS on Linux 3-5
Downloading the Linux Media PackUse the following procedure to download the Linux installer media pack from the Oracle Software Deliver Cloud website. The media pack is delivered as a compressed ISO image file which you can extract and write to portable media of your choice.
1. Start a web browser on the system and navigate to the Oracle Software Delivery Cloud website at the following URL.
https://edelivery.oracle.com/linux
2. Click Sign In/Register.
3. Enter the user ID and password provided by your Oracle support representative.
4. On the Terms and Restrictions screen:
a. Select Oracle Linux in the Select a Product Pack menu.
b. Select x86 64 bit.
c. Click Go.
5. Select Oracle Linux Release 6 Update 3 or 4 Media Pack for x86 64 (64 Bit).
6. Click Download and save the media pack.zip file to the location of your choice.
7. Use any unzip tool to extract the ISO image file from the .zip file.
8. Use the media writing software of your choice to write the ISO image file to the media of your choice.
Installing LinuxACSLS 8.3 has been tested and verified on Linux 6.3, and 6.4, using the standard base installation of Linux with no specific packages required beyond those selected by default with the Linux installer. It is recommended that PostgreSQL packages are not included with the base installation of Linux. These are installed in the following section.
Installing ACSLS PrerequisitesAfter Linux is installed, you will add specific packages required for ACSLS from the Oracle Yum repository.
If your ACSLS server is behind a firewall, you may need to configure your ACSLS Linux system to use a local proxy server.
1. Edit /etc/yum.conf and /etc/wgetrc to update proxy and caching parameters:
yum/confProxy=http://your local proxy serverhttp_caching=packages
wgetrc#You can set the default proxies for wget to use for http, https, and ftp.#They will override the value in the environment.http_proxy=http://your local proxy server
# Remove the comment sign (#) from this line: #use_proxy=on
2. Configure yum to use the Oracle repository for the correct architecture.

Installing the ACSLS Package
3-6 StorageTek Automated Cartridge System Library Software Installation Guide
a. Obtain the repository list from the Oracle yum server.
# cd /etc/yum.repos.d# wget http://public-yum.oracle.com/public-yum-ol6.repo
b. Edit the file, public-yum-ol6.repo, to include i686 packages. Add the following lines to the bottom of this file.
[ol6_latest_i386]name=Oracle Linux 6 Latest 32-bit (i386)baseurl=http://public-yum.oracle.com/repo/OracleLinux/OL6/latest/i386/gpgkey=http://public-yum.oracle.com/RPM-GPG-KEY-oracle-ol6gpgcheck=1enabled=1
3. Disable the yum packagekit refresh.
a. Edit the file:
/etc/yum/pluginconf.d/refresh-packagekit.conf
b. Set enabled=0.
4. Install the pre-requisite packages for ACSLS.
yum install -y glibc.i686 pam pam.i686yum install -y libstdc++ libstdc++.i686yum install -y libxml2 libxml2.i686yum install -y postgresql-server.i686yum install -y unixODBC.i686 postgresql-odbc.i686
With these pre-requisites installed, you are now ready to install the ACSLS 8.3 package.
Linux Installation TipsYour Linux installation may not contain all of the packages required for ACSLS. When you install the ACSLS package with rpm -ivh ACSLS-8.3.0.i686.rpm, this operation may return an error indicating specific unmet package dependencies. For each dependency that is identified, your can install that package with yum. Simply copy the package name from the dependency error message and submit that package name to a yum install command.
# yum install <package name>
If you would like to get a list of any dependencies in the ACSLS package before you attempt to install it, you can run the rpm install command with the --test option.
# rpm -ivh --test ACSLS-8.3.0.i686.rpm
If there are still unmet dependencies that remain on your Linux system, those dependencies are displayed with this test option.
Installing the ACSLS PackageThe ACSLS 8.3 package is contained in the file ACSLS_8.3.0_Linux.zip which you can download from the Oracle eDelivery site. You will typically download the file to the /opt directory on your ACSLS server. Unzip the file and go into the ACSLS_8.3.0 directory to access the rpm package, ACSLS-8.3.0.i686.rpm.
Running install.sh
Installing ACSLS on Linux 3-7
ACSLS 8.3 installs in any directory. Determine the base install directory where the ACSLS application should reside. If that directory does not exist, then you must create it before installing the STKacsls package. The directory must be owned by root with permissions set to 755.
Note: Unless otherwise specified by the user, ACSLS will be installed in /export/home.
1. As root, go into the ACSLS_8.3.0 package installation directory and install the ACSLS package.
pkg=ACSLS-8.3.0.i686.rpmrpm -i $pkg
This method places the ACSLS application under the default install directory, /export/home. If you want to place the application under a different directory, use the following method to extract the package:
path=/my/desired/path(the file system where you intend for the ACSLS application to reside)
rpm -Uvh --prefix $path ACSLS-8.3.0.i686.rpm
The rpm utility creates user and group IDs for users acsss, acssa, and acsdb. It assigns home directories for these users and places them in the acsls group. The root user is also added to the acsls group.
On systems where users acsss, acssa, and acsdb may already exist, please advise these users to log out before you install the package. The package install fails if a user is logged in while it is necessary to change the user's home directory. This happens in upgrade contexts where you have defined a different install directory from the previous ACSLS installation.
Note: Secure administration practices recommend that you to set initial passwords for these users immediately after the package installation.
2. Once the package is installed, you should inherit the new ACSLS environment to your current shell. To inherit the acsls group identity, you must log out and log back in (or simply su -). Verify with the groups command.
su -# groups root acsls(other groups may be listed)
3. To set your shell to the ACSLS installation environment, source the.acsls_env file.
. /var/tmp/acsls/.acsls_env
This step lets you refer to $ACS_HOME during subsequent installation operations.
Running install.shThe install.sh utility lets you select from the extracted ACSLS 8.3 package the specific features required for your unique Oracle StorageTek library environment. Flexibility has been added in ACSLS 8.3, allowing you to choose whether to install
Running install.sh
3-8 StorageTek Automated Cartridge System Library Software Installation Guide
options including the Graphical User Interface (GUI) and fibre library support. You can run this utility to install the entire product, any portion of the product, or to alter an already-installed product without the need for a full installation.
While you are still logged in as root, run the following commands:
cd $ACS_HOME/install./install.sh
Note: If you are installing Linux 6.4 and get the message Linux 6.4 may not be supported, type ‘y’ and continue with the installation.
Creating the DatabaseDatabase creation is first step in the install.sh routine. This step is necessary if you are installing the package for the first time. If your ACSLS database already exists and you do not want to rebuild it, then you have the option to skip this step.
This step creates a new database under PostgreSQL and establishes an automated schedule for database backups. For Linux 6, it loads SE Linux policy modules that provide ACSLS with secure but unrestrained access to the PostgreSQL database engine.
Determine the directory where you intend for the database to reside. If that directory does not exist, then you must first create the directory. The directory must be owned by root with permissions set to 755. Unless you specify otherwise, the database is installed in export/backup.
The install.sh routine asks:
Which file system will be used to store database backups?[/export/backup]
Click Return to select the suggested directory, or specify a different directory. If you assign a relative path, it is placed directly under the desired path that you assigned in step-1 in the previous section, "Installing the ACSLS Package" on page 3-6.
The install routine proceeds to load SE Linux policy modules. Unless you specify otherwise, the routine places the directory for database backups directly under the desired path that you assigned in step-1.
Installing an mchanger DriverThe mchanger driver is relevant only to fibre-attached or SCSI-attached library configurations. The install.sh routine asks:
Shall we install the mchanger driver for fibre-attached libraries? (y/n)
Respond with y or n whether your library environment includes a fibre-attached library such as the SL500 or SL150 library.
If you entered y, the routine scans the attached SAN environment, looking for any StorageTek library devices. It reports the devices it finds and prompts whether any additional libraries are attached. If you have an older SCSI attached L700 or L180 library, respond y to the prompt.
For SCSI attached libraries, simply enter the target:lun address for each library, separating them by a space. For example:
==> 4:0 5:0 5:1
Running install.sh
Installing ACSLS on Linux 3-9
Removing mchanger Device LinksWhen controlling fibre-attached libraries such as the SL500 or SL150, mchanger is the name that ACSLS uses when referring to the device driver for the SCSI media changer device. On Linux, /dev/mchanger* is a symbolic link to the SCSI Generic sg driver. It is not our purpose to remove sg since sg is a standard device driver on Linux. We simply remove the device links between mchanger and sg. This task is normally accomplished when you remove the ACSLS rpm package. But if you want to remove mchanger without removing the ACSLS package, use the following procedure:
1. Remove the device links for mchanger in /dev.
# cd /dev# rm mchanger*
2. Remove the rules that created the device links that you removed in step 1.
# cd /etc/udev/rules.d# rm persistent-storage-tape-acsls.rules
To re-create the mchanger device links:
1. Login as root.
2. Source the ACSLS environment:
# . /var/tmp/acsls/.acsls_env
3. Create the mchanger device links.
# $ACS_HOME/install/install_scsi_Linux.sh
Installing the Graphical User InterfaceThe Graphical User Interface (GUI) is an option. If you chose to install the GUI:
1. Enter y at the following prompt:
Do you want to install the ACSLS Graphical User Interface? (y/n)
2. If this is a minor update or configuration change (not a new installation) your ACSLS GUI may already be installed.
In this case, you will have the option to re-install the GUI or to skip this section and retain the current ACSLS GUI domain. The install routine prompts:
The Acsls GUI Domain exists. Do you want to re-install it? (y/n)
3. Select one of the following:
■ Enter y if you are installing a new ACSLS release.
The WebLogic server package is extracted and the default GUI admin user account is created with the user name, acsls_admin.
You are then asked to assign a password for the admin user. The password must be between eight and sixteen characters using both alpha and numeric characters.
The install procedure unpacks and deploys the ACSLS GUI application and then creates the Acsls user group. At a later time, you can add GUI users to this group using the administrative tool, userAdmin.sh.
■ If you enter n, you have the option (y/n) whether to remove the existing GUI configuration.
Running install.sh
3-10 StorageTek Automated Cartridge System Library Software Installation Guide
When you install WebLogic on your ACSLS server, a simple 512-bit public key is automatically available to support basic https exchanges with client browsers. Normally, no further configuration should be necessary. However, some browsers, notably the Microsoft Internet Explorer, require a lengthier key of no less than 1024 bits. Refer to "Configuring an SSL Encryption Key" on page A-1 for a description of and procedures for configuring an SSL encryption key.
Installing lib_cmdThe lib_cmd feature is a command-line interface that performs many of the same operations that can be performed in the ACSLS GUI. This tool is installed automatically if you choose to install the GUI. While many lib_cmd operations apply to logical library functions, this feature is also useful for displaying the status of physical libraries, volumes and drives. The option to install lib_cmd is presented when support for logical libraries was not selected.
Shall we install the optional lib_cmd interface (y or n):
Installing acsss Services for SMF ControlDepending on the set of features that you have selected in the above installation dialog, this final step installs Linux init.d services to control the automatic start, stop, and status functions for each selected ACSLS feature.
The service list includes any subset of the following:
acsdbacslsrmi-registrysurrogateweblogic
Adding Users of the ACSLS GUIDuring install.sh, you created the acsls_admin user. This user can now create accounts and assign passwords for other users of the ACSLS Web-based GUI application. You can refer to the list of GUI users that you saved earlier. To add a user, follow this procedure:
1. As root, go to the /export/home/ACSSS/install directory.
2. Run ./userAdmin.sh.
3. Enter the acsls_admin password that you assigned in "Installing the Graphical User Interface" on page 3-9.
4. From the menu, select (1) to add a new user.
5. Enter the ID of the user you want to add.
6. Assign a password for that user.
Passwords must contain eight characters with a combination of alpha and numeric or special characters.
You can use the userAdmin.sh utility at any time to add or delete users or to change passwords for all ACSLS GUI users. See userAdmin.sh in the Utilities chapter of the StorageTek ACSLS 8.3 Administrator’s Guide.
Completing ACSLS Installation
Installing ACSLS on Linux 3-11
Completing ACSLS InstallationTo complete ACSLS installation continue with "Getting Started" on page 4-1. This chapter provides information on importing the database or configuring your library hardware and verifying your ACSLS Installation.
Completing ACSLS Installation
3-12 StorageTek Automated Cartridge System Library Software Installation Guide
4
Getting Started 4-1
4Getting Started
After you have successfully installed ACSLS on Solaris or Linux, you complete ACSLS installation by importing the database, configuring your library hardware, and verifying your ACSLS installation.
Importing the Database and Control FilesYou need to perform this step only under the following conditions:
■ If you are migrating to ACSLS 8.3.
■ If you have exported the database and control files.
The control files include those files in the data/external directory that have been customized to your specific environment.
For more information on importing the database and control files, refer to Importing the Database in the “Database Administration” chapter of the StorageTek ACSLS 8.3 Administrator’s Guide.
Configuring your Library Hardware1. Verify that the server system hardware is properly configured, connected,
powered on, and ready.
2. Verify each of the physical connections (Ethernet, fibre, SCSI, etc) connections between the server and the library hardware.
3. Before configuring ACSLS to your library complex, make sure all libraries, rails, and CAPs are fully configured, powered on, and ready and all CAP magazines are installed.
4. Create or import the Library Configuration. Refer to the ACSLS 8.3 Administrator's Guide for details.
To import the configuration from an earlier ACSLS release, see the section Importing the Database in the “Database Administration” chapter.
To create a new library configuration, see the section Configuring or Reconfiguring Library Hardware in the “Installing and Configuring Your Library Hardware” chapter.
5. For Solaris only:
If you are using logical libraries to support SCSI clients over Fibre Channel, set up the FC connections between any client HBA ports and suitable HBA ports on the

Verifying the ACSLS Installation
4-2 Product Title/BookTitle as a Variable
ACSLS server. Fibre connections to logical library client machines should be active when you install ACSLS.
For help with connectivity problems, refer to the “Troubleshooting” chapter in the StorageTek ACSLS 8.3 Administrator's Guide.
Verifying the ACSLS InstallationUse the following procedure to verify ACSLS. You should be logged in as acsss. This procedure mounts and dismounts a cartridge.
To start ACSLS Software, login as user acsss and run the acsss enable command. Refer to acsss in the “Utility” chapter of the StorageTek ACSLS 8.3 Administrator’s Guide.
For instructions on using cmd_proc, refer to "Using a cmd_proc" in the "Overview" chapter in the StorageTek ACSLS 8.3 Administrator’s Guide.
1. Query the server from the cmd_proc by entering
query server
If messages are displayed indicating that the server is in recovery, wait for a message indicating that the server is running.
2. Verify that the following are online. You must have at least one of each online. If not, bring them online with the vary command.
query lsm allquery acs allquery lsm allquery drive allquery cap all
3. Audit a library with the audit command.
audit cap_id acs acs_id
Wait for the audit to complete and all the cartridges in the ACS to be discovered.
4. Do you have at least one cartridge in an LSM?
■ YES - continue with the procedure.
■ NO - enter a cartridge into an LSM.
5. Use the query mount command to identify tape drives that are compatible with a tape cartridge.
query mount vol_id
Tape drives that are compatible with the specified tape cartridge are listed. For example, if a T10000T2 tape cartridge is specified, only tape drives that can read or write that tape cartridge will be listed. The closest tape drives are listed first.
6. Mount the volume on one of the tape drives reported to the query mount command.
mount vol_id drive_id
7. Did you see a message indicating a successful mount?
A successful mount message is:
Mount: vol_id mounted on drive_id
Auditing Your Libraries
Getting Started 4-3
■ YES - Proceed to dismount the cartridge.
■ NO - If an error message appears, run this verification procedure again, ensuring that you specified a valid, available and compatible drive and a library cartridge. If the mount/dismount still fails, call Oracle Support for assistance.
8. Dismount the cartridge by entering:
dismount vol_id drive_id force
In the above example, vol_id is the volume and drive_id is the drive you specified in Step 4.
Auditing Your LibrariesThe last step of your installation is auditing all of your libraries. You need to audit your libraries if:
■ This is a new installation.
■ You are adding new libraries to an existing configuration.
Refer to “Auditing the Library” in the Library Management chapter of the StorageTek ACSLS 8.3 Administrator’s Guide.

Auditing Your Libraries
4-4 Product Title/BookTitle as a Variable

5
Uninstalling ACSLS 5-1
5Uninstalling ACSLS
This chapter describes the procedures for uninstalling ACSLS 8.3 on Solaris and Linux.
Uninstalling ACSLS 8.3 on SolarisIf you are upgrading to another release of ACSLS, make sure to export your ACSLS database by using the db_export.sh utility command discussed in the “Utility” chapter of the StorageTek ACSLS 8.3 Administrator’s Guide.
1. Log in as acsss.
2. Enter acsss shutdown.
3. Remove the package. To do this:
a. Log in as root.
b. Go to the ACSLS_8.3.0 package installation directory (typically /opt/ACSLS_8.3.0) and run pkg_uninstall.sh.
The pkg_uninstall script removes many, but not all ACSLS file systems and it keeps the user accounts in place for acsss, acssa, and acsdb. This approach allows for faster upgrades of ACSLS.
On Solaris 11, the pkg_uninstall utility prompts you whether to uninstall the PostgreSQL packages. You would normally answer "n" to this prompt unless you are permanently removing the ACSLS application.
4. To remove the contents of the ACSLS database backup directory:
rm -rf $ACSDB_BKUP
5. WebLogic and the ACSLS GUI are not removed automatically during a package uninstall for the following reasons:
■ Upgrading ACSLS may not require an upgrade of WebLogic or the ACSLS GUI.
■ Uninstalling WebLogic and the ACSLS GUI removes ACSLS GUI users and their passwords.
■ Uninstalling WebLogic and the ACSLS GUI removes any custom SSL keystore that may have been configured for the ACSLS GUI.
■ Reinstalling WebLogic takes time (five minutes or more) to complete.
If you want to completely remove ACSLS from your system, perform the following steps:
cd $installDir
Uninstalling ACSLS 8.3 on Linux
5-2 Product Title/BookTitle as a Variable
rm -rf Oracle, SSLMuserdel acsssuserdel acssauserdel acsdb
6. Reboot.
Uninstalling any SCSI Media Changer Drivers1. Login as root.
2. Remove the SCSI Media Changer (mchanger) drivers.
#rem_drv mchanger
3. Remove mchanger.conf.
#rm /usr/kernel/drv/mchanger.conf
4. Remove any mchanger device links.
#rm /dev/mchanger*
5. Remove package directories.
#rm -rf /opt/STKchanger
Uninstalling ACSLS 8.3 on Linux1. Log in as acsss.
2. Enter acsss shutdown.
3. Remove package:
■ Log in as root.
■ Enter rpm -e ACSLS-8.3.0-0.i686
The rpm script removes many, but not all ACSLS file systems and it keeps the user accounts in place for acsss, acssa, and acsdb. This approach allows for faster upgrades of ACSLS.
4. To remove the contents of the ACSLS database backup directory:
rm -rf $ACSDB_BKUP
5. WebLogic and the ACSLS GUI are not removed automatically during a package uninstall for the following reasons:
■ Upgrading ACSLS may not require an upgrade of WebLogic or the ACSLS GUI.
■ Uninstalling WebLogic and the ACSLS GUI removes ACSLS GUI users and their passwords.
■ Uninstalling WebLogic and the ACSLS GUI removes any custom SSL keystore that may have been configured for the ACSLS GUI.
■ Reinstalling WebLogic takes time (five minutes or more) to complete.
If you want to completely remove ACSLS from your system, perform the following steps:
cd $installDir
Uninstalling ACSLS 8.3 on Linux
Uninstalling ACSLS 5-3
rm -rf Oracle, SSLMuserdel acsssuserdel acssauserdel acsdb
6. Reboot.

Uninstalling ACSLS 8.3 on Linux
5-4 Product Title/BookTitle as a Variable
A
Configuring an SSL Encryption Key A-1
AConfiguring an SSL Encryption Key
The ACSLS GUI uses the https transport protocol for network transactions between the WebLogic server and client browsers. With https, communication transpires securely using the cryptographic protocol, SSL (now TLS). When a client browser initially contacts the server, a set of keys are exchanged between client and server. These are used to encrypt and decrypt subsequent secure exchanges between the two nodes.
When you install WebLogic on your ACSLS server, a simple 512-bit public key is automatically available to support basic https exchanges with client browsers. Normally, no further configuration should be necessary. However, some browsers, notably the Microsoft Internet Explorer, require a lengthier key of no less than 1024 bits.
This section explains how to create a custom SSL key for your WebLogic server.
1. Generate a keystore database of cryptographic keys.
a. As root user, source the basic acsls environmental variables.
. /var/tmp/acsls/.acsls_env
b. Define keystore parameters:
keyPath=$installDir/Oracle/Middleware/wlserver_10.3/server/libkeyStore=acslsKeyStore.jksmyPw=<enter a desired password here>
c. Generate the public/private encryption key pair and digital certificate. Place them in the keyStore.
keytool -genkeypair -alias selfsigned \-keystore $keyPath/$keyStore -keyalg RSA \-storepass $myPw -validity 7300 -keysize 2048
This produces a certificate valid for 7300 days (20 years) with encryption key that is 2048 bits in length.
The keytool prompts you with the following questions. The answers you give are written to a certificate that can be displayed on a remote browser any time the ACSLS GUI user is asked to confirm the authenticity of the HTTPS connection.
What is your first and last name? [Unknown]: ACSLS Library Server
What is the name of your organizational unit? [Unknown]: Tape Library Services
A-2 Product Title/BookTitle as a Variable
What is the name of your organization? [Unknown]: Our Organization
What is the name of your City or Locality? [Unknown]: Our Town
What is the name of your State or Province? [Unknown]: Our Province?
What is the two-letter country code for this unit? [Unknown]: CA
When prompted for a password, simply press return to use the value for $myPw that you set in step 1-b.
The tool summarizes the parameters you submitted and asks you to confirm (yes/no) that the parameters are correct.
2. Configure WebLogic to use the newly-generated keyStore.
a. Logon to the WebLogic console as ‘acsls_admin' using the acsls_admin password.
http://acsls_server:7001/console
b. From the main page top-left corner of the console page, click the Lock & Edit button.
c. Just below the Lock and Edit button, you see 'Domain Structure'. Select Environment under the 'AcslsDomain'.
d. From the 'Summary of Environment' frame, click Servers.
e. From the 'Summary of Servers', select the Configuration tab and click AdminServer(admin) from the Servers table.
f. From the 'Settings for AdminServer' frame, select Keystores tab.
g. In the Keystores niche, click the Change button and select Custom Identity and Custom Trust. Click Save.
h. In the 'Custom Identity Keystore' text box, enter the path to the keyStore.jks file using the $keyPath/$keyStore values that you defined in step 1-b above. Leave the 'Custom Identity Keystore Type' text box empty.
i. In the 'Custom Identity Keystore Passphrase' text box, enter the password that you defined as $myPw in step 1-b above.
j. Confirm the Custom Identity Keystore Passphrase in the next text box.
k. In the 'Custom Trust Keystore' text box, enter the full path to the acslsKeyStore.jks file using the $keyPath/$keyStore values that you entered in step 2-h. Leave the 'Custom Trust Keystore Type' text box empty.
l. In the 'Custom Trust Keystore Passphrase' text box, enter the same password you defined in step 2-i. Enter confirmation of that password in the remaining text box.
m. Click Save. Observe the verification message at the top of the page.
n. Select SSL tab in the 'Settings for Administrator' frame.
o. In 'Identity and Trust Locations' make sure that 'Keystores' is selected. Click Change to correct the setting if necessary.
Configuring an SSL Encryption Key A-3
p. In the 'Private Key Alias' text box, enter selfsigned.
q. In the 'Private Key Passphrase' text box, enter the same password you defined as $myPw in step 1-b above. Confirm using the same password in the remaining text box.
r. Click Save. Look for the green verification message at the top of the page.
s. Click the Activate Changes button in the top-left corner of the page. Observe the verification message at the top of the page.

A-4 Product Title/BookTitle as a Variable
Index-1
Index
AACSLS
removing backup files, 2-4
Bbrowser requirements, 1-3
Cco-hosting, 1-3
EExporting the database, 2-1
IInstalling Solaris, 2-2
LLinux
exporting database and control files, 3-4installation media, 3-4installing ACSLS 8.3, 3-6installing Linux, 3-5preliminary notes, 3-1running install.sh, 3-7
Ssoftware requirements, 1-1Solaris
exporting the database and control files, 2-1removing previous version, 2-3
SSL encryption keyconfiguring, A-1
system requirements, 1-2

Index-2