Embed Size (px)
Citation preview
WHERE YOURBACKER BELONGS
DENSSHIELD and the GEORGIA-PACIFIC logo are trademarks owned by or licensed to GP Gypsum. DUROCK is a trademark owned by U.S. Gypsum Company. HARDIBACKER and MOLDBLOCK are trademarks owned by James Hardie. ©2018 GP Gypsum. All rights reserved. 1/18 Lit #622922
Superior stopping power.Built to fight moisture and humidity.
KITCHEN• Backsplash • Walls • Countertops
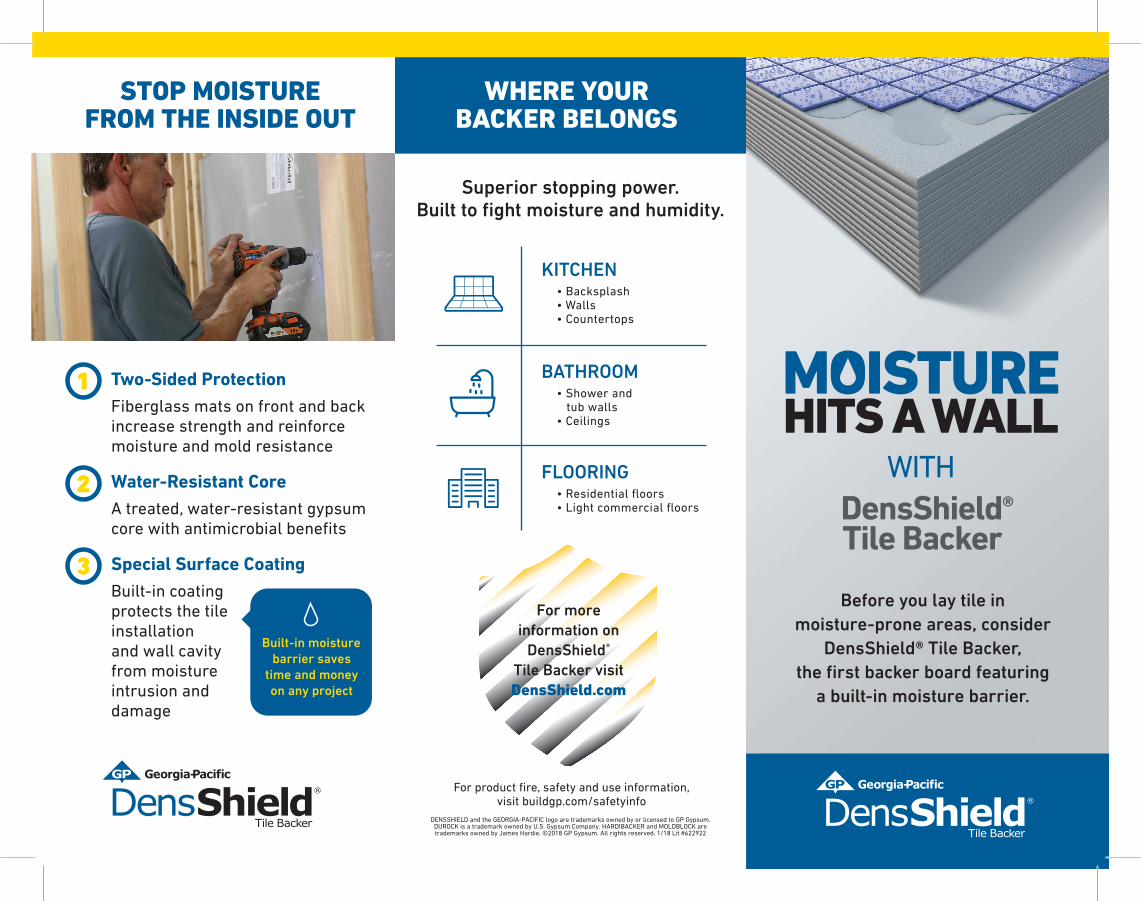
Two-Sided ProtectionFiberglass mats on front and back increase strength and reinforce moisture and mold resistance
Water-Resistant CoreA treated, water-resistant gypsum core with antimicrobial benefits
Special Surface CoatingBuilt-in coating protects the tile installationand wall cavity from moisture intrusion and damage
DensShield®Tile Backer
STOP MOISTUREFROM THE INSIDE OUT
Before you lay tile in moisture-prone areas, consider
DensShield® Tile Backer,the first backer board featuring
a built-in moisture barrier.
WITH
1
2
3
BATHROOM• Shower and tub walls• Ceilings
FLOORING• Residential floors • Light commercial floors
Built-in moisture barrier saves
time and money on any project
For product fire, safety and use information,visit buildgp.com/safetyinfo
For moreinformation on
DensShield®
Tile Backer visit DensShield.com
■ Position DensShield® Tile Backer panel next to framing with the grey coated face away from studs. Score panel with utility knife to required size and snap.
■ Install either parallel or perpendicular to framing for both wall and ceiling applications.
■ Fit ends and edges closely.
NOT ALL TILE BACKERS PERFORM THE SAME THREE EASY STEPSTO INSTALL
■ Fasteners should be spaced 6” (152mm) on center for walls and ceilings.
■ Drive fasteners flush with coated surface. Do not countersink.
■ Fit ends and edges closely.■ DensShield® Tile Backer
has a built-in moisture barrier – no additional moisture barrier required.
■ Caulk corners and edges prior to addition of 2”(51mm) fiberglass mesh tape in skim coat of tile setting material.
■ Seal penetrations and abutments to dissimilar materials.
1
2
3
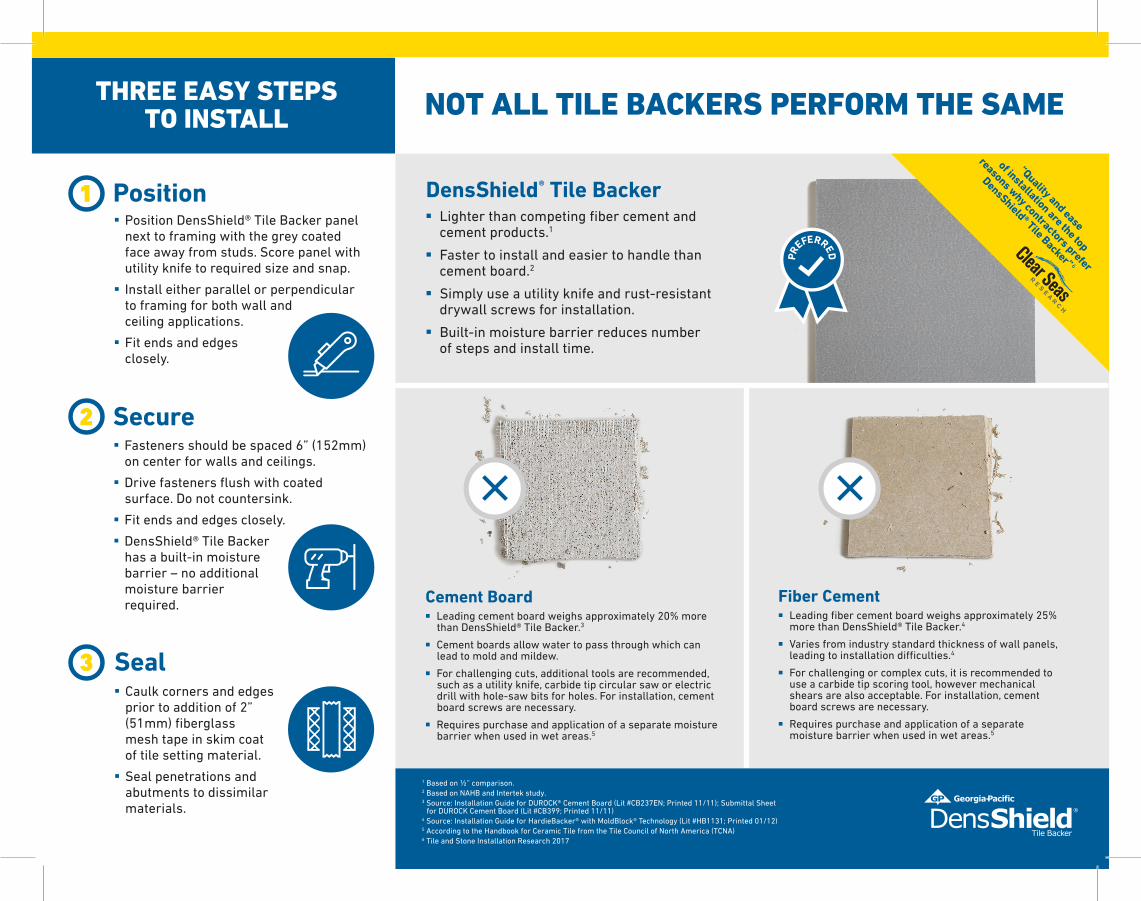
DensShield® Tile Backer■ Lighter than competing fiber cement and
cement products.1
■ Faster to install and easier to handle than cement board.2
■ Simply use a utility knife and rust-resistant drywall screws for installation.
■ Built-in moisture barrier reduces numberof steps and install time.
Position
Secure
Seal
Cement Board■ Leading cement board weighs approximately 20% more
than DensShield® Tile Backer.3
■ Cement boards allow water to pass through which can lead to mold and mildew.
■ For challenging cuts, additional tools are recommended, such as a utility knife, carbide tip circular saw or electric drill with hole-saw bits for holes. For installation, cement board screws are necessary.
■ Requires purchase and application of a separate moisture barrier when used in wet areas.5
Fiber Cement■ Leading fiber cement board weighs approximately 25%
more than DensShield® Tile Backer.4
■ Varies from industry standard thickness of wall panels, leading to installation di�culties.4
■ For challenging or complex cuts, it is recommended to use a carbide tip scoring tool, however mechanical shears are also acceptable. For installation, cement board screws are necessary.
■ Requires purchase and application of a separate moisture barrier when used in wet areas.5
“Quality and ease
of installation are the top
reasons why contractors prefer
DensShield® Tile Backer” 6
PR
EFERRED
1 Based on ½” comparison.2 Based on NAHB and Intertek study.3 Source: Installation Guide for DUROCK® Cement Board (Lit #CB237EN; Printed 11/11); Submittal Sheet
for DUROCK Cement Board (Lit #CB399; Printed 11/11)4 Source: Installation Guide for HardieBacker® with MoldBlock® Technology (Lit #HB1131; Printed 01/12)5 According to the Handbook for Ceramic Tile from the Tile Council of North America (TCNA)6 Tile and Stone Installation Research 2017


![DensShield® Tile Backer Installation Instructions...DensShield® Tile Backer is lighter and easier to install than leading cement and fiber cement board brands (1⁄29 [12.7 mm] comparison).DensShield](https://img.pdfslide.us/doc/110x75/5e661539043bb2395a76015e/densshield-tile-backer-installation-instructions-densshield-tile-backer.jpg)