Embed Size (px)
Citation preview
Step 6.8
Step 6.9
TETRIX® PRIME Expansion Crane Bot Assembly 229
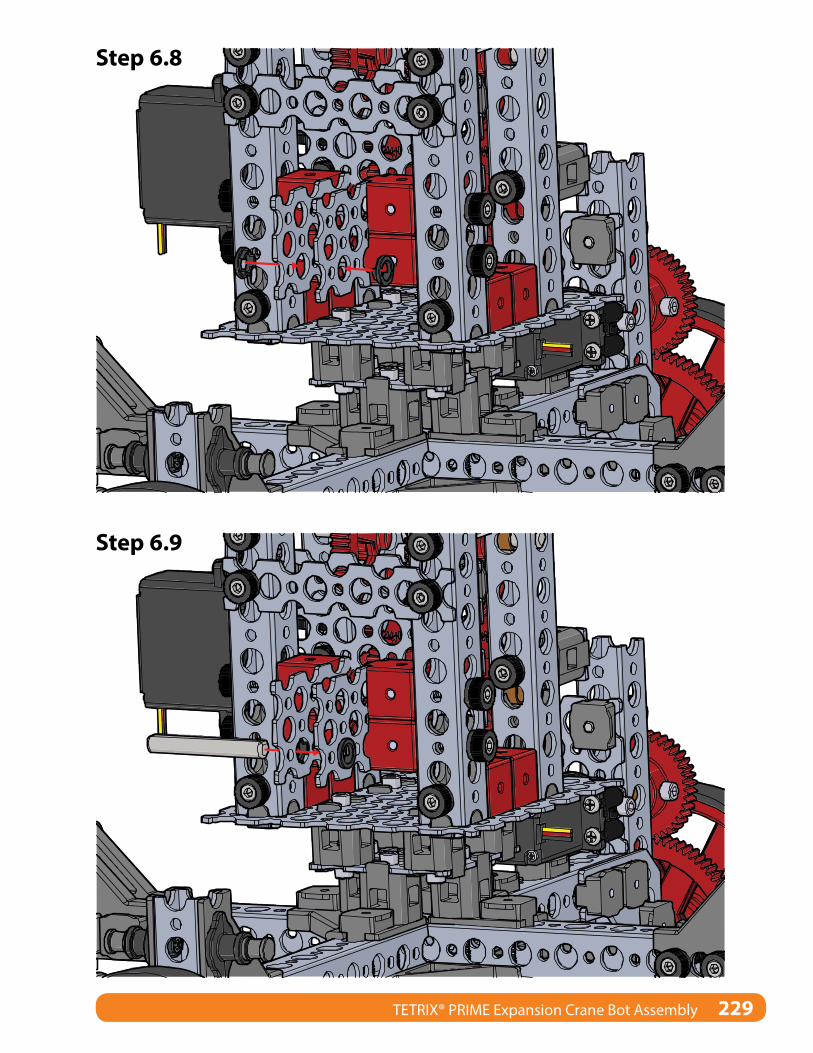
Step 6.10
Detail
230 TETRIX® PRIME Expansion Crane Bot Assembly
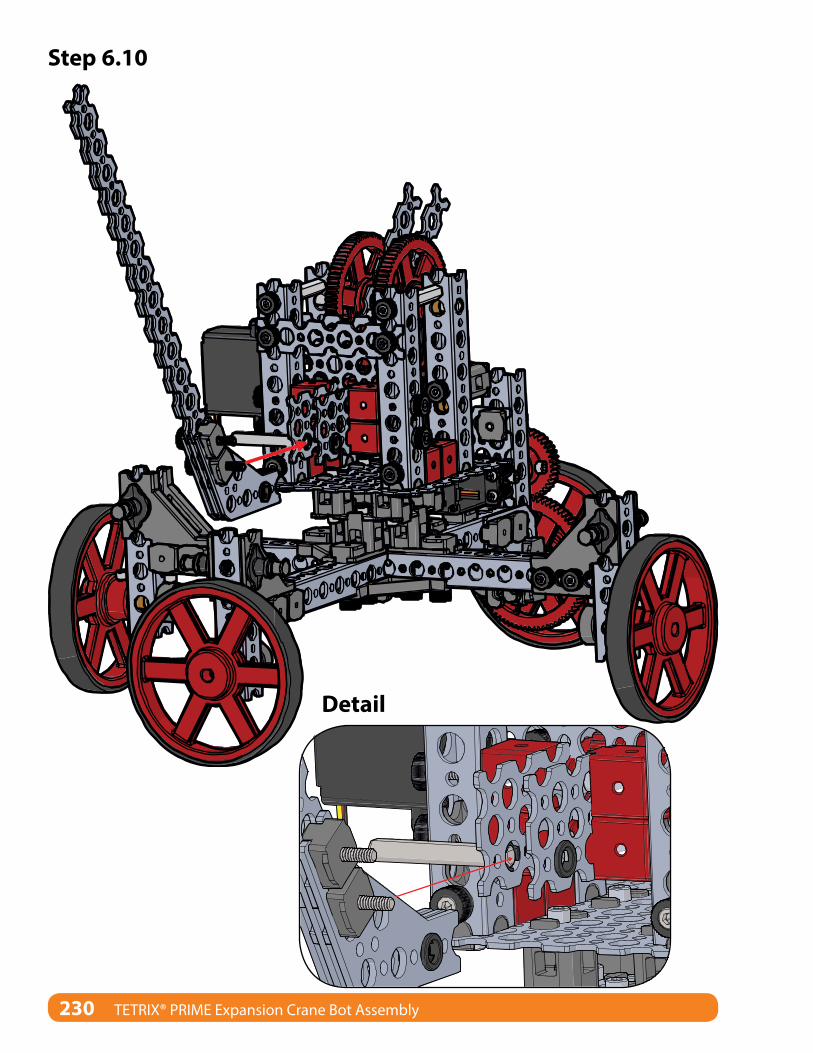
Step 6.11
Step 6.12
TIP: Don’t forget to tighten the Socket Head Cap Screw after positioning the axle.
TETRIX® PRIME Expansion Crane Bot Assembly 231
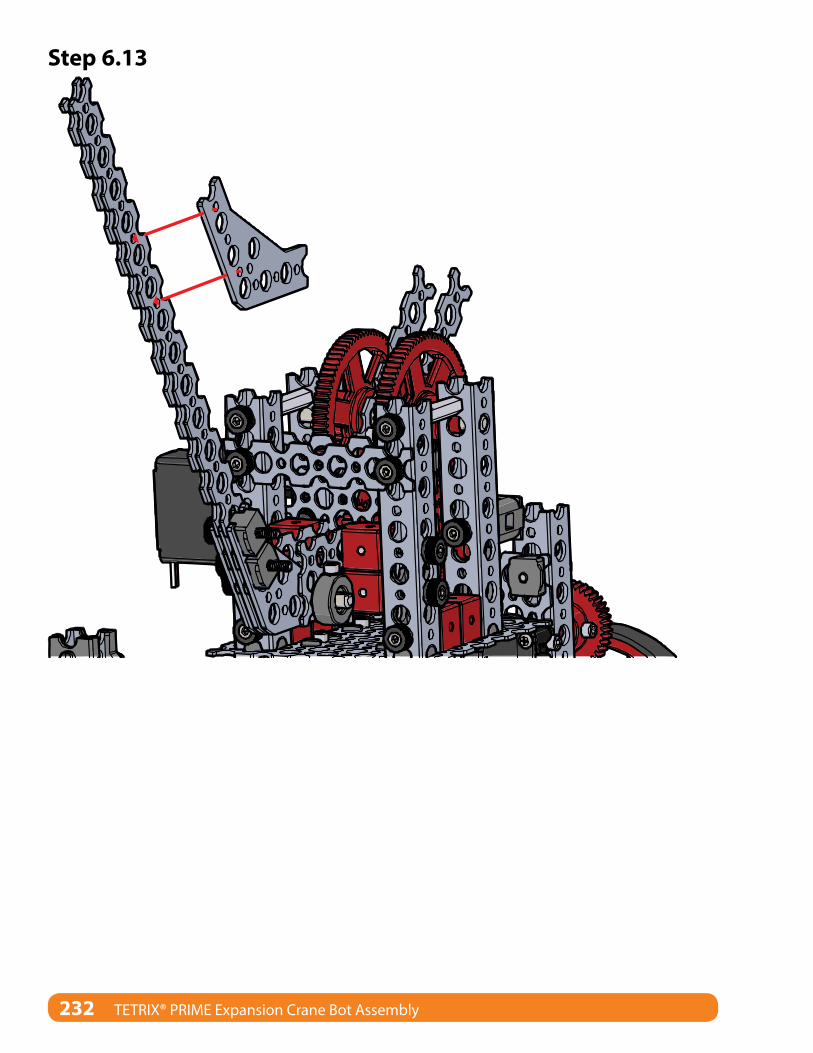
Step 6.13
232 TETRIX® PRIME Expansion Crane Bot Assembly
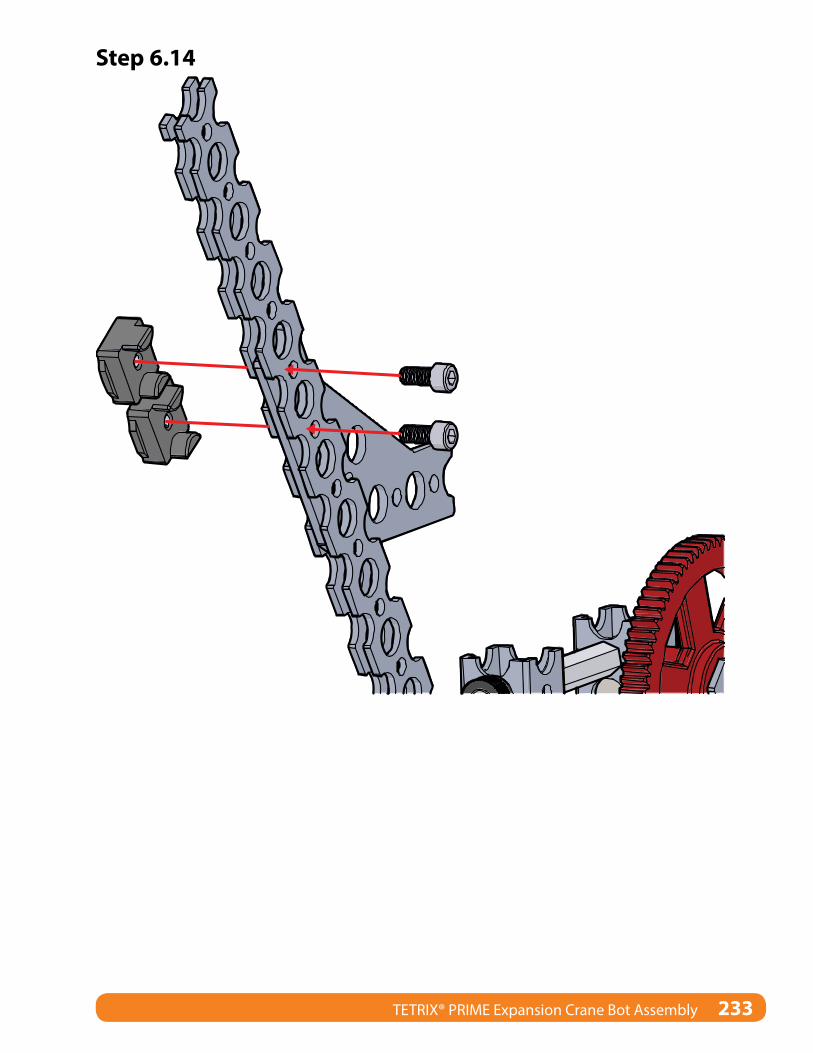
Step 6.14
TETRIX® PRIME Expansion Crane Bot Assembly 233
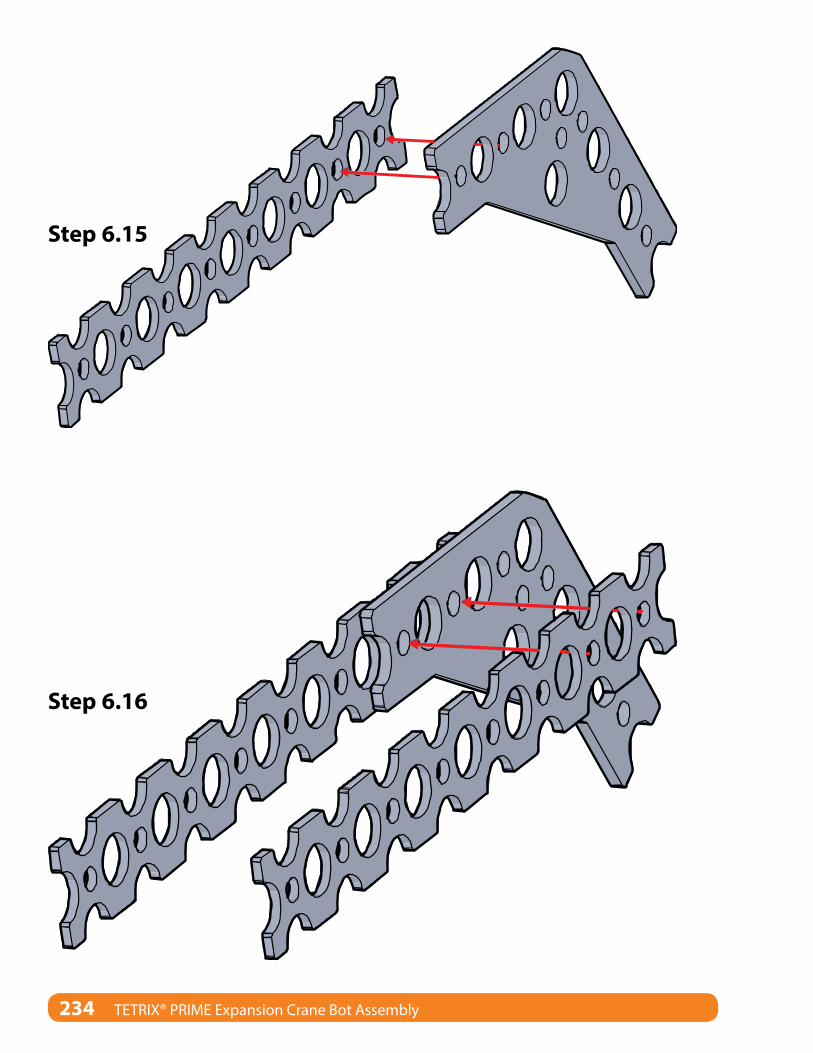
Step 6.15
Step 6.16
234 TETRIX® PRIME Expansion Crane Bot Assembly
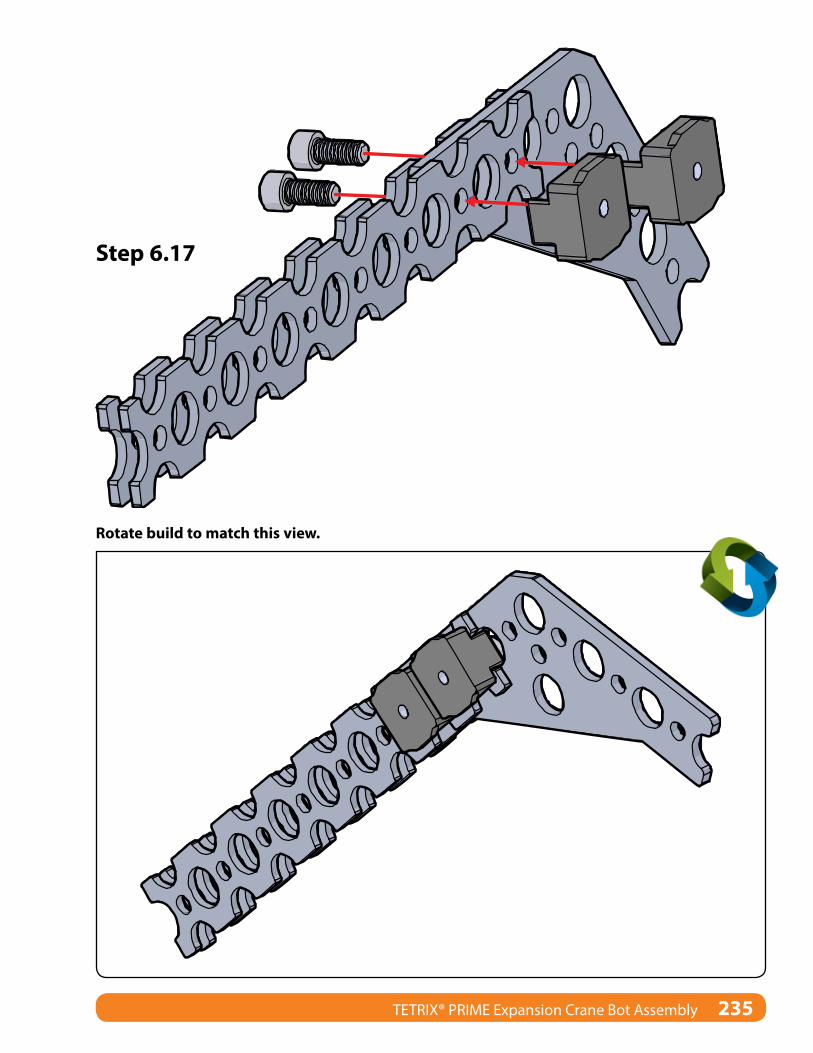
Step 6.17
Rotate build to match this view.
TETRIX® PRIME Expansion Crane Bot Assembly 235
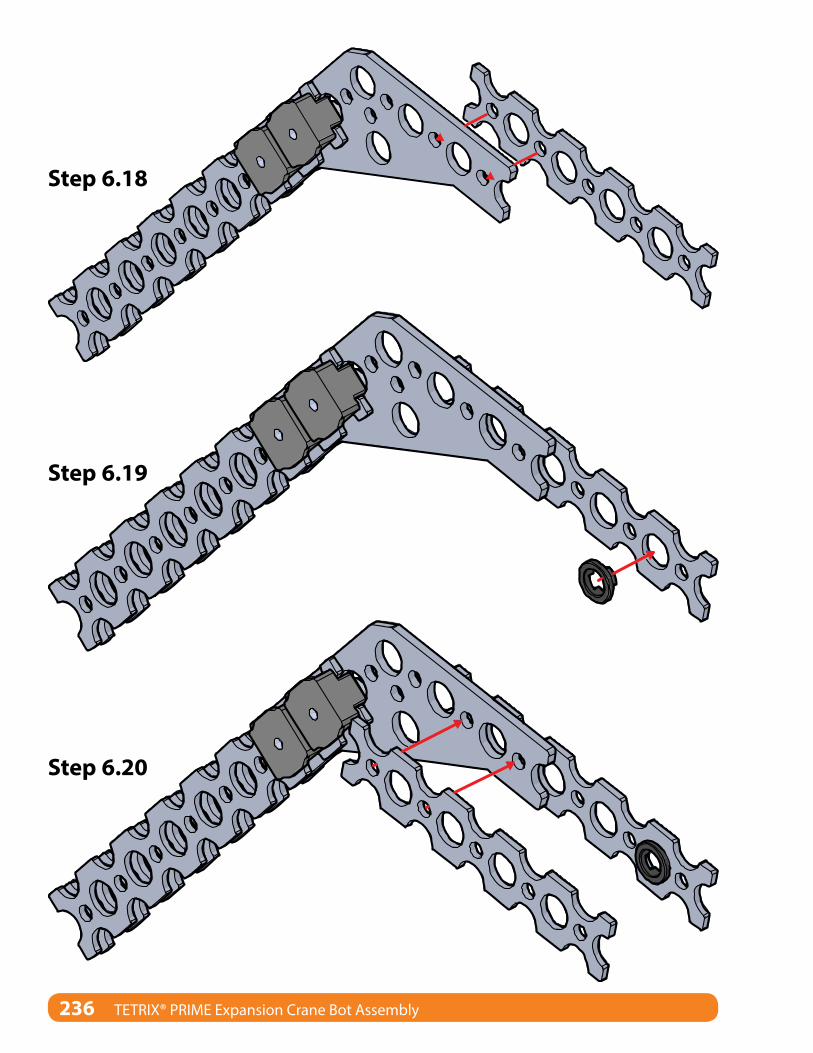
Step 6.18
Step 6.19
Step 6.20
236 TETRIX® PRIME Expansion Crane Bot Assembly
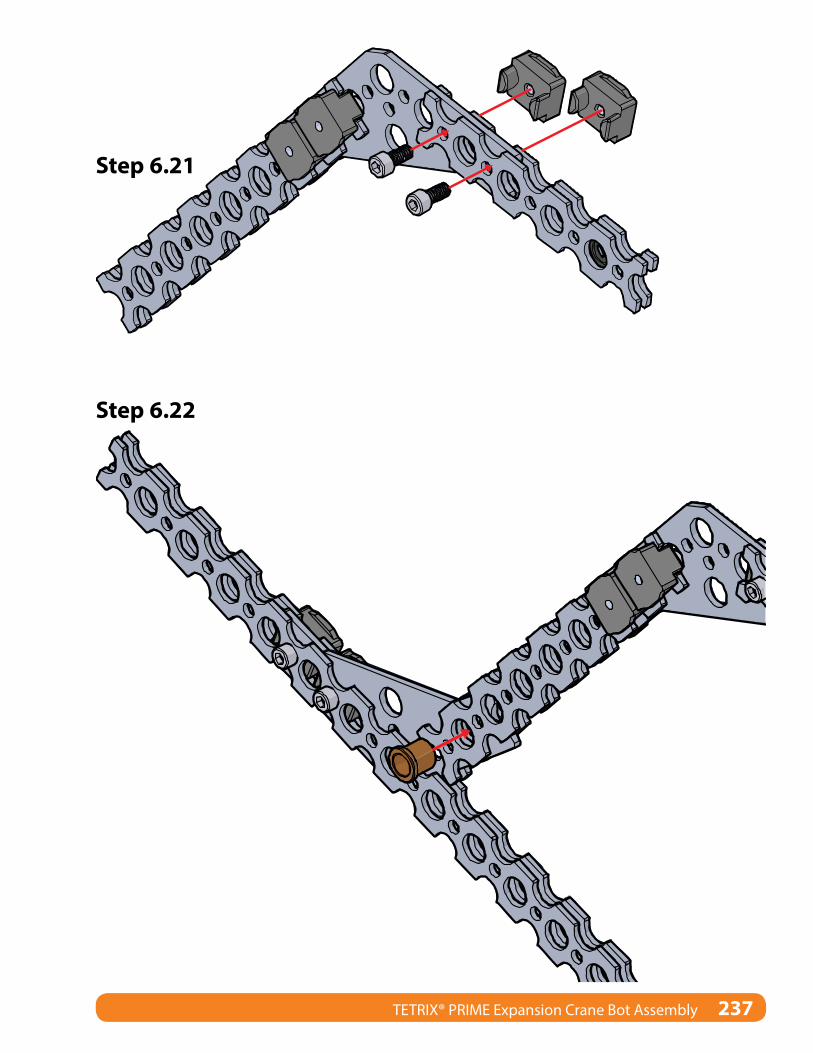
Step 6.21
Step 6.22
TETRIX® PRIME Expansion Crane Bot Assembly 237
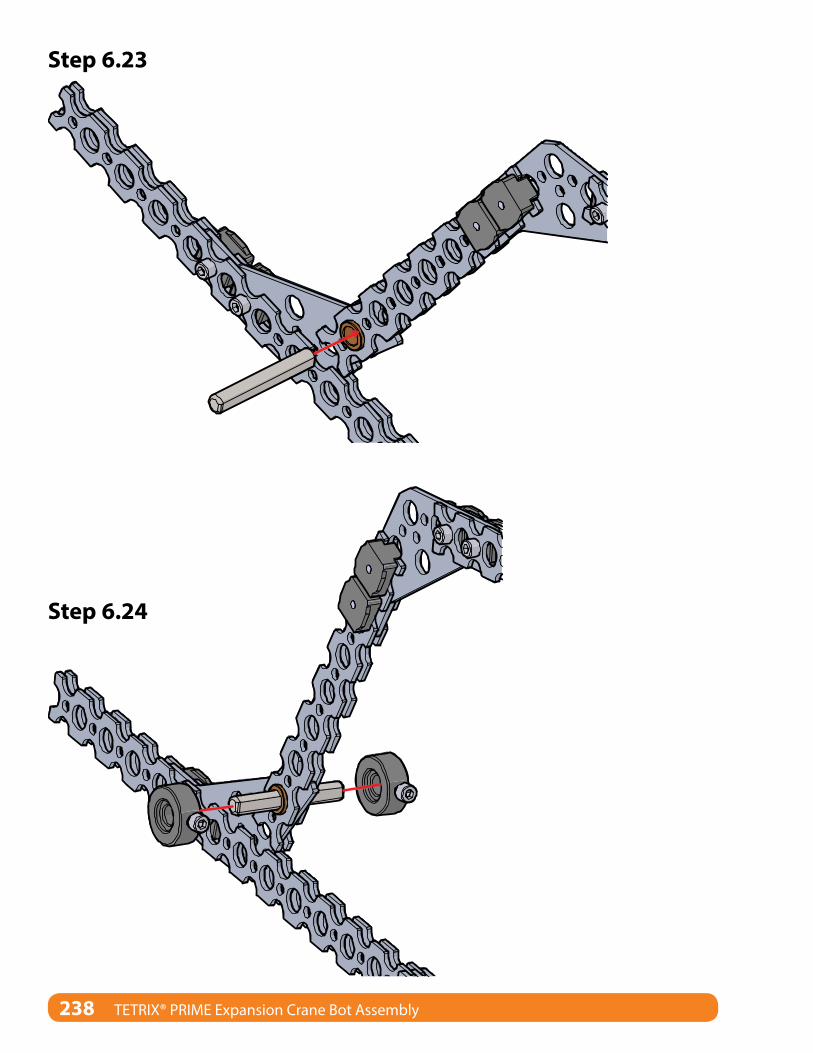
Step 6.23
Step 6.24
238 TETRIX® PRIME Expansion Crane Bot Assembly
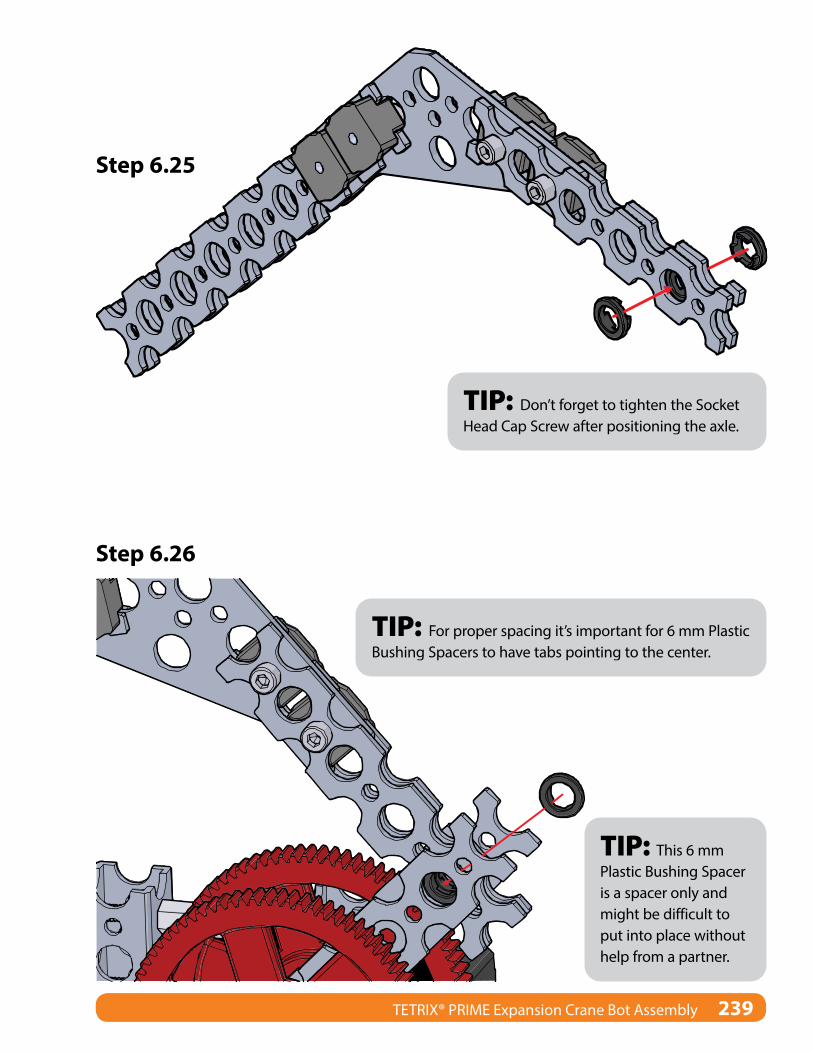
Step 6.25
Step 6.26
TIP: For proper spacing it’s important for 6 mm Plastic Bushing Spacers to have tabs pointing to the center.
TIP: This 6 mm Plastic Bushing Spacer is a spacer only and might be difficult to put into place without help from a partner.
TIP: Don’t forget to tighten the Socket Head Cap Screw after positioning the axle.
TETRIX® PRIME Expansion Crane Bot Assembly 239
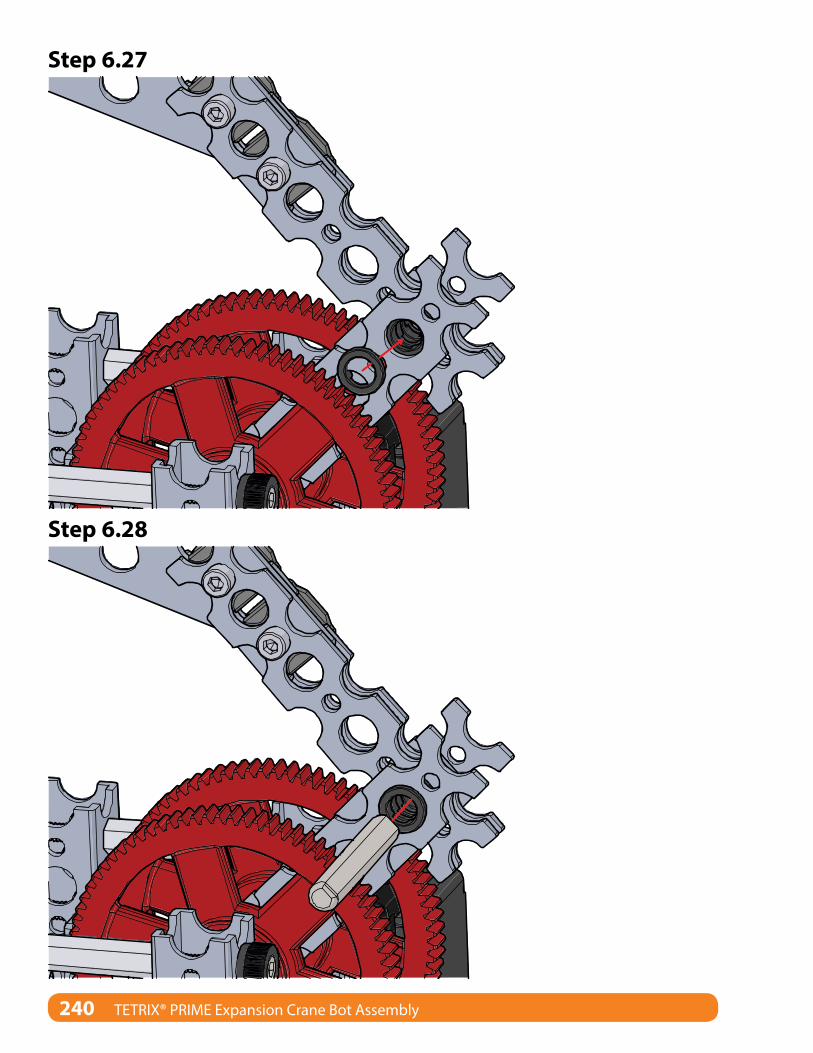
Step 6.27
Step 6.28
240 TETRIX® PRIME Expansion Crane Bot Assembly
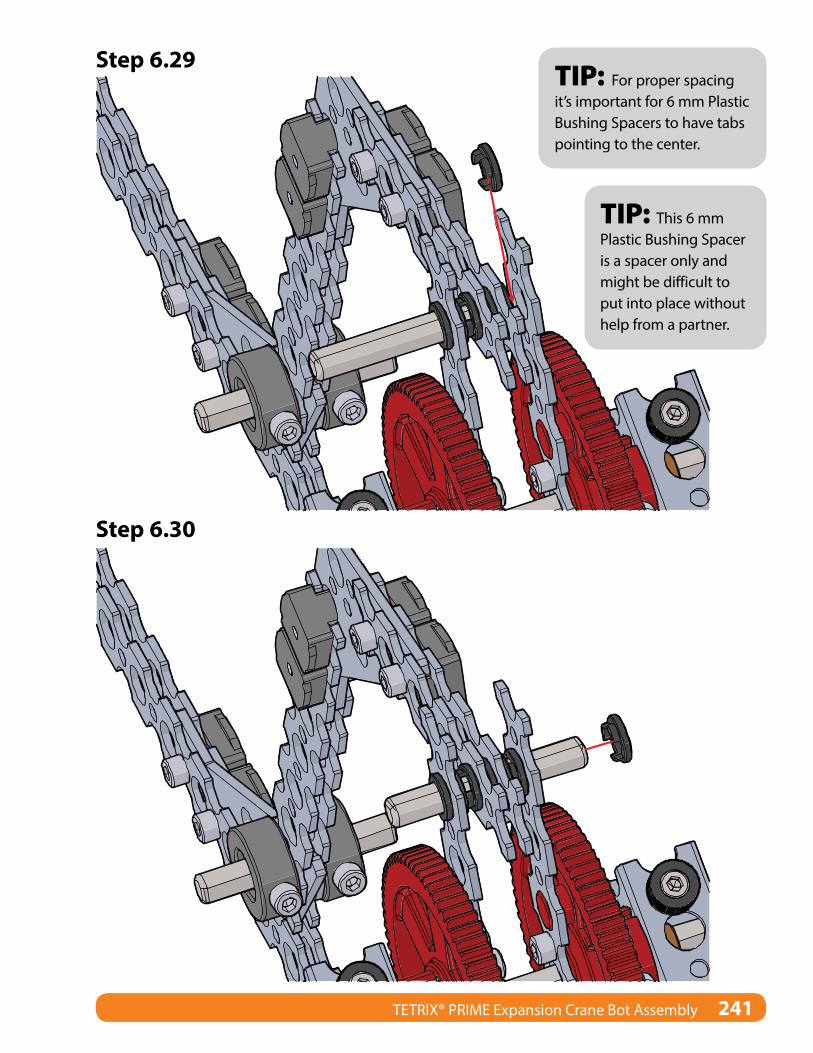
Step 6.29
Step 6.30
TIP: For proper spacing it’s important for 6 mm Plastic Bushing Spacers to have tabs pointing to the center.
TIP: This 6 mm Plastic Bushing Spacer is a spacer only and might be difficult to put into place without help from a partner.
TETRIX® PRIME Expansion Crane Bot Assembly 241
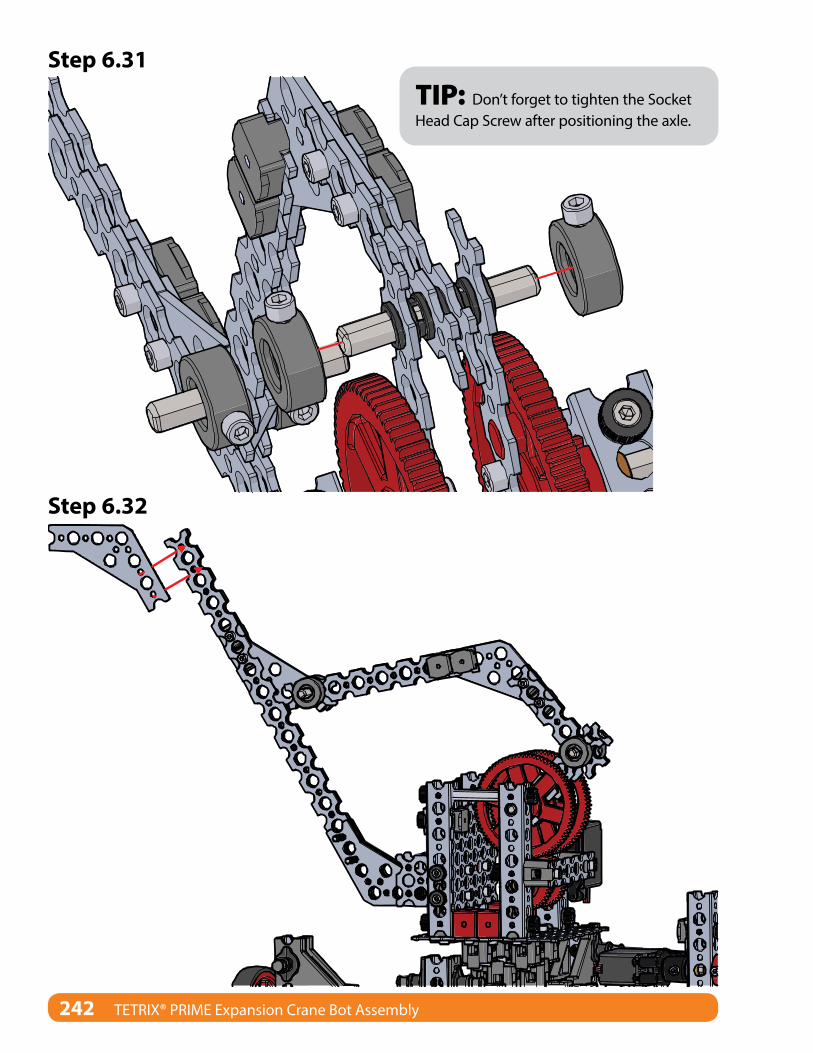
Step 6.31
Step 6.32
TIP: Don’t forget to tighten the Socket Head Cap Screw after positioning the axle.
242 TETRIX® PRIME Expansion Crane Bot Assembly
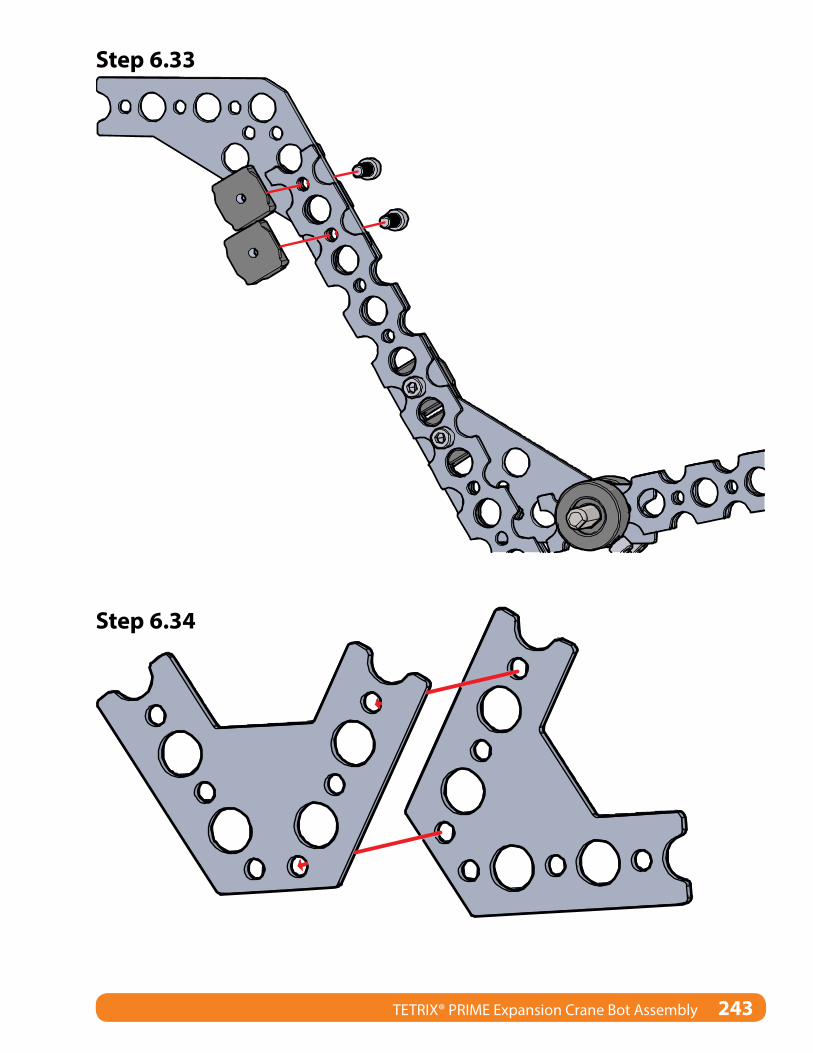
Step 6.33
Step 6.34
TETRIX® PRIME Expansion Crane Bot Assembly 243
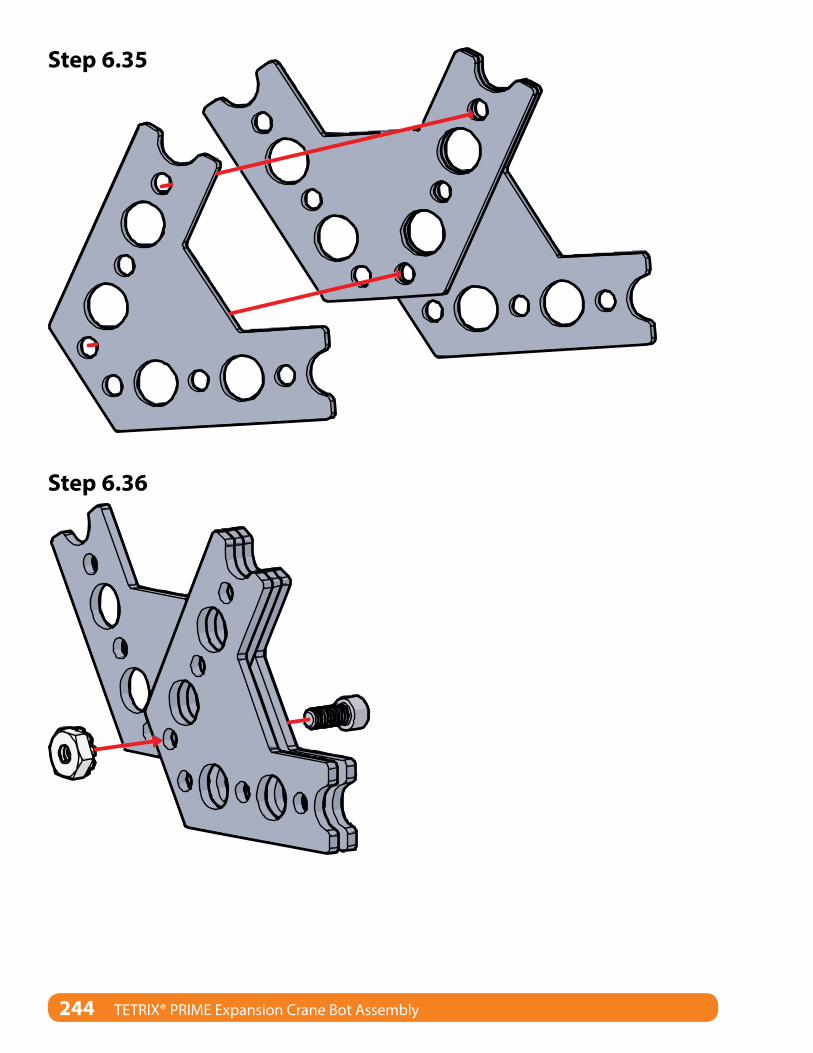
Step 6.35
Step 6.36
244 TETRIX® PRIME Expansion Crane Bot Assembly
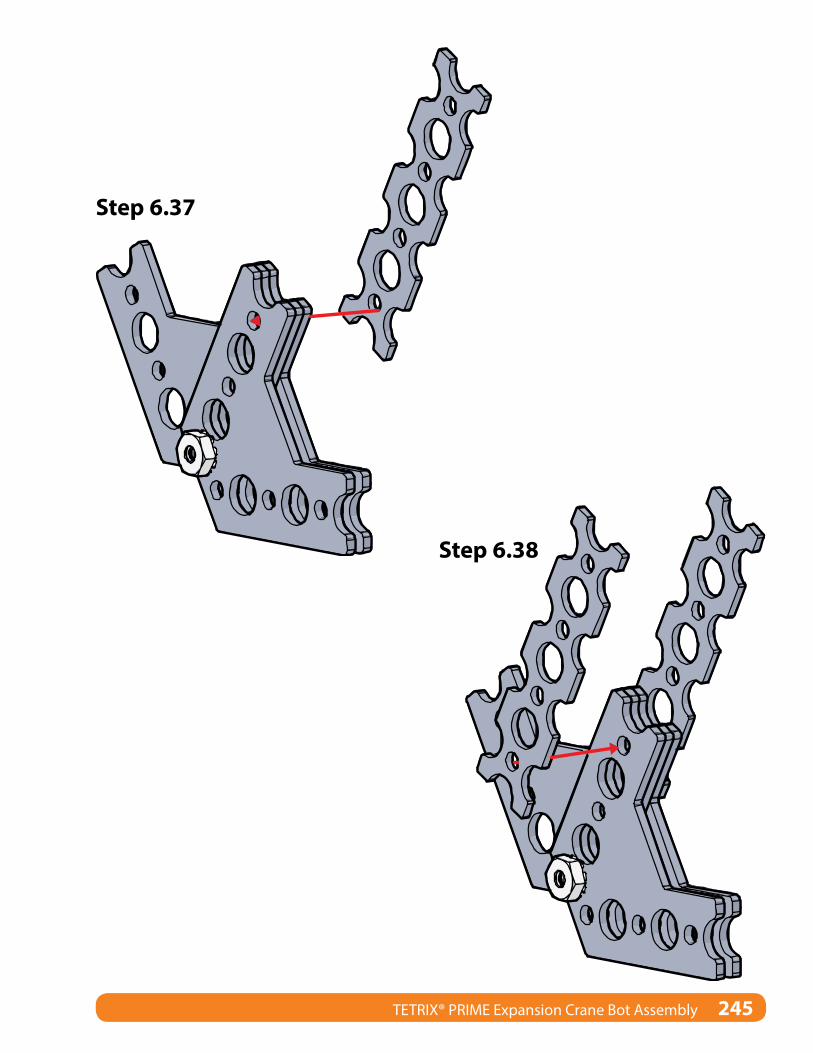
Step 6.37
Step 6.38
TETRIX® PRIME Expansion Crane Bot Assembly 245
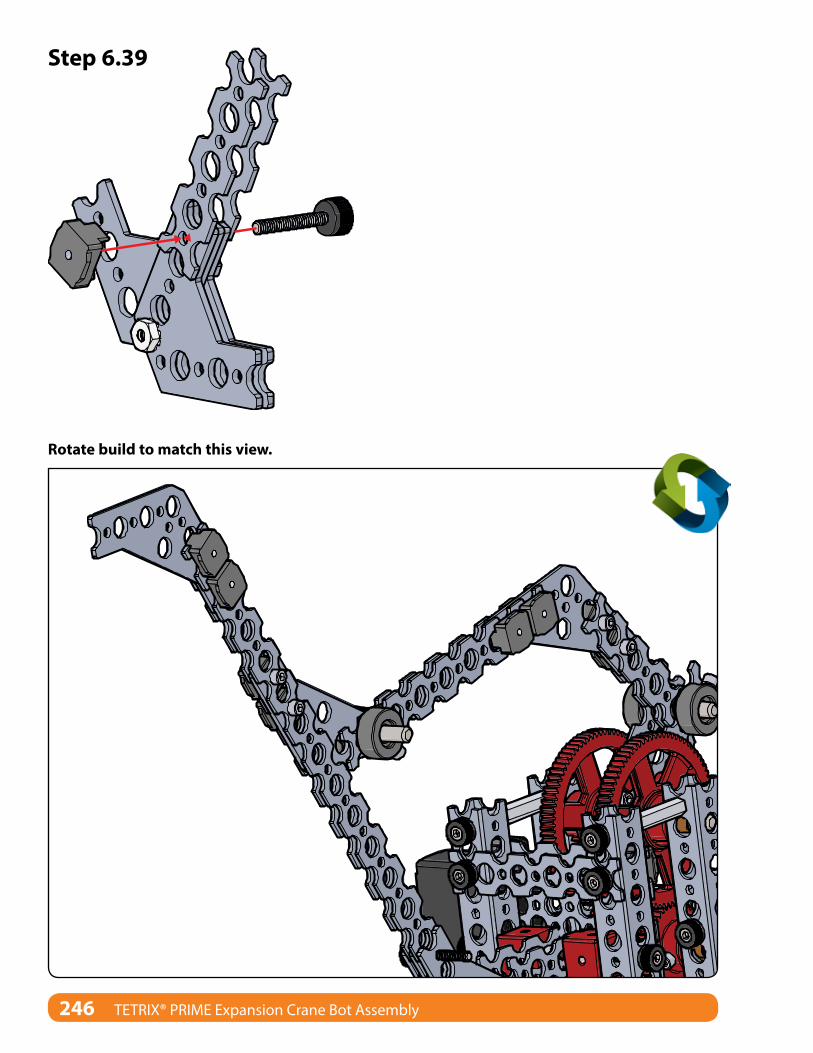
Step 6.39
Rotate build to match this view.
246 TETRIX® PRIME Expansion Crane Bot Assembly
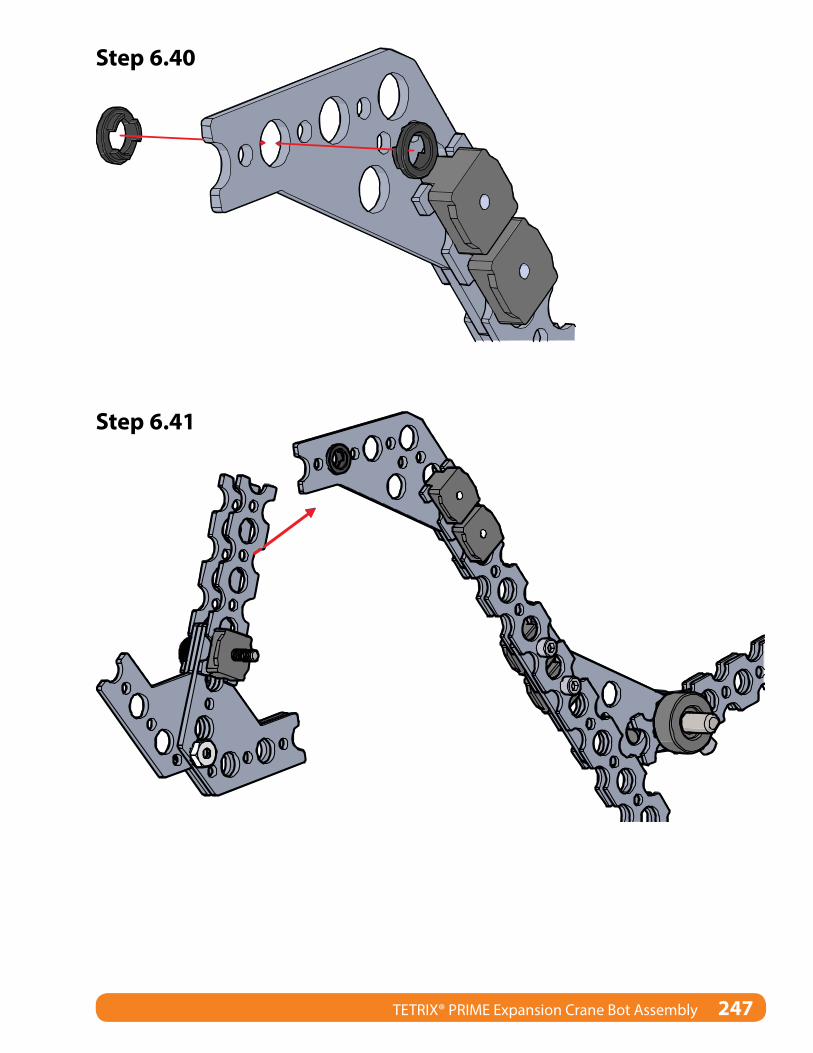
Step 6.40
Step 6.41
TETRIX® PRIME Expansion Crane Bot Assembly 247
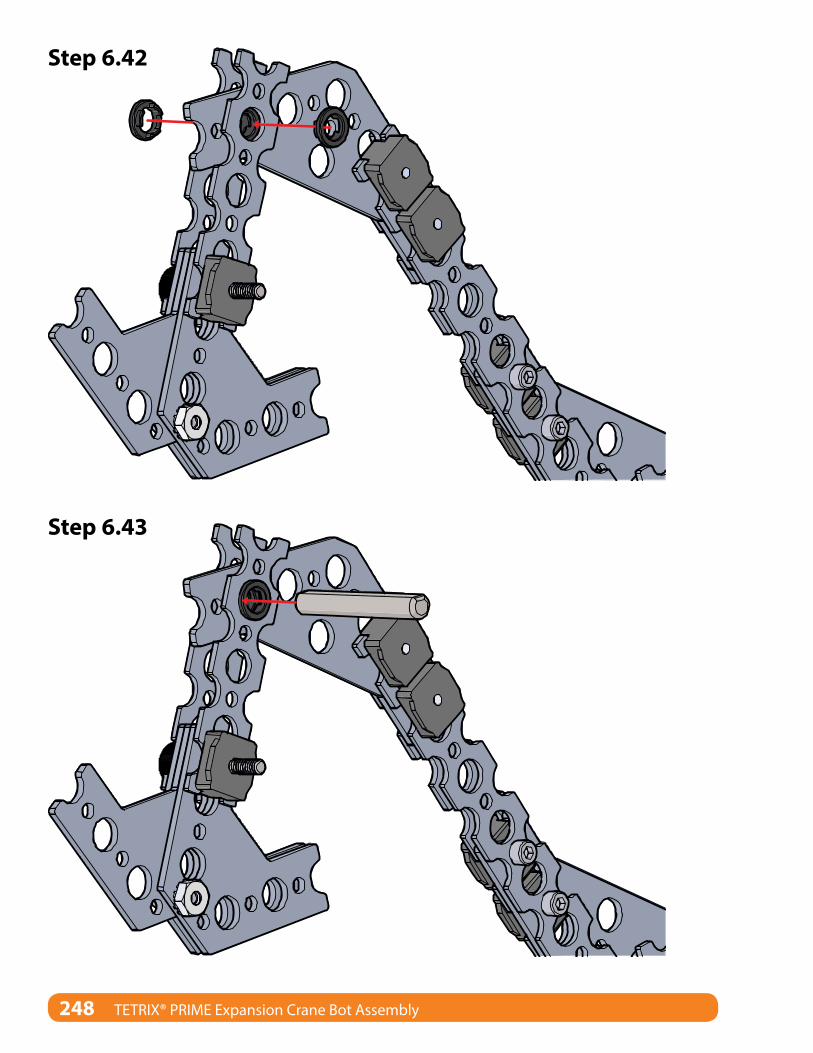
Step 6.42
Step 6.43
248 TETRIX® PRIME Expansion Crane Bot Assembly
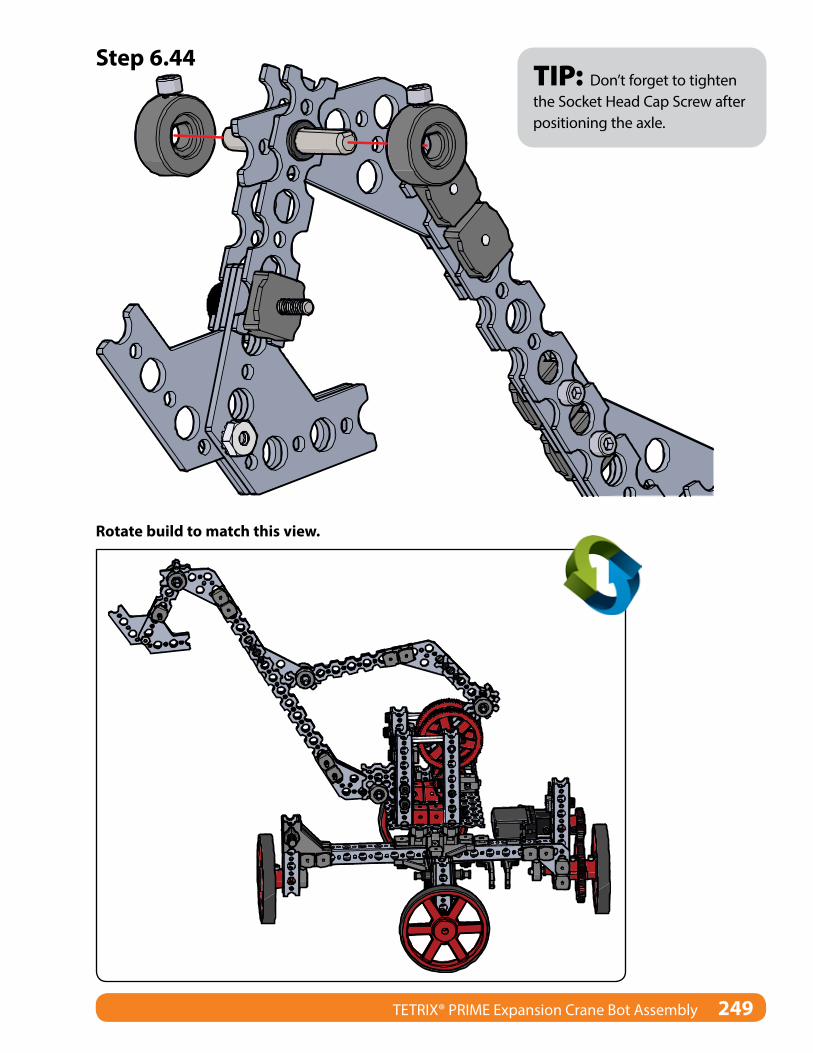
Step 6.44
Rotate build to match this view.
TIP: Don’t forget to tighten the Socket Head Cap Screw after positioning the axle.
TETRIX® PRIME Expansion Crane Bot Assembly 249
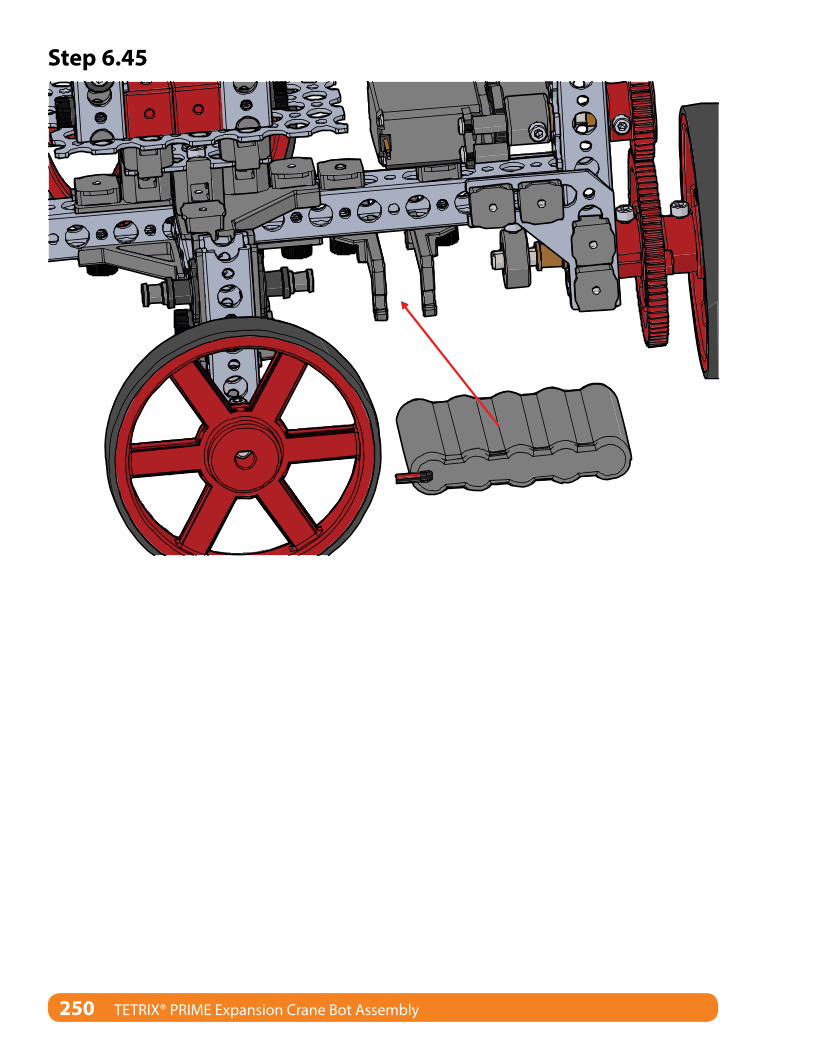
Step 6.45
250 TETRIX® PRIME Expansion Crane Bot Assembly
TETRIX PRIME Expansion Crane Bot ActivitiesFinal Connections:After you’ve installed the battery with the Battery Mount Bracket, you are ready to connect the servo motors to the wireless receiver.
Secure the receiver and wires so they do not become entangled in any moving parts. Connect the battery to the BAT connection on the receiver. Connect the CR servo from the base wheel to Channel 4 of the wireless receiver. Connect the CR servo from the lift arm to Channel 3 of the wireless receiver. Turn on the Wireless Joystick Gamepad System and test operation of the Crane Bot. Remember to keep fingers and wires away from all gears and levers while in motion. If the motion of the bot does not correspond to joystick input, either change channels for the servos or use the 4-in-1 Screwdriver to adjust the position of the DIP switches on the gamepad. If necessary, use the trimmer controls to adjust servo movement or position when the joysticks are in the neutral position.
Don’t forget to reference page 16 for complete instructions on setting up the Wireless Joystick Gamepad System and configuring input to personal preferences.
Sample Activities:• Construction is over. Now, it’s time to operate the Crane Bot. Have fun familiarizing yourself with how the
Crane Bot performs.
• The Crane Bot is modeled after real-life crane mechanisms. One of the main jobs cranes perform for us is picking up and moving loads from one location to another. Create a pick-and-place activity by modifying the activity cups with pipe cleaner handles and practicing picking them up from one level and moving them to a different level within the field of influence of the Crane Bot arm. How large of a field of influence does the arm cover? Because the arm is a fixed length with a fixed hook mechanism, does the field of influence change at different heights?
• The lifting arm of the Crane Bot functions as a simple machine lever. Can you identify the parts of the lever that help classify which type of lever it is? Where is the fulcrum? Where is the load and where is the work being applied?
• Determine how much weight the Crane Bot can lift. We can use the pipe cleaner-modified activity cups as a changeable weight to test the lifting capacity. Start by weighing the empty cup to establish a baseline and then gradually add dry components to the cup, weighing each attempt until the Crane Bot can no longer lift the cup.
• After you’ve established the lifting capacity in the current configuration, discuss how the model can be modified to increase its lifting capacity without changing the class of lever. With the permission of the instructor, modify your model to test your ideas and see how much weight you can lift.
• Take inspiration from real life. What are some design concepts used in real life that you could implement on your crane to create a more efficient machine? With the permission of the instructor, begin an open-ended building challenge to create the most efficient crane-type lifting machine that you can.
Don’t forget to document your efforts, and remember the engineering design process.
TIP: The extra Steel Axles can make good incremental weights as long as they don’t tip over the cup.
TETRIX® PRIME Expansion Crane Bot Activities 251