Embed Size (px)
Citation preview
SCCM Office 2019 Deployment – Office 365 Client Installation Wizard
So the good news is we can create SCCM Office 2019 deployment now using Office 365 client installation wizard. Office 2019 uses only click-to-run installation technology. Office 2019 was not available for deployment via client installation wizard. But now we should find Office 2019 under Products section in Office 365 client installation wizard. If you don’t want to use customization tool, you can either download an ISO through VLSC or use the Office Deployment Tool.
In this post we will create SCCM office 2019 deployment. The advantage of deploying Office 2019 using client installation wizard are many. You can customize a lot of settings as per your requirement and at the end the tool creates configuration file. Therefore if you are planning to deploy Office 2019 to an entire organization, this post covers the easy steps to do that. Hopefully it will useful for our environment.
Step 1 – Create SCCM Office 2019 DeploymentFirst of all we will create SCCM Office 2019 deployment. Open the SCCM console and go to Software Library > Overview > Office 365 Client Management. Click Office 365 Installer and this will bring up Microsoft Office 365 client installation wizard. Under Application Settings, specify the name of application and content location. Click Next.
Step 2 – Using Office Customization ToolOn Office Settings page, click Go to the Office Customization Tool.
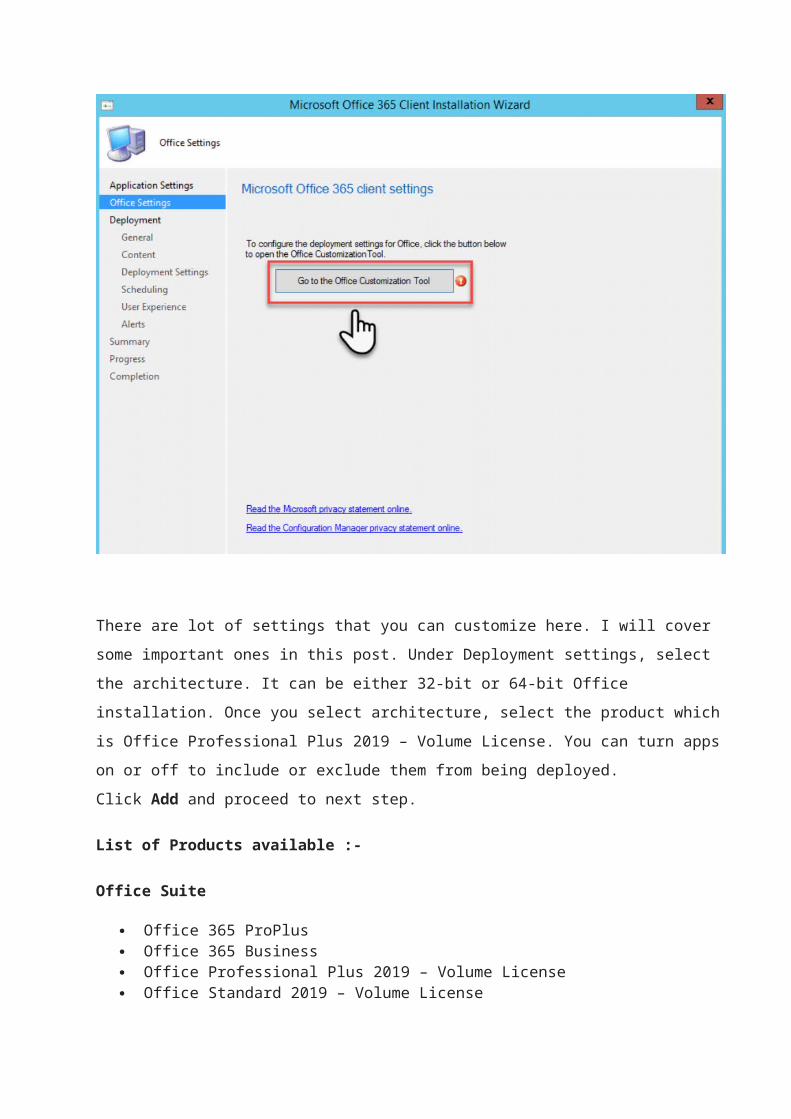
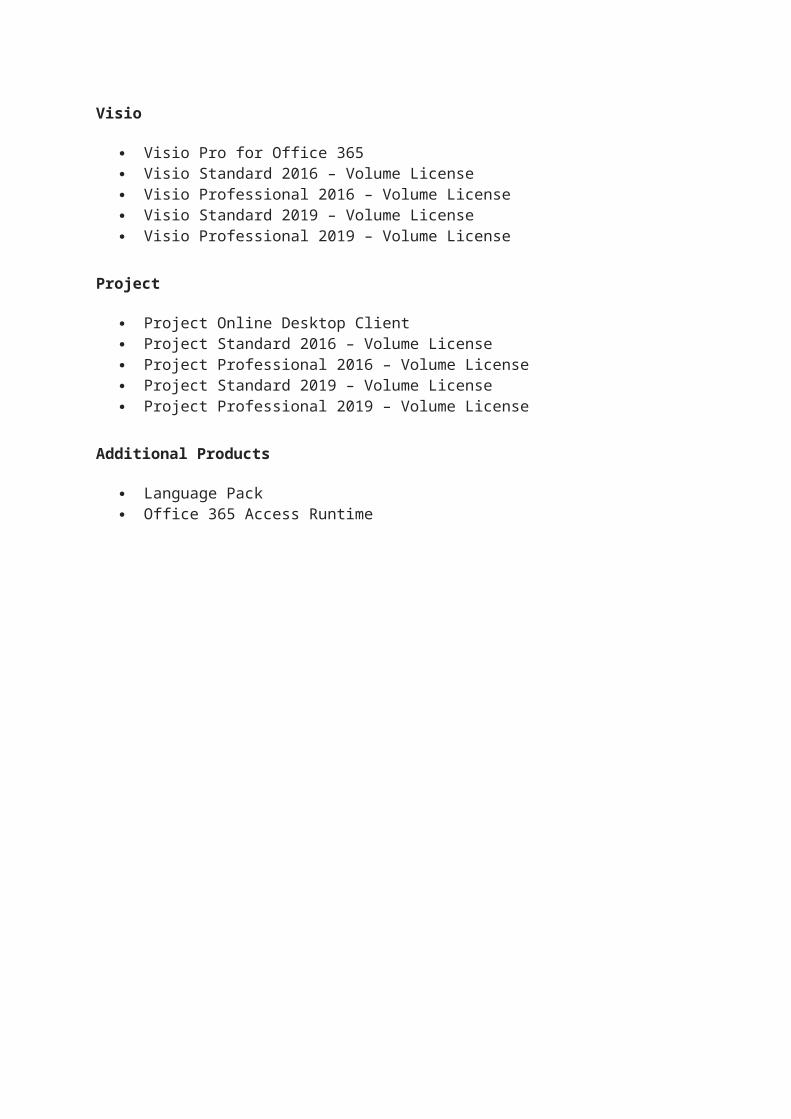
There are lot of settings that you can customize here. I will cover some important ones in this post. Under Deployment settings, select the architecture. It can be either 32-bit or 64-bit Office installation. Once you select architecture, select the product which is Office Professional Plus 2019 – Volume License. You can turn apps on or off to include or exclude them from being deployed. Click Add and proceed to next step.
List of Products available :-
Office Suite
Office 365 ProPlus Office 365 Business Office Professional Plus 2019 – Volume License Office Standard 2019 – Volume License
Visio
Visio Pro for Office 365 Visio Standard 2016 – Volume License Visio Professional 2016 – Volume License Visio Standard 2019 – Volume License Visio Professional 2019 – Volume License
Project
Project Online Desktop Client Project Standard 2016 – Volume License Project Professional 2016 – Volume License Project Standard 2019 – Volume License Project Professional 2019 – Volume License
Additional Products
Language Pack Office 365 Access Runtime
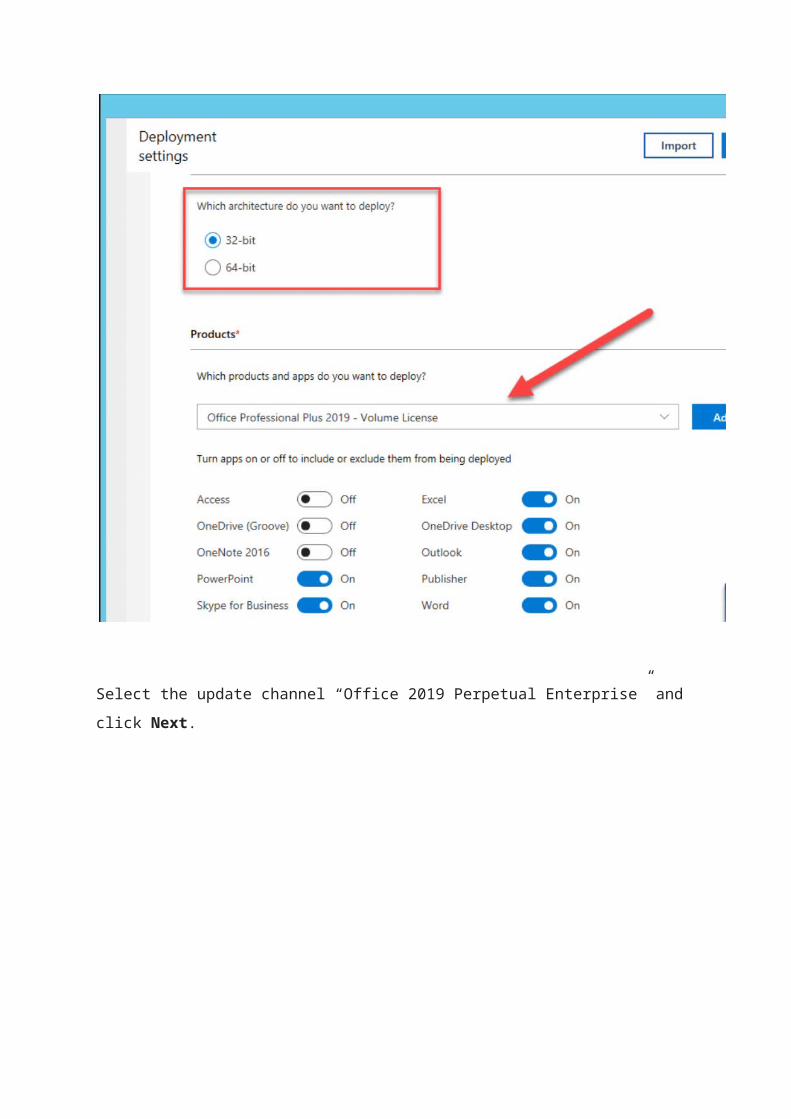
Select the update channel “Office 2019 Perpetual Enterprise” and click Next.
You can select the primary language and additional languages. Click Next.
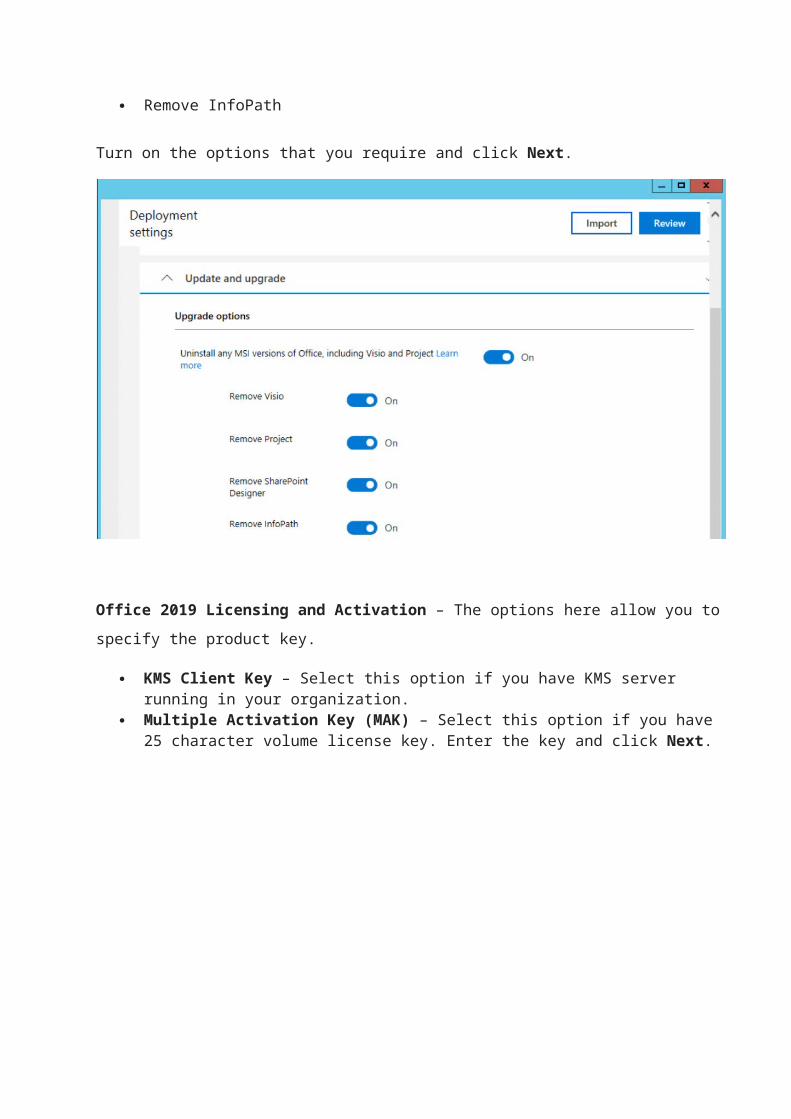
Upgrade Options – The settings allow to uninstall the older version of apps.
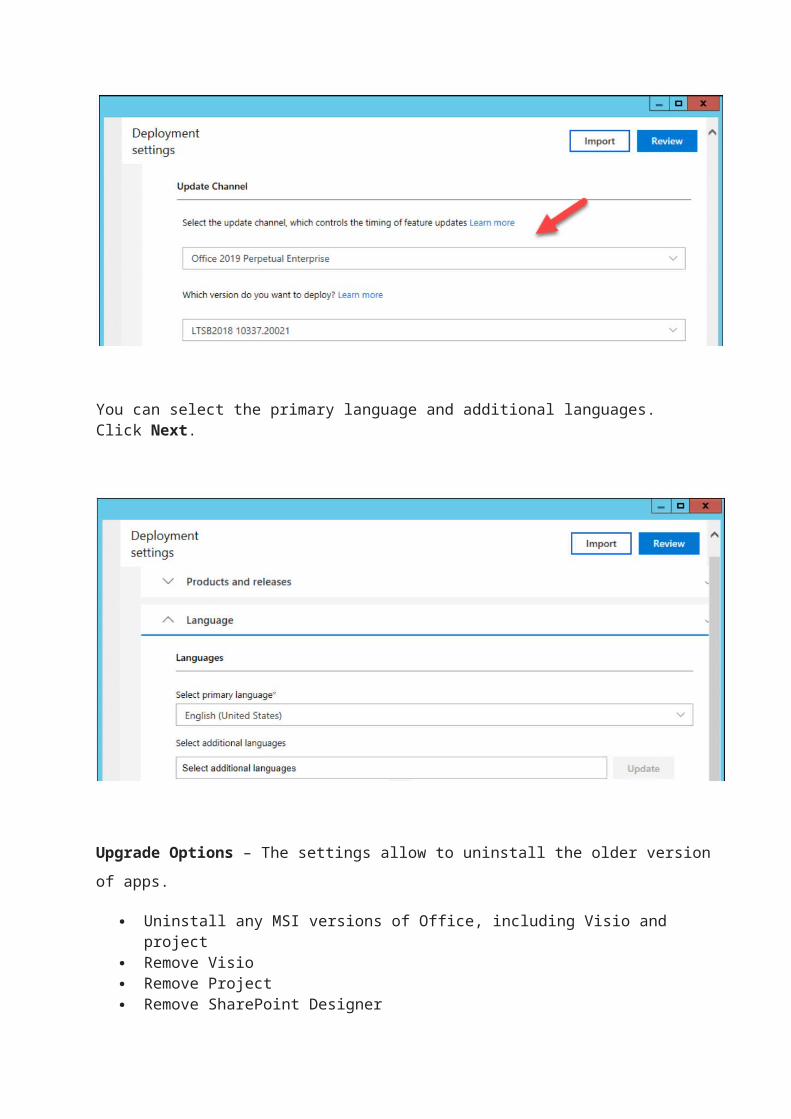
Uninstall any MSI versions of Office, including Visio and project Remove Visio Remove Project Remove SharePoint Designer Remove InfoPath
Turn on the options that you require and click Next.
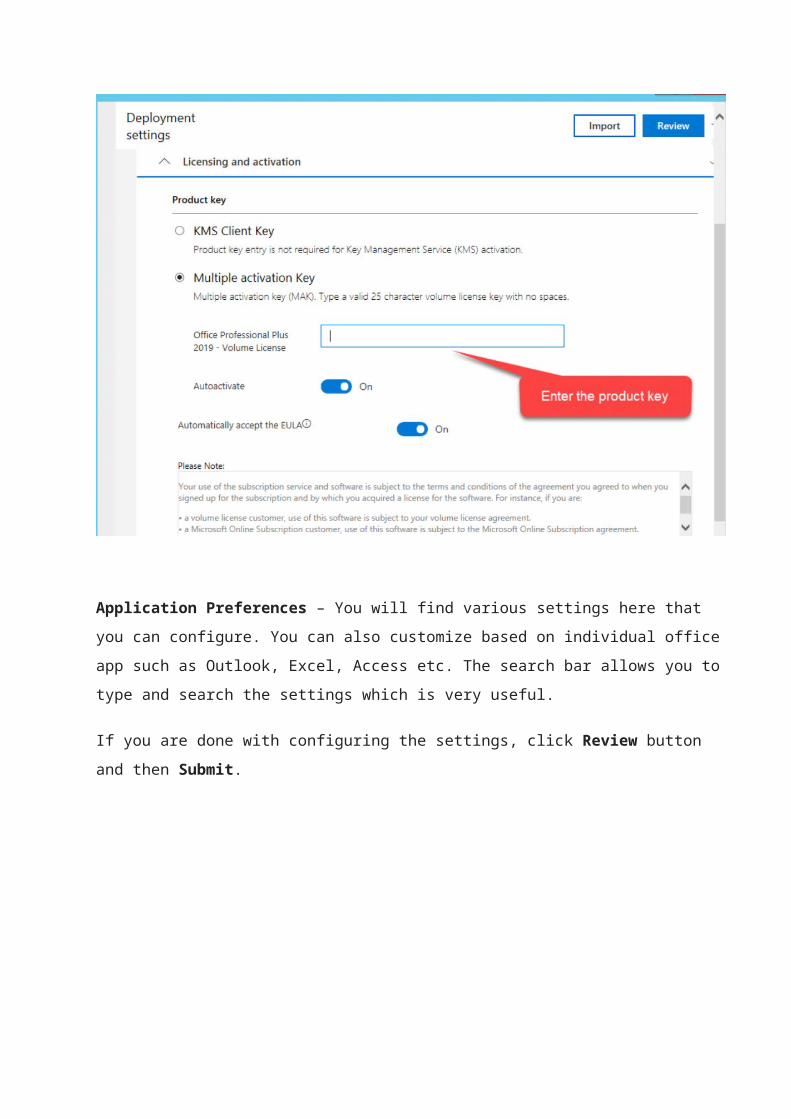
Office 2019 Licensing and Activation – The options here allow you to specify the product key.
KMS Client Key – Select this option if you have KMS server running in your organization.
Multiple Activation Key (MAK) – Select this option if you have 25 character volume license key. Enter the key and click Next.
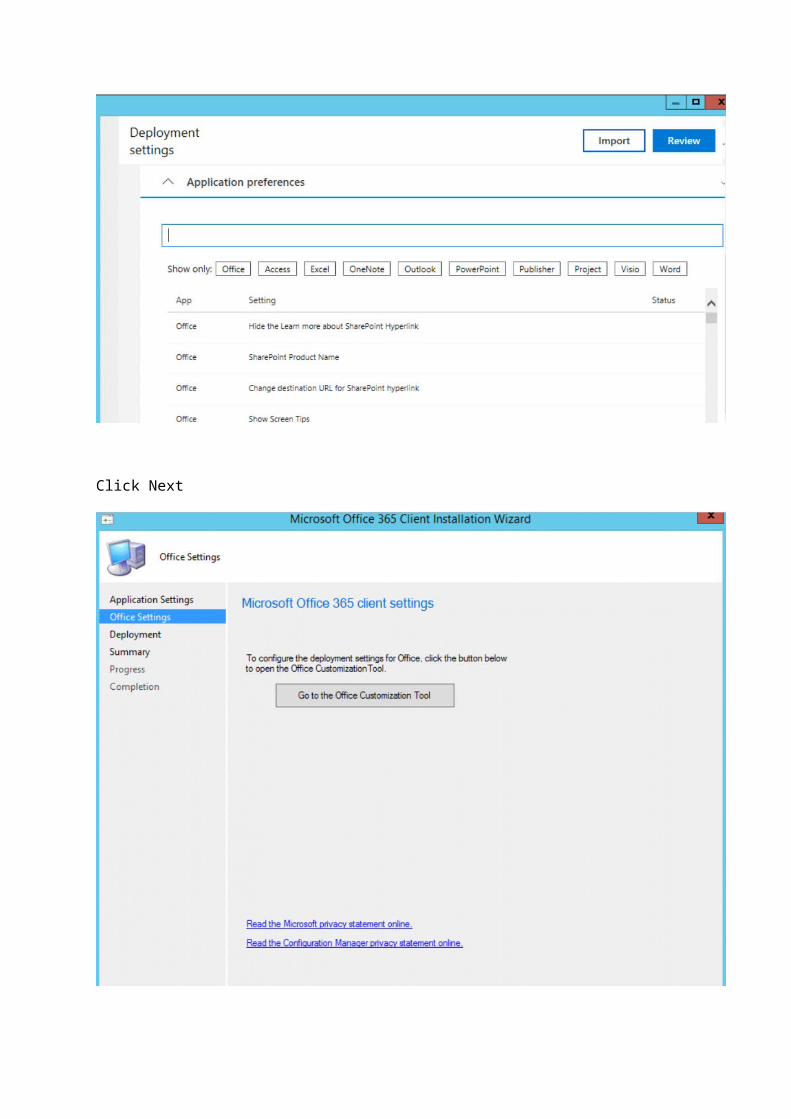
Application Preferences – You will find various settings here that you can configure. You can also customize based on individual office app such as Outlook, Excel, Access etc. The search bar allows you to type and search the settings which is very useful.
If you are done with configuring the settings, click Review button and then Submit.
Click Next
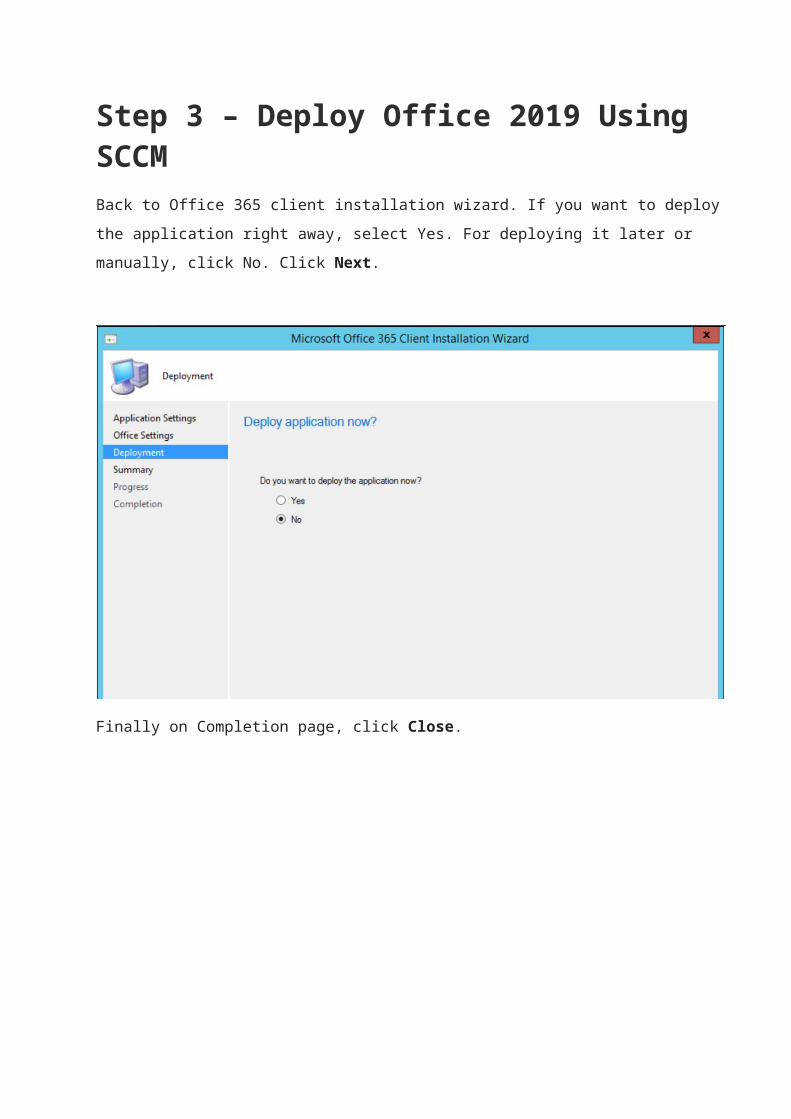
Step 3 – Deploy Office 2019 Using SCCMBack to Office 365 client installation wizard. If you want to deploy the application right away, select Yes. For deploying it later or manually, click No. Click Next.
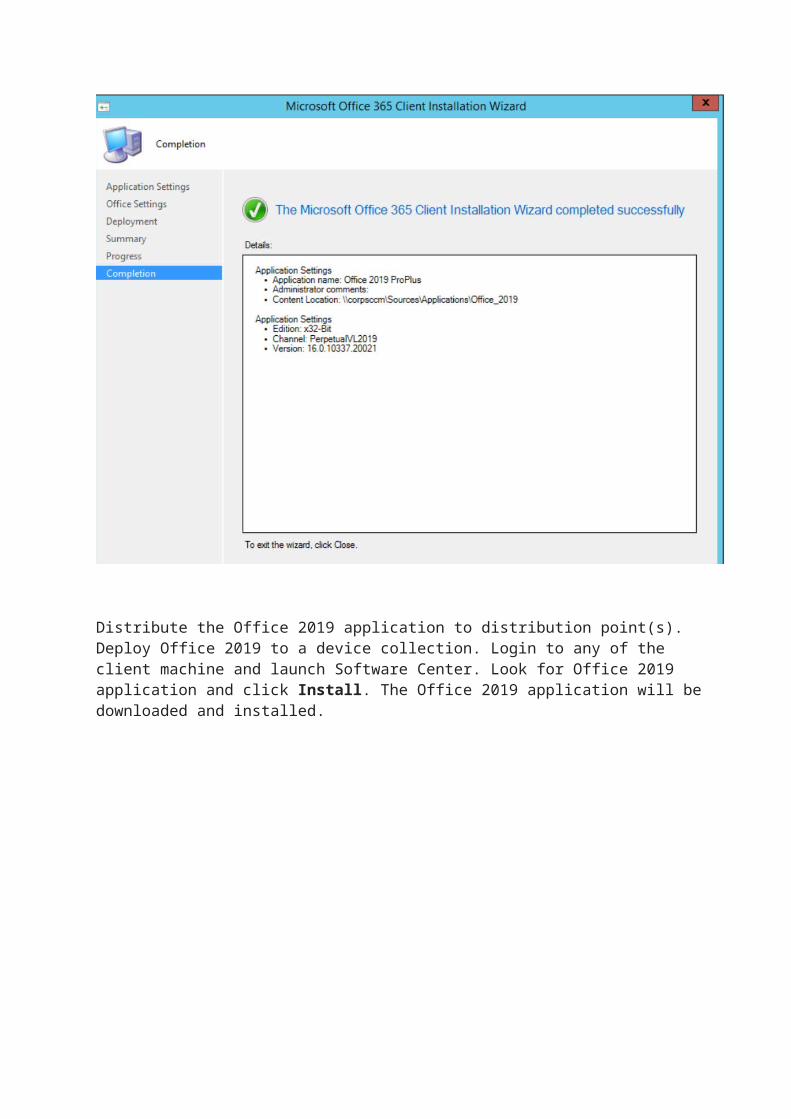
Finally on Completion page, click Close.
Distribute the Office 2019 application to distribution point(s). Deploy Office 2019 to a device collection. Login to any of the client machine and launch Software Center. Look for Office 2019 application and click Install. The Office 2019 application will be downloaded and installed.