Embed Size (px)
Citation preview
Stave Constructionby Delbert Dowdy
708 Geneva DrWake Village, Tx [email protected]
Over"view:I will give a basic discussion of the use and reason for staves.
Construction of staves will include wood choices, sizes, thick-ness, gluing, and holding for turning. Examples showing howthese staves can be incorporated will be discussed. I will usethe examples of decorative indoor birdhouses and outdoorbirdhouses.
What are staves:Wooden staves have been around for thousands of years.
First used in containers, buckets, and musical instruments,staves are simply enlongated segments of wood. Staves thatare all parallel to each other are called simple staves. Bucketsusually use a compound stave that flairs out and produces alareer diameter at one end than the other.
My turning philosophy:Many woodturners including myself are impatient by nature
and choose woodtuming in part because of its speed. Usingsegments and staves slows the process but allows the use ofcolor, grain, and pattems in interesting ways. This is at a muchcheaper price in board form compared to turning blocks. I amnot striving for museum quality pieces but for pieces that onemust examine closely to tell the difference. So I choose meth-ods that are quick, cheap, repeatable, and simple that produceexcellent results.
Why use staves:One can sum up the use of segments with design, color, and
grain pattern. Woods of different color and grain can be mixedto produce interesting designs. Veneers separating staves canfurther enhance the design. Many grain patterns are availablein lumber but rare to find in turning stock. These can be ori-ented in different ways to best emphasise the patterns.
But why use stavEs? Staves are simply long segments. Thereare pieces that have a design that calls for fairly straight verti-cal walls where you would like the grain pattem to remainunbroken for the length of the segments. Staves can save time.
Cutting one set of staves can take the place of many segmented
rinss.
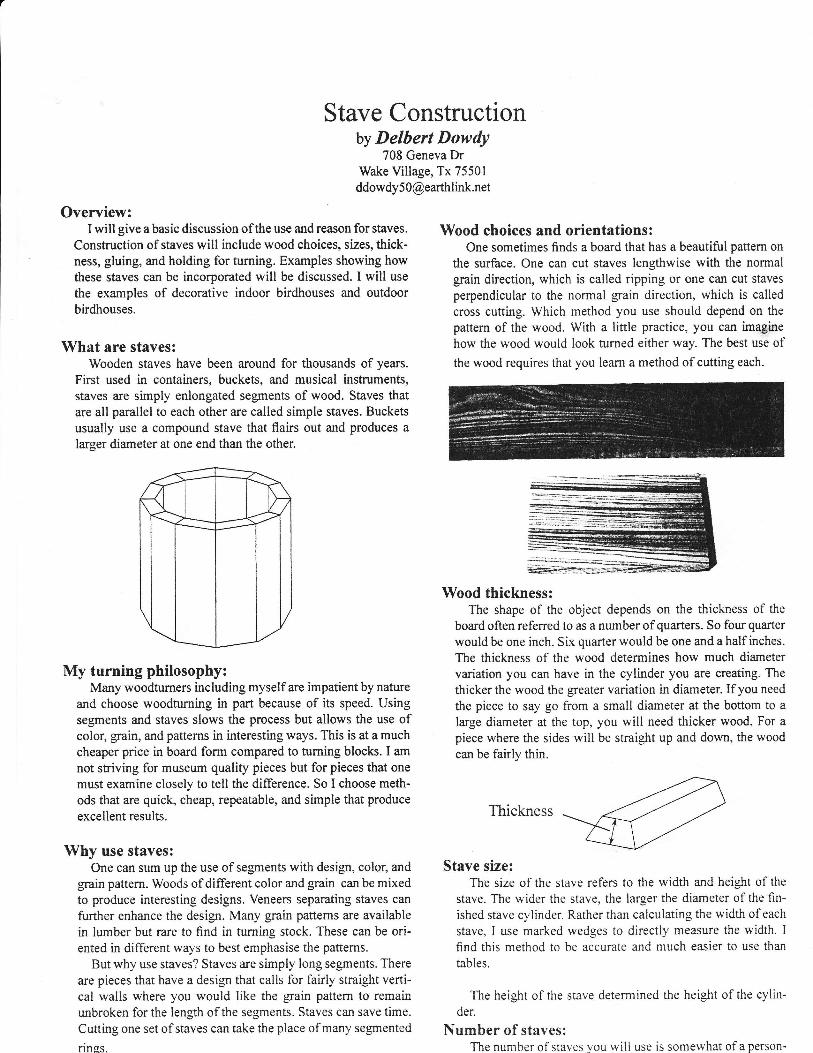
Wood choices and orientations:One sometimes finds a board that has a beautiful pattern on
the surface. One can cut staves lengthwise with the normalgrain direction, which is called ripping or one can cut stavesperpendicular to the normal grain direction, which is calledcross cutting. Which method you use should depend on thepattern of the wood. With a little practice, you can imaginehow the wood would look turned either way. The best use of
the wood requires that you learn a method of cutting each.
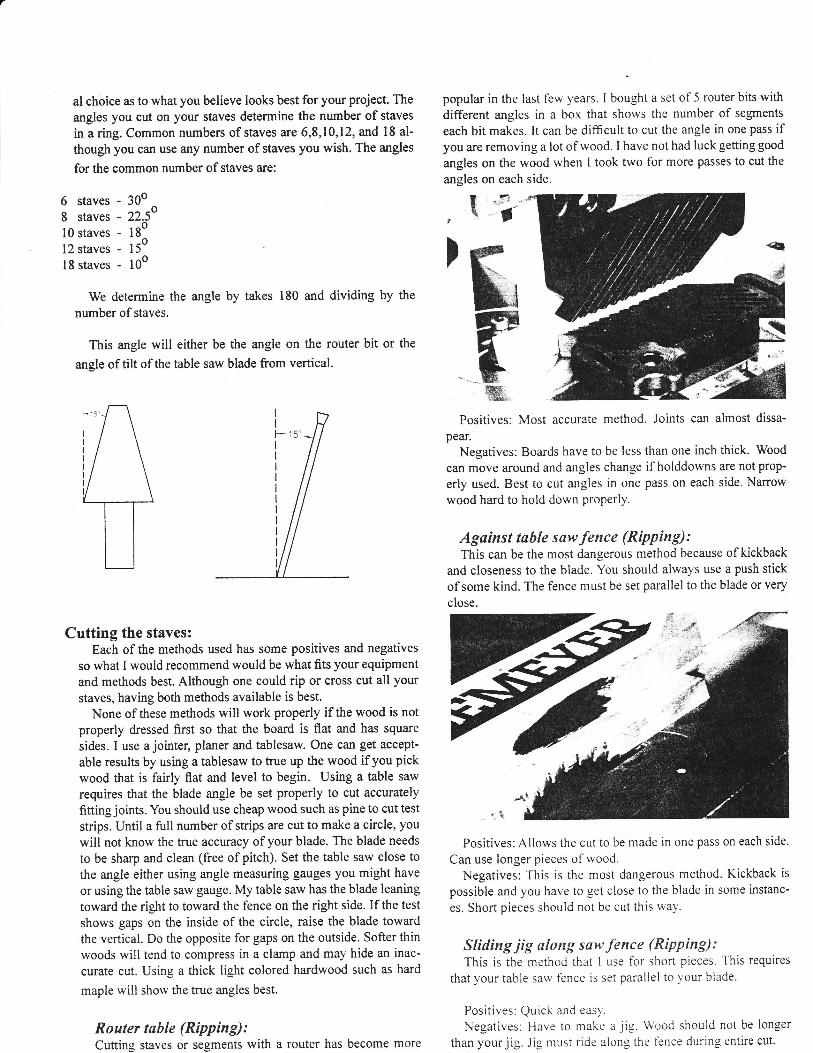
Wood thickness:The shape of the object depends on the thickness of the
board often referred to as a number ofquarters. So four quarter
would be one inch. Six quarter would be one and a half inches.The thickness of the wood determines how much diametervariation you can have in the cylinder you are ffeating. Thethicker the wood the greater variation in diameter. If you needthe piece to say go from a small diameter at the bottom to alarge diameter at the top, you will need thicker wood. For apiece where the sides will be straight up and down, the woodcan be fairly thin.
Thickness
Stave size:The size of the stave refers to the width and height of the
stave. The wider the stave, the larger the diameter of the fin-
ished stave cylinder. Rather than calculating the width of each
stave, I use marked wedges to directly measure the width. I
find this method to be accurate and much easier to use thantables.
The height of the stave determined the height of the cylin-der.
Number of staves:The number of staves you wil l use is somewhat of a person-
al choice as to what you believe looks best for your project. Theangles you cut on your staves determine the number of stavesin a ring. Common numbers of staves are 6,8,10,12, and l8 al-though you can use any number of staves you wish. The angles
for the common number of staves are:
6 staves - 30o8 staves - 22.5010 staves - l8o12 staves - l5o18 staves - 10o
We determine the angle by takes 180 and dividing by thenumber of staves.
This angle will either be the angle on the router bit or the
angle of tilt of the table saw blade from vertical.
Cutting the staves:Each of the methods used has some positives and negatives
so what I would recommend would be what fits your equipmentand methods best. Although one could rip or cross cut all yourstaves, having both methods available is best.
None of these methods will work properly if the wood is notproperly dressed first so that the board is flat and has squaresides. I use a jointer, planer and tablesaw. One can get accept-able results by using a tablesaw to true up the wood if you pickwood that is fairly flat and level to begin. Using a table sawrequires that the blade angle be set properly to cut accuratelyfitting joints. You should use cheap wood such as pine to cut teststrips. Until a full number of strips are cut to make a circle, youwill not know the true accuracy ofyour blade. The blade neeGto be sharp and clean (free ofpitch). Set the table saw close tothe angle either using angle measuring gauges you might haveor using the table saw gauge. My table saw has the blade leaningtoward the right to toward the fence on the right side. If the testshows gaps on the inside of the circle, raise the blade towardthe vertical. Do the opposite for gaps on the outside. Softer thinwoods will tend to compress in a clamp and may hide an inac-curate cut. Using a tirick light colored hardwood such as hard
maple will show the tme angles best.
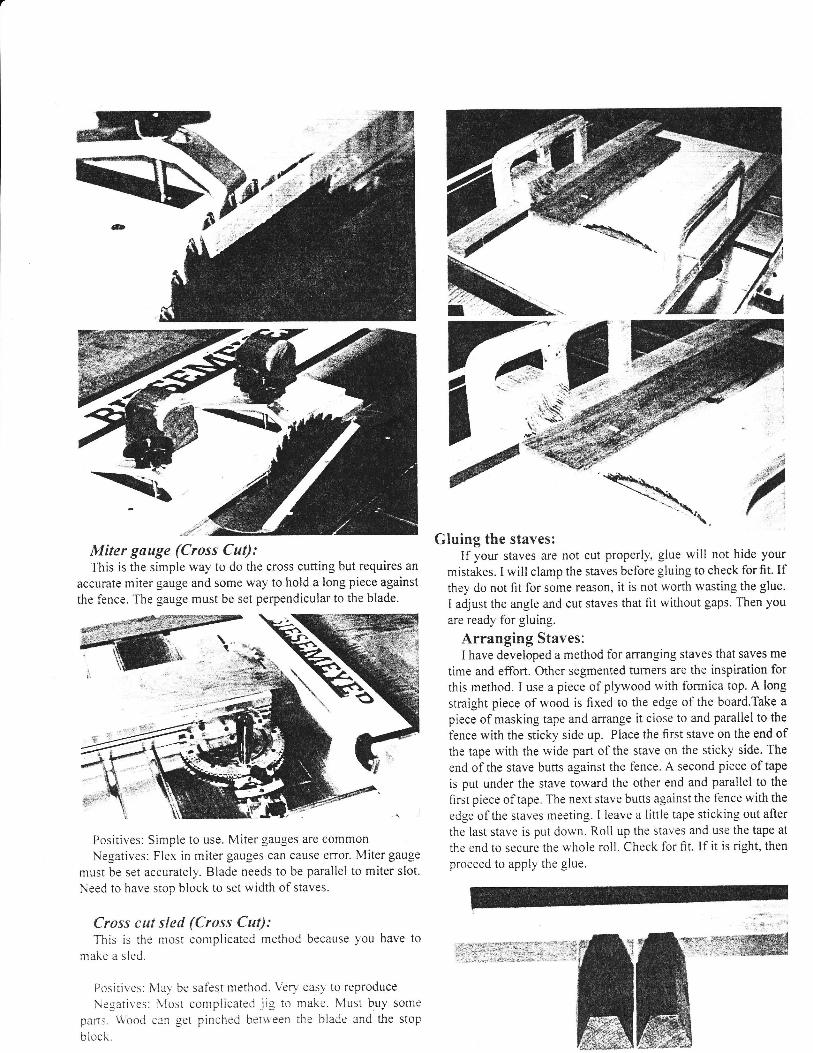
Router table (Ripping) :Cutting staves or segments with a router has become more
popular in the last few years. I bought a set of 5 router bits with
different angles in a box that shows the number of segments
each bit makes. It can be difficult to cut the angle in one pass if
you are removing a lot of wood. I have not had luck getting good
angles on the wood when I took two for more passes to cut the
angles on each side.
, I r [ -
Positives: Most accurate method. Joints can almost dissa-
pear.Negatives: Boards have to be less than one inch thick' Wood
can move around and angles change ifholddowns are notprop-
erly used. Best to cut angles in one pass on each side. Narrow
wood hard to hold down properly.
Against table sawfence (RipPing):This can be the most dangerous method because of kickback
and closeness to the blade. You should always use a push stick
of some kind. The fence must be set parallel to the blade or very
close.
Positives: Allows the cut to be made in one pass on each side.
Can use longer pieces of wood.
Negatives: This is the most dangerous method' Kickback is
possible and you have to get close to the blade in some instanc-
es. Short pieces should not be cut this wa1'.
Sliding jig along saw fence (Ripping):This is the method that I use for short pieces. This requires
that your table sarv fence is set parallel to your blade.
Positives: Quick and easl'.Negatives: Have to make a j ig. Wood should not be longer
than your j ig. Jig must ride along the fence during entire cut.
)
w
a
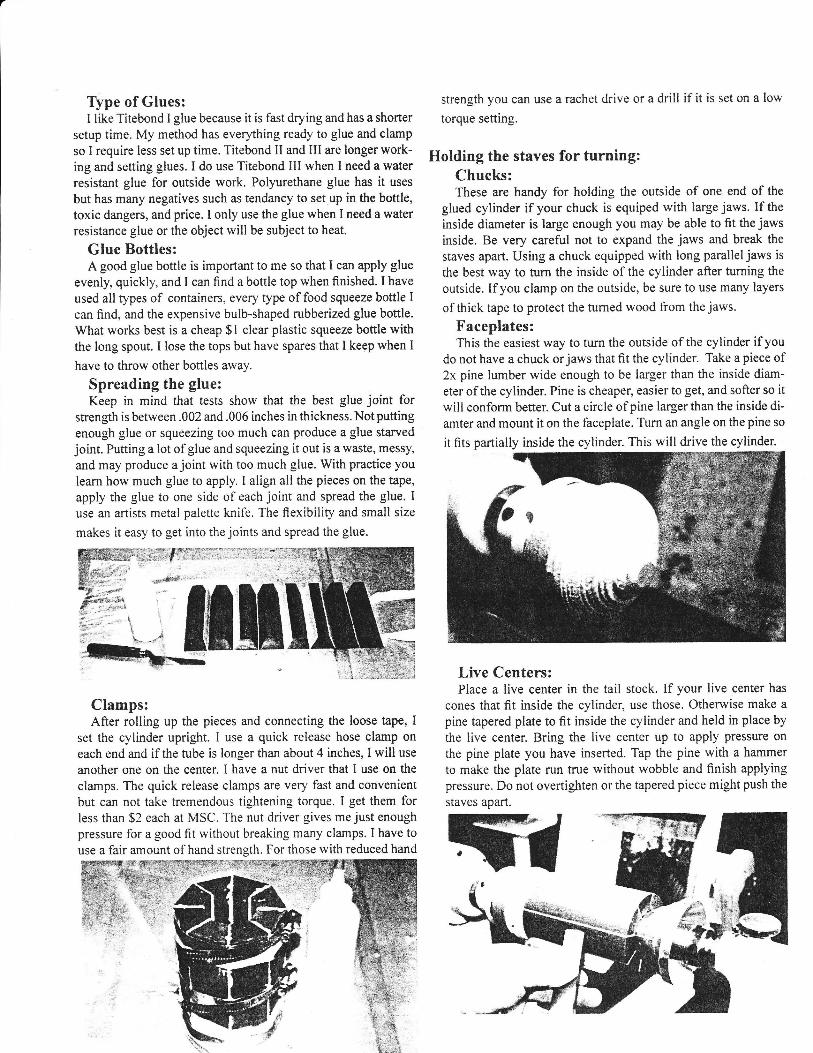
Miter gauge (Cross Cut):This is the simple way to do the cross cutting but requires an
accurate miter gauge and some way to hold a long piece against
the fence. The gauge must be set perpendicular to the blade.
Positives: Simple to use. Miter gauges are common
Negatives: Fle.x in miter gauges can cause error. Miter gauge
must be set accurately. Blade needs to be parallel to miter slot.
Need to have stop block to set width of staves.
Cross cut sled (Cross Cut):This is the most complicated method because you have to
make a s led.
Positives: Nlay be sat'est method. \ 'ery easy to reproduce
Negat ives: iv lost compl icated i ig to make. Must buy somepans. \\ 'ood can set pinched benveen the blade and the stop
biock.
Gluing the staves:If your staves are not cut properly, glue will not hide your
mistakes. I will clamp the staves before gluing to check for fit. If
they do not fit for some reason, it is not worth wasting the glue.
I adjust the angle and cut staves that fit without gaps. Then you
are ready for gluing.
Arranging Staves:I have developed a method for arranging staves that saves me
time and effort. Other segmented turners are the inspiration for
this method. I use a piece of plywood with formica top. A long
straight piece of rvood is fixed to the edge of the board.Take a
piece of masking tape and anange it close to and parailel to the
fence with the sticky side up. Place the first stave on the end of
the tape with the wide part of the stave on the sticky side. The
end ofthe stave butts against the fence. A second piece oftape
is put under the stave toward the other end and parallel to the
first piece of tape. The next stave butts against the fence with the
edge of the staves meeting. I leave a little tape sticking out after
the last stave is put down. Roll up the staves and use the tape at
the end to secure the whole roll. Check for f it. If i t is right, then
proceed to apply the glue.
a
Type of Glues:I like Titebond I glue because it is fast drying and has a shorter
setup time. My method has every'thing ready to glue and clampso I require less set up time. Titebond II and III are longer work-ing and setting glues. I do use Titebond III when I need a waterresistant glue for outside work. Polyurethane glue has it usesbut has many negatives such as tendancy to set up in the bottle,toxic dangers, and price. I only use the glue when I need a waterresistance glue or the object will be subject to heat.
Glue Bottles:A good glue bottle is important to me so that I can apply glue
evenly, quickly, and I can find a bottle top when finished. I haveused all types of containers, every type offood squeeze bottle Ican find, and the expensive bulb-shaped rubberized glue bottle.What works best is a cheap $ I clear plastic squeeze boftle withthe long spout. I lose the tops but have spares that I keep when I
have to throw other bottles away.
Spreading the glue:Keep in mind that tests show that the best glue joint for
strength is between .002 and .006 inches in thickness. Not pufiingenough glue or squeezing too much can produce a glue starvedjoint. Putting a lot of glue and squeezing it out is a waste, messy,and may produce a joint with too much glue. With practice youlearn how much glue to apply. I align all the pieces on the tape,apply the glue to one side of each joint and spread the glue. Iuse an artists metal palette knife. The flexibility and small size
makes it easy to get into the joints and spread the glue.
Clamps:After rolling up the pieces and connecting the loose tape, I
set the cylinder upright. I use a quick release hose clamp oneach end and if the tube is longer than about 4 inches, I will useanother one on the center. I have a nut driver that I use on theclamps. The quick release clamps are very fast and convenientbut can not take tremendous tightening torque. I get them forless than $2 each at MSC. The nut driver gives me just enoughpressure for a good fit without breaking many clamps. I have touse a fair amount of hand sffength. For those with reduced hand
strength you can use a rachet drive or a drill ifit is set on a low
torque setting.
Holding the staves for turning:
Chucks:These are handy for holding the outside of one end of the
glued cylinder if your chuck is equiped with large jaws. If theinside diameter is large enough you may be able to fit the jawsinside. Be very careful not to expand the jaws and break thestaves apart. Using a chuck equipped with long parallel jaws isthe best way to hrrn the inside of the cylinder after turning theoutside. If you clamp on the outside, be sure to use many layers
of thick tape to protect the tumed wood from the jaws.
Faceplates:This the easiest way to tum the outside of the cylinder if you
do not have a chuck orjaws that fit the cylinder. Take a piece of2x pine lumber wide enough to be larger than the inside diam-eter of the cylinder. Pine is cheaper, easier to get, and softer so itwill conform better. Cut a circle of pine larger tlan the inside di-amter and mount it on the faceplate. Turn an angle on the pine so
it fits partially inside the cylinder. This will drive the cylinder.
Live Centers:Place a live center in the tail stock. If your live center has
cones that fit inside the cylinder, use those. Otherwise make apine tapered plate to fit inside the cylinder and held in place by
the live center. Bring the live center up to apply pressure on
the pine plate you have inserted. Tap the pine with a hammer
to make the plate run true without wobble and finish applyingpressure. Do not overtighten or the tapered piece might push the
staves aDart.