Embed Size (px)
Citation preview
The embryo is the young plant. Mature seeds will germinate when exposed to favorable conditions.
SEED SELECTIONStart with good quality seed from a reliable dealer. Quality seed is true to cultivar/variety name, and does not contain contaminants, such as weed seed, insect casings, soil particles, or plant pulp. Make the best plant selection for the existing growing conditions by researching the many varieties available. Seed can be purchased for a wide variety of plants and characteristics, such as color, size, and growth habit. Many varieties will even be resistant to certain diseases. Choose varieties suitable for your area that will reach maturity before frost, survive heat, and tolerate present growing conditions.
It is best to purchase only enough seed for use in the current season. Seed can be stored from year to year, but germination percentage and seedling vigor will decline with age and improper storage conditions. Store excess seed in a cool, dry place. Seeds in paper packages are best stored in containers that can be sealed tightly. A low-humidity environment at 40 degrees F is best for seed storage, such as the crisper drawer of a refrigerator.
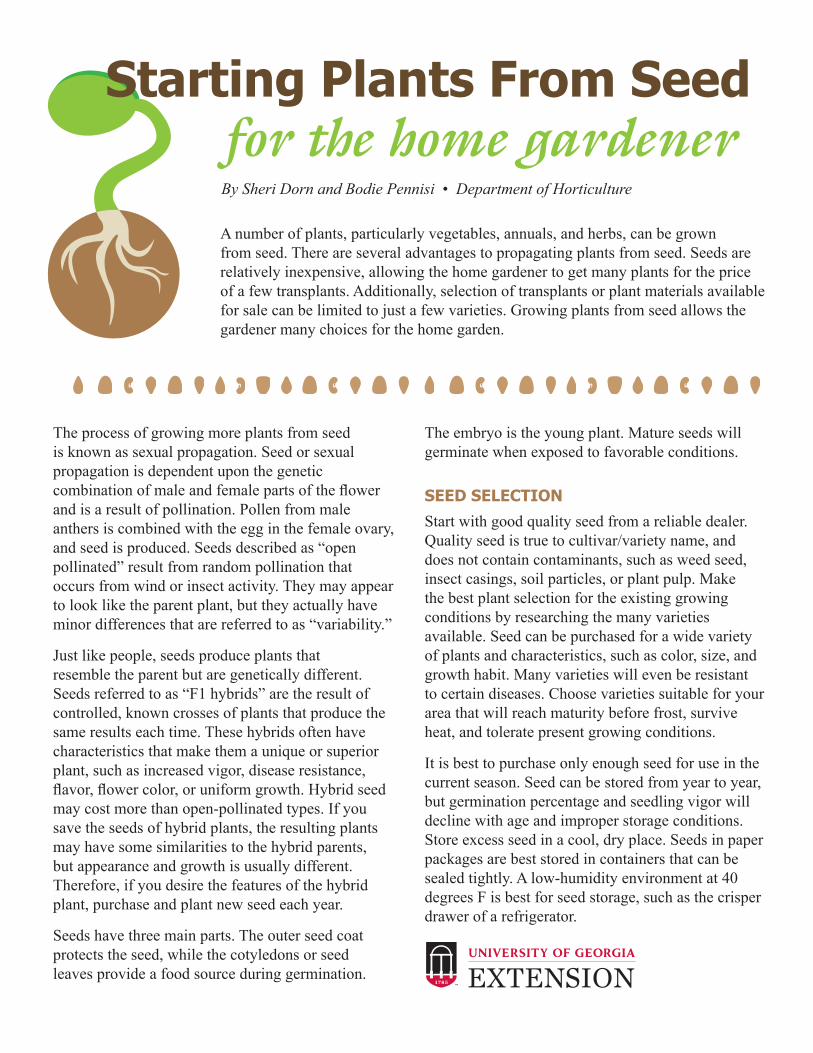
Starting Plants From Seed for the home gardener By Sheri Dorn and Bodie Pennisi • Department of Horticulture
The process of growing more plants from seed is known as sexual propagation. Seed or sexual propagation is dependent upon the genetic combination of male and female parts of the flower and is a result of pollination. Pollen from male anthers is combined with the egg in the female ovary, and seed is produced. Seeds described as “open pollinated” result from random pollination that occurs from wind or insect activity. They may appear to look like the parent plant, but they actually have minor differences that are referred to as “variability.”
Just like people, seeds produce plants that resemble the parent but are genetically different. Seeds referred to as “F1 hybrids” are the result of controlled, known crosses of plants that produce the same results each time. These hybrids often have characteristics that make them a unique or superior plant, such as increased vigor, disease resistance, flavor, flower color, or uniform growth. Hybrid seed may cost more than open-pollinated types. If you save the seeds of hybrid plants, the resulting plants may have some similarities to the hybrid parents, but appearance and growth is usually different. Therefore, if you desire the features of the hybrid plant, purchase and plant new seed each year.
Seeds have three main parts. The outer seed coat protects the seed, while the cotyledons or seed leaves provide a food source during germination.
A number of plants, particularly vegetables, annuals, and herbs, can be grown from seed. There are several advantages to propagating plants from seed. Seeds are relatively inexpensive, allowing the home gardener to get many plants for the price of a few transplants. Additionally, selection of transplants or plant materials available for sale can be limited to just a few varieties. Growing plants from seed allows the gardener many choices for the home garden.
UGA Extension B 1432 • Starting Plants from Seed for the Home Gardener 2
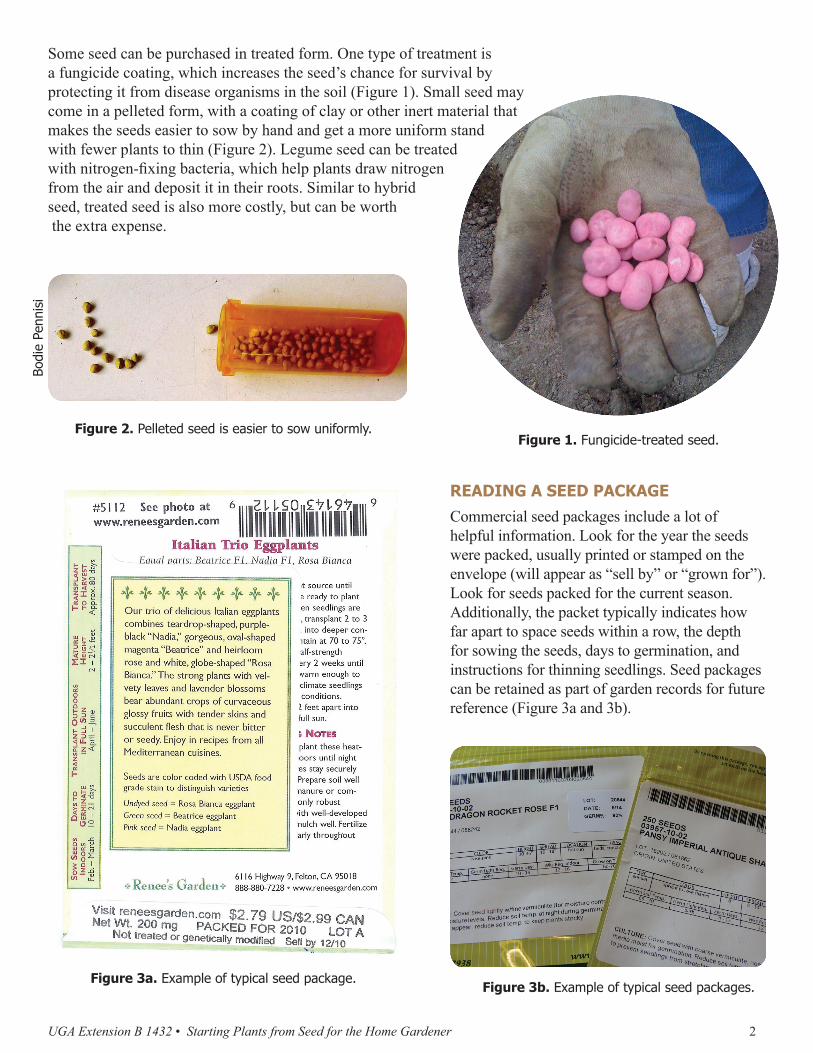
Some seed can be purchased in treated form. One type of treatment is a fungicide coating, which increases the seed’s chance for survival by protecting it from disease organisms in the soil (Figure 1). Small seed may come in a pelleted form, with a coating of clay or other inert material that makes the seeds easier to sow by hand and get a more uniform stand with fewer plants to thin (Figure 2). Legume seed can be treated with nitrogen-fixing bacteria, which help plants draw nitrogen from the air and deposit it in their roots. Similar to hybrid seed, treated seed is also more costly, but can be worth the extra expense.
Figure 2. Pelleted seed is easier to sow uniformly.
Figure 3a. Example of typical seed package.Figure 3b. Example of typical seed packages.
Figure 1. Fungicide-treated seed.
READING A SEED PACKAGECommercial seed packages include a lot of helpful information. Look for the year the seeds were packed, usually printed or stamped on the envelope (will appear as “sell by” or “grown for”). Look for seeds packed for the current season. Additionally, the packet typically indicates how far apart to space seeds within a row, the depth for sowing the seeds, days to germination, and instructions for thinning seedlings. Seed packages can be retained as part of garden records for future reference (Figure 3a and 3b).
Bodi
e Pe
nnis
i

UGA Extension B 1432 • Starting Plants from Seed for the Home Gardener 3
Figure 4. Seed-starting media (left) versus growing media (right).
GERMINATIONGermination is the process of the embryo emerging from the seed. It starts with imbibition, or the absorption of water. Germination is heavily influenced by four environmental factors, including water, oxygen, light, and temperature.
Water Water is critical for the first step in germination. Without water, seeds will remain dormant. The amount of water is critical; too much water causes seeds to rot, and too little water causes embryos to die. Adequate, continuous moisture is essential to germination. Misting seeds with a mist nozzle or a hand-held spray bottle provides light, even, gentle moisture without disrupting seeds. Covering seeds with a thin layer of vermiculite or peat moss helps ensure good seed-to-media contact and helps prevent the embryo from drying out. Keep the humidity high around germinating seeds by covering pots or flats with a clear humidity dome or enclosing plants in clear plastic bags. Remove plastic bags as the seeds germinate and seedlings emerge.
Oxygen Viable (live) seeds actively respire, releasing carbon dioxide and consuming oxygen. As germination proceeds, respiration increases and more oxygen is needed. Seed-starting media needs to drain well enough to meet this need for oxygen. If the media (i.e., garden soil) is too heavy or too wet, seeds will not have the oxygen they require, and germination may be greatly slowed or stopped (death).
Light Some seeds require light to germinate, while others require darkness. Some seeds have no preference at all. Look in catalogs and seed packets for specific information for the seeds being grown. If a seed requires light for germination, sow the seeds on the soil surface. If a seed requires darkness, cover it lightly with a layer of fine peat moss or vermiculite.
Temperature Temperature affects the number of seeds that germinate as well as how fast the seeds germinate. Some seeds have a very specific temperature range for germination, while others will germinate over a broad range of temperatures. Seed packets and catalogs generally list the optimum temperature for
germination. A good rule of thumb is 65 to 75 degrees F for germinating most seeds.
To monitor soil or media temperature, use a thermometer with its probe in the middle of the container or flat. To raise temperature, use moisture-proof heating mats or cables under flats or containers (following manufacturer’s instructions). Alternately, flats can be placed in warm spots in the home, such as near a radiator, for the germination process. Then move the seedlings to a bright location so they can continue to develop. Monitor temperature and moisture so that embryos and seedlings remain viable. After germination, temperature should be gradually lowered to 65 degrees F.
MATERIALSMediaChoose a sterile, soilless potting media without fertilizer to start seeds. Sterile mixes are free of weed seeds and disease organisms. Weeds compete with the germinating seedlings for water and nutrients, and disease organisms can kill seedlings in the early stages of germination. Avoid using garden soil as it is heavy, holds a tremendous amount of water, and often contains weed seeds or disease. A good seed-starting media will have a fine, even texture and be fairly uniform. This will help maintain good contact of seed with media. You do not want a seed-starting media that is lumpy or chunky, especially when sowing small seeds (Figure 4).
There are several sterile, soilless materials from which to choose. Sand, perlite, vermiculite, and peat moss are readily available and can be mixed together to create a media that has good moisture-holding capacity and good drainage. Sphagnum peat moss is often combined with perlite for a seed-starting

UGA Extension B 1432 • Starting Plants from Seed for the Home Gardener 4
media. A good recipe for making your own media includes 4 quarts shredded sphagnum peat moss, 4 quarts fine vermiculite, 1 tablespoons of superphosphate, and 2 tablespoons of ground limestone. Mix thoroughly, then wet completely. Leave the soil to drain and do not plant for 5 to 6 days. This allows the lime to react with the peat moss and create a favorable environment for the seedlings.
ContainersAny container can be used for starting seeds as long as it drains, is deep enough for good root development, and is sanitized prior to use (Figures 5a, 5b, and 5c). Plastic inserts, flats, and trays are available for purchase. Rectangular flats and trays are usually 12 to 18 inches long and often come with a clear, fitted dome or cover. You can make your own flats from wood, but they are heavier than plastic flats and are more difficult to sanitize for reuse. Be sure to leave gaps between the slats, or drill holes in the bottom, for drainage. You can fill the flat directly with media, or use an insert or smaller container set into the flat and filled with media. Growing seedlings in individual cells or containers reduces damage to roots and shock to the seedling when later transplanted into the garden or another container.
You can also make your own containers from recycled materials, such as plastic salad boxes and muffin containers, as long as good drainage is provided and there is adequate depth for root development. The clear plastic containers are like mini greenhouses. When the lids are closed, an ideal high-humidity environment is created for germinating seeds. As the seedlings emerge and grow, the lid can be gradually opened and removed. Pots can also be made from recycled newspaper using a can or bottle as a form, or soil blocks can be made with an initial investment in a molding device.
Additionally, seeds can be started in hydrated peat pellets for easy transplant into the garden (Figure 6).
Sanitation is critical in the germination process. Disease-causing fungi can attack seedlings and kill them at this early stage. To reduce chance of fungal attack, use sterile media and sanitized containers. To sanitize used containers, wash to remove any soil or debris and rinse with a solution of one part chlorine bleach to nine parts water. Rinse thoroughly with clean water.
LocationProviding appropriate air and media temperatures as well as adequate moisture and humidity is important to seed
Figure 6. Plant growing in a peat pellet.
Figure 5a. Hydrated peat pellets in a flat with humidity dome.
Figure 5b. Recycled plastic sandwich box.
Figure 5c. Fiber Pots.
UGA Extension B 1432 • Starting Plants from Seed for the Home Gardener 5
germination. Choose a warm location that provides bright, indirect light and good air circulation. For best results, refer to the information on temperature previously mentioned in the section on germination.
SEEDING TECHNIQUESSeeds can be sown directly into the container or space where they will grow, or they can be transplanted to another container or space to finish growing. Most seeds are planted at a depth approximately twice their diameter. Very small seeds should be simply pressed gently into the surface of the soil and barely covered.To raise the humidity for the germinating seeds, the container can be covered with plastic wrap or placed in a plastic bag, but remove the bag as soon as germination occurs.
Once seeds germinate, you will need to provide supplemental light for proper seedling growth. Light stands should position the lights within 2 to 3 inches of the seedlings. As the seedlings grow, raise the lights, but keep them 2 to 3 inches above the seedlings. Set a timer so that the lights are on 16 hours daily. As seedlings grow, raise the lights above the plants. Without supplemental light, plants will be weak and spindly, often stretching toward a window or other light source.
Direct SeedingNot all plants respond well to transplanting, and for some crops, such as beans, transplanting does not offer benefit enough to pursue. Most large-seeded plants, such as corn and pumpkin, and root crops, such as carrots and beets, are best direct-seeded. Sow seeds directly into the container or place where they will grow, following the recommended seeding depth on the package. Species with small seeds can be more challenging to handle. Carefully prepare the seed bed so that it is smooth and even, and pay close attention during germination and initial growth of the seedlings.
Seeds that can be direct sown:
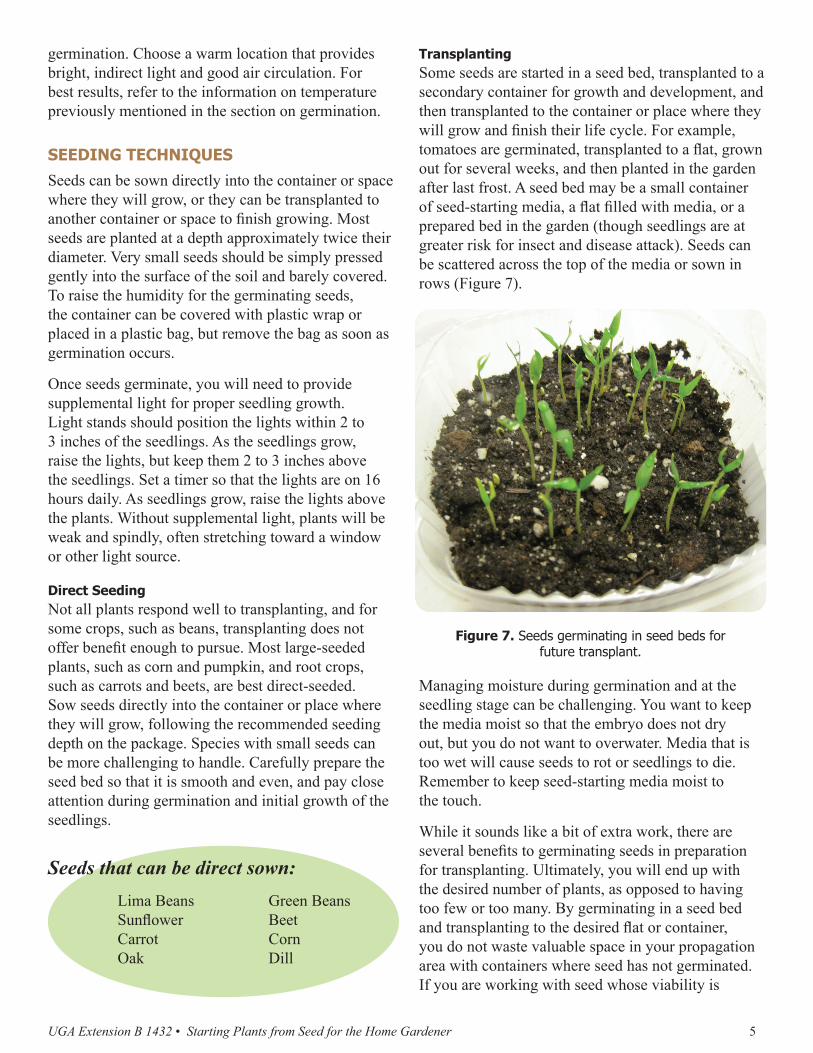
TransplantingSome seeds are started in a seed bed, transplanted to a secondary container for growth and development, and then transplanted to the container or place where they will grow and finish their life cycle. For example, tomatoes are germinated, transplanted to a flat, grown out for several weeks, and then planted in the garden after last frost. A seed bed may be a small container of seed-starting media, a flat filled with media, or a prepared bed in the garden (though seedlings are at greater risk for insect and disease attack). Seeds can be scattered across the top of the media or sown in rows (Figure 7).
Managing moisture during germination and at the seedling stage can be challenging. You want to keep the media moist so that the embryo does not dry out, but you do not want to overwater. Media that is too wet will cause seeds to rot or seedlings to die. Remember to keep seed-starting media moist to the touch.
While it sounds like a bit of extra work, there are several benefits to germinating seeds in preparation for transplanting. Ultimately, you will end up with the desired number of plants, as opposed to having too few or too many. By germinating in a seed bed and transplanting to the desired flat or container, you do not waste valuable space in your propagation area with containers where seed has not germinated. If you are working with seed whose viability is
Figure 7. Seeds germinating in seed beds for future transplant.
Lima BeansSunflower CarrotOak
Green BeansBeetCornDill

UGA Extension B 1432 • Starting Plants from Seed for the Home Gardener 6
declining, you can sow extra seed in a seed bed and transplant what actually germinates and is vigorous. This also gives you an indication of when the seed are no longer viable and ready for discard. Growing transplants allows you to make the most of the growing season by having plants ready at the best time for planting outdoors.
Plants that benefit from transplanting:
TIMINGIf you are sowing seeds to grow transplants, timing is an important consideration. You want the transplants to be ready for planting in the garden when soil temperatures are appropriate and threat of frost has past. If seeds are started too early, seedlings may be ready for transplant before they can safely be planted outdoors. When timed properly, warm-season plants (i.e., tomatoes, squash, zinnias, and marigolds) are ready to plant outside in the spring garden by the time of last frost. Cool-season plants (i.e., pansies, broccoli, cabbage, and snapdragons) for fall gardens should be planted with enough time to establish and produce before the first frost. Generally, sow seeds 6 to 8 weeks prior to transplant time. For example, if your average last frost date is April 15, sow tomato seeds inside in late-February/early March. For more information, refer to the vegetable planting chart in Vegetable Gardening in Georgia (UGA Extension circular 963).
THINNING SEEDLINGSGardeners generally sow more seeds than are desired as a precaution to ensure that the right number of plants is ultimately grown. Especially with tiny seeds, such as pansy or carrot, lots of seeds can end up in a small space. Regardless, seedlings need to be thinned, leaving the remaining plants with enough space between them to grow and develop properly. Even though it can be difficult to remove excess seedlings, crowded plants — plants that are not thinned — are at risk for death from competition for water, light, and nutrients. The spacing information can often be found
on the seed packet. Weak or unwanted seedlings can be snipped off with scissors or pinched off at the media level.
TRANSPLANTING SEEDLINGSAfter germination and the development of the first true leaves, the seedlings can be transplanted to a container of choice. Use a pencil or dibble tool to probe under seedling roots and lift gently (Figure 8). Use the same pencil or dibble to create a hole for the seedling in the new container or location. Seedlings should be set at approximately the same depth they were growing in the seedling flat or pot. Avoid planting too deep or too shallow. Never tug seedlings out of a seed bed or transplant container by grabbing the stem. This can result in a crimped stem, which will result in seedling death.
When ready to be transferred to the garden, the small plants will have several sets of leaves and a sturdy root system (Figure 9).
Figure 9. A transplant ready to go in the garden.
Figure 8. Transplanting seedlings.
BroccoliCabbageTomatoPepper
PetuniaPansyAlyssum

UGA Extension B 1432 • Starting Plants from Seed for the Home Gardener 7
After transplanting, water the plants thoroughly but gently. Seedlings can dry out quickly so check them daily, especially if they are on a heat mat or heat cables or under lights. Seedlings dry out faster with additional heat. The first few weeks are most critical because root systems are small and developing.
Begin fertilizing transplants with soluble fertilizer according to label directions for new transplants. Because new seedlings are easily damaged by excess fertilizer, initial applications are often half of the regular rate. Repeat at two-week intervals after transplanting. Never fertilize plants that show signs of moisture stress, such as wilted or gray-green leaves.
HARDENING OFFPlants raised in a high humidity, sheltered location need to be prepared prior to planting in drier, harsher conditions, such as outside in the garden. This preparation process is referred to as “hardening off.” One way to prepare plants is to move them outside to a shady location, gradually increasing the amount of sunlight over a period of several days. You can also choose an overcast day to first take the plants outside, bringing the plants back inside after a few hours. Repeat daily, extending the length of time that plants remain outside by an hour, until the plants have acclimated to the brighter, drier outdoor conditions. This transition can also be accomplished by reducing temperatures (to between 45 and 50 degrees F) and reducing water.
The idea is to slow growth and thicken plant cell walls. Start this process one to two weeks prior to planting seedlings in the garden. Take care to transition plants gradually as extreme changes can slow growth to the point of plant death.
SAVING SEEDYou may want to save seed from your garden plant. These seeds are the result of random pollination and will most likely not produce plants identical to the parents, particularly with hybrid varieties. Be sure that seed collected from the garden is mature and totally dry before storing. Seeds stored with extra plant pulp or plant material that is not completely dry may mold and deteriorate while in storage. Collected seeds usually have a 65-80 percent germination rate, and three-quarters of those seedlings will produce satisfactory plants.

UGA Extension B 1432 • Starting Plants from Seed for the Home Gardener 8

Directions for Starting Seeds
1. Select a container, making sure that it is sanitized, will drain, and is deep enough for root growth and development.
2. Fill the container with moistened, sterile, seed-starting mix and firm the surface.
3. Check seed package for planting depth.
4. Make shallow indentations in the media and sow the seed evenly.
5. Lightly water the surface, and place the container in a warm area (not in direct sunlight).
6. As seeds germinate, move seedlings to a well-lit area, such as under fluorescent lights.
7. The cotyledons, or seed leaves will emerge first.

9. Allow plants to grow several more sets of true leaves. Keep lights 2 to 3 inches above seedlings, adjusting as necessary.
10. When plants have reached desired size, prepare them for planting in the garden by “hardening off.”
11. Water the transplants well initially and for several weeks after planting.
8. When two or three true leaves emerge, transplant seedlings into flats or small pots filled with moist potting soil. Keep soil evenly moist.
Bulletin 1432 Reviewed February 2018Published by the University of Georgia in cooperation with Fort Valley State University, the U.S. Department of Agriculture, and counties of the state. For more information, contact your local UGA Cooperative Extension office.The University of Georgia College of Agricultural and Environmental Sciences (working cooperatively with Fort Valley State University, the U.S. Department of Agriculture, and the counties of Georgia) offers its educational programs, assistance, and materials to all people without regard to race, color, religion, sex, national origin, disability, gender identity, sexual orientation or protected veteran status and is an Equal Opportunity, Affirmative Action organization.
extension.uga.edu