Embed Size (px)
Citation preview
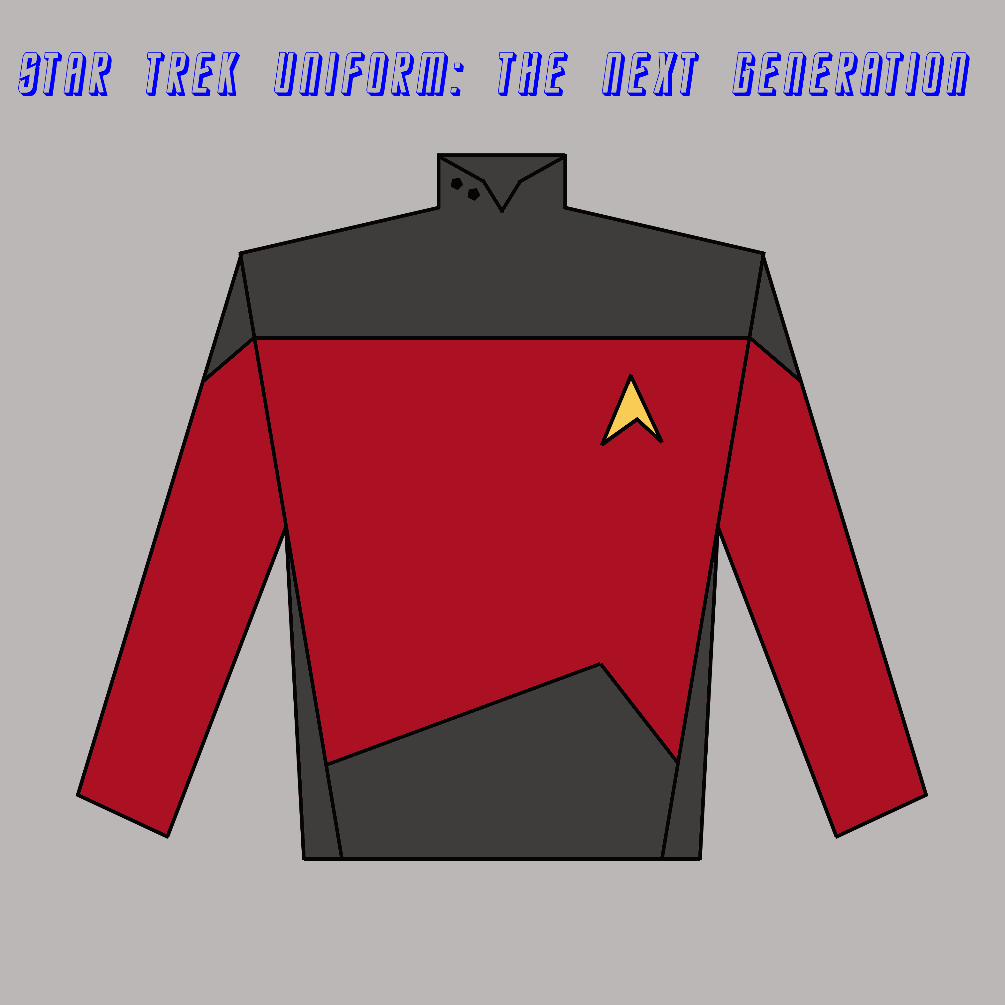
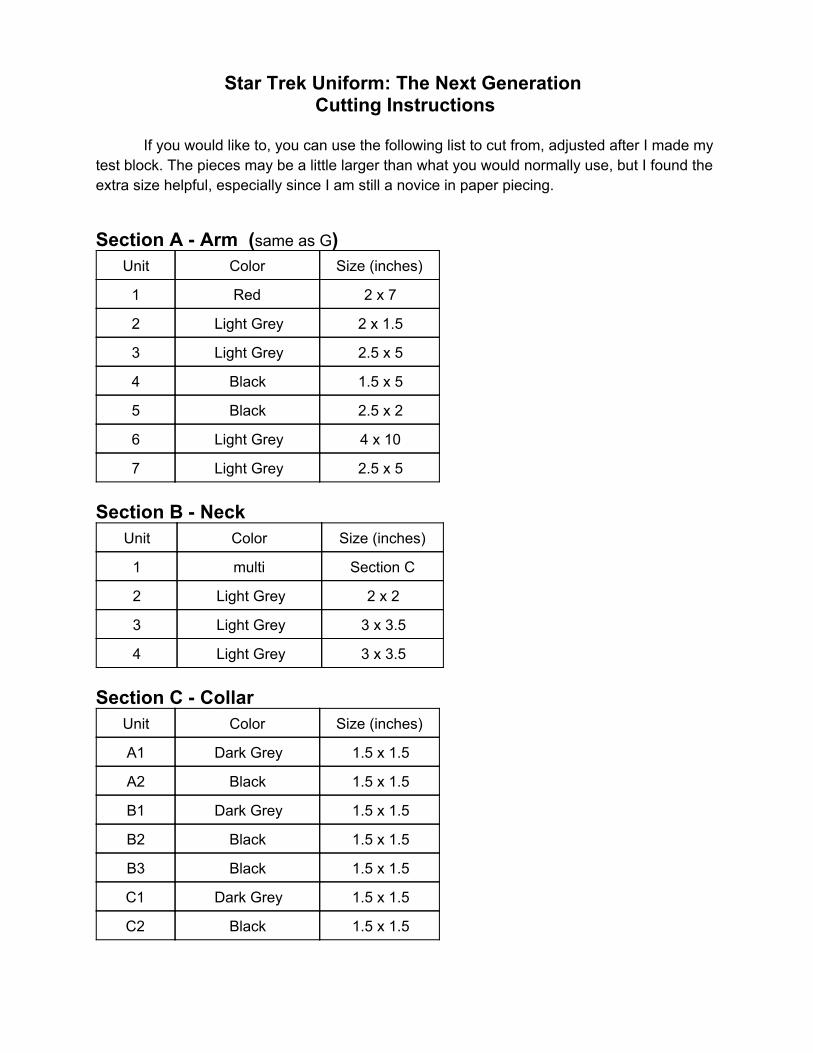
Star Trek Uniform: The Next Generation Cutting Instructions
If you would like to, you can use the following list to cut from, adjusted after I made my
test block. The pieces may be a little larger than what you would normally use, but I found the extra size helpful, especially since I am still a novice in paper piecing.
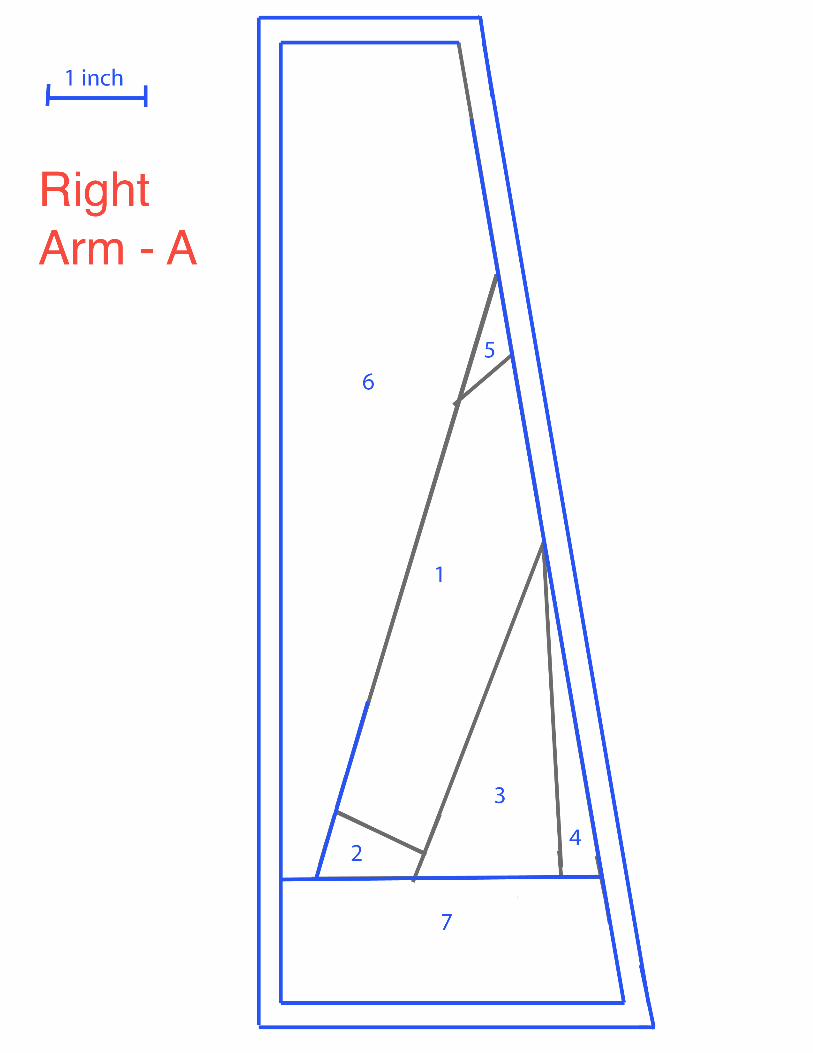
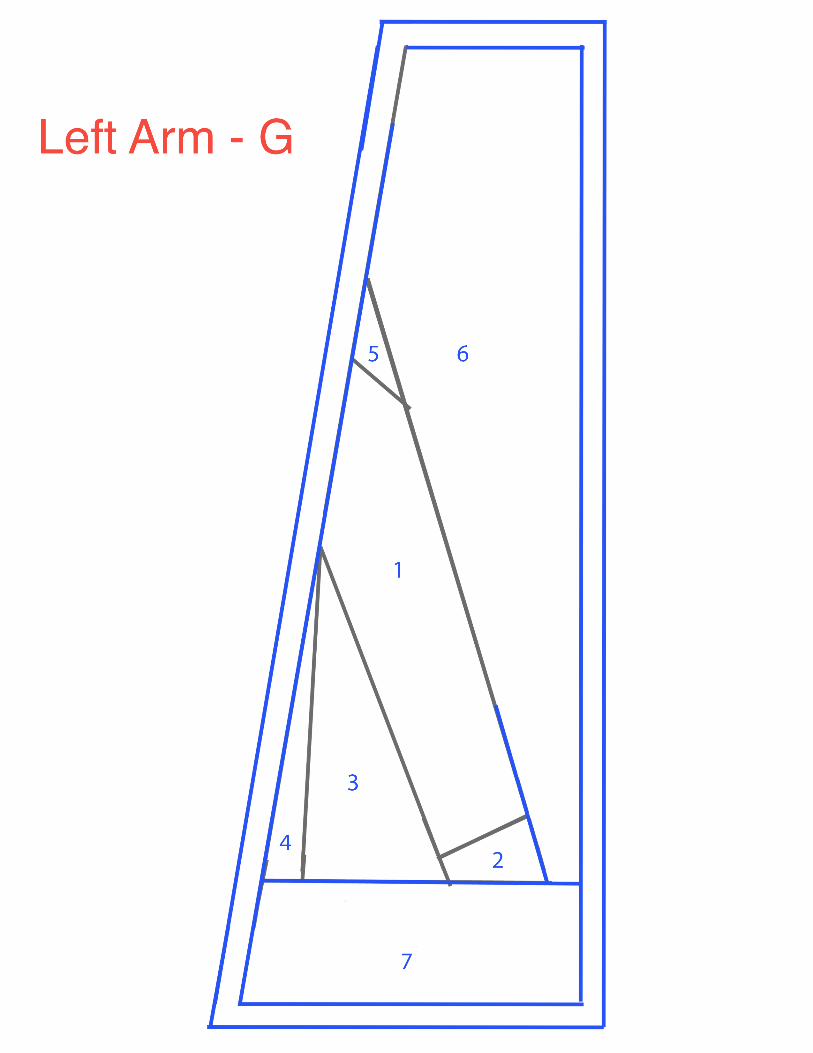
Section A - Arm (same as G) Unit Color Size (inches)
1 Red 2 x 7
2 Light Grey 2 x 1.5
3 Light Grey 2.5 x 5
4 Black 1.5 x 5
5 Black 2.5 x 2
6 Light Grey 4 x 10
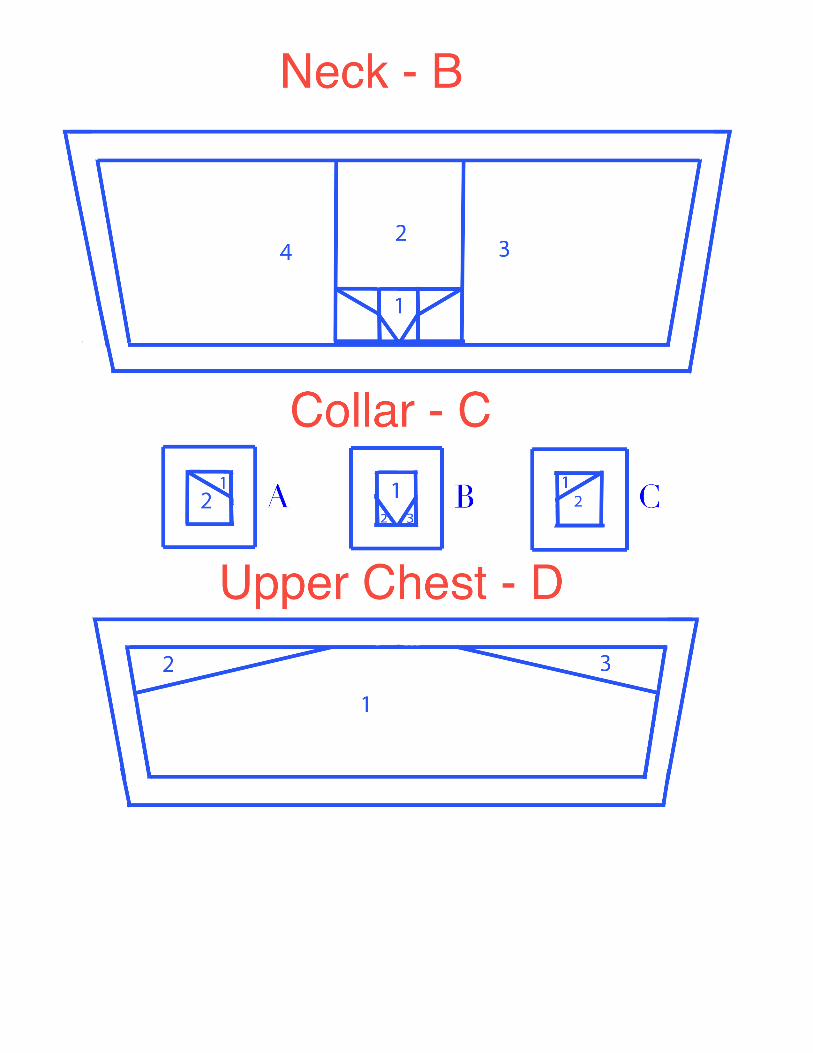
7 Light Grey 2.5 x 5 Section B - Neck
Unit Color Size (inches)
1 multi Section C
2 Light Grey 2 x 2
3 Light Grey 3 x 3.5
4 Light Grey 3 x 3.5 Section C - Collar
Unit Color Size (inches)
A1 Dark Grey 1.5 x 1.5
A2 Black 1.5 x 1.5
B1 Dark Grey 1.5 x 1.5
B2 Black 1.5 x 1.5
B3 Black 1.5 x 1.5
C1 Dark Grey 1.5 x 1.5
C2 Black 1.5 x 1.5
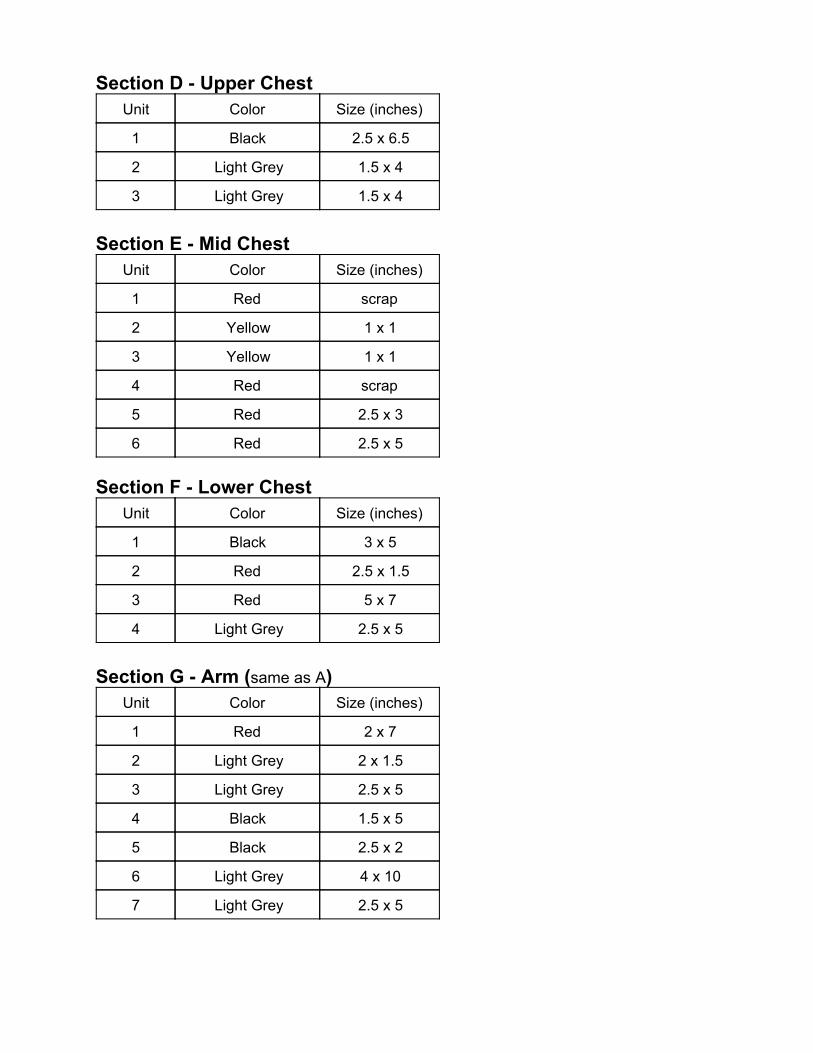
Section D - Upper Chest Unit Color Size (inches)
1 Black 2.5 x 6.5
2 Light Grey 1.5 x 4
3 Light Grey 1.5 x 4
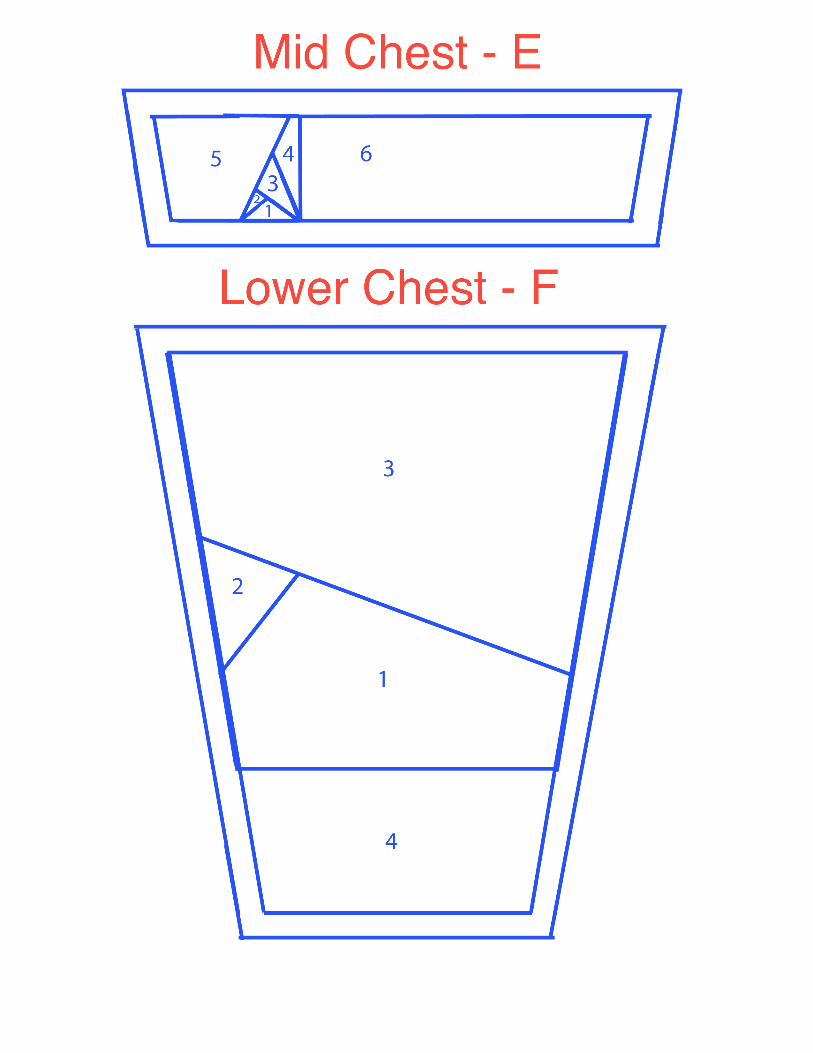
Section E - Mid Chest
Unit Color Size (inches)
1 Red scrap
2 Yellow 1 x 1
3 Yellow 1 x 1
4 Red scrap
5 Red 2.5 x 3
6 Red 2.5 x 5 Section F - Lower Chest
Unit Color Size (inches)
1 Black 3 x 5
2 Red 2.5 x 1.5
3 Red 5 x 7
4 Light Grey 2.5 x 5
Section G - Arm (same as A)
Unit Color Size (inches)
1 Red 2 x 7
2 Light Grey 2 x 1.5
3 Light Grey 2.5 x 5
4 Black 1.5 x 5
5 Black 2.5 x 2
6 Light Grey 4 x 10
7 Light Grey 2.5 x 5
Assembly:
1. Make section C first. Remove the paper before attaching it to section B.
2. Make all other sections EXCEPT for E. This will allow you to use scraps of red for the units 1 and 4.
3. Press seams between mid and lower chest (E and F) downwards, toward F. The small
piecing for the com badge in E makes this section bulky, and thus this is the best option, in my opinion.
4. Attach the sections from the chest first, then add on the arms (A & G).
5. If you wish, you can leave off the bottom row of background fabric from sections A, F,
and G until the block is completely assembled. Then, you can add it in one long strip of fabric, giving the block a cleaner look and making it easier to trim. The piece needed for this will be approximately 3 x 11 - adding an extra allowance for trimming the block.