Embed Size (px)
DESCRIPTION
Stand Assembly
Citation preview
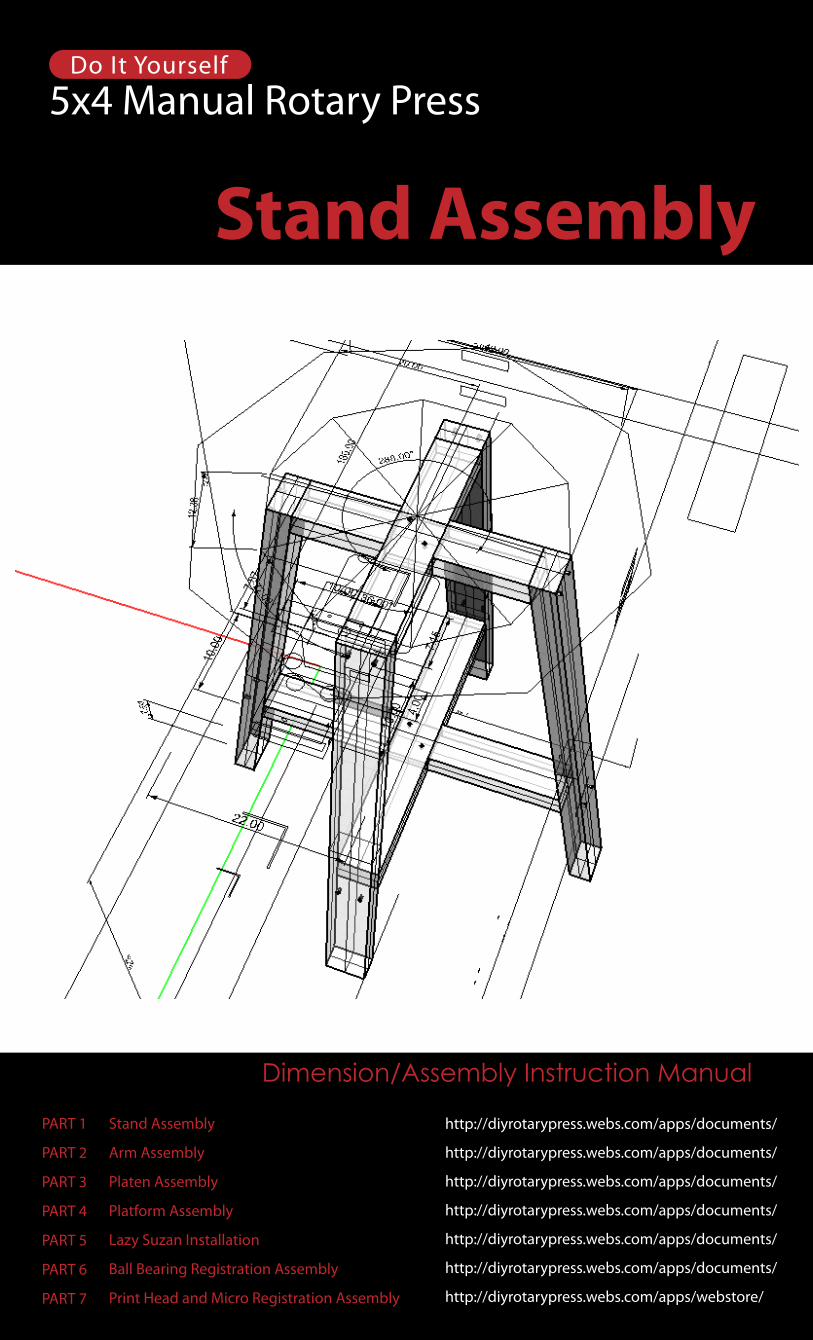
Stand Assembly
Dimension/Assembly Instruction Manual
http://diyrotarypress.webs.com/apps/webstore/
PART 1 Stand Assembly
Arm Assembly
Platen Assembly
Platform Assembly
Lazy Suzan Installation
Ball Bearing Registration Assembly
Print Head and Micro Registration Assembly
PART 2
PART 3
PART 4
PART 5
PART 6
PART 7
http://diyrotarypress.webs.com/apps/documents/
http://diyrotarypress.webs.com/apps/documents/
http://diyrotarypress.webs.com/apps/documents/
http://diyrotarypress.webs.com/apps/documents/
http://diyrotarypress.webs.com/apps/documents/
http://diyrotarypress.webs.com/apps/documents/

This manual do not o�er any technical support. It is of its best intent to give all possible informations and instructions to make the assembly as convenient as possible. However, those may not be enough and some migth have not been provided due to the designer’s limitation. The availability of the materials used may also be a hinder in the making. Therefore, it is highly recommended to study the diagram and look at all alternative approach and possiblities if you wish to pursue. It is wise to anticipate any pros and cons in doing any modi�cation on each part. Your technical skills and knowledge is highly expected in this project.
The designer of the said DIY manual rotary press is not responsible for any techhical problem on the �nal output. DIYOR- Do it at your own risk. Good Luck!
MUST READ
All images and text are copyright RuxvellPrints and are to be printed only for personal use. Sale of plans and use of images for pro�t are prohibited.
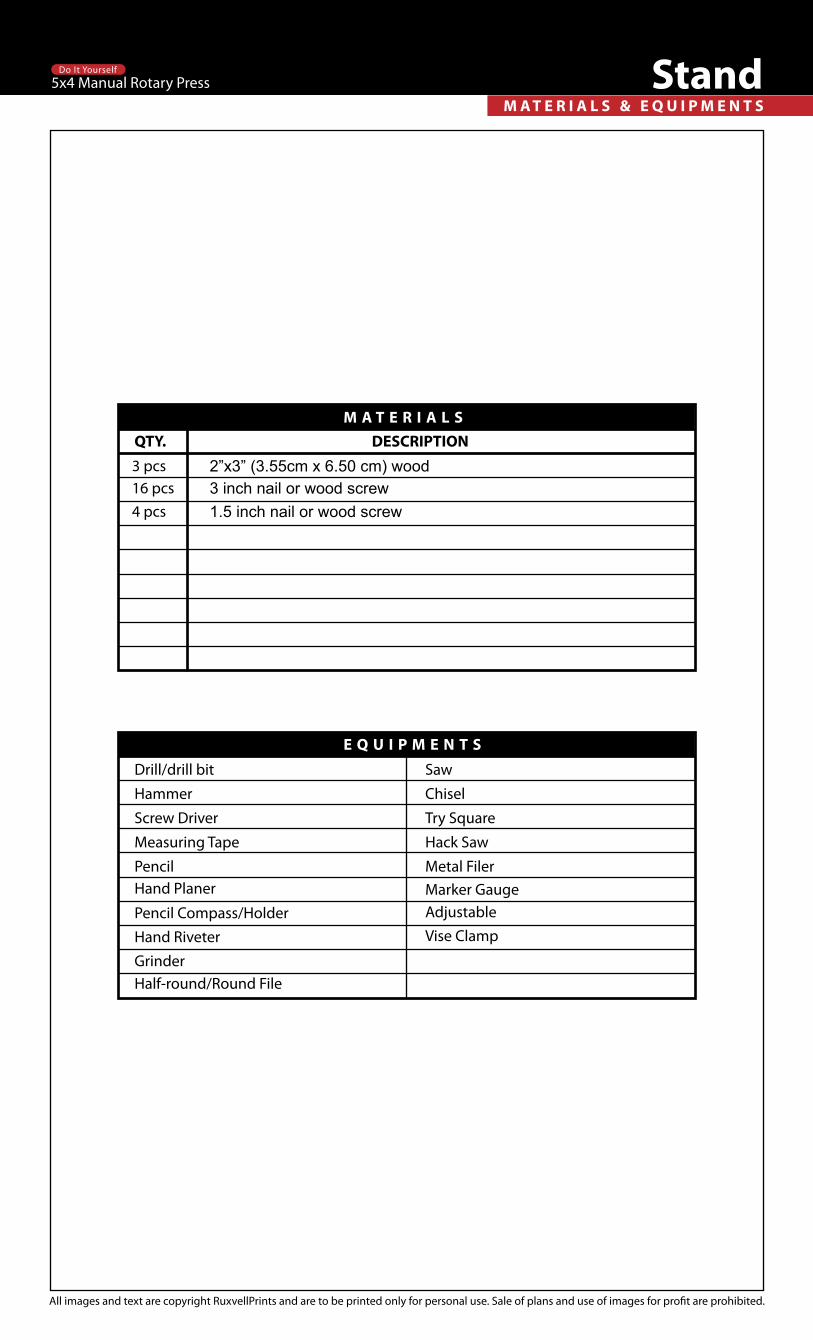
QTY. DESCRIPTIONM A T E R I A L S
3 pcs 2”x3” (3.55cm x 6.50 cm) wood16 pcs 3 inch nail or wood screw4 pcs 1.5 inch nail or wood screw
E Q U I P M E N T S
Drill/drill bit
Hammer
Screw Driver
Measuring Tape
PencilHand Planer
Pencil Compass/HolderHand Riveter
GrinderHalf-round/Round File
Saw
Chisel
Try Square
Hack Saw
Metal FilerMarker GaugeAdjustableVise Clamp
M A T E R I A L S & E Q U I P M E N T SStand
All images and text are copyright RuxvellPrints and are to be printed only for personal use. Sale of plans and use of images for pro�t are prohibited.
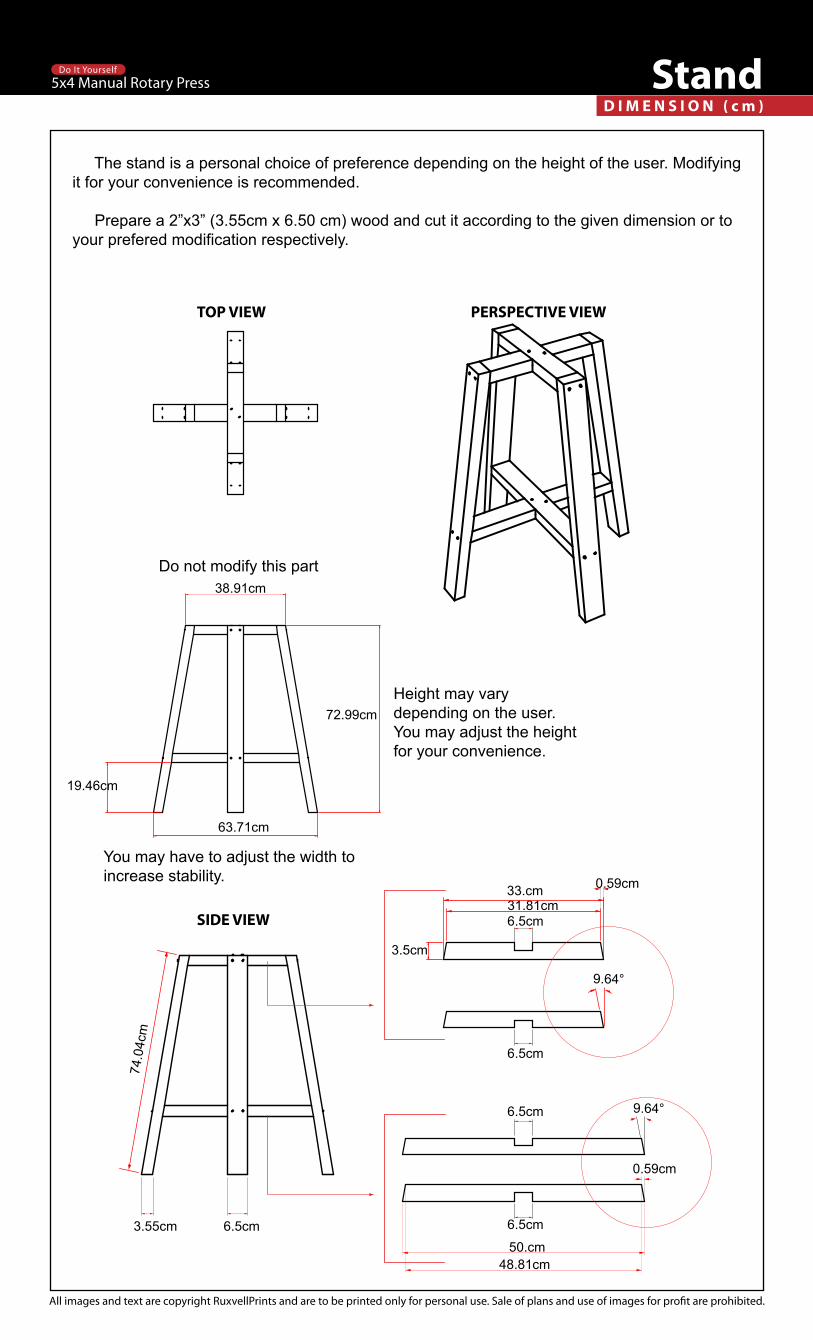
3.5cm
6.5cm
6.5cm
6.5cm
6.5cm
72.99cm
38.91cm
63.71cm
6.5cm3.55cm
74.0
4cm
19.46cm
You may have to adjust the width to increase stability.
The stand is a personal choice of preference depending on the height of the user. Modifying it for your convenience is recommended.
Prepare a 2”x3” (3.55cm x 6.50 cm) wood and cut it according to the given dimension or to your prefered modification respectively.
Height may vary depending on the user. You may adjust the height for your convenience.
Do not modify this part
31.81cm33.cm 0.59cm
50.cm48.81cm
0.59cm
9.64°
9.64°
TOP VIEW
SIDE VIEW
PERSPECTIVE VIEW
D I M E N S I O N ( c m )Stand
All images and text are copyright RuxvellPrints and are to be printed only for personal use. Sale of plans and use of images for pro�t are prohibited.
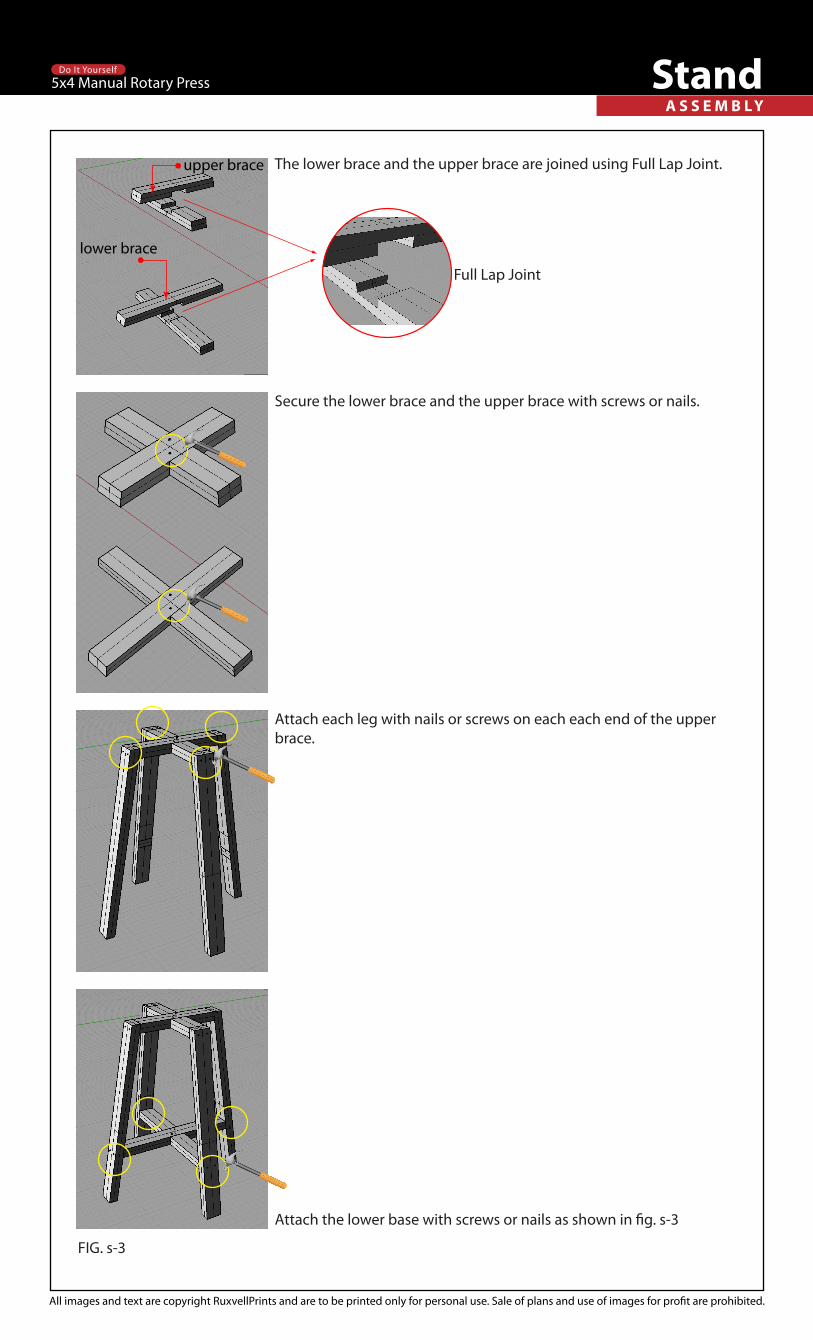
The lower brace and the upper brace are joined using Full Lap Joint.
Secure the lower brace and the upper brace with screws or nails.
Attach each leg with nails or screws on each each end of the upper brace.
Attach the lower base with screws or nails as shown in �g. s-3
lower brace
upper brace
FIG. s-3
Full Lap Joint
A S S E M B L YStand
All images and text are copyright RuxvellPrints and are to be printed only for personal use. Sale of plans and use of images for pro�t are prohibited.
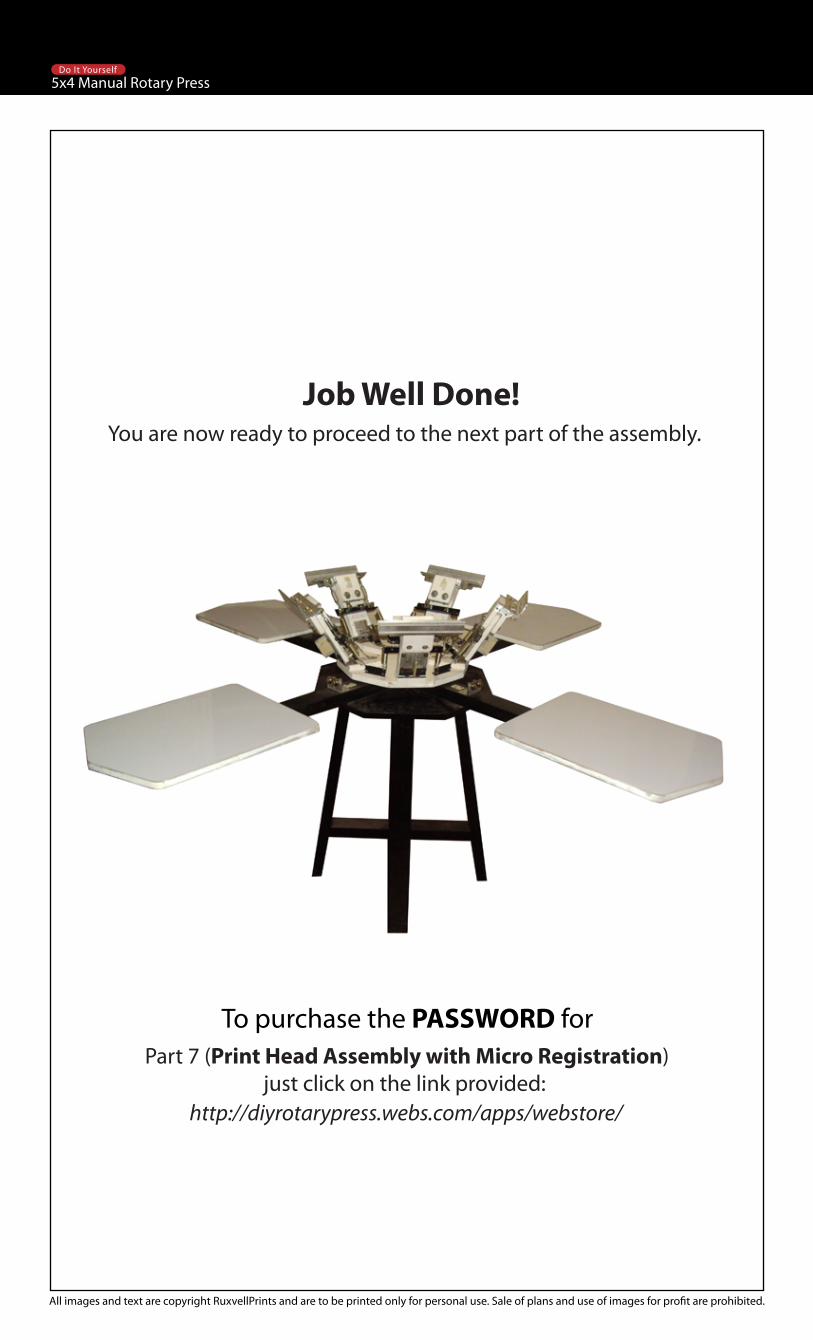
Job Well Done!
http://diyrotarypress.webs.com/apps/webstore/
Part 7 (Print Head Assembly with Micro Registration)just click on the link provided:
You are now ready to proceed to the next part of the assembly.
To purchase the PASSWORD for
All images and text are copyright RuxvellPrints and are to be printed only for personal use. Sale of plans and use of images for pro�t are prohibited.