Embed Size (px)
Citation preview

Page 1
Spreadsheet Journal Upload Created on 2/19/2013 5:47:00 PM
Table of Contents Spreadsheet Journal Upload ............................................................................................ 1
Spreadsheet Journal Upload
The Spreadsheet Journal Upload Tool is used to create journal entries to be uploaded to Core-
CT. The steps to create spreadsheet journals are mostly the same in Core-CT 9.1 as they are in
Core-CT 8.9 with two differences. In Core-CT 9.1 users can:
Automatically generate Journal IDs using the NEXT value. (Users should following
agency conventions in creating Journal IDs.)
Enter a SpeedType code in the journal lines section. Core-CT 9.1 will create the
distribution coding for the line based on the SpeedType code entered in the Spreadsheet
Journal Upload Tool.
In this example the Spreadsheet Journal Upload Tool is used to create a journal entry using a
SpeedType code.
The uploading process of spreadsheet journals in Core-CT 9.1 is identical to that used in Core-CT
8.9.
Procedure
Navigation: Locating the Spreadsheet Journal Upload Tool will vary with each user.

Page 2
Step Action
1. Double-click the 91_spreadsheet_journal_upload list item.

Page 3
Step Action
2. Click the New button to add a new journal.
Step Action
3. The New Journal Sheet Name must be unique and should contain only letters and
numbers. Do not use spaces or grammatical marks.
Enter OSCDB00001 into the New Journal Sheet Name: field.
4. Click the OK button.

Page 4
Step Action
5. A new journal header is required for each journal included on the spreadsheet.
Click the Add a New Journal Header button.
Page 5
Step Action
6. Core-CT 9.1 allows users to let Core-CT automatically assign Journal IDs using the
NEXT functionality. Follow agency naming convention when assigning Journal
IDs.
Click in the Journal ID field.
7. Enter OSCDB00001 into the Journal ID field.
8. Use PC for Payroll correction journals and DC for AR Deposit correction journals.
For all other journals use SSJ.
EnterSSJ into the Source field.
9. Description is a required field.
Enter UPK Sample Journal into the Description field.
Step Action
10. Click the OK button.

Page 6
Step Action
11. Click the Add a New Journal Line button.
Step Action
12. Enter STATE into the Unit field.

Page 7
Step Action
13. The value in the Ledger field on the line must be the same as the value in the
Ledger Group field in the Edit Journal Header dialogue box.
Enter MOD_ACCRL into the Ledger field.
14. Users can enter a SpeedType code in the SpeedType field. Core-CT will
automatically populate the distribution values once the spreadsheet journal is
uploaded to Core-CT.
Enter DOT_TF into the Speed Type field.
15. Enter 54060 into the Account field.
Step Action
16. Click the Scroll bar to move to the right of the sheet.

Page 8
Step Action
17. Enter 150 into the Amount field.
18. Click the scrollbar to move to the left of the sheet.

Page 9
Step Action
19. Click the Add a New Line button to add a second line.
Step Action
20. The second line inherits values from the first line. The values in the Account and
Amount fields must be edited.
Click in the Account field of the second line.
Double-click the desired object.
21. Enter 10436 into the Account field on the second line.
22. Click the scrollbar to move to the right of the sheet.

Page 10
Step Action
23. Enter -150.00 into the Amount field of the second line.
24. Click the away from the Amount field.
25. Click the scrollbar top move to the left of the sheet.
Page 11
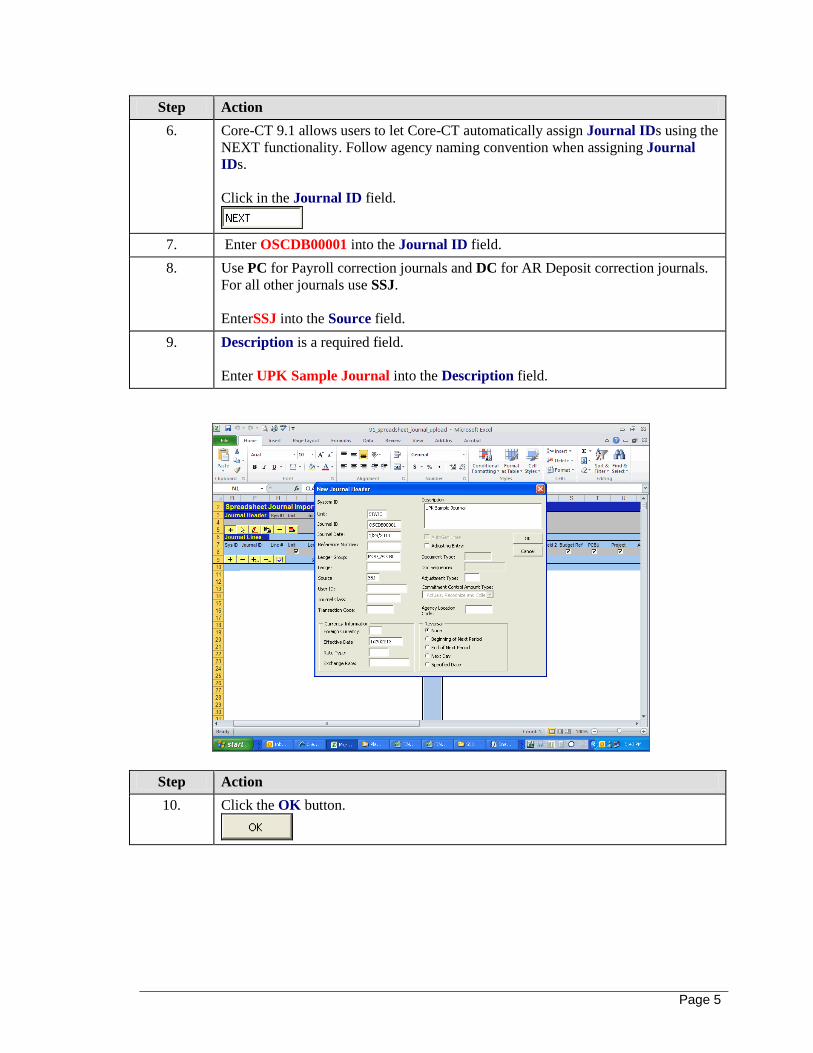
Step Action
26. Click the Save button.
27. Click the Home button.
Step Action
28. Click the Write File button.

Page 12
Step Action
29. Click in the File name field.
30. Enter OSCDB00001.xml in the File Name field.

Page 13
Step Action
31. Click the OK button.
32.
End of Procedure.