Embed Size (px)
Citation preview

6/22/12 4:55 PMgg designs Catalog Home of Unmounted, Carved Look Rubber Stamps
Page 1 of 25http://www.ggdesigns.net/Gazette/Challenges/DebLovettsSSTech.html
Carved Look, Unmounted Rubber Stamps Catalog •[email protected]
February/March 2010
Special orders (requests for stamps not currently in stock) placed on the 15th of every month.
Deb Lovett's Spray Starch Challenge
I enjoy stamping and learning new techniques, and I look for opportunities to sharethat enjoyment with others. I am a teacher at heart. That teaching opportunitymay be in a class, a tutorial, or even by publishing a card and explaining how itis made.
Deb acknowledges her love of techniques and her willingness to share them. Her belief that "even if wearen't "artistic," we can be creative and make something lovely" is at the heart of the tutorials andchallenges here at gg designs.This month she is sharing her "Spray Starch Technique." She writes: BTW,as far as I know I came up with the technique. I was doing a : "Stamping Around the House" series severalyears ago and wanted to have a class using items from the laundry room, and wondered what would happenif I mixed spray starch and PE [Pearl Ex]. I was thrilled with how it turned out... I sent the technique toTechnique Junkies and Pat featured it as an Ultimate Technique. After a year or so I sent it to Take Tenand they they featured it in the Jan 2008 issue. That was pretty exciting for me.
Spray Starch TechniqueYou will love the shimmer and shine of this amazingly simple background.
Materials needed:Black cardstockSpray Starch (I use Niagra)Pearl Ex (one or more colors)Foam paint brushTray (devoted to crafting)
• Place black cardstock on the tray and spray it liberally with Spray Starch. • Tap on Pearl Ex powder(s). • Use the foam paint brush to swirl the Pearl Ex into the Spray Starch. If using more than one color, try notto mix. • Let dry. Use as a background, or emboss your stamped image with a contrasting color directly on theSpray Starch background.
Note: The Spray Starch acts as the adhesive and sets the Pearl Ex.
There you have it! Short-Sweet-Simple! And oh so much fun!
6/22/12 4:55 PMgg designs Catalog Home of Unmounted, Carved Look Rubber Stamps
Page 2 of 25http://www.ggdesigns.net/Gazette/Challenges/DebLovettsSSTech.html
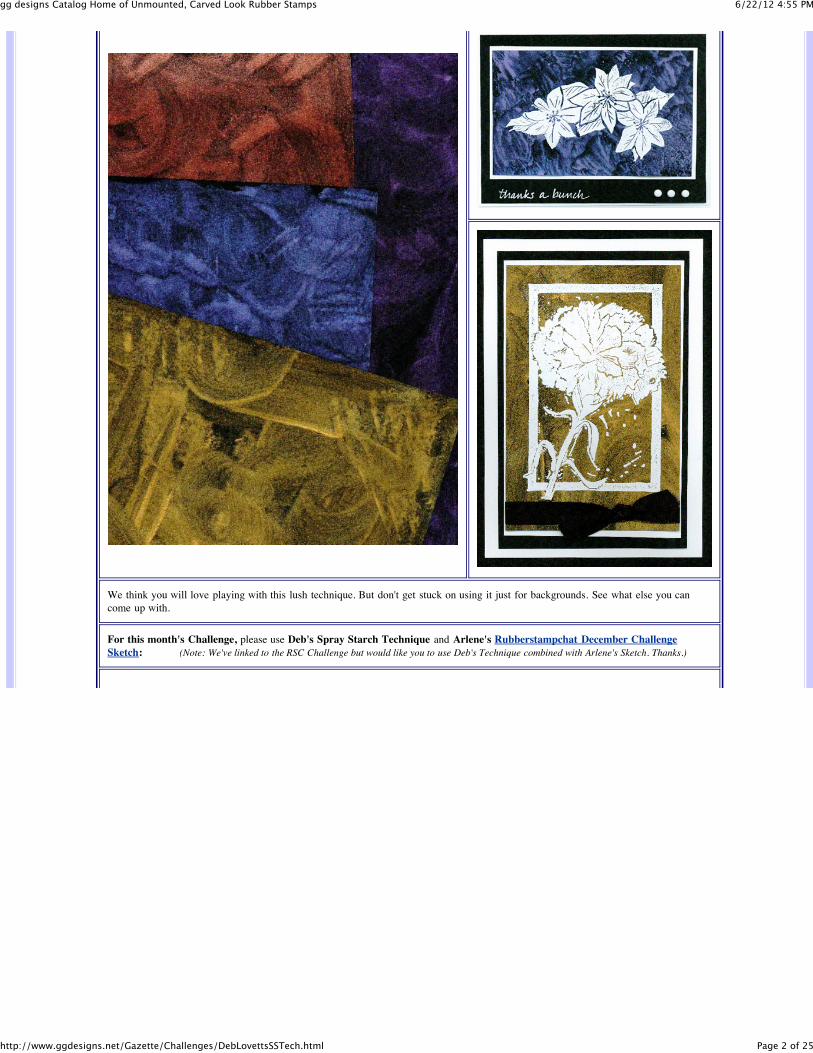
We think you will love playing with this lush technique. But don't get stuck on using it just for backgrounds. See what else you cancome up with.
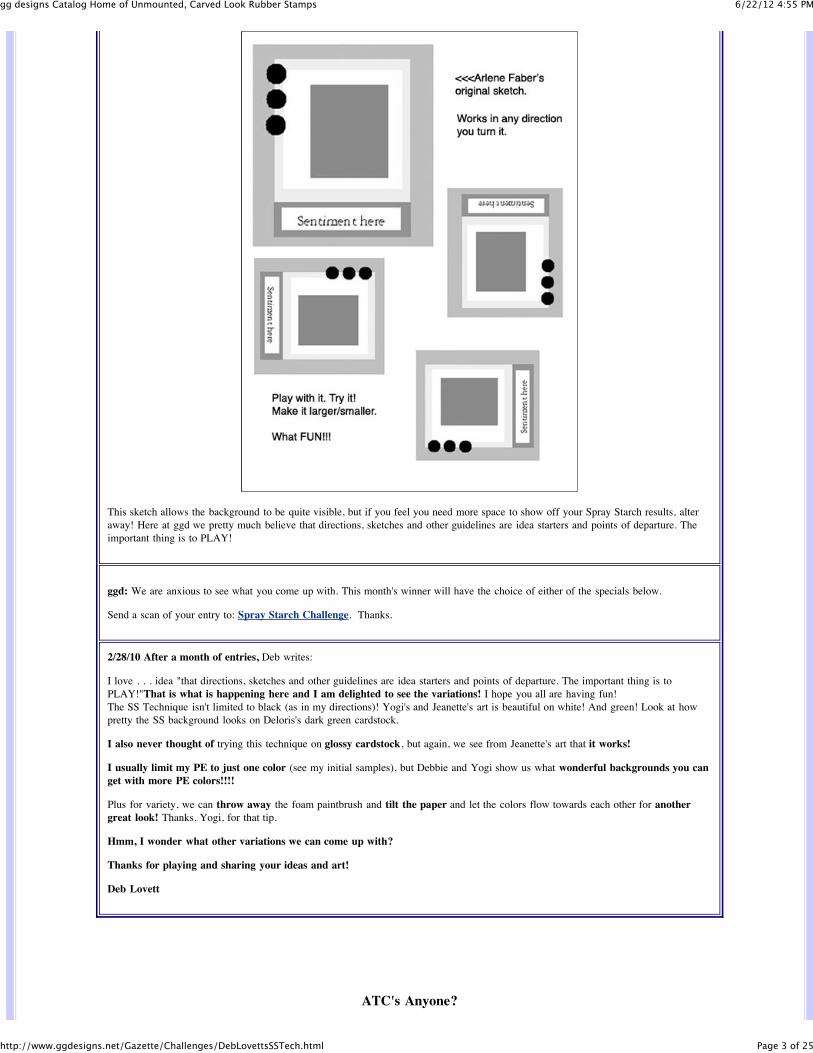
For this month's Challenge, please use Deb's Spray Starch Technique and Arlene's Rubberstampchat December ChallengeSketch: (Note: We've linked to the RSC Challenge but would like you to use Deb's Technique combined with Arlene's Sketch. Thanks.)
6/22/12 4:55 PMgg designs Catalog Home of Unmounted, Carved Look Rubber Stamps
Page 3 of 25http://www.ggdesigns.net/Gazette/Challenges/DebLovettsSSTech.html
This sketch allows the background to be quite visible, but if you feel you need more space to show off your Spray Starch results, alteraway! Here at ggd we pretty much believe that directions, sketches and other guidelines are idea starters and points of departure. Theimportant thing is to PLAY!
ggd: We are anxious to see what you come up with. This month's winner will have the choice of either of the specials below.
Send a scan of your entry to: Spray Starch Challenge. Thanks.
2/28/10 After a month of entries, Deb writes:
I love . . . idea "that directions, sketches and other guidelines are idea starters and points of departure. The important thing is toPLAY!"That is what is happening here and I am delighted to see the variations! I hope you all are having fun!The SS Technique isn't limited to black (as in my directions)! Yogi's and Jeanette's art is beautiful on white! And green! Look at howpretty the SS background looks on Deloris's dark green cardstock.
I also never thought of trying this technique on glossy cardstock, but again, we see from Jeanette's art that it works!
I usually limit my PE to just one color (see my initial samples), but Debbie and Yogi show us what wonderful backgrounds you canget with more PE colors!!!!
Plus for variety, we can throw away the foam paintbrush and tilt the paper and let the colors flow towards each other for anothergreat look! Thanks, Yogi, for that tip.
Hmm, I wonder what other variations we can come up with?
Thanks for playing and sharing your ideas and art!
Deb Lovett
ATC's Anyone?
6/22/12 4:55 PMgg designs Catalog Home of Unmounted, Carved Look Rubber Stamps
Page 4 of 25http://www.ggdesigns.net/Gazette/Challenges/DebLovettsSSTech.html
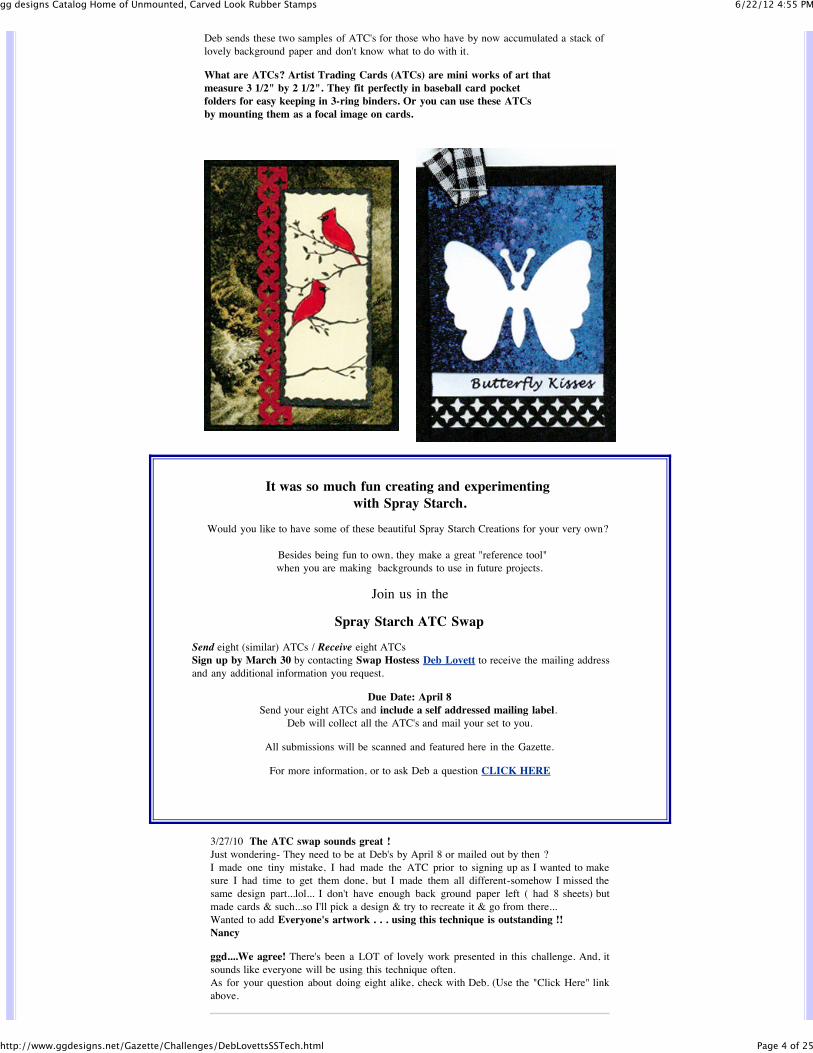
Deb sends these two samples of ATC's for those who have by now accumulated a stack oflovely background paper and don't know what to do with it.
What are ATCs? Artist Trading Cards (ATCs) are mini works of art that measure 3 1/2" by 2 1/2". They fit perfectly in baseball card pocket folders for easy keeping in 3-ring binders. Or you can use these ATCs by mounting them as a focal image on cards.
It was so much fun creating and experimenting with Spray Starch.
Would you like to have some of these beautiful Spray Starch Creations for your very own?
Besides being fun to own, they make a great "reference tool" when you are making backgrounds to use in future projects.
Join us in the
Spray Starch ATC Swap
Send eight (similar) ATCs / Receive eight ATCsSign up by March 30 by contacting Swap Hostess Deb Lovett to receive the mailing addressand any additional information you request.
Due Date: April 8Send your eight ATCs and include a self addressed mailing label.
Deb will collect all the ATC's and mail your set to you.
All submissions will be scanned and featured here in the Gazette.
For more information, or to ask Deb a question CLICK HERE
3/27/10 The ATC swap sounds great !Just wondering- They need to be at Deb's by April 8 or mailed out by then ? I made one tiny mistake, I had made the ATC prior to signing up as I wanted to makesure I had time to get them done, but I made them all different-somehow I missed thesame design part...lol... I don't have enough back ground paper left ( had 8 sheets) butmade cards & such...so I'll pick a design & try to recreate it & go from there... Wanted to add Everyone's artwork . . . using this technique is outstanding !!Nancy
ggd....We agree! There's been a LOT of lovely work presented in this challenge. And, itsounds like everyone will be using this technique often.As for your question about doing eight alike, check with Deb. (Use the "Click Here" linkabove.

6/22/12 4:55 PMgg designs Catalog Home of Unmounted, Carved Look Rubber Stamps
Page 5 of 25http://www.ggdesigns.net/Gazette/Challenges/DebLovettsSSTech.html
3/30/10 Spray Starch ATC Swap UpdateI am very excited about the response to the Spray Starch ATC swap. I will extend the sign up deadline -- but the receiving date of April 8 is firm. People are already sending me their art. I know everyone will want to have some of these ATCs for their very own!
Yes, Nancy, please send your 8 ATCs even if they are all different. I was just trying to save everyone some time and creativity by suggesting that the ATCs be the same.
Deb
New Submissions
3/30/10 Thanks everyone for playing and experimentingwith the Spray Starch Technique. This has been such ajoy! Thanks ggdesigns for hosting this challenge! Deb
3/31/10 Not sure you want this spraystarch card because it uses a digi imagebut I'm sending it anyway. I like how itturned out. It was made for a sketchchallenge using black, white and onecolor. My sailor girl would have lookedbetter with a bit of color in her face.But, I like how the spray starchbackground looks beachy. I'm almostcaught up and will send you an emailabout the forum and other things.
Jeanette
6/22/12 4:55 PMgg designs Catalog Home of Unmounted, Carved Look Rubber Stamps
Page 6 of 25http://www.ggdesigns.net/Gazette/Challenges/DebLovettsSSTech.html
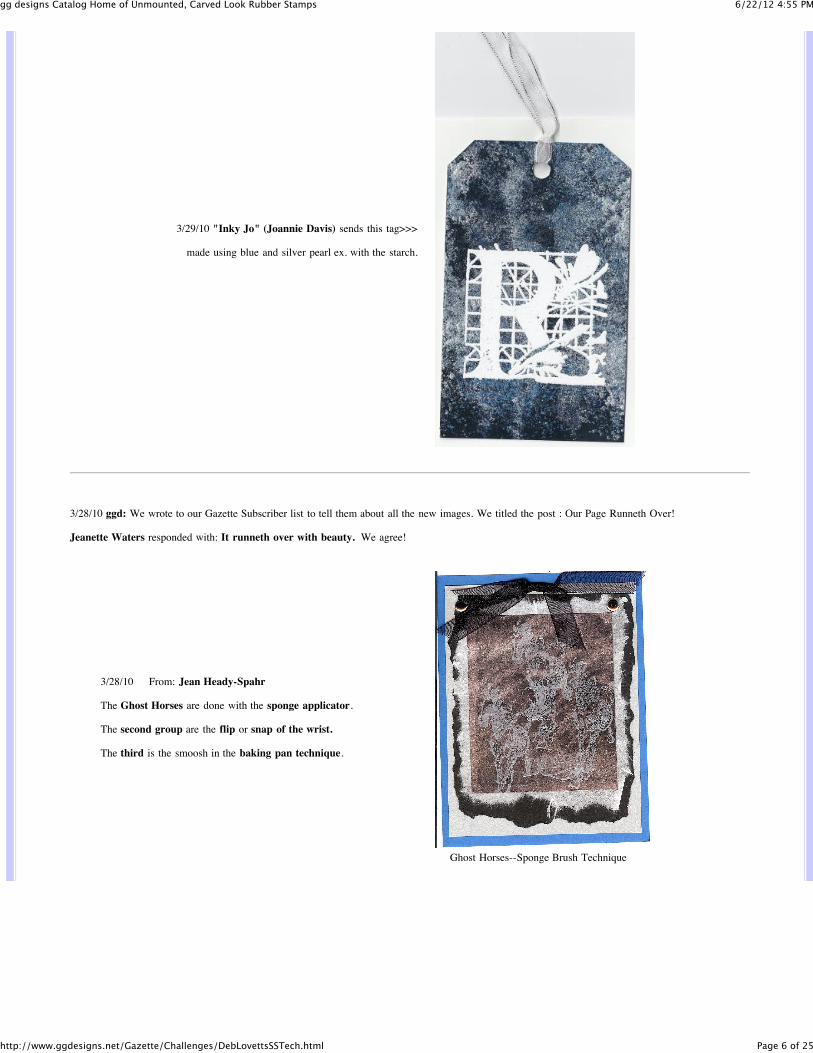
3/29/10 "Inky Jo" (Joannie Davis) sends this tag>>>
made using blue and silver pearl ex. with the starch.
3/28/10 ggd: We wrote to our Gazette Subscriber list to tell them about all the new images. We titled the post : Our Page Runneth Over!
Jeanette Waters responded with: It runneth over with beauty. We agree!
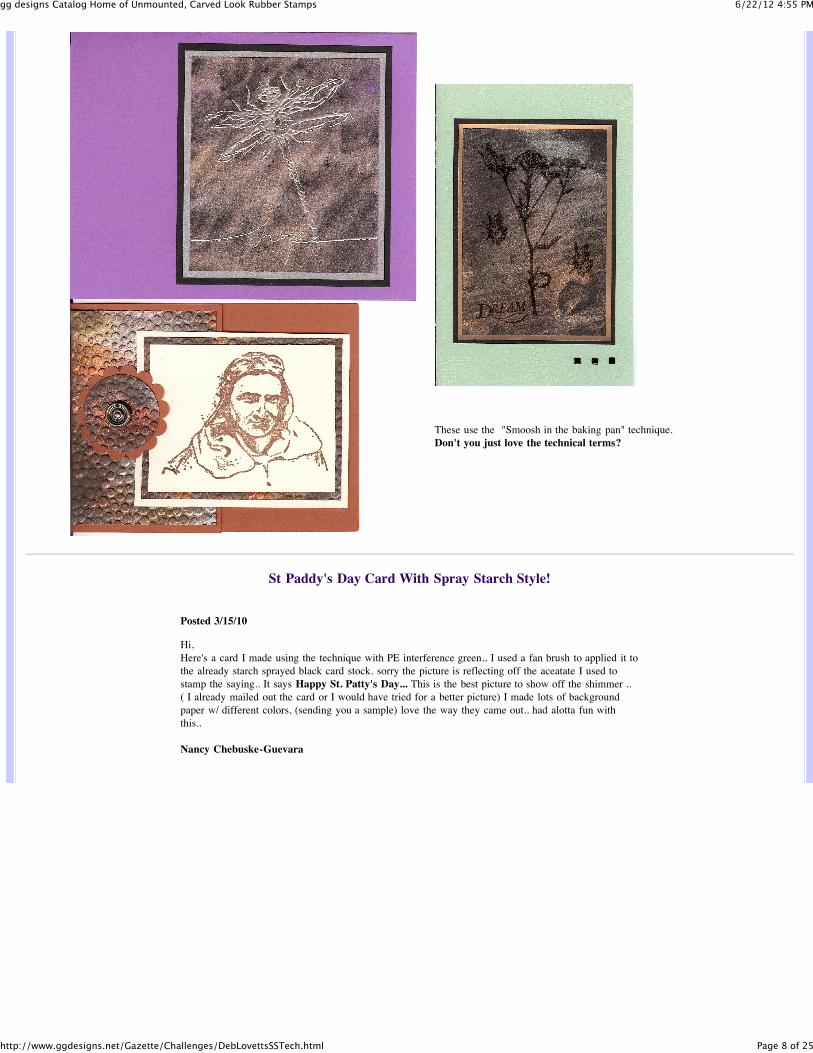
3/28/10 From: Jean Heady-Spahr
The Ghost Horses are done with the sponge applicator.
The second group are the flip or snap of the wrist.
The third is the smoosh in the baking pan technique.
Ghost Horses--Sponge Brush Technique
6/22/12 4:55 PMgg designs Catalog Home of Unmounted, Carved Look Rubber Stamps
Page 7 of 25http://www.ggdesigns.net/Gazette/Challenges/DebLovettsSSTech.html
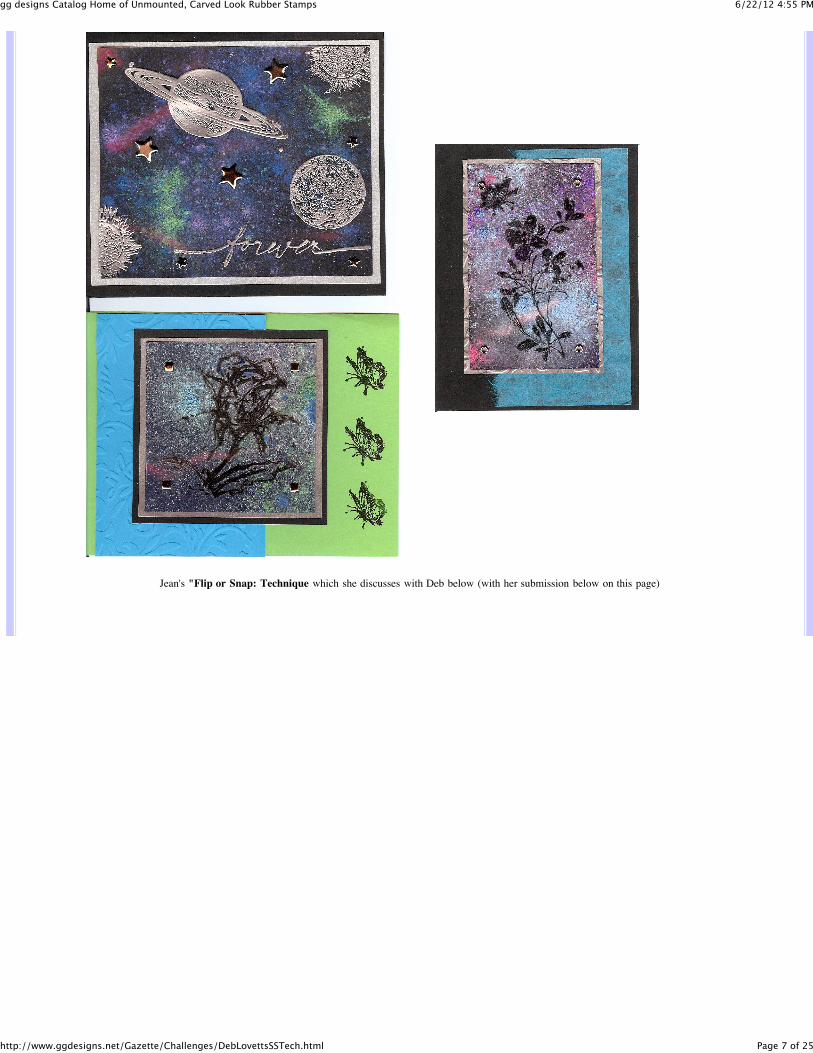
Jean's "Flip or Snap: Technique which she discusses with Deb below (with her submission below on this page)
6/22/12 4:55 PMgg designs Catalog Home of Unmounted, Carved Look Rubber Stamps
Page 8 of 25http://www.ggdesigns.net/Gazette/Challenges/DebLovettsSSTech.html
These use the "Smoosh in the baking pan" technique.Don't you just love the technical terms?
St Paddy's Day Card With Spray Starch Style!
Posted 3/15/10
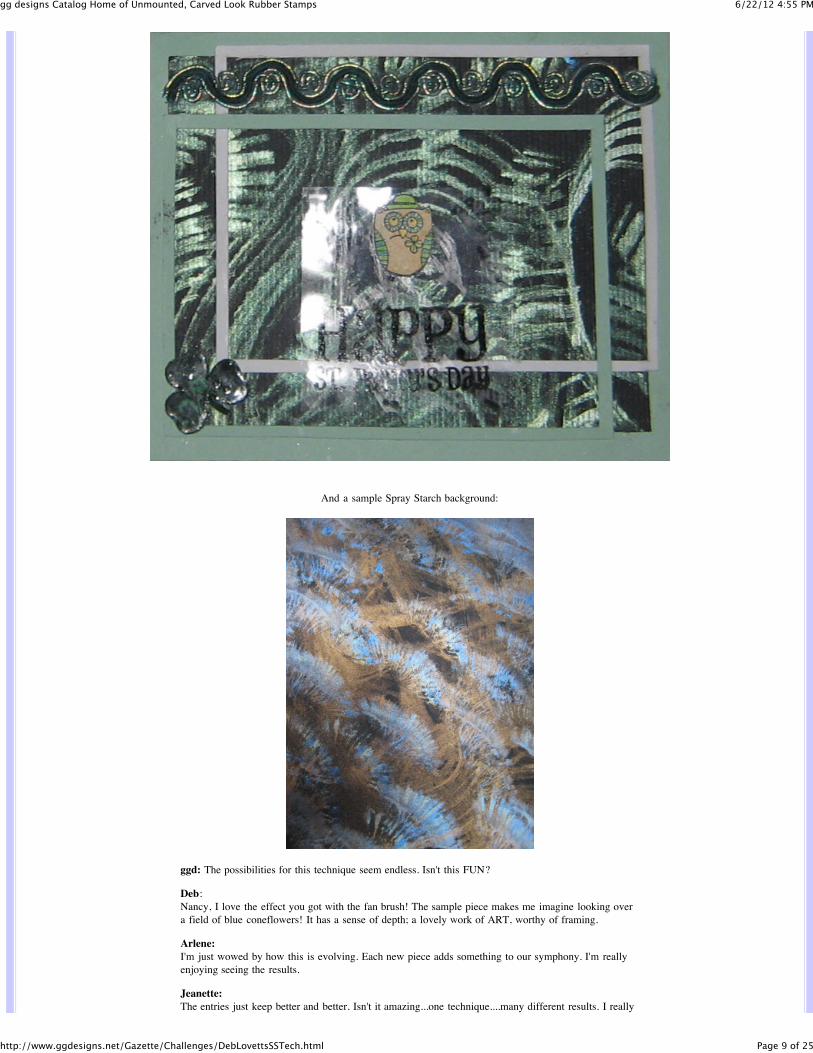
Hi,Here's a card I made using the technique with PE interference green,, I used a fan brush to applied it tothe already starch sprayed black card stock. sorry the picture is reflecting off the aceatate I used tostamp the saying.. It says Happy St. Patty's Day... This is the best picture to show off the shimmer ..( I already mailed out the card or I would have tried for a better picture) I made lots of backgroundpaper w/ different colors, (sending you a sample) love the way they came out.. had alotta fun withthis..
Nancy Chebuske-Guevara
6/22/12 4:55 PMgg designs Catalog Home of Unmounted, Carved Look Rubber Stamps
Page 9 of 25http://www.ggdesigns.net/Gazette/Challenges/DebLovettsSSTech.html
And a sample Spray Starch background:
ggd: The possibilities for this technique seem endless. Isn't this FUN?
Deb:Nancy, I love the effect you got with the fan brush! The sample piece makes me imagine looking overa field of blue coneflowers! It has a sense of depth; a lovely work of ART, worthy of framing.
Arlene:I'm just wowed by how this is evolving. Each new piece adds something to our symphony. I'm reallyenjoying seeing the results.
Jeanette:The entries just keep better and better. Isn't it amazing...one technique....many different results. I really
6/22/12 4:55 PMgg designs Catalog Home of Unmounted, Carved Look Rubber Stamps
Page 10 of 25http://www.ggdesigns.net/Gazette/Challenges/DebLovettsSSTech.html
is a wonderful technique. Thanks Deb for sharing with us.
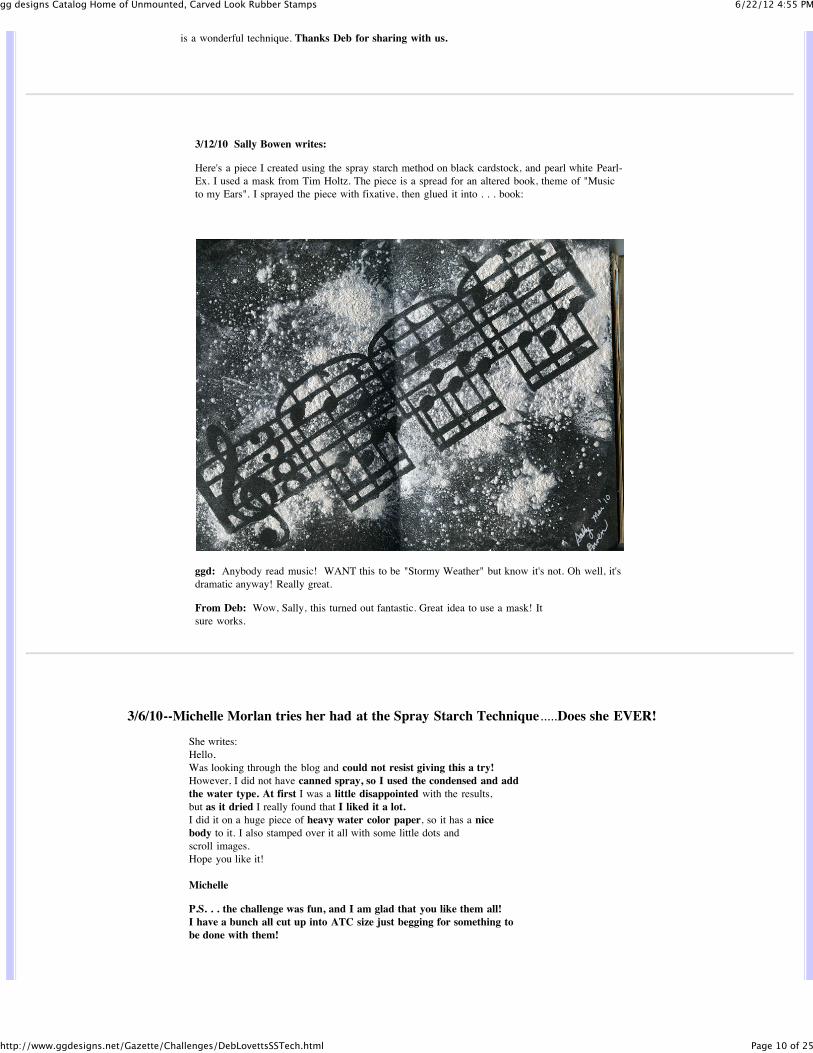
3/12/10 Sally Bowen writes:
Here's a piece I created using the spray starch method on black cardstock, and pearl white Pearl-Ex. I used a mask from Tim Holtz. The piece is a spread for an altered book, theme of "Musicto my Ears". I sprayed the piece with fixative, then glued it into . . . book:
ggd: Anybody read music! WANT this to be "Stormy Weather" but know it's not. Oh well, it'sdramatic anyway! Really great.
From Deb: Wow, Sally, this turned out fantastic. Great idea to use a mask! It sure works.
3/6/10--Michelle Morlan tries her had at the Spray Starch Technique.....Does she EVER!
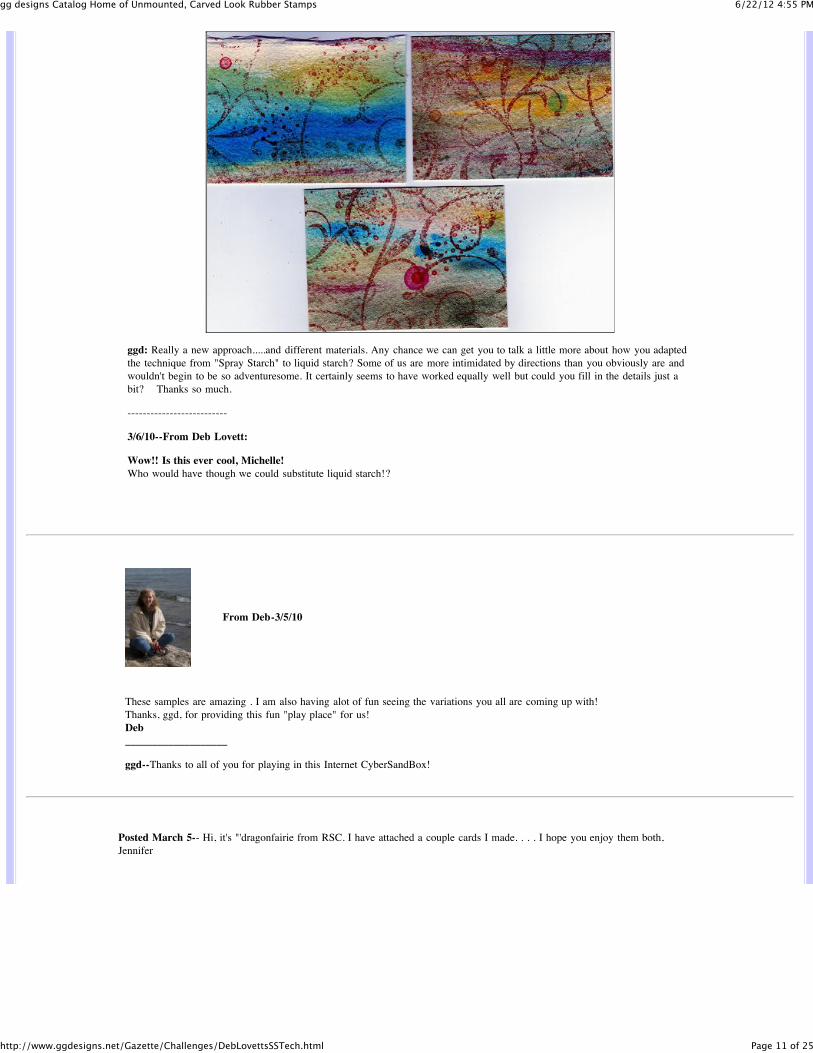
She writes:Hello,Was looking through the blog and could not resist giving this a try!However, I did not have canned spray, so I used the condensed and addthe water type. At first I was a little disappointed with the results,but as it dried I really found that I liked it a lot.I did it on a huge piece of heavy water color paper, so it has a nicebody to it. I also stamped over it all with some little dots andscroll images.Hope you like it!
Michelle
P.S. . . the challenge was fun, and I am glad that you like them all!I have a bunch all cut up into ATC size just begging for something tobe done with them!
6/22/12 4:55 PMgg designs Catalog Home of Unmounted, Carved Look Rubber Stamps
Page 11 of 25http://www.ggdesigns.net/Gazette/Challenges/DebLovettsSSTech.html
ggd: Really a new approach.....and different materials. Any chance we can get you to talk a little more about how you adaptedthe technique from "Spray Starch" to liquid starch? Some of us are more intimidated by directions than you obviously are andwouldn't begin to be so adventuresome. It certainly seems to have worked equally well but could you fill in the details just abit? Thanks so much.
--------------------------
3/6/10--From Deb Lovett:
Wow!! Is this ever cool, Michelle!Who would have though we could substitute liquid starch!?
From Deb-3/5/10
These samples are amazing . I am also having alot of fun seeing the variations you all are coming up with! Thanks, ggd, for providing this fun "play place" for us!Deb ___________________
ggd--Thanks to all of you for playing in this Internet CyberSandBox!
Posted March 5-- Hi, it's "'dragonfairie from RSC. I have attached a couple cards I made. . . . I hope you enjoy them both,Jennifer
6/22/12 4:55 PMgg designs Catalog Home of Unmounted, Carved Look Rubber Stamps
Page 12 of 25http://www.ggdesigns.net/Gazette/Challenges/DebLovettsSSTech.html
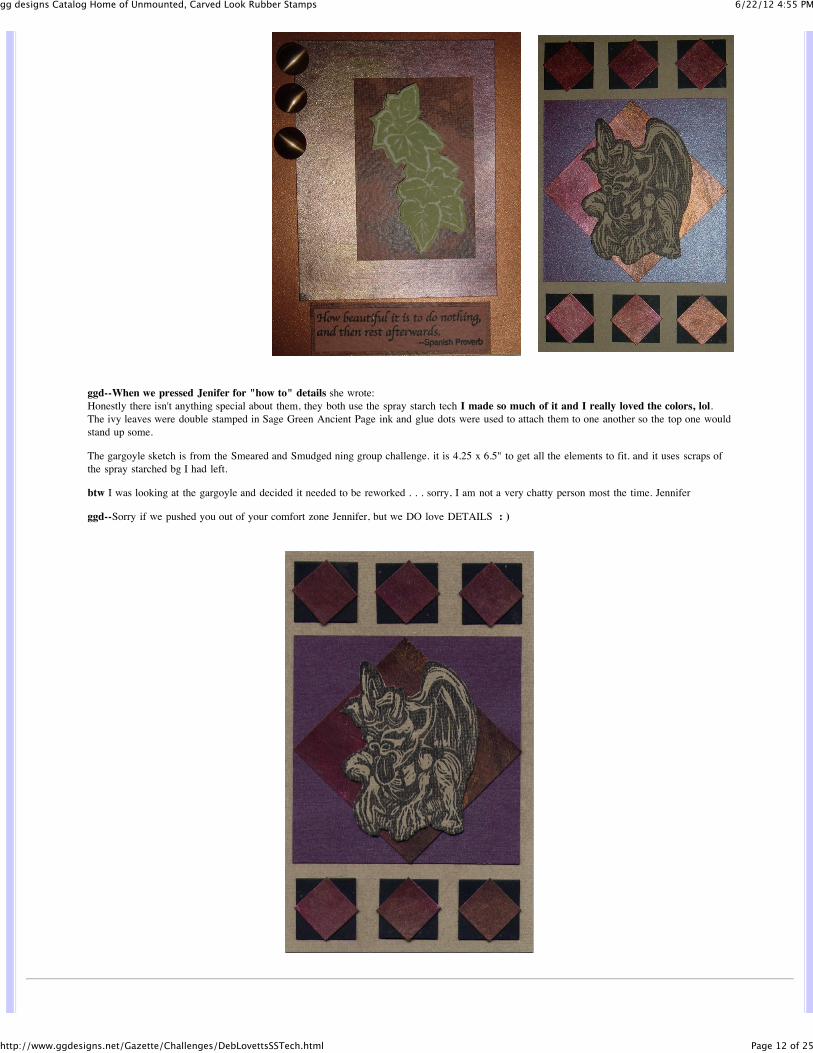
ggd--When we pressed Jenifer for "how to" details she wrote:Honestly there isn't anything special about them, they both use the spray starch tech I made so much of it and I really loved the colors, lol.The ivy leaves were double stamped in Sage Green Ancient Page ink and glue dots were used to attach them to one another so the top one wouldstand up some.
The gargoyle sketch is from the Smeared and Smudged ning group challenge. it is 4.25 x 6.5" to get all the elements to fit. and it uses scraps ofthe spray starched bg I had left.
btw I was looking at the gargoyle and decided it needed to be reworked . . . sorry, I am not a very chatty person most the time. Jennifer
ggd--Sorry if we pushed you out of your comfort zone Jennifer, but we DO love DETAILS : )
6/22/12 4:55 PMgg designs Catalog Home of Unmounted, Carved Look Rubber Stamps
Page 13 of 25http://www.ggdesigns.net/Gazette/Challenges/DebLovettsSSTech.html
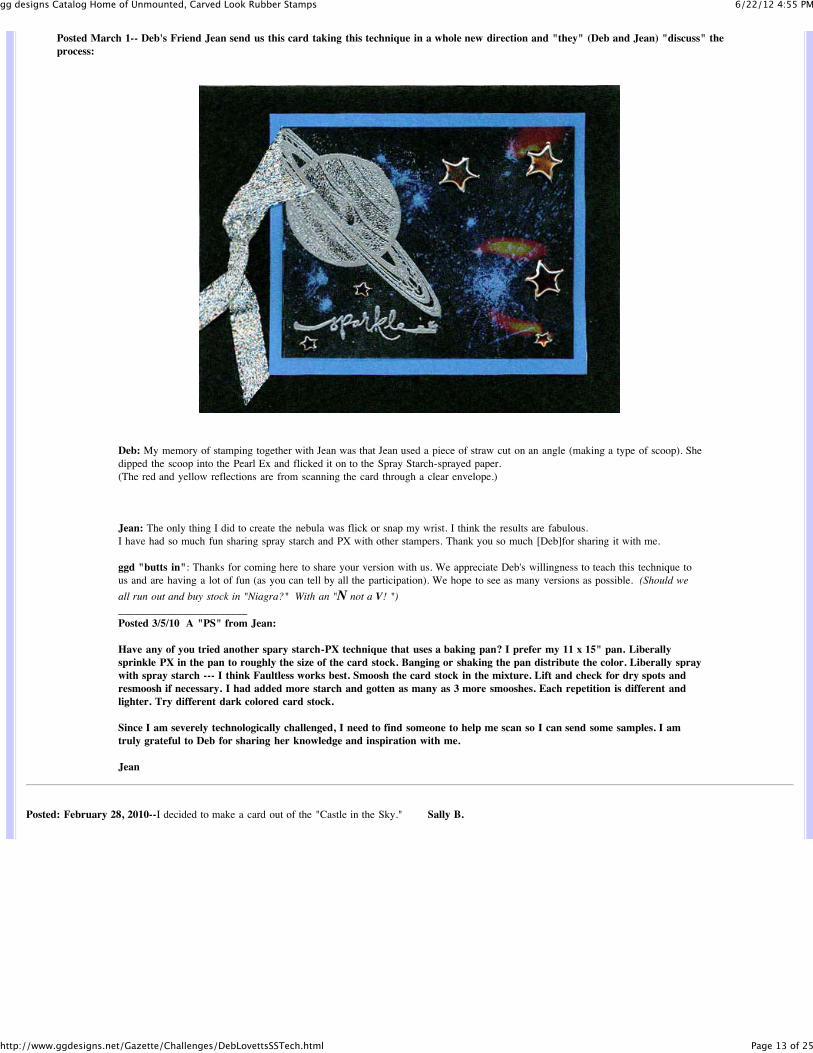
Posted March 1-- Deb's Friend Jean send us this card taking this technique in a whole new direction and "they" (Deb and Jean) "discuss" theprocess:
Deb: My memory of stamping together with Jean was that Jean used a piece of straw cut on an angle (making a type of scoop). Shedipped the scoop into the Pearl Ex and flicked it on to the Spray Starch-sprayed paper.(The red and yellow reflections are from scanning the card through a clear envelope.)
Jean: The only thing I did to create the nebula was flick or snap my wrist. I think the results are fabulous.I have had so much fun sharing spray starch and PX with other stampers. Thank you so much [Deb]for sharing it with me.
ggd "butts in": Thanks for coming here to share your version with us. We appreciate Deb's willingness to teach this technique tous and are having a lot of fun (as you can tell by all the participation). We hope to see as many versions as possible. (Should weall run out and buy stock in "Niagra?" With an "N not a V! ")________________________Posted 3/5/10 A "PS" from Jean:
Have any of you tried another spary starch-PX technique that uses a baking pan? I prefer my 11 x 15" pan. Liberallysprinkle PX in the pan to roughly the size of the card stock. Banging or shaking the pan distribute the color. Liberally spraywith spray starch --- I think Faultless works best. Smoosh the card stock in the mixture. Lift and check for dry spots andresmoosh if necessary. I had added more starch and gotten as many as 3 more smooshes. Each repetition is different andlighter. Try different dark colored card stock.
Since I am severely technologically challenged, I need to find someone to help me scan so I can send some samples. I amtruly grateful to Deb for sharing her knowledge and inspiration with me.
Jean
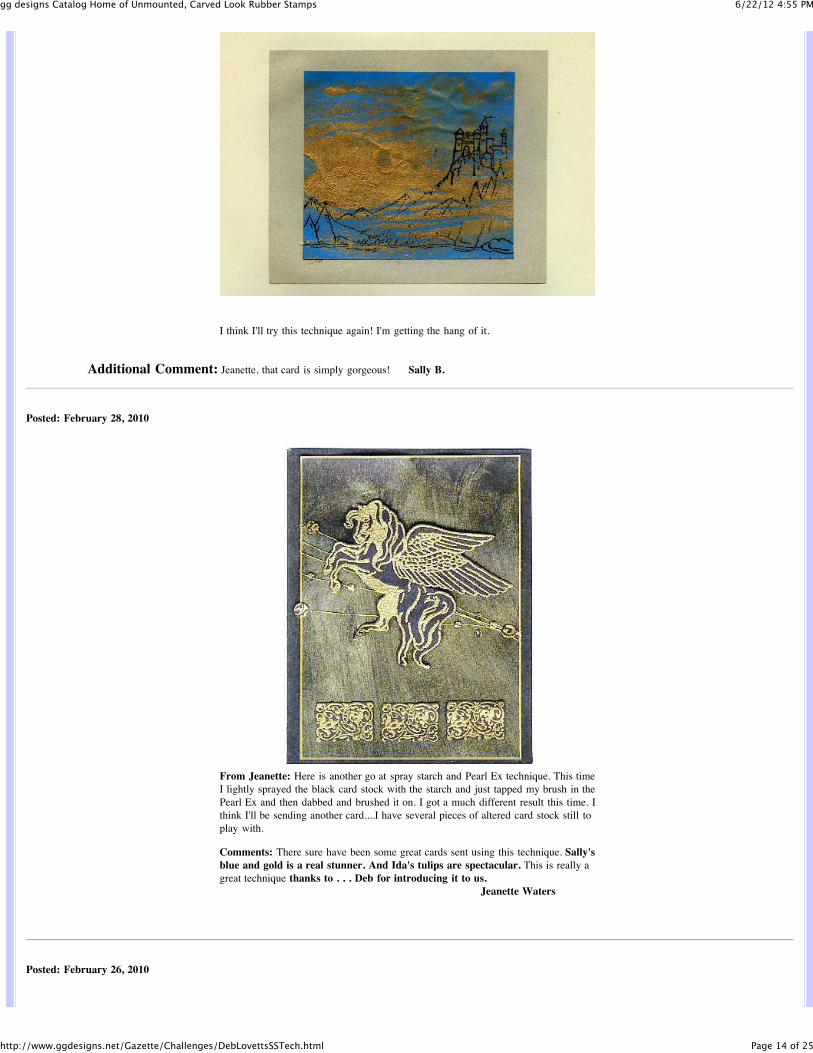
Posted: February 28, 2010--I decided to make a card out of the "Castle in the Sky." Sally B.
6/22/12 4:55 PMgg designs Catalog Home of Unmounted, Carved Look Rubber Stamps
Page 14 of 25http://www.ggdesigns.net/Gazette/Challenges/DebLovettsSSTech.html
I think I'll try this technique again! I'm getting the hang of it.
Additional Comment: Jeanette, that card is simply gorgeous! Sally B.
Posted: February 28, 2010
From Jeanette: Here is another go at spray starch and Pearl Ex technique. This timeI lightly sprayed the black card stock with the starch and just tapped my brush in thePearl Ex and then dabbed and brushed it on. I got a much different result this time. Ithink I'll be sending another card....I have several pieces of altered card stock still toplay with.
Comments: There sure have been some great cards sent using this technique. Sally'sblue and gold is a real stunner. And Ida's tulips are spectacular. This is really agreat technique thanks to . . . Deb for introducing it to us. Jeanette Waters
Posted: February 26, 2010
6/22/12 4:55 PMgg designs Catalog Home of Unmounted, Carved Look Rubber Stamps
Page 15 of 25http://www.ggdesigns.net/Gazette/Challenges/DebLovettsSSTech.html
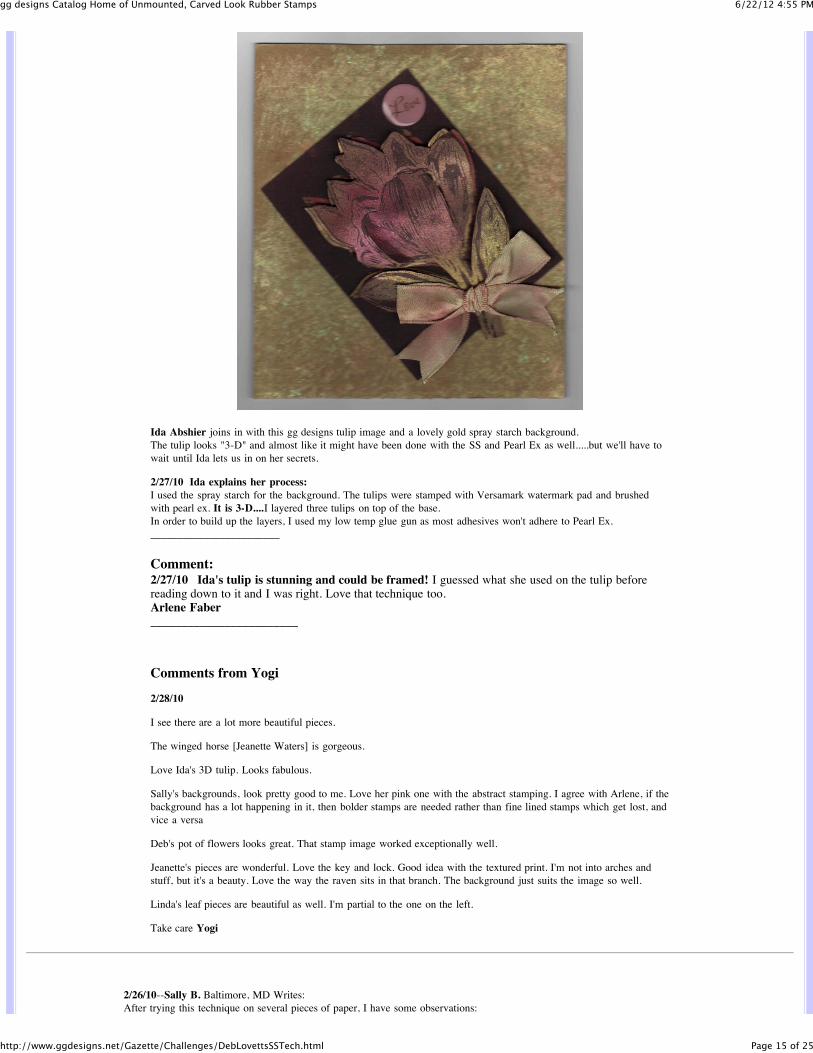
Ida Abshier joins in with this gg designs tulip image and a lovely gold spray starch background. The tulip looks "3-D" and almost like it might have been done with the SS and Pearl Ex as well.....but we'll have towait until Ida lets us in on her secrets.
2/27/10 Ida explains her process:I used the spray starch for the background. The tulips were stamped with Versamark watermark pad and brushedwith pearl ex. It is 3-D....I layered three tulips on top of the base.In order to build up the layers, I used my low temp glue gun as most adhesives won't adhere to Pearl Ex.________________________
Comment:2/27/10 Ida's tulip is stunning and could be framed! I guessed what she used on the tulip beforereading down to it and I was right. Love that technique too.Arlene Faber ________________________
Comments from Yogi
2/28/10
I see there are a lot more beautiful pieces.
The winged horse [Jeanette Waters] is gorgeous.
Love Ida's 3D tulip. Looks fabulous.
Sally's backgrounds, look pretty good to me. Love her pink one with the abstract stamping. I agree with Arlene, if thebackground has a lot happening in it, then bolder stamps are needed rather than fine lined stamps which get lost, andvice a versa
Deb's pot of flowers looks great. That stamp image worked exceptionally well.
Jeanette's pieces are wonderful. Love the key and lock. Good idea with the textured print. I'm not into arches andstuff, but it's a beauty. Love the way the raven sits in that branch. The background just suits the image so well.
Linda's leaf pieces are beautiful as well. I'm partial to the one on the left.
Take care Yogi
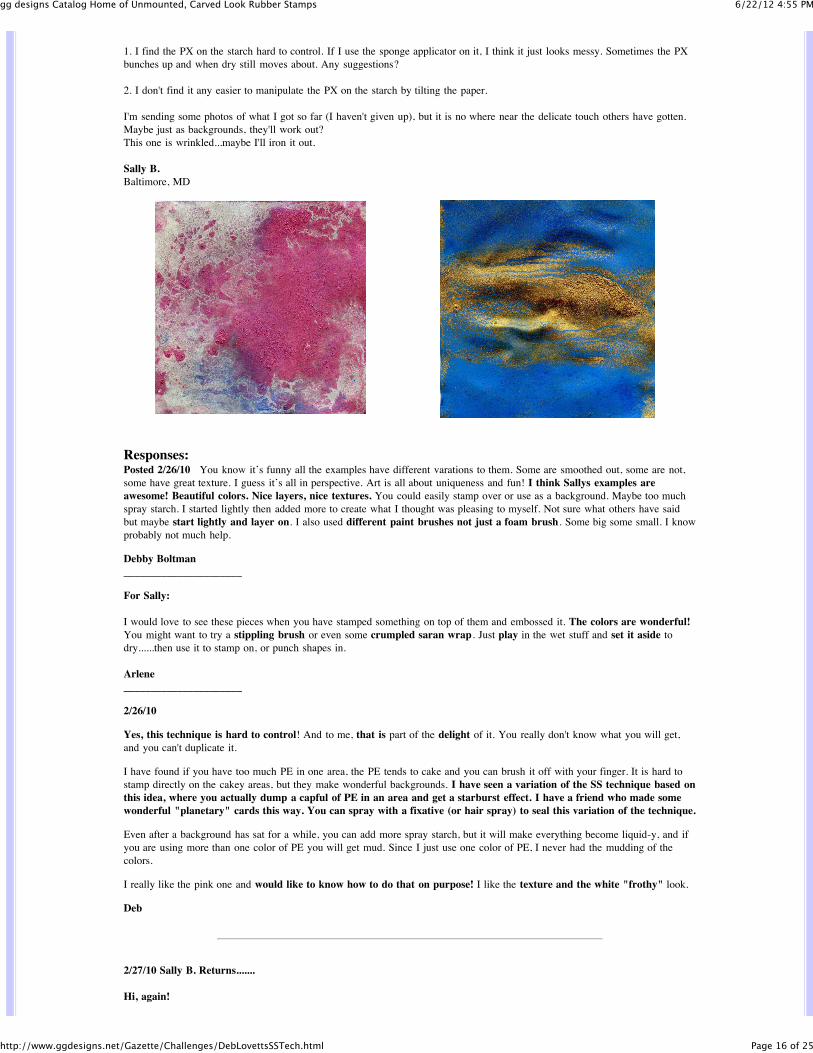
2/26/10--Sally B. Baltimore, MD Writes: After trying this technique on several pieces of paper, I have some observations:
6/22/12 4:55 PMgg designs Catalog Home of Unmounted, Carved Look Rubber Stamps
Page 16 of 25http://www.ggdesigns.net/Gazette/Challenges/DebLovettsSSTech.html
1. I find the PX on the starch hard to control. If I use the sponge applicator on it, I think it just looks messy. Sometimes the PXbunches up and when dry still moves about. Any suggestions?
2. I don't find it any easier to manipulate the PX on the starch by tilting the paper.
I'm sending some photos of what I got so far (I haven't given up), but it is no where near the delicate touch others have gotten.Maybe just as backgrounds, they'll work out?This one is wrinkled...maybe I'll iron it out.
Sally B.Baltimore, MD
Responses:Posted 2/26/10 You know it’s funny all the examples have different varations to them. Some are smoothed out, some are not,some have great texture. I guess it’s all in perspective. Art is all about uniqueness and fun! I think Sallys examples areawesome! Beautiful colors. Nice layers, nice textures. You could easily stamp over or use as a background. Maybe too muchspray starch. I started lightly then added more to create what I thought was pleasing to myself. Not sure what others have saidbut maybe start lightly and layer on. I also used different paint brushes not just a foam brush. Some big some small. I knowprobably not much help.
Debby Boltman______________________
For Sally:
I would love to see these pieces when you have stamped something on top of them and embossed it. The colors are wonderful!You might want to try a stippling brush or even some crumpled saran wrap. Just play in the wet stuff and set it aside todry......then use it to stamp on, or punch shapes in.
Arlene______________________
2/26/10
Yes, this technique is hard to control! And to me, that is part of the delight of it. You really don't know what you will get,and you can't duplicate it.
I have found if you have too much PE in one area, the PE tends to cake and you can brush it off with your finger. It is hard tostamp directly on the cakey areas, but they make wonderful backgrounds. I have seen a variation of the SS technique based onthis idea, where you actually dump a capful of PE in an area and get a starburst effect. I have a friend who made somewonderful "planetary" cards this way. You can spray with a fixative (or hair spray) to seal this variation of the technique.
Even after a background has sat for a while, you can add more spray starch, but it will make everything become liquid-y, and ifyou are using more than one color of PE you will get mud. Since I just use one color of PE, I never had the mudding of thecolors.
I really like the pink one and would like to know how to do that on purpose! I like the texture and the white "frothy" look.
Deb
2/27/10 Sally B. Returns.......
Hi, again!
6/22/12 4:55 PMgg designs Catalog Home of Unmounted, Carved Look Rubber Stamps
Page 17 of 25http://www.ggdesigns.net/Gazette/Challenges/DebLovettsSSTech.html
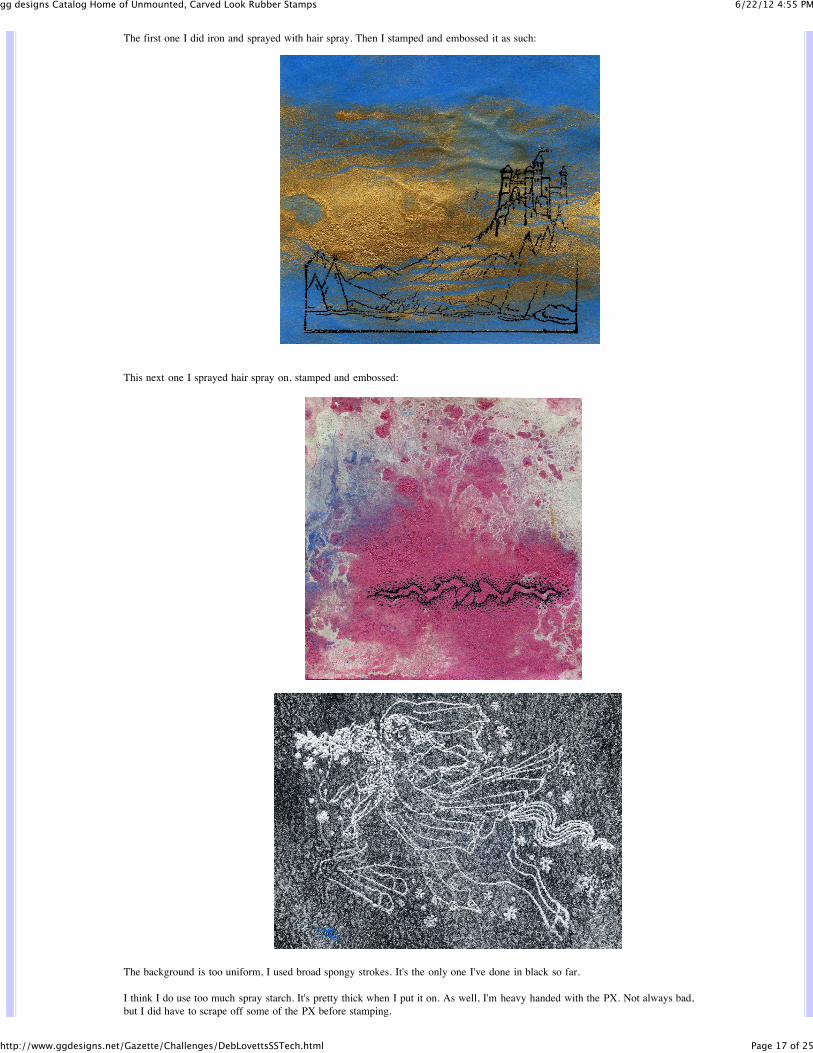
The first one I did iron and sprayed with hair spray. Then I stamped and embossed it as such:
This next one I sprayed hair spray on, stamped and embossed:
The background is too uniform, I used broad spongy strokes. It's the only one I've done in black so far.
I think I do use too much spray starch. It's pretty thick when I put it on. As well, I'm heavy handed with the PX. Not always bad,but I did have to scrape off some of the PX before stamping.

6/22/12 4:55 PMgg designs Catalog Home of Unmounted, Carved Look Rubber Stamps
Page 18 of 25http://www.ggdesigns.net/Gazette/Challenges/DebLovettsSSTech.html
I'd love some comments! I appreciate the comments so far. I am feeling more at home with the process, I realize that I needto loosen up! *Thank you all.
*Good advice for us all, with this technique. ggd_________________________
2/27/10 Arlene Faber observes:Sally used fine line stamps and after seeing several samples now it seems that the bolder embossed designs don't get so lost intothe stunning backgrounds. Perhaps you want to try that Sally if you have bolder stamps to use._________________________
Response:2/28/10Thanks, Arlene . . . I do see what you mean, I didn't think of that when I stamped and embossed.
I may cut these and redo some area to see how they come out. I'm also planning to make more backgrounds!
That said, the cards WOW me, congratulations to you folks who submitted such beautiful, finished products! I really am inawe.
Sally B.
Posted: February 23, 2010
This is a ggd image. Click on cards to see other versions.
Deb Lovett .......
sends this additional sample which utilizes Arlene'ssketch.
ggd: Just as a "conversation starter"--How many of youlike using sketches to get you started? How many findsketches hamper you?
6/22/12 4:55 PMgg designs Catalog Home of Unmounted, Carved Look Rubber Stamps
Page 19 of 25http://www.ggdesigns.net/Gazette/Challenges/DebLovettsSSTech.html
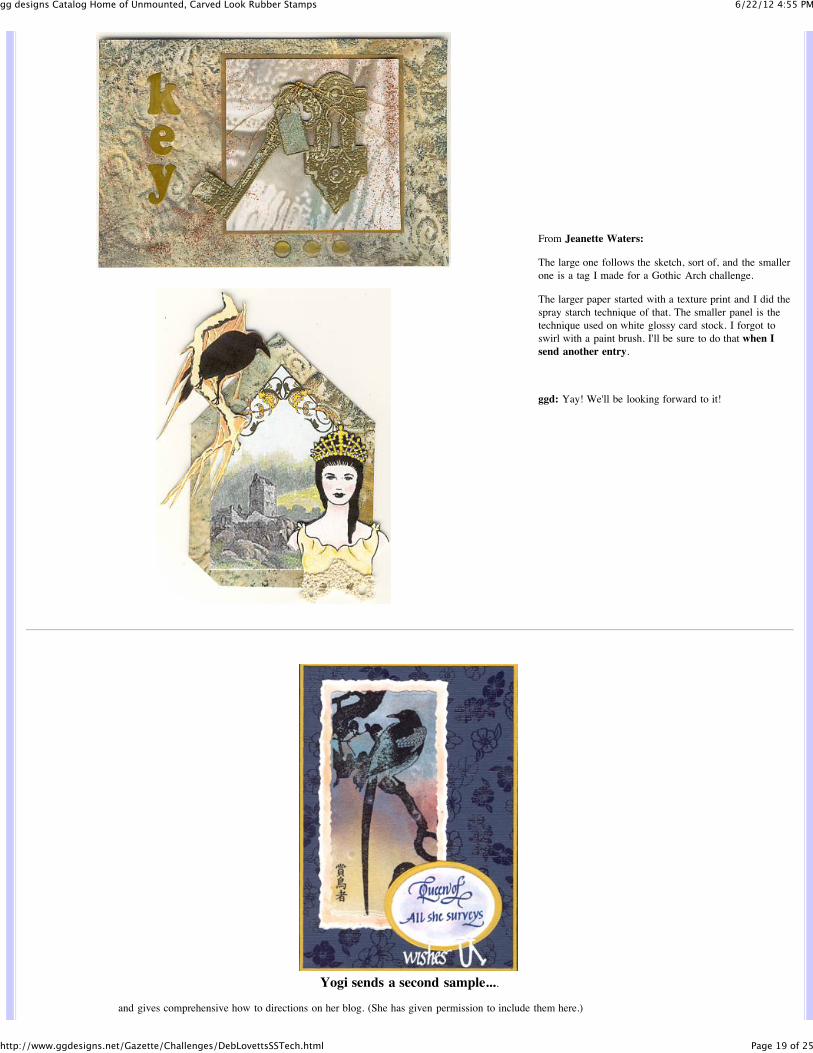
From Jeanette Waters:
The large one follows the sketch, sort of, and the smallerone is a tag I made for a Gothic Arch challenge.
The larger paper started with a texture print and I did thespray starch technique of that. The smaller panel is thetechnique used on white glossy card stock. I forgot toswirl with a paint brush. I'll be sure to do that when Isend another entry.
ggd: Yay! We'll be looking forward to it!
Yogi sends a second sample....
and gives comprehensive how to directions on her blog. (She has given permission to include them here.)
6/22/12 4:55 PMgg designs Catalog Home of Unmounted, Carved Look Rubber Stamps
Page 20 of 25http://www.ggdesigns.net/Gazette/Challenges/DebLovettsSSTech.html
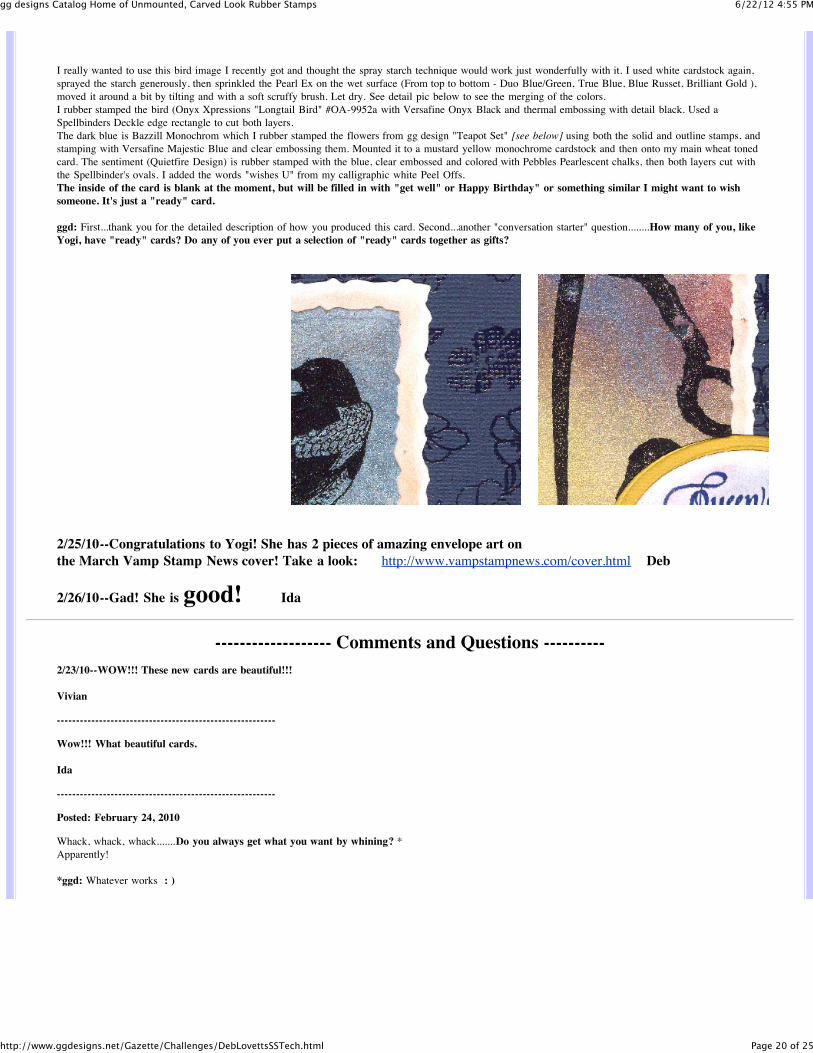
I really wanted to use this bird image I recently got and thought the spray starch technique would work just wonderfully with it. I used white cardstock again,sprayed the starch generously, then sprinkled the Pearl Ex on the wet surface (From top to bottom - Duo Blue/Green, True Blue, Blue Russet, Brilliant Gold ),moved it around a bit by tilting and with a soft scruffy brush. Let dry. See detail pic below to see the merging of the colors.I rubber stamped the bird (Onyx Xpressions "Longtail Bird" #OA-9952a with Versafine Onyx Black and thermal embossing with detail black. Used aSpellbinders Deckle edge rectangle to cut both layers.The dark blue is Bazzill Monochrom which I rubber stamped the flowers from gg design "Teapot Set" [see below] using both the solid and outline stamps, andstamping with Versafine Majestic Blue and clear embossing them. Mounted it to a mustard yellow monochrome cardstock and then onto my main wheat tonedcard. The sentiment (Quietfire Design) is rubber stamped with the blue, clear embossed and colored with Pebbles Pearlescent chalks, then both layers cut withthe Spellbinder's ovals. I added the words "wishes U" from my calligraphic white Peel Offs.The inside of the card is blank at the moment, but will be filled in with "get well" or Happy Birthday" or something similar I might want to wishsomeone. It's just a "ready" card.
ggd: First...thank you for the detailed description of how you produced this card. Second...another "conversation starter" question........How many of you, likeYogi, have "ready" cards? Do any of you ever put a selection of "ready" cards together as gifts?
2/25/10--Congratulations to Yogi! She has 2 pieces of amazing envelope art on the March Vamp Stamp News cover! Take a look: http://www.vampstampnews.com/cover.html Deb
2/26/10--Gad! She is good! Ida
------------------- Comments and Questions ----------2/23/10--WOW!!! These new cards are beautiful!!!
Vivian
---------------------------------------------------------
Wow!!! What beautiful cards.
Ida
---------------------------------------------------------
Posted: February 24, 2010
Whack, whack, whack.......Do you always get what you want by whining? *Apparently!
*ggd: Whatever works : )
6/22/12 4:55 PMgg designs Catalog Home of Unmounted, Carved Look Rubber Stamps
Page 21 of 25http://www.ggdesigns.net/Gazette/Challenges/DebLovettsSSTech.html
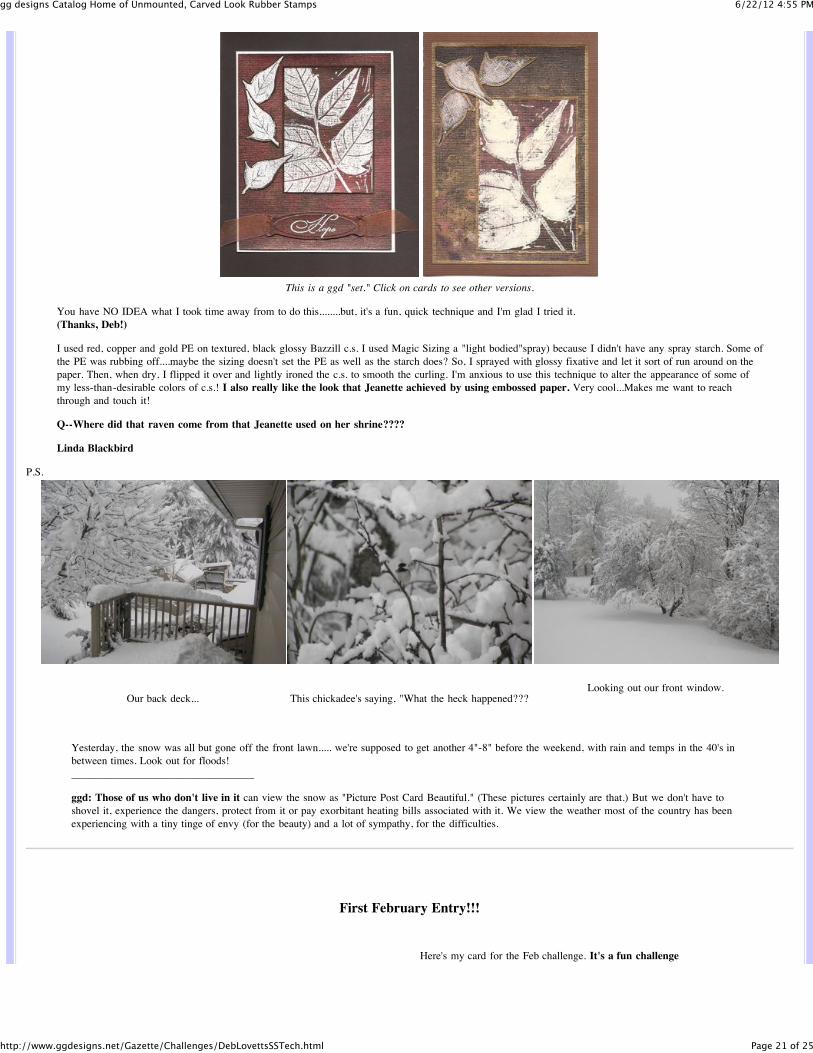
This is a ggd "set." Click on cards to see other versions.
You have NO IDEA what I took time away from to do this........but, it's a fun, quick technique and I'm glad I tried it. (Thanks, Deb!)
I used red, copper and gold PE on textured, black glossy Bazzill c.s. I used Magic Sizing a "light bodied"spray) because I didn't have any spray starch. Some ofthe PE was rubbing off....maybe the sizing doesn't set the PE as well as the starch does? So, I sprayed with glossy fixative and let it sort of run around on thepaper. Then, when dry, I flipped it over and lightly ironed the c.s. to smooth the curling. I'm anxious to use this technique to alter the appearance of some ofmy less-than-desirable colors of c.s.! I also really like the look that Jeanette achieved by using embossed paper. Very cool...Makes me want to reachthrough and touch it!
Q--Where did that raven come from that Jeanette used on her shrine????
Linda Blackbird
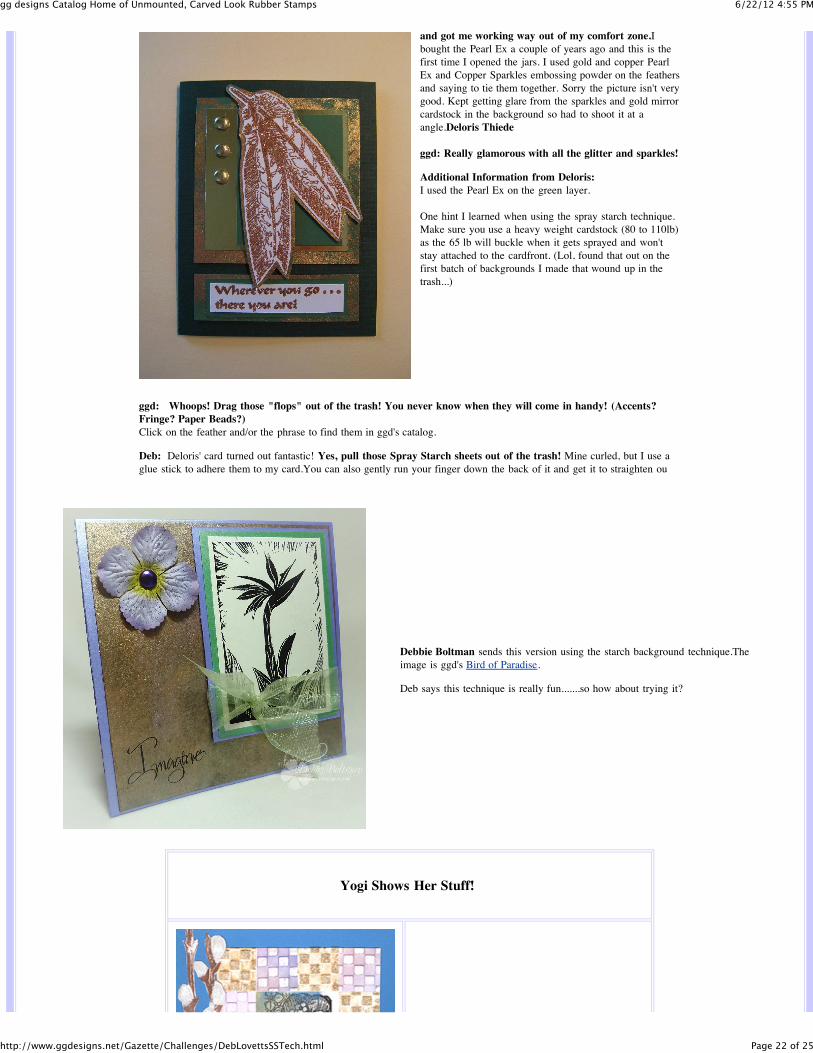
P.S.
Our back deck... This chickadee's saying, "What the heck happened???Looking out our front window.
Yesterday, the snow was all but gone off the front lawn..... we're supposed to get another 4"-8" before the weekend, with rain and temps in the 40's inbetween times. Look out for floods!__________________________________
ggd: Those of us who don't live in it can view the snow as "Picture Post Card Beautiful." (These pictures certainly are that.) But we don't have toshovel it, experience the dangers, protect from it or pay exorbitant heating bills associated with it. We view the weather most of the country has beenexperiencing with a tiny tinge of envy (for the beauty) and a lot of sympathy, for the difficulties.
First February Entry!!!
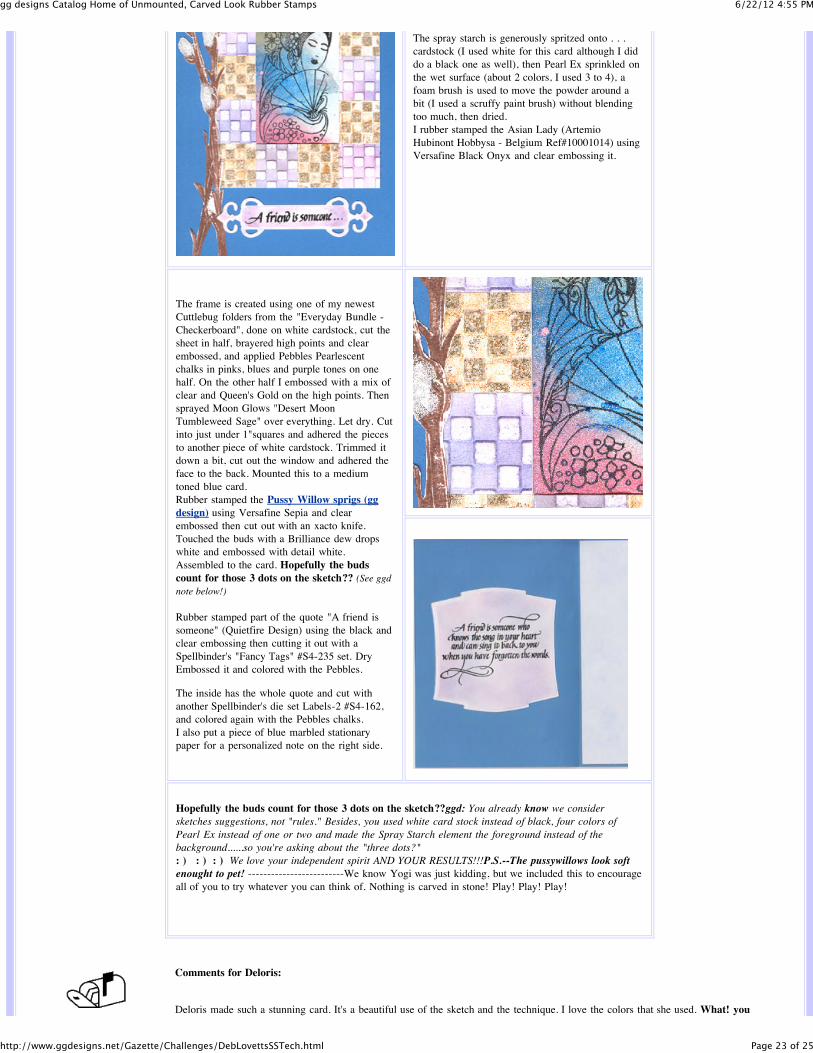
Here's my card for the Feb challenge. It's a fun challengeand got me working way out of my comfort zone.I
6/22/12 4:55 PMgg designs Catalog Home of Unmounted, Carved Look Rubber Stamps
Page 22 of 25http://www.ggdesigns.net/Gazette/Challenges/DebLovettsSSTech.html
and got me working way out of my comfort zone.Ibought the Pearl Ex a couple of years ago and this is thefirst time I opened the jars. I used gold and copper PearlEx and Copper Sparkles embossing powder on the feathersand saying to tie them together. Sorry the picture isn't verygood. Kept getting glare from the sparkles and gold mirrorcardstock in the background so had to shoot it at aangle.Deloris Thiede
ggd: Really glamorous with all the glitter and sparkles!
Additional Information from Deloris:I used the Pearl Ex on the green layer.
One hint I learned when using the spray starch technique.Make sure you use a heavy weight cardstock (80 to 110lb)as the 65 lb will buckle when it gets sprayed and won'tstay attached to the cardfront. (Lol, found that out on thefirst batch of backgrounds I made that wound up in thetrash...)
ggd: Whoops! Drag those "flops" out of the trash! You never know when they will come in handy! (Accents?Fringe? Paper Beads?)Click on the feather and/or the phrase to find them in ggd's catalog.
Deb: Deloris' card turned out fantastic! Yes, pull those Spray Starch sheets out of the trash! Mine curled, but I use aglue stick to adhere them to my card.You can also gently run your finger down the back of it and get it to straighten ou
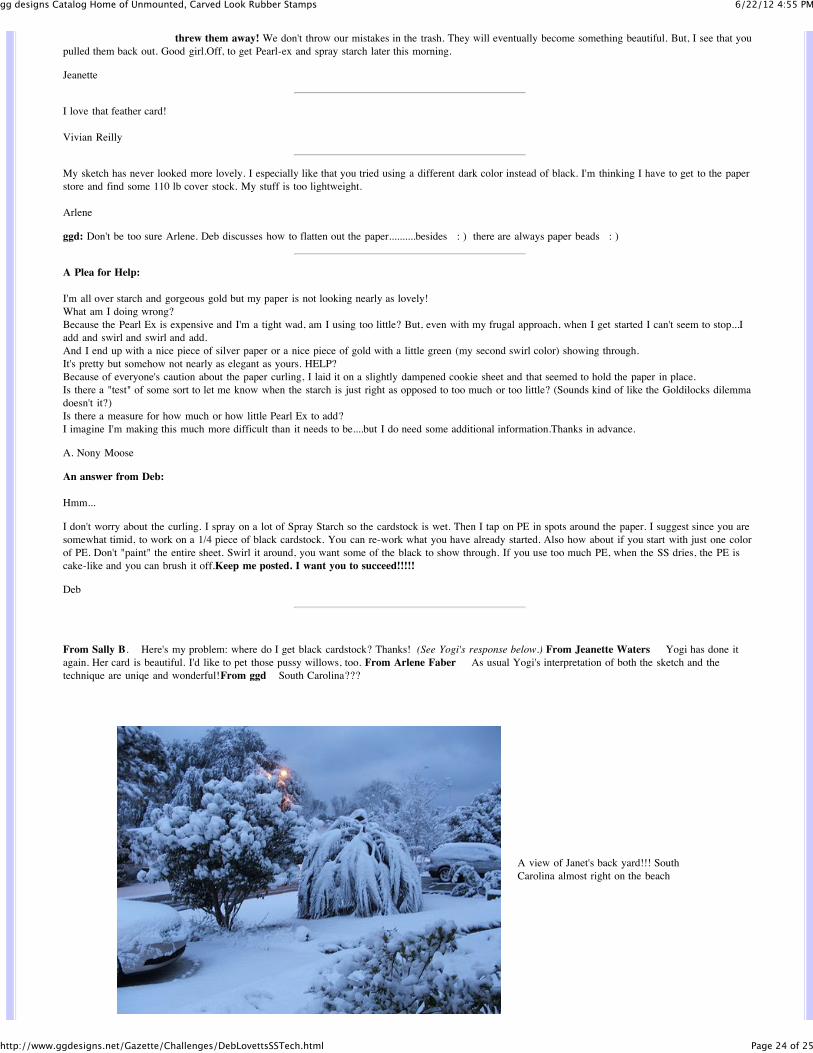
Debbie Boltman sends this version using the starch background technique.Theimage is ggd's Bird of Paradise.
Deb says this technique is really fun.......so how about trying it?
Yogi Shows Her Stuff!
6/22/12 4:55 PMgg designs Catalog Home of Unmounted, Carved Look Rubber Stamps
Page 23 of 25http://www.ggdesigns.net/Gazette/Challenges/DebLovettsSSTech.html
The spray starch is generously spritzed onto . . .cardstock (I used white for this card although I diddo a black one as well), then Pearl Ex sprinkled onthe wet surface (about 2 colors, I used 3 to 4), afoam brush is used to move the powder around abit (I used a scruffy paint brush) without blendingtoo much, then dried.I rubber stamped the Asian Lady (ArtemioHubinont Hobbysa - Belgium Ref#10001014) usingVersafine Black Onyx and clear embossing it.
The frame is created using one of my newestCuttlebug folders from the "Everyday Bundle -Checkerboard", done on white cardstock, cut thesheet in half, brayered high points and clearembossed, and applied Pebbles Pearlescentchalks in pinks, blues and purple tones on onehalf. On the other half I embossed with a mix ofclear and Queen's Gold on the high points. Thensprayed Moon Glows "Desert MoonTumbleweed Sage" over everything. Let dry. Cutinto just under 1"squares and adhered the piecesto another piece of white cardstock. Trimmed itdown a bit, cut out the window and adhered theface to the back. Mounted this to a mediumtoned blue card.Rubber stamped the Pussy Willow sprigs (ggdesign) using Versafine Sepia and clearembossed then cut out with an xacto knife.Touched the buds with a Brilliance dew dropswhite and embossed with detail white.Assembled to the card. Hopefully the budscount for those 3 dots on the sketch?? (See ggdnote below!)
Rubber stamped part of the quote "A friend issomeone" (Quietfire Design) using the black andclear embossing then cutting it out with aSpellbinder's "Fancy Tags" #S4-235 set. DryEmbossed it and colored with the Pebbles.
The inside has the whole quote and cut withanother Spellbinder's die set Labels-2 #S4-162,and colored again with the Pebbles chalks.I also put a piece of blue marbled stationarypaper for a personalized note on the right side.
Hopefully the buds count for those 3 dots on the sketch??ggd: You already know we considersketches suggestions, not "rules." Besides, you used white card stock instead of black, four colors ofPearl Ex instead of one or two and made the Spray Starch element the foreground instead of thebackground......so you're asking about the "three dots?": ) : ) : ) We love your independent spirit AND YOUR RESULTS!!!P.S.--The pussywillows look softenought to pet! -------------------------We know Yogi was just kidding, but we included this to encourageall of you to try whatever you can think of. Nothing is carved in stone! Play! Play! Play!
Comments for Deloris:
Deloris made such a stunning card. It's a beautiful use of the sketch and the technique. I love the colors that she used. What! you
6/22/12 4:55 PMgg designs Catalog Home of Unmounted, Carved Look Rubber Stamps
Page 24 of 25http://www.ggdesigns.net/Gazette/Challenges/DebLovettsSSTech.html
threw them away! We don't throw our mistakes in the trash. They will eventually become something beautiful. But, I see that youpulled them back out. Good girl.Off, to get Pearl-ex and spray starch later this morning.
Jeanette
I love that feather card!
Vivian Reilly
My sketch has never looked more lovely. I especially like that you tried using a different dark color instead of black. I'm thinking I have to get to the paperstore and find some 110 lb cover stock. My stuff is too lightweight.
Arlene
ggd: Don't be too sure Arlene. Deb discusses how to flatten out the paper..........besides : ) there are always paper beads : )
A Plea for Help:
I'm all over starch and gorgeous gold but my paper is not looking nearly as lovely!What am I doing wrong?Because the Pearl Ex is expensive and I'm a tight wad, am I using too little? But, even with my frugal approach, when I get started I can't seem to stop...Iadd and swirl and swirl and add.And I end up with a nice piece of silver paper or a nice piece of gold with a little green (my second swirl color) showing through.It's pretty but somehow not nearly as elegant as yours. HELP?Because of everyone's caution about the paper curling, I laid it on a slightly dampened cookie sheet and that seemed to hold the paper in place.Is there a "test" of some sort to let me know when the starch is just right as opposed to too much or too little? (Sounds kind of like the Goldilocks dilemmadoesn't it?)Is there a measure for how much or how little Pearl Ex to add?I imagine I'm making this much more difficult than it needs to be....but I do need some additional information.Thanks in advance.
A. Nony Moose
An answer from Deb:
Hmm...
I don't worry about the curling. I spray on a lot of Spray Starch so the cardstock is wet. Then I tap on PE in spots around the paper. I suggest since you aresomewhat timid, to work on a 1/4 piece of black cardstock. You can re-work what you have already started. Also how about if you start with just one colorof PE. Don't "paint" the entire sheet. Swirl it around, you want some of the black to show through. If you use too much PE, when the SS dries, the PE iscake-like and you can brush it off.Keep me posted. I want you to succeed!!!!!
Deb
From Sally B. Here's my problem: where do I get black cardstock? Thanks! (See Yogi's response below.) From Jeanette Waters Yogi has done itagain. Her card is beautiful. I'd like to pet those pussy willows, too. From Arlene Faber As usual Yogi's interpretation of both the sketch and thetechnique are uniqe and wonderful!From ggd South Carolina???
A view of Janet's back yard!!! SouthCarolina almost right on the beach
6/22/12 4:55 PMgg designs Catalog Home of Unmounted, Carved Look Rubber Stamps
Page 25 of 25http://www.ggdesigns.net/Gazette/Challenges/DebLovettsSSTech.html
Comments from Yogi:
Now that I finished my piece I went to look at the others. Very nice. Deloris' piece has a beautiful elegance to it. Love the shimmery green/gold backgroundand the saying is wonderful.I did my backgrounds on 65# cardstock (1/2 sheets), and yes it curled, but glued down fine to what I was making. And I really wet my paper, so much that Iwas able to tilt it and let some of the colors flow into each other.Definitely DO NOT throw out your rejects. Makes great strips for weaving, great punchedout flowers (that could use a bit of curl), border punch elements, besides the beads & fringe mentioned. And don't forget the scrap background andembossing technique. Put double sided tape (I use Sookwang Be Creative tape - resists heat) onto a piece of cardstock. Remove the release paper a sectionat a time. Cut your scraps into triangles and other straight sided shapes, place one next to another on the tape, leaving about 1/16th to 1/8th" between shapes.Cut more shapes "TO FIT" into areas. Sprinkle with embossing powder (I usually use gold) and heat set. This makes such a glorious background, or for aframe etc.Debbie's background is glorious as well. Love that word stamp too.Sally I usually get my black cardstock from Michael's (which I guess would beHolly Lobby or something like that in the US). I like Spectrum full color cardstock for the lighter weights, and value pack for the slightly heavier weight.ANony Moose: Sounds like you're swirling the colors all into each other. Let some of the background show through (gives interest). You don't need a lot ofpowder, even for a larger piece of cardstock, especially if your background is wet enough to move the powder easily. The drier the cardstock, the harder tomove the powder, the more you need. Make sense? Take care.