Embed Size (px)
Citation preview
SPECTRUMSecurity Manager 3.3
Installation Guide for Windows
Document 5102
Security Management
Titlepage

Installation Guide for Windows Page 1
Copyright Notice
Document 5102. Copyright © 2002 - present by Aprisma Management Technologies, Inc. All rights reserved worldwide. Use, duplication, or disclosure by the United States government is subject to the restrictions set forth in DFARS 252.227-7013(c)(1)(ii) and FAR 52.227-19.
Liability Disclaimer
Aprisma Management Technologies, Inc. (“Aprisma”) reserves the right to make changes in specifications and other information contained in this document without prior notice. In all cases, the reader should contact Aprisma to inquire if any changes have been made.
The hardware, firmware, or software described in this manual is subject to change without notice.
IN NO EVENT SHALL APRISMA, ITS EMPLOYEES, OFFICERS, DIRECTORS, AGENTS, OR AFFILIATES BE LIABLE FOR ANY INCIDENTAL, INDIRECT, SPECIAL, OR CONSEQUENTIAL DAMAGES WHATSOEVER (INCLUDING BUT NOT LIMITED TO LOST PROFITS) ARISING OUT OF OR RELATED TO THIS MANUAL OR THE INFORMATION CONTAINED IN IT, EVEN IF APRISMA HAS BEEN ADVISED OF, HAS KNOWN, OR SHOULD HAVE KNOWN, THE POSSIBILITY OF SUCH DAMAGES.
Trademark, Service Mark, and Logo Information
SPECTRUM, IMT, and the SPECTRUM IMT/VNM logo are registered trademarks of Aprisma Management Technologies, Inc., or its affiliates. APRISMA, APRISMA MANAGEMENT TECHNOLOGIES, the APRISMA MANAGEMENT TECHNOLOGIES logo, MANAGE WHAT MATTERS, DCM, VNM, SpectroGRAPH, SpectroSERVER, Inductive Modeling Technology, Device Communications Manager, SPECTRUM Security Manager, and Virtual Network Machine are unregistered trademarks of Aprisma Management Technologies, Inc., or its affiliates. For a complete list of Aprisma trademarks, service marks, and trade names, go tohttp://www.aprisma.com/manuals/trademark-list.htm.
All referenced trademarks, service marks, and trade names identified in this document, whether registered or unregistered, are the intellectual property of their respective owners. No rights are granted by Aprisma Management Technologies, Inc., to use such marks, whether by implication, estoppel, or otherwise. If you have comments or concerns about trademark or copyright references, please send an e-mail to [email protected]; we will do our best to help.

Installation Guide for Windows Page 2
Restricted Rights Notice
(Applicable to licenses to the United States government only.)
This software and/or user documentation is/are provided with RESTRICTED AND LIMITED RIGHTS. Use, duplication, or disclosure by the government is subject to restrictions as set forth in FAR 52.227-14 (June 1987) Alternate III(g)(3) (June 1987), FAR 52.227-19 (June 1987), or DFARS 52.227-7013(c)(1)(ii) (June 1988), and/or in similar or successor clauses in the FAR or DFARS, or in the DOD or NASA FAR Supplement, as applicable. Contractor/manufacturer is Aprisma Management Technologies, Inc. In the event the government seeks to obtain the software pursuant to standard commercial practice, this software agreement, instead of the noted regulatory clauses, shall control the terms of the government's license.
Virus Disclaimer
Aprisma makes no representations or warranties to the effect that the licensed software is virus-free.
Aprisma has tested its software with current virus-checking technologies. However, because no antivirus system is 100 percent effective, we strongly recommend that you write-protect the licensed software and verify (with an antivirus system in which you have confidence) that the licensed software, prior to installation, is virus-free.
Contact Information
Aprisma Management Technologies, Inc.
273 Corporate Drive
Portsmouth, NH 03801
Phone: 603-334-2100
U.S. toll-free: 877-468-1448
Web site: http://www.aprisma.com

Contents
About the documentation.................................................................................................... 13
Document Feedback........................................................................................... 13
Online Documents ............................................................................................. 14
Conventions Used in This Guide ........................................................................................ 14
Text conventions ................................................................................................ 14
Icons.................................................................................................................... 14
CHAPTER 1: PREPARATION
About Preparing to Install SSM ......................................................................................... 17
SPECTRUM Integration ................................................................................... 17
Security Environment ....................................................................................... 18
Supported Devices ............................................................................................. 18
Extraction and Activation Keys ........................................................................ 19
Generating Activation Keys .............................................................................. 19
To generate activation keys................................................................... 19
Key Usage Notes .................................................................................... 20
Pre-Installation Checklist ................................................................................................... 21
CHAPTER 2: INSTALLATION OVERVIEW
About Installing SSM.......................................................................................................... 23

4 SSM Installation Guide For Windows
Installing SSM Components ............................................................................. 24
The Central Server ................................................................................ 24
Event Consolidators............................................................................... 25
Normalizers ............................................................................................ 25
The Reporting System ........................................................................... 25
The SSM Database................................................................................. 26
The JDBC Configuration Wizard .......................................................... 26
Remote Consoles .................................................................................... 26
Agents ..................................................................................................... 26
Installing SSM ................................................................................................... 27
CHAPTER 3: CREATING A DATABASE
About the SSM Database .................................................................................................... 29
About MS SQL Server Database Integration .................................................................... 30
Creating an SQL Server database .................................................................... 30
Creating a User with DBO Rights .................................................................... 30
To create a new user with DBO rights ................................................. 31
To set the owner rights for an existing generic user............................ 31
Validating........................................................................................................... 32
Troubleshooting ................................................................................................. 32
About Oracle Database Integration.................................................................................... 33
Creating an Oracle Database............................................................................ 33
Validating........................................................................................................... 33
Troubleshooting ................................................................................................. 34
CHAPTER 4: INSTALLING CENTRAL SERVERS
About Installing Central Servers ....................................................................................... 35
Prerequisites ...................................................................................................... 35
Installation Notes .............................................................................................. 35
Running SSM on Windows 2000 Server ............................................... 35
To configure IIS to not start automatically .......................................... 36
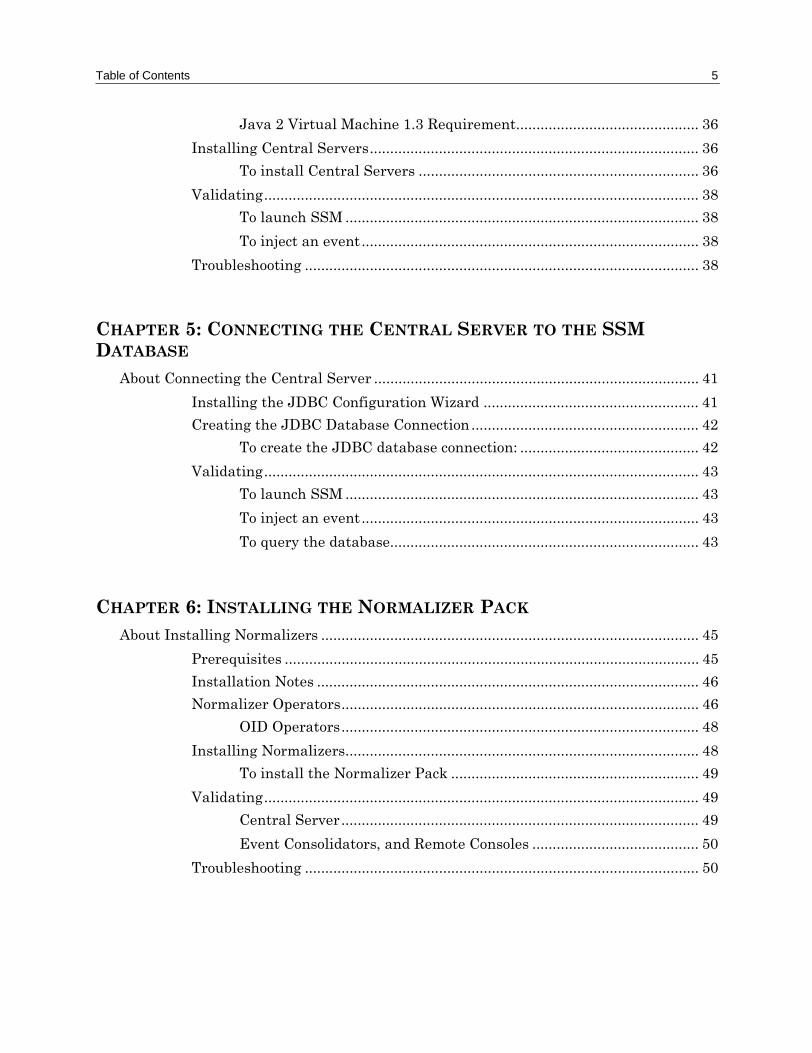
Table of Contents 5
Java 2 Virtual Machine 1.3 Requirement............................................. 36
Installing Central Servers................................................................................. 36
To install Central Servers ..................................................................... 36
Validating........................................................................................................... 38
To launch SSM ....................................................................................... 38
To inject an event................................................................................... 38
Troubleshooting ................................................................................................. 38
CHAPTER 5: CONNECTING THE CENTRAL SERVER TO THE SSM DATABASE
About Connecting the Central Server ................................................................................ 41
Installing the JDBC Configuration Wizard ..................................................... 41
Creating the JDBC Database Connection ........................................................ 42
To create the JDBC database connection: ............................................ 42
Validating........................................................................................................... 43
To launch SSM ....................................................................................... 43
To inject an event................................................................................... 43
To query the database............................................................................ 43
CHAPTER 6: INSTALLING THE NORMALIZER PACK
About Installing Normalizers ............................................................................................. 45
Prerequisites ...................................................................................................... 45
Installation Notes .............................................................................................. 46
Normalizer Operators........................................................................................ 46
OID Operators........................................................................................ 48
Installing Normalizers....................................................................................... 48
To install the Normalizer Pack ............................................................. 49
Validating........................................................................................................... 49
Central Server........................................................................................ 49
Event Consolidators, and Remote Consoles ......................................... 50
Troubleshooting ................................................................................................. 50
6 SSM Installation Guide For Windows
CHAPTER 7: INSTALLING AGENTS
About Agents ....................................................................................................................... 53
Installation Notes .............................................................................................. 54
About BlackIce Defender Agent.......................................................................................... 54
About the Supported Product ............................................................................................. 54
Prerequisites ...................................................................................................... 55
Installation Notes .............................................................................................. 55
Installing BlackIce Defender............................................................................. 56
To install BlackIce Defender ................................................................. 56
To configure the BlackIce Defender Agent ........................................... 57
To run the Agent .................................................................................... 57
Validating........................................................................................................... 57
Troubleshooting ................................................................................................. 57
About the Cisco IDS Agent ................................................................................................. 58
About the Supported Product ............................................................................................. 59
Installing the Cisco IDS Agent ......................................................................... 59
To install the Cisco IDS Agent .............................................................. 59
To use FTP to transfer the Cisco IDS files ........................................... 60
To configure the itactics_ciscoids.conf file....................................... 60
To activate the Cisco IDS Agent: .......................................................... 61
Configuring the Cisco IDS Agent to start automatically:................................ 61
Validating........................................................................................................... 61
Troubleshooting ................................................................................................. 61
About Intruder Alert Agent ................................................................................................ 62
About the Supported Product ............................................................................................. 62
Prerequisites ...................................................................................................... 63
Installation Notes .............................................................................................. 63
Installing Intruder Alert Agent ........................................................................ 63
To install the Intruder Alert Device Agent .......................................... 63
To configure the agent ........................................................................... 64
Running the Agent............................................................................................. 64
Validating........................................................................................................... 64
Troubleshooting ................................................................................................. 64
Table of Contents 7
About the McAfee Agent ..................................................................................................... 65
About the Supported Product ............................................................................................. 66
Installing McAfee............................................................................................... 66
Prerequisites .......................................................................................... 67
To install the McAfee agent................................................................... 67
Validating........................................................................................................... 67
Troubleshooting ................................................................................................. 67
About NetCache Agent........................................................................................................ 68
About the Supported Product ............................................................................................. 68
Prerequisites ...................................................................................................... 69
Installation Notes .............................................................................................. 69
Installing NetCache Agent................................................................................ 69
To install the NetCache Agent .............................................................. 69
To configure the agent ........................................................................... 70
Running the Agent............................................................................................. 72
Validating........................................................................................................... 72
Troubleshooting ................................................................................................. 72
About the Oracle Agent....................................................................................................... 73
About the Supported Product ............................................................................................. 74
Installing Oracle Agent ..................................................................................... 74
Prerequisites .......................................................................................... 75
To install the Oracle Agent ................................................................... 75
Validating........................................................................................................... 76
Troubleshooting ................................................................................................. 76
About the Syntegra Agent................................................................................................... 77
About the Supported Product ............................................................................................. 78
Prerequisites ...................................................................................................... 78
Installation Notes .............................................................................................. 78
To Configure Syntegra Agent............................................................................ 79
To install the Syntegra Agent ........................................................................... 79
Run the Script on System Startup.................................................................... 80
Validating........................................................................................................... 80
Troubleshooting ................................................................................................. 81

8 SSM Installation Guide For Windows
CHAPTER 8: INSTALLING EVENT2MESSAGE
About Event2Message......................................................................................................... 83
Prerequisites ...................................................................................................... 84
Installation Options........................................................................................... 84
Installation Notes .............................................................................................. 84
Remote Host Monitoring........................................................................ 84
Setting Up Event2Message ................................................................... 84
Installing Event2Message Service.................................................................... 85
Configuring SSM�s Event2Message Service..................................................... 85
Adding a Filter to Event2Message.................................................................... 87
To install filters...................................................................................... 87
Configuring the Windows Event Viewer .......................................................... 87
Windows NT ........................................................................................... 88
Windows 2000 ........................................................................................ 88
Configuring SSM�s Event2Message Service to Start Automatically .............. 88
Configuring Windows auditing ......................................................................... 89
Windows NT ........................................................................................... 89
Windows 2000 ........................................................................................ 89
Adding a Remote Host ....................................................................................... 90
To add a remote host.............................................................................. 90
Removing a Remote Host .................................................................................. 91
Validating........................................................................................................... 91
Troubleshooting ................................................................................................. 91
CHAPTER 9: INSTALLING THE REPORTING SYSTEM
About the Reporting System............................................................................................... 93
Installation Notes .............................................................................................. 94
Installing the Reporting System....................................................................... 94
Connecting to a Database ................................................................................................... 94
To use a native driver to connect to the database............................................ 95
To use an SQL ODBC driver to connect to the database................................. 95
To configure the ODBC driver to recognize your password ............................ 96
Table of Contents 9
Securing Connections Using SSL ....................................................................................... 97
Using SSL certificates ....................................................................................... 97
Setting up SSL ................................................................................................... 97
Launching the Reporting System ....................................................................................... 98
Starting and stopping Jakarta-Tomcat ............................................................ 99
Using a Web browser to access the Reporting System .................................... 99
Using SSM to access the Reporting System..................................................... 99
To configure SSM ................................................................................. 100
To configure the CS Reports button in SSM ...................................... 100
Validating......................................................................................................... 101
Troubleshooting ............................................................................................... 102
CHAPTER 10: INSTALLING EVENT CONSOLIDATORS
About Installing Event Consolidators .............................................................................. 103
Prerequisites .................................................................................................... 103
Installation Notes ............................................................................................ 104
Installation directory ........................................................................... 104
Running SSM on Windows 2000 Server ............................................. 104
To configure IIS to not start automatically ........................................ 104
Java 2 Virtual Machine 1.3 Requirement........................................... 104
Installing Event Consolidators ....................................................................... 105
To install Event Consolidators ............................................................ 105
Validating......................................................................................................... 106
To launch SSM ..................................................................................... 106
To Set up the debugger on an Event Consolidator............................. 106
To inject an event................................................................................. 107
Troubleshooting ............................................................................................... 107
CHAPTER 11: INSTALLING REMOTE CONSOLES
About Remote Consoles..................................................................................................... 109
Prerequisites .................................................................................................... 109

10 SSM Installation Guide For Windows
Installation Notes ............................................................................................ 110
Installation directory ........................................................................... 110
Running SSM on Windows 2000 Server ............................................. 110
To configure IIS to not start automatically ........................................ 110
Java 2 Virtual Machine 1.3 Requirement........................................... 110
Installing Remote Consoles............................................................................. 111
Configuring SSM to send data to a Remote Console ..................................... 111
Validating......................................................................................................... 112
Troubleshooting ............................................................................................... 112
CHAPTER 12: VALIDATING DATA FLOW
About Validating Data Flow ............................................................................................. 115
Prerequisites .................................................................................................... 115
Installing Event Replicator ............................................................................. 116
To install Event Replicator.................................................................. 116
Adding a Connection........................................................................................ 116
Sending an Event............................................................................................. 116
Adding a Message ............................................................................................ 117
Editing a Message............................................................................................ 117
Sending an Event at a Specified Rate ............................................................ 119
Performing SQL Queries ................................................................................. 120
To add additional drivers..................................................................... 120
CHAPTER 13: SPECIAL SITUATIONS
About Configuring SSM for Trusted Sources................................................................... 121
Configuring SSM for Trusted Sources............................................................ 121
About Traversing a Firewall............................................................................................. 123
Traversing a Firewall ...................................................................................... 123
To configure your Event Consolidator ................................................ 123
To configure the Central Server.......................................................... 124

Table of Contents 11
CHAPTER 14: REMOVING SSMAbout Removing SSM........................................................................................................ 125
Removing SSM and the Normalizer Pack ...................................................... 125
To remove SSM .................................................................................... 126
Removing Agents ............................................................................................. 126
To remove the Reporting System.................................................................... 126
APPENDIX A: SYSTEM REQUIREMENTS ................................................ 129About SSM System Requirements ................................................................................... 129
Reporting System Requirements .................................................................... 130
APPENDIX B: SUPPORTED DEVICES ..................................................... 133About SSM Supported Devices ......................................................................................... 133

12 SSM Installation Guide For Windows

Preface
About the documentation
This guide is part of the SPECTRUM Security Manager (SSM) documentation set.
The full documentation set includes:
� SPECTRUM Security Manager Basics Guide
� SPECTRUM Security Manager Installation Guide for Windows
� SPECTRUM Security Manager Installation Guide for Solaris
� SPECTRUM Security Manager Reporting System Installation and Configuration
Guide
� Installing and Using SPECTRUM Security Manager with SPECTRUM
� Normalizer Pack online help
� SSM online help
� release notes for SSM, the Reporting System, and the Normalizer Pack
Document Feedback
Please send feedback regarding SPECTRUM documents to the following e-mail
address:
Thank you for helping us improve our documentation.

14 SSM Installation Guide For Windows
Online Documents
SPECTRUM documents are available online at:
http://www.aprisma.com/manuals
Check this site for the latest updates and additions.
Conventions Used in This Guide
Text conventions
This guide uses various typefaces to differentiate between coded and regular text, as
well as to help you identify important concepts:
� Text that you type and text that appears on screen is presented in Lucinda
Console type.
� Placeholders for variables and expressions appear in [square brackets].
� User interface labels, such as dialog box titles and button names, appear in bold.
� Italics are used for references to other guides in the documentation set, and to
introduce new terms.
Icons
This guide also uses Note, Tip, and Caution icons to call attention to important
information.
The Note icon indicates essential information related to the surrounding overview or
procedure.
The Tip icon indicates a recommendation. Many tips introduce �best practice�
concepts.

15
The Caution icon indicates a warning. Cautions advise you about potential problems,
and offer advice for avoiding these problems.

16 SSM Installation Guide For Windows
1Preparation
About Preparing to Install SSM
This chapter contains information to help you prepare to install NSM on your system.
Aprisma recommends that you read this chapter, follow the procedures, and gather
any essential information before beginning your SSM installation. This chapter
includes information about:
� SSM system requirements.
� SPECTRUM Integration
� What you need to know about your security environment.
� The security devices that SSM supports.
� How to obtain and use Extraction and activation keys.
SPECTRUM Integration
If you will be using SSM with SPECTRUM, you must install the SPECTRUM
Integration component of SSM before installing the SSM application. For installation
instructions and further information, refer to the Using and Installing SPECTRUM
Security Manager 3.3 with SPECTRUM guide.

18 SSM Installation Guide For Windows
Security Environment
Before installing SSM, you need to know:
� Which security devices are installed on your network (for example Firewalls,
IDSs, and so forth);
� The type, model, version number, and operating system version (if applicable) of
each security device. This information is vital because Aprisma develops decoders
for data emitted from specific devices, and in some case, for specific versions of
devices;
� The configuration of each security device;
� Who configured each security device;
� The type of data emitted from each security device (for example SNMP, SMTP,
Syslog);
� Who the DBA is for the SSM database and their availability (optional).
� The Operating System hardening level.
You may also want to have a log sample for each security device.
Supported Devices
SSM supports third-party security devices through agents and normalizers, which can
be installed from an SSM Normalizer Pack. Normalizer Packs may be bundled with
SSM or released separately and contain the latest normalizers and agents.
For a list of the security devices supported by SSM, see "Supported Devices" on page
133 of this guide.
If you use a device (or a version of a device) that does not appear on the supported
devices list, SSM can parse and normalizer information from the device as long as it
emits one of the following:
� SMTP traps
� SNMP traps
� Syslogs
Aprisma continually expands the list of supported devices. For the latest normalizers
and agent schedule, contact the Aprisma Customer Support Department.

Chapter 1: Preparation 19
Extraction and Activation Keys
SSM requires two types of keys: extraction keys and activation keys. Extraction keys
can be found in the letter supplied with your SSM CD and allow you to install SSM as
a Central Server, Event Consolidator, or Remote Console. You cannot generate
extraction keys yourself. A single extraction key can have one or more activation keys
associated with it.
You can generate activation keys from the Aprisma Web site. You can generate an
activation key for each Central Server, Event Consolidator, and Remote Console that
you are evaluating or purchasing.
Activation keys expire for evaluation users. When the key expires, SSM shuts down
and displays a message.
Generating Activation Keys
You create activation keys on the Aprisma key generation Web site using the Login
Name and Login Password provided in the letter you received with your SSM CD.
If you did not receive a Login Name or Password or if you experience difficulties
logging in to the key generation Web site, contact the Aprisma Management
Technologies support center, 24 hours a day at 1-877-468-1448 Option 6 or 603-334-
2440. Alternatively, you can email support at [email protected].
Activation keys are unique to a specific Company Name and IP address. This means
that each activation works only with the computer that corresponds to the IP address
that you enter during the key generation process. Aprisma recommends that you
install SSM components on computers that have static IP addresses.
To generate activation keys
1. Open a Web browser and navigate to http://www.aprisma.com/swmfg/act-keygen/.
2. Click on the Generate a SPECTRUM Security Manager Activate Key link.
3. Type your Login and Password.
4. Click Login. A list of your extraction keys appear.

20 SSM Installation Guide For Windows
5. Click the key referred to in the letter provided with your SSM CD.
6. Type the correct IP addresses for each Central Server, Event Consolidator, and
Remote Console that you plan to install.
You do not have to generate all your activation keys at once.
7. When finished, click Get_Keys. Your activation keys appear in the right column.
8. Click Logout to exit.
Ensure that you enter the correct IP addresses. SSM will not run if you enter an
incorrect IP address. If you enter an incorrect IP address, contact the Aprisma
Management Technologies support center, 24 hours a day at 1-877-468-1448 Option 6
or 603-334-2440. Alternatively, you can email support at customer-
Key Usage Notes
The products that use extraction and activation keys are case-sensitive. The keys,
however, will always use uppercase letters. The Organization or Company Name
must be exact, is case-sensitive and may be a combination of uppercase and lowercase
letters and punctuation marks.
Ensure that you do not confuse 1's and I's and 0's and O's when entering keys.
Chapter 1: Preparation 21
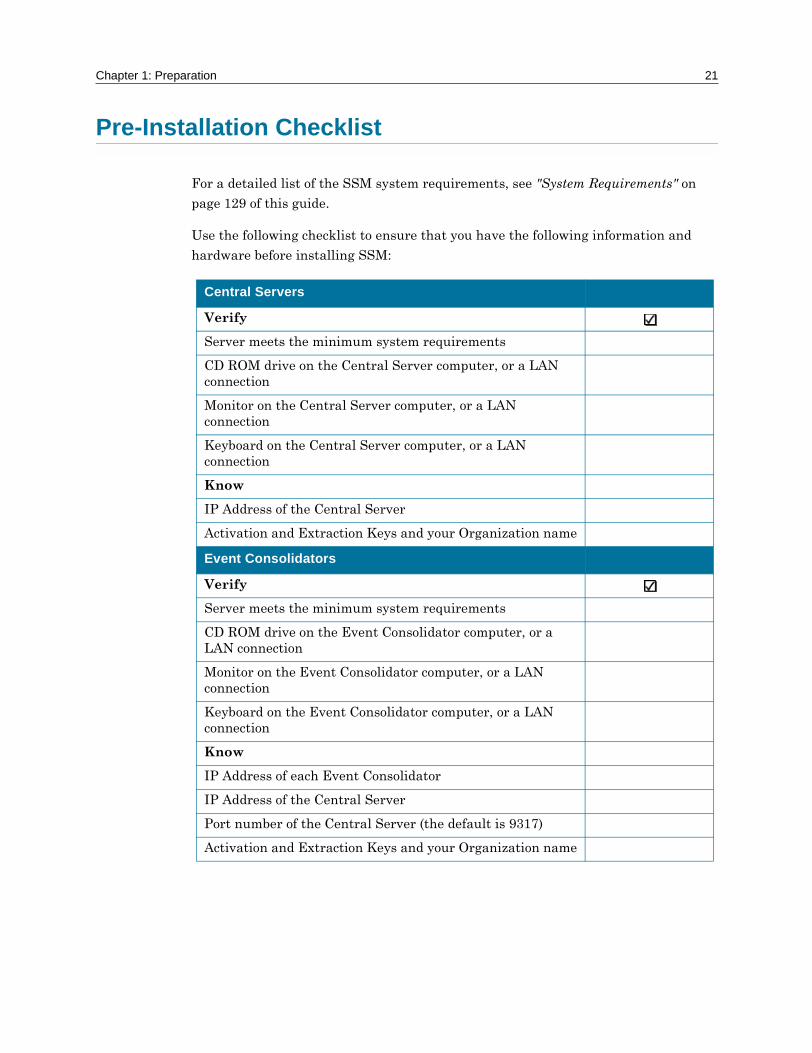
Pre-Installation Checklist
For a detailed list of the SSM system requirements, see "System Requirements" on
page 129 of this guide.
Use the following checklist to ensure that you have the following information and
hardware before installing SSM:
Central Servers
Verify
Server meets the minimum system requirements
CD ROM drive on the Central Server computer, or a LAN connection
Monitor on the Central Server computer, or a LAN connection
Keyboard on the Central Server computer, or a LAN connection
Know
IP Address of the Central Server
Activation and Extraction Keys and your Organization name
Event Consolidators
Verify
Server meets the minimum system requirements
CD ROM drive on the Event Consolidator computer, or a LAN connection
Monitor on the Event Consolidator computer, or a LAN connection
Keyboard on the Event Consolidator computer, or a LAN connection
Know
IP Address of each Event Consolidator
IP Address of the Central Server
Port number of the Central Server (the default is 9317)
Activation and Extraction Keys and your Organization name
22 SSM Installation Guide For Windows
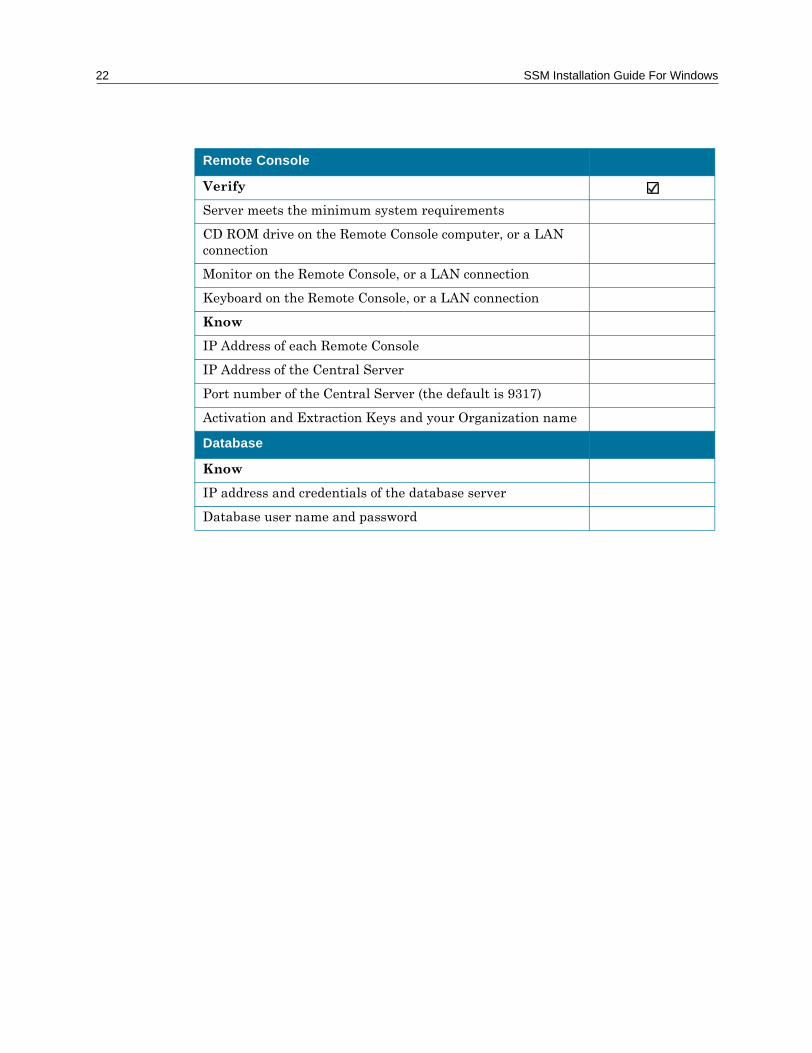
Remote Console
Verify
Server meets the minimum system requirements
CD ROM drive on the Remote Console computer, or a LAN connection
Monitor on the Remote Console, or a LAN connection
Keyboard on the Remote Console, or a LAN connection
Know
IP Address of each Remote Console
IP Address of the Central Server
Port number of the Central Server (the default is 9317)
Activation and Extraction Keys and your Organization name
Database
Know
IP address and credentials of the database server
Database user name and password

2Installation Overview
About Installing SSM
The following example illustrates a typical SSM installation. Your installation may
differ depending on your network environment and security architecture.
24 SSM Installation Guide For Windows
Installing SSM Components
A typical SSM installation consists of the following components:
� A Central Server
� An SSM Database
� One or more Event Consolidators
� Normalizers
An SSM installation may also have the following optional components:
� SPECTRUM Integration component
� The Reporting System
� The Reporting System/SPECTRUM Web Operator Suite Integration
� One or more Remote Consoles
� Agents
For detailed information on installing the SPECTRUM integration component or the
Reporting System as an integrated component of SPECTRUM�s Web Operator Suite,
see the Using and Installing SPECTRUM Security Manager 3.3 with SPECTRUM
guide.
The Central Server
The Central Server is considered the core of SSM. You use it to create rules and direct
other SSM components to detect, filter, prioritize, and transmit information from
Event Consolidators and security devices. The Central Server has a user interface to
build and edit rules. Once rules are created, they are pushed out to the Event
Consolidators, Device Consolidators, and Remote Consoles. These components use
rules to send events to SSM.
Aprisma recommends that you install the Central Server on its own computer.
The Central Server connects to the SSM database via a Java Database Connectivity
(JDBC) connection. Use the JDBC Configuration Wizard ( Start>Programs>
Spectrum Security Manager>Administrative Tools>Driver Configuration) to
create this connection.

Chapter 2: Installation Overview 25
Event Consolidators
Event Consolidators are collectors that receive information from your network
devices, filter this information, and then send it to a Central Server. They are
deployed throughout an organization to collect, analyze, and correlate event
information.
Event Consolidators do not have graphical user interfaces. Rules are be built on the
Central Server and pushed out the Event Consolidators.
Normalizers
Normalizers are specialized applications that take messages from third-party security
devices and reformat them into the standard SSM Message format. Install
normalizers on any SSM devices (Central Servers, Event Consolidators, or Remote
Consoles) that will receive events directly from third-party security devices.
You can install normalizers from the SSM Normalizer Pack. Before you can use
normalizers, you must:
� configure your security devices to send events to SSM
� edit the corresponding SSM rules
For more information about normalizers, see the Normalizer Online Help.
The Reporting System
The Reporting System is a Web-based application that lets you create text- and
graphic-based reports from information stored in your SSM database. It can be
installed as a standalone application or as an integrated component of SPECTRUM�s
Web Operator Suite. You can generate a report from a pre-defined report or create
your own custom reports.
The Reporting System connects to the SSM database via a Web connection, which you
can secure using Secure Socket Layering (SSL). Once installed and configured, you
can launch the Reporting System from either a Web browser or the SSM Central
Console.
You can install the Reporting System on the same computer as the Central Server or
on a separate computer.
26 SSM Installation Guide For Windows
For more information, see the Reporting System Installation and Configuration
Guide.
The SSM Database
The SSM database component is either an Oracle or MS SQL Server database. You
must create the database on your server using scripts included on the SSM
Installation CD before you can store SSM messages to it or run reports.
You must edit the Central Server rules to store SSM events to this database. You can
also create a database for each Event Consolidator.
The JDBC Configuration Wizard
SSM provides default JDBC drivers for the Oracle 8i and MS SQL Server databases.
The JDBC Configuration Wizard allows you to create a connection to the SSM
database using these drivers, and saves this information as the default settings. If you
want to use a database other then Oracle 8i or MS SQL, you must download the driver
and specify the settings.
The JDBC Configuration Wizard is installed automatically with SSM Central Server.
Remote Consoles
Remote Consoles are dynamic graph viewers that you can install on computers other
than the SSM Central Server. This product allows you to remotely monitor events in
real-time. You can also use a Remote Console to create, edit, and test rules for your
Central Server and Event Consolidators. Once your rules are ready to be deployed,
you can copy them to other components.
You must define rules on your Central Server, to make it send copies of events to your
Remote Consoles. You build and edit these rules on the Central Server and send them
to the Remote Consoles through rule-syncing. Remote Consoles can not send events to
the Central Server.
Agents
Agents are small programs or scripts that extract information from devices and send
this information to an Event Consolidator or Central Server. Each type of agent
Chapter 2: Installation Overview 27
extracts logs from a specific network device. For example the Intruder Alert Agent
extracts logs form Intruder Alert version 3.5. This means that you need only install
the agents that correspond to your network security devices. You can install agents on
computers that are running or have access to third-party security devices.
You can install agents from the SSM Normalizer Pack.
For more information about agents, see the Normalizer Pack Online Help.
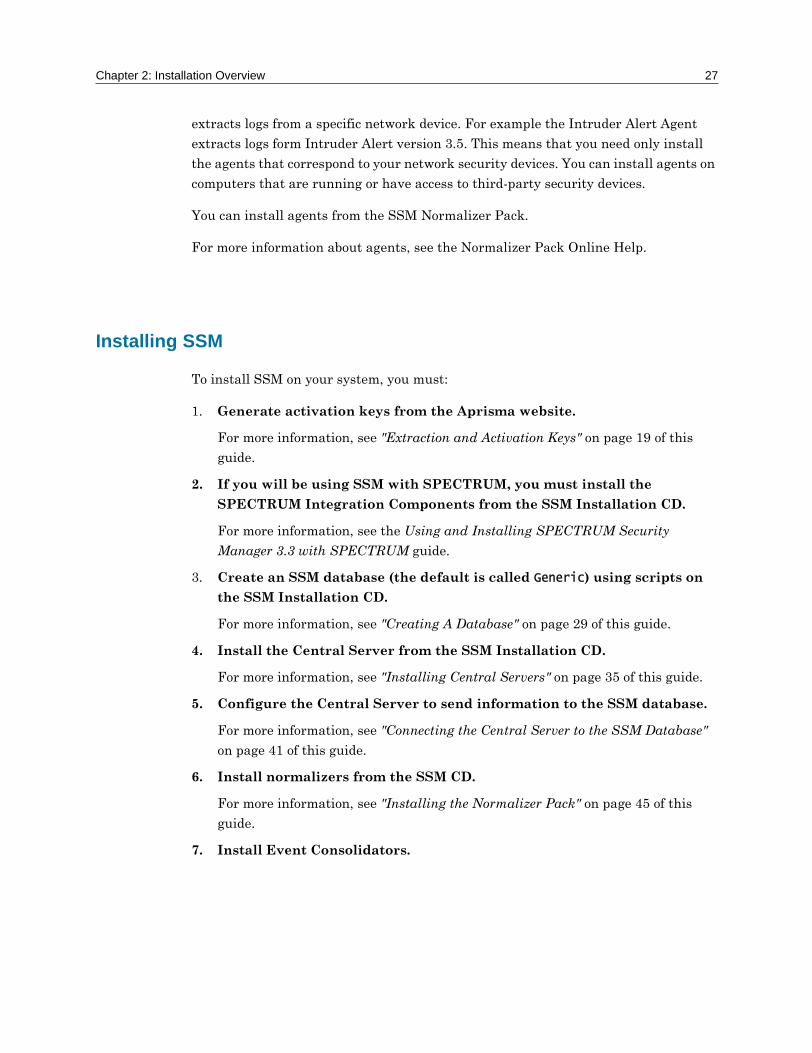
Installing SSM
To install SSM on your system, you must:
1. Generate activation keys from the Aprisma website.
For more information, see "Extraction and Activation Keys" on page 19 of this
guide.
2. If you will be using SSM with SPECTRUM, you must install the
SPECTRUM Integration Components from the SSM Installation CD.
For more information, see the Using and Installing SPECTRUM Security
Manager 3.3 with SPECTRUM guide.
3. Create an SSM database (the default is called Generic) using scripts on
the SSM Installation CD.
For more information, see "Creating A Database" on page 29 of this guide.
4. Install the Central Server from the SSM Installation CD.
For more information, see "Installing Central Servers" on page 35 of this guide.
5. Configure the Central Server to send information to the SSM database.
For more information, see "Connecting the Central Server to the SSM Database"
on page 41 of this guide.
6. Install normalizers from the SSM CD.
For more information, see "Installing the Normalizer Pack" on page 45 of this
guide.
7. Install Event Consolidators.
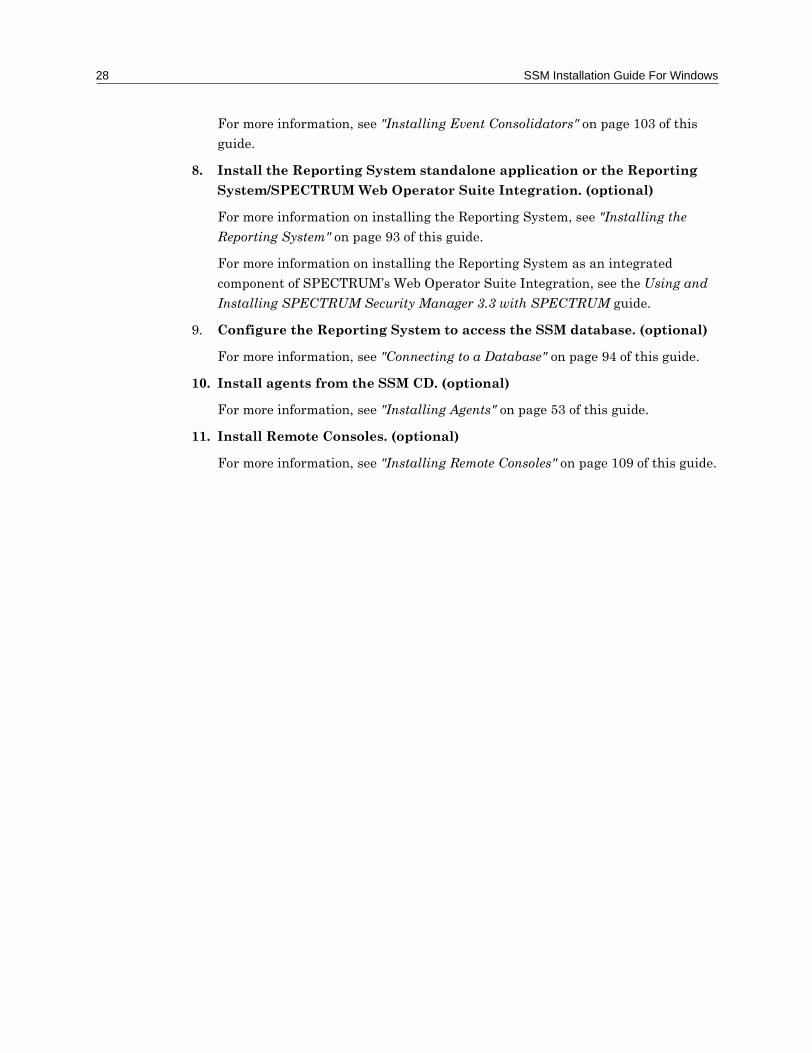
28 SSM Installation Guide For Windows
For more information, see "Installing Event Consolidators" on page 103 of this
guide.
8. Install the Reporting System standalone application or the Reporting
System/SPECTRUM Web Operator Suite Integration. (optional)
For more information on installing the Reporting System, see "Installing the
Reporting System" on page 93 of this guide.
For more information on installing the Reporting System as an integrated
component of SPECTRUM�s Web Operator Suite Integration, see the Using and
Installing SPECTRUM Security Manager 3.3 with SPECTRUM guide.
9. Configure the Reporting System to access the SSM database. (optional)
For more information, see "Connecting to a Database" on page 94 of this guide.
10. Install agents from the SSM CD. (optional)
For more information, see "Installing Agents" on page 53 of this guide.
11. Install Remote Consoles. (optional)
For more information, see "Installing Remote Consoles" on page 109 of this guide.
3Creating A Database
About the SSM Database
You must create the SSM database on your database server before you can store SSM
messages in it. You only need to create the database once, since any additional SSM
components can use this same database.
The Central Server should have its own database. If you desire, you can add
additional databases for your Event Consolidators. For Central Servers and Event
Consolidators, you must define which events are stored in the database using SSM
rules.
SSM supports MS SQL Server and Oracle databases.
30 SSM Installation Guide For Windows
About MS SQL Server Database Integration
To use MS SQL Server with SSM, you must:
1. Create an MS SQL Server database.
2. Create a user with database ownership (DBO) rights.
The following procedures assume that you have installed and configured
MS SQL Server.
Creating an SQL Server database
1. Go to Start > Programs > Microsoft SQL Server > Query Analyzer.
The SQL Server Query Analyzer opens.
2. Log on to the appropriate server as the system administrator.
3. Go to File > Open. Browse to the SSM Installation CD. Open the DB_Scripts
directory.
4. Double-click the sql_create.sql file to open it.
This script replaces any existing database (named Generic) with a new, empty
version. If a database named Generic already exists on your system and you wish
to save the data, you must back up the database before running the script.
If you need to use a different database name, you must:
� Edit the database script.
� Change the default database name in the JDBC Configuration Wizard.
5. Press F5 to run the script. The script creates the Generic database and tables.
6. Close SQL Server Query Analyzer.
Creating a User with DBO Rights
Once you create your SSM database, you need to create a user with DBO rights for the
database.

Chapter 3: Creating A Database 31
If you wish to use an existing user for the SSM database, follow the steps outlined in
the "To set the owner rights for an existing generic user" section to ensure that the
existing user has been assigned the db_owner role. Without this role, the existing user
cannot access the Generic database.
If you wish to create a new user, follow the steps outlines in the "To create a new user
with DBO rights" section.
Remember your username and password; you will need them later in the installation
procedure.
To create a new user with DBO rights
1. Go to Start > Programs > Microsoft SQL Server >Enterprise Manager.
2. Connect to the SQL server that contains the SSM Generic database.
3. To create a new user, go to Console Root > Microsoft SQL Servers > SQL
Server Group > [name of your server] > Security.
4. Right-click Logins and select New Login from the shortcut menu.
5. Type the Name for the new user.
6. Select the SQL Server Authentication option.
7. Type a Password.
8. From the Default Database field, select Generic.
9. On the Database Access tab, select the Generic checkbox.
10. The Database Rules for Generic will appear below. Select db_owner checkbox.
Click OK.
11. Click OK in the Confirm the new password popup.
12. Exit SQL Server Enterprise Manager.
To set the owner rights for an existing generic user
1. Go to Start > Programs > Microsoft SQL Server >Enterprise Manager.
2. Connect to the SQL server that contains the SSM Generic database.
3. Go to Console Root > Microsoft SQL Servers > SQL Server Groups >[name
of your server] > Databases > [name of your SSM database].
32 SSM Installation Guide For Windows
4. Double-click Users.
5. Double-click the user you want to give DBO rights to..
6. In the Database Role Membership box, select the db_owner.
7. Exit SQL Server Enterprise Manager.
Validating
To validate that the database and event table exists and that you can query it. Log in
to the database using either SQL Server Query Manager or SQL Plus and submit a
query (select * from event) against the Generic database. If the query returns an
empty result, this means that the database exists and is working. If the query returns
an error, this means that the database is not working properly or you are not using
the correct database.
Troubleshooting
If the database is not working, check that:
� The database name is correct (the default is Generic).
� The SSM database tables are created by the sql_create.sql script.
Chapter 3: Creating A Database 33
About Oracle Database Integration
To use Oracle with SSM, you must create an Oracle database.
The following procedures assume that you have installed and configured Oracle.
Creating an Oracle Database
1. Log on to SQL Plus Worksheet as the user assigned the DBO role.
2. Open the following file from the SSM CD: DB_Scripts\create_Oracle.sql.
This script replaces any existing database named Generic with a new, empty
version. If a database named Generic already exists on your system, and you
wish to save the data, you must back up the database before running the script.
3. Once the script is finished, select Execute from the Worksheet menu.
4. Exit SQL Plus Worksheet.
To use a different database name, you must:
� Edit the database script.
� Change the default database name in the JDBC Configuration Wizard.
Validating
To validate that the database and event table exists that you can query it, log in to the
database and submit a query (select * from event). If the query returns an empty
result, this means that the database exists and is working. If the query returns an
error, this means that the database is not working properly.

34 SSM Installation Guide For Windows
Troubleshooting
If the database is not working, check that:
� The database name is correct (the default is Generic).
� The SSM database tables are created.

4Installing Central Servers
About Installing Central Servers
The Central Server is used to create rules and direct other SSM components to detect,
filter, prioritize, and transmit information from Event Consolidators.
Prerequisites
Before installing the Central Server, ensure that the server meets the system
requirements and you have all of the necessary information specified in the
"Preparation" chapter of this guide.
Installation Notes
Running SSM on Windows 2000 Server
SSM uses some of the same ports as the Windows 2000 Internet Information Server
(IIS). The IIS is installed and started automatically with some versions of Windows.
The port conflict can prevent SSM from receiving Syslogs and SMTP traps.
Make certain that the IIS is not running before you start SSM. You can configure the
IIS service so that it does not start automatically when Windows restarts.

36 SSM Installation Guide For Windows
If you have configured Windows to run the SMTP server, SSM will not receive any
events from port 25.
To configure IIS to not start automatically
1. Click Start > Settings > Control Panel.
2. Double-click Administrative Tools, then Services. The Services dialog box
appears.
3. Right-click IIS Admin and select Properties from the shortcut menu. The IIS
Admin Services Properties dialog box appears.
4. From the Startup type drop-down, select Manual.
5. Click Stop to immediately stop IIS.
6. Click OK to save your changes.
Java 2 Virtual Machine 1.3 Requirement
SSM requires the Java 2 Virtual Machine (JVM), version 1.3. The SSM InstallShield
automatically installs the Java 2 Virtual Machine (JVM), version 1.3, even if there
already is a JVM installed.
Installing Central Servers
Shut down any open applications before installing any SSM software.
To install Central Servers
1. Insert the SSM CD into your CD-ROM drive. If Autorun is enabled on your
computer, the SSM InstallShield begins.Click on the SPECTRUM Security
Manager installation option.
If Autorun is disabled run /SSM/SSMsetup.exe. The InstallShield begins.
2. At the Welcome screen click Next.
Chapter 4: Installing Central Servers 37
3. Ensure that you type the correct information at this screen:
� Type any Name that describes this installation.
� Type the Company Name provided in the letter included with your SSM
purchase in the Organization field.
� Type the Central Server Extraction key provided in the letter included with
your SSM purchase.
4. Click I accept the terms of the license agreement.
5. Do not enter a memory allocation value that is higher than the maximum memory
of the server. This causes a black DOS prompt to appear and then disappear
when starting SSM. For example, if the total RAM is 512 MB, then the total
allocation should be 384 (512 -128) to ensure that all system resources are not
allocated to SSM, leaving nothing for the operating system.
6. It is strongly recommended that you use C:\SSM as the installation directory
name because of limitations of the JRE 1.3.
You can change this name; however, keep the length of the file name under five
characters. The SSM installation folder must use a short directory name for SSM
to register properly, and there must not be any spaces in the path. Installing SSM
to a path such as C:\Program Files\SSM will result in unpredictable and
unstable behavior.
7. This screen shows you the Setup Type you are installing, based on the extraction
key. In this case it will say Central Server.
8. When the installation is complete, the JDBC Configuration Wizard appears. If
the JDBC Configuration Wizard does not appear, launch it manually by selecting
Start > Programs > Spectrum Security Manager > Administration Tools
>Driver Configuration.
Configure this information to match the database user or click Finished to
accept the following default values:
JDBC URL: jdbc:inetdae7:127.0.0.1:1433?database=Generic
Username: sa
Password: [blank]
You must restart the computer for the database changes to take effect.
38 SSM Installation Guide For Windows
Validating
Ensure that the Central Server is installed properly by:
1. Launching SSM.
2. Sending an event.
To launch SSM
1. Click Start > Programs > Spectrum Security Manager > SPECTRUM
Security Manager 3.3.
2. You will be prompted to enter the activation key the first time you launch SSM.
3. The SSM Central Console appears, click the SSM button in the lower left hand
corner. Closing this window will shutdown SSM.
To inject an event
1. Click Go to Localsystem Graph and draw an edge from msg_listener to the
debugger. To draw an edge; place your mouse pointer over the msg_listener
node, click and drag a line to the debugger node and release. You will see an line
with an arrow drawn between the nodes, this is called an edge.
2. Open a command line and telnet to port 9317 on the Central Server. Type:
event
t_ip [any IP Address]
endevent
You should see the event pass through the debugger window. The debugger window is
the black window that opens behind the SSM Central Console. The title bar of the
debugger window reads C:\SSM\_smjvm\bin\java.exe.
When you are satisfied that the Central Server is working properly, delete the edge
from msg_listener to the debugger because sending events to the debugger adds
overhead.
Troubleshooting
If the Central Server does not launch:
Chapter 4: Installing Central Servers 39
1. Restart the computer and re-launch the Central Server. If the computer is low on
memory, the Central Server may not launch.
2. Next, check that you entered the same Company Name when you launched the
Event Consolidator as you entered in the Organization field in the InstallShield.
If you entered the wrong information in the InstallShield, remove the SSM folder
from your hard drive and reinstall SSM.
If the activation key dialog box disappears and you receive an error message
prompting you to contact Aprisma�s Customer Support department, your activation
key is wrong. Ensure that you:
� Typed the correct activation key (ensure that you didn't confuse I's and 1's and
O's and 0's).
� Entered correct IP Address when you generated the activation key.
If Java exception errors appear in the DOS window, install JRE 1.3 from the SSM CD.
This situation may result from an incompatible JRE version.
You can test whether your browser�s JRE is working by navigating to a website that
contains Java applets.

40 SSM Installation Guide For Windows
5Connecting the Central Server to the SSM Database
About Connecting the Central Server
SSM uses a JDBC Configuration Wizard to create and maintain the database
connection to SSM. You can change the default database to Oracle or add another
database by adding a new driver to the C:\SSM\lib\db directory and entering this
information into the JDBC Configuration Wizard. You can use any type of suitable
driver.
You cannot duplicate database connections using one database driver.
The JDBC Configuration Wizard writes information to the /scripts/db.nsm
directory. You can also edit this file directly.
You can find information needed for the JDBC Configuration Wizard in the
corresponding driver�s documentation.
Installing the JDBC Configuration Wizard
The JDBC Configuration Wizard is installed with the SSM Central Servers and Event
Consolidators.

42 SSM Installation Guide For Windows
Creating the JDBC Database Connection
Connecting the JDBC driver to the database is an integral part of installing SSM. If
this connection is not working or fails for any reason, SSM cannot store messages in
the database.
To create the JDBC database connection:
1. Click Start > Programs > Spectrum Security Manager > Administration
Tools and select Driver Configuration.
2. Modify the following fields, as required.
3. Click Finished.
You must restart SSM for any changes made to the database to take effect.
Field Do
Connect to Database
Choose either Default SQL or Default Oracle from the drop-down list.
Connection Name Type a name for the database connection.
JDBC URL Type the location of the database driver. This must consist of the following: jdbc, the name of the driver, the IP address of the database server, and the database name. For example, the default SQL entry is jdbc:inetdae7:127.0.0.1:1433?database=Generic.
For the default Oracle or SQL settings, only the IP address and the name of the database must be edited.
Name of Driver Type the name of the driver used for the database.
For the default Oracle or SQL settings, this should not be changed.
Location of JAR file
Type the location of the database driver on your local drive. This default should not be changed for the Oracle or SQL databases. If adding a new driver for another database, it should be saved in the C:\SSM\lib\db directory.
Username Type the username used to connect to the database.
Password Type the password used to connect to the database.
Chapter 5: Connecting the Central Server to the SSM Database 43
Validating
Validate that the Central Server is sending events to the database by:
1. Launching SSM.
2. Sending an event.
3. Querying the database.
To launch SSM
1. Click Start > Programs > Spectrum Security Manager > SPECTRUM
Security Manager 3.3.
2. You will be prompted to enter the activation key the first time you launch SSM.
3. The SSM Central Console appears.
To inject an event
1. Open a command line and telnet to port 9317 on the Central Server. Type:
event
t_ip [any IP Address]
endevent
To query the database
Log in to the database and submit a query (select * from event). If the query
returns a result with the value of t_ip the same as the event you entered in the above
step, SSM is connected to the database properly.

44 SSM Installation Guide For Windows

6Installing the Normalizer Pack
About Installing Normalizers
Normalizers are specialized software applications that take messages from third-
party security devices and reformat them into the SSM Message format. Install
normalizers on the SSM devices (Central Servers, Event Consolidators, Device
Consolidators, or Remote Consoles) that will be receiving events from third-party
security devices.
Prerequisites
You must install SSM before installing the Normalizer Pack.
46 SSM Installation Guide For Windows
Installation Notes
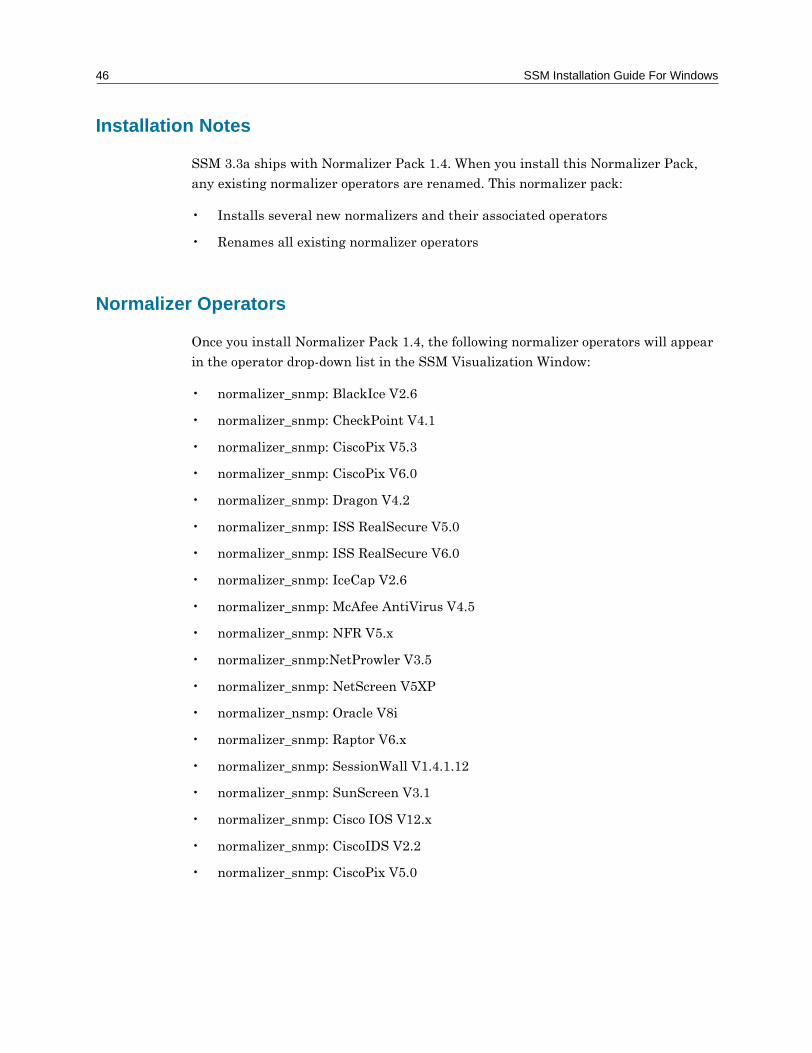
SSM 3.3a ships with Normalizer Pack 1.4. When you install this Normalizer Pack,
any existing normalizer operators are renamed. This normalizer pack:
� Installs several new normalizers and their associated operators
� Renames all existing normalizer operators
Normalizer Operators
Once you install Normalizer Pack 1.4, the following normalizer operators will appear
in the operator drop-down list in the SSM Visualization Window:
� normalizer_snmp: BlackIce V2.6
� normalizer_snmp: CheckPoint V4.1
� normalizer_snmp: CiscoPix V5.3
� normalizer_snmp: CiscoPix V6.0
� normalizer_snmp: Dragon V4.2
� normalizer_snmp: ISS RealSecure V5.0
� normalizer_snmp: ISS RealSecure V6.0
� normalizer_snmp: IceCap V2.6
� normalizer_snmp: McAfee AntiVirus V4.5
� normalizer_snmp: NFR V5.x
� normalizer_snmp:NetProwler V3.5
� normalizer_snmp: NetScreen V5XP
� normalizer_nsmp: Oracle V8i
� normalizer_snmp: Raptor V6.x
� normalizer_snmp: SessionWall V1.4.1.12
� normalizer_snmp: SunScreen V3.1
� normalizer_snmp: Cisco IOS V12.x
� normalizer_snmp: CiscoIDS V2.2
� normalizer_snmp: CiscoPix V5.0
Chapter 6: Installing the Normalizer Pack 47
� normalizer_syslog: CiscoPix V6.0
� normalizer_syslog: CyberGuard V4.3
� normalizer_syslog: NetScreen V10.0
� normalizer_syslog: Snort V1.8
� normalizer_syslog: Solaris V8.0
� normalizer_syslog: WatchGuard V4.61
Each operator name indicates:
� The product it supports (for example, as BlackIce).
� The version of the product it supports (for example, as V2.6).
� The type of data it normalizes, and the SSM rulespaces it works in (for example,
snmp or syslog)
The Normalizer Pack also reconfigures the default SSM rules to include these
operators.
� All operators with "snmp" in their names will appear in both your Central Server
and Event Consolidator SNMP rules.
� All operators with "syslog" in their names will appear in both your Central Server
and Event Consolidator Syslog rules.
You must configure the operators in these rules in order for the rules to work
properly.

48 SSM Installation Guide For Windows
OID Operators
Normalizer Pack 1.4 adds the following object identifier (OID) operators to SSM:
� Object Identifier: Black Ice
� Object Identifier: Checkpoint
� Object Identifier: Dragon
� Object Identifier: ISS Realoid: Dragon
� Object Identifier: IceCap
� Object Identifier: McAfee AntiVirus
� Object Identifier: NFR
� Object Identifier: NetProwler
� Object Identifier: NetScreen OS2.4
� Object Identifier: NetScreen OS2.6
� Object Identifier: Oracle
� Object Identifier: Pix
� Object Identifier: Raptor
� Object Identifier: SessionWall
� Object Identifier: SunScreen
� Object Identifier: oid
These operators will appear in your default SSM rules, but you do not need to
configure them.
Installing Normalizers
When you install the Normalizer Pack, all normalizers are installed by default. SNMP
normalizers are added to your Central Server and Event Consolidator SNMP rules.
Syslog normalizers are added to the Syslog rules.

Chapter 6: Installing the Normalizer Pack 49
SSM will not work properly until:
� You configure any normalizers that you intend to use.
To install the Normalizer Pack
1. Insert the SSM CD into the CD ROM. The InstallShield begins. Choose the
Normalizer Pack installation option.
2. Follow the procedures outlined in the InstallShield. Ensure that:
� The install directory is the same as the directory where you installed SSM. If
you left the default for your SSM installation the directory is C:\SSM.
Validating
Central Server
On the Central Server, check that the Normalizer Pack is installed properly by:
� Opening the SSM Visualization Window and ensure that normalizer operators
now appear in the operator drop-down list.
� Checking the corresponding .properties files are located in the /etc directory.
� Navigating to the SNMP rule space and ensuring that your graph looks similar to
50 SSM Installation Guide For Windows
the following:
Event Consolidators, and Remote Consoles
On Event Consolidators, and Remote Consoles, check that the Normalizer Pack is
installed properly by:
� Checking the corresponding .properties files are located in the /etc directory.
Troubleshooting
If the normalizer operators do not appear in the operator drop-down list:
� Check that you have installed into the correct directory. To remedy this situation,
remove and then reinstall the Normalizer Pack.
If SSM is not receiving events from a security device:
� For security devices that generate SNMP events, use a third party application

Chapter 6: Installing the Normalizer Pack 51
such as Trapreceiver to check the OID of the security device. Enter this in the oid
attribute of the corresponding normalizer.
� For security devices that generate syslog events, use a third party device such as
Snoop or Netcat to check the facility number of the security device. Enter this in
the facility_number attribute of the corresponding normalizer.

52 SSM Installation Guide For Windows

7Installing Agents
About Agents
Agents are small programs or scripts that extract information from network devices
and send this information to SSM. Agents are needed for devices that do not have the
capability to send information to SSM on their own using SNMP, SMTP or Syslog.
Agents are installed from the SSM CD. There are eight agents that ship with
Normalizer Pack 1.4:
� BlackIce Defender
� Cisco IDS
� Event2Message
� Intruder Alert
� McAfee
� NetCache
� Oracle
� Syntegra
The Event2Message agent has extended functionality and the installation
instructions for this agent are documented in "Installing Event2Message" on page 83
of this guide.
54 SSM Installation Guide For Windows
Installation Notes
Agents must have access to the logs of the products that they work with. For example,
the McAfee agent needs access to McAfee AntiVirus logs. You can install an agent on
the computer running the associated product, or you can install it on a different
computer as long as the agent still has access to the product logs. Some third-party
products allow remote logging, or network access to logs.
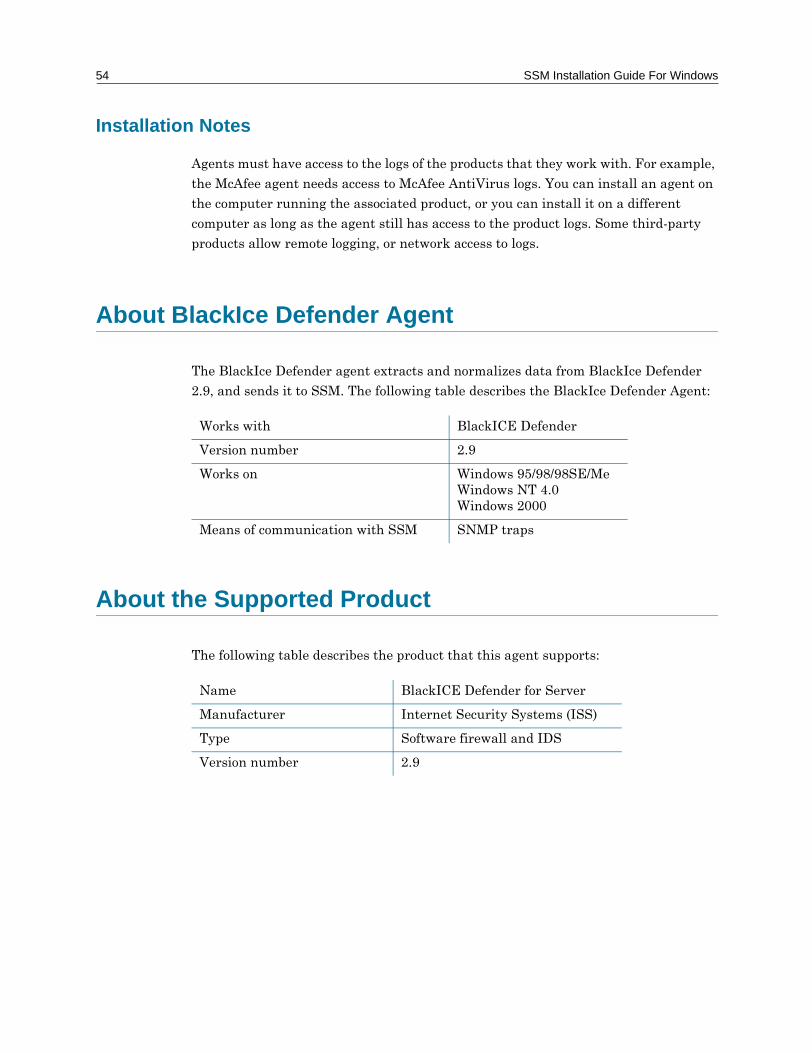
About BlackIce Defender Agent
The BlackIce Defender agent extracts and normalizes data from BlackIce Defender
2.9, and sends it to SSM. The following table describes the BlackIce Defender Agent:
About the Supported Product
The following table describes the product that this agent supports:
Works with BlackICE Defender
Version number 2.9
Works on Windows 95/98/98SE/MeWindows NT 4.0Windows 2000
Means of communication with SSM SNMP traps
Name BlackICE Defender for Server
Manufacturer Internet Security Systems (ISS)
Type Software firewall and IDS
Version number 2.9
Chapter 7: Installing Agents 55
Prerequisites
Before you set up your system to monitor BlackIce Defender information, you need to
know:
� The IP address of the SSM Central Server or Event Consolidator.
� The location of the attack-list.csv produced by BlackIce Defender
Before you install the BlackIce Defender Agent, ensure that:
� SSM is installed and configured.
Installation Notes
For the BlackIce Defender agent to function, you must ensure that it has access to
BlackIce Defender 2.9. To provide this access, install the BlackIce agent on the
computer running BlackIce Defender 2.9.
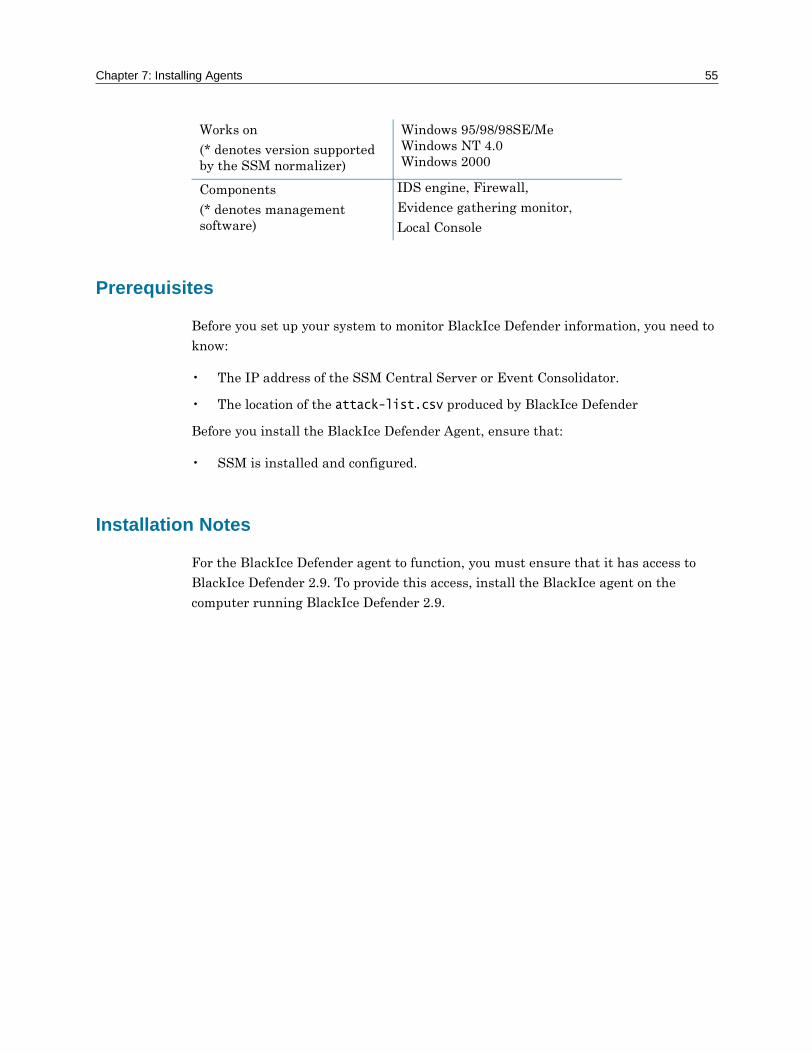
Works on
(* denotes version supported by the SSM normalizer)
Windows 95/98/98SE/MeWindows NT 4.0Windows 2000
Components
(* denotes management software)
IDS engine, Firewall,
Evidence gathering monitor,
Local Console
56 SSM Installation Guide For Windows
Installing BlackIce Defender
To install and validate the BlackIce Defender agent, you need to:
1. Install the BlackIce Defender Agent.
2. Configure the agent.
3. Run the agent.
To install BlackIce Defender
1. Insert the SSM CD into your CD ROM drive. If Autorun is enabled on your
computer, the InstallShield will automatically start. Click Close to exit the
installation.
2. Navigate to the \Agents\BlackIce folder.
3. Double-click the BlackIce_Agent.exe file.
4. Follow the InstallShield directions to install the Agent. Ensure that you:
� Type the correct delimiter. This is typically a comma.
� Type the correct location of the attack-list.csv file. By default, this is directory
that BlackIce is installed.
Chapter 7: Installing Agents 57
To configure the BlackIce Defender Agent
To configure the BlackIce Defender Agent to send data to SSM, you must change:
� The default SSM address to the IP address of the SSM Central Server or the
Event Consolidator.
� The location of the attack-list.csv (by default, it is located in C:\Program
Files\Network Ice\BlackIce\attack-list.csv)
� The location of the BlackIce Agent (by default, it is in C:\Program Files\Network
Ice\BlackIce)
To run the Agent
1. Go to Start > Programs > Spectrum Security Manager > Agents > Black
Ice Agent
Validating
To validate that the BlackIce Agent is working properly:
1. Go to the Local System Graph and draw an edge from the snmp_listener node to
the debugger node.
Troubleshooting
If the BlackIce Agent is not working properly check that:
� SSM is receiving message by using a third-party listener such as Netcat.
� The agent is installed properly.
58 SSM Installation Guide For Windows
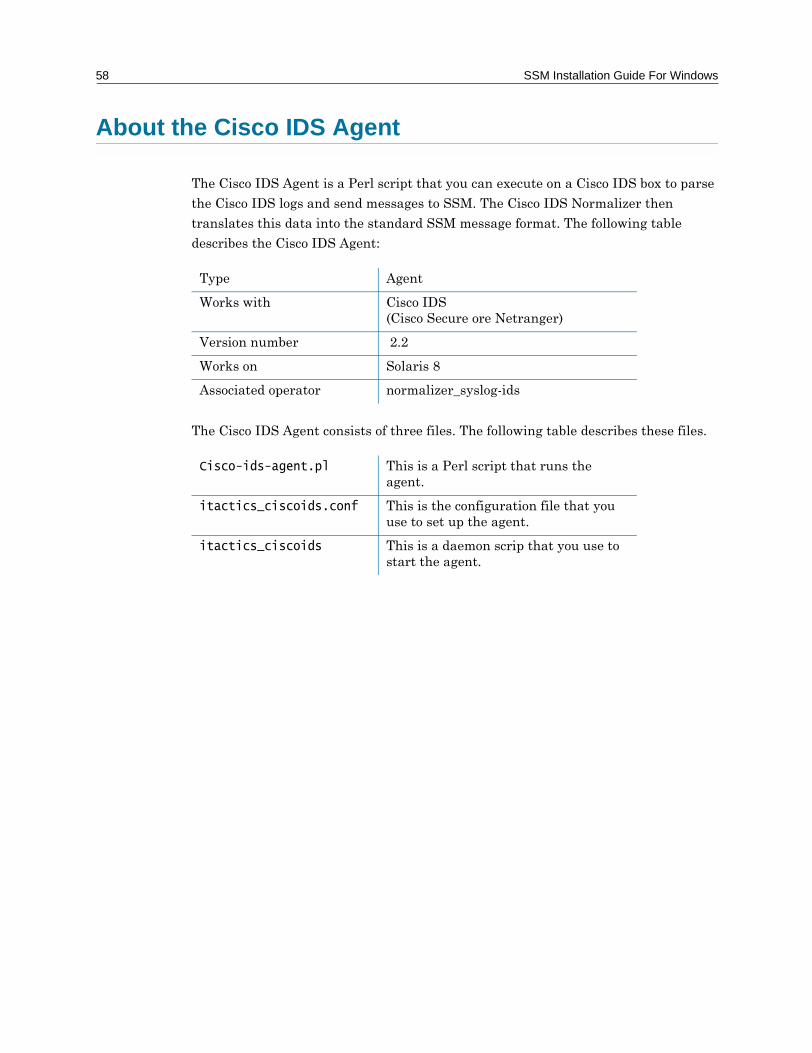
About the Cisco IDS Agent
The Cisco IDS Agent is a Perl script that you can execute on a Cisco IDS box to parse
the Cisco IDS logs and send messages to SSM. The Cisco IDS Normalizer then
translates this data into the standard SSM message format. The following table
describes the Cisco IDS Agent:
The Cisco IDS Agent consists of three files. The following table describes these files.
Type Agent
Works with Cisco IDS(Cisco Secure ore Netranger)
Version number 2.2
Works on Solaris 8
Associated operator normalizer_syslog-ids
Cisco-ids-agent.pl This is a Perl script that runs the agent.
itactics_ciscoids.conf This is the configuration file that you use to set up the agent.
itactics_ciscoids This is a daemon scrip that you use to start the agent.
Chapter 7: Installing Agents 59
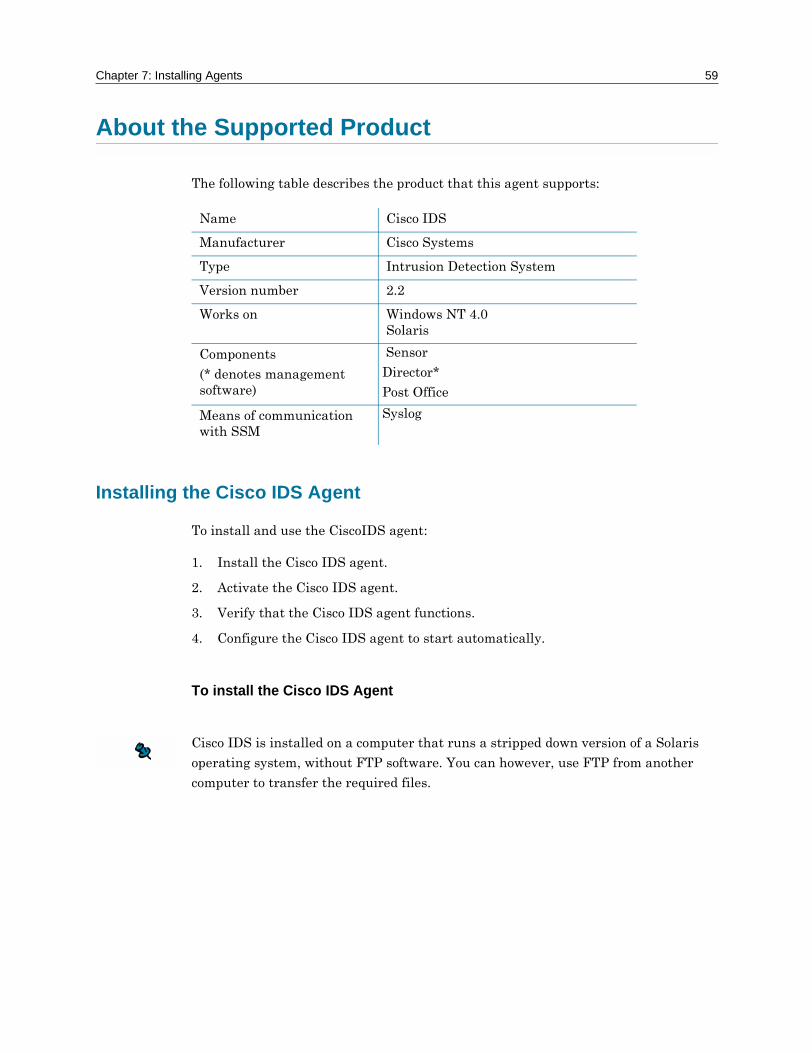
About the Supported Product
The following table describes the product that this agent supports:
Installing the Cisco IDS Agent
To install and use the CiscoIDS agent:
1. Install the Cisco IDS agent.
2. Activate the Cisco IDS agent.
3. Verify that the Cisco IDS agent functions.
4. Configure the Cisco IDS agent to start automatically.
To install the Cisco IDS Agent
Cisco IDS is installed on a computer that runs a stripped down version of a Solaris
operating system, without FTP software. You can however, use FTP from another
computer to transfer the required files.
Name Cisco IDS
Manufacturer Cisco Systems
Type Intrusion Detection System
Version number 2.2
Works on Windows NT 4.0Solaris
Components
(* denotes management software)
Sensor
Director*
Post Office
Means of communication with SSM
Syslog

60 SSM Installation Guide For Windows
To use FTP to transfer the Cisco IDS files
1. Setup an FTP server on another computer on the same network.
2. Copy the 3 Cisco IDS agent files from the SSM CD to the FTP server and use an
FTP client on the Cisco IDS computer to download the files.
3. In the /usr/nr/var directory of the Cisco IDS computer, type
ftp [address of ftp server]
4. Log in at the prompt.
5. To download the Perl script, type get cisco-ids-agent.pl
6. To switch to the /etc directory, type !cd /etc
7. To download the configuration file, type get itactics_ciscoids.conf
8. To the /etc/init.d directory on the IDS machine
9. To change directories, type !cd /etc/init.d
10. To download the daemon script, type get Itactics_ciscoids
To configure the itactics_ciscoids.conf file
Before you can use the agent, you must configure the conf file to specify the
appropriate variables. You must edit the itactics_ciscoids.conf file in the /etc directory:
1. Open the Itactics_ciscoids.conf file with a text editor.
2. Edit the IP address
3. ·Leave the ports settings alone in the second variable
4. ·Specify the IP address of your Cisco IDS machine in the third variable
5. ·Scroll down the file to the Debug section. Change the debug info debug = true
(Without setting debug to true, you will not be able to see anything when you run
the script in interactive mode)
cisco-ids-agent.pl into the directory /usr/nr/var.
6. Ensure that the file permissions for cisco-ids-agent.pl are rw-r--r--. This step
makes the file secure so that it cannot run in an unprivileged mode.
7. Ensure that the file is owned by the netranger account or its equivalent. This
account is the default ids account.
Chapter 7: Installing Agents 61
To activate the Cisco IDS Agent:
1. Enter your user name and password.
2. Type cd /usr/nr/var. This command takes you to the correct directory.
3. Type perl cisco-ids-agent <IP address> 514 &. The IP address must be the
valid IP address of the SSM Central Server. 514 is the port that syslog
information will be sent on. The character & forces the agent to run in the
background.
4. Press CTRL + D to log off.
Configuring the Cisco IDS Agent to start automatically:
1. Type cd/etc/rc.2. This command takes you to the boot files directory.
2. Modify rc.2 to autostart the Perl script.
Validating
1. On the SSM Central Console, click Goto Local System Graph.
2. Draw an edge from the syslog_listener node to the debugger node.
Troubleshooting
If the Cisco IDS agent and normalizer pair are not working properly check that:
� The agent is installed properly.
� The network path between the agent and SSM.

62 SSM Installation Guide For Windows
About Intruder Alert Agent
The Intruder Alert agent extracts and normalizes data from Intruder Alert 3.5 and
sends it to SSM. The following table describes the Intruder Alert agent:
About the Supported Product
The following table describes the product that this agent supports:
Type Agent
Works with Intruder Alert
Version number 3.5
Works on Windows NT 4.0Solaris
Name Intruder Alert 3.5
Manufacturer Symantec Corporation
Type IDS
Version number 3.5
Works on Windows NT 4.0Solaris
Components SNMP
Chapter 7: Installing Agents 63
Prerequisites
To install the Intruder Alert Agent, you need to know:
� The IP address of your SSM Central Server (or Event Consolidator).
� The name and directory of the Intruder Alert log file.
Before you install the Intruder Alert Agent, ensure that:
� SSM is installed and configured.
Installation Notes
For the Intruder Alert agent to function, you must ensure that it has access to
Intruder Alert 3.5. To provide this access, install the Intruder Alert agent on the
computer running Intruder Alert 3.5.
Installing Intruder Alert Agent
To install and validate the Intruder Alert agent:
1. Install the Intruder Alert agent from the SSM CD.
2. Configure Intruder Alert 3.5 to send data to a log file.
For more information on this step, consult your Intruder Alert 3.5 documentation.
3. Configure the Intruder Alert Agent to extract data from the log file.
To install the Intruder Alert Device Agent
1. Insert the SSM CD into your CD ROM drive. If Autorun is enabled on your
computer, the InstallShield will automatically start. Click Close to exit the
installation.
2. Navigate to the \Agents\IntruderAlert folder.
3. Double-click the IntruderAlert_Agent.exe file.
4. Follow the InstallShield directions to install the Agent.
64 SSM Installation Guide For Windows
To configure the agent
To configure the Intruder Alert Agent to send data to SSM, you need to:
� Change the default SSM address to the IP address of the SSM Central Server (or
Event consolidator).
� Change the default location of the logfile, and you may also change the name of
the logfile (by default, ia.logfile).
� Choose a different folder from the default directory C:\IA_Agent, as may be
required.
Running the Agent
1. Click Start > Programs > Spectrum Security Manager > Agents > Intruder
Alert Agent
Validating
To validate the Intruder Alert agent is working properly:
� Use a third-party listener to see if messages are being passed to SSM.
Troubleshooting
If the Intruder Alert agent is not working properly check that:
� The agent is installed properly.
� The network path between the agent and SSM.

Chapter 7: Installing Agents 65
About the McAfee Agent
Most agents extract log or database information, translate it into a standard format,
and send it to SSM. The McAfee agent does not work this way. While the McAfee
agent does extract event information from a McAfee database, it does not normalize
the event information ("normalizing" involves translating data into SSM format). A
separate McAfee normalizer handles this step.
To monitor McAfee anti-virus servers, you must install both the McAfee agent and the
McAfee normalizer.
The following table describes the McAfee agent and normalizer prithee following table
describes the Intruder Alert agent:
Type Agent and Normalizer
Works with McAfee VirusScan 4.5
McAfee NetShield 4.5
(Not GroupShield for Exchange)
Version number 4.5
Works on Windows NT
Associated operator normalizer_snmp: McAfee AntiVirus V4.5
Associated rules Central Server snmp rule
Event Consolidator snmp rule
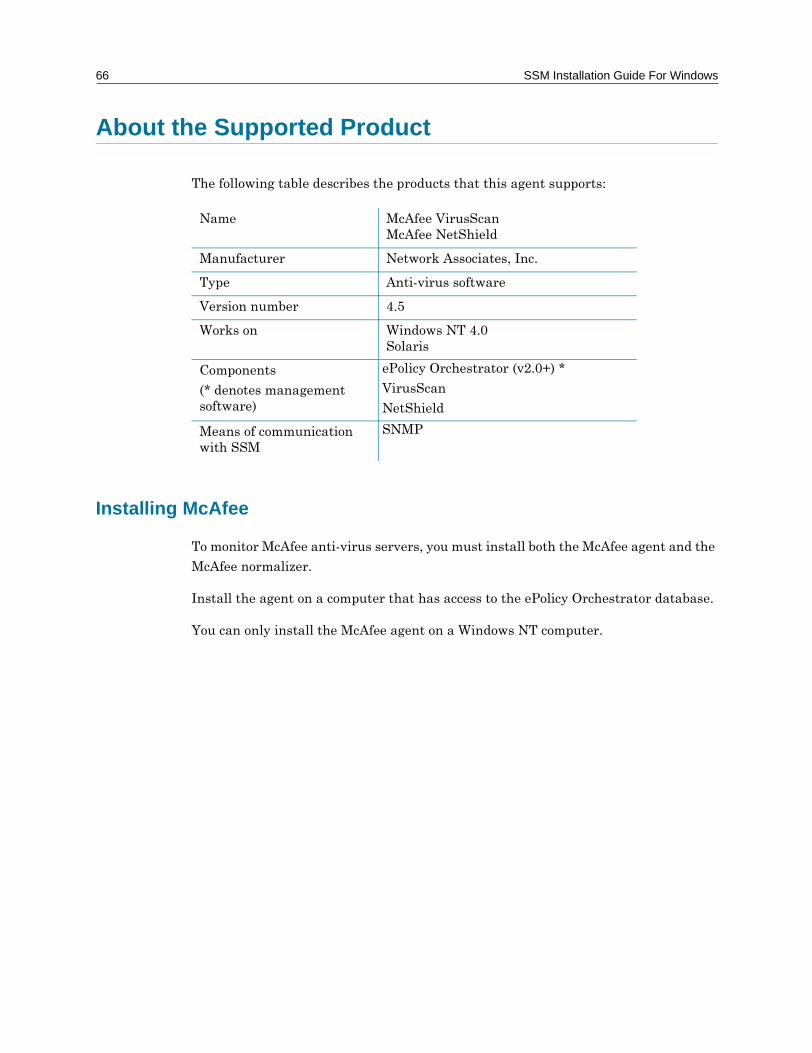
66 SSM Installation Guide For Windows
About the Supported Product
The following table describes the products that this agent supports:
Installing McAfee
To monitor McAfee anti-virus servers, you must install both the McAfee agent and the
McAfee normalizer.
Install the agent on a computer that has access to the ePolicy Orchestrator database.
You can only install the McAfee agent on a Windows NT computer.
Name McAfee VirusScanMcAfee NetShield
Manufacturer Network Associates, Inc.
Type Anti-virus software
Version number 4.5
Works on Windows NT 4.0Solaris
Components
(* denotes management software)
ePolicy Orchestrator (v2.0+) *
VirusScan
NetShield
Means of communication with SSM
SNMP
Chapter 7: Installing Agents 67
Prerequisites
To install the McAfee agent, you need to know:
� The IP address of your SSM Central Server (or Event Consolidator).
� The hostname of your ePolicy server.
� The name of your ePolicy database.
� The username and password of an ePolicy database user account (this account
must have Read privileges)
To install the McAfee agent
1. Insert the SSM CD into your CD ROM drive. If Autorun is enabled on your
computer, the InstallShield will automatically start. Click Close to exit the
installation.
2. Navigate to the \Agents\McAfee folder.
3. Double-click the setup.exe file.
4. Follow the InstallShield directions to install the agent.
Validating
To validate that the McAfee agent and normalizer pair are working properly:
1. On the SSM Central Console, click Goto Local System Graph.
2. Draw an edge from the message_listener node to the debugger node.
Troubleshooting
If the McAfee agent and normalizer pair are not working properly check that:
� The agent is installed properly.
� The network path between the agent and SSM.

68 SSM Installation Guide For Windows
About NetCache Agent
The NetCache Agent extracts data from NetCache 1.0, normalizes it and sends it to
SSM. The following table describes the NetCache Agent:
About the Supported Product
The following table describes the product that this agent supports:
Works with NetCache
Version number 1.0
Works on Proprietary OS
Name NetCache
Manufacturer Network Appliance
Type Proxy Server
Version number 5.2.1D8
Works on Proprietary OS
Chapter 7: Installing Agents 69
Prerequisites
To install the NetCache Agent, you need to know:
� The IP address of your SSM Central Server (or Event Consolidator).
� The FTP server IP address.
� The FTP server port.
� The FTP server Username and Password that you will use.
Before you install the NetCache Agent, ensure that:
� SSM is installed and configured.
� The FTP server is installed and configured.
Installation Notes
For the NetCache Agent to function, you must ensure that it has access to the
NetCache system. To provide this access, install the NetCache Agent on the computer
running NetCache.
Installing NetCache Agent
To install and use the NetCache Agent:
1. Install the NetCache Agent from the SSM CD.
2. Configure the NetCache Agent
To install the NetCache Agent
1. Insert the SSM CD into your CD ROM drive. If Autorun is enabled on your
computer, the InstallShield will automatically start. Click Close to exit the
installation.
2. Navigate to the \Agents\NetCache folder.
3. Run NetCache_Agent_win32.exe
4. Click Next at the Welcome Screen

70 SSM Installation Guide For Windows
5. Accept the default install Directory Name.
6. Enter the following information
� FTP Server Username
� FTP Server Password
� FTP Server Address
� FTP Server Port
7. Enter the log file names you want the NetCache Agent to monitor:
� Web Log File Name
� NNTP Log File Name
8. Enter the following information:
� Central Server IP address
� Central Server Port
9. Read the summary screen and click Next.
10. Click Finish.
To configure the agent
1. Edit user.properties. The file allows you to add anew user account and
password to the FTP server. The following example shows hoe to add a user and
password.
FtpServer.user.USER.enabled=true
FtpServer.user.USER.home=C\:/netcache/logs/
FtpServer.user.USER.idle=500
FtpServer.user.USER.password=PASSWORD
FtpServer.user.USER.upload=0
FtpServer.user.USER.write=true
2. Edit netcache.properties. The following are example entries.
� Location and name of file that events are being logged to.
nc.logfile = C:\\netcache\\logs\web_defaultlog;C:\\netcache\\logs\\
nntp_log
� Listener classes that correspond to the log files showed above.
nc.logclass =

Chapter 7: Installing Agents 71
com.itactics.sm.agent.io.netcache.WebLogListener;com.itactics.sm.agent.io.n
etcache.NNTPLogListener
Multiple logs and listener class files must be separated by semicolons and
must be listed in order so that they correspond with each other.
� Indicate whether or not to archive processed files
nc.archiving=true
� Address of SSM
nsm.address = 10.0.0.1
3. Edit ftpd.conf. This file enables the user to change the default ftp server port
number. The following is the default setting:
## Ftp server port number
## Default FTP port is 21
FtpServer.server.config.port=21
72 SSM Installation Guide For Windows
Running the Agent
1. Go to Start > Programs > Spectrum Security Manager > Agents >
NetCache Agent> Install NetCache Agent Service. If this gives you an error
you can run the service install manually from C:\netcache\JNT\
installnetcacheservice.bat.
Validating
To validate the NetCache Agent service is running:
� Click Start >Settings > Control Panel.
� Click Administrative Tools.
� Click Services.
� You will see the Netcache Agent service set to automatically run.
Troubleshooting
If the NetCache Agent is not working properly check that:
� The Netcache Agent service is installed properly.
� The network path between the agent and SSM.
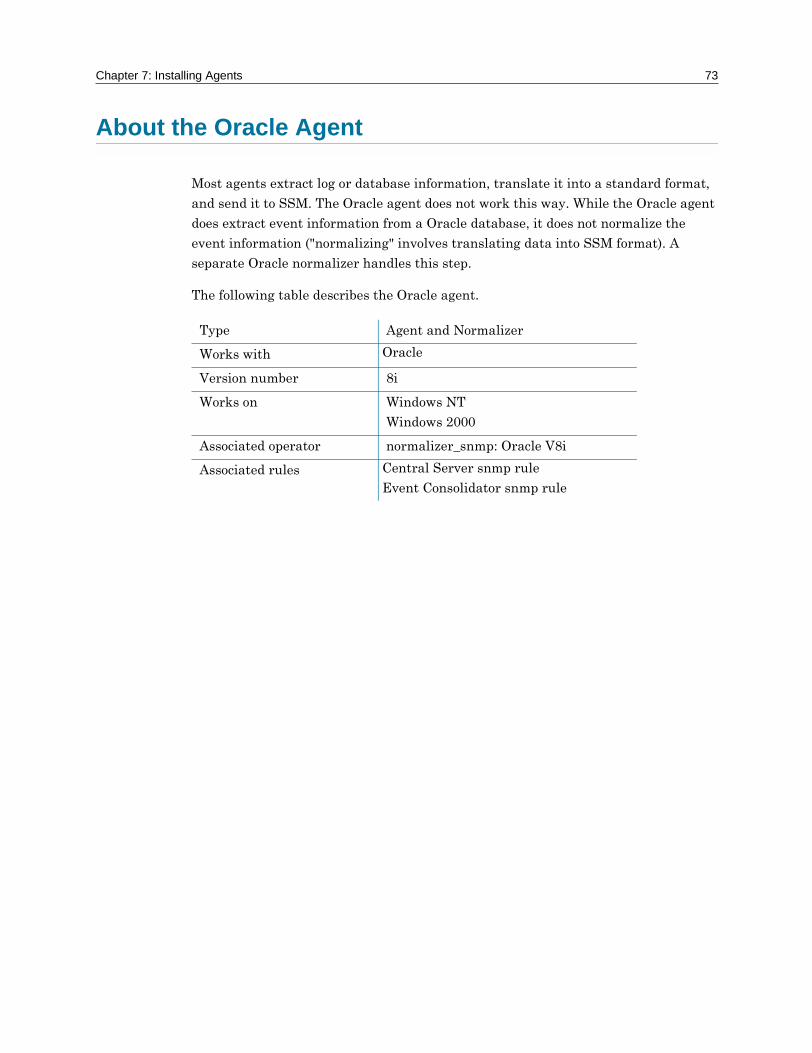
Chapter 7: Installing Agents 73
About the Oracle Agent
Most agents extract log or database information, translate it into a standard format,
and send it to SSM. The Oracle agent does not work this way. While the Oracle agent
does extract event information from a Oracle database, it does not normalize the
event information ("normalizing" involves translating data into SSM format). A
separate Oracle normalizer handles this step.
The following table describes the Oracle agent.
Type Agent and Normalizer
Works with Oracle
Version number 8i
Works on Windows NT
Windows 2000
Associated operator normalizer_snmp: Oracle V8i
Associated rules Central Server snmp rule
Event Consolidator snmp rule
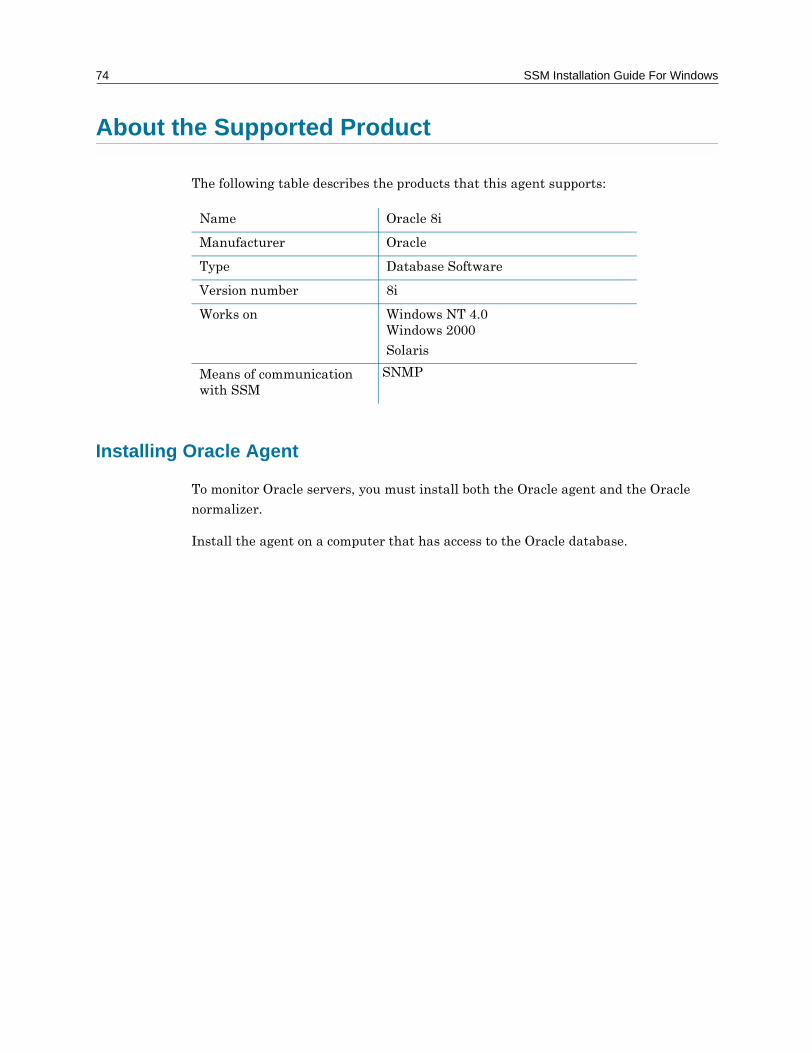
74 SSM Installation Guide For Windows
About the Supported Product
The following table describes the products that this agent supports:
Installing Oracle Agent
To monitor Oracle servers, you must install both the Oracle agent and the Oracle
normalizer.
Install the agent on a computer that has access to the Oracle database.
Name Oracle 8i
Manufacturer Oracle
Type Database Software
Version number 8i
Works on Windows NT 4.0Windows 2000
Solaris
Means of communication with SSM
SNMP
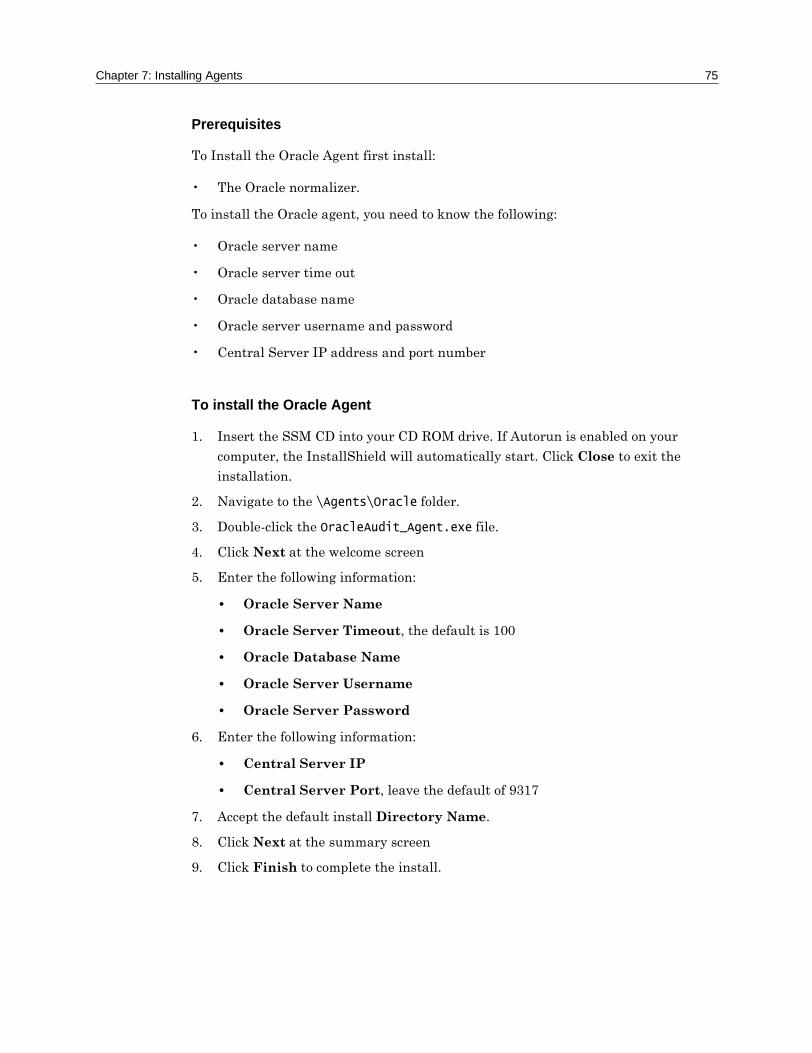
Chapter 7: Installing Agents 75
Prerequisites
To Install the Oracle Agent first install:
� The Oracle normalizer.
To install the Oracle agent, you need to know the following:
� Oracle server name
� Oracle server time out
� Oracle database name
� Oracle server username and password
� Central Server IP address and port number
To install the Oracle Agent
1. Insert the SSM CD into your CD ROM drive. If Autorun is enabled on your
computer, the InstallShield will automatically start. Click Close to exit the
installation.
2. Navigate to the \Agents\Oracle folder.
3. Double-click the OracleAudit_Agent.exe file.
4. Click Next at the welcome screen
5. Enter the following information:
� Oracle Server Name
� Oracle Server Timeout, the default is 100
� Oracle Database Name
� Oracle Server Username
� Oracle Server Password
6. Enter the following information:
� Central Server IP
� Central Server Port, leave the default of 9317
7. Accept the default install Directory Name.
8. Click Next at the summary screen
9. Click Finish to complete the install.

76 SSM Installation Guide For Windows
Validating
To validate that the Oracle agent and normalizer pair are working properly:
1. On the SSM Central Console, click Goto Local System Graph.
2. Draw an edge from the message_listener node to the debugger node.
Troubleshooting
If the Oracle agent and normalizer pair are not working properly check that:
� The agent is installed properly.
� You have installed Normalizer Pack 1.4
� The network path between the agent and SSM.

Chapter 7: Installing Agents 77
About the Syntegra Agent
Most agents extract log or database information, translate it into a standard format,
and send it to SSM. The Syntegra agent does not normalize the event information
("normalizing" involves translating data into SSM format) before sending it to SSM. A
separate Syntegra normalizer handles this step.
The following table describes the Syntegra agent.
Type Agent and Normalizer
Works with Syntegra Global Directory Service
Works on Linux
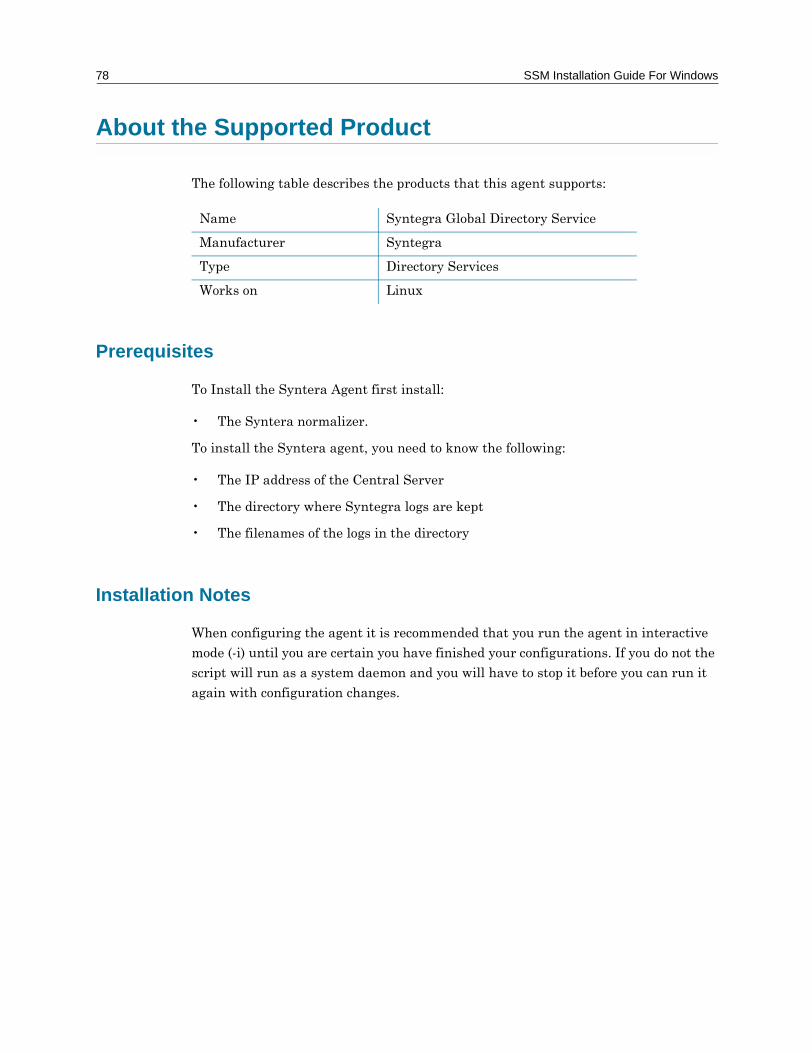
78 SSM Installation Guide For Windows
About the Supported Product
The following table describes the products that this agent supports:
Prerequisites
To Install the Syntera Agent first install:
� The Syntera normalizer.
To install the Syntera agent, you need to know the following:
� The IP address of the Central Server
� The directory where Syntegra logs are kept
� The filenames of the logs in the directory
Installation Notes
When configuring the agent it is recommended that you run the agent in interactive
mode (-i) until you are certain you have finished your configurations. If you do not the
script will run as a system daemon and you will have to stop it before you can run it
again with configuration changes.
Name Syntegra Global Directory Service
Manufacturer Syntegra
Type Directory Services
Works on Linux
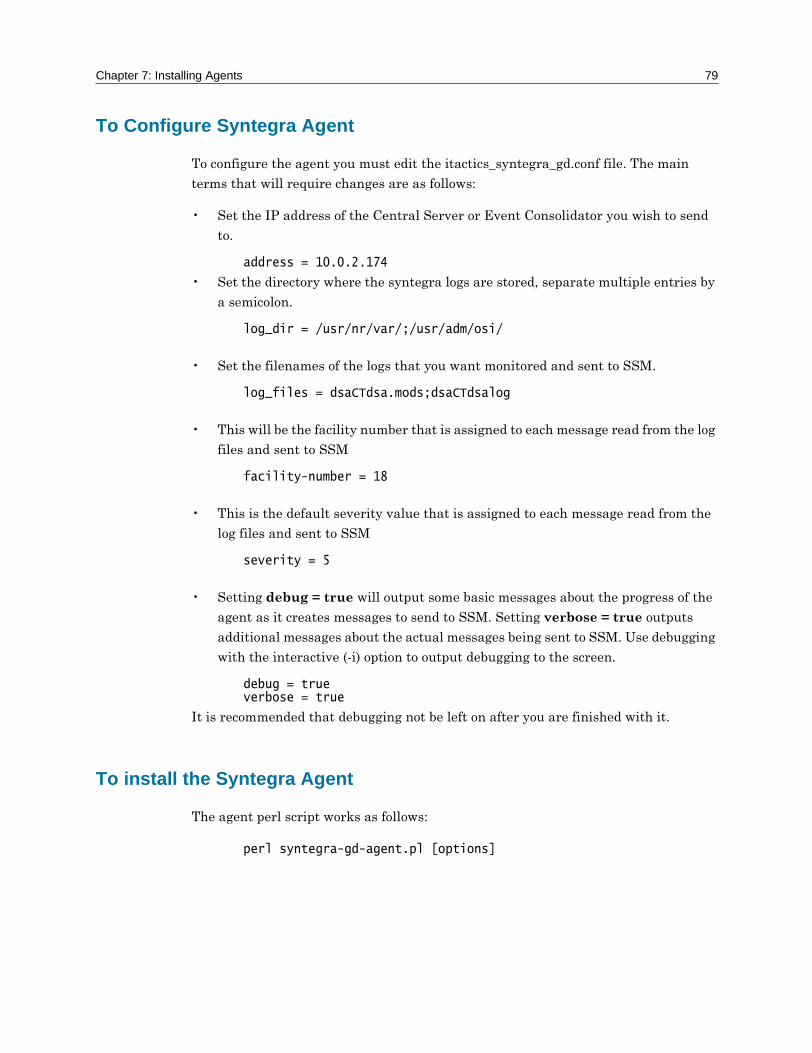
Chapter 7: Installing Agents 79
To Configure Syntegra Agent
To configure the agent you must edit the itactics_syntegra_gd.conf file. The main
terms that will require changes are as follows:
� Set the IP address of the Central Server or Event Consolidator you wish to send
to.
address = 10.0.2.174
� Set the directory where the syntegra logs are stored, separate multiple entries by
a semicolon.
log_dir = /usr/nr/var/;/usr/adm/osi/
� Set the filenames of the logs that you want monitored and sent to SSM.
log_files = dsaCTdsa.mods;dsaCTdsalog
� This will be the facility number that is assigned to each message read from the log
files and sent to SSM
facility-number = 18
� This is the default severity value that is assigned to each message read from the
log files and sent to SSM
severity = 5
� Setting debug = true will output some basic messages about the progress of the
agent as it creates messages to send to SSM. Setting verbose = true outputs
additional messages about the actual messages being sent to SSM. Use debugging
with the interactive (-i) option to output debugging to the screen.
debug = trueverbose = true
It is recommended that debugging not be left on after you are finished with it.
To install the Syntegra Agent
The agent perl script works as follows:
perl syntegra-gd-agent.pl [options]
80 SSM Installation Guide For Windows
With no options the script starts up as s system daemon, using the configuration
parameters found in the /etc/itactics_syntegra_gd.conf file.
The following Options are available:
� Interactive mode. The script will not run as a daemon and all output will be
directed to the users console. This is only useful if the configuration file has
set debug=true.
perl syntegra-gd-agent.pl -i
� Use a specified configuration file:
perl syntegra-gd-agent.pl -c /test/test.conf
Run the Script on System Startup
To run the script on system startup, perform the following:
� First ensure that the script runs correctly from the command-line with default
configuration.
� Copy the itactics_syntegragd script to the /etc/init.d directory. Make sure it is
executable.
� Place the syntegra-gd-agent.pl script in a known location and make sure it is
executable.
� Modify the itactics_syntegragd script to point to the location of the perl script.
� Create a symbolic link in the appropriate run level directories to
/etc/init.d/itactics_syntegragd script. For example to start the perl script in
runlevel 2, perform the following:
� In -s /etc/init.d/syntegrags /etc/rc2.d/s99ItacticsSyntegraGD
Validating
To validate that the Syntegra agent and normalizer pair are working properly:
1. On the SSM Central Console, click Goto Local System Graph.
2. Draw an edge from the msg_listener node to the debugger node.
Chapter 7: Installing Agents 81
Troubleshooting
If the Syntegra agent and normalizer pair are not working properly check that:
� The agent is installed properly.
� You have installed Normalizer Pack 1.4
� The network path between the agent and SSM is working.

82 SSM Installation Guide For Windows
8Installing Event2Message
About Event2Message
SSM�s Event2Message service extracts event log entries from Windows NT and
Windows 2000 computers and sends this information to SSM. Eventlogs can contain
thousands of event types. The Event2Message service determines which events go to
SSM, translates these events into the standard SSM message format, and then sends
these parsed messages as well as the original event messages to SSM on port 9317.
Event2Message monitors the three standard Windows NT/2000 logs: System,
Application, and Security.
Event2Message can gather logs from remote computers on the same domain. A server
with Event2Message can monitor events from up to 20 other computers. If more than
20 computers require monitoring, you can share the load among several computers,
each running Event2Message.

84 SSM Installation Guide For Windows
Prerequisites
Before installing Event2Message, ensure that you:
� Install the proper Windows service pack(s) on the computer that will be running
Event2Message. On Windows NT: Service Pack 6a; on Windows 2000: Service
Pack 2.
� Set the Regional Settings in Control Panel to English.
Installation Options
For local monitoring, you can install Event2Message on any Windows NT or Windows
2000 computer.
Installation Notes
Remote Host Monitoring
If you intend to use Event2Message for remote host monitoring, the following
restrictions apply:
� Event2Message must be installed on a domain controller (PDC or BDC).
� The Event2Message server must be in the same domain as the computers it
monitors.
� The account needs to be logged on as the domain administrator.
Using a remote host to manage event logs can impact performance. On busy systems,
you should use a dedicated Event2Message agent.
Setting Up Event2Message
For Event2Message to work, you must:
1. Install Event2Message on the computer that will be sending events to SSM.
2. Configure Event2Message
Chapter 8: Installing Event2Message 85
3. Add filters.
4. Configure the Windows Event Viewer.
5. Set Event2Message to automatically initialize.
6. Configure Windows auditing.
7. Add remote hosts. (optional)
Installing Event2Message Service
1. Insert the SSM CD into your CD-ROM drive.
2. If Autorun is enabled on your computer, the InstallShield will automatically
start.
Click Close to exit the installation.
3. On the CD, navigate to the Agents folder, and open the Event2Message folder.
4. Double-click the setup.exe file.
5. Follow the InstallShield directions to install Event2Message.
6. The Collector Configuration Console automatically starts once the
installation finishes. Click Close.
7. Click Finish to exit the install wizard.
Configuring SSM’s Event2Message Service
You must stop and then restart the Event2Message service for any changes to the
system setting to take effect.
1. To open the Collector Configuration Console go to Start > Programs >
Spectrum Security Manager > Administration Tools and select Event
Agent Configuration.
The Collector Configuration window appears.
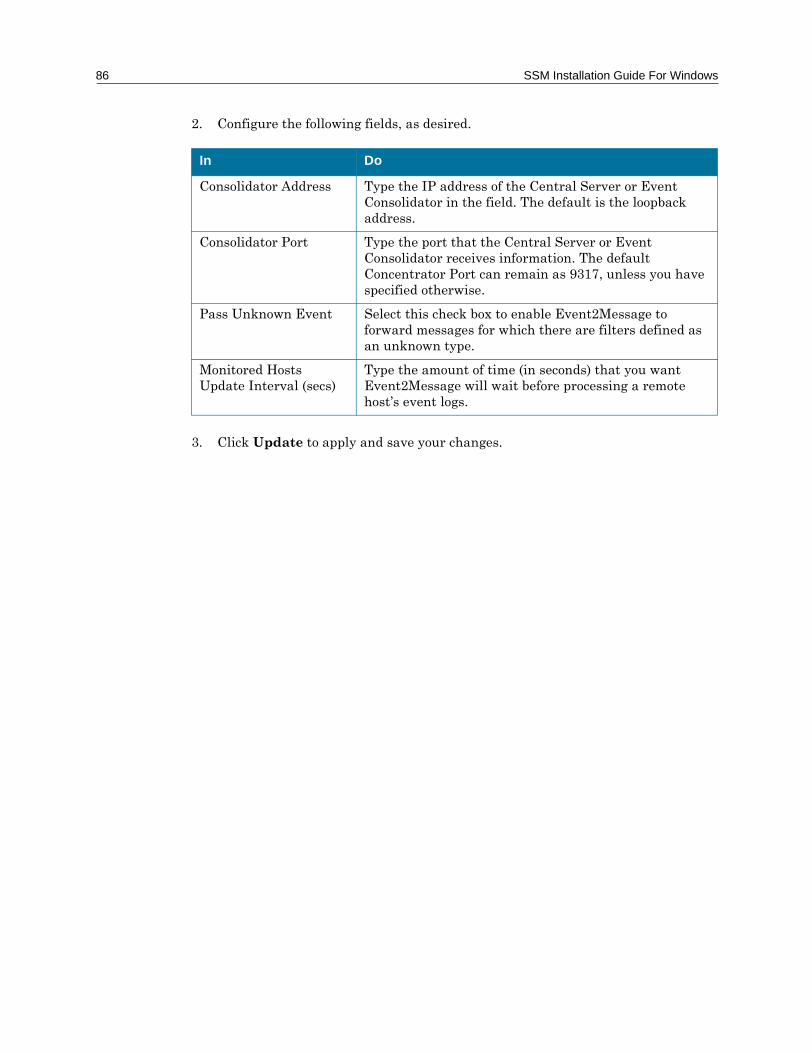
86 SSM Installation Guide For Windows
2. Configure the following fields, as desired.
3. Click Update to apply and save your changes.
In Do
Consolidator Address Type the IP address of the Central Server or Event Consolidator in the field. The default is the loopback address.
Consolidator Port Type the port that the Central Server or Event Consolidator receives information. The default Concentrator Port can remain as 9317, unless you have specified otherwise.
Pass Unknown Event Select this check box to enable Event2Message to forward messages for which there are filters defined as an unknown type.
Monitored Hosts Update Interval (secs)
Type the amount of time (in seconds) that you want Event2Message will wait before processing a remote host�s event logs.
Chapter 8: Installing Event2Message 87
Adding a Filter to Event2Message
Many applications, including Operating Systems, write information to the Event Log.
Event2Message requires a filter for each application logs you want to normalize and
forward to SSM. For example, �security� for OS events. The filters available for
Event2Message are:
� security.filter
� sqlserver2000.filter
To install filters
1. On the computer running Event2Message, go to Start > Programs > Spectrum
Security Manager > Administration Tools > Event Agent Configuration.
The Collector Configuration window appears.
2. In the tree view on the left side, double-click the computer that you want to add
the filter to.
If you want to add the filter to the local host, double-click the Local Host
Configuration node.
If you want to add the filter to a remote host, double-click the Remote Host
Configuration node. Then double-click the appropriate computer.
3. Double-click the Event Filters node. The Registered Filters pane appears at
the right side of the window.
4. Click Install Filter. A file dialog box appears.
5. Browse to the C:\Program Files\NT Collector folder. Select the file that
corresponds to the filter you want to install (for example, sqlserver2000.filter)
and click Open.
6. The Registered Filters area now lists the new filter. Select the check box to
activate the filter.
Configuring the Windows Event Viewer
You must configure each log in the Windows Event Viewer, such that new events
never overwrite older events. If you set up Event2Message to monitor remote hosts,
you must configure Event Viewer on each monitored computer.
88 SSM Installation Guide For Windows
Windows NT
1. Go to Start > Programs > Administrative Tools > Event Viewer.
2. From the Log menu, choose a log name.
3. From the Log menu, choose Log Settings. The Event Log Settings dialog box
appears.
4. Select Do Not Overwrite Events (Clear Logs Manually).
5. Click OK to save your changes.
6. Repeat steps 1 to 5 for each Event Viewer log that Event2Message will filter.
Windows 2000
1. Go to Start > Settings > Control Panel > Administrative Tools > Event
Viewer.
2. Right-click a log name and select Properties from the shortcut menu.
3. On the General tab, select the Do not overwrite events option (in the Log size
area).
4. Click OK to save your changes.
5. Repeat steps 1 to 3 for each Event Viewer log that Event2Message will filter.
You must monitor the size of the event log and clear them periodically. Otherwise, the
event logs may build up quickly and occupy a lot of system memory. Some systems
may halt if the log is full.
Configuring SSM’s Event2Message Service to Start Automatically
1. In Windows NT go to Start > Settings > Control Panel. In Windows 2000 go to
Start > Settings > Control Panel > Admin Tools.
2. Double-click Services.
The Services dialog box appears.
3. Double-click Event2Message.
The Event2Message Properties dialog box appears.
Chapter 8: Installing Event2Message 89
4. From the Startup type drop-down, select Automatic.
5. Click the Log On tab.
6. Select This account: and enter the details for the domain administrator account.
7. Click Apply, then OK.
Configuring Windows auditing
To use the Windows auditing features, you must disable the following:
� Audit policy change
� Audit privilege use
If you set up Event2Message to monitor remote hosts, you must configure Windows
auditing on each monitored computer.
Windows NT
1. Go to Start > Programs > Administrative Tools > User Manager.
2. From the Policies menu, choose Audit. The Audit Policy dialog box appears.
3. Select Audit These Events.
4. Clear the Success and Failure check boxes next to Use of User Rights.
5. Clear the Success and Failure check boxes next to Security Policy Changes.
6. Click OK to save your changes.
Windows 2000
1. Go to Start > Settings > Control Panel > Administrative Tools.
2. Double-click Local Security Policy.
3. In the Tree area, expand Local Policies.
4. Select Audit Policy.
5. In the Policy area, double-click Audit privilege use.
6. Clear the Success and Failure check boxes, if selected.
90 SSM Installation Guide For Windows
7. Double-click Audit policy change.
8. Clear the Success and Failure check boxes, if selected.
9. Click OK to save your changes.
Adding a Remote Host
Remote hosts are computers that will be monitored by the Event2Message service.
You must be able to browse the network from the computer that Event2Message is
installed on in order to add a remote host. (You cannot type the IP address of a remote
host manually.)
All remote hosts being monitored by Event2Message must have identical NT Eventlog
configurations.
To add a remote host
1. Select the Remote Host Configuration node. The Registered Hosts pane
appears at the right side of the window.
2. In the Domain Computers list box, navigate to the computer you wish to
monitor and click the red down-arrow button.
The selected computer will now appear in the Monitored Computers list box,
with a check box beside it. When the check box is selected, the computer will be
monitored; when it is not selected, it will not be monitored and a red disabled
symbol will appear over the computer�s node under the Remote Host
Configuration node.
When you select a computer in the Monitored Computers list box, information
about the Hostname, IP Address, and Last Update will be displayed below the
Monitored Computers box. If you want unknown events to be passed to the
Central Server or Event Consolidator, select the Pass Unknown Events check
box.
3. Repeat steps 2 through 4 for each computer you want to monitor as a Remote
Host. They will now appear as nodes under the Remote Host Configuration node

Chapter 8: Installing Event2Message 91
Removing a Remote Host
1. Select the Remote Host Configuration node. The Registered Hosts pane
appears at the right side of the window.
2. In the Monitored Computers list box, select the computer you wish to remove.
Click the red up-arrow button.
A warning dialog box appears.
3. Click Yes.
All of the host data will be removed.
Validating
To confirm that the Event2Message service is sending event logs to SSM, draw an
edge from the debugger to the Msg_Listener and send a security event through.
To validate that the remote hosts are working properly, try attempting to log in three
times using a false ID or accessing files that you do not have permission to access.
Troubleshooting
If SSM is not receiving events from Event2Message, check that:
1. Messages are sent to the message rule space.
To do this, draw an edge from the debugger to the message rule space and try to
ping SSM.
2. You entered the correct Consolidator port.
3. Event2Message is configured to use filters.
If Event2Message fails to respond when launched, check that:
� An EvntMsg.nsm file exists. This file stores events whenever Event2Message
discovers the SSM server is not available and may grow excessively large. If the
files grows too large, it may cause Event2Message to stop responding when
started.
Rename this file and restart Event2Message.

92 SSM Installation Guide For Windows
9Installing the Reporting System
About the Reporting System
The Reporting System is an application that lets you create reports from information
stored in an SSM database. The Reporting System:
� Creates columnar reports augmented by charts (i.e. pie charts).
� Uses a web-based interface;
� Provides standard, pre-configured reports;
� Allows users to search for specific information and create reports based on their
search results;
� Supports multiple simultaneous users with different access rights;
� Lets administrators modify existing reports and add new, custom reports;
You can use the Reporting System to assess your network before writing SSM rules.
94 SSM Installation Guide For Windows
Installation Notes
To access the Reporting System and run reports, you need to have one of the following
Web browsers installed:
� Internet Explorer 5.x
� Netscape 4.7
You must enable your Web browser for the following:
� Cookies
� Java
� JavaScript
Installing the Reporting System
You must have an extraction key to install the Reporting System. If your software did
not come with an extraction key, or if you lose this information, please contact
Customer Support.
If you are installing the Reporting System as an integrated component of the
SPECTRUM Web Operator Suite, refer to the Installing and Using SPECTRUM
Security Manager 3.3 with SPECTRUM guide for installation instructions.
1. Insert the SSM CD into your CD-ROM drive. The Reporting System InstallShield
starts. Click the Report Tool installation option.
2. Follow the InstallShield instructions to install the Reporting System.
If you change the default installation directory, make certain that you do not use
a directory with a space in its name. This may prevent the Reporting System from
launching.
Connecting to a Database
When editing driver information in the reports.properties file, you can cut and
paste from the SSM JDBC Wizard to avoid typing errors.
Chapter 9: Installing the Reporting System 95
To use a native driver to connect to the database
1. Navigate to <root>/webapps/reports/WEB-INF/etc/properties.
2. Open reports.properties with any text editor.
3. Search for the paragraph labelled Database.
4. Edit the values of dbURL, driverName, user, and password to match the values of
your database and driver. Look for this information in the documentation for the
driver you are adding.
If you are installing the Reporting System on an SSM computer and you want to
use the same database driver for both the Reporting System and SSM itself, you
can copy the driver information from SSM's JDBC Configuration Wizard. Go to
Start > Programs > Spectrum Security Manager > Administration Tools >
Driver Configuration.
5. Save and close reports.properties.
6. Navigate to the location of the driver that you are adding, copy the driver and add
it to <root>/lib.
7. Navigate to <root>/bin, and open tomcat.bat in a text editor.
8. Locate the group of lines that resemble the following:
set CLASSPATH=%CLASSPATH%;%TOMCAT_HOME%\lib\<driver_name>.jar
9. Add the following line:
set CLASSPATH=%CLASSPATH%;%TOMCAT_HOME%\lib\<new_driver>.jar
Where <new_driver> is the name of the driver that you are adding.
10. Save your changes and quit the text editor.
To use an SQL ODBC driver to connect to the database
1. Open your Data Sources dialog box.
Windows NT: Go to Start > Settings > Control Panel > Data Sources
(ODBC).
Windows 2000: Go to Start > Settings > Control Panel > Administrative
Tools > Data Sources (ODBC).
2. Select the System DSN tab.
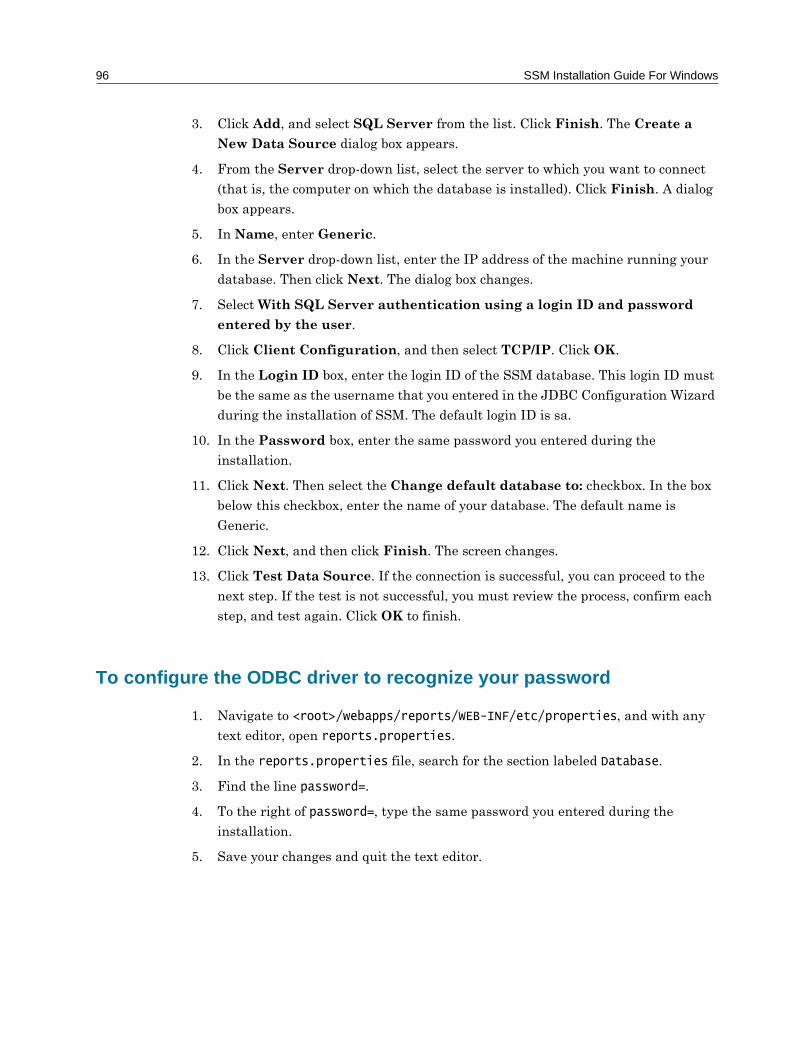
96 SSM Installation Guide For Windows
3. Click Add, and select SQL Server from the list. Click Finish. The Create a
New Data Source dialog box appears.
4. From the Server drop-down list, select the server to which you want to connect
(that is, the computer on which the database is installed). Click Finish. A dialog
box appears.
5. In Name, enter Generic.
6. In the Server drop-down list, enter the IP address of the machine running your
database. Then click Next. The dialog box changes.
7. Select With SQL Server authentication using a login ID and password
entered by the user.
8. Click Client Configuration, and then select TCP/IP. Click OK.
9. In the Login ID box, enter the login ID of the SSM database. This login ID must
be the same as the username that you entered in the JDBC Configuration Wizard
during the installation of SSM. The default login ID is sa.
10. In the Password box, enter the same password you entered during the
installation.
11. Click Next. Then select the Change default database to: checkbox. In the box
below this checkbox, enter the name of your database. The default name is
Generic.
12. Click Next, and then click Finish. The screen changes.
13. Click Test Data Source. If the connection is successful, you can proceed to the
next step. If the test is not successful, you must review the process, confirm each
step, and test again. Click OK to finish.
To configure the ODBC driver to recognize your password
1. Navigate to <root>/webapps/reports/WEB-INF/etc/properties, and with any
text editor, open reports.properties.
2. In the reports.properties file, search for the section labeled Database.
3. Find the line password=.
4. To the right of password=, type the same password you entered during the
installation.
5. Save your changes and quit the text editor.

Chapter 9: Installing the Reporting System 97
Securing Connections Using SSL
Secure Sockets Layer (SSL) is a protocol for transmitting documents securely over the
Internet, using encryption. Web sites that use SSL generally have URLs that start
with https instead of http. You can use SSL to secure the web connections between
your users and the Reporting System.
If you decide to use SSL, you must disable port 8080 on your Reporting System server.
(For instructions, see "Setting up SSL".) Port 8080 is the port that you typically use to
access the Reporting System; SSL uses port 8443. If you do not disable port 8080,
users will be able to bypass SSL and access the Reporting System normally.
The Reporting System must be installed and working properly before you set up SSL.
Using SSL certificates
The Reporting System comes with a default SSL certificate. This certificate remains
valid until March, 2004. You can use this certificate, or replace it with your own SSL
certificate. The certificate file is named .keystore file, and is located in <root>/conf.
To use your own certificate, replace this file with a certificate of the same name.
For information on generating SSL certificates, see
http://jakarta.apache.org/tomcat/tomcat-3.2-doc/tomcat-ssl-howto.html#s62
Setting up SSL
1. On the Reporting System server, navigate to <root>/conf.
2. Open the server.xml file in any text editor.
3. Locate the following lines:
<!--Connector className="org.apache.tomcat.service.PoolTcpConnector">
<Parameter name="handler" value="org.apache.tomcat.service.http.HttpConnectionHandler"/>
<Parameter name="port" value="8443"/>
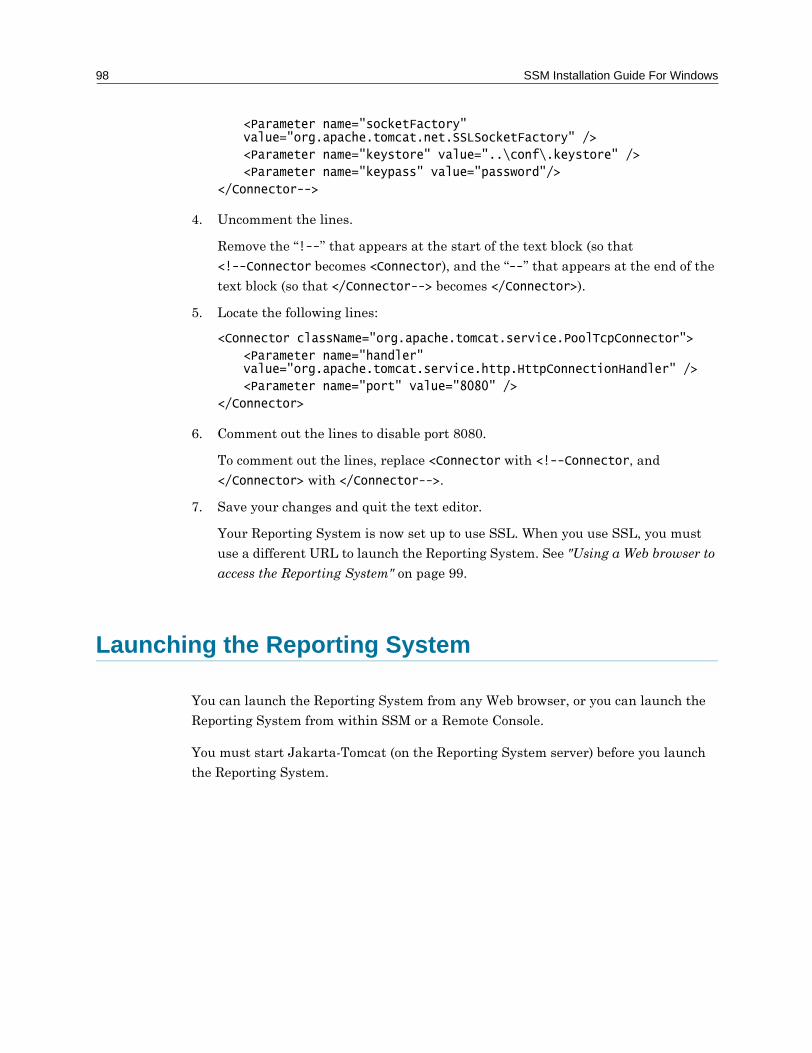
98 SSM Installation Guide For Windows
<Parameter name="socketFactory" value="org.apache.tomcat.net.SSLSocketFactory" />
<Parameter name="keystore" value="..\conf\.keystore" />
<Parameter name="keypass" value="password"/>
</Connector-->
4. Uncomment the lines.
Remove the �!--� that appears at the start of the text block (so that
<!--Connector becomes <Connector), and the �--� that appears at the end of the
text block (so that </Connector--> becomes </Connector>).
5. Locate the following lines:
<Connector className="org.apache.tomcat.service.PoolTcpConnector">
<Parameter name="handler" value="org.apache.tomcat.service.http.HttpConnectionHandler" />
<Parameter name="port" value="8080" />
</Connector>
6. Comment out the lines to disable port 8080.
To comment out the lines, replace <Connector with <!--Connector, and
</Connector> with </Connector-->.
7. Save your changes and quit the text editor.
Your Reporting System is now set up to use SSL. When you use SSL, you must
use a different URL to launch the Reporting System. See "Using a Web browser to
access the Reporting System" on page 99.
Launching the Reporting System
You can launch the Reporting System from any Web browser, or you can launch the
Reporting System from within SSM or a Remote Console.
You must start Jakarta-Tomcat (on the Reporting System server) before you launch
the Reporting System.
Chapter 9: Installing the Reporting System 99
Starting and stopping Jakarta-Tomcat
1. On the Reporting System server, double-click the Start Jakarta-Tomcat icon
(located on the Windows desktop).
Jakarta-Tomcat initializes the webapps in the WEB-INF directory. A DOS window
appears, showing this activity.
2. When you finish using the Reporting System, double-click the Stop Jakarta-
Tomcat icon on the desktop.
The DOS window disappears.
Using a Web browser to access the Reporting System
1. Open your Web browser.
2. Enter the URL of your reporting system.
By default, the URL uses the following format:
http://<IP address of computer running Jakarta-
Tomcat>:8080/reports/StartReportsStandalone.htm
If your Reporting System uses SSL, the URL uses the following format:
https://<IP address of computer running Jakarta-
Tomcat>:8443/reports/StartReportsStandalone.htm
The Reporting System web page appears, prompting you to log in. The default
username and password are administrator and password.
Using SSM to access the Reporting System
You can access the Reporting System from an SSM Central Server or Remote Console.
These products provide a CS Reports button on their Main Console. Clicking this
button launches the Reporting System in a separate Web browser window.
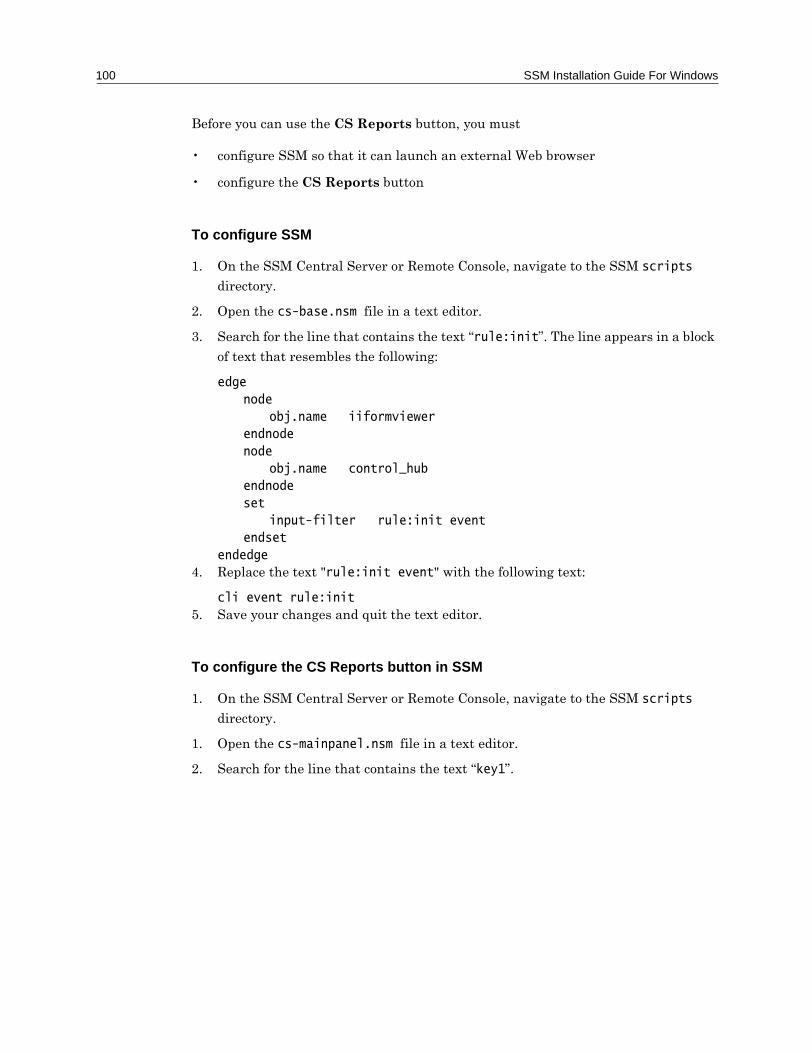
100 SSM Installation Guide For Windows
Before you can use the CS Reports button, you must
� configure SSM so that it can launch an external Web browser
� configure the CS Reports button
To configure SSM
1. On the SSM Central Server or Remote Console, navigate to the SSM scripts
directory.
2. Open the cs-base.nsm file in a text editor.
3. Search for the line that contains the text �rule:init�. The line appears in a block
of text that resembles the following:
edge
node
obj.name iiformviewer
endnode
node
obj.name control_hub
endnode
set
input-filter rule:init event
endset
endedge
4. Replace the text "rule:init event" with the following text:
cli event rule:init
5. Save your changes and quit the text editor.
To configure the CS Reports button in SSM
1. On the SSM Central Server or Remote Console, navigate to the SSM scripts
directory.
1. Open the cs-mainpanel.nsm file in a text editor.
2. Search for the line that contains the text �key1�.
Chapter 9: Installing the Reporting System 101
The line appears in a block of text that resembles the following:
message
on selection
cli
command key1
args key2
method execute
endcli
endmessage
3. Replace the text "key1" with the path and executable name of your Web browser.
For example: C:\Progra~1\Intern~1\IEXPLORE.EXE
4. Replace the text "key2" with the URL of your reporting system.
By default, the URL uses the following format:
http://<IP address of computer running Jakarta-
Tomcat>:8080/reports/StartReportsStandalone.htm
If your Reporting System uses SSL, the URL uses the following format:
https://<IP address of computer running Jakarta-
Tomcat>:8443/reports/StartReportsStandalone.htm
5. Save your changes.
The CS Reports button will work the next time you start SSM.
You must restart your computer for the changes to take effect.
Validating
You can validate that the Reporting System is installed and configured properly by:
� Launching the Reporting System.
� Running a report.
102 SSM Installation Guide For Windows
Troubleshooting
If the Reporting System does not launch and you receive a "Cannot Find Server"
message, then the Reporting System is not installed properly. Retrace your steps to
find your installation error.
If the Reporting System does not launch and you receive a "Error: 500" message, then
the reports.properties file contains incorrect database information or your JRE
may not be compatible.

10Installing Event Consolidators
About Installing Event Consolidators
Event Consolidators are network-based collectors that receive information sent over a
LAN. They are deployed throughout an organization to collect, analyze, and correlate
event information. Rules are built on the Central Server and pushed out to the Event
Consolidators. Event Consolidators do not have graphical user interfaces. Event
Consolidators do not require their own database. You may want to add databases to
Event Consolidators for scalability.
Prerequisites
Before installing the Event Consolidator, ensure that:
� The server meets the system requirements and you have all of the necessary
information specified in the "Preparation" chapter of this guide.
� The Central Server is functioning and storing events to the database.
You must have the appropriate extraction key to install Event Consolidators.
Extraction keys can be found in the letter included with your SSM purchase.

104 SSM Installation Guide For Windows
Installation Notes
Installation directory
It is strongly recommended that you use C:\SSM as the installation directory name.
You can change this name; however, keep the length of the file name under five
characters. The SSM installation folder must use a short directory name for SSM to
register properly, and there must not be any spaces in the path. Installing SSM to a
path such as C:\Program Files\SSM will result in unpredictable and unstable
behavior.
Running SSM on Windows 2000 Server
SSM uses some of the same ports as the Windows 2000 Internet Information Server
(IIS). The IIS is installed and started automatically with some versions of Windows.
The port conflict can prevent SSM from receiving Syslogs and SMTP traps.
Make certain that the IIS is not running before you start SSM. You can configure the
IIS service so that it does not start automatically when Windows restarts.
To configure IIS to not start automatically
1. Click Start > Settings > Control Panel. Control Panel appears.
2. Double-click Administrative Tools, then Services. The Services dialog box
appears.
3. Right-click IIS Admin and select Properties from the shortcut menu. The IIS
Admin Services Properties dialog box appears.
4. From the Startup type drop-down, select Manual.
5. Click Stop to stop IIS
6. Click OK to save your changes.
Java 2 Virtual Machine 1.3 Requirement
SSM requires the Java 2 Virtual Machine (JVM), version 1.3. The SSM InstallShield
automatically installs the Java 2 Virtual Machine (JVM), version 1.3, even if there
already is a JVM installed
Chapter 10: Installing Event Consolidators 105
Installing Event Consolidators
Before you begin, shut down any open applications before installing any SSM
software.
To install Event Consolidators
1. Insert the SSM CD into your CD-ROM drive. If Autorun is enabled on your
computer, the SSM InstallShield begins. Click on the SSM installation option.
If Autorun is disabled run SSMsetup.exe and click OK. The InstallShield begins.
2. At the Welcome screen click Next.
3. Ensure that you type the correct information at this screen:
� Type any Name that describes this installation.
� Type the Company Name provided in the letter included with your SSM
purchase in the Organization field.
� Type the Central Server Extraction key from the letter included with your SSM
purchase.
4. Click I accept the terms of the license agreement.
5. Do not enter a memory allocation value that is higher than the maximum memory
of the server. This causes a black DOS prompt to appear and then disappear
when starting SSM. For example, if the total RAM is 512 MB, then the total
allocation should be 384 (512 -128) to ensure that all system resources are not
allocated to SSM, leaving nothing for the operating system.
6. Enter the following information:
� Central Server IP.
� Central Server Port. You should leave the default of 9317.
7. It is strongly recommended that you use C:\SSM as the installation directory
name because of limitations of the JRE 1.3.
You can change this name; however, keep the length of the file name under five
characters. The SSM installation folder must use a short directory name for SSM
to register properly, and there must not be any spaces in the path. Installing SSM
to a path such as C:\Program Files\SSM will result in unpredictable and
unstable behavior.
106 SSM Installation Guide For Windows
8. This screen shows you the Setup Type you are installing, based on the extraction
key. In this case it will say Central Server.
9. When the installation is complete, the JDBC Configuration Wizard appears. If
the JDBC Configuration Wizard does not appear, launch it manually by selecting
Start > Programs > Spectrum Security Manager > Administration Tools
>Driver Configuration.
Configure this information to match the database user or click Finished to
accept the following default values:
JDBC URL: jdbc:inetdae7:127.0.0.1:1433?database=Generic
Username: sa
Password: [blank]
You must restart the computer for the database changes to take effect.
Validating
Ensure that the Event Consolidator is installed properly by:
1. Launching SSM.
2. Setting up the debugger.
3. Sending an event.
To launch SSM
1. Click Start > Programs > Spectrum Security Manager > SPECTRUM
Security Manager 3.3.
2. You will be prompted to enter the activation key the first time you launch SSM.
3. The SSM Central Console appears, click the SSM button in the lower left hand
corner. Closing this window will shutdown SSM.
To Set up the debugger on an Event Consolidator
In the scripts folder of the Event Consolidator, open the con-base.nsm file using a
text editor.
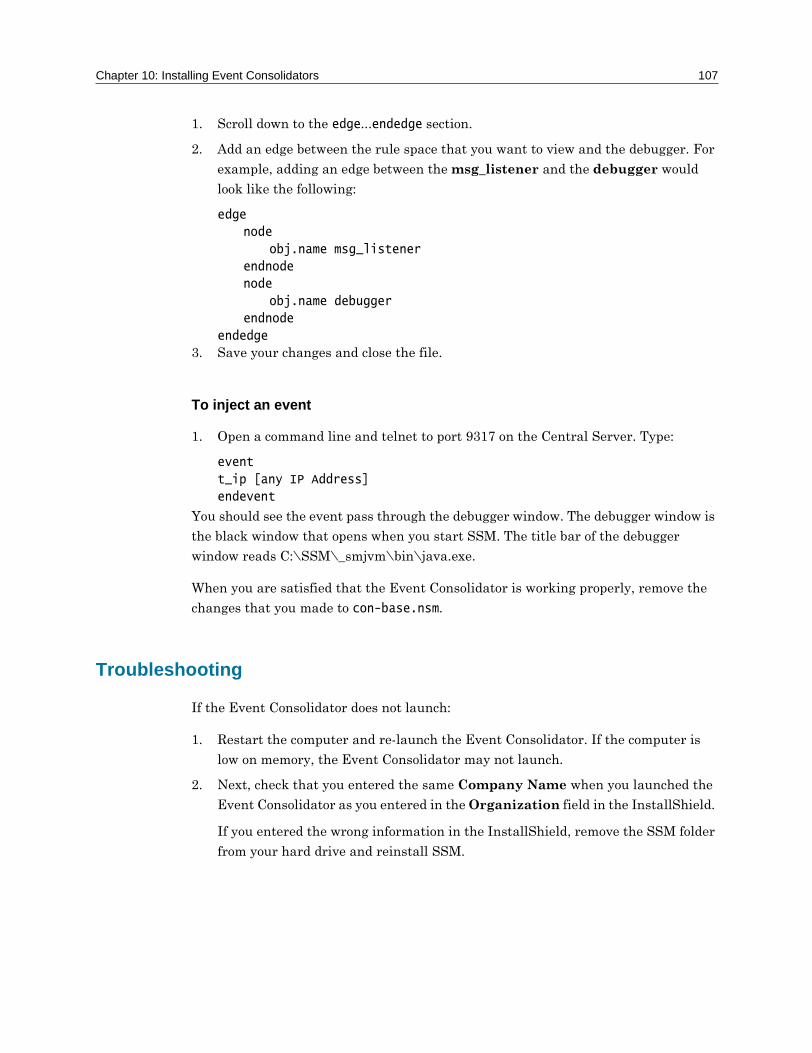
Chapter 10: Installing Event Consolidators 107
1. Scroll down to the edge...endedge section.
2. Add an edge between the rule space that you want to view and the debugger. For
example, adding an edge between the msg_listener and the debugger would
look like the following:
edge
node
obj.name msg_listener
endnode
node
obj.name debugger
endnode
endedge
3. Save your changes and close the file.
To inject an event
1. Open a command line and telnet to port 9317 on the Central Server. Type:
event
t_ip [any IP Address]
endevent
You should see the event pass through the debugger window. The debugger window is
the black window that opens when you start SSM. The title bar of the debugger
window reads C:\SSM\_smjvm\bin\java.exe.
When you are satisfied that the Event Consolidator is working properly, remove the
changes that you made to con-base.nsm.
Troubleshooting
If the Event Consolidator does not launch:
1. Restart the computer and re-launch the Event Consolidator. If the computer is
low on memory, the Event Consolidator may not launch.
2. Next, check that you entered the same Company Name when you launched the
Event Consolidator as you entered in the Organization field in the InstallShield.
If you entered the wrong information in the InstallShield, remove the SSM folder
from your hard drive and reinstall SSM.
108 SSM Installation Guide For Windows
If the activation key dialog box disappears and you receive an error message
prompting you to contact Aprisma�s Customer Support department, your activation
key is wrong. Ensure that you:
� Typed the correct activation key (ensure that you didn't confuse I's and 1's and
O's and 0's).
� Entered correct IP Address when you generated the activation key.
If Java exception errors appear in the DOS window, install JRE 1.3 from the SSM CD.
This situation may result from an incompatible JRE version.
You can test whether your browser�s JVM is working by navigating to a website that
contains Java applets.
11Installing Remote Consoles
About Remote Consoles
The SSM Remote Console is a dynamic graph viewer that you can run on computers
other than the SSM Central Server. The application interface resembles the SSM
Visualization Window. This product allows you �plug into� and monitor events in real
time. You can create, edit, and test rules for your Central Server and Event
Consolidators. Once your rules are ready to be deployed, you can copy them to the
Central Server.
Remote Consoles listen only to SSM messages, not SNMP, Syslog, or SMTP.
Prerequisites
Before installing Remote Consoles, ensure that the server meets the system
requirements and you have all of the necessary information specified in the
"Preparation" chapter of this guide.
You must have the appropriate extraction key to install Remote Consoles. Extraction
keys can be found in the letter included with your SSM purchase.

110 SSM Installation Guide For Windows
Installation Notes
Installation directory
It is strongly recommended that you use C:\SSM as the installation directory name.
You can change this name; however, keep the length of the file name under five
characters. The SSM installation folder must use a short directory name for SSM to
register properly, and there must not be any spaces in the path. Installing SSM to a
path such as C:\Program Files\SSM will result in unpredictable and unstable
behavior.
Running SSM on Windows 2000 Server
SSM uses some of the same ports as the Windows 2000 Internet Information Server
(IIS). The IIS is installed and started automatically with some versions of Windows.
The port conflict can prevent SSM from receiving Syslogs and SMTP traps.
Make certain that the IIS is not running before you start SSM. You can configure the
IIS service so that it does not start automatically when Windows restarts.
To configure IIS to not start automatically
1. Go to Start > Settings > Control Panel. Control Panel appears.
2. Double-click Administrative Tools, then Services. The Services dialog box
appears.
3. Right-click IIS Admin and select Properties from the shortcut menu. The IIS
Admin Services Properties dialog box appears.
4. From the Startup type drop-down, select Manual.
5. Click OK to save your changes.
Java 2 Virtual Machine 1.3 Requirement
SSM requires the Java 2 Virtual Machine (JVM), version 1.3. The SSM InstallShield
automatically installs the Java 2 Virtual Machine (JVM), version 1.3, even if there
already is a JVM installed
Chapter 11: Installing Remote Consoles 111
To use the SSM Remote Console, you must:
� Install the application.
� Configure your SSM Central Server to send event data to the SSM Remote
Console.
� Create dynamic graph rules on your SSM Remote Console.
Installing Remote Consoles
1. Insert the SSM CD into your CD-ROM drive. If Autorun is enabled on your
computer, the SSM InstallShield begins. Click the SSM installation option.
If Autorun is disabled run SSMsetup.exe and click OK. The InstallShield begins.
2. Follow the instructions outlined in the InstallShield. Ensure that you:
� Type the Remote Console extraction key.
� Type the correct entry in the Organization field.
� Do not enter a memory allocation value that is higher than the maximum memory
of the server. This causes a black DOS prompt to appear and then disappear
when starting SSM. For example, if the total RAM is 512 MB, then the total
allocation should be 384 (512 -128) to ensure that all system resources are not
allocated to SSM, leaving nothing for the operating system.
Configuring SSM to send data to a Remote Console
1. Determine what information you want to base your dynamic graphs on (SNMP,
syslog, SMTP, or data filtered or otherwise manipulated by existing rules).
2. On your Central Server, run the SSM Visualization Window.
3. Find the rule that deals with the data types you are interested in. For instance, if
you want to build dynamic graphs based on e-mail information, you would go to
your Central Server SMTP rule - /localroot/rules/cs-rules/smtp.
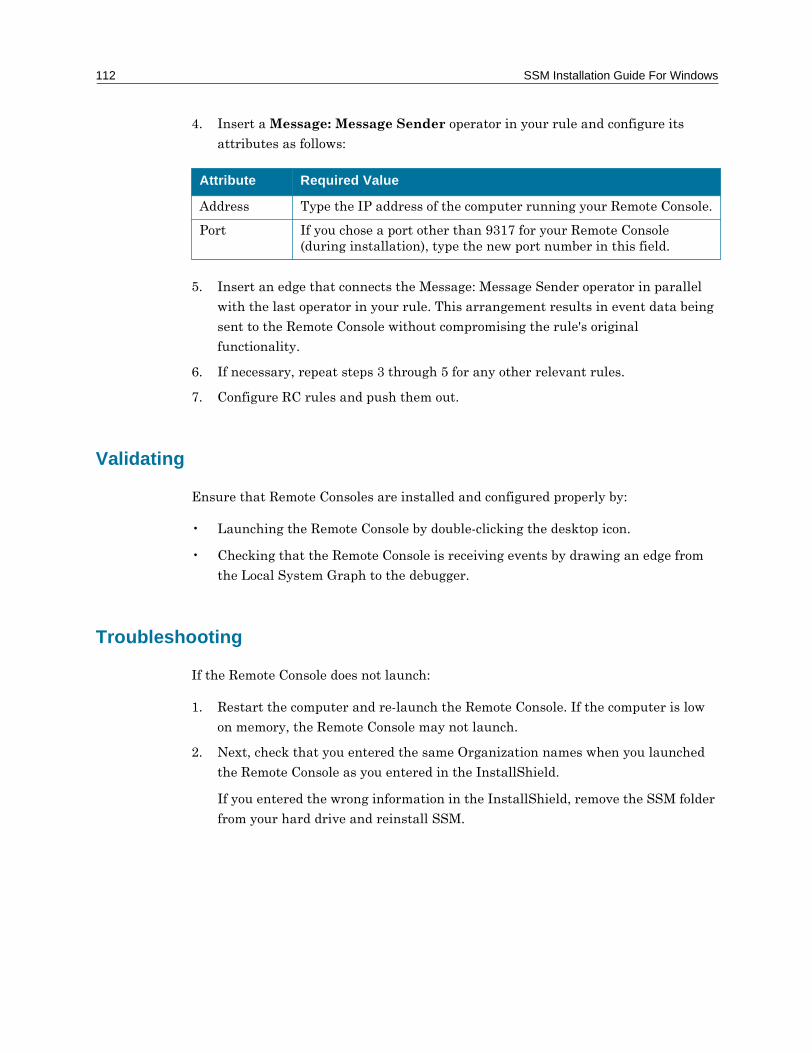
112 SSM Installation Guide For Windows
4. Insert a Message: Message Sender operator in your rule and configure its
attributes as follows:
5. Insert an edge that connects the Message: Message Sender operator in parallel
with the last operator in your rule. This arrangement results in event data being
sent to the Remote Console without compromising the rule's original
functionality.
6. If necessary, repeat steps 3 through 5 for any other relevant rules.
7. Configure RC rules and push them out.
Validating
Ensure that Remote Consoles are installed and configured properly by:
� Launching the Remote Console by double-clicking the desktop icon.
� Checking that the Remote Console is receiving events by drawing an edge from
the Local System Graph to the debugger.
Troubleshooting
If the Remote Console does not launch:
1. Restart the computer and re-launch the Remote Console. If the computer is low
on memory, the Remote Console may not launch.
2. Next, check that you entered the same Organization names when you launched
the Remote Console as you entered in the InstallShield.
If you entered the wrong information in the InstallShield, remove the SSM folder
from your hard drive and reinstall SSM.
Attribute Required Value
Address Type the IP address of the computer running your Remote Console.
Port If you chose a port other than 9317 for your Remote Console (during installation), type the new port number in this field.
Chapter 11: Installing Remote Consoles 113
If the activation key dialog box disappears and you receive an error message
prompting you to contact Aprisma�s Customer Support department, your activation
key is wrong. Ensure that you:
� Typed the correct activation key (ensure that you didn't confuse I's and 1's and
O's and 0's).
� Entered correct IP Address when you generated the activation key.
If Java exception errors appear in the DOS window, install JRE 1.3 from the SSM CD.
This situation may result from an incompatible JRE version.

114 SSM Installation Guide For Windows
12Validating Data Flow
About Validating Data Flow
SPECTRUM Security Manager' Event Replicator is a Java library used to simulate
network messages. You can use this tool to test how SSM responds to network
messages and security events. It contains a library of recorded network events from
the following supported network protocols:
� SNMP
� Syslog
� Win32
� EventLogs
� SMTP
� TCP sessions
Event Replicator can simulate a network environment or DoS attack by controlling
the rate of events sent to SSM. You can also use it to query a SQL database.
Prerequisites
Event Replicator requires Java 2 Runtime Environment 1.3 (JRE), which is installed
with SSM.
116 SSM Installation Guide For Windows
Installing Event Replicator
A beta release of Event Replicator can be obtained from the First Aid CD available
from the Customer Support department.
To install Event Replicator
1. Double-click the eventreplicator.jar file.
2. Follow the instructions outlined in the InstallShield.
Adding a Connection
1. Click the expand connection options button. The Connection Edit dialog box
appears.
2. From the connection select combo box, select a connection you want to duplicate.
To change the protocol, you must select a message that uses the desired protocol
from the message select combo box.
3. Click the new button. The screen changes to reveal new options.
4. Type the desired Name, IP, and Port. The name must be unique.
5. From the Persistent drop-down list, select either Maintain Collection or
Persistent.
6. Click Ok to submit your changes.
7. To make the connection available the next time you use Event Replicator, click
Save.
Sending an Event
1. From the message select combo box, select the network message you want to
replicate.
2. From the connection select combo box, select the connection you want to send the
message on.
3. Click the send button. The specified message is sent on the specified connection.

Chapter 12: Validating Data Flow 117
Adding a Message
1. Click the expand message button. The message tree appears.
2. From the message tree, select a message you wish to duplicate (such as Netscreen
startup). This message must be the same as the protocol that you want to create.
3. Click New. The new message will appear in the message tree.
Before you can use the message, you must edit it.
Editing a Message
1. Click the expand message options button. The message tree appears.
2. From the message tree, select a message you want to edit.
3. Click Edit. The message edit window opens.
4. Modify the following fields, as desired.
Protocol Field Description
all Device The name of the device that generates this message. Include a version number, if possible.
Name Each message requires a unique name.
Comments Enter any comments about this message such as platform of the device, the procedure used to generate the event, and any information about the configuration of the device.
Owner The name and e-mail address of the user who recorded this message.
snmp Varbinds The set of SNMP varbinds for the trap. Each varbind must be in the following form oid type value, where oid is the varbind OID, type is one of STRING, INTEGER, or TIMETICK, and value is the corresponding value. String values must be encapsulated in double quotes.
Community The SNMP community, usually public.
OID The Enterprise OID of the device that generated this message.
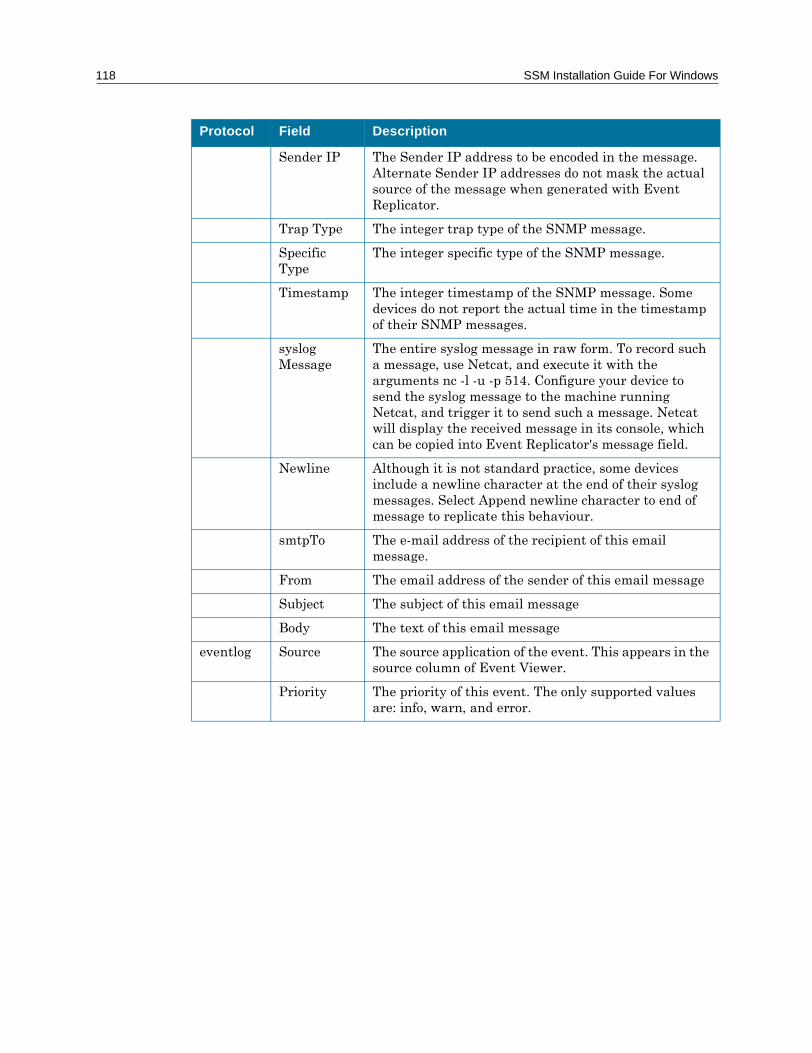
118 SSM Installation Guide For Windows
Sender IP The Sender IP address to be encoded in the message. Alternate Sender IP addresses do not mask the actual source of the message when generated with Event Replicator.
Trap Type The integer trap type of the SNMP message.
Specific Type
The integer specific type of the SNMP message.
Timestamp The integer timestamp of the SNMP message. Some devices do not report the actual time in the timestamp of their SNMP messages.
syslogMessage
The entire syslog message in raw form. To record such a message, use Netcat, and execute it with the arguments nc -l -u -p 514. Configure your device to send the syslog message to the machine running Netcat, and trigger it to send such a message. Netcat will display the received message in its console, which can be copied into Event Replicator's message field.
Newline Although it is not standard practice, some devices include a newline character at the end of their syslog messages. Select Append newline character to end of message to replicate this behaviour.
smtpTo The e-mail address of the recipient of this email message.
From The email address of the sender of this email message
Subject The subject of this email message
Body The text of this email message
eventlog Source The source application of the event. This appears in the source column of Event Viewer.
Priority The priority of this event. The only supported values are: info, warn, and error.
Protocol Field Description
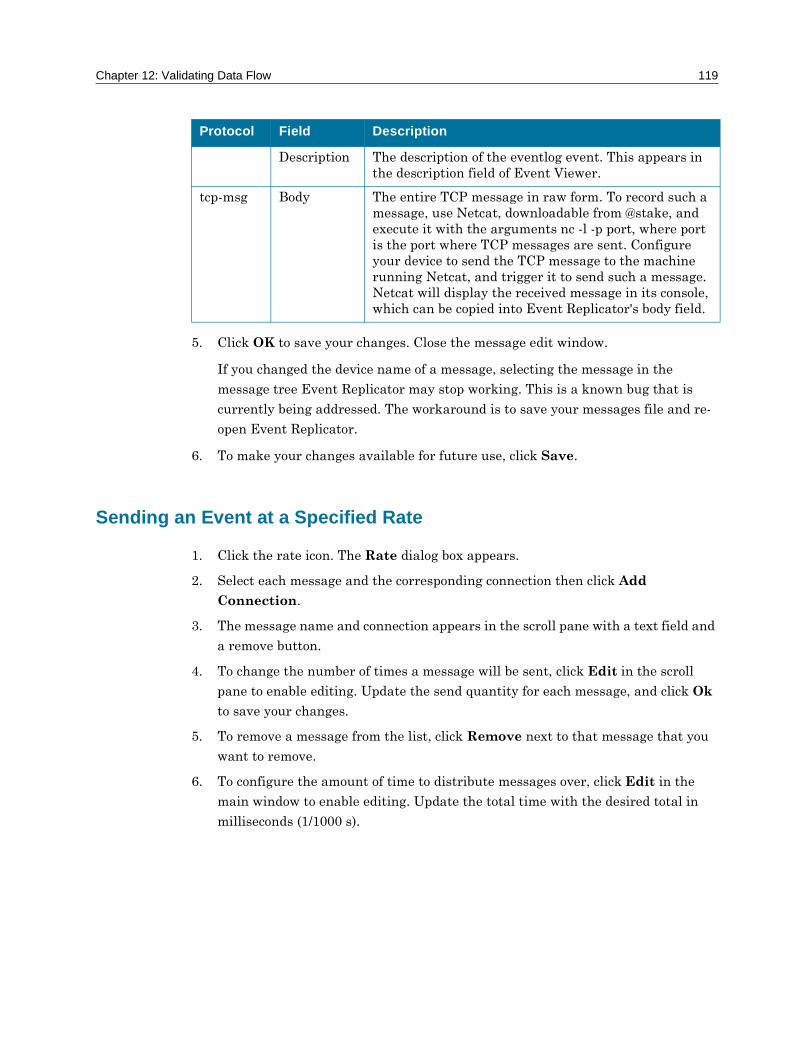
Chapter 12: Validating Data Flow 119
5. Click OK to save your changes. Close the message edit window.
If you changed the device name of a message, selecting the message in the
message tree Event Replicator may stop working. This is a known bug that is
currently being addressed. The workaround is to save your messages file and re-
open Event Replicator.
6. To make your changes available for future use, click Save.
Sending an Event at a Specified Rate
1. Click the rate icon. The Rate dialog box appears.
2. Select each message and the corresponding connection then click Add
Connection.
3. The message name and connection appears in the scroll pane with a text field and
a remove button.
4. To change the number of times a message will be sent, click Edit in the scroll
pane to enable editing. Update the send quantity for each message, and click Ok
to save your changes.
5. To remove a message from the list, click Remove next to that message that you
want to remove.
6. To configure the amount of time to distribute messages over, click Edit in the
main window to enable editing. Update the total time with the desired total in
milliseconds (1/1000 s).
Description The description of the eventlog event. This appears in the description field of Event Viewer.
tcp-msg Body The entire TCP message in raw form. To record such a message, use Netcat, downloadable from @stake, and execute it with the arguments nc -l -p port, where port is the port where TCP messages are sent. Configure your device to send the TCP message to the machine running Netcat, and trigger it to send such a message. Netcat will display the received message in its console, which can be copied into Event Replicator's body field.
Protocol Field Description
120 SSM Installation Guide For Windows
7. From the drop-down list, select either Random or Even Distribution. Random
Distribution sends messages at random until all messages have are sent. Even
Distribution selects messages based on a percentage of send quantity.
8. To start sending messages, click Send.
Rate send consumes most of host computer's processing power while messages are
sent.
You may not be able to send the desired quantity of messages in the desired time. In
this case, the quantity will be sent but time taken will exceed the time specified.
Performing SQL Queries
1. Click the query icon. The SQL Queries window appears.
2. Select a query from the Query drop-down list.
3. To change the default fields, click Edit.
4. To edit the JDBC drivers, update the JDBC URL field, then click the Edit
button. Click OK to save the changes.
5. Click Save to make the query available next time you use Event Replicator.
6. Enter the database Username and Password in the appropriate fields.
7. Click Run to start the query. If the query is valid, the results appear in the table
pane.
You must provide additional JDBC drivers as parameters when launching Event
Replicator.
To add additional drivers
1. In a command line, type java -classpath
eventreplicator.jar;jdbc_driver_path com.itactics.eventreplicator.
EventReplicatorWindow
For a list of drivers, go to: http://industry.java.sun.com/products/jdbc/drivers.
13Special Situations
About Configuring SSM for Trusted Sources
You can configure SSM to allow only trusted sources to run applications on your SSM
computer by going to the msg_rules rulespace and adding operators to filter messages
based on IP address and port. You must perform the following procedure for each IP
address that you want to trust.
If you use Event Consolidators, you must perform this procedure on both the Central
Server and any Event Consolidators. To configure Event Consolidators, use the
msg_rules space.
If you want to trust a PIX firewall, enter the IP address in the syslog space.
If you enter an IP address in the msg_rules space on a Central Server, it may be
necessary to enter the IP address of the Central Server itself.
Configuring SSM for Trusted Sources
1. Navigate to the msg_rules rulespace.
2. Delete the edge that connects the root node to the Event_Message node.
3. From the drop-down list, choose a Condition: Equal node, and click in the rule
to insert the node.

122 SSM Installation Guide For Windows
4. Draw an edge from the root node to the Condition: Equal node.
5. Right-click the Condition: Equal node. In varx, enter s_ip. In vary, enter the IP
address of a computer that you want to be able to run programs on your SSM
computer.
6. From the drop-down list, again choose a Condition: Equal node, and click in the
rule to insert the node.
7. Right-click the second Condition: Equal node. In varx, enter s_port. In vary,
enter the port that you want to allow to send commands to SSM.
8. Draw an edge from the first Condition: Equal node to the second Condition:
Equal node. Then draw an edge from the second Condition: Equal node to the
Event_Message node.

Chapter 13: Special Situations 123
About Traversing a Firewall
Follow this procedure if you have an Event Consolidator that is located on an
untrusted part of the network (such as a DMZ) and a Central Server that is located on
a trusted segment with a high assurance firewall separating them, meaning that no
connection can be initiated from the untrusted side.
Traversing a Firewall
To allow SSM to traverse a firewall, you must:
1. Configure the Event Consolidator.
2. Configure the Central Server.
To configure your Event Consolidator
1. Open the %SSM%/etc/audit.properties file on a text editor.
2. Comment out the @ECHO ON lines (#@ECHO ON)
3. Edit the con-base.nsm (or cs-base, rc-base, and so forth) file.
4. Add an edge from the event_hub to the debugger with an input-filter on event.
This ensures you do not have init context messages flowing through.
5. Insert the following text in the con-base.nsm file.
edge
node
obj.name event_hub
endnode
node
obj.name debugger
endnode
set
relation true
endset
set
input-filter event
endset
endedge
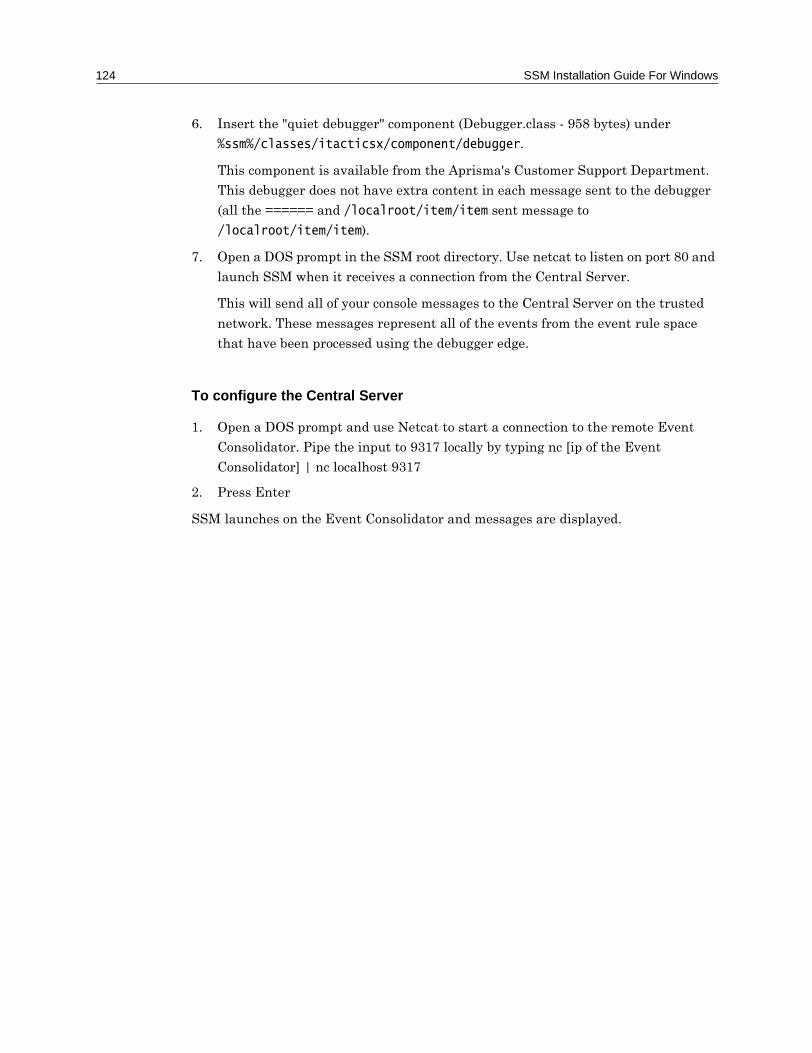
124 SSM Installation Guide For Windows
6. Insert the "quiet debugger" component (Debugger.class - 958 bytes) under
%ssm%/classes/itacticsx/component/debugger.
This component is available from the Aprisma's Customer Support Department.
This debugger does not have extra content in each message sent to the debugger
(all the ====== and /localroot/item/item sent message to
/localroot/item/item).
7. Open a DOS prompt in the SSM root directory. Use netcat to listen on port 80 and
launch SSM when it receives a connection from the Central Server.
This will send all of your console messages to the Central Server on the trusted
network. These messages represent all of the events from the event rule space
that have been processed using the debugger edge.
To configure the Central Server
1. Open a DOS prompt and use Netcat to start a connection to the remote Event
Consolidator. Pipe the input to 9317 locally by typing nc [ip of the Event
Consolidator] | nc localhost 9317
2. Press Enter
SSM launches on the Event Consolidator and messages are displayed.

14Removing SSM
About Removing SSM
To remove SSM and all of its components from your system, you must remove:
� SSM (Central Servers, Event Consolidators, and Remote Consoles)
� The Normalizer Pack
� Agents (if installed)
� The Reporting System
Removing SSM and the Normalizer Pack
Removing SSM also removes the Normalizer Pack from your system.
If you have created any rules that you want to save, backup your scripts directory to
another location.
126 SSM Installation Guide For Windows
To remove SSM
1. Go to Start > Settings > Control Panel, and double-click Add/Remove
Programs. The Add/Remove Programs Properties dialog box appears.
2. Select SPECTRUM Security Manager from the list of currently installed
programs.
3. Click Add/Remove. The SSM Uninstaller launches.
4. Follow the Uninstaller instructions to remove the SSM files.
5. Click Close to exit the Add/Remove Programs Properties dialog box.
The SSM uninstaller does not delete the directory where you installed the
application. You must delete this directory manually. The default directory is
/SSM.
Removing Agents
1. Go to Start > Settings > Control Panel, and double-click Add/Remove
Programs. The Add/Remove Programs Properties dialog box appears.
2. Select the agent that you want to remove from the list of currently installed
programs.
3. Click Add/Remove. The associated agent Uninstaller launches.
4. Follow the Uninstaller instructions to remove the associated agent files.
5. Click Close to exit the Add/Remove Programs Properties dialog box.
To remove the Reporting System
1. Go to Start > Settings > Control Panel, and double-click Add/Remove
Programs. The Add/Remove Programs Properties dialog box appears.
2. Select Reporting System from the list of currently installed programs.
3. Click Add/Remove. The Reporting System Uninstaller launches.
4. Follow the Uninstaller instructions to remove the Reporting System files.
5. Click Close to exit the Add/Remove Programs Properties dialog box.

Chapter 14: Removing SSM 127
The Reporting System uninstaller does not delete the directory where you
installed the application. You must delete this directory manually. The default
directory is /Reporting_System.

128 SSM Installation Guide For Windows
15System Requirements
About SSM System Requirements
The following system requirements apply to Central Servers, Event Consolidators,
Device Consolidators, and Remote Consoles.
Aprisma does not recommend using Pentium 4-based workstations for SSM.
Performance comparison tests indicate that a 1.4 GHz P4 Central Server or Event
Consolidator has less event throughput performance than a PIII 933 MHz Xeon
computer. To ensure optimum performance, a dual-processor PIII-1.0GHz computer is
currently recommended.
Hardware System Requirements
Windows NT Pentium III 733
Windows 2000 Pentium III 733

130 SSM Installation Guide For Windows
Windows 2000 Professional and Windows 2000 Advanced Server are not supported.
Aprisma recommends that you install the database on a separate server.
Databases are only required for Central Servers.
Reporting System Requirements
Operating System Requirements
Windows NT Windows NT 4.0 Server with Service Pack 6a
Windows 2000 Windows 2000 Server with Service Pack 2
Space Requirements
Windows NT 2000 MB of hard drive space
512 MB RAM
Windows 2000 2000 MB of hard drive space
512 MB RAM
Database Requirements
Windows NT MS SQL Server 7 with Service Pack 2, or Oracle 8i with 1 GB of disk space for every 2 million events
Windows 2000 MS SQL Server 7 with Service Pack 2, or Oracle 8i with 1 GB of disk space for every 2 million events
Hardware System Requirements
Windows NT Pentium III 733
Windows 2000 Pentium III 733
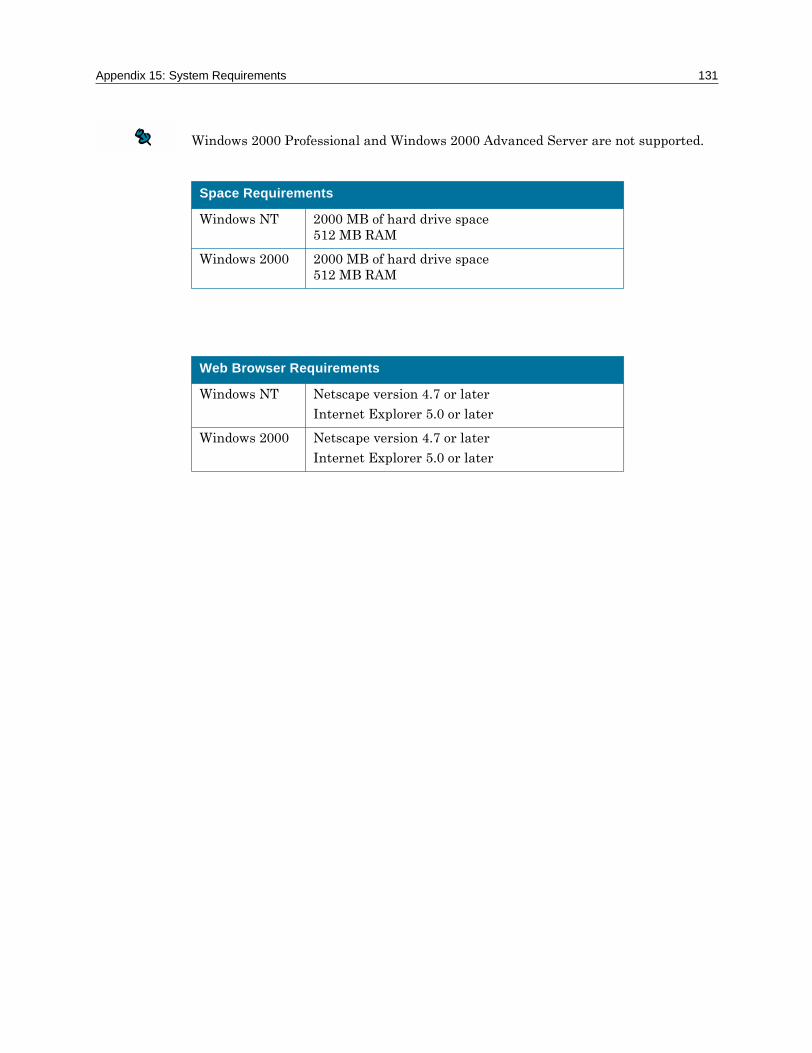
Appendix 15: System Requirements 131
Windows 2000 Professional and Windows 2000 Advanced Server are not supported.
Space Requirements
Windows NT 2000 MB of hard drive space 512 MB RAM
Windows 2000 2000 MB of hard drive space512 MB RAM
Web Browser Requirements
Windows NT Netscape version 4.7 or later
Internet Explorer 5.0 or later
Windows 2000 Netscape version 4.7 or later
Internet Explorer 5.0 or later

132 SSM Installation Guide For Windows
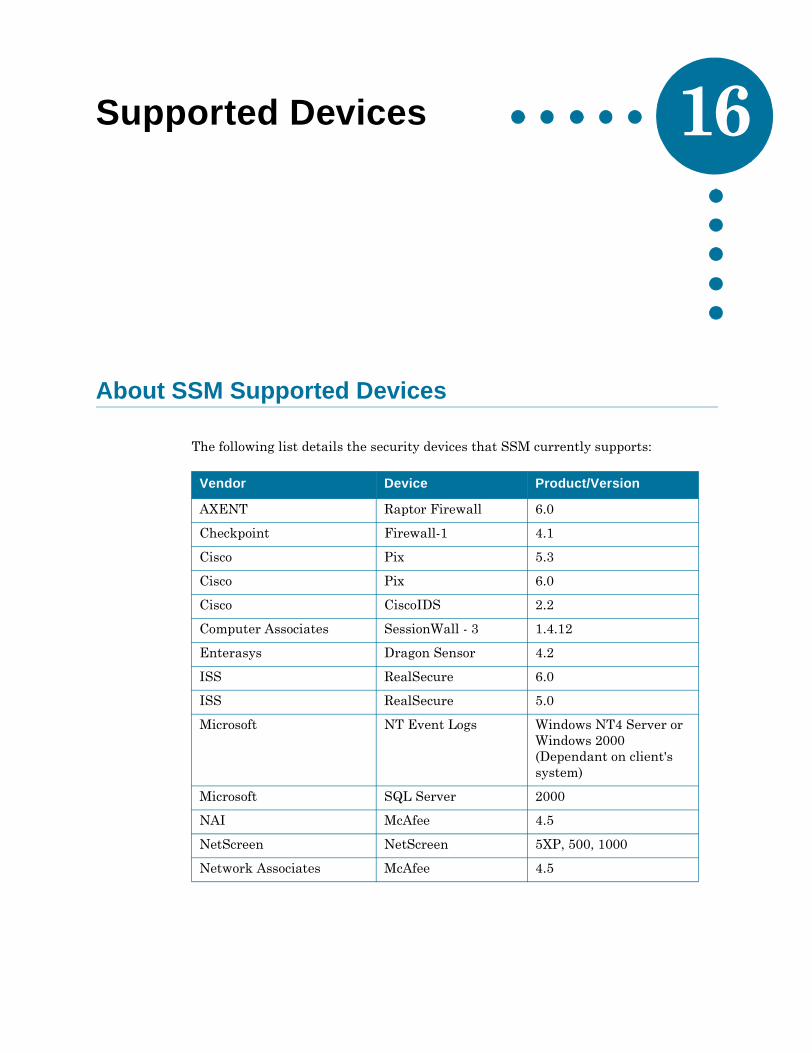
16Supported Devices
About SSM Supported Devices
The following list details the security devices that SSM currently supports:
Vendor Device Product/Version
AXENT Raptor Firewall 6.0
Checkpoint Firewall-1 4.1
Cisco Pix 5.3
Cisco Pix 6.0
Cisco CiscoIDS 2.2
Computer Associates SessionWall - 3 1.4.12
Enterasys Dragon Sensor 4.2
ISS RealSecure 6.0
ISS RealSecure 5.0
Microsoft NT Event Logs Windows NT4 Server or Windows 2000 (Dependant on client's system)
Microsoft SQL Server 2000
NAI McAfee 4.5
NetScreen NetScreen 5XP, 500, 1000
Network Associates McAfee 4.5
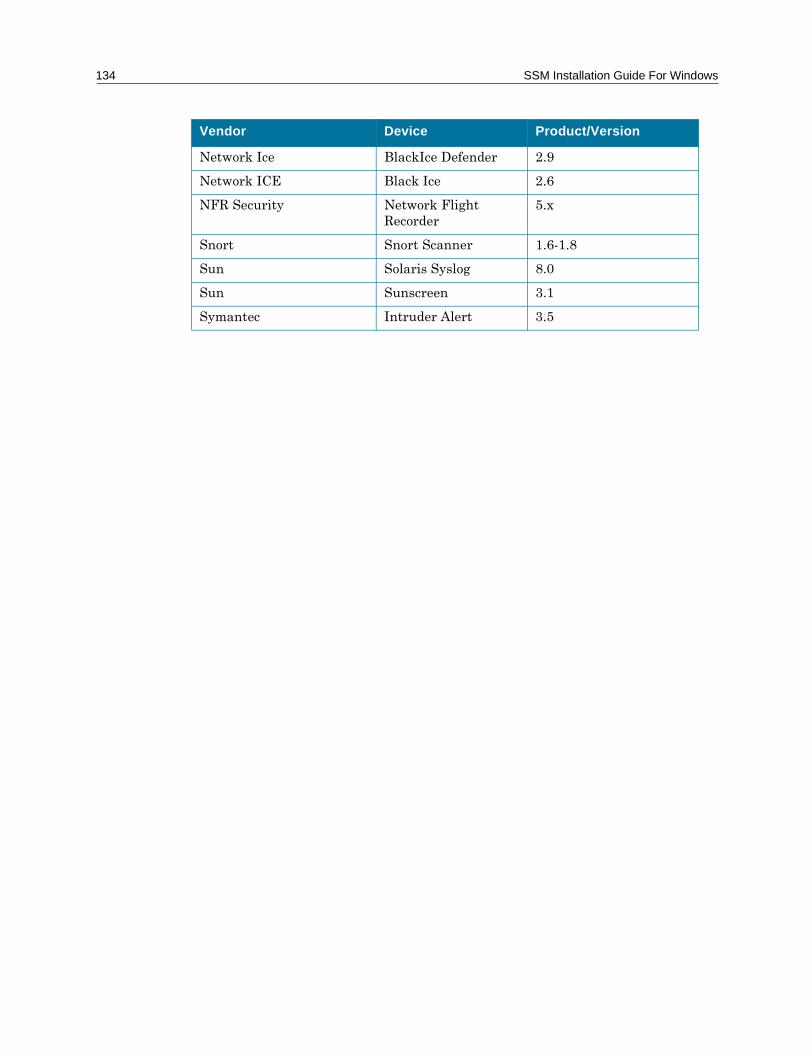
134 SSM Installation Guide For Windows
Network Ice BlackIce Defender 2.9
Network ICE Black Ice 2.6
NFR Security Network Flight Recorder
5.x
Snort Snort Scanner 1.6-1.8
Sun Solaris Syslog 8.0
Sun Sunscreen 3.1
Symantec Intruder Alert 3.5
Vendor Device Product/Version