Embed Size (px)
Citation preview

Registered in England No. 2727193 THE MORTON PARTNERSHIP LTD.
CONSULTING CIVIL & STRUCTURAL ENGINEERS,HISTORIC BUILDING SPECIALISTSOld Timber Yard House, 55 The Timber YardDrysdale Street, London N1 6NDTel: 020 7324 7270 Fax: 020 7729 1196email: [email protected]
Registered Office: Leonardo House, 11 Market Place, Halesworth, Suffolk IP19 8BA Tel: (01986) 875651 Fax: (01986) 875085London Office: Old Timber Yard House, 55The Timber Yard, Drysdale Street, London N1 6ND Tel: 020 7324 7270 Fax: 020 7729 1196
Essex Office: 8 Church Street, Coggeshall, Essex. CO6 1TU Tel: 01376 563883 Fax: 01376 563894
SPECIFICATION ANDSCHEDULE OF STRUCTURAL WORKS
TO116 HIGH STREET
BOSTONLINCOLNSHIRE
Client: Heritage Lincolnshire Trust
Architect: Anderson & GlennMill TowerKirton EndBostonLincolnshire
Prepared by: The Morton Partnership LimitedOld Timber Yard House55 The Timber YardDrysdale StreetLondon N1 6ND
Date: December 2008
Reference: EJM\KLC\SPEC/11505~spec and sched main works rev 3
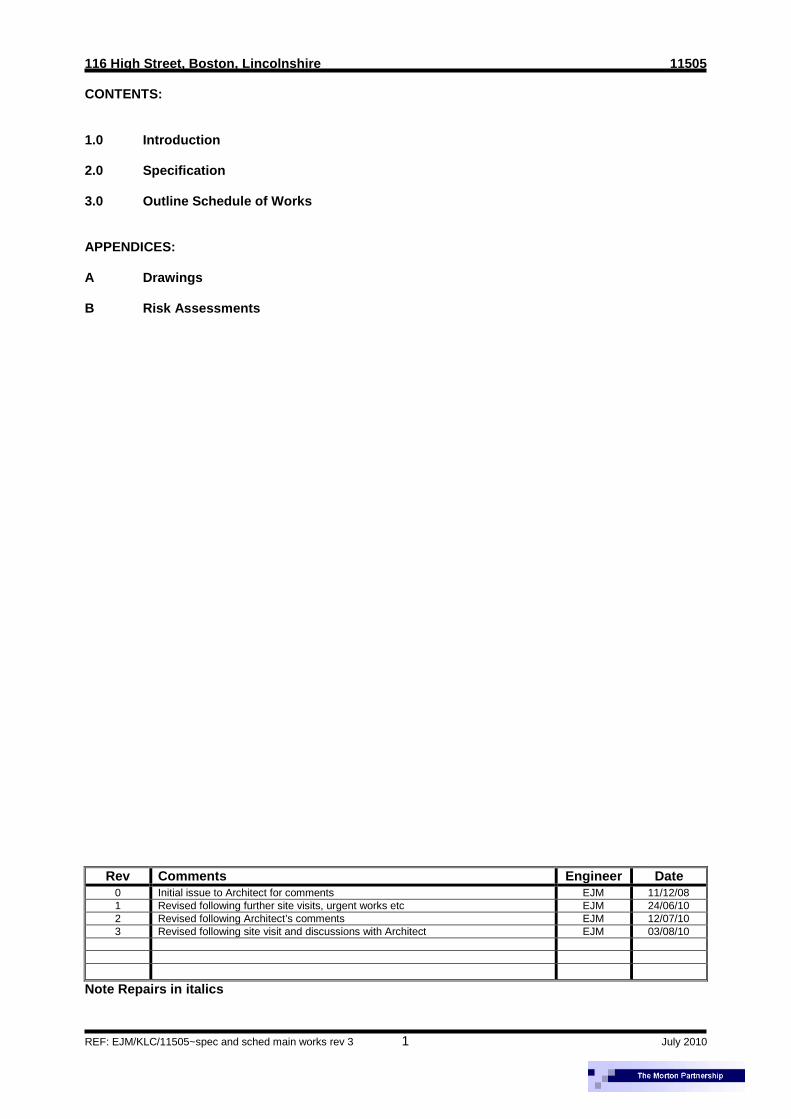
116 High Street, Boston, Lincolnshire 11505
REF: EJM/KLC/11505~spec and sched main works rev 3 1 July 2010
CONTENTS:
1.0 Introduction
2.0 Specification
3.0 Outline Schedule of Works
APPENDICES:
A Drawings
B Risk Assessments
Rev Comments Engineer Date0 Initial issue to Architect for comments EJM 11/12/081 Revised following further site visits, urgent works etc EJM 24/06/102 Revised following Architect’s comments EJM 12/07/103 Revised following site visit and discussions with Architect EJM 03/08/10
Note Repairs in italics
116 High Street, Boston, Lincolnshire 11505
REF: EJM/KLC/11505~spec and sched main works rev 3 2 July 2010
1.0 INTRODUCTION
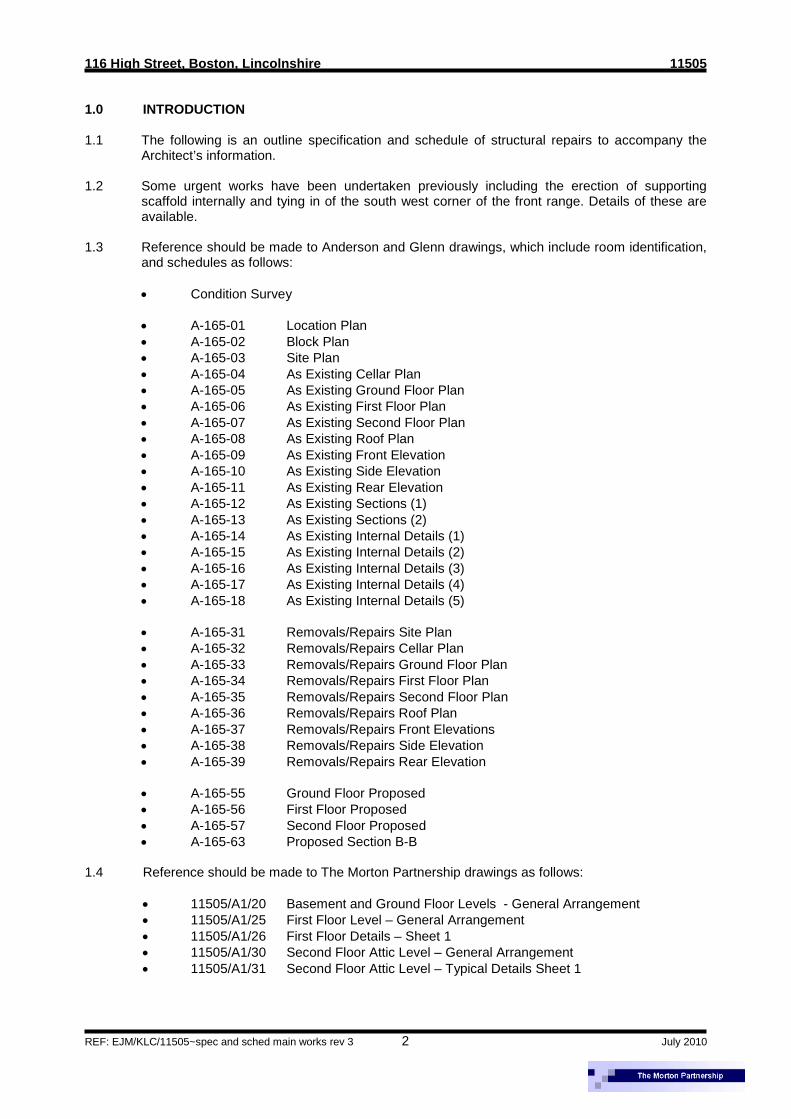
1.1 The following is an outline specification and schedule of structural repairs to accompany theArchitect’s information.
1.2 Some urgent works have been undertaken previously including the erection of supportingscaffold internally and tying in of the south west corner of the front range. Details of these areavailable.
1.3 Reference should be made to Anderson and Glenn drawings, which include room identification,and schedules as follows:
Condition Survey
A-165-01 Location Plan A-165-02 Block Plan A-165-03 Site Plan A-165-04 As Existing Cellar Plan A-165-05 As Existing Ground Floor Plan A-165-06 As Existing First Floor Plan A-165-07 As Existing Second Floor Plan A-165-08 As Existing Roof Plan A-165-09 As Existing Front Elevation A-165-10 As Existing Side Elevation A-165-11 As Existing Rear Elevation A-165-12 As Existing Sections (1) A-165-13 As Existing Sections (2) A-165-14 As Existing Internal Details (1) A-165-15 As Existing Internal Details (2) A-165-16 As Existing Internal Details (3) A-165-17 As Existing Internal Details (4) A-165-18 As Existing Internal Details (5)
A-165-31 Removals/Repairs Site Plan A-165-32 Removals/Repairs Cellar Plan A-165-33 Removals/Repairs Ground Floor Plan A-165-34 Removals/Repairs First Floor Plan A-165-35 Removals/Repairs Second Floor Plan A-165-36 Removals/Repairs Roof Plan A-165-37 Removals/Repairs Front Elevations A-165-38 Removals/Repairs Side Elevation A-165-39 Removals/Repairs Rear Elevation
A-165-55 Ground Floor Proposed A-165-56 First Floor Proposed A-165-57 Second Floor Proposed A-165-63 Proposed Section B-B
1.4 Reference should be made to The Morton Partnership drawings as follows:
11505/A1/20 Basement and Ground Floor Levels - General Arrangement 11505/A1/25 First Floor Level – General Arrangement 11505/A1/26 First Floor Details – Sheet 1 11505/A1/30 Second Floor Attic Level – General Arrangement 11505/A1/31 Second Floor Attic Level – Typical Details Sheet 1

116 High Street, Boston, Lincolnshire 11505
REF: EJM/KLC/11505~spec and sched main works rev 3 3 July 2010
2.0 SPECIFICATION
B10 SCAFFOLDING
100 JOB SPECIFIC DOCUMENTS:- General Preliminaries – describes known restrictions regarding site access, hours of working,
control of noise and dirt, Local Authority requirements etc.- Schedule of Scaffolding – this schedule states below the purpose of the scaffold and gives
detailed requirements. The tenderers must price the scaffold separately from generalpreliminaries.
130 APPROVAL: the design of a scaffold to a Listed Structure needs special care andconsideration, particularly on the method of attachment. The CA’s approval MUST be soughtBEFORE any work starts on site. Such approval or otherwise will be given within 7 days ofreceipt.
140 LOADINGS TO EXISTING STRUCTURES: Loads from all temporary structures are not to betransmitted to the existing building unless specifically indicated in this document or shown onthe drawings. Any proposals for horizontal restraint from uplift and lateral forces are to beagreed with the CA.
160 PROGRAMME: The Contractor must submit with their tender full details of the scaffoldingsubcontractor that they will employ and two copies of their programme for erection of thescaffold and subsequent maintenance during the contract. List main stages of activities withanticipated start and finish dates for each stage.
170 DRAWINGS, ETC SUBMITTED FOR APPROVAL: Accept responsibility for the accuracy of alldrawings and documents submitted for the CA’s approval. Approval or acceptance by the CA inno way diminishes the Contractor’s responsibility for any errors or omissions contained in suchdrawings or documents nor for their other contractual and legal obligations. Where changes arerequired in drawings previously submitted arrange for the changes to be made and submitrevised drawings for approval.
180 TAKING DIMENSIONS FROM DRAWINGS: When taking dimensions from drawings, at anystage of the work, including before work is commenced:
- Do not scale drawings but obtain from the CA any dimensions required but not given in figuresor calculable from figures shown on drawings;
- Check their compatibility with each other with the site and work completed to date;- Inform the CA of any discrepancy and seek their instructions
190 SPECIFICATION REFERENCES ON DRAWINGS: Where specification references are given ondrawings to define the clause (or clauses) applicable to that part of the construction drawn, theymust not be taken as excluding any other relevant information contained in other clauses of thisSpecification.
200 SITE MEETINGS AND MANAGEMENT: Hold such regular site meetings as are necessary forthe proper management and co-ordination of the scaffold Contract. Due to the complexity of thescaffold and temporary roof the proper management of the erection is vital. The Contractorshould include with the method statement an indication of the management re-sources to beutilised for this element of works, both from the Main Contractor and the Scaffolding sub-contractor.
210 INDUCTION: Due to status of the building and the tenants being in occupation an induction willbe given to all site workers. The Contractor should allow for attendance.
220 METHOD STATEMENT: The Contractor will be required to produce a detailed methodstatement for the erection of the scaffold.

116 High Street, Boston, Lincolnshire 11505
REF: EJM/KLC/11505~spec and sched main works rev 3 4 July 2010
230 GENERALLY: Where the Contractor is required by the specification to provide details ofsubcontractors and suppliers these must be supplied with the tender. Where methodstatements, drawings, calculations, samples or approvals are required, a minimum of one weekshould be allowed. These periods should be indicated on the Contractor’s programme.Materials
300 METAL SCAFFOLDING: To BS 1139; Section 1.1: 1990; Part 2: 1982; Section 2.1:1991;Part3:1983; Part 4;1982: Part 5;1990. All scaffolding and couplings to be hot dip galvanised toBS EN ISO 1461:1999.
310 TIMBER SCAFFOLD BOARDS: To BS 2482: 1981 re-issued with amendment 1990, 38 x 225softwood with metal end caps. Supply stable boards of moisture content to suit situation.Discard twisted or damaged boards.
320 LADDERS: To BS 1129:1990 and BS 2037:1994. All ladders to be steel and in good repair.Timber ladders will not be permitted.
330 ROOFING SHEETS: To CP 143 or alternative proprietary system as agreed with the CA inwriting and during the tender period.
340 SHEETING: Side Sheeting to be translucent flame retardant flexible sheeting, or approved.
350 NETTING: Nylon woven green debris netting, with neoprene rubber anchor straps.
360 PLYWOOD SHEETING: Exterior quality WBP 18mm thick to BS 6566.
370 ANCHOR SOCKETS: Will not be permitted.
380 BUTTS: Will be permitted providing suitably protected with plywood and polystyrene pads.Single butts must be able to be removed to allow repairs to fabric below.
390 WARNING TAPES AND STRIPS: Fluorescent and/or striped plastic tape and self-adhesivestrips.
400 KENTLEDGE: Where required the scaffold will be held down with kentledge. The Contractorshould provide details for the proposed kentledge for approval. The following will not beacceptable: scaffold tubes, water containers, ground anchors.
Design
500 ACCESS AND WORKING SCAFOLDING: Access and working scaffolding should be designed,constructed and used in accordance with BS EN 12811-1: 2003 Code of Practice for Accessand Working Scaffolds and Special Scaffold Structures in steel. Scaffold structures will normallyfall into one of two categories:
- Standard scaffolds.- Special scaffolds.
510 STANDARD SCAFFOLDS- This category includes putlog and independent ties scaffolds. Putlog scaffolds will not
be permitted.- Un-sheeted independent scaffolds, where no loading rating is specified, may be constructed up
to a height of 50m without calculations providing they are constructed in accordance with BS EN12811-1: 2003 and that they do not carry greater loads nor have greater bay lengths than thosegiven in the table below.
Table 1. Access and working scaffolds of tube and couplersDuty Use of Platform Load on
PlatformkN/m2
Max No ofPlatforms
Commonly usedwidths using225mm boards
Max BayLength(m)
Inspection andvery light duty
Inspection, painting, stonecleaning, light cleaning andaccess
0.75 1 working platform 3 boards 2.7

116 High Street, Boston, Lincolnshire 11505
REF: EJM/KLC/11505~spec and sched main works rev 3 5 July 2010
Light Duty Plastering, painting, stonecleaning, glazing and pointing.
1.50 2 working platforms 4 boards 2.4
General Purpose General building work includingbrickwork, window and mullionfixing, rendering, plastering.
2.00 2 working platforms+ 1 at very light duty
5 boards or 4boards + 1 inside
2.1
Heavy Duty Blockwork, brickwork, andheavy cladding.
2.50 2 working platforms+ 1 at very light duty
5 boards or 5boards + 1 insideor 4 boards + 1inside
2.0
Masonry orSpecial duty
Masonry work, concreteblockwork, and very heavycladding
3.00 1 working platform +1 at very light duty
6 to 8 boards 1.8
BS EN 12811-1: 2003Note: This table should be read in conjunction with the remainder of the code.
520 SPECIAL SCAFFOLDS- These will include all access and working scaffolds other than those identified under standard
scaffold limitations. All special scaffolds should be designed by a competent person.- These will generally cover:- Cantilever scaffolds- Protection fans- Cantilever loadings bays- Truss out scaffolds- Freestanding towers- Power line crossings- Guys and struts- Access birdcages- Hoist towers- Ladder towers- Stair towers- Stair towers- Slung scaffolds- Pedestrian bridges and walkways- Temporary ramps and elevated roadways- Masts- Lighting towers Transmission towers- Lifting gantries- Temporary buildings- Temporary roofs- Spectator terraces and seating stands- Temporary storage on site- Sheeted scaffolds including open mesh sheeting- Scaffolds deriving lateral support from buttressing- Scaffolds including a standard bearing on a bridging beam or bracing
530 FIXINGS/TIES: Ties and anchorages to external walls will need the careful consideration of theDesigners, and is to be agreed with the Architect prior to the tender submission.
540 CONTRACTOR DESIGN:- The Main Contractor is responsible for ascertaining the requirements of all subcontractors
including the use of each platform, the number to be fully boarded, those to be sheeted, locationand purpose of hoists, fans, hoardings, loading bays and the length of time the structure will bein position, together with other relevant information, unless stipulated within the schedule ofworks.
- The Main Contractor should be responsible for obtaining a documented design with calculationsfor the erection, use and dismantling of scaffold structures and for the integration of theseactivities within the overall work programme. It is the duty of the main contractor to check thedesign. The Main Contractors must submit details of the following, when requested to do so:
- design- full set of drawings- calculations- number and location of working levels- loading bays

116 High Street, Boston, Lincolnshire 11505
REF: EJM/KLC/11505~spec and sched main works rev 3 6 July 2010
- manufacturer’s details for specialist equipment such as ladder beams and cluster props etc.- method statements covering erection, use and dismantling.
550 WIND LOADING: To be in accordance with BS 6399:part 2:1997 and as modified by BREDigest 119 Edition 1984. It is anticipated that the scaffold shall be in position for in excess oftwelve months.
560 ROOF LOADS: To be in accordance with BS 6399, Part 3, 1988.
560 SCAFFOLDING CONTRACTOR:- The scaffolding contractor should be members of the National Association of Scaffolding
Contractors (NASC).- Contractors would have to demonstrate:- A sound Health and Safety Policy- Adequate Employers and Public Liability Insurance- Scaffolding operatives should be registered under the Construction Industry Training Board
(CITB)- Scaffolders Record Scheme to Identify the level of competence- All operatives are fully trained, registered and competent in activities undertaken- All work is adequately supervised by competent trained Supervisors.- Materials conform to the specified standards and are regularly checked and maintained- Work is carried out in accordance with relevant codes of practice
570 CONTROL OF WORK ON SITE:- Notwithstanding the overall responsibilities of the Main Contractor for site activities and health
and safety, adequate supervision must be provided by the Scaffolding Contractor at all timesduring erection and dismantling of scaffolding and temporary structures.
- Designers of special scaffolds should, under the terms of contract, be required to attend site onthe first day of erection to liaise, and brief the Scaffolding Supervisor on the requirements of thedesign.
- Designers should be required to emphasis that any variations to the design will not bepermitted, without the designer’s written authority. Any agreed variations must be clearlydocumented and must go through the Main Contractor and Planning Supervisor to be checkedby a competent person.
- Designers should also be required to visit the site at least weekly during erection. Oncompletion the Designer should certify (on F91 part 1 section A) to the Main Contractors thatthe scaffold has been erected full in accordance with the design and any approved variations.Copies of the certification should be passed to the Planning Supervisor.
- All scaffolds and structures should be inspected at least every seven days (and after weatherconditions likely to have affected their strength or stability) by a competent person.
- Records of such inspections together with necessary action must be made in register F91 andsigned by the person making the inspection.
- No alterations must be made at any time without written authority from the Designer and theMain Contractor.
- At all times during erection, dismantling or alteration to scaffold structures, access to theworking areas needs to be clearly defined by suitable barriers and notices. Notices warning“incomplete scaffold” should be secured as necessary in an appropriate place.
- It is a wise precaution to stop all work on external scaffolding during a thunderstorm.
580 PROTECTION:- Tubes bearing on masonry should be provided with suitable timber bearers. Against leadwork,
felt or other suitable packing should be used between the timber and leadwork.- All scaffold tube ends which are near or likely to come into contact with the fabric of the building
during erection, dismantling or as a consequence of lateral movement should be provided withplastic end caps.
- All scaffolding and temporary structures must be adequately earthed against lightning strikes, orbonded into the existing installation and is to be carried out by an approved lightning conductorsspecialist.
590 LADDERS: Provide ladder access for full height of scaffold. Ladders to extend a maximum oftwo scaffold lifts.

116 High Street, Boston, Lincolnshire 11505
REF: EJM/KLC/11505~spec and sched main works rev 3 7 July 2010
600 PUBLIC ACCESS:- During erection, modification or dismantling, care must be taken to exclude the public and staff
from a clearly defined area around the work.- Authorised access thoroughfares must have effective protection in the form of fans, netting,
sheeting, brickguards, etc., to protect persons from falling objects.- Ladders must not be left unattended when accessible to the public.- Ladders at ground floor level and other risk areas should be removed and securely locked away
at the end of each working day.
610 MOBILE SCAFFOLD TOWERS:- Mobile scaffold towers should be designed and used in accordance with HSE Guidance Note
GS42.- If a static tower is to be free standing (that is not tied to a building), the maximum height to base
ratio, is 4:1 for use inside a building and 3:5:1 for use outside buildings.- If a mobile tower is to be free standing, the maximum height to base ration, is 3:5:1 for use
inside a building and 3:0:1 for use outside the building.- The minimum base dimensions can be increased, and stability improved, by the use of
outriggers or stabilisers.- The recommended maximum height for a free standing tower is 9.6m when mobile and 12m
when static.
620 LOADING ON EXISTING STRUCTURES: Foot ties and butts will be permitted subject to detailsof how the fabric will be protected (i.e., foam cushions, plywood and polystyrene packs) andprovided all ties through window openings are made secure. Individual butts should be able tobe removed to allow repairs to walls etc.
630 SUPPORT STRUCTURE OF SCAFFOLD: The support structure of the scaffold should beconcentrated as necessary to leave the area adjacent to the building as free as possible.
640 SHEETING ENVELOPE: any roof cladding is to be securely fixed down to the scaffold structurein accordance with the manufacturer’s recommendations. Ensure fixings and joints arewatertight, taking special care at any hips, ridges etc. Where sides are to be enclosed thesheeting shall be fire and water retardant sheeting.
650 RAINWATER: If the scaffold has a roof provided, a 150 x 150mm metal or UPVC gutter to befitted to the eaves of the temporary roof. Gutters to collect rain water which will be conductedaway by upvc downpipes to suitable drainage points. Liaise with the CA and install downpipesin agreed positions and drainage points.
660 PLATFORMS:- Standards to be designed and erected to allow a minimum of two clear scaffold boards width
between them and the building elevation or details such as window heads, cornices etc.- The scaffold is to be boarded out at each lift level to suit the work including inspections by the
Architect.- Around the exterior envelope hand rails and toe boards will be required.- Set out lifts to suit principal features of elevations and avoid cutting across windows. Ensure
that boards are fully supported and lie flush, to prevent traps, particularly at ladder holes. Allowboards immediately adjacent to walls to lift out.
690 LIGHTNING PROTECTION: Bond scaffold to suitable lightning conductor terminal(s) driven intothe ground or in pits in positions agreed with the CA to comply with the requirements of BS EN62305-1:2006. Test connection(s) and continuity through scaffold on completion of the contract.Provide details of lightning protection proposed with the tender and to the approval of the CA.
700 CLEARANCES: Clear access is to be provided to all doorways at all times unless otherwiseagreed with the CA in writing. The lifts immediately above all openings and also over the SouthStreet gantry are to have hardboard sheeting and polythene sheeting placed below the scaffoldboards to prevent any debris falling. The scaffold temporary roofs will have a minimum of600mm clearance over the existing structures.

116 High Street, Boston, Lincolnshire 11505
REF: EJM/KLC/11505~spec and sched main works rev 3 8 July 2010
710 FIXINGS/TIES: All scaffold to be fully independent with no physical fixings into the fabric.
720 TAKE CARE: To prevent damage to the existing buildings, its fittings and furniture. Any damagecaused to the building is to be made good to the approval of the CA at the Contractor’sexpense. Listed Buildings are of national historical and Cultural importance and the historicfabric is vulnerable to damage and much of it irreplaceable. All personnel should be madeaware of this and treat the building with great care. When erecting high level scaffoldinginternally, valuable fittings below the working area (e.g. organs, monuments, decorative plasterfeatures) must be temporarily protected from damage and dirt during the erection and striking ofscaffold, and this must be included in any proposal.
730 PERMISSIBLE BEARING PRESSURE: Ensure that the permissible bearing pressure of theground or of the building below the structure is not exceeded. Set standards on scaffold boardsto spread the load, taking care not to block access to drains, rainwater channels, outlets etc.Where founded on soil, set out on appropriate spreaders as sole plates. Provide protection toany underlying stone, lead work, asphalt etc. with 50mm polystyrene and 19mm plywood asbase for scaffold supports.
740 SCAFFOLD TUBE ENDS: All to be covered with plastic caps where within 50mm of thebuilding. All ends to be kept a minimum of 100mm back from any glazing. Where butting ispermitted provide detail of padding to butt to avoid damage to fabric. Assume minimum of50mm polystyrene and 18mm plywood. Wrap any vulnerable carvings or fittings with bubblewrap and cover glass or decorations in rigid sheeting where adjacent to scaffolding.
750 FIRE ESCAPE: Do not obstruct means of escape routes from the site or adjoining buildingsunless alternative routes are provided, signed and agreed in writing with the CA.
C30 SHORING
To be read with Preliminaries/General conditions.
110 GENERALLY: Before starting work:- Examine all available information.- Survey the structure, site and surrounding area.- Submit method statements to the CA covering any relevant matters raised in the design brief.- Ensure that all statutory notices have been given and licenses obtained.
120 COMMENCEMENT CONDITION SURVEY:- Before starting work, survey the existing state of structure to be kept in place to locate and
record the magnitude and extent of all cracks, spalling, flaking and other irregularities of thefabric.
- Agree the commencement condition survey record with the CA.
125 GENERAL:- All items of pulling down, cutting openings and any other demolition items, alterations, etc., to
the existing works shall include shoring, strutting and propping to support the superincumbentand adjacent work likely to be injured or affected by the operations and construction of the newWorks and also for maintaining, easing and adjusting, striking and removing same when nolonger required and making good all work disturbed.
- Provide any necessary temporary concrete foundation bases etc., required for the shoring etc.,and break up same and clear away when no longer required and make good.
- Particular care must be exercised to ensure that every part of the structure requiring needling,shoring, etc., is carefully and sufficiently supported before demolition, pulling down andalterations and construction and re-erection commences.

116 High Street, Boston, Lincolnshire 11505
REF: EJM/KLC/11505~spec and sched main works rev 3 9 July 2010
220 ERECTING SUPPORT SYSTEMS:- Locate positions of existing and new services which may be affected by support systems.
Provide any necessary temporary diversions.- Prevent excessive loadings from foundations of support systems being imposed onto
foundations of structure to be kept in place.- Erect support systems and connect to structure to be kept in place taking all necessary
precautions to prevent damage, and taking due account of movement of structure which mayoccur before, during and after demolition.
- Promptly repair any damage caused to adjoining property by erection or connection of supportsystems. Make good to ensure safety, stability, weather protection and security.
- Report to the CA any damage caused to retained facades by erection or connection of supportsystems. Agree methods of repair with the CA.
- Check support systems at agreed stages during erection for compliance with design proposals.
240 LOADING SUPPORT SYSTEMS:- Complete erection and connection of the following support systems before commencement of
the demolition of adjoining structure: Nib walls adjacent to party wall.- When support systems are erected and all connections are made to structure to be kept in
place inform the CA and obtain any required permission to load systems.
320 MAINTAINING SUPPORTED STRUCTURE:- Regularly inspect and monitor supported structure to ensure stability. Report any significant
movement or deterioration of the fabric of supported structure to the CA.- Agree any necessary remedial work with the CA.- Adequately protect supported structure from damage by site operations and from staining due
to corrosion of support systems.
410 DISMANTLING SUPPORT SYSTEMS: When all permanent connections between supportedstructure and new construction have been made inform the CA and obtain any requiredpermission to disconnect and dismantle support systems.
430 MAKING GOOD: Repair any connection holes made in the structure kept in place.
440 COMPLETION: Clear away all support systems and leave the site and any working areasbeyond the site boundary in a tidy condition on completion.
G20 CARPENTRY/TIMBER FRAMING/FIRST FIXING
TYPE(S) OF TIMBER
150 STRENGTH GRADING OF TIMBER- Grader: Any company currently registered under a third party quality assurance scheme
operated by a certification body approved by the UK Timber Grading Committee.- Grading and marking of timber:- Timber of a target/finished thickness less than 100 mm and not specified for wet exposure:
Graded at an average moisture content not exceeding 20% with no reading being in excess of24% and clearly marked as 'DRY' or 'KD' (kiln dried).
- Timber graded un-dried (green) and specified for installation at higher moisture contents:Clearly marked as 'WET' or 'GRN'.
- Structural timber members cut from large graded sections: Re-graded to approval and markedaccordingly.
210 GRADED SOFTWOOD FOR STRUCTURAL USE GENERALLY- Stress graded to BS 4978 or other national equivalent and so marked.- Strength class to BS EN 519 or EN 338:C16 (SC3) or C24 (SC4)- Surface finish: sawn generally, regularised for ceiling joists.- Preservative treatment: As section Z12 and British Wood Preserving and Damp-proofing
Association Commodity Specification C8 : constructional timbers.

116 High Street, Boston, Lincolnshire 11505
REF: EJM/KLC/11505~spec and sched main works rev 3 10 July 2010
260 GRADED HARDWOOD FOR REPAIRS- Type: Three years or more old, felled English Oak.- Grading standard: Equivalent to or exceeding good quality THB (BS 57560, to a minimum
strength class D30 with the following qualification- Tie beams, half ties, dragon beams, dragon ties, principal rafters, and hip rafters to be boxed
heart with the heart to be located as close to the centre as possible.- Live knots may not exceed 50% of any face.- Small sound dead knots allowed < 50mm diameter, not allowed in the middle 50% of the length
of beams and bending members.- Slope of grain typically 1:8 (12%) and not to exceed 1:5 (20%).- Sap is allowed on arrises but will account for no more than 15% of face or edge.- On larger section tie beams sap or wane may occur on all four corners.- Wane not to exceed 10% of face or edge.- Fungal attack shall not be allowed.- Small heart shakes are allowed, but should not extend beyond 25% of the radius of the beam in
any direction.- Ring shake shall be graded out.- Surface fissures not to exceed half the length of the piece.- Bow should be less than 3mm per metre run.- Surface finish: New Sawn.- Treatment: Finish to Architect’s requirements after installation.- Moisture content at time of erection: As clause 450.- Inspection: Structural timber to be inspected at timber yard by CA or Structural Engineer prior to
delivery to site. Timber to be free from defects which in the opinion of the CA or StructuralEngineer render it unsuitable for its purpose.
- For any sections less than 50mm provide kiln dried oak.
310 SCREWS:- Material: Stainless steel.- Grade: 304- Type: Wood screws to BS 1210.- Sizes: Various as detailed in specification or on drawings.
311 BOLTS:- Material: Stainless steel.- Grade: 304.- Type: Hexagonal head to BS 3692.- Sizes: Various as detailed in specification or on drawings.
312 WASHERS:- Material: Stainless steel.- Grade: 304.- Type: Gauge to BS 4320.- Sizes: Various as detailed in specification or on drawings.
313 COACH SCREWS:- Material: Stainless steel.- Grade: 304.- Type: Hexagonal head.- Sizes: Various as detailed in specification or on drawings.
314 STUDDING:- Material: Stainless steel.- Grade: 304.- Size: Various as detailed in specification or on drawings.

116 High Street, Boston, Lincolnshire 11505
REF: EJM/KLC/11505~spec and sched main works rev 3 11 July 2010
315 TOOTH PLATE CONNECTORS:- Material: Stainless steel.- Grade: 304.- Type: Double or single sided as specified.- Sizes: 38, 50, 63 or 75mm diameter as detailed in specification or on drawings.
316 ANGLE CLEATS:- Material: Stainless steel.- Grade: 304.- Type: Purpose cut from bent plate.- Sizes: Various as detailed in specification or on drawings.- Supplier: Ancon Building Products, Tel: 0114 275 5224 or similar approved.
317 PLATES:- Material: Stainless steel.- Grade: 304.- Type: Purpose cut from standard plate.- Sizes: Various as detailed in specification or on drawings.
318 BRICK REINFORCEMENT:- Material: Stainless Steel- Grade: 304.- Type: SMR 150.- Supplier: Ancon Building Products, Tel: 0114 275 5224 or similar approved.
WORKMANSHIP GENERALLY
400 BASIC WORKMANSHIP: Comply with the clauses of BS 8000:Part 5 which are relevant to thissection.
405 ACCURACY: Not withstanding BS 8000: Part 5, clause 3.2.1, comply with Preliminaries clauseA33/340 and any required critical dimensions given in the Specification or on the drawings.
410 CROSS SECTION DIMENSIONS OF TIMBER shown on drawings or scheduled are basic sizesunless stated otherwise. Maximum permitted deviations from basic sizes to be as stated in BS4471 for softwoods and BS 5450 for hardwoods.
415 REDUCTION TO FINISHED SIZES of planed/regularised timber to be to BS 4471 for softwoodsand BS 5450 for hardwoods.
430 SELECTION AND USE OF TIMBER:- Do not use timber members which are damaged, crushed or split beyond the limits permitted by
their grading.- Ensure that notches and holes are not so positioned in relation to knots or other defects that the
strength of members will be reduced.- Do not use scarf joints, finger joints or splice plates without approval, unless specified.
440 PROCESSING TREATED TIMBER:- Carry out as much cutting and machining as possible before treatment.- Re-treat all treated timber which is sawn along the length, ploughed, thicknessed, planed or
otherwise extensively processed.- Treat timber surfaces exposed by minor cutting and drilling with two flood coats of a solution
recommended for the purpose by main treatment solution manufacturer.

116 High Street, Boston, Lincolnshire 11505
REF: EJM/KLC/11505~spec and sched main works rev 3 12 July 2010
450 MOISTURE CONTENT of timber at time of erection to be not more than:- Under cover in generally unheated spaces: 20%- Under cover in generally heated spaces: 18%- Internal in continuously heated spaces: 15%- When directed by Contract Administrator test at fabrication and / or erection stages moisture
content of timber section using an electrical moisture meter to manufacturers recommendations.Test 5% of each cross section in the centre of the length of timber. 90% of values obtained tobe within specified range. Provide Contact Administrator with record of all tests.
510 PROTECTION:- Keep timber dry and do not overstress, distort or disfigure sections or components during
transit, storage, lifting, erection or fixing.- Store timber and components under cover, clear of the ground and with good ventilation.
Support on regularly spaced, level bearers on a dry, firm base. Open pile to ensure freemovement of air through the stack.
- Arrange sequence of construction and cover timber as necessary during and after erection toensure that specified moisture content is not exceeded.
JOINTING TIMBER
570 JOINTING/FIXING GENERALLY: Where not specified otherwise, select fixing and jointingmethods and types, sizes and spacing of fastenings in compliance with relevant BritishStandards.
575 JOINTS:- Finish joint surfaces to all scarf joints, splices and finger joints so that adjoining surfaces are in
full contact over the whole of the surface of the joints.- Cut all mortise and tenons so that adjoining surfaces are good fit with maximum cumulative
gasp in one direction of 5mm.- Mortise and tenons cut in new timber where replacing existing decayed joints, are to match the
existing sizes unless otherwise specified.
630 BOLTED JOINTS:- Locate holes accurately and drill to diameters as close as practical to the nominal bolt diameter
and not more than 2 mm larger.- Place washers under all bolt heads and nuts which bear directly on timber. Use spring washers
in locations which will be hidden or inaccessible in the completed building.- Tighten bolts so that washers just bite the surface of the timber and at least one complete
thread protrudes from the nut.- Check at agreed regular intervals up to Practical Completion and tighten as necessary to
prevent slackening of joints.
635 COACH SCREWED JOINTS:- Pilot Hole: Drill to threaded length and to correct diameter for coach screw specified, and in
specified positions.- Pre-drill holes to coach screw shank diameter plus 2mm for length of shank only.- Position coach screw with specified washers and fully tighten.
640 STUDDING:- Pre-drill holes in timber to specified stud diameter.- Cut studding to correct length.- Position studding and pass through timber, where necessary assist with blows from a hammer
with a block of timber to threaded end to prevent damage.- Apply washers, and / or tooth plate connectors, and gully tighten nuts.- Where threaded length extends past nuts these should be cut to a length of 10mm 3mm.- Clean cut ends to remove all loose or sharp material.
116 High Street, Boston, Lincolnshire 11505
REF: EJM/KLC/11505~spec and sched main works rev 3 13 July 2010
645 TOOTH PLATE CONNECTORS:- Pre-drill holes at specified diameters and bolt positions.- Position tooth plate connector(s) and 38mm diameter, 3mm thick stainless steel washers to
external face(s).- Draw timber sections together using high tensile studding so that teeth are fully bonded.- Remove high tensile studding and replace with specified bolts and washers.
650 ANGLE CLEAT TO JOIST / BEAM JOINT:- Cleat formed from 90mm x 90mm x 5mm thick stainless steel plate.- Pre-drill holes in angle cleat at specified diameters and bolt positions.- Pre-drill pilot holes in timber to coincide with those in angle cleat, and at specified diameters.- Position cleat and fix specified bolts with washers under head. Fully tighten.- Where elongated mortises exist and the fixing positions coincides with this, use oak blocking
pieces cut to the size of the mortise and fix through blocking piece into ceiling beam.
ERECTION AND INSTALLATION
770 ADDITIONAL SUPPORTS:- Where not shown on drawings, position and fix additional studs, noggins or battens for
appliances, fixtures, edges of sheets, etc., in accordance with manufacturers'recommendations.
- All additional studs, noggins or battens to be of adequate size and have the same treatment, ifany, as adjacent timber supports.
780 WALL PLATES: Ensure that wall plates are:- Positioned and aligned to studs and posts and existing features to be placed correctly and to
the correct level etc.
784 INSTALLING JOISTS GENERALLY:- Position at equal centres not exceeding designed spacing and true to level.- Install bowed joists with positive camber.- Position end joists approximately 50 mm from masonry walls.
786 INSTALLING HORIZONTAL TIMBERS ON HANGERS:- Bed hangers directly on and hard against supporting construction. Do not use packs or bed on
mortar.- Cut joists to leave not more than 6mm gap between ends of joists and back of hanger.- Rebate joists to lie flush with underside of hangers.- Fix joists to hangers with a nail in every hole.
C41 REPAIRING/ RENOVATING/ CONSERVING MASONRY
To be read with Preliminaries/ General conditions
GENERALLY/ PREPARATION
110 SCOPE OF WORK- Various crack repairs and making good of finishes damaged by subsidence.
120 REVIEWING SCOPE OF THE WORK- Inspection: Arrange before starting work. Confirm type and extent of work required.- Marking: Mark clearly, but not indelibly, on face of masonry units or parts of units to be cut out
and replaced.- Identification of masonry units to be removed, replaced or repaired: Code number cross-
referenced to drawings/ photographs.- Records of masonry to be repaired: Before starting work, use measurements and photographs
as appropriate to record bonding patterns, joint widths, special features, etc.
116 High Street, Boston, Lincolnshire 11505
REF: EJM/KLC/11505~spec and sched main works rev 3 14 July 2010
WORKMANSHIP GENERALLY
150 POWER TOOLS FOR REMOVAL OF MORTAR- Usage: Not permitted unless approved by CA.
155 PUTLOG SCAFFOLDING- Usage: Not permitted.
165 STRUCTURAL STABILITY- General: Maintain stability of masonry. Report defects, including signs of movement, that are
exposed or become apparent during the removal of masonry units.
170 DISTURBANCE TO RETAINED MASONRY- Retained masonry in the vicinity of repair works: Disturb as little as possible.- Existing retained masonry: Do not cut or adjust to accommodate new or reused units.- Retained loose masonry units and those vulnerable to movement during repair works: Prop or
wedge so as to be firmly and correctly positioned.
180 OPERATIVES- General: Skilled and experienced with the materials and procedures required.- Evidence of training and previous experience: Provide on request.
185 ADVERSE WEATHER- Frozen materials: Do not use. Do not lay masonry units on frozen surfaces.- Air temperature: Do not bed masonry units or re-point:
- In cement gauged mortars when at or below 3°C and falling or unless it is at least 1°C andrising (unless mortar has a temperature of not less than 4°C when laid and the masonry isthoroughly protected).- In hydraulic lime : sand mortars when at or below 5°C and falling or unless it is at least 3°Cand rising.- In non-hydraulic lime : sand mortars in cold weather without approval.
- Temperature of the work: Maintain above freezing until mortar has fully set.- Rain and snow: Protect masonry by covering during precipitation and at all times when work is
not proceeding.- Hot conditions and drying winds: Prevent masonry from drying out too rapidly.- New mortar damaged by frost: Rake out and replace.
190 CONTROL SAMPLES- General: Obtain approval of the following before proceeding with the remainder: Repointing.- Protection: Protect from adverse weather and damage.
195 SAND SAMPLES- Approval: Before placing order, submit for approval representative samples of: Sands for
bedding and pointing.
MATERIALS/ PRODUCTION/ ACCESSORIES
215 SAMPLES- Inspection: Make arrangements for the to inspection of samples of the following materials:
Bricks to match existing.- Samples: Representative of the range of variation in appearance for each type of material to be
matched.- Appearance: Obtain approval before placing orders with suppliers or proceeding with
production.- Approved samples: Keep samples for reference purposes. Protect from damage.
260 BRICKS- Types: second hand as clause 265, to approval.- Sizes/ Special shapes: To match existing.

116 High Street, Boston, Lincolnshire 11505
REF: EJM/KLC/11505~spec and sched main works rev 3 15 July 2010
265 SALVAGED/ SECOND HAND BRICKS- Condition:- Free from matter such as mortar, plaster, paint, bituminous materials and organic growths.- Sound, clean and reasonably free from cracks and chipped arrises.
285 JOINT REINFORCEMENT [For Crack Stitching]- Manufacturer: Helifix or similar approved.- Product reference: HeliBar.- Material: Austenitic stainless steel.- Width: Approximately 40-50 mm less in width than wall or leaf.- Laying: On an even bed of mortar in a continuous strip with 225 mm laps at joints and full laps
at angles. Keep back 20 mm from face of external work, 12 mm back from face of internal workand finish mortar joint to normal thickness.
290 DOWELS, THREADED RODS, PINS, WIRE, BED REINFORCEMENT AND FIXINGS ETC:- To be Grade 18/8 Austenitic Stainless Steel.- For brick dowels use 10mm diameter threaded rods.- Length to suit situation or as specified.
300 RESIN- Manufacturer: Exchem Mining & Construction Ltd., PO Box 7, Venture Crescent,
Alfreton, Derby DE5 7RE tel: 01773 540440 fax: 01773 607638 or equal approved.- Reference: Resifix 3S- Type: polyester resin grout.
REPLACEMENTS AND INSERTIONS
330 PREPARATION FOR REPLACEMENT MASONRY- Defective material: Carefully remove to the extent agreed. Do not disturb, damage or mark
adjacent retained masonry.- Existing metal fixings, frame members, etc: Report when exposed.- Redundant metal fixings: Remove completely.- Recesses: Thoroughly clean to remove loose material and leave joint surfaces in a suitable
condition to receive replacement units. Protect from adverse weather.
365 REPLACEMENT OF BRICKS To main walls that are cracked- Bricks: second hand clay as clause 260.- Mortar: As section Z21.
- Mix: hydraulic based lime to match existing in texture and appearance.- Sand source/ type: Contractor’s choice to approval.
- Fixings: not required.- Joints: to match existing.- Other requirements: none.
385 LAYING REPLACEMENT MASONRY- Exposed faces of new material: Keep to approved face lines.- Faces, angles and features: Accurately align. Set out carefully to ensure satisfactory junctions
with existing masonry and maintain existing joint widths.- Joint surfaces: Dampen to control suction as necessary.- Laying: On a full bed of mortar, all joints filled.- Exposed faces: Keep clear of mortar and grout.
390 GROUTING JOINTS- Grout mix: Non-hydraulic lime with pozzolanic admixture; mix subject to site trials.- Joints that cannot be fully filled with bedding mortar: Grout thoroughly around replacement
masonry units.- Grouting: Keep grout back from exposed face to allow for the depth of pointing, using an
approved temporary sealing material. Prevent grout staining exposed face.

116 High Street, Boston, Lincolnshire 11505
REF: EJM/KLC/11505~spec and sched main works rev 3 16 July 2010
CRACK REPAIRS/ TIES/ REINFORCEMENT
610 MORTAR REPAIR OF CRACKS As directed on site- Mortar: As section Z21.
- Mix: hydraulic based lime to match existing in texture and appearance.- Sand source/ type: Contractor’s choice to approval.
- Preparation: Clean out cracks to remove loose debris, dust and dirt. Dampen joints to controlsuction as necessary.
- Applying mortar: Press well into joints so that they are fully filled. Ensure that no mortarencroaches upon exposed faces. Finish flush.
- Other requirements: None.
650 LATERAL RESTRAINT TIES- Existing construction:
- Wall type/ thickness: To be confirmed on site- Joist/ size/ spacing: To be confirmed on site
- Preparation:- Before commencing insertion of each tie, ensure that there are no service pipes, electricalcables or other obstructions in its path.- Clean fixing holes in masonry thoroughly to remove dust and debris.
- Tie system:- Manufacturer: Helifix or similar approved.- Product reference: Bow Tie- Tie spacing:- Joists parallel to wall: As indicated in outline schedule of works.- Joists at right angles to wall: As indicated in outline schedule of work.- Tie installation: Insert ties accurately and securely into mid depth of joists or as near as
practicable.- Expansion type anchor fixings: Set to correct torque.- Bonded type fixings: Thoroughly grouted.- Making good: As agreed with CA.
675 JOINT REINFORCEMENT For stitching across cracks- Existing construction Solid brickwork.- Joint width: As existing.- Reinforcement system:
- Manufacturer: Helifix Ltd.- Product reference: Helibar.- Type/ Diameter: 6mm stainless steel.
- Grout: As approved by manufacturer.- Insertion: Remove mortar carefully and without damaging adjacent masonry or widening joints.
Form a neat square recess to depth recommended by the reinforcement manufacturer. Removedust and debris and install reinforcement in joints using methods recommended by thereinforcement system manufacturer.
- Joints: Re-point as clause 820.
690 MAKING GOOD OF INJECTION/ INSERTION HOLES- Preparation: Clean out holes thoroughly.- Repair mortar: To match existing masonry units/ joints in colour and texture. Fully fill holes and
finish neatly and flush.- Give notice: Before starting and obtain approval of appearance of first few holes before
completing the remainder.
116 High Street, Boston, Lincolnshire 11505
REF: EJM/KLC/11505~spec and sched main works rev 3 17 July 2010
POINTING/ REPOINTING
810 PREPARATION FOR REPOINTING- Removing mortar:
- Work from the top of the wall downwards.- Remove carefully and without damaging adjacent masonry, arrises or widening joints.
- Recess for re-pointing: Form a neat recess of depth not less than 30mm. When mortar beyondthis depth is loose and friable and/ or cavities are found seek instructions.
- Dust and loose debris. Remove. Dampen joints to control suction as necessary.
820 POINTING- Preparation of joints: As clause 810.- Mortar: As section Z21.- Mix: hydraulic based lime to match existing in texture and appearance.- Sand source/ type: Contractor’s choice to approval.- Joints: To match existing.- Other requirements: None.
840 POINTING WITH TOOLS/ IRON- General: Press mortar well into joints using pointing tools/ irons that fit into the joints, so that
they are fully filled.- Face of masonry: Keep clear of mortar. Use suitable temporary adhesive tape on each side of
joints where necessary. Finish joints neatly.
850 POINTING WITH INJECTION MORTAR- General: Inject mortar into joints so that they are fully filled with no voids.- Face of masonry: Keep clear of mortar. Finish joints neatly.
860 BRUSHED FINISH TO JOINTS- General: After the initial set has taken place, brush joints to remove laitance/ excess fines and
give a coarse texture. Do not compact mortar.

116 High Street, Boston, Lincolnshire 11505
REF: EJM/KLC/11505~spec and sched main works rev 3 18 July 2010
3.0 SCHEDULE OF STRUCTURAL WORKS
3.1 External – Front Elevation
3.1.1 To window W11 allow to support masonry from front of opening and to remove painted stonehead and brickwork above to allow for removal of potential decayed timber lintel. Carefullyremove the stone jambs, and all iron cramps fixed to timber or reveals or between stones. Pieceback any fractured sections to stonework and stitch pin heads using 8mm threaded stainlesssteel rods set in resin. Use 4 No stainless steel cramps to tie back stone surrounds to newconcrete lintels and brick reveals. Rebuild the disturbed masonry above incorporating stainlesssteel brick-tor reinforcement in the bed joints and rake back the bedding mortar for re-pointing.Re-point the joints to the stonework and make good any areas necessary with stone dust mortarto match existing.
3.1.2 In conjunction with 3.1.1 cut out and remove potential decayed backing timber lintels. Replacewith 3 No 100mm wide new pre-stressed concrete lintel including dry packing over. Include forall associated temporary works to support floor/roof structure over as necessary.
3.1.3 To window W12 allow to support masonry from front of opening and to remove painted stonehead and brickwork above to allow for removal of potential decayed timber lintel. Carefullyremove the stone jambs, and all iron cramps fixed to timber or reveals or between stones. Pieceback any fractured sections to stonework and stitch pin heads using 8mm threaded stainlesssteel rods set in resin. Use 4 No stainless steel cramps to tie back stone surrounds to newconcrete lintels and brick reveals. Rebuild the disturbed masonry above incorporating stainlesssteel brick-tor reinforcement in the bed joints and rake back the bedding mortar for re-pointing.Re-point the joints to the stonework and make good any areas necessary with stone dust mortarto match existing.
3.1.4 In conjunction with 3.1.3 cut out and remove potential decayed backing timber lintels. Replacewith 3 No 100mm wide new pre-stressed concrete lintel including dry packing over. Include forall associated temporary works to support floor/roof structure over as necessary.
3.1.5 To window W13 allow to support masonry from front of opening and to remove painted stonehead, including key stone(s) and brickwork above to allow for removal of potential decayedtimber lintel. Carefully remove the stone jambs, and all iron cramps fixed to timber or reveals orbetween stones. Piece back any fractured sections to stonework and stitch pin heads using8mm threaded stainless steel rods set in resin. Use 4 No stainless steel cramps to tie backstone surrounds to new concrete lintels and brick reveals. Rebuild the disturbed masonry aboveincorporating stainless steel brick-tor reinforcement in the bed joints and rake back the beddingmortar for re-pointing. Re-point the joints to the stonework and make good any areas necessarywith stone dust mortar to match existing.
3.1.6 In conjunction with 3.1.5 cut out and remove potential decayed backing timber lintels. Replacewith 3 No 100mm wide new pre-stressed concrete lintel including dry packing over. Include forall associated temporary works to support floor/roof structure over as necessary.
3.1.7 To window W1 allow to support masonry from front of opening and to remove painted stonehead and brickwork above to allow for removal of potential decayed timber lintel. Carefullyremove the stone jambs, and all iron cramps fixed to timber or reveals or between stones. Pieceback any fractured sections to stonework and stitch pin heads using 8mm threaded stainlesssteel rods set in resin. Use 4 No stainless steel cramps to tie back stone surrounds to newconcrete lintels and brick reveals. Rebuild the disturbed masonry above incorporating stainlesssteel brick-tor reinforcement in the bed joints and rake back the bedding mortar for re-pointing.Re-point the joints to the stonework and make good any areas necessary with stone dust mortarto match existing.
3.1.8 In conjunction with 3.1.7 cut out and remove potential decayed backing timber lintels. Replacewith 2 No 100mm wide new pre-stressed concrete lintel including dry packing over. Include forall associated temporary works to support floor/roof structure over as necessary.

116 High Street, Boston, Lincolnshire 11505
REF: EJM/KLC/11505~spec and sched main works rev 3 19 July 2010
3.1.9 To window W2 allow to support masonry from front of opening and to remove painted stonehead and brickwork above to allow for removal of potential decayed timber lintel. Carefullyremove the stone jambs, and all iron cramps fixed to timber or reveals or between stones. Pieceback any fractured sections to stonework and stitch pin heads using 8mm threaded stainlesssteel rods set in resin. Use 4 No stainless steel cramps to tie back stone surrounds to newconcrete lintels and brick reveals. Rebuild the disturbed masonry above incorporating stainlesssteel brick-tor reinforcement in the bed joints and rake back the bedding mortar for re-pointing.Re-point the joints to the stonework and make good any areas necessary with stone dust mortarto match existing.
3.1.10 In conjunction with 3.1.9 cut out and remove potential decayed backing timber lintels. Replacewith 2 No 100mm wide new pre-stressed concrete lintel including dry packing over. Include forall associated temporary works to support floor/roof structure over as necessary.
3.1.11 Allow to take down and re-build 9” parapet wall from stone cornice level upwards. Allow to re-build to same width but incorporating stainless steel brick Tor in 2 joints for full length. Re-setcopings using 6mm stainless dowels into brickwork below.
3.2 External – Side Elevation
3.2.1 Allow to kill all plant growth and remove.
3.2.2 Allow to carefully measure to establish position of chimney internally. Drill through face of southwall to west gable at position of chimney side walls and insert 8mm stainless steel threadedrods at 450mm centres to extend to within 125mm of internal face to tie brickwork for bothground and first floors. Set in resin with rods set back from face by 20mm and then made goodwith a brick dust mortar to match existing.
3.2.3 Allow to temporary shore front elevation close to corner to allow external and internal skins ofbrickwork to old doorway to be removed including lintel over, and then re-built for the fullthickness of wall and ensuring new brickwork is fully toothed and bonded in to the existing eitherside of opening.
3.2.4 On completion of 3.2.3 and when mortar fully cured allow to drill through from front elevation atfour different positions in height of old door opening and along the south elevation for a distanceof approximately 2.5m and staggered in the width of the wall. At each position allow for 1 NoCintec Anchor for 2.5m length, set in accordance with manufacturers guidelines. Allow to makegood in brick dust mortar to match existing.
3.2.5 Allow provisionally for inserting 15 No Helibar, at 2.5m length at positions agreed on site.
3.2.6 At east end of western gable at position of small return allow for pinning through straightconstruction joint with Helibar every 5
thcourse and extending 300mm into internal cross wall.
Set in resin with rods set back from face by 20mm and then made good with a brick dust mortarto match existing.
3.2.8 At east end allow for pinning through straight construction between added bay and south wingjoint with Helibar every 5
thcourse and extending 300mm past joint. Set in resin with rods set
back from face by 20mm and then made good with a brick dust mortar to match existing.
3.3 External – Rear Elevation
3.3.1 Allow to kill and remove all vegetation so that a full inspection can be carried out.
3.3.2 Allow provisionally for inserting 15 No Helibar, at 2.5m length at positions agreed on site.

116 High Street, Boston, Lincolnshire 11505
REF: EJM/KLC/11505~spec and sched main works rev 3 20 July 2010
3.3.3 Allow to carefully support curved brick arches over windows W17, W18 and W19. Allow tocarefully pin back arch, every 4
thbrick, with 6mm stainless steel dowels into backing brickwork.
Set in resin with rods set back from face by 20mm and then made good with a brick dust mortarto match existing. Once set allow to slate pack any open joints and point to match existing.Include to replace 8 No brick voussoirs as part of this work.
[Include extra over/under rate per voussoir brick £...........................]
3.3.4 Allow to insert 4 No 1000mm long Helibar in crack over W20.
3.3.5 To north side of added bay allow for pinning through straight construction (seen internally)between added bay and south wing with Helibar every 5
thcourse and extending 300mm past
joint. Set in resin with rods set back from face by 20mm and then made good with a brick dustmortar to match existing.
3.3.6 Note that the single storey modern further bay has not been included as it assumed it will beremoved as part of any works.
3.4 Internal – Roof General
3.4.1 when roof coverings, gutters etc removed allow to carefully clean out all voids etc of all debrisso that a full inspection can be carried out.
3.4.2 Allow to check all fixings between common rafters and ridge, eaves plate, collars and commonrafters, jack rafters and hip rafters, and reinforce where loose with appropriate sized coachscrews.
3.4.3 When roof coverings removed allow for the Architect and Structural Engineer to re-assessstructure to confirm repairs necessary.
3.4.4 Allow for drilling of timbers to test for hidden decay with 8mm long drill piece at positions agreedwith Architect /Structural Engineer. Record on drawings and provide 2 copies to Architect and 1copy to Structural Engineer.
3.4.5 Provisionally allow for removal of all added firring pieces, additional rafters alongside, soffitboards, sprockets etc. Soffit boards, sprockets etc to be set aside for inspection by Architectand potential re-use.
3.4.6 Allow provisionally for treated softwood firrings scribed to deflected shape of existing rafters toprovide a reasonable plain for battening and re-tiling although it is not desirable to have acompletely flat plain. Fix through to rafters with 14g diameter stainless steel screws at 250mmstaggered centres along the length with minimum penetration into the existing rafters of 40mmof their depth.
3.4.7 Allow provisionally to reinforce 20 No. ridge joints with 10mm thick x 150mm deep boardsspanning between rafter pairs at head and fixed to each rafter with a minimum of 2 No. 12gauge screws.
[Indicate extra over/under rate per board £……………. per board]
3.4.8 Allow provisionally to scarf foot to 5 no. rafter feet where decayed with new rafter foot as perdetail 11505/31 Detail 6. Assumed decayed length 1.0m.
[Indicate extra over / under rate per new rafter foot £…………………]
3.4.9 Allow provisionally to scarf 5 no. rafter feet where decayed with new rafter feet as per detail11505/31 Detail 6. Assume decayed length 0.5m.
[Indicate extra over / under rate per new rafter foot £…………………]

116 High Street, Boston, Lincolnshire 11505
REF: EJM/KLC/11505~spec and sched main works rev 3 21 July 2010
3.4.10 Allow to replace decayed length of roof eaves plate, 1.0m long plus halving joints at each endas per detail 11505/31 Detail 5. Provide temporary support to rafters whilst work carried out andre-fix rafters on completion of plate repair.
3.5 Internal – Roof over S5 - Front Range
3.5.1 It is assumed that all parapet and valley gutter boards, and support timbers will be removed andrenewed as part of the re-roofing.
3.5.2 To the north end of the roof structure below the valley between the front range and north rangeallow to re-build loose brick on edge course directly below eaves plate for length of 2.0mincluding the top for course of the 13 ½” wall below.
3.5.3 At this position (item 3.5.2) Allow to scarf in new section of oak eaves plate (200mm x 160mm)for length of 2.0m including as per detail 11505/31 Detail 1. Provide temporary support to rafterswhilst work carried out and re-fix rafters on completion of plate repair including sitting in notch intop face of plate if appropriate. Allow to remove iron strap to east side, on onto return plate,clean paint and replace with new fixings on completion.
3.5.4 At this position (item 3.5.2) allow to scarf foot to 1 No oak rafter (130 x100), with decayed length0.8m in the vicinity of the decay to the plate as per detail 11505/31 Detail 2.
3.5.5 Allow to replace 1 No oak rafter (130 x100) close to north party wall and add further new rafter(130 x 100) immediately alongside wall to support battens. Both new rafters to be oak andapproximately 3.2m long.
3.5.6 Allow to scarf bottom of hip rafter at this position (item 3.5.2) with decayed length 1.0m as perdetail 11505/31 Detail 2. Provide temporary support to jack rafters whilst work carried out andre-fix rafters on completion.
3.5.7 To north end of eaves plate to west slope allow for scarfing in new section of oak eaves plate(170mm x 130mm deep) for length of 3.6m including new joint as per detail 11505/31 Detail 5.Provide temporary support to rafters whilst work carried out and re-fix rafters on completion ofplate repair including sitting in notch in top face of plate if appropriate. Note where the dormerexist the horizontal timbers extending out over the stone cornice will need to be retained due totheir apparent holding down action on the stone.
3.5.8 At this position (item 3.5.5) allow to scarf foot of 5 No rafters, decayed length 0.9m, in thevicinity of the decay to the plate as per detail 11505/31 Detail 2. Allow to release and reinstatetimber ashlar posts.
3.5.9 Directly below dormer at this position (item 3.5.5) allow to replace dormer cill trimmer in newoak (100 x 100), spiking into rafters either side of dormer.
3.5.10 Allow to replace 1 No rafter for its full length where decayed at this position (item 3.5.5).
3.5.11 Below central dormer to west elevation allow for scarfing in new section of oak eaves plate(170mm x 130mm deep) for length of 1.0m including new joint as per detail 11505/31 Detail 5 toboth ends. Provide temporary support to rafters whilst work carried out and re-fix rafters oncompletion of plate repair including sitting in notch in top face of plate if appropriate. Note wherethe dormer exist the horizontal timbers extending out over the stone cornice will need to beretained due to their apparent holding down action on the stone.
3.5.12 At this position (item 3.5.11) allow to scarf foot of 2 No rafters, decayed length 0.9m, in thevicinity of the decay to the plate as per detail 11505/31 Detail 2. Allow to release and reinstatetimber ashlar posts.
3.5.13 Directly below dormer at this position (item 3.5.11) allow to supply and fix new dormer cilltrimmer in oak (100 x 100), spiking into rafters either side of dormer.

116 High Street, Boston, Lincolnshire 11505
REF: EJM/KLC/11505~spec and sched main works rev 3 22 July 2010
3.5.14 To south end of eaves plate to west slope allow for scarfing in new section of oak eaves plate(170mm x 130mm deep) for length of 2.4m including new joint as per detail 11505/31 Detail 5.Provide temporary support to rafters whilst work carried out and re-fix rafters on completion ofplate repair including sitting in notch in top face of plate if appropriate. Note where the dormerexist the horizontal timbers extending out over the stone cornice will need to be retained due totheir apparent holding down action on the stone.
3.5.15 At this position (item 3.5.8) allow to scarf foot of 5 No rafters in the vicinity of the decay to theplate as per detail 11505/31 Detail 2. Include for removing later decayed repair timbersalongside.
3.5.16 Allow to supply and nail fix 5 No new oak ashlar posts (80 x80) where missing to west side.
3.5.17 Below the valley between the front range and south range to the north side allow for scarfing innew section of oak eaves plate (180mm x 200mm deep) for length of 1.5m including new jointas per detail 11505/31 Detail 1 at both ends. Provide temporary support to rafters whilst workcarried out and re-fix rafters on completion of plate repair including sitting in notch in top face ofplate if appropriate. Note that this wall plate is partly built into the brick wall which rises from it,and thus temporary works will need to be considered. Ensure that eaves plate sits tightly inpocket and that brickwork over is fully supported in permanent condition.
3.5.18 At this position (item 3.5.17) allow to replace 4 No rafters (100 x 100) for their full length in thevicinity of the decay to the plate. Include for re-fixing collars of those to be retained, i.e. maincollars only.
3.5.19 To 4 No purlin ends at junction with gables allow to splice new oak member above with splicelength of 1.0m and 6 No 12mm bolts, bearing tight into pocket in wall. Provide Bat Strap at eachposition to provide positive mechanical connection between purlins and gables as per 11505/31Detail 3.
3.5.20 Allow to stitch crack in chimney to north end of attic S5 using 800mm long Helibar at 350mmvertical centres for 2.5m height. Allow to re-point crack and adjoining brickwork. Include forreplacing 15 No decayed or damaged bricks.
3.5.21 Replace 1 No oak rafter to south end of east elevation to match existing.
3.5.22 Allow to replace hip rafter (130 x 100) to south side of northern range where this meets frontrange including temporary removal and replacement of jack rafters.
3.5.23 At this position (item 3.5.22) allow to scarf foot to 1 No oak rafter (130 x100), with decayedlength 1.4m in the vicinity of the decay to the hip rafter as per detail 11505/31 Detail 2.
3.5.24 Allow to replace 1 No oak rafter (130 x100) close to this position (item 3.5.22). New rafters to beoak and approximately 3.8m long and to have brick infilled on top to support end wall of S4.
3.5.25 Allow to cut out and replace 10 No decayed or damaged bricks to chimney at south end.
3.5.26 Allow to supply and nail fix 12 No new oak ashlar posts (80 x80) where missing to west side.
3.6 Internal – Roof over S1, S2 and S3 - North Range
3.6.1 It is assumed that all parapet and valley gutter boards, and support timbers will be removed andrenewed as part of the re-roofing.
3.6.2 Allow provisionally for scarfing in new section of treated softwood timber eaves plate for lengthof 2.5m including as per detail 11505/31 Detail 5. Provide temporary support to rafters whilstwork carried out and re-fix rafters on completion of plate repair.
3.6.3 Allow provisionally for to splice feet of 12 No rafters as per detail 11505/31 Detail 6.
116 High Street, Boston, Lincolnshire 11505
REF: EJM/KLC/11505~spec and sched main works rev 3 23 July 2010
3.6.4 To north elevation of S3 and part S2 allow to progressively remove earlier eaves plate, whichsits partly under the party wall, and brick on edge course below. Allow to build up off ledge insolid brickwork ensuring party wall fully supported on completion as per 11505/31 Detail 4.
3.6.5 Allow to provide 8mm x 1.2m long steel plates bolted to existing wall plate in Room S1 by raiseddormer window.
3.6.6 At the east end of Room S1 allow for scarfing in new section of treated softwood timber eavesplate for length of 1.5m including new joints at both ends as per detail 11505/31 Detail 5.Provide temporary support to rafters whilst work carried out and re-fix rafters on completion ofplate repair. Note there is brickwork above the plate which will be disturbed as part of the works.Note the parapet bears on top of this plate and thus will need to either be supported or takendown and re-built.
3.6.7 At this position (item 3.6.6) allow to splice 5 No rafters (85 x 35) in the vicinity of the decay tothe plate as per detail 11505/31 Detail 6. New members to be 85 x 50.
3.7 Internal – Roof over S4
3.7.1 No particular signs of defects to roof structure noted, but allow a provisional sum of £1,000 totimber repairs when exposed.
3.8 Internal – Roof over F4 - South Range
3.8.1 It is assumed that all parapet and valley gutter boards, and support timbers will be removed andrenewed as part of the re-roofing.
3.8.2 At the west end of roof to north side allow for temporary propping rafters and ceiling joists, andthen cutting back decayed timber and brick infilling voids in walling. Provide new 150mm deep x75mm wide treated softwood timber plate to be fixed against wall with 12mm s/s resin fixings at250mm centres. Length of plate to be cut out 2.0m.
3.8.3 At this position (item 3.8.2) allow to scarf foot of 6 No rafters in the vicinity of the decay to theplate as per detail 11505/31 Detail 6.
3.8.4 At this position (item 3.8.2) allow to partner 6 No ceiling joists with new treated softwood timberwith lap length of 800mm and 4 No 10mm bolts staggered bearing onto new plate o fixed withmaxi speedy BAT joist hanger.
3.8.5 At the east end of roof to south side allow for scarfing in new section of treated softwood timbereaves plate for length of 1.9m including as per detail 11505/31 Detail 5. Provide temporarysupport to rafters whilst work carried out and re-fix rafters on completion of plate repair. Notethere is brickwork over the eaves plate so some local consolidation will be required.
3.8.6 At this position (item 3.8.5) allow to scarf foot of 6 No rafters in the vicinity of the decay to theplate as per detail 11505/31 Detail 6.
3.9 Internal – Flat Roof over F5
3.9.1 Externally allow to deep re-point the parapet wall at the east end which is very open jointed.
3.9.2 See items 3.18.2 and 3.18.6

116 High Street, Boston, Lincolnshire 11505
REF: EJM/KLC/11505~spec and sched main works rev 3 24 July 2010
3.10 Internal – Room S5
3.10.1 At south west corner allow to cut back 4 decayed joists ends (approx 125mm deep x 125mmwide) and partner alongside with lap length of 800mm and 4 No 10mm staggered bolts. Assumedecayed length of 1.2m. New joist ends to bear onto wall plate (see item 3.10.2) and beloweaves plate as per detail 11505/31 Detail 7. Include all temporary works required.
3.10.2 To south end of wall plate to west slope at south end allow for scarfing in new section of oakplate (160mm x 140mm deep) for length of 2.4m including new joint as per detail 11505/31Detail 5 and to extend over window opening. Provide temporary support to floor joists andrafters whilst work carried out and re-fix on completion of plate repair
3.10.3 Allow to replace 1 No missing joist in south west corner alongside wall. Support of joist hangersin brickwork.
3.10.4 Provisionally allow to cut back 4 decayed joists ends (approx 125mm deep x 125mm wide)along west wall and partner alongside with lap length of 800mm and 4 No 10mm staggeredbolts as per detail 11505/31 Detail 7. Assume decayed length of 1.2m. New joist ends to bearonto wall plate and below eaves plate. Include all temporary works required.
3.10.5 Provisionally allow to cut back 4 decayed joists ends (approx 125mm deep x 125mm wide)along west wall and partner alongside with lap length of 800mm and 4 No 10mm staggeredbolts as per detail 11505/31 Detail 7. Assume decayed length of 0.8m. New joist ends to bearinto wall and below eaves plate. Include all temporary works required and making good bricklocally on completion.
3.10.6 Allow to replace 1 No missing joist in north east corner alongside wall. Support off joist hangerin brickwork.
3.11 Internal – Room S2
3.11.1 Allow to cut back 6 assumed decayed joists ends in area of dry rot to north wall (approx 120mmdeep x 105mm wide 380 centres) and partner alongside with lap length of 800mm and 4No.10mm staggered bolts as per detail 11505/31 Detail 7. Assume decayed length of 1.2m. Newjoist ends to bear into wall. Include all temporary works required and making good brick locallyon completion. Include all temporary works required.
3.11.2 No further structural works identified. Include a provisional sum of £1,000 for other works to thefloors.
3.12 Internal – Room S3
3.12.1 No structural works identified. Include a provisional sum of £1,000 for works to the floors.
3.12.2 Allow to re-fix floor joists at south end to beam to be replaced below (see item 3.19.2-3.19.7)with Bat Maxi-Speedy joist hangers.
3.13 Internal – Room S4
3.13.1 The east wall of this room is built partly off a beam below and also off a roof joist to the flat roofalongside. These are not at the same level and the change in level is made up with a brick onedge. The timbers below the wall are decayed. Although this will be reviewed on site allowanceshould be made to re-build the wall in 9” brickwork. Include for temporary support to rafters overas work is undertaken.
[If the wall can be retained it will be necessary to remove decayed in-built timbers and brick infillthe voids. An area of brickwork to the south end of the east wall will need re-building at low levelwhere it has dropped]
116 High Street, Boston, Lincolnshire 11505
REF: EJM/KLC/11505~spec and sched main works rev 3 25 July 2010
3.13.2 Allow provisionally for re-building south wall for full height and including extending back overrafters (see item 3.5.24).
3.13.3 Include a provisional sum of £750 for works to the floors.
3.14 Internal – Room S1
3.14.1 To south wall allow to stitch 2 No cracks both internally and externally with Helibar 800mm long.Allow for 5 No bars internally and 5 No bars externally.
3.15 Internal – Room F1
3.15.1 Allow to insert Helibar to north face of chimney in every 3rd
course for 1000mm length. See alsoitem 3.2.3.
3.15.2 At south west corner allow to cut back 5 decayed joists ends (150mm deep x 110mm wide) andpartner alongside with lap length of 800mm and 4 No 10mm staggered bolts as per detail11505/26 Detail 1. Infill joist pockets with brick. New joist end to be supported on maxi-speedyBAT joist hanger with 4 No 6mm s/s resin fixings into masonry. Assume decayed length of1.2m.
3.15.3 Allow to removed all decayed bonding timbers to walls and piece infill with brickwork inpiecemeal manner.
3.15.4 At south east corner allow to cut back 5 decayed joists ends (125mm deep x 150mm wide) andpartner alongside with lap length of 800mm and 4 No 10mm staggered bolts as per detail11505/26 Detail 1. Infill joist pockets with brick. New joist end to be supported on maxi-speedyBAT joist hanger with 4 No 6mm s/s resin fixings into masonry. Assume decayed length of1.2m.
3.16 Internal – Room F2
3.16.1 Allow to cut back 3 decayed joists ends to front elevation (125mm deep x 125mm wide) andpartner alongside with lap length of 800mm and 4 No 10mm staggered bolts as per detail11505/26 Detail 1. Infill joist pockets with brick. New joist end to be supported on maxi-speedyBAT joist hanger with 4 No 6mm s/s resin fixings into masonry. Assume decayed length of1.2m.
3.16.2 Allow to cut back 3 decayed separate ceiling joist ends below floor joists and partner alongsidewith lap length of 800mm and 4 No 10mm staggered bolts as per detail 11505/26 Detail 1. Infilljoist pockets with brick. New joist end to be supported on maxi-speedy BAT joist hanger with 4No 6mm s/s resin fixings into masonry. Assume decayed length of 1.2m.
3.17 Internal – Room F3
3.17.1 Allow to cut back 7 decayed joists ends to front elevation (130mm deep x 120mm wide) andpartner alongside with lap length of 800mm and 4 No 10mm staggered bolts as per detail11505/26 Detail 1. Infill joist pockets with brick and consolidate brick on edge course wherenecessary alongside. New joist end to be supported on maxi-speedy BAT joist hanger with 4 No6mm s/s resin fixings into masonry. Assume decayed length of 1.2m.
3.17.2 Allow to removed all decayed bonding timbers to walls and piece infill with brickwork inpiecemeal manner.
3.17.3 To the east wall the original rear wall of the north range has been removed at ground level anda 400mm wide x 300mm deep timber beam inserted with the floor joists to this room supportedoff iron hangers. The existing beam supports the brick wall above (13 ½”) the first floor joistsfrom F3 and S5, and the roof. It is decayed at its south end. The existing beam is shallow for itsspan and loading.
116 High Street, Boston, Lincolnshire 11505
REF: EJM/KLC/11505~spec and sched main works rev 3 26 July 2010
a) Allow for all temporary support to floors and roof over and for removing finishes to wall,recording, and carefully dismantling of first floor wall for full thickness, cleaning and settingaside bricks for re-use. Allow to install new 254 x 254 x 132 kg/m UC section with 340mmwide x 8mm thick plate welded to top to provide full support to wall over and with concretepadstones to both ends. Include of 1 hour intumescent paint to steel. Build up 1 ½ brickthick wall for full height off beam to eaves level above. See drawings 11505/25 and11505/26 Section 1-1. Assume 50% salvage of bricks for re-use possible and 50% newstock bricks.
[Indicate extra over cost for 50% additional new stock bricks if existing not salvageable£................]
b) [As an alternative and with price not to be carried forward - allow for temporarysupporting masonry wall by needling through at regular centres and also floor structuresalongside. Allow for removing existing timber beam and replacing with new steel beam 254x 254 x 132kg/m UC section with 340mm wide x 8mm thick plate welded to top to providefull support to wall over. Provide new concrete padstones at either end. Allow to hard packto underside of brickwork over. Make good brickwork as needles removed. See drawings11505/25 and 11505/26 Section 1-1. £............................................]
3.17.4 Include for timber to be bolted alongside web of steel between flanges, and then fixing all theexisting joists to this timber with maxi-speedy joist hangers and 4 No 6mm coach screws.
3.18 Internal – Room F4
3.18.1 There are many positions around the room and at different heights where bonding timbers havebeen built in, but decayed and in many places then been removed with temporary timber foldingwedges installed. Allow to remove any remaining section of timber and then infill all voids withnew brickwork in a piecemeal manner, removing folding wedges etc as work proceeds.
3.18.2 To doorway through to F5 allow to provide temporary support as necessary to wall with needlesthrough, and support to roof over and to flat roof over F5. Record wall and then carefully removebrickwork including to beyond vertical straight joints to either side, and re-build ensuringbrickwork it bonded throughout. Include for new pre-stressed concrete lintels over doorwayincluding re-building a minimum of 3 courses over new lintels.
3.18.3 To the re-positioned chimney to the south side of F4 allow to drill through reveals at either endand pin to existing external wall using 8mm s/s threaded rod (or Helibar) at 350mm verticalcentres ensuring holes stop at approximately 50mm from the outside face. Remove shortdecayed bonding soldiers and infill with brickwork. See drawing 11505/26 Detail 2.
3.18.4 Allow to investigate support to chimney at east end where supported on floor joists. Allow aprovisional sum of £1,000 for strengthening if required.
3.18.5 Where iron straps link between added bay to east side and south range, allow to carefully cutout brickwork and remove iron straps and then make good. (Note: the action of these straps hasbeen replaced by the external pining through of the joints – see items 3.2.9 and 3.3.6).
3.18.6 The floor is sub-divided into quarters by 3 timber main beams. Two of the beams are originaland 290mm deep x 170mm wide with the floor joists tenoned in. The ceiling was originallyformed on the underside of the joists which are 120mm deep x 75mm wide @ 380mm centres.The eastern beam is a later insert presumably dating to the addition of the bay and is 175mmdeep x 340mm wide with the floor joists above bearing on top of this. A new ceiling was insertedat this time to produce a flat soffit to the ceiling below in line with the underside of the originaltimber beams. The two original timber beams are decayed at their north ends.
116 High Street, Boston, Lincolnshire 11505
REF: EJM/KLC/11505~spec and sched main works rev 3 27 July 2010
Allow to temporary support beam and then cut tenons and joist ends to allow new 203 x 76channels to be bolted alongside for 1.2m length and bolted through existing beam with 12mmdiameter bolts at 225mm staggered centres. Channels to extend onto wall to provide bearingwith allowance made to re-build brickwork locally to ensure sound bearing pad. Insert timberblocking piece into web of channels and fixed back as part of bolting through. Existing joists tobe fixed to timber with maxi speedy BAT joist hangers and 4 No 6mm coach screws.
3.18.7 The eastern main beam (deflected in its length) is also decayed at its north end, as well asbeing too shallow for its span allowing the floor considerable bounce. Allow for the 203 x 76channels alongside for full length including providing a new bearing at the north end, butfinishing 500mm short of south wall and bolted through timber beam with 12mm bolts at 350mmcentres. Allow to cut floor joists above to accommodate new channels. See drawing 11505/25and 26 Section 2-2.
[Note: it is assumed for both 3.17.6 and 3.17.7 that the ceiling in the ground floor is to remainflush, i.e. the original ceiling line on the underside of the joists is not to be re-introduced.]
3.18.8 Allow to replace 8 No floor joists against the north wall where decayed for their full length.
3.18.9 Allow to replace 8 No ceiling joists against the north wall where decayed for their full length.
3.18.10 Allow a provisional sum of £1,500 for possible strengthening of main beam where cut short andsupported on trimmer to south side where chimney position changed.
3.18.11 Allow to replace timber backing lintels over window W17 and replace with new pre-stressedconcrete lintels. Include temporary works necessary to support brickwork over.
3.18.12 Allow to replace timber backing lintels over window W18 and replace with new pre-stressedconcrete lintels. Include temporary works necessary to support brickwork over.
3.18.13 Allow to replace timber backing lintels over window W19 and replace with new pre-stressedconcrete lintels. Include temporary works necessary to support brickwork over.
3.19 Internal – Room F5
3.19.1 To west side of F5 at junction of original rear wall to south range and cross wall to north side ofF2, which appears to be added, a significant amount of brickwork has been lost. Allow to re-build end of south wall for full height of first floor and extending back for width of between 500-750mm and bonding together with rebuilt wall to east of F3 (see item 3.17.3). In re-buildingallow to bond two walls together where coursing runs true or use stainless steel frame crampsresin fixed to end of cross wall and built into joints of rear wall as work proceeds andapproximately every third course.
3.19.2 Due to work required to the main timber and steel flitch beam (item 3.18.4) allow to removeexisting flat roof between north and south range with recording as necessary beforehand andsetting aside of all materials including roof-light for inspection. Include for removal of lathe andplaster finishes to main beam to allow full inspection.
3.19.3 At west end allow to remove timber beam supporting east wall of S4 as well as associatedsupporting flat roof joist. See item 3.13. also to ensure works are integrated.
3.19.4 To main timber and iron flitch beam spanning east west directly under and supporting the southwall of the south range at second floor level, its associated roof and also floor joists allow forproviding any additional temporary support required to the undertake repair work includingpossible needling through of brickwork above. Allow to carefully remove decayed timber tosouth side of beam. Assume at least 100% of timber will require replacement. Allow for cleaningdown and paint treating iron plate. Allow for providing new 10mm thick steel plate x depth ofbeam to south side of repaired and retained timber for full length of span. Bolt through existingflitch beam to connect the new to the old with 12mm bolts at 300mm staggered centres. Repeatthis to the north side. See drawing 11505/25 and 26 Section 3-3.
116 High Street, Boston, Lincolnshire 11505
REF: EJM/KLC/11505~spec and sched main works rev 3 28 July 2010
[Note: this beam performs an important structural function and supports significant load fromabove. The intention is to essentially treat the existing or new timber as a packing element withthe strength being provided by the existing iron plate and the two new steel plates. It is thoughtthat there is sufficient room to install these without compromising the plaster when reinstated.[Note due to the length of the steel plates these will probably require craning into positioning.]
3.19.5 At west end of south side steel added plate allow to weld angle cleats to sides to providesupport to north south beam below east wall of S4 above. Allow for new beam 225mm wide x200mm deep in oak (steel could be used alternatively). New beam to bear into wall to southside and fixed to angle cleat to north side. Beam to fully support retained or re-built wall of S4above. See drawing 11505/26 Section 3-3.
3.19.6 Allow to provide new 150mm deep x 75mm wide treated softwood timber to be bolted alongsideboth north and south masonry walls at position of flat roof. Resin fix into masonry with 12mm s/sbolts at 250mm staggered centres and washers behind to space off wall. Allow to insert newtreated flat joist to roof, including trimming around roof-light with 150mm x 50mm joists at400mm centres and fixed to wall plates on galvanised joist hangers.
3.19.7 At west end of F5 allow to carefully take down existing brick pier for full height. Allow for repairof structure below (see item 3.23.2). Allow to re-build pier but increasing to 400mm (existingwidth) x 345mm wide (existing depth is 270mm).
3.19.8 Allow to cut back 4 decayed joists ends and partner alongside with lap length of 800mm and 4No 10mm staggered bolts as per detail 11505/26 Detail 1. Infill joist pockets with brick. New joistend to be supported on maxi-speedy BAT joist hanger with 4 No 6mm s/s resin fixings intomasonry. Assume decayed length of 1.2m.
3.19.9 Allow to replace 4 no joists to F5.
3.19.10 As inspection is hindered in this area allow a provisional sum of £1,500 for any additionalrepairs to the floors.
3.20 Internal – Room F6
3.20.1 Allow to carefully remove existing stud wall, providing temporary works to allow floor above untilsuch time as new first floor partitions constructed as we considfer this wall does provide somesupport to the floor even though the wall is built at first floor level off the floor structure. Allow for12mm plywood clad to both sides and to close screw to all studs, noggins, head and sole platesetc with 14g screws at 150mm centres. Ensure all edges of boards fully supported. Noggins atmax 1.2m centres in walls.
3.20.2 Allow for cutting second floor joists adjacent to party wall to allow stair case to rise. Cut ends offloor joists to be supported off joists hangers of head plate of stud partition former stairenclosure and which aligns over wall below at ground floor.
3.20.3 No structural works identified. Joists noted as 125 x 125 to west side spanning north south butchanging to 50mm x 225 at east end and spanning east west. Include a provisional sum of£1,000 for works to the floors.
3.21 Internal – Room F7
3.21.1 Allow to insert Helibar to cracks in masonry in every 3rd
course for 800mm length. Assume 12No bars in total.
3.21.2 Allow to carefully remove non-loadbearing brick partitions as shown, but retaining the section atthe south end which supports the end of the repaired east west flitch beam running along thehead of the stair landing.

116 High Street, Boston, Lincolnshire 11505
REF: EJM/KLC/11505~spec and sched main works rev 3 29 July 2010
3.21.3 To new stud partition forming F7 allow to 12mm plywood clad to both sides and to close screwto all studs, noggins, head and sole plates etc with 14g screws at 150mm centres. Ensure alledges of boards fully supported. Noggins at max 1.2m centres in walls. Allow to fix end stud intoretained brick at first floor to south end with fabricated 150mm deep x 5mm thick x 250mm legsto each wall and 4 No 10mm resin fixings into brick and 8mm coach screws into nogginsbetween studs to stud wall. Allow for 4 No in height of wall.
3.21.4 To small area to south end of F7 allow to double up east west joist and then run secondaryjoists 150mm deep x 50mm wide C16 at 400mm centres southwards to brick wall andsupported off joist hangers at either end, that to the south brick wall being fixed to wall 150mm x50mm plate fixed to wall with 12mm s/s fixings at 400mm staggered centres. If necessaryinclude noggins to allow floorboards to run through in same orientation.
3.21.5 No other structural works identified. Include a provisional sum of £1,000 for works to the floors.
3.21.6 See also works to G5 and G7.
3.22 Internal – Stair Landing as part of Room F5
3.22.1 Allow for replacement of 5 No floor joists. Include a provisional sum of £1,000 for further worksidentified including to the window seat.
3.23 Internal – Room G1
3.23.1 Allow to replace 4 No modern decayed joists ends to south elevation (180mm deep x 50mmwide), length 2.2m. To bear onto existing support to north side and maxi-speedy BAT joisthanger to south side with 4 No 6mm s/s resin fixings into masonry.
3.23.2 For works to old doorway to south elevation see item 3.2.5 and 3.2.6.
3.23.3 Allow to remove decayed timber lintel over door to G2 and replace with new treated timberlintel. Allow for 3 No new treated 80mm deep x 50mm wide studs to wall in this position.
3.23.4 See item 3.2.2 for pinning of chimney. In addition allow to carefully remove panelling, markingand setting aside of re-use. Include a provisional sum of £750 for further brick repairs whenchimney exposed.
3.23.5 The floorboards are built into the east and west walls and decayed. Allow to remove on apiecemeal basis in short lengths and for driving slate into joint on a hit and miss basis (gaps of250mm) and then carefully and deep re-pointing both around the slate but also between toensure that brickwork above has full bearing.
3.24 Internal – Room G2
3.24.1 No structural works identified at the west end.
3.24.2 At the doorways into G3 and G5 the lintels are completely decayed and have compromised thestructural support to the stricture above, in particular the pier in F5 (see item 3.18.7). Allow toprovide any additional temporary support required to undertake the works. Allow to re-buildreveals of doorway to G3 and to re-build entire pier of masonry between door to G3 and door toG5. Provide new pre-stressed concrete lintel over doorways. Bond to existing brickworkalongside.
3.24.3 Allow to re-build brick circular window into G5 including structural door frame to resist thrust.Allow for frame to comprise 200 x 125 deep vertical and lintel over with the verticals pinned intowall/pier with 8mm s/s threaded rods set in resin at 350mm vertical staggered centres,excluding area of circular window. Retain brickwork below but removing timber bondingmembers and infilling with brickwork.

116 High Street, Boston, Lincolnshire 11505
REF: EJM/KLC/11505~spec and sched main works rev 3 30 July 2010
3.24.4 Above opening into G5 and also above arched window allow to carefully take down brickworkensuring all necessary support provided to floor joists etc over. Allow to provide new 225mmwide x 200mm deep oak lintel spanning between re-built pier to west and existing pier to east.Re-build brickwork over to underside of floor.
3.25 Internal – Room G3
3.25.1 Allow to insert Helibar to south face of chimney in every 3rd
course for 1000mm length wherecracked.
3.25.2 The floor is largely missing to the west side, although the spine beam spanning east westsurvives and appears sound at its west end. Allow to provide new 150mm deep x 75mm treatedsoftwood joists at 380mm centres to replace missing floor. To north and south wall allow toprovide new 150mm deep x 75mm wide treated softwood timber to be bolted alongside bothnorth and south masonry walls at position of floor. Resin fix into masonry with 12mm s/s bolts at250mm staggered centres. Include for local re-building of head of south wall where loose over4-6 courses.
3.25.3 To base of east wall, which is of brick with narrow timber studs, the timbers have decayed.Allow to carefully remove timbers and splice in new including re-setting of disturbed brickwork toensure this is all tight.
3.25.4 Allow to replace 6 No joist to east end of room to north side over cellar passage with 150mmdeep x 75mm treated softwood joists at 380mm centres. Provide new 150mm deep x 75mmwide treated softwood timber to be bolted alongside north masonry walls at position of floor.Resin fix into masonry with 12mm s/s bolts at 250mm staggered centres.
3.26 Internal – Room G4
3.26.1 There are many positions around the room and at different heights where bonding timbers havebeen built in, but decayed. Allow to remove any in-built timbers and then infill all voids with newbrickwork in a piecemeal manner, removing existing timbers as work proceeds. Include in thiswork for removing decayed old door frame members to north wall including removing localbrickwork to allow full bonding. Record prior to work being undertaken.
3.26.2 Allow to replace lintel over doorway to G2 where decayed with new pre-stressed concrete lintel.Include for making good distorted brickwork over including bonding to existing. Include for alltemporary works necessary.
3.26.3 To straight joints in north wall allow to insert Helibar every 5th
course to unite the differentphases of construction. Note courses will need to be chosen where they run through.
3.26.4 T150mm deep x 75mm wide treated softwood timber to be bolted alongside both north andsouth masonry walls at position of floor. Resin fix into masonry with 12mm s/s bolts at 250mmstaggered centres. To east side assume that the existing added structure will be removedincluding steel beams etc. A careful methodology will be required for the support of the structureover whilst the steel is removed. The timber beams below the first floor structure are partiallydecayed. Subject to the design of the ground floor of the bay allowance should be made for newdeep pre-stressed lintels over any openings.
3.26.5 Allow for new 750mm wide mass concrete foundation for re-built bay as 11505/20.
3.27 Internal – Room G5
3.27.1 Allow to replace lintel over doorway to G8 where decayed with treated softwood lintel.
3.27.2 Full inspection is impeded by scaffold and temporary support. Allow a provisional sum of £750for any additional structural work required.
3.27.3 Allow to re-build corner of pier to east side of opening with new lintel over (refer to 3.24.4 also).

116 High Street, Boston, Lincolnshire 11505
REF: EJM/KLC/11505~spec and sched main works rev 3 31 July 2010
3.28 Internal – Room G6
3.28.1 There are 2 decayed timber and iron flitch beams which are decayed supporting structure over.Allow to replace the south beam between external wall and internal pier at corner of G5 withnew steel lintel 152 x 152 x 23kg supporting brick wall over with 150mm deep x 225mm long x225mm wide concrete padstones. Include for associated temporary works and making good toretained brickwork over.
3.28.2 Allow to carefully remove brick partitions as shown between G5 and G7. Allow for all temporarysupport to floor structure over.
3.28.3 Allow for new timber flitch beam (2 No 275mm deep x 100mm wide SC24 with 15mm plate) towest of G6 which will support new stair landing/ceiling joists running to the west to the externalwall line. These floor joists will be set out to support the stair quarter landing and with nogginsbetween to allow the boards to be re-laid in the direction to match existing. New floor joists to be175mm deep x 50mm wide C24 at 400mm centres. Existing upper joists to north side to bedoubled up under timber partitions over where these extend east west. Allow for new 200 x 200timber post SC4 to north end of flitch beam supported on 600mm
2concrete pad foundation,
assume 600mm deep with engineering brick pier 215 x 215 rising up 2 course above floor level.Post to have 12mm resin or screw fixings into wall behind, dependent on if brick noggin ortimber stud position, carefully drilled to provide lateral stability and at 450mm vertical staggeredcentres.
3.28.4 See also item 3.21.
3.28.5 Allow to replace timber backing lintel over window W9 and replace with new pre-stressedconcrete lintel.
3.28.6 Allow to replace timber backing lintel over rear door and replace with new pre-stressed concretelintel.
3.29 Internal – Room G7
3.29.1 No structural works identified. Include provisional sum for concealed structural works in the sumof £500.
3.30 Internal – Room G8
3.30.1 No structural works identified. Include provisional sum for concealed structural works in the sumof £1,000.
3.31 Internal – Room B1
3.31.1 Allow for removal of inbuilt timbers to reveal of window to south elevation and brick infill.
3.31.2 To south end of one of the main timber beam spanning east west, allow to temporary supportbeam and insert new 203 x 76 channels to be bolted alongside for 1.2m length and boltedthrough existing beam with 12mm diameter bolts at 225mm staggered centres. Channels toextend onto wall to provide bearing with allowance made to re-build brickwork locally to ensuresound bearing pad.
3.31.3 Provisionally allow to build up 2 No 9” x 9” brick piers off new 250mm deep x 1.0m2
concretefoundations set below floor finishes so that these can be re-laid. Include for pump duringexcavation to remove any ground water.
3.31.4 Where timber lintels missing to end of southern main beam allow to locally re-build reveals ofopening and then insert 2 No 225mm deep x 100mm wide pre-stressed lintels and set to ensuremain beam end fully supported.
3.31.5 Allow provisionally to repeat the above to one other beam end.

116 High Street, Boston, Lincolnshire 11505
REF: EJM/KLC/11505~spec and sched main works rev 3 32 July 2010
3.31.6 Allow to remove short iron RSJ and make good brickwork.
3.31.7 Allow for removal of any further in-built timbers and replace with either brickwork or pre-stressedconcrete lintels.
3.31.8 Include provisional sum of £1,500 for additional brick repairs.
3.32 Internal – Room B2
3.32.1 Allow for removal of any further in-built timbers and replace with either brickwork or pre-stressedconcrete lintels.
3.32.2 Allow to remove decayed timber lintel between B2 and B3 and replace with new pre-stressedlintel.
3.32.3 Include provisional sum of £500 for additional brick repairs.
3.33 Internal – Room B3
3.33.1 No structural works identified other than those highlighted form G3 – see item 3.25.
3.34 Completion
3.34.1 On completion of structural works or as work proceeds allow to remove all existing scaffold andtemporary works and store on site for removal by others.

116 High Street, Boston, Lincolnshire 11505
REF: EJM/KLC/11505~spec and sched main works rev 3 July 2010
APPENDIX A
Drawings

116 High Street, Boston, Lincolnshire 11505
REF: EJM/KLC/11505~spec and sched main works rev 3 July 2010
APPENDIX B
Risk Assessments