Embed Size (px)
Citation preview
© Copyright 2018-2020 Gary Reighn pg. 1
Space City Buildings from Fireball XL5 April 2020
By Gary Reighn
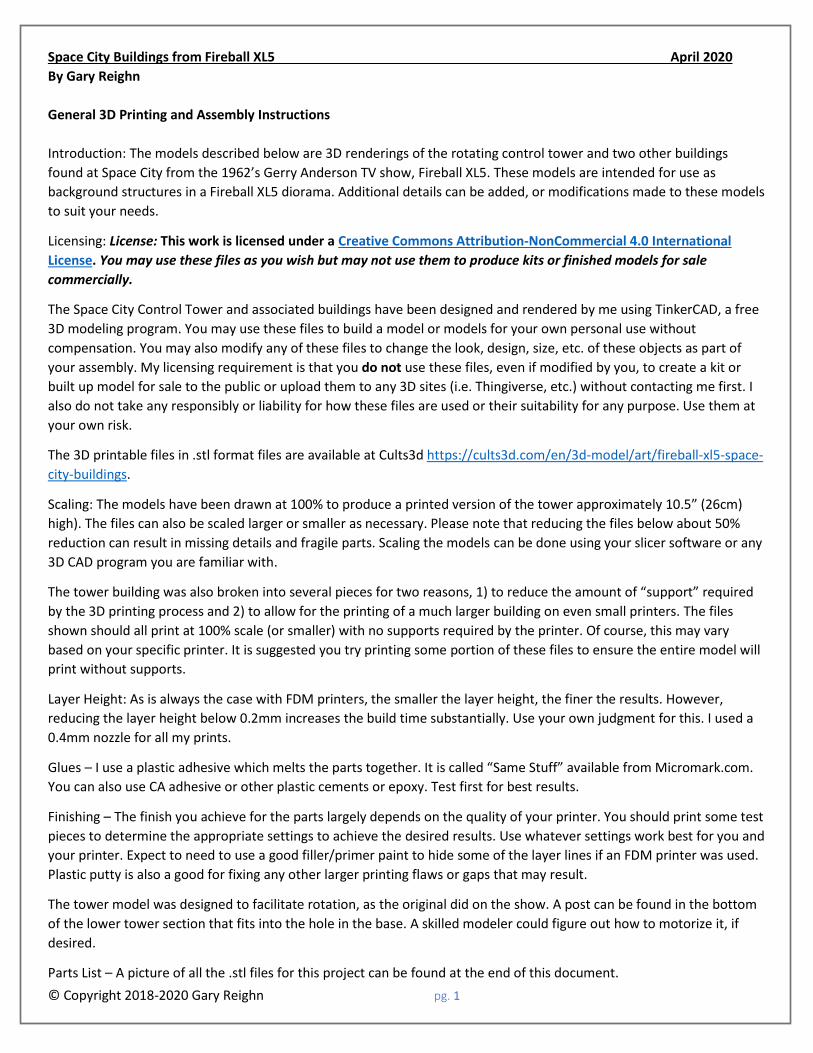
General 3D Printing and Assembly Instructions
Introduction: The models described below are 3D renderings of the rotating control tower and two other buildings
found at Space City from the 1962’s Gerry Anderson TV show, Fireball XL5. These models are intended for use as
background structures in a Fireball XL5 diorama. Additional details can be added, or modifications made to these models
to suit your needs.
Licensing: License: This work is licensed under a Creative Commons Attribution-NonCommercial 4.0 International
License. You may use these files as you wish but may not use them to produce kits or finished models for sale
commercially.
The Space City Control Tower and associated buildings have been designed and rendered by me using TinkerCAD, a free
3D modeling program. You may use these files to build a model or models for your own personal use without
compensation. You may also modify any of these files to change the look, design, size, etc. of these objects as part of
your assembly. My licensing requirement is that you do not use these files, even if modified by you, to create a kit or
built up model for sale to the public or upload them to any 3D sites (i.e. Thingiverse, etc.) without contacting me first. I
also do not take any responsibly or liability for how these files are used or their suitability for any purpose. Use them at
your own risk.
The 3D printable files in .stl format files are available at Cults3d https://cults3d.com/en/3d-model/art/fireball-xl5-space-
city-buildings.
Scaling: The models have been drawn at 100% to produce a printed version of the tower approximately 10.5” (26cm)
high). The files can also be scaled larger or smaller as necessary. Please note that reducing the files below about 50%
reduction can result in missing details and fragile parts. Scaling the models can be done using your slicer software or any
3D CAD program you are familiar with.
The tower building was also broken into several pieces for two reasons, 1) to reduce the amount of “support” required
by the 3D printing process and 2) to allow for the printing of a much larger building on even small printers. The files
shown should all print at 100% scale (or smaller) with no supports required by the printer. Of course, this may vary
based on your specific printer. It is suggested you try printing some portion of these files to ensure the entire model will
print without supports.
Layer Height: As is always the case with FDM printers, the smaller the layer height, the finer the results. However,
reducing the layer height below 0.2mm increases the build time substantially. Use your own judgment for this. I used a
0.4mm nozzle for all my prints.
Glues – I use a plastic adhesive which melts the parts together. It is called “Same Stuff” available from Micromark.com.
You can also use CA adhesive or other plastic cements or epoxy. Test first for best results.
Finishing – The finish you achieve for the parts largely depends on the quality of your printer. You should print some test
pieces to determine the appropriate settings to achieve the desired results. Use whatever settings work best for you and
your printer. Expect to need to use a good filler/primer paint to hide some of the layer lines if an FDM printer was used.
Plastic putty is also a good for fixing any other larger printing flaws or gaps that may result.
The tower model was designed to facilitate rotation, as the original did on the show. A post can be found in the bottom
of the lower tower section that fits into the hole in the base. A skilled modeler could figure out how to motorize it, if
desired.
Parts List – A picture of all the .stl files for this project can be found at the end of this document.
© Copyright 2018-2020 Gary Reighn pg. 2
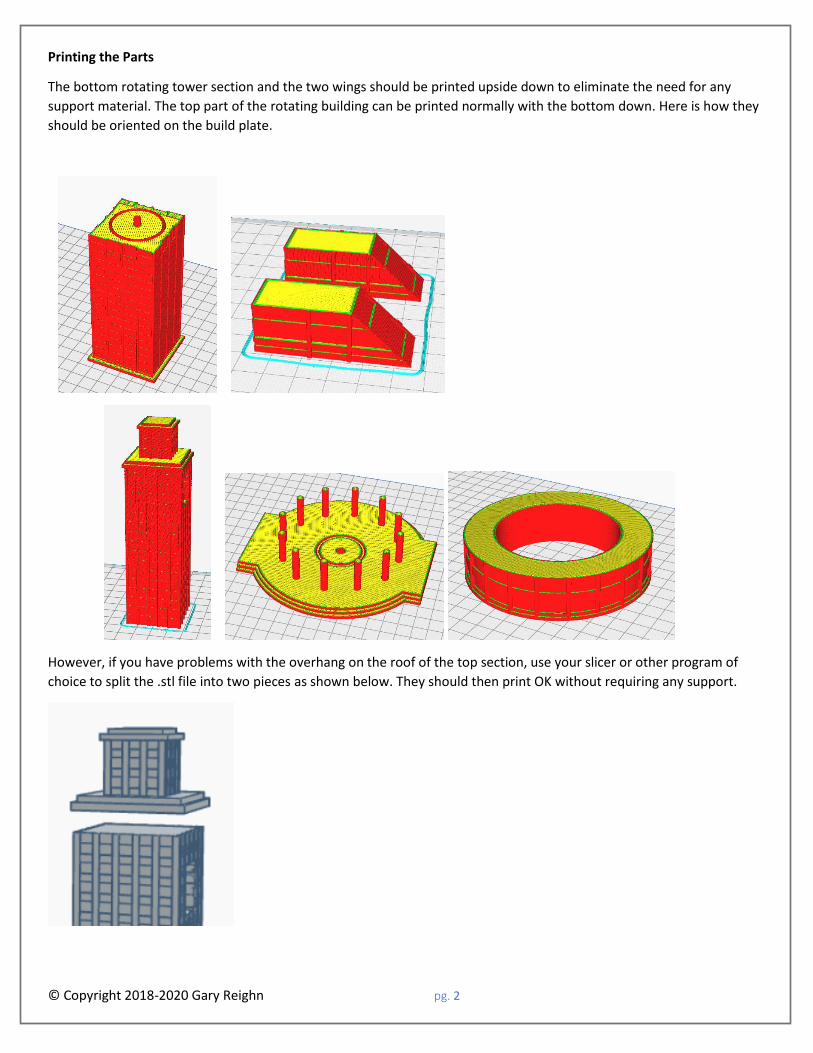
Printing the Parts
The bottom rotating tower section and the two wings should be printed upside down to eliminate the need for any
support material. The top part of the rotating building can be printed normally with the bottom down. Here is how they
should be oriented on the build plate.
However, if you have problems with the overhang on the roof of the top section, use your slicer or other program of
choice to split the .stl file into two pieces as shown below. They should then print OK without requiring any support.
© Copyright 2018-2020 Gary Reighn pg. 3
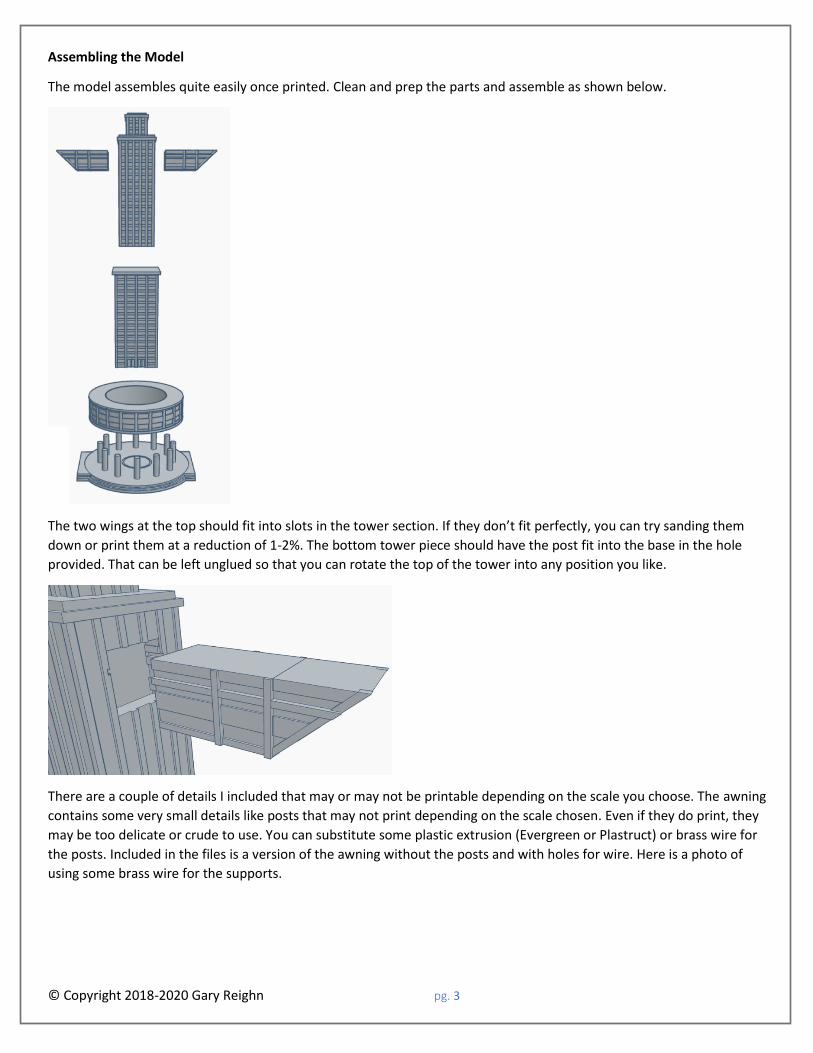
Assembling the Model
The model assembles quite easily once printed. Clean and prep the parts and assemble as shown below.
The two wings at the top should fit into slots in the tower section. If they don’t fit perfectly, you can try sanding them
down or print them at a reduction of 1-2%. The bottom tower piece should have the post fit into the base in the hole
provided. That can be left unglued so that you can rotate the top of the tower into any position you like.
There are a couple of details I included that may or may not be printable depending on the scale you choose. The awning
contains some very small details like posts that may not print depending on the scale chosen. Even if they do print, they
may be too delicate or crude to use. You can substitute some plastic extrusion (Evergreen or Plastruct) or brass wire for
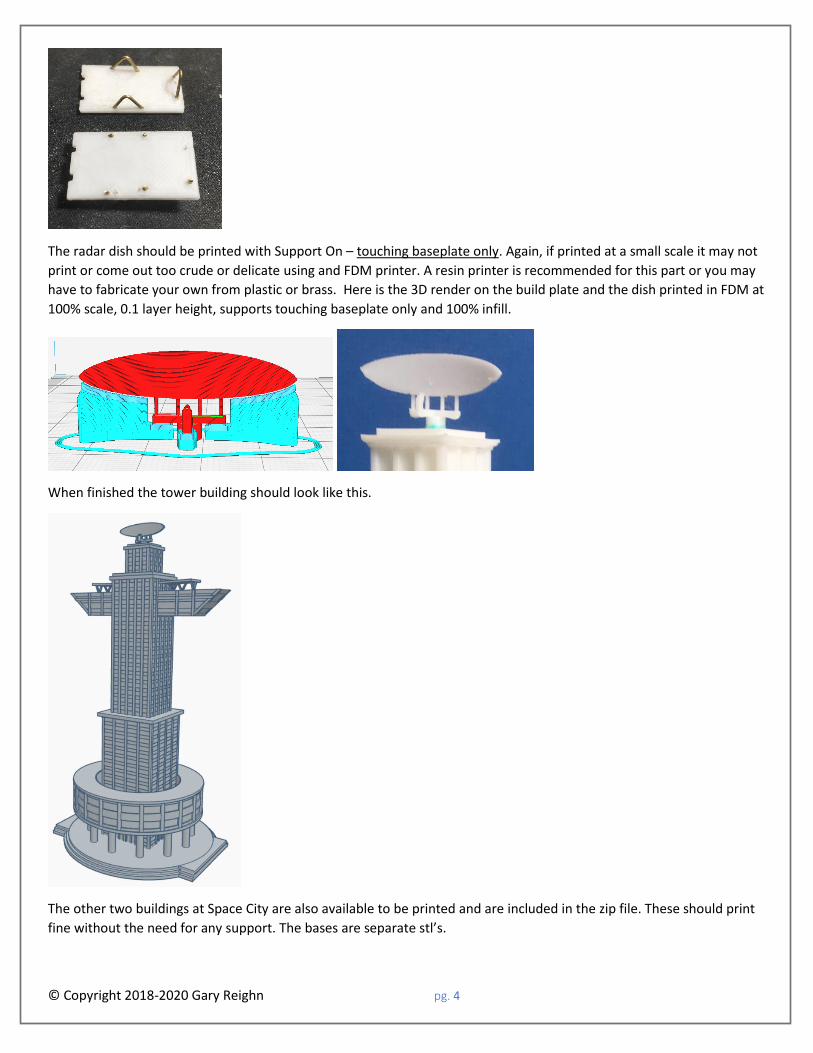
the posts. Included in the files is a version of the awning without the posts and with holes for wire. Here is a photo of
using some brass wire for the supports.
© Copyright 2018-2020 Gary Reighn pg. 4
The radar dish should be printed with Support On – touching baseplate only. Again, if printed at a small scale it may not
print or come out too crude or delicate using and FDM printer. A resin printer is recommended for this part or you may
have to fabricate your own from plastic or brass. Here is the 3D render on the build plate and the dish printed in FDM at
100% scale, 0.1 layer height, supports touching baseplate only and 100% infill.
When finished the tower building should look like this.
The other two buildings at Space City are also available to be printed and are included in the zip file. These should print
fine without the need for any support. The bases are separate stl’s.

© Copyright 2018-2020 Gary Reighn pg. 5
The entire complex should look like this when assembled:
And this completes the build. Enjoy!
© Copyright 2018-2020 Gary Reighn pg. 6
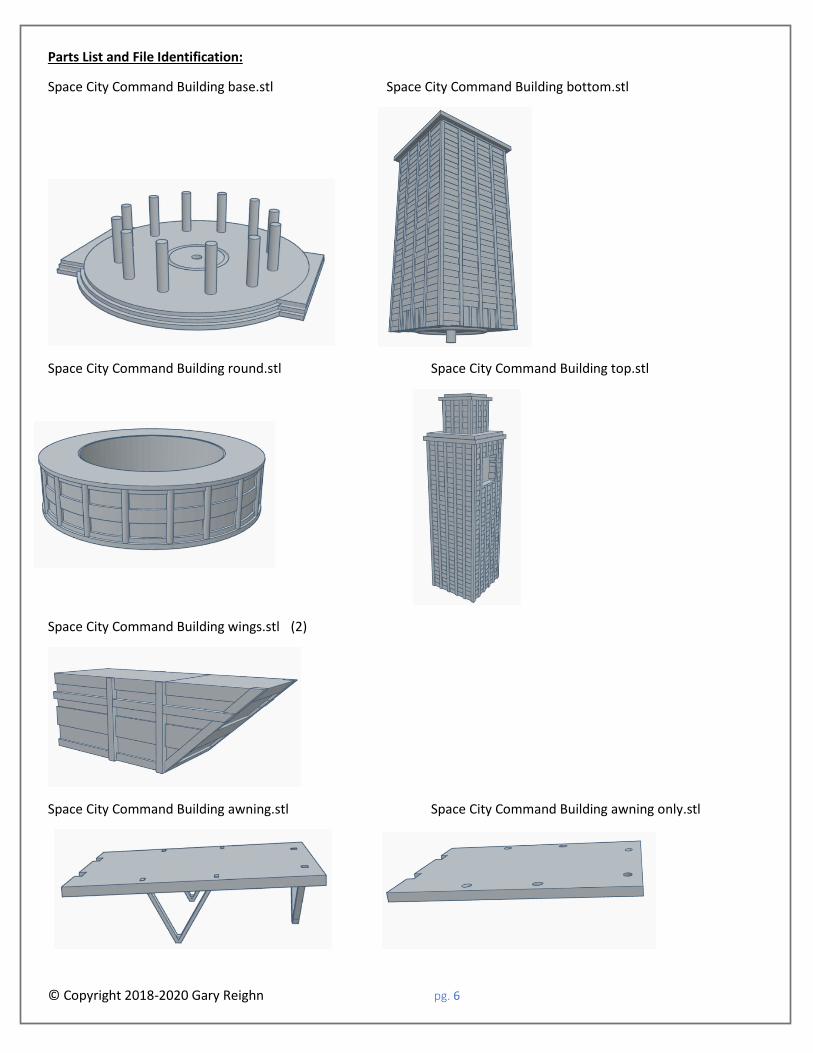
Parts List and File Identification:
Space City Command Building base.stl Space City Command Building bottom.stl
Space City Command Building round.stl Space City Command Building top.stl
Space City Command Building wings.stl (2)
Space City Command Building awning.stl Space City Command Building awning only.stl
© Copyright 2018-2020 Gary Reighn pg. 7
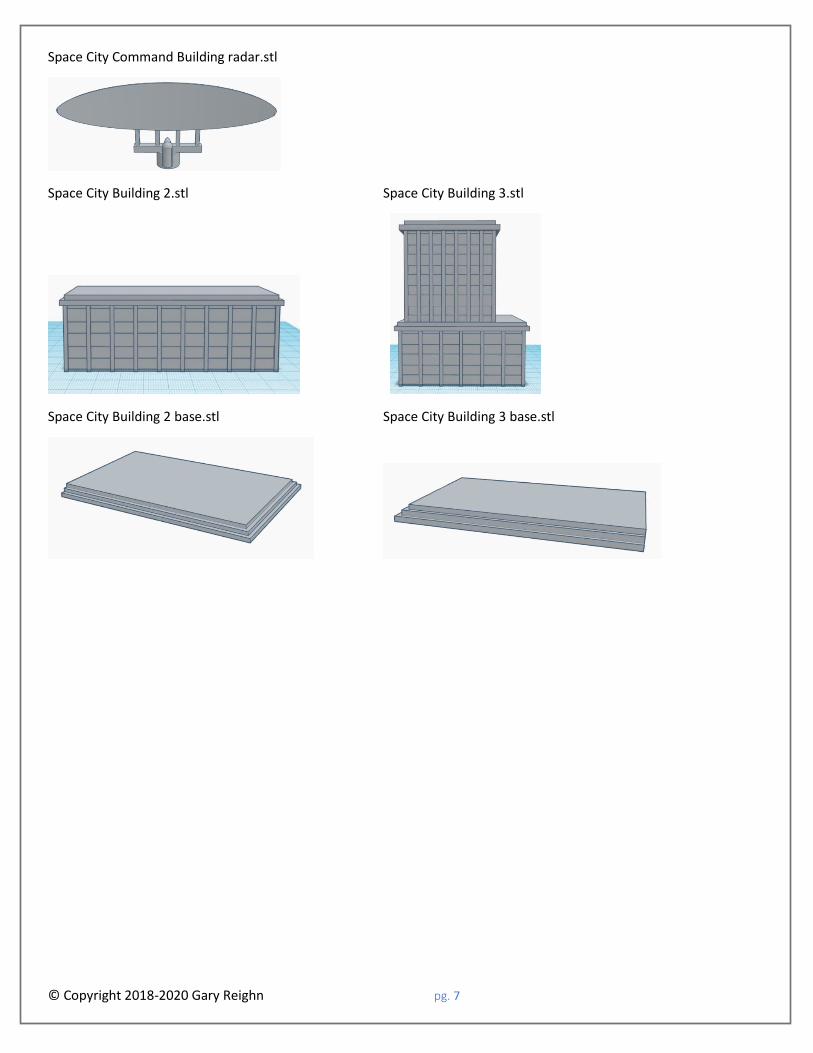
Space City Command Building radar.stl
Space City Building 2.stl Space City Building 3.stl
Space City Building 2 base.stl Space City Building 3 base.stl