Embed Size (px)
Citation preview
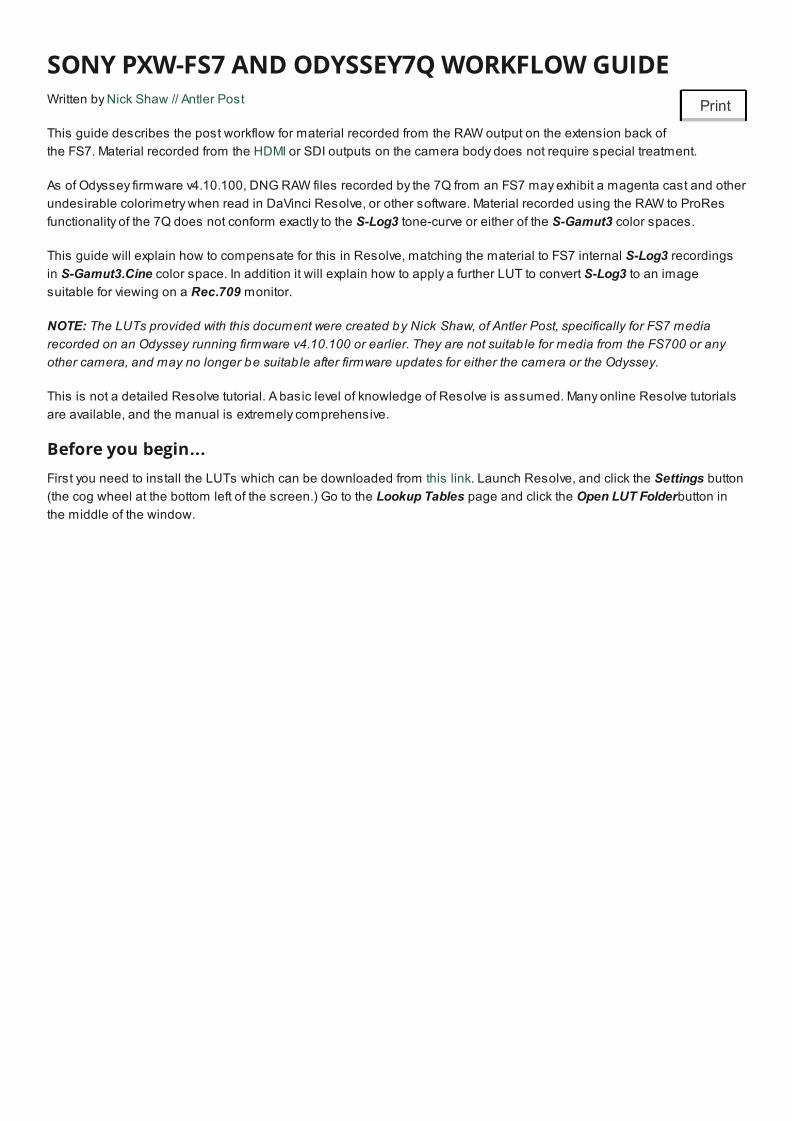
SONY PXW-FS7 AND ODYSSEY7Q WORKFLOW GUIDEWritten by Nick Shaw // Antler Post
This guide describes the post workflow for material recorded from the RAW output on the extension back ofthe FS7. Material recorded from the HDMI or SDI outputs on the camera body does not require special treatment.
As of Odyssey firmware v4.10.100, DNG RAW files recorded by the 7Q from an FS7 may exhibit a magenta cast and otherundesirable colorimetry when read in DaVinci Resolve, or other software. Material recorded using the RAW to ProResfunctionality of the 7Q does not conform exactly to the SLog3 tonecurve or either of the SGamut3 color spaces.
This guide will explain how to compensate for this in Resolve, matching the material to FS7 internal SLog3 recordingsin SGamut3.Cine color space. In addition it will explain how to apply a further LUT to convert SLog3 to an imagesuitable for viewing on a Rec.709 monitor.
NOTE: The LUTs provided with this document were created by Nick Shaw, of Antler Post, specifically for FS7 mediarecorded on an Odyssey running firmware v4.10.100 or earlier. They are not suitab le for media from the FS700 or anyother camera, and may no longer be suitab le after firmware updates for either the camera or the Odyssey.
This is not a detailed Resolve tutorial. A basic level of knowledge of Resolve is assumed. Many online Resolve tutorialsare available, and the manual is extremely comprehensive.
Before you begin...First you need to install the LUTs which can be downloaded from this link. Launch Resolve, and click the Settings button(the cog wheel at the bottom left of the screen.) Go to the Lookup Tables page and click the Open LUT Folderbutton inthe middle of the window.
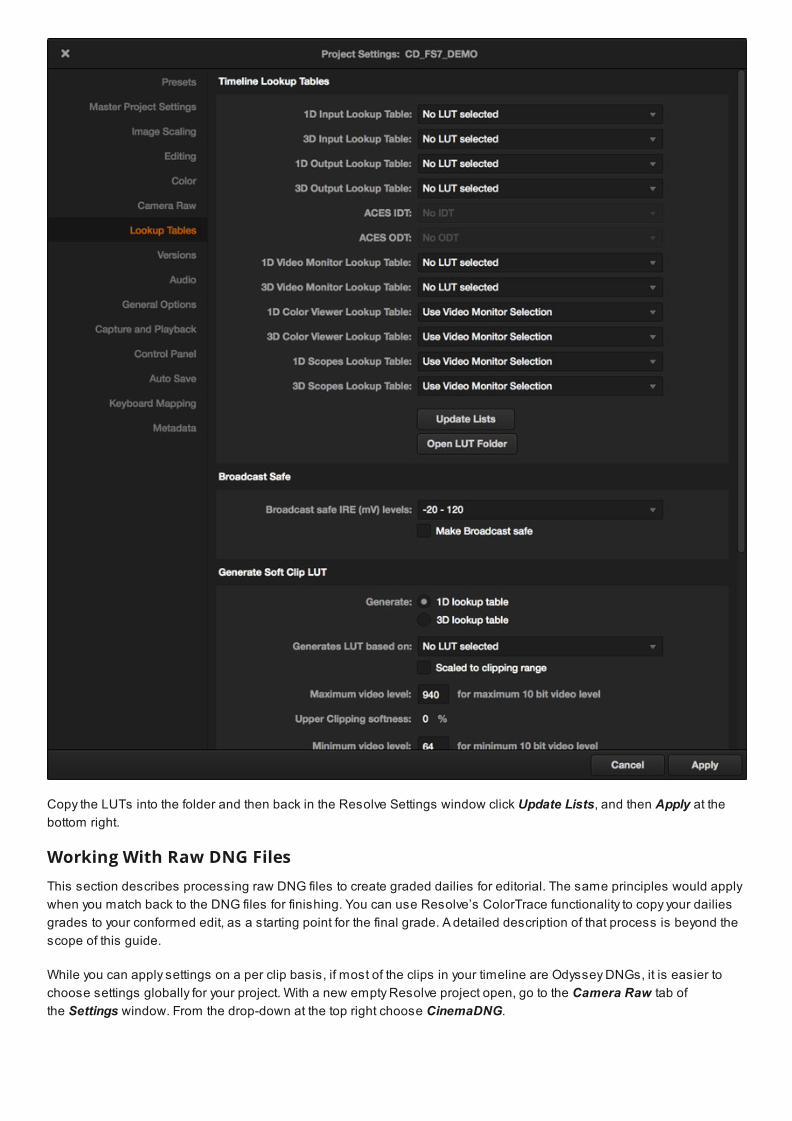
Copy the LUTs into the folder and then back in the Resolve Settings window click Update Lists, and then Apply at thebottom right.
Working With Raw DNG FilesThis section describes processing raw DNG files to create graded dailies for editorial. The same principles would applywhen you match back to the DNG files for finishing. You can use Resolve’s ColorTrace functionality to copy your dailiesgrades to your conformed edit, as a starting point for the final grade. A detailed description of that process is beyond thescope of this guide.
While you can apply settings on a per clip basis, if most of the clips in your timeline are Odyssey DNGs, it is easier tochoose settings globally for your project. With a new empty Resolve project open, go to the Camera Raw tab ofthe Settings window. From the dropdown at the top right choose CinemaDNG.
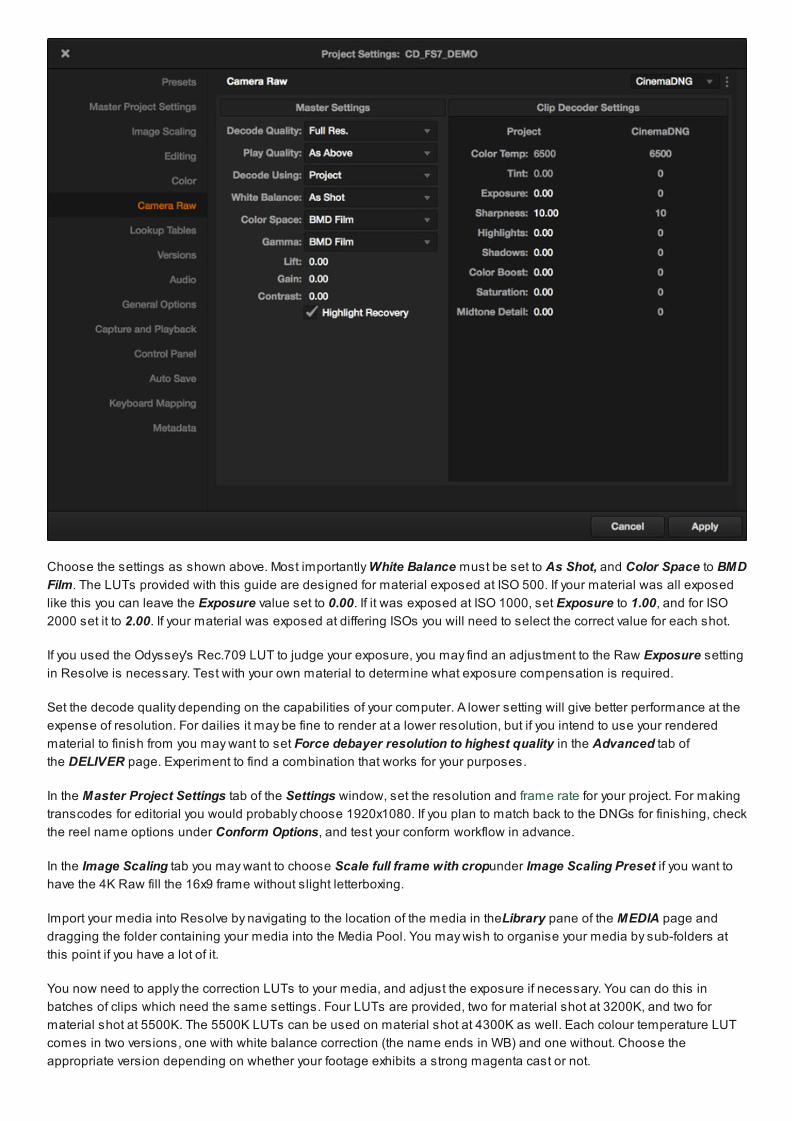
Choose the settings as shown above. Most importantly White Balance must be set to As Shot, and Color Space to BMDFilm. The LUTs provided with this guide are designed for material exposed at ISO 500. If your material was all exposedlike this you can leave the Exposure value set to 0.00. If it was exposed at ISO 1000, set Exposure to 1.00, and for ISO2000 set it to 2.00. If your material was exposed at differing ISOs you will need to select the correct value for each shot.
If you used the Odyssey's Rec.709 LUT to judge your exposure, you may find an adjustment to the Raw Exposure settingin Resolve is necessary. Test with your own material to determine what exposure compensation is required.
Set the decode quality depending on the capabilities of your computer. A lower setting will give better performance at theexpense of resolution. For dailies it may be fine to render at a lower resolution, but if you intend to use your renderedmaterial to finish from you may want to set Force debayer resolution to highest quality in the Advanced tab ofthe DELIVER page. Experiment to find a combination that works for your purposes.
In the Master Project Settings tab of the Settings window, set the resolution and frame rate for your project. For makingtranscodes for editorial you would probably choose 1920x1080. If you plan to match back to the DNGs for finishing, checkthe reel name options under Conform Options, and test your conform workflow in advance.
In the Image Scaling tab you may want to choose Scale full frame with cropunder Image Scaling Preset if you want tohave the 4K Raw fill the 16x9 frame without slight letterboxing.
Import your media into Resolve by navigating to the location of the media in theLibrary pane of the MEDIA page anddragging the folder containing your media into the Media Pool. You may wish to organise your media by subfolders atthis point if you have a lot of it.
You now need to apply the correction LUTs to your media, and adjust the exposure if necessary. You can do this inbatches of clips which need the same settings. Four LUTs are provided, two for material shot at 3200K, and two formaterial shot at 5500K. The 5500K LUTs can be used on material shot at 4300K as well. Each colour temperature LUTcomes in two versions, one with white balance correction (the name ends in WB) and one without. Choose theappropriate version depending on whether your footage exhibits a strong magenta cast or not.
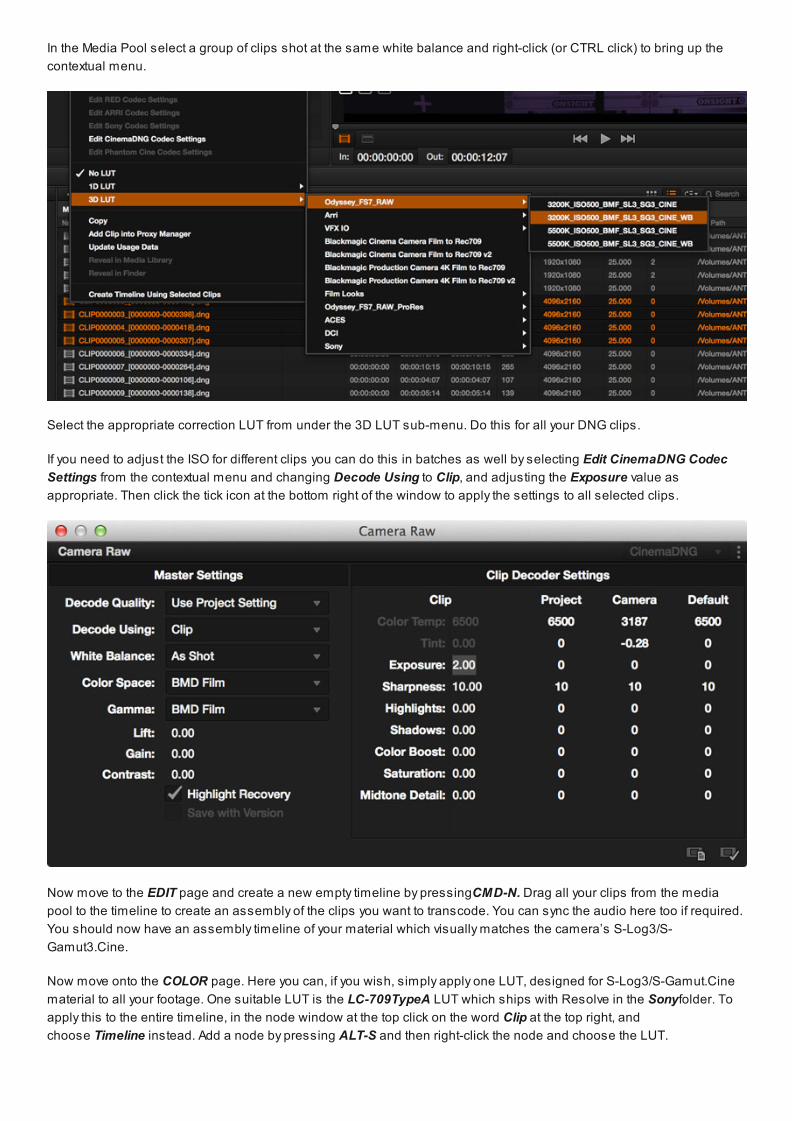
In the Media Pool select a group of clips shot at the same white balance and rightclick (or CTRL click) to bring up thecontextual menu.
Select the appropriate correction LUT from under the 3D LUT submenu. Do this for all your DNG clips.
If you need to adjust the ISO for different clips you can do this in batches as well by selecting Edit CinemaDNG CodecSettings from the contextual menu and changing Decode Using to Clip, and adjusting the Exposure value asappropriate. Then click the tick icon at the bottom right of the window to apply the settings to all selected clips.
Now move to the EDIT page and create a new empty timeline by pressingCMDN. Drag all your clips from the mediapool to the timeline to create an assembly of the clips you want to transcode. You can sync the audio here too if required.You should now have an assembly timeline of your material which visually matches the camera’s SLog3/SGamut3.Cine.
Now move onto the COLOR page. Here you can, if you wish, simply apply one LUT, designed for SLog3/SGamut.Cinematerial to all your footage. One suitable LUT is the LC709TypeA LUT which ships with Resolve in the Sonyfolder. Toapply this to the entire timeline, in the node window at the top click on the word Clip at the top right, andchoose Timeline instead. Add a node by pressing ALTS and then rightclick the node and choose the LUT.
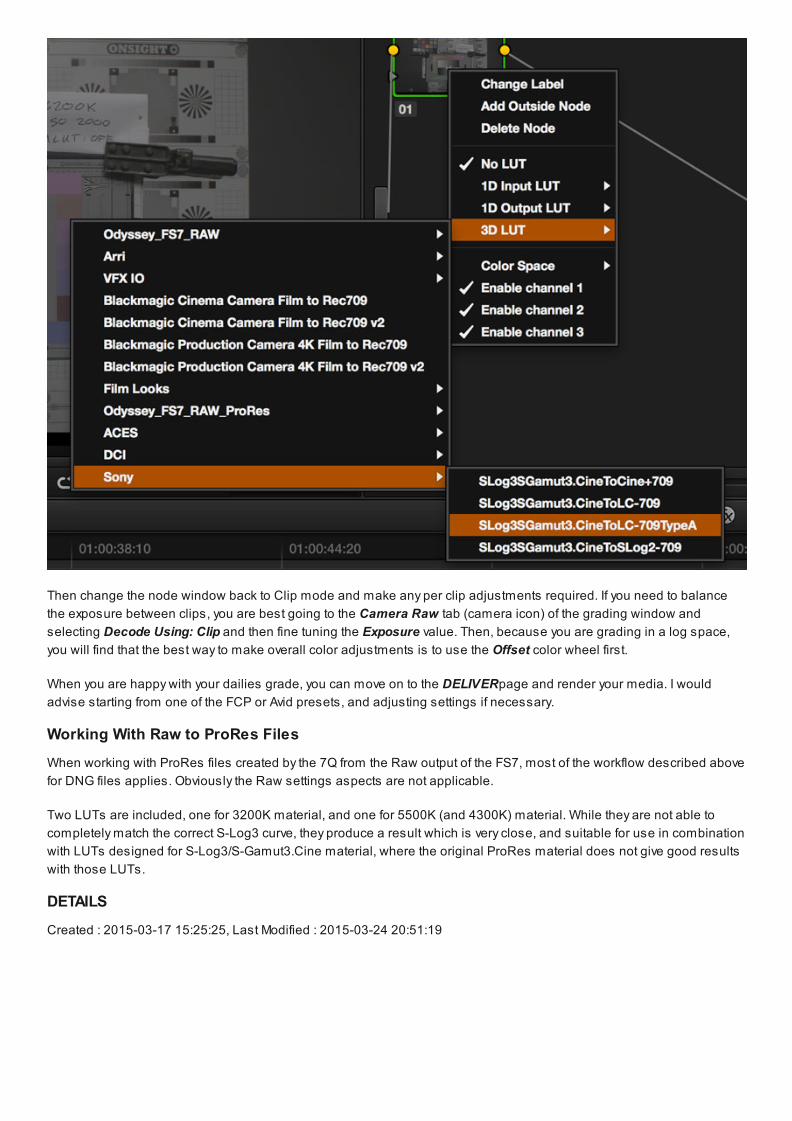
Then change the node window back to Clip mode and make any per clip adjustments required. If you need to balancethe exposure between clips, you are best going to the Camera Raw tab (camera icon) of the grading window andselecting Decode Using: Clip and then fine tuning the Exposure value. Then, because you are grading in a log space,you will find that the best way to make overall color adjustments is to use the Offset color wheel first.
When you are happy with your dailies grade, you can move on to the DELIVERpage and render your media. I wouldadvise starting from one of the FCP or Avid presets, and adjusting settings if necessary.
Working With Raw to ProRes Files
When working with ProRes files created by the 7Q from the Raw output of the FS7, most of the workflow described abovefor DNG files applies. Obviously the Raw settings aspects are not applicable.
Two LUTs are included, one for 3200K material, and one for 5500K (and 4300K) material. While they are not able tocompletely match the correct SLog3 curve, they produce a result which is very close, and suitable for use in combinationwith LUTs designed for SLog3/SGamut3.Cine material, where the original ProRes material does not give good resultswith those LUTs.
DETAILS
Created : 20150317 15:25:25, Last Modified : 20150324 20:51:19