Embed Size (px)
Citation preview

Solutions for California Title 24

Title 24 Envelope Highlights
Envelope HighlightsMandatory Measures §150.0There are several new thresholds for mandatory enveloperequirements including:• Ceiling/Roof insulation maximum = 0.043 U-factor (R-22 wood framing)
Prescriptive High Performance Walls §150.1In Climate Zones 1-5 & 8-16, above grade framed wallassemblies must not exceed a maximum U-factor of 0.051:• 2x6 @ 16” OC framing—R19 cavity + R5 continuous• 2x4 @ 16” OC framing—R15 cavity + R8 continuousIn Climate Zones 6 & 7, the maximum U-Factor is 0.065
Prescriptive High Performance Attics §150.1There are three options that may be used to comply:• Option A: Ducts and air handler may be locatedin the attic– Install attic radiant barrier (Zones 2-15)– Install R-38 insulation at ceiling (R-30 in zones 3 & 5-7)– Install continuous roof deck insulation (Zones 4 & 8-16)• R-6 with air space above insulation/ R-8with no space

Rmax Solutions
A complete line of insulation solutionsTo help meet Title 24 requirements.
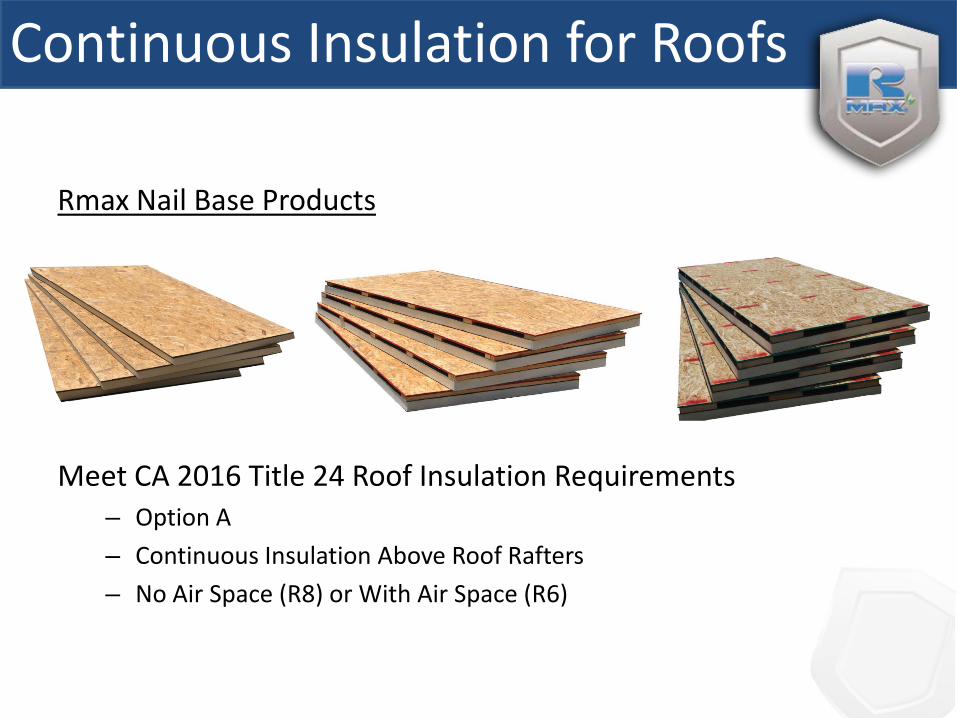
Rmax Nail Base Products
Meet CA 2016 Title 24 Roof Insulation Requirements– Option A– Continuous Insulation Above Roof Rafters– No Air Space (R8) or With Air Space (R6)
Continuous Insulation for Roofs

Composite Panel – 7/16” OSB, Vent Space, Polyiso Foam Insulation
• 1”, 1.5” or 2” vent space based on length of run
• On-line calculators such as www.metalera.com
• Net free area per linear foot
Vented Nailable Base w/ T24 Chart
Climate Zone
1 2 3 4 5 6 7 8 9 10 11 12 13 14 15 16
Build
ing
Enve
lope
In
sula
tion:
Ro
ofs/
Ceili
ngs
Opt
ion
A
Cont
inuo
us In
sula
tion
Abov
e Ro
of R
afte
r
Roof
Typ
e No
Air
Spac
e
NR NR NR R8 NR NR NR R8 R8 R8 R8 R8 R8 R8 R8 R8
With
Air
Spac
e
NR NR NR R6 NR NR NR R6 R6 R6 R6 R6 R6 R6 R6 R6
TABLE 150.1-A COMPONENT PACKAGE-A STANDARD BUILDING DESIGN Title 24
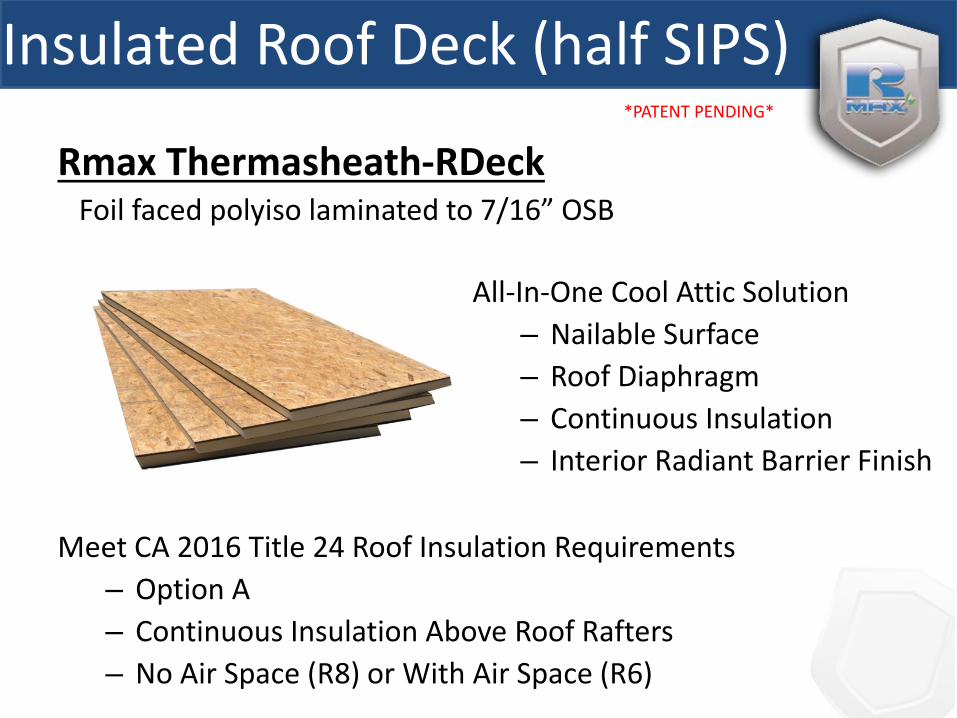
Rmax Thermasheath-RDeckFoil faced polyiso laminated to 7/16” OSB
Meet CA 2016 Title 24 Roof Insulation Requirements– Option A– Continuous Insulation Above Roof Rafters– No Air Space (R8) or With Air Space (R6)
Insulated Roof Deck (half SIPS)
All-In-One Cool Attic Solution– Nailable Surface– Roof Diaphragm– Continuous Insulation– Interior Radiant Barrier Finish
*PATENT PENDING*

• Nail Board Fasteners
• Engineering Document Sealed by PE– SDPWS, Section 4.2 Tables– Nominal unit shear
capacities for blocked and unblocked diaphragms
– Fastener capacity tables
RDeck Installation
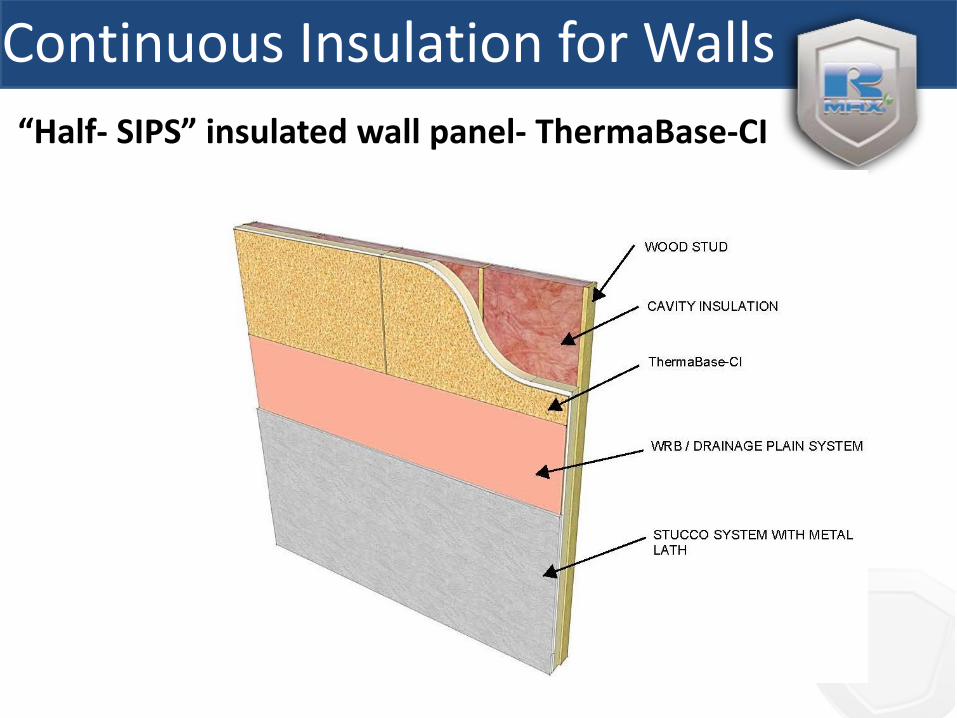
Continuous Insulation for Walls “Half- SIPS” insulated wall panel- ThermaBase-CI

ThermaBase-CIFastening Chart for ThermaBase

Structural Bracing• Install continuously across the wall to
simplify design
• Install as a braced wall panel with Thermasheath-3 to optimize design costs
• Eliminates the need for heavy OSB sheathing
• Decrease time and costs associated with materials and labor
Continuous Insulation (c.i.)
• Polyiso has the highest R/inch of any foam plastic insulation
• Eliminates thermal bridging
• Allows you to meet or exceed energy code requirements
• Lowers energy consumption and energy bills
Air Barrier• Prevent air infiltration
• Keeps the home comfortable
• Makes your HVAC systems run more efficient
Water Barrier• Eliminates the need for house wrap or felt
• Resists water intrusion and moisture migration
• Defends against the growth of mold and mildew
4-in-1 Approach:One Building Product to Complete the Envelope
2 2
2
3 3
3
44
4
4
1
1 3
R-SEAL Construction Tape

Recommended Zones
Installation Step 1: Measuring and Cutting
Wind Zones: • Use prescriptively in wind zones
≤110 mph • Use in higher wind zones requires
an engineered design
Wind Loading Seismic Loading
Seismic Zones: • Use prescriptively in seismic
design categories/regions − A, B and C− Do, D1 and D2
NOTE: With ½” gypsum applied to interior. Adjustment factor needed when there is no interior gypsum. Refer to TER 1207-01 for full details.

Recommended Usage
• Residential applications with numerous veneers: brick, stone, stucco, siding (wood, vinyl, aluminum), cement board, etc.
• Exterior wood frame walls
• Use as intermittent bracing with Thermasheath-3
• Use as continuous structural insulated sheathing
• With taped joints and other standard construction practices for sealing, achieve air barrier and water-resistive barrier (WRB)
• Do NOT install panels unless temperature is above 20˚F
• Wear eye protection when using power cutting tools
• Safety mask may be necessary while cutting this product due to nuisance dust
• Measure and mark panels for cutting using: − Chalk line
− Straight edge and marker
• Cut boards on a level, durable surface, using a circular saw
• Notes for cutting:− Do not shave, rasp or carve facers off any panels
− Rmax does not recommend scoring or cutting the back side of a panel allowing the board to
conform to framing regulations
− Rmax does not recommend the cutting or trimming of panels with the “score and snap” method
− Polyiso will not break cleanly or evenly – recommend using a sharp, fine-toothed saw
Installation - Step 1: Measuring and Cutting
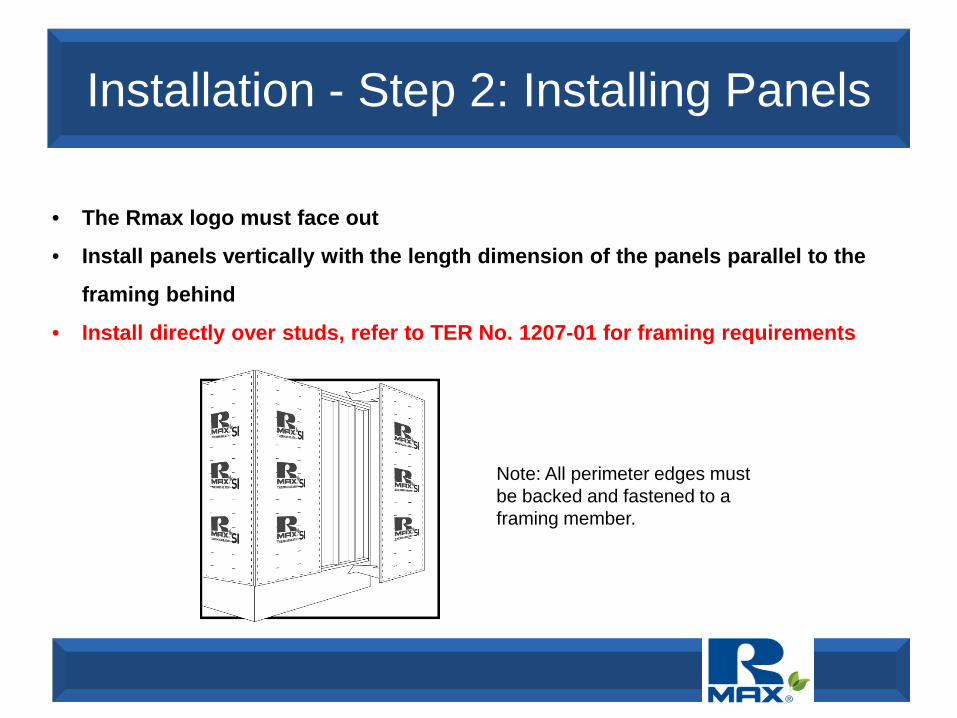
Installation - Step 2: Installing Panels
• The Rmax logo must face out
• Install panels vertically with the length dimension of the panels parallel to the
framing behind
• Install directly over studs, refer to TER No. 1207-01 for framing requirements
Note: All perimeter edges must be backed and fastened to a framing member.

Installation - Step 2: Installing Panels (continued)
− Use Thermasheath-SI continuously
OR
− Use Thermasheath-SI in areas where
bracing is required per code
− Integrate remaining wall with Rmax
Thermasheath-3 insulation
R-SEAL Construction Tape

Installation - Step 3: Fastening• Fasten boards using approved staples every 3” along
perimeter and every 6” in the fields of the boards
• Fasteners must be placed not less than 3/8” (9.5 mm)
from sheathing edges
• Staples shall be a minimum 16 gauge, 1/2” or 1” crown,
at least 1 1/4” leg and penetrate a minimum of 1” into the
stud
• Nails shall be minimum 0.113” x 2 3/8” and penetrate a
minimum of 1 ¼ inch into the stud.
• Sheathing joints must be butted at framing members and
a single row of fasteners must be applied to each panel
edge into the stud behind
NOTE: Do not tack sheathing products to framing, but fasten each panel completely once fastening begins.
Note: Maintain a minimum 1” penetration into wood studs, fasteners may be countersunk.
DO NOT TACK FASTEN COMPLETELY
FIRST
FASTEN EVERY 3”ALONG PERIMETER
FASTEN EVERY6” IN THE FIELD

Installation - Step 4: Taping
• To achieve a WRB:
− Tape all joints & protrusions with
3” R-SEAL Construction Tape
− Center the tape over the joints to cover fastener penetrations
− Tape must be installed in temperatures between -25°F to 135°F
− Apply in shingle like fashion starting from bottom up
NOTE: Fasteners in the field of the board do not need to be taped to achieve WRB.

Solutions for California Title 24