Embed Size (px)
Citation preview
Uploading and Appending Documents Friday, July 10, 2017
Page 1 of 24
Slide 1 - of 24
Slide notes
Welcome to the Workers' Compensation Medicare Set-Aside Portal (WCMSAP) Uploading and Appending Documents Course.
As a reminder, you may view the slide number you are on by clicking on the moving cursor.
Additionally, you can view the narration by clicking the Closed Captioning [CC] button in the lower right hand corner of the screen.
Uploading and Appending Documents Friday, July 10, 2017
Page 2 of 24
Slide 2 - of 24
Slide notes
While all information in this document is believed to be correct at the time of writing, this Computer Based Training (CBT) is for educational purposes only and does not constitute official Centers for Medicare & Medicaid Services (CMS) instructions for the WCMSAP.
All affected entities are responsible for following the applicable CMS instructions found at the following link: http://go.cms.gov/wcmsa/.
Uploading and Appending Documents Friday, July 10, 2017
Page 3 of 24
Slide 3 - of 24
Slide notes
This module describes how WCMSAP users may add additional documents to an existing case,
delete documents from a work-in-progress case,
and replace commingled documents on submitted cases.
Uploading and Appending Documents Friday, July 10, 2017
Page 4 of 24
Slide 4 - of 24
Slide notes
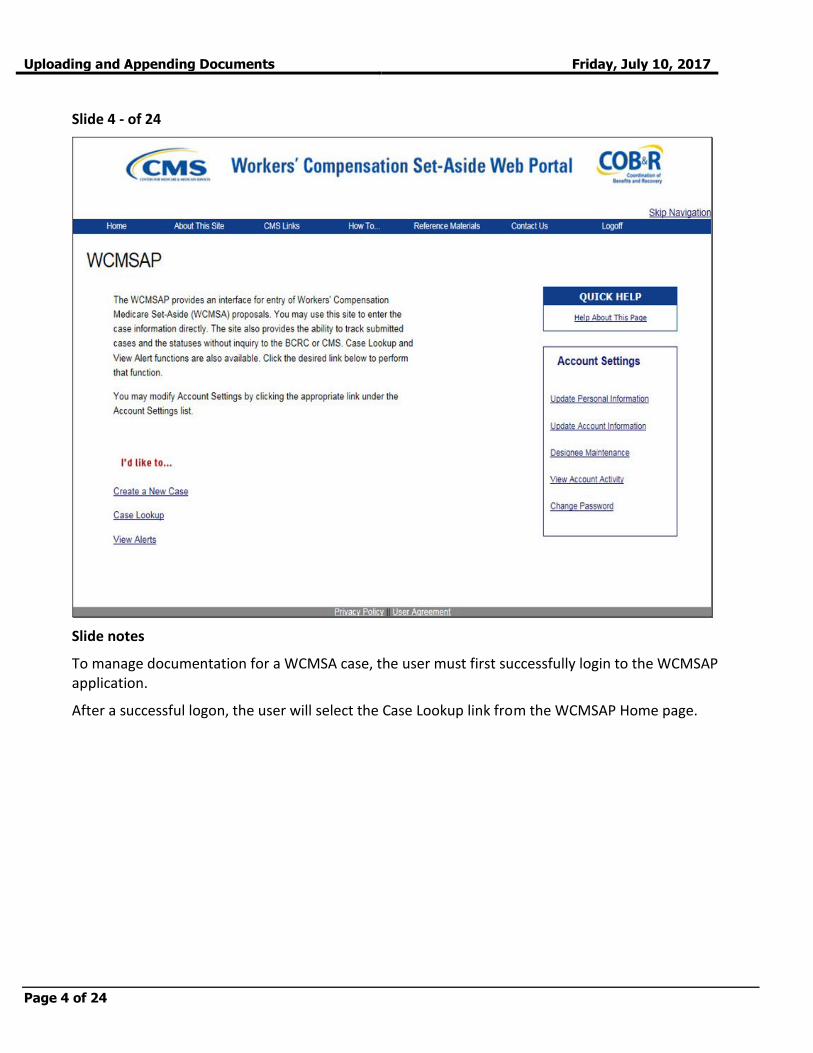
To manage documentation for a WCMSA case, the user must first successfully login to the WCMSAP application.
After a successful logon, the user will select the Case Lookup link from the WCMSAP Home page.
Uploading and Appending Documents Friday, July 10, 2017
Page 5 of 24
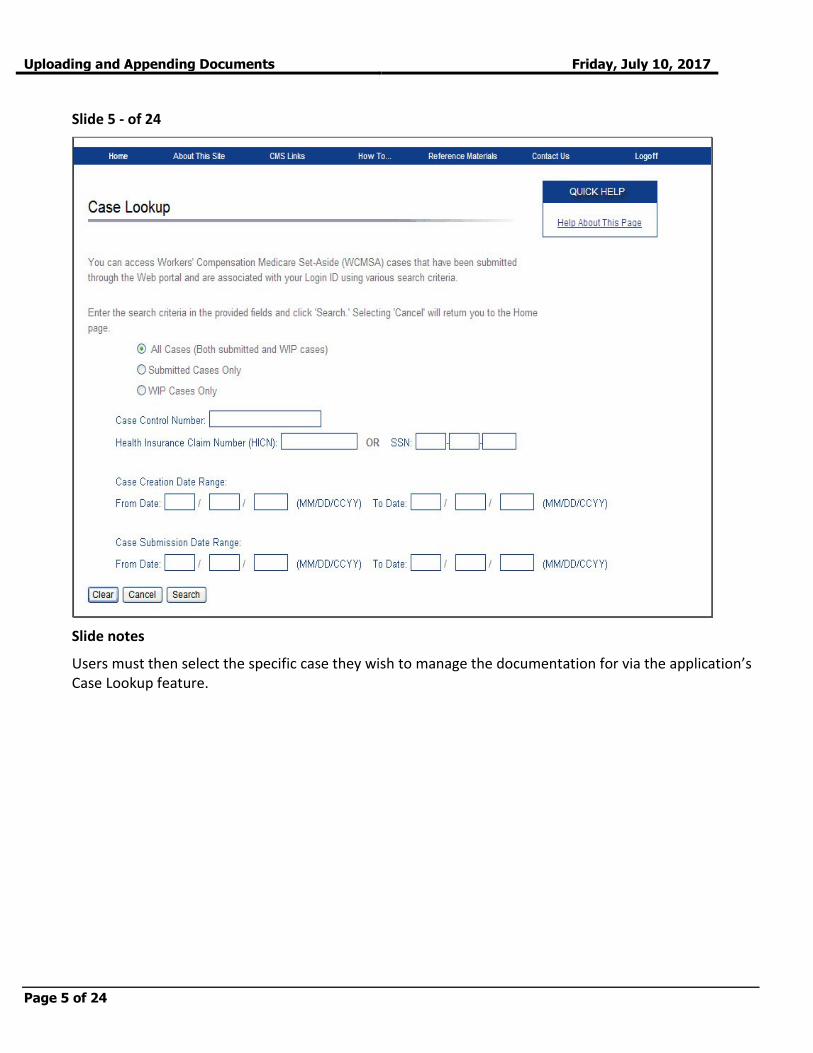
Slide 5 - of 24
Slide notes
Users must then select the specific case they wish to manage the documentation for via the application’s Case Lookup feature.
Uploading and Appending Documents Friday, July 10, 2017
Page 6 of 24
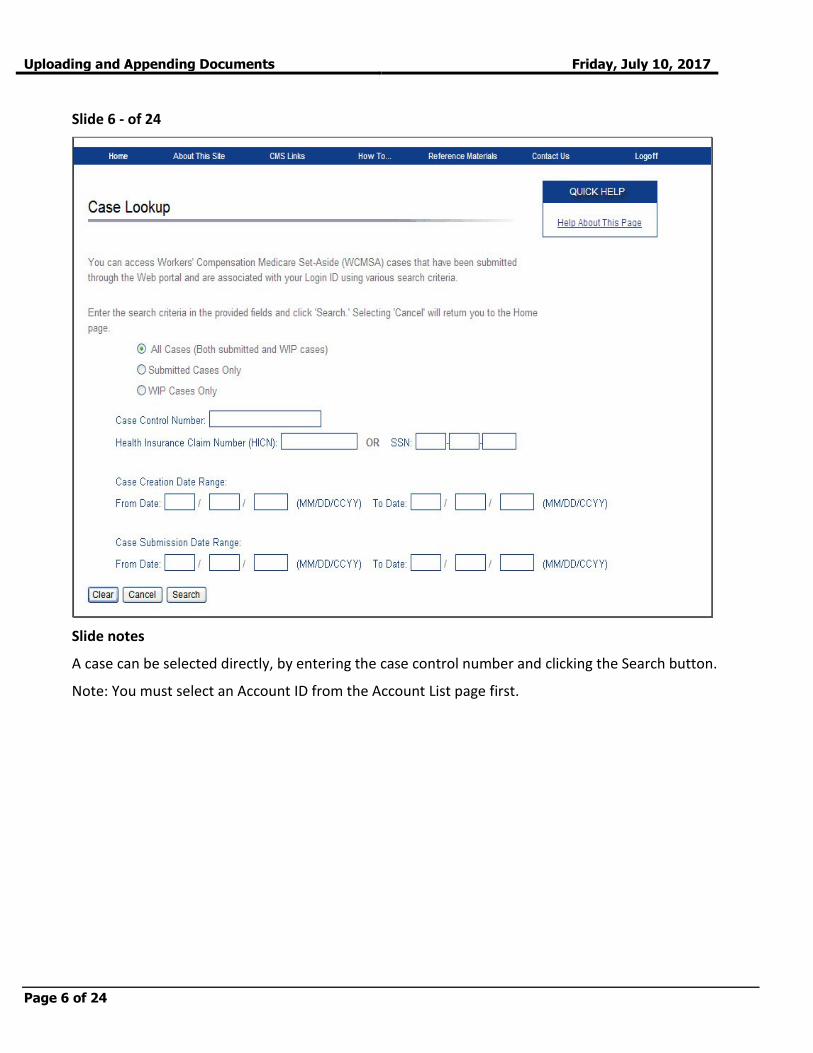
Slide 6 - of 24
Slide notes
A case can be selected directly, by entering the case control number and clicking the Search button.
Note: You must select an Account ID from the Account List page first.
Uploading and Appending Documents Friday, July 10, 2017
Page 7 of 24
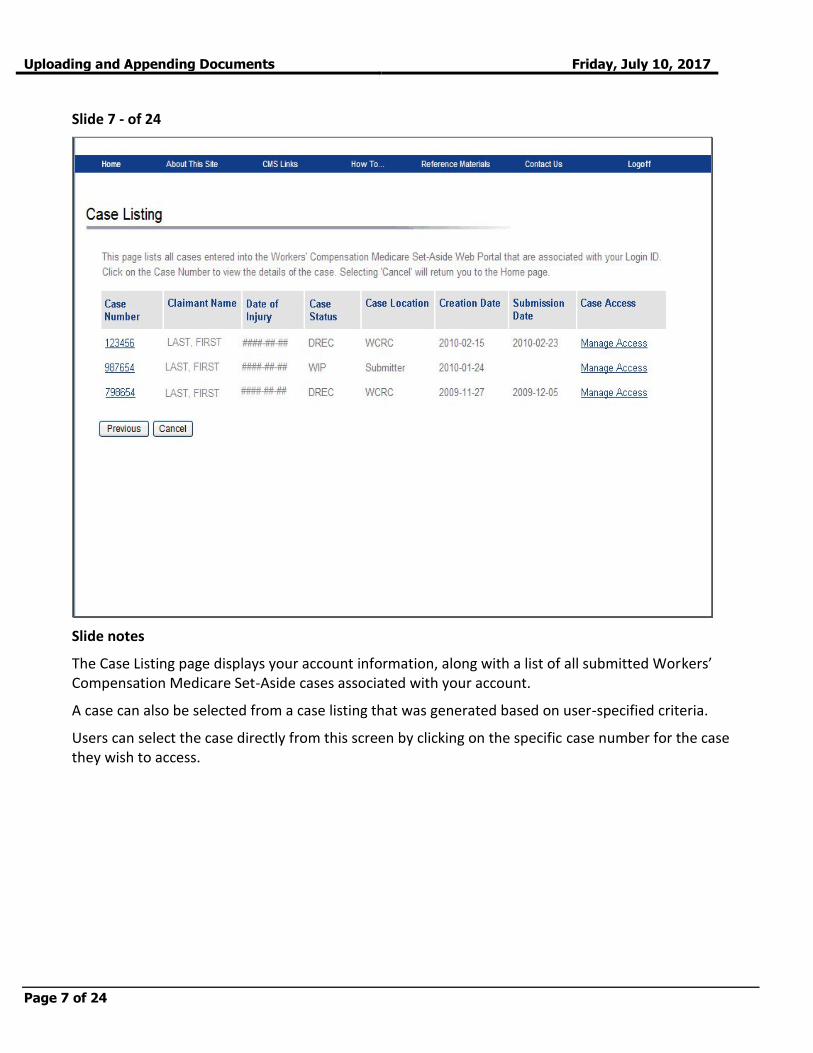
Slide 7 - of 24
Slide notes
The Case Listing page displays your account information, along with a list of all submitted Workers’ Compensation Medicare Set-Aside cases associated with your account.
A case can also be selected from a case listing that was generated based on user-specified criteria.
Users can select the case directly from this screen by clicking on the specific case number for the case they wish to access.
Uploading and Appending Documents Friday, July 10, 2017
Page 8 of 24
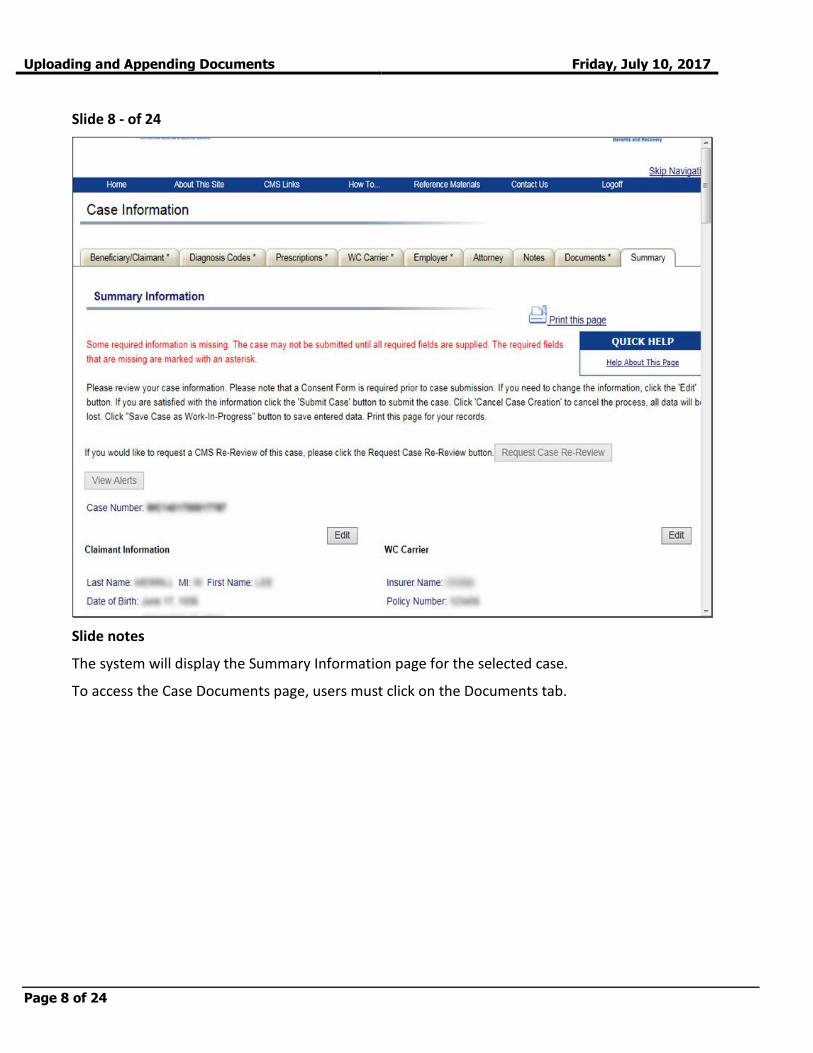
Slide 8 - of 24
Slide notes
The system will display the Summary Information page for the selected case.
To access the Case Documents page, users must click on the Documents tab.
Uploading and Appending Documents Friday, July 10, 2017
Page 9 of 24
Slide 9 - of 24
Slide notes
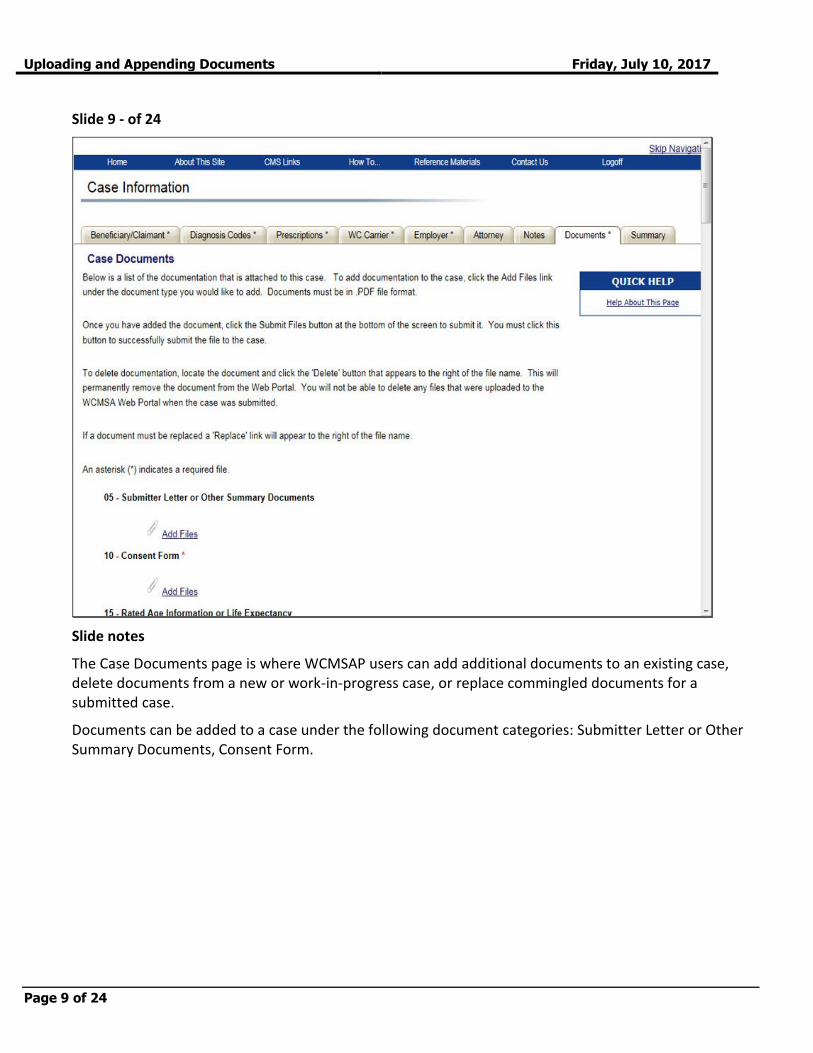
The Case Documents page is where WCMSAP users can add additional documents to an existing case, delete documents from a new or work-in-progress case, or replace commingled documents for a submitted case.
Documents can be added to a case under the following document categories: Submitter Letter or Other Summary Documents, Consent Form.
Uploading and Appending Documents Friday, July 10, 2017
Page 10 of 24
Slide 10 - of 24
Slide notes
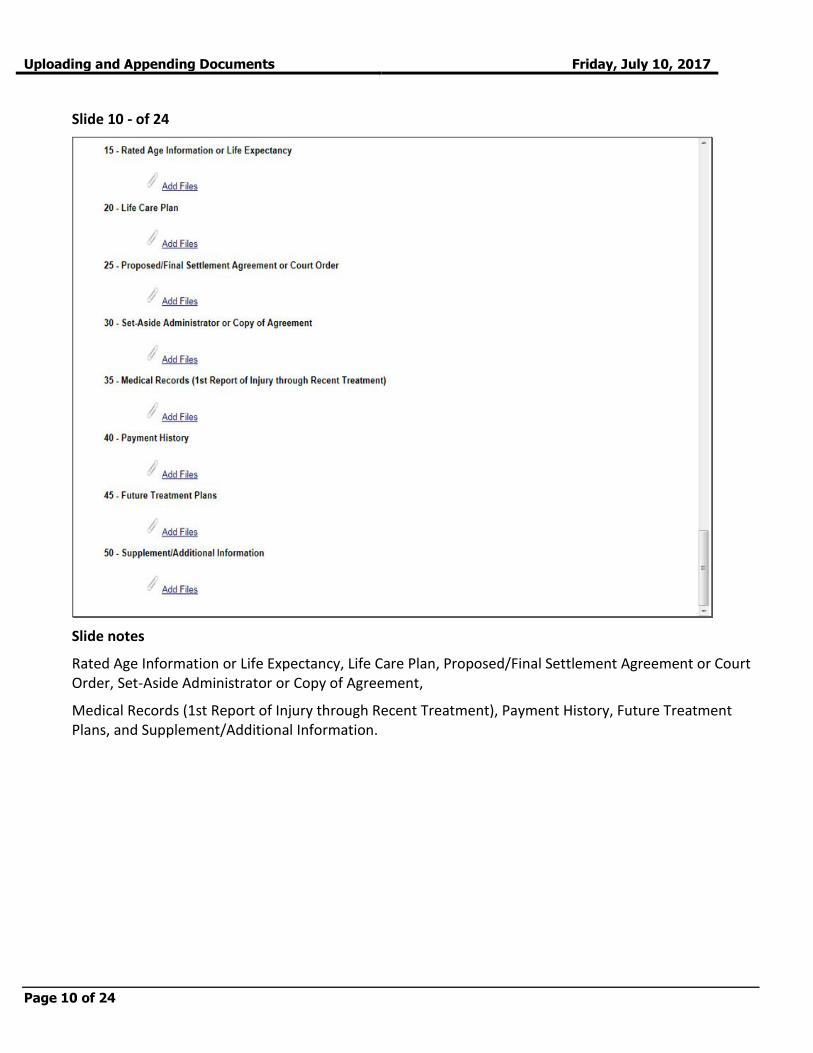
Rated Age Information or Life Expectancy, Life Care Plan, Proposed/Final Settlement Agreement or Court Order, Set-Aside Administrator or Copy of Agreement,
Medical Records (1st Report of Injury through Recent Treatment), Payment History, Future Treatment Plans, and Supplement/Additional Information.

Uploading and Appending Documents Friday, July 10, 2017
Page 11 of 24
Slide 11 - of 24
Slide notes
The "Consent Form" is the only document that is required as part of a WCMSA case. This does not have to be supplied until the user submits the case.
Note: A blank “Consent to Release Form” and an example form with instructions can be found in the “WCMSA Reference Guide.” The “WCMSA Reference Guide” is available for download at the following link: http://go.cms.gov/wcmsa.
To add files to a case click the Add Files link under the document category you wish to add files to.

Uploading and Appending Documents Friday, July 10, 2017
Page 12 of 24
Slide 12 - of 24
Slide notes
The user may click on the Browse button to look for files in their system to attach to the case.
If you have selected the wrong document category, click the Cancel button to return to the Case Documents page and click the Add Files link under the desired document category.
The system does not limit the number of files that may be appended to each document category, but only allows a maximum of 3 files to be uploaded at one time.
Selected files must be in PDF format. If a user attempts to attach a non-.PDF file, the system will present a message stating: "Invalid File Extension."
The maximum size of the files being uploaded at one time cannot exceed 40MB total for all files being attached (up to 3 files).
If a user attempts to attach a file that is too large, they will receive the following error: “File size is too large. Please split your files into smaller files and resubmit."

Uploading and Appending Documents Friday, July 10, 2017
Page 13 of 24
Slide 13 - of 24
Slide notes
Users must ensure that all files related to a case have been converted to PDF format, and do not exceed size limits.
This is especially important for medical records. Medical records must be separated into files that contain 100 or fewer pages.
If a beneficiary or claimant’s medical records contain more than 100 pages, create separate files before attaching the records.
The system accepts single PDF files. Do not upload files in PDF Portfolio format. A PDF Portfolio contains multiple files assembled into an integrated PDF unit.
PDF files that meet the noted criteria can be added to a case as long as they are virus-free.
If a virus is detected, the file will be rejected and the system will display a message that states “A virus has been detected, therefore your file(s) has not been added."
Uploading and Appending Documents Friday, July 10, 2017
Page 14 of 24
Slide 14 - of 24
Slide notes
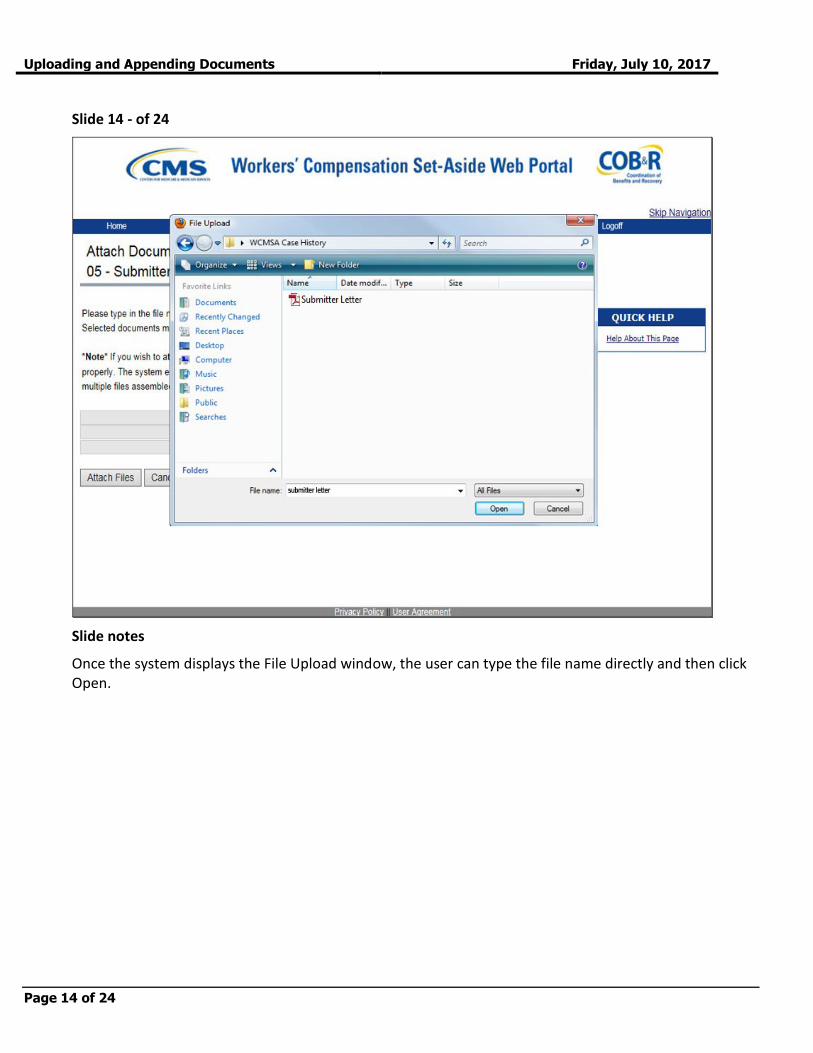
Once the system displays the File Upload window, the user can type the file name directly and then click Open.
Uploading and Appending Documents Friday, July 10, 2017
Page 15 of 24
Slide 15 - of 24
Slide notes
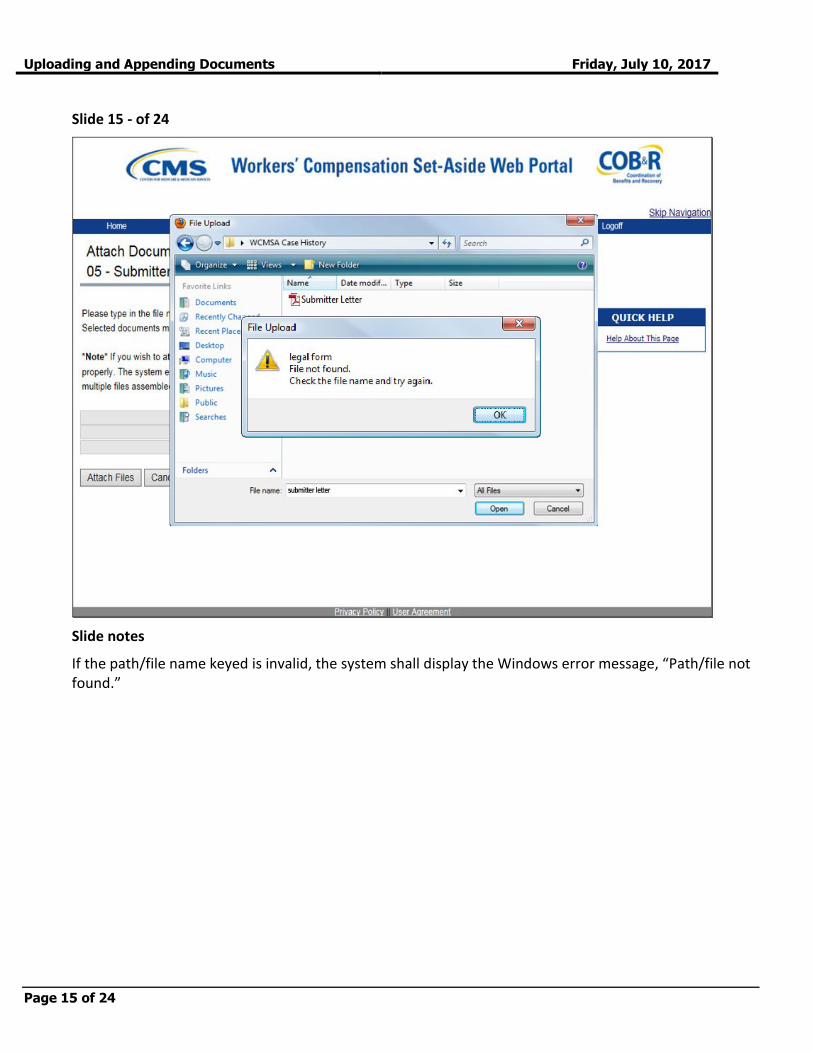
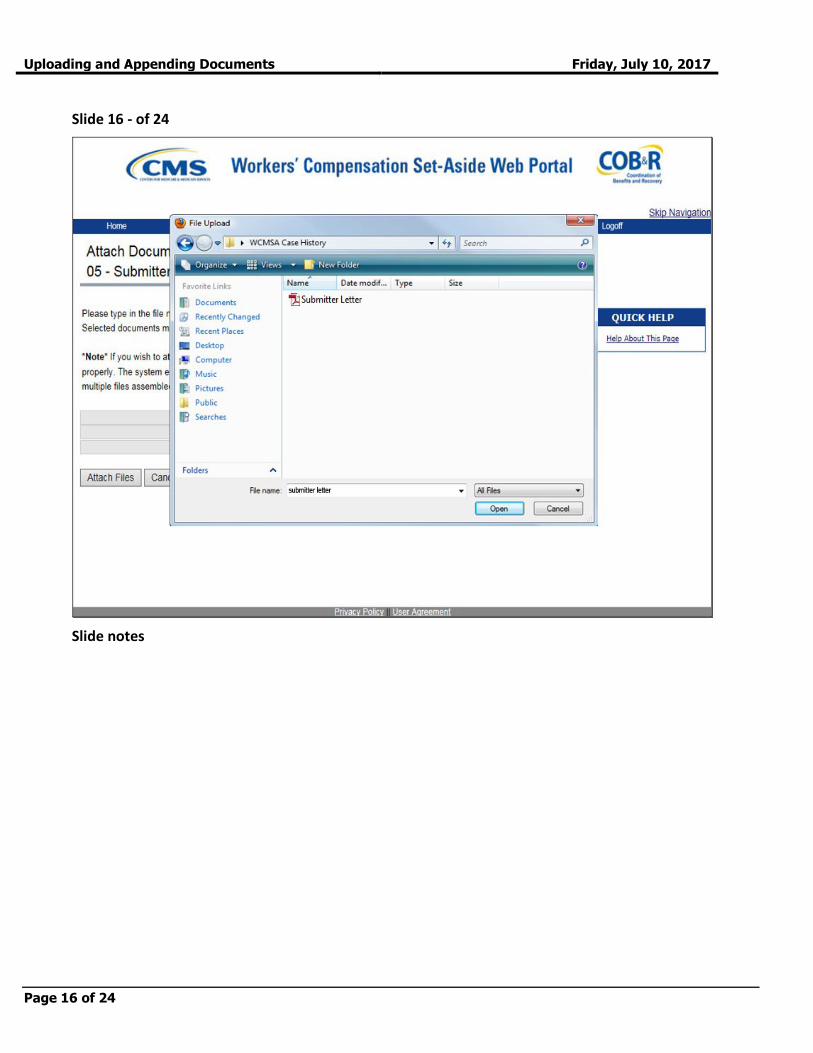
If the path/file name keyed is invalid, the system shall display the Windows error message, “Path/file not found.”
Uploading and Appending Documents Friday, July 10, 2017
Page 16 of 24
Slide 16 - of 24
Slide notes
Uploading and Appending Documents Friday, July 10, 2017
Page 17 of 24
Slide 17 - of 24
Slide notes
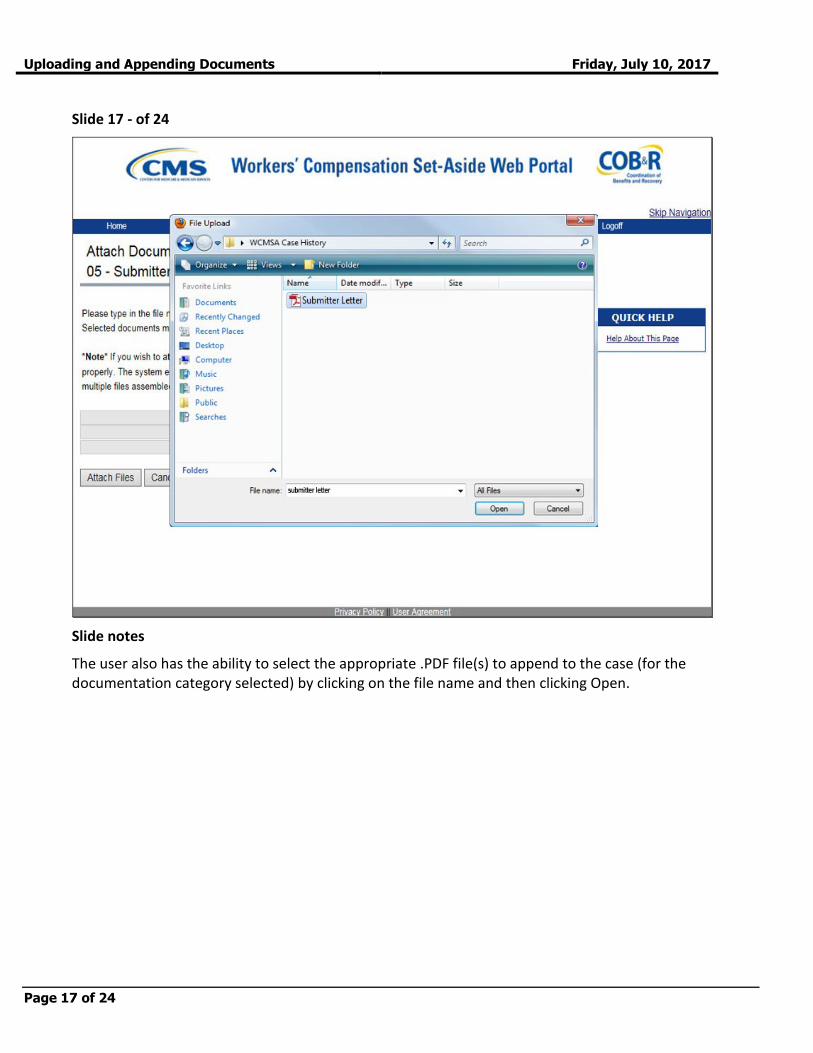
The user also has the ability to select the appropriate .PDF file(s) to append to the case (for the documentation category selected) by clicking on the file name and then clicking Open.

Uploading and Appending Documents Friday, July 10, 2017
Page 18 of 24
Slide 18 - of 24
Slide notes
After the user has selected a file to be added to a case, they can either click Attach Files to add the file or Cancel to cancel the process.
Uploading and Appending Documents Friday, July 10, 2017
Page 19 of 24
Slide 19 - of 24
Slide notes
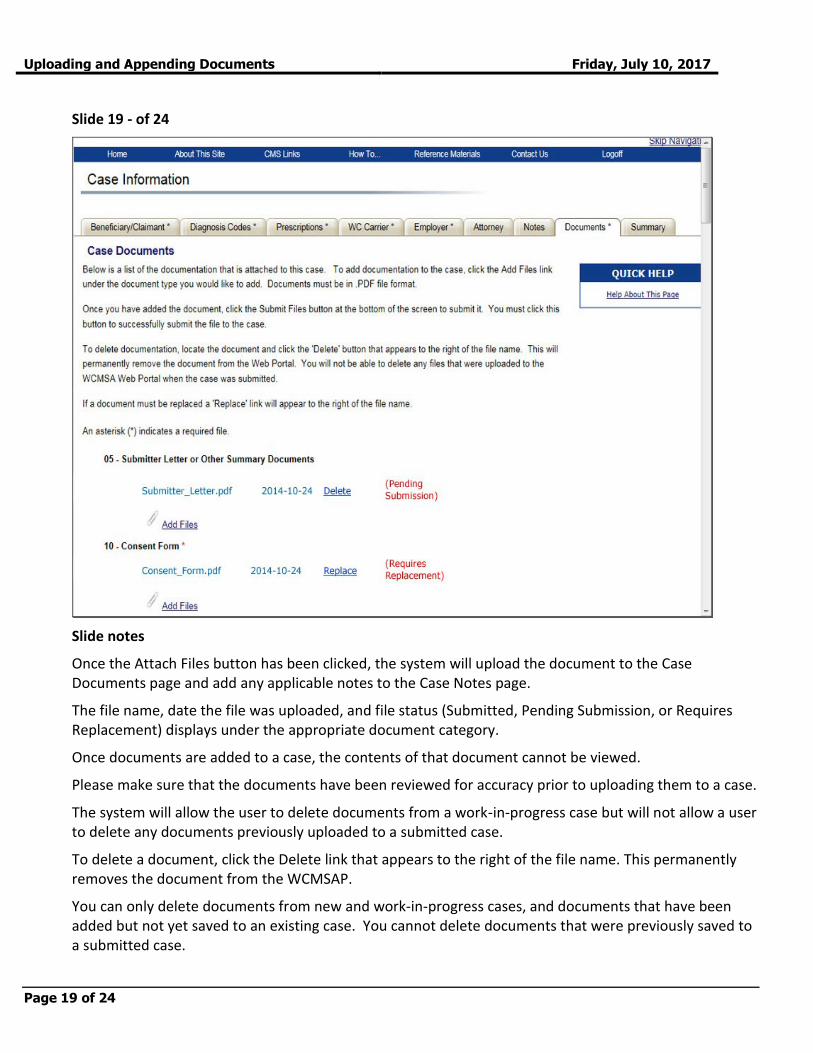
Once the Attach Files button has been clicked, the system will upload the document to the Case Documents page and add any applicable notes to the Case Notes page.
The file name, date the file was uploaded, and file status (Submitted, Pending Submission, or Requires Replacement) displays under the appropriate document category.
Once documents are added to a case, the contents of that document cannot be viewed.
Please make sure that the documents have been reviewed for accuracy prior to uploading them to a case.
The system will allow the user to delete documents from a work-in-progress case but will not allow a user to delete any documents previously uploaded to a submitted case.
To delete a document, click the Delete link that appears to the right of the file name. This permanently removes the document from the WCMSAP.
You can only delete documents from new and work-in-progress cases, and documents that have been added but not yet saved to an existing case. You cannot delete documents that were previously saved to a submitted case.

Uploading and Appending Documents Friday, July 10, 2017
Page 20 of 24
Slide 20 - of 24
Slide notes
The system will allow users to replace specific files that have been flagged as replaceable by the Workers' Compensation Recovery Contractor (WCRC).
Typically, documents must be replaced when a case has been submitted and it contains commingled documents.
A commingled alert will be listed on the Alert Lookup page in this instance.
If a document must be replaced, click the Replace link that appears to the right of the file name. The Replace link will continue to display until you click this link and successfully upload a replacement file.

Uploading and Appending Documents Friday, July 10, 2017
Page 21 of 24
Slide 21 - of 24
Slide notes
This displays the Attach Documentation page.
To replace a document, enter a new file name and path in the text box, or use the Browse button next to the text box to search your system for the desired document.
Medical records must be separated into files that contain 100 or fewer pages.
If a beneficiary or claimant’s medical records contain more than 100 pages, create separate files before attaching the records.
To attach the selected file, click the Attach Files button.
This uploads the document to the Case Documents page.
Click the “I attest that the documentation attached is complete and accurate to the best of my knowledge” checkbox to provide your attestation and select “Submit Files” to add the files to the case.
Uploading and Appending Documents Friday, July 10, 2017
Page 22 of 24
Slide 22 - of 24
Slide notes
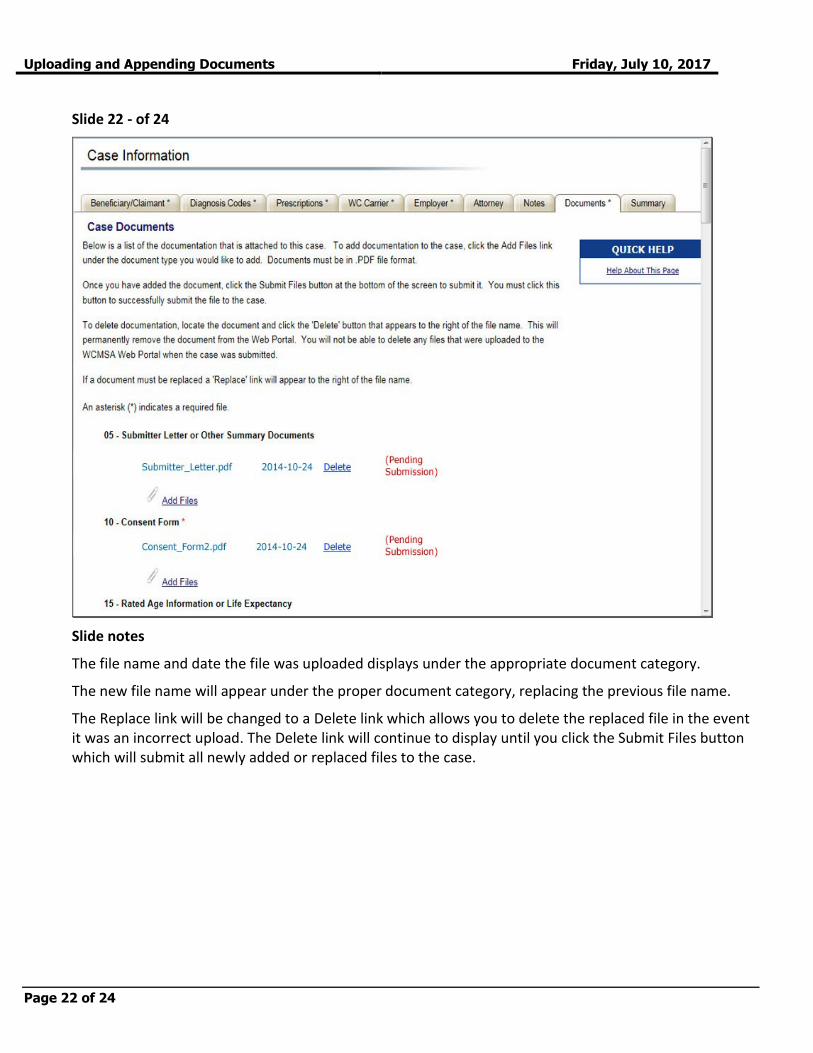
The file name and date the file was uploaded displays under the appropriate document category.
The new file name will appear under the proper document category, replacing the previous file name.
The Replace link will be changed to a Delete link which allows you to delete the replaced file in the event it was an incorrect upload. The Delete link will continue to display until you click the Submit Files button which will submit all newly added or replaced files to the case.
Uploading and Appending Documents Friday, July 10, 2017
Page 23 of 24
Slide 23 - of 24
Slide notes
You have completed the Uploading and Appending Documentation course. The information in this course can be referenced by
using the document at the link below: https://www.cob.cms.hhs.gov/WCMSA/assets/wcmsa/userManual/WCMSAUserManual.pdf.

Uploading and Appending Documents Friday, July 10, 2017
Page 24 of 24
Slide 24 - of 24
Slide notes
If you have any questions or feedback on this material, please go the following URL: https://www.surveymonkey.com/s/WCMSAPTraining.