Embed Size (px)
Citation preview

SketchBook ProLine and Shape tools
Resize a brushChange your view
Move, rotate, or scale a selected areaHide and show a layer
Tool selectionTool summary
Keyboard shortcutsResizing an image
Resizing the canvasCreate a Do-It-Yourself brush

Copyrights and Trademarks
Autodesk SketchBook Pro 2011
©2011 Autodesk, Inc. All Rights Reserved. Except as otherwise permitted by Autodesk, Inc., this publication, or parts thereof, may not be reproduced in any form, by any method, for any purpose. Certain materials included in this publication are reprinted with the permission of the copyright holder.
Trademarks
Th e following are registered trademarks or trademarks of Autodesk, Inc., and/or its subsidiaries and/or affi liates in the USA and other countries: 3DEC (design/logo), 3December, 3December.com, 3ds Max, Algor, Alias, Alias (swirl design/logo), AliasStudio, Alias|Wavefront (design/logo), ATC, AUGI, AutoCAD, AutoCAD Learning Assistance, AutoCAD LT, AutoCAD Simulator, AutoCAD SQL Extension, AutoCAD SQL Interface, Autodesk, Autodesk Envision, Autodesk Intent, Autodesk Inventor, Autodesk Map, Autodesk MapGuide, Autodesk Streamline, AutoLISP, AutoSnap, AutoSketch, AutoTrack, Backburner, Backdraft, Built with ObjectARX (logo), Burn, Buzzsaw, CAiCE, Civil 3D, Cleaner, Cleaner Central, ClearScale, Colour Warper, Combustion, Communication Specifi cation, Constructware, Content Explorer, Dancing Baby (image), DesignCenter, Design Doctor, Designer’s Toolkit, DesignKids, DesignProf, DesignServer, DesignStudio, Design Web Format, Discreet, DWF, DWG, DWG (logo), DWG Extreme, DWG TrueConvert, DWG TrueView, DXF, Ecotect, Exposure, Extending the Design Team, Face Robot, FBX, Fempro, Fire, Flame, Flare, Flint, FMDesktop, Freewheel, GDX Driver, Green Building Studio, Heads-up Design, Heidi, HumanIK, IDEA Server, i-drop, ImageModeler, iMOUT, Incinerator, Inferno, Inventor, Inventor LT, Kaydara, Kaydara (design/logo), Kynapse, Kynogon, LandXplorer, Lustre, MatchMover, Maya, Mechanical Desktop, Moldfl ow, Moonbox, MotionBuilder, Movimento, MPA, MPA (design/logo), Moldfl ow Plastics Advisers, MPI, Moldfl ow Plastics Insight, MPX, MPX (design/logo), Moldfl ow Plastics Xpert, Mudbox, Multi-Master Editing, Navisworks, ObjectARX, ObjectDBX, Open Reality, Opticore, Opticore Opus, Pipeplus, PolarSnap, PortfolioWall, Powered with Autodesk Technology, Productstream, ProjectPoint, ProMaterials, RasterDWG, RealDWG, Real-time Roto, Recognize, Render Queue, Retimer,Reveal, Revit, Showcase, ShowMotion, SketchBook, Smoke, Softimage, Softimage|XSI (design/logo), Sparks, SteeringWheels, Stitcher, Stone, StudioTools, ToolClip, Topobase, Toxik, TrustedDWG, ViewCube, Visual, Visual LISP, Volo, Vtour, Wire, Wiretap, WiretapCentral, XSI, and XSI (design/logo). All other brand names, product names or trademarks belong to their respective holders.
Disclaimer
THIS PUBLICATION AND THE INFORMATION CONTAINED HEREIN IS MADE AVAILABLE BY AUTODESK, INC. “AS IS.” AUTODESK, INC. DISCLAIMS ALL WARRANTIES, EITHER EXPRESS OR IMPLIED, INCLUDING BUT NOT LIMITED TO ANY IMPLIED WARRANTIES OF MERCHANTABILITY OR FITNESS FOR A PARTICULAR PURPOSE REGARDING THESE MATERIALS.
Published by:
Autodesk, Inc.111 McInnis ParkwaySan Rafael, CA 94903, USA

What’s NewTh is chapter introduces new features and a list of improvements & enhancements that can be found in this release of SketchBook Pro.
Copic Color Library
Th e Copic Color Library contains over 300 colors. To access it, select Window > Copic Library.
• Tap its arrows to collapse and expand sections.
• Use your mouse wheel, Wacom touch strip, tap-drag the color set slider, or for Mac users, 2-fi nger drag to scroll through pages of colors. Note - If using your Wacom touch strip, in the Wacom Tablet Properties, Touch Strip Function must be
set to either Zoom or Auto Scroll/Zoom.
• Drag colors from the library into the lower section to create a custom library of colors.
Text editing tools
1. In the Text tool, tap the Font button to access the following text editing tools:
• Collections – Manage the list of fonts that appear in Family and see only the fonts you want. Create custom font collections. Use default sets to load only fun fonts or ones with fi xed width. Load only your favorite fonts or those recently used.
• Family – Select a font from the list. If a font family is not listed, change the Collections option to All Fonts.
• Typeface – Choose from Condensed, Condensed Italic, Bold Condensed, Bold Condensed Italic typefaces.
• Size – Set the size of the text.
2. Tap the Color box to set text color.
Work with PXDs
PXD is the native Pixlr fi le format. Now you can save images as PXDs, open them in SketchBook, and add PXD images to sketches.
Save PXDsSave images as PXDs to work on them in Pixlr. For images with colored text, to preserve the color, SketchBook converts the text to an image. To save a sketch that can be opened in Pixlr, select File > Save as type > PXD Files (*.pxd).
Open PXDsWhen opening an image from Pixlr, if the image uses a blend mode not supported by SketchBook, the Normal blend mode is used to replace it. To bring an image from Pixlr into SketchBook, select File > Open, then select a PXD fi le.
Add PXDWhen adding a PXD image to a sketch, SketchBook fl attens the fi le, without making any visual changes. Select File > Add Image, then select a PXD fi le.

Copic brush set
Th e Copic brush set was added to the Brush Palette. It contains the following brushes:
• 4 assorted Copic markers
• 1 Copic Multi-liner
• 1 Copic Drawing Pen
Opacity and Tilt shortcut keys
Th e following two shortcut keys were created for this release:
• Press the O key to quickly switch to set brush opacity.
• Press the / key to quickly switch to set brush tilt.
Improvements and enhancements
Th e following changes were made this release:
Brush puck
It only resizes a brush. Press the O key to quickly switch to set brush opacity.
Text
• After inputting a text string, SketchBook automatically switches to the Transform tool.
• When text appears in the middle of the canvas, you are in the Move Transform mode. Use the puck to select a diff erent mode.
• When rotating or scaling the text, SketchBook uses the center of the text as the pivot point.
• When transforming text using scale, font size is changed, resulting in no visual quality change.
Custom icons
When custom created icons are assigned to brushes and the brushes are exported, the icons now appear with their assigned brushes upon import.

Introduction
Tool selection
Pick a tool using one of the following methods:
• Flick toward an icon to select it.
• Touch the stylus to an icon and hold, then fl ick through a tool.
• Tap a tool the toolbar to select it.
Tool summary
1
2
3 4
5
6
7
89
1. Brush Palette (shows current tool)2. Color (shows current color) 3. Interface controls
4. View controls, canvas transform tools, rulers, layers, & symmetry
5. Brushes & palette
6. Colors
7. Selection, editing, & layer transform tools
8. Open, save, new, next & previous image
9. Undo/redo
Choose a brush
In the Brush Palette or from the lagoon, tap a brush and start sketching. Select an eraser for modifi cations.
Blurring an area
Blur - Paint over an area to soften it, making the area appear out of focus.Note - To change its size or strength, either double-click the brush or tap
to access Brush Properties.
Sharpening an area
Sharpen - Paint over an area to makes it look crisper; sharpening the areas. Note - To change its size or strength, either double-click the brush or tap
to access Brush Properties.

Change brush properties
In the Brush Palette, tap to access the Brush Properties window and change brush settings, such as wetness and slant.
Resize a brush
In the Brush Palette, tap or hold down the B key to access a puck. Th en, drag to the right to increase a brush’s size or left to decrease it.
Changing brush opacityUse the O key to change the amount of paint applied by a brush. Tap a brush, then press-hold the O key as you drag up to increase a brush’s opacity or down to decrease it.
Undo or redo a brushstroke
• To undo the previous action, tap or press Cmd+Z for Mac or Ctrl+Z for PC.
• To redo an action, tap or press Shift+Cmd+Z for Mac or Ctrl+Y for PC.
Note - You can change the number of undos in the General tab of the Preferences.
Clear brushstrokes Flick toward or press the Delete or Backspace key.
Clearing an area from the current layer1. Flick toward or , or press the M key, then
drag over the area you want to clear. 2. Next, either fl ick toward or press the Delete key
to remove the selected area.
Swap between two brushes
Use one brush, then return to a previous one. After using a brush, select another, then fl ick toward or press S to move between them.

1
2
3
4
5
6
1
2
3
4
5
6
Color Editors
Tap , then fl ick toward a color or select Window > Copic Library to access the Copic Color Library and select from over 300 colors.
Note - If you fl ick , your brush will erase existing color pixels on that layer.
PC
1. RGB
2. Swatch (current color)3. Customized palette (drop down)
4 Eyedropper
5 Color Wheel
6. Slider
Pick a color from the screen In the Color Editor, tap , move over a color, then lift your stylus to pick the color. A swatch appears.
Create a custom color
Tap the current color icon to access the Color Editor.
Show/hide parts of the editor Tap the arrow at the top or bottom of the editor to show/hide parts of the editor.
Mac 1. Tabs (various methods for picking colors):
Choose a hue or tints and the value (light).
Specify a color using color gradients, such as gray scale, RGB, CMYK, or HSB values.
Choose from a lists of colors (Apple, Developer, Crayons, Web Safe), or create your own list of colors.
Choose a color from a spectrum of hues and values.
Pick from 48 colors displayed as a box of crayons.
2. Swatch (current color)3. Slider
4. Customized palette
5. Color Wheel
6. Magnifying glass (color picker)

Pick a color from the screen Tap to change the cursor to . Move over and tap a color on your screen.
Set the RGB In the Color Editor, tap the RGB fi elds and add numeric values. Th e color in the Color Wheel changes to display a color with those RGB values.
Create a customized color palette Drag a color chip from the swatch to the palette at the bottom of the Color Editor.
Saving a customized color palette Th e next time SketchBook opens, your customized color palette appears.
Copic Color Library
1. Minimize/maximize Color set
2. Tabs
3. Color set
4. Current & complementary color
5. Minimize/maximize Custom set
6. Custom set
Choose a color In the toolbar, tap or select Window > Copic Library to access the Copic Color Library. Use your mouse wheel, Wacom touch strip, tap-drag the color set slider, or for Mac users, 2-fi nger drag to scroll between the pages of colors.
Note - If using your Wacom touch strip, in the Wacom Tablet Properties, Touch Strip Function must be set to either Zoom or Auto Scroll/Zoom.
Select the complementarly colorTap a color chip to load its complementary color. Tap the Complementary color below the chip to select it.Note - Not every color will have an assigned complementary color. For those
without, a selection of colors similar to its complementary or nothing will appear.
Create a custom color setTap-drag a color chip from the Color set or a complementary color into the Custom set.
Show/hide parts of the libraryTap the arrows near the top and bottom of the library to show/hide parts of it.
12
3
4
5
6

Tools for Sketching
Line and Shape tools
In the toolbar, tap a Line and Shape tools, Line, Rectangle, Polyline, or Oval, to help create shapes and lay down lines.
Lines To draw a line, either tap or for a horizontal or vertical line, hold down the Shift key. Th en, tap-drag. See Free for diagonal lines.
Rectangles To draw a rectangle, tap and tap-drag to draw the shape.
Polylines To draw a polyline, tap and tap to place each point. Dbl-tap the last point to change the line to a solid line.
OvalsTo draw an oval or circle, tap and tap-drag to draw the shape.
FreeTo return to freestyle stroke mode, tap . To draw a diagonal (45-degree angle) line, hold down the D key. Th en, tap-drag.
Flood fi ll an area
Fill the active or visible layers with color.
Flood fi ll an active layer In the Brush Palette, tap , then tap an area to fi ll that area on that layer.
Flood fi ll visible layers In the Brush Palette, tap , then tap an area to fi ll that area in all visible areas.
Penguin (c) 1296613 Ontario Inc.

Change Flood Fill properties
Change the tolerance to determine the range of color values aff ected when fl ooding a region with paint and fi ll gaps between the fi ll paint and the pixels creating the boundary of the fi ll.
Th e minimum tolerance, 0 (zero), selects and fi lls only pixels of that color value. Th e maximum tolerance, 255, selects and fi lls all pixels regardless of the region.
Dbl-tap or and tap to change fl ood fi ll tolerances.
Rulers
Tap or r or press R for the straight ruler and E for the elliptical ruler. Sketch using a circular motion close to or on the elliptical ruler. Th e stroke doesn’t have to be perfect, since it snaps to the ellipse.
Position a ruler
• Tap-drag to pivot the ruler using the opposite handle as the pivot point.
• Tap-drag to move the rulers.
• Dbl-tap any outer handle to reposition the ruler horizontally or vertically.
• Dbl-tap to rotate the ellipse around its center.
• Dbl-tap to equally scale the ellipse in all directions.
• Tap-drag to scale the ellipse in one direction.
• Dbl-tap any scale handle to change the ellipse to a circle.
Show/hide a rulerTo hide the ruler, tap the close handle .
Symmetry
horizontal symmetry
Tap or press Y for horizontal symmetry. Draw on one side of the axis. It is mirrored to the other side.
Note - Th e axis of symmetry always appears at the center of the window.
Tap or press X for vertical symmetry.
Stop stroke at center lineIn Preferences > General, tap Stroke stops at the center line to stop your stroke at the line of symmetry.
vertical symmetry

View, Edit & Save your Sketch
Change your view
Zoom in and move aboutTap and fl ick toward or press and hold down the spacebar to access
the puck.
• Move your stylus to the center to zoom and tap-drag to zoom in and out.
• Move your stylus to the outer ring and tap-drag to reposition your sketch on the canvas.
Note - For best performance with a Tablet PC, use primary landscape orientation when zooming in on and pulling your sketch around. To change to this orientation, go to the Control Panel.
Zoom using a touch strip Cintiqs and some tablets have a touch strip for zooming. Position your cursor over the area you want to zoom in or out of. Move your fi nger along the touch strip in an upward motion to zoom in or a downward motion to zoom out.
View an image’s actual size For the actual pixel size of an image, tap and fl ick toward or press Alt+Ctrl+0 (zero) for PC or Option+Cmd+0 (zero) for Mac.
Fit an image in the display To expand or shrink an image, tap and fl ick toward or press Cmd+0 (zero) for Mac or Ctrl+0 (zero) for PC.

Select an area
Select (M) Lagoon
Select All
Select (M) Toolbar
Lasso Select (L) Toolbar
Use one of the following methods:
• To select an area, do one of the following, then tap-drag to select the area you want:
• tap in the toolbar or press the M key
• tap in the toolbar or press the L key
• To select everything, select Edit > Select all or press Cmd+A for Mac or Ctrl+A for PC.
Deselect an area
To de-select the area:
1. Tap outside the area.
2. Flick toward one of the other selection tools.
3. Press Cmd+D for Mac or Ctrl+D for PC.
4. Select Edit > Deselect.
Copy your sketch
Use the Selection tools to select everything or just an area, then use one of the Copy tools.
To copy: • everything on a layer, select Edit > Select All or press the A key.
• a rectangular area, use or press the M key, then click-drag to surrounds the area you want to copy.
• an irregular area, use or press the L key, then click-drag to surrounds the area you want to copy.
• the contents from the current layer only, fl ick toward or press Cmd+C for Mac or Ctrl+C for PC.
To paste, fl ick toward or press Cmd+V for Mac or Ctrl+V for PC.

Move, rotate, or scale a selected area
Use the Transform Layer puck to move, rotate, and scale content. Use one of the Selection tools, then the Transform Layer puck appears.
Note - To move, rotate, or scale a selected area for all layers, merge the layers fi rst.
To move a selection, highlight the move outer circle. Tap, then drag to move the layer around the canvas.
To rotate a selection around its center, highlight the rotate middle circle. Tap, then drag in a circular motion in the direction you want to rotate.
To scale a selection bigger or smaller, highlight the scale inner circle. Tap, then drag to scale up or down to display the percentage scaling.
To non-proportionately scale a selection, highlight the upper part of the inner circle. Tap, then drag in the direction you want scaled.
Crop
Use these tools to select an area to crop it by tap-dragging to surround the area. Anything outside the selection is deleted. Tap to remove unselected parts of the sketch.
Crop – makes a square or rectangular crop selection.
Crop to Selection – crops irregular, square, & rectangular selections.
Crop the canvasUse Image > Canvas Size to set size of the canvas, using inches, cm, or mm. Tap the Anchor interface to specify how to crop the canvas.

Resize an image
Use Image size to change the dimensions of the image in pixels, its resolution, or the document size. Th is change directly aff ects memory usage, quadrupling it if you double the pixel size. Due to memory requirements, there is a 6400 x 6400-pixel upper limit on image size.
Change resolutionResolution is the number of pixels per inch or per cm. Leaving the document size the same increases the quality of the image and resolution; however, the memory size also increases.
Fit a resized image onto the screenTo expand or reduce an image to fi ll the screen, fl ick toward Fit to View or press Cmd+0 (zero) for Mac or Ctrl+0 (zero) for PC.
Rotate canvas
To rotate the canvas, hold down the Spacebar, mouse over the rotate ring of the puck, then click-drag to freely pivot the canvas.
Rotate or fl ip your sketch
Rotate Image CCW
Rotate Image CW
Flip canvas Vertically
Mirror Canvas
Flip Layer Vertically
Mirror Layer
• To rotate an image counter-clockwise, select Image > Rotate Image CCW .
• To rotate an image clockwise, select Image > Rotate Image CW .Note - Keep selecting either of these to rotate the image 180 or 270 degrees.
• To fl ip an image vertically, select .
• To fl ip an image horizontally, select .

Add an image
An image, such as a PXD from Pixlr, can be inserted onto the current layer or imported onto a new layer. To add an image, select File > Add Image, then select a fi le.
Note - When adding a PXD image to a sketch, SketchBook fl attens the fi le, without making any visual changes.
To add an image to the current layer, ensure that in the preferences Add Image: import into a new layer is not checked.
Note - Once an image added to a layer, it’s “baked” into the current sketch. You can no longer rotate, scale, or move it on its own. If you do not like its placement, choose to undo it and try again.
Color correct images
Th e Image menu contains the following options for editing an image. You can also invert the colors in an image or change it to grayscale.
Brightness/Contrast – Make colors pop. Increase the contrast to make colors richer. Decreasing it to wash them out for images that text can be placed over top. Increase brightness to bring out details from darker areas. Decrease it to melt away darker aspects of an image and shift the focus to things that are bright.
Hue/Saturation/Lightness – Change the color range, increase or decrease the purity of a color or brilliance of the colors. Adds/subtracts color (hue) or adjusts the relative amount of color (saturation) in each pixel.
Color Balance – Remove unwanted color casts by lights or inclement weather conditions by adjusting the cyan, red, magenta, green, yellow, and blue in each pixel.
Grayscale – Change a color image to one that uses black, white, and various shapes of gray by removing all color from the image.
Invert – Switch the contrast of an image. Change black elements to white and white to black to create an opposite image. Convert color information for each pixel to its complementary color.
Hide or move the interface
Use these tools to set what interface elements are visible.
Displays the toolbar and lagoon and fl ips it to the left corner of the canvas.
Display the toolbar and lagoon and fl ips the lagoon to the right corner of the canvas.
Hide the toolbar and lagoon.
Display the toolbar, but hide the lagoon.

Create a new sketch
To create a new sketch, fl ick toward or press Cmd+N for Mac or Ctrl+N for PC.Note - Use the Preferences window to set the default canvas size opened when you create new sketches.
Save your sketch
When saving a fi le, you can set options for saving with an alpha channel and set the format of the saved fi le.
Save with an alpha channel1. Set the preference Transparent background to create an alpha channel and make
the background of a layer transparent. 2. Select TIFF, PNG, or PSD when saving an image to save out the alpha channel. Important For this option to take eff ect, you must either select File > New and start a new
project or quit SketchBook and restart.
3. In the Background layer, tap-drag and select , then tap-drag the Opacity slider, to set the opacity to 0.
Save your sketch as an Adobe® Photoshop® fi leWhen saving, select the Adobe Photoshop PSD fi le type option for Mac or Adobe Photoshop Files (*.PSD) fi le type option for PC.
Save your sketch as a PXDSave images as PXDs to work on them in Pixlr. For images with colored text, to preserve the color, SketchBook converts the text to an image.
To save a sketch that can be opened in Pixlr, select File > Save as type > PXD Files (*.pxd).
Save your sketch as an image fi leWhen saving, select the type of image you want saved.
Note - Only the TIFF and PSD image formats preserve layers. Saving them as any other image format fl attens them. Only use Autodesk SketchBook Pro to read TIFF fi les containing layers. We do not advise you to open these images in other programs because we cannot guarantee layer preservation.
Open a saved sketch
To open sketches of various formats, fl ick toward or press Cmd+O for Mac or Ctrl+O for PC.
Open a PXDOpen an image from Pixlr in SketchBook. If the image uses a blend mode not supported by SketchBook, the Normal blend mode is used to replace it. To bring an image from Pixlr into SketchBook, select File > Open, then select a PXD fi le.

Use LayersUse layers to make changes to an image without modifying the content on other layers. Use multiple layers for drawing complex sketches or to test variations of a design.
How do I use layers?
1. Flick toward to open the Layer Editor.
2. Tap-hold the middle of a layer to access layer tools, then fl ick toward any of the following:
Add a layer (Cmd+L for Mac or Ctrl+L for PC)
Delete a layer
Rename a layer
Merge all layers together
Merge with the layer below (Cmd+E for Mac or Ctrl+E for PC)
Lock and unlock a layer
Hide or Show a layer
Make a duplicate layer
Select a layer
In the Layer Editor, tap a layer to select and highlight it. All actions are applied to this layer, until another layer is selected.Note - Only one layer can be selected and active at a time.
Persistent selectionAfter selecting a region on the canvas, you can add, delete, or switch layers, while the “marching ants” created by the Select/Lasso/Crop tools stay active. Your selection is maintained.
Edit a layer
With a layer selected in the Layer Editor, move, rotate, or scale the layer, mirror or fl ip its content, use the color correction tools, or add text.
Note - Moving, rotating, and scaling a layer only aff ects the current layer. To move, rotate, or scale the entire canvas, merge all the layers fi rst.
To move, rotate, or scale a layer, fl ick toward or press-hold the V key and use the Transform puck. To do this to another layer, select a new layer and repeat.Note - If using the V hotkey, press and hold it down, as you tap the top of the middle circle, and drag up, down,
right, or left.
To mirror or fl ip a layer, see Rotate or fl ip your sketch.
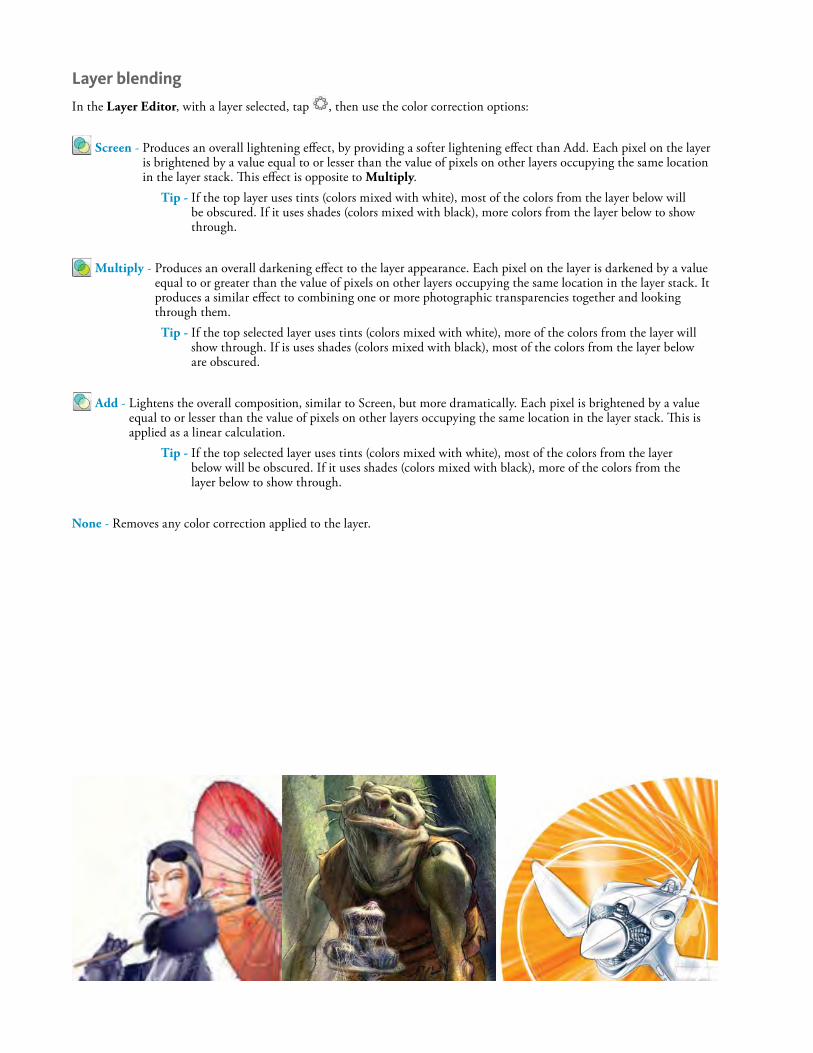
Layer blending
In the Layer Editor, with a layer selected, tap , then use the color correction options:
Screen - Produces an overall lightening eff ect, by providing a softer lightening eff ect than Add. Each pixel on the layer is brightened by a value equal to or lesser than the value of pixels on other layers occupying the same location in the layer stack. Th is eff ect is opposite to Multiply.
Tip - If the top layer uses tints (colors mixed with white), most of the colors from the layer below will be obscured. If it uses shades (colors mixed with black), more colors from the layer below to show through.
Multiply - Produces an overall darkening eff ect to the layer appearance. Each pixel on the layer is darkened by a value equal to or greater than the value of pixels on other layers occupying the same location in the layer stack. It produces a similar eff ect to combining one or more photographic transparencies together and looking through them.Tip - If the top selected layer uses tints (colors mixed with white), more of the colors from the layer will
show through. If is uses shades (colors mixed with black), most of the colors from the layer below are obscured.
Add - Lightens the overall composition, similar to Screen, but more dramatically. Each pixel is brightened by a value equal to or lesser than the value of pixels on other layers occupying the same location in the layer stack. Th is is applied as a linear calculation.
Tip - If the top selected layer uses tints (colors mixed with white), most of the colors from the layer below will be obscured. If it uses shades (colors mixed with black), more of the colors from the layer below to show through.
None - Removes any color correction applied to the layer.

Organize layers
Drag layers and reposition them and change the spacial position of objects and how they combine to create the overall composition. Once satisfi ed with layer order, they can be combined by merging two or all of them.
In the Layer Editor, pen down on to drag the layer up or down. Release the stylus to drop the layer into position.
Merge two layersCombine two layers together. Tap the upper layer and fl ick toward to merge it with the one below or press Cmd+E for Mac or Ctrl+E for PC.
Merge all layersCombine all layers to create a project with one layer. Flick toward to merge them, even hidden (which become visible) or locked ones.
Change the transparency of a layer
Blend a layer with other layers using transparency.
Full opacity Medium opacity (translucent) Transparent
In the Layer Editor, with a layer selected, drag the slider to the opacity.Note - If a layer is not visible, check to see if the opacity is at 0%.
To lock the transparency of a layer, use the secondary marking menu and fl ick upwards toward .To unlock transparency, fl ick upward toward .

Create Custom BrushesTh ere are three sets of custom brushes. Create more by copying a brush and changing its setting or creating a Do-It-Yourself brush.
Brush sets
Th ere are an assortment of default brush set, including a set of Copic brushes. Create custom sets to group and manage brushes. Export sets for others to use or save them to an external drive. Import and use brush sets created by others. Label your brush sets to help identify them. In the Brush Palette, tap to access the following options:
New Brush Set – Create a new brush set.
Rename Brush Set – Change the name of the selected brush set.
Export brush set – Share brushes with people working on diff erent platforms.
Import Brush Set – Load an exported zipped brush set fi le into the Brush Palette.
Delete Brush Set – Remove the selected brush set from the Brush Palette.
New Brush – Create a new brush and add it to the selected brush set.
Copy Brush – Create a duplicate of a selected brush and add it to the selected brush set.
Delete Brush – Permanently remove a selected brush.
Do-It-Yourself brushes
Once you create a Do-It-Yourself brush, you can do the following:
• Adjust the pressure sensitivity - Set brush width or transparency according to the amount of pressure applied to the stylus. Double-tap a Do-It-Yourself brush and make changes to its Size to vary its brush thickness as the stylus pressure changes.Note - Th e brush size values are a rough approximation of pixel size, but
can vary. For example, if lines are too thin to be drawn on the screen, they default to being wider. To resize a marker, try adjusting its opacity and stamp spacing. To make a bigger marker, set the opacity lower and the brush stamp spacing lower.
• Change the opacity – Set Opacity to vary brush opacity as the stylus pressure changes.

Create a Texture Brush
Once a Do-It-Yourself brush is created, a texture can be added to it, creating a texture brush. You can set the shape and/or color and make a texture from a rotated stroke or capture something on your canvas to use as a texture. When capturing a texture, one of the following Custom Texture settings can be selected:
Shape + Colors Uses the current paint color, as well as the selected shape, to
create your texture. Whenever the texture brush is used, it uses the color set during creation.
Shape
Creates a texture brush with no assigned color. Each time the texture brush is used, a diff erent color can be set.
Rotate to Stroke Dynamically rotates the texture in the direction of the stroke.
Image compliments of Starr Shaw
1. With a Do-It-Yourself brush selected, tap Show Brush Properties to open Brush Properties.
2. Tap Capture.
3. From Custom Texture, select either Shape + Colors or Shape and/or check Rotate to Stroke.
4. Within the canvas, tap the area to be captured as the texture. Th e display in Brush Properties updates to show the texture and color. Note - When capturing the texture shape, SketchBook uses the current size of the Do-It-Yourself brush. If
the complete shape is not captured, resize the Do-It-Yourself brush, then capture the shape again.
Saving a texture brushTap Save at the bottom of Brush Properties to save the brush.
Modifying a texture brushTh ere are many ways to modify a texture brush, from resetting it, opening its properties and changing settings, changing a stroke, to assigning a permanent color to it.
• Changing texture brush properties - Change attributes of a texture brush.
• Changing a texture - Change the stroke used by a texture brush.
• Setting color on a Shape texture brush - Set a diff erent color for a texture brush.
• Adjust the brush stamp for a Do-It-Yourself brush - Adjust the aspect, rotation, spacing, noise, jitter, and brush edge of a Do-It-Yourself brush.
• Setting brush stamp aspect and rotation - Use the Aspect and Rotation sliders in the Brush Properties window to control the shape of the brush stamp.
• Setting brush stamp spacing - Use the Stamp Spacing slider in the Brush Properties window to control the spacing between these stamps.
• Replacing a custom brush icon - In the Identify Custom Brush window, select an item from the Icon list.

• Setting brush edges - Normally, the brush type you have selected determines this setting. To achieve certain eff ects, change it. Soft edges gives soft, feathered brush edges. For example, an airbrush. Solid edges gives hard edges that still bleed slightly. For example, markers or ballpoint pens. Hard edges are hard. For example, a calligraphy pen on high-quality paper stock, or lines from computer drafting software.
• Identify a custom brush - Rename a custom brush or eraser, or change its icon appearing in the expanded area at the bottom of the Brush Palette.Note - You cannot change the name or icon for the default brushes.
Create your own brush icons
Create your own unique icons to identify custom brushes. When exporting these brushes, the custom icons assignments appear upon import.Note - Custom icons cannot be assigned to default brushed, only brushes in the bottom part of the Brush Palette.
Each icon you create must be a PNG image fi le that is 36 x 36 pixels. A custom brush icon not matching these criteria does not appear. For each icon, create three image fi les:
One image of the icon itself, given a descriptive name. For example, MyBrush.png. Th is fi le name appears in the Icons list of the Identify Custom Brush window.
One image for the icon in rollover state (that is, for when the cursor passes over it). Th is fi le must use the same name as the fi rst icon, but with “ _ over” added to the end (use the underscore character “ _ ” and not a space). For example, MyBrush _over.png.
One image for the icon in selected state (that is, for when it is the current brush). Th is fi le must use the same name, with “ _ press” added to the end. For example, MyBrush _ press.png.
About the sample iconTh ere is a sample icon called “Sample,” visible in the Icon list of the Identify Custom Brush window. Th is sample icon provides three image fi les for the icon in its three states. Find these fi les, named “Sample.png”, “Sample _ over.png”, and “Sample _ press.png”, in the following folder:
For PC:C:\Documents and Settings\[your login name]\Application Data\Autodesk\SketchBook Pro\5.2\
For Windows 7 and Vista users:C:\Users\[user account]\AppData\Roaming\Autodesk\SketchBook Pro\5.2\You will have to create a folder called BrushPresetIcons.
For Mac:[your user folder]/Library/Application Support/Autodesk/SketchBook Pro/5.2/You will have to create a folder called BrushPresetIcons. Store any icon images you create in this same folder to see them in the Identify Custom Brush window.

Change the brush cursorIn your Preferences, set the type of display for the brush cursor.
Remove the brush outlineBy default, a brush outline appears for the sharpen, blur, and smear brushes, eraser, and other low-opacity brushes such as the airbrush. Th is outline lets you see the size of the brush before you start drawing.
In your Preferences, this can be turned off .

Annotate, Send, Print & Present
Print images or email them. Annotate sketches. Present sketches to colleagues, clients, or friends.
Text
Use to create simple RTF text objects. Set the font, size, style, and color, select and position them, change their transparency, and use Edit Text Layer to modify them.
Adding text
1. To add text, in the toolbar, tap . If in the Layer Editor, along the right side of a layer, tap .
2. Start typing in the Edit Text Layer window.
3. Use the in-line editing tools to make changes to the text. See Editing text for more information.
4. Tap OK when fi nished.
Editing textTh rough tapping Font button in the the Edit Text Layer window, you can access the following text editing tools:
• Collections – Manage the list of fonts that appear in Family and see only the fonts you want. Create custom font collections. Use default sets to load only fun fonts or ones with fi xed width. Load only your favorite fonts or those recently used.
• Family – Select a font from the list. If a font family is not listed, change the Collections option to All Fonts.
• Typeface – Choose from Condensed, Condensed Italic, Bold Condensed, Bold Condensed Italic typefaces.
• Size – Set the size of the text.
To set text color, click .
1. If the Edit Text Layer window is not open, select a text layer.
2. Along the right side of the layer, tap .
3. Select Edit Text Layer to open the Edit Text Layer window.
4. Tap the Font button to access the in-line text editing tools.

Changing the transparency of textTh e opacity of a text layer can be changed using the layer’s opacity slider. Click-drag the opacity slider to change the transparency of a text layer.
A A ATransforming textOnce text appears in the middle of the canvas, you are in Transform mode. Move is set as the default transform. Use the puck to select a diff erent mode.
• When rotating or scaling the text, SketchBook uses the center of the text as the pivot point.
• When scaling text, font size is changed, resulting in no visual quality change. Note - Font size determines how much you can scale a font. A font size of 12 cannot be scaled up as much as
one set to 24. A font of 12 cannot be scaled down as much as one set to 5. To scale a font any further, return to the Text window and increase or decrease the font size.
Rasterizing a text layerChange text into pixels to paint on the same layer. Th e Text layer is converted into a regular layer and its content is converted to pixels. Paint can be applied to this new layer. In the Layer Editor, fl ick .Note - When text is rasterized, Edit Text can no longer be applied.
Email a sketchEmail a sketch to someone by selecting File > Send Mail.
Troubleshooting
For PC users, if you get a message that you cannot email the image, check that:
You have an email account set up on your computer.
To select a default email application on a Windows XP system:
• Go to the Internet Properties control panel (Start > Settings > Control Panel > Internet Options).
• Click the Programs tab.
• Pick the default email application from the E-mail dropdown list.
You have selected a default email application.
Your email program is open. Some email programs (for example, Microsoft Outlook) must be open before using this feature.
You can launch your default email program from outside of SketchBook.
Try the following:
• From the Windows Start menu, choose Run.
• Type the “mailto:” command.
• Click OK. If a new empty message window does not appear, then there is a problem with the confi guration of your email application and/or account.

For Mac users, if you get a message that you cannot email the image, check that:
• You have an email account set up on your computer.
• You have selected a default email application.
• You can launch your default email program from outside SketchBook.
If your email program creates the email message, but cannot send the message, ensure that your email service provider is operational. (Refer to the documentation of your email program for further information.)
Use background templates
Create your own background templates. Make graphs, lines, and other images you can draw over. When opening these templates into Autodesk SketchBook Pro, your markups have an annotation layer, with the image itself preserved as a locked background layer.
Print a sketch
Make printouts of your sketches by selecting File > Print.
Flip through your sketches
View the images in a folder.
• To move to the next image in the current folder, tap , then fl ick toward . Images are displayed in increasing order by fi le name. For example, HOUSE1, HOUSE2, HOUSE3.
• To move to the previous image in the current folder, tap , then fl ick toward . Images are displayed in decreasing order by fi le name. For example, HOUSE3, HOUSE2, HOUSE1.Note - If you mark up the images, a prompt to save your changes when you go to the previous or next image
appears. To preserve the original image, save the marked-up image under a diff erent fi le name.
Present images
Organize and determine their order, then hide the interface to make the images the focal point.
• • Put your images in order for presentation - Create a folder containing the images you want to include in the presentation. Rename the images in the folder in alphabetical or numerical order you want to present them.
• Presenting images - Browse to the folder containing the images you want to present. Open the fi rst fi le in the folder. To show the next image, tap , then fl ick toward . To go backwards, tap , then fl ick toward .
• Hiding the interface for a bigger viewing area – To view a full-size display with no title bar or tools, tap , then fl ick . To move back and forth between images, use the Page Up and Page Down keys. To view all the tools again, tap , then fl ick .

Adjust System & Program Settings
Create your own marking menus and populate the lagoon with the options you use most frequently. Right-tap to access a virtual fl oating lagoon.
Customizing lagoon icons
Change the icons displayed in the lagoon, using the top section of the Lagoon Preferences.
Customizing marking menus
Customize the marking menu for an icon in the lagoon, using the Lagoon Preferences to add tools that you commonly use. Once done, you can use clutch keys or right-click to access these custom marking menus without visiting the lagoon.
Lagoon position Mouse Stylus
Right-click and press 1 Press-hold 1 and pen-down
Right-click and press 2 Press-hold 2 and pen-down
Right-click and press 3 Press-hold 3 and pen-down
Right-click and press 4 Press-hold 4 and pen-down
Right-click and press 5 Press-hold 5 and pen-down
Right-click and press 6 Press-hold 6 and pen-down
Resetting your preferences
At any time, you can reset your preferences back to their original state. In the Lagoon tab, tap Reset.
Hiding or showing scroll bars
Tap the Canvas tab. Turn off Enable canvas scroll bars.Note - You can still use the Zoom and Move tool to view those
parts of the image that are off the screen.
Changing the behavior of Page Up and Page Down
Some machines use the Page Up and Page Down keys diff erently for browsing to previous or next fi les. Tap the General tab, in the Page Up section, tap one of the following setting to set up the program behavior that works best for your system.
• Open next image
• Open previous image

Changing the Maximum Number of Undos
Changing the number of undos only takes eff ect once a fi le is created or another one is imported. We recommend you restart SketchBook. Tap the General tab. Enter the number of undos in Maximum undos. Th e maximum value is 50, but we recommend a lower value for optimal speed and performance.
Changing the default canvas size for new fi lesBy default, the size of a new image is the size of the display.
• • Use width and height of window - To specify a custom size. Enter the width and height in the fi elds provided (choose from pixels, inches, cm, or mm). Note - Th e maximum size is 6400 x 6400 pixels.
• • Use width and height of window - To use the default display size again.
Improve performance
Some users may experience slower performance when Enable Rotate Canvas is enabled. Th is can be corrected by changing a setting in the Preferences, which turn off Enable Rotate Canvas.
Tip - Press the [ and ] keys to rotate the canvas to the left of right, respectively.
Wacom tablet troubleshooting
For users of either the Wacom Cintiq or Intuos tablet devices, who have experienced any of the following issues:
• Cursor off set (Cintiq)
• Cursor acceleration (dual monitor setups)
• Erratic pen inputYou may want to also read these articles at visit the following links:
• http://www.wacom.com/faqs/view.php?id=289
• http://www.wacom.com/faqs/view.php?id=115
Installing the latest driversIf your Wacom device seems to work when you fi rst plug it in, but you experience erratic behavior (for example, problems with stylus pressure or with drifting or off set of the brush stroke), you need the latest tablet driver.
Note - If you switch from serial to USB devices, try uninstalling the tablet driver and reinstalling it.
For the latest Wacom drivers, go to the Support area of http://www.wacom.com.
Install a tablet driver only after you have plugged in the Wacom device, uninstalled the previous driver, and restarted.
Note - For PC users, do not install Wacom drivers on a Tablet PC. Only install those drivers provided by your Tablet PC manufacturer.

Using default tip pressure feelIf you fi nd that brush strokes change abruptly from too light to too dark as you vary the amount of pressure you apply to your stylus:
1. For PC users, display the Wacom Tablet Properties window. Access this window from Start > Settings > Control Panel > Wacom tablet. For Mac users, fi nd the installed Wacom drivers and double-clicking the Wacom Tablet icon to access this window.
2. To customized settings for other applications, add Autodesk SketchBook Pro to the list of applications with customized tool settings, which applies the changes only to it.
3. Move the Tip Pressure Feel slider to half-way between Soft and Hard. Th e shape of the pressure curve in the More Options display must be a diagonal line. It takes this shape by default when you move the Tip Pressure Feel slider to the middle.
Note - For information about using SketchBook with Wacom tablets, see the section to follow, Adjusting stylus responsiveness.
Adjusting stylus responsiveness
Styli (pens) for various systems each respond diff erently to the pressure you apply. If you dislike the feel of your current stylus, do the following:Note - Th is setting aff ects brushstrokes for all pressure-sensitive brushes.
1. Select a pressure-sensitive brush, such as the pencil. Note - You cannot adjust stylus responsiveness, unless the current brush is pressure-sensitive.
2. Select Edit > Pen Responsiveness. Th e Pen Responsiveness window appears.
3. Move the slider to the right to increase the responsiveness of the stylus. As you move toward the Less end of the scale, the feel of the stylus becomes softer. You do not have to press hard to get dark and thick strokes. As you move toward the More end of the scale, the feel of the stylus becomes harder. Press hard to get dark, thick strokes.
4. Test your stylus on the canvas. Experiment with diff erent types of brushes. Note - Th e Pen Responsiveness window stays up while you test.
Keep testing with diff erent responsiveness values until the marks on the screen look and feel right. With heavy pressure, the markers and other heavier brushes tend to make dark, thick strokes. With light pressure, the pencils tend to make light, but visible strokes.Note - You may need to adjust the pen responsiveness each time you use a diff erent tablet or stylus.
Adjusting stylus responsiveness for one brushTh e Pen Responsiveness window applies to all brushes. To create a brush that responds diff erently to the pressure you apply to the stylus, create a do-it-yourself brush and change its size and opacity levels.Note - Brushstrokes can change abruptly from too light to too dark as you vary the stylus pressure.
Setting the tip pressure feel to its default value corrects the abrupt changes.
Changing the width of the Brush Palette
Select how many columns wide the Brush Palette will be. To change the width of the Brush Palette, in the Preferences > Brush > Brush Palette section, choose 2 or 3 from Column Number.