Embed Size (px)
Citation preview
SISTEMI EMBEDDEDAA 2012/2013
Building a Nios II processorfrom scratch
Introduction
• Problem:– Build a (NIOS II) system tailored to application needs
• Solutions:– Use library cores and custom Verilog code– Use specific design tools (SOPC Builder/Qsys) with
library of CPUs and peripherals that can be connected through the Avalon System Fabric
• DE2_basic and DE2_media are examples– Pre-built Nios_systems– Different requirements (basic system, media system)– Different peripherals
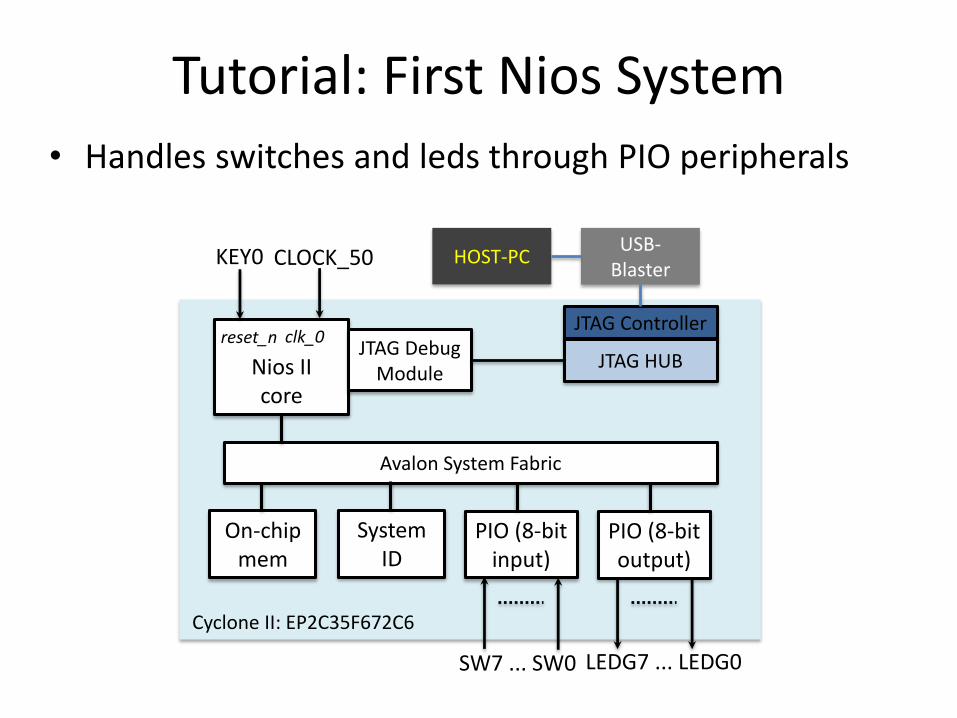
Tutorial: First Nios System
• Handles switches and leds through PIO peripherals
Avalon System Fabric
Nios IIcore
JTAG Debug Module
KEY0
reset_nJTAG Controller
Cyclone II: EP2C35F672C6
On-chipmem
PIO (8-bit input)
SW7 ... SW0
PIO (8-bit output)
LEDG7 ... LEDG0
clk_0
JTAG HUB
USB-Blaster
HOST-PC
System ID
CLOCK_50

First Nios System units
• CPU (simplest, i.e., economy variant) with JTAG Debug Module
• 2 PIOs
– Input for switches (8 bit)
– Output for driving LEDs (8 bit)
• On-chip memory for program and data (8 kB)
• System ID Peripheral for CPU identification (must be named sysid)
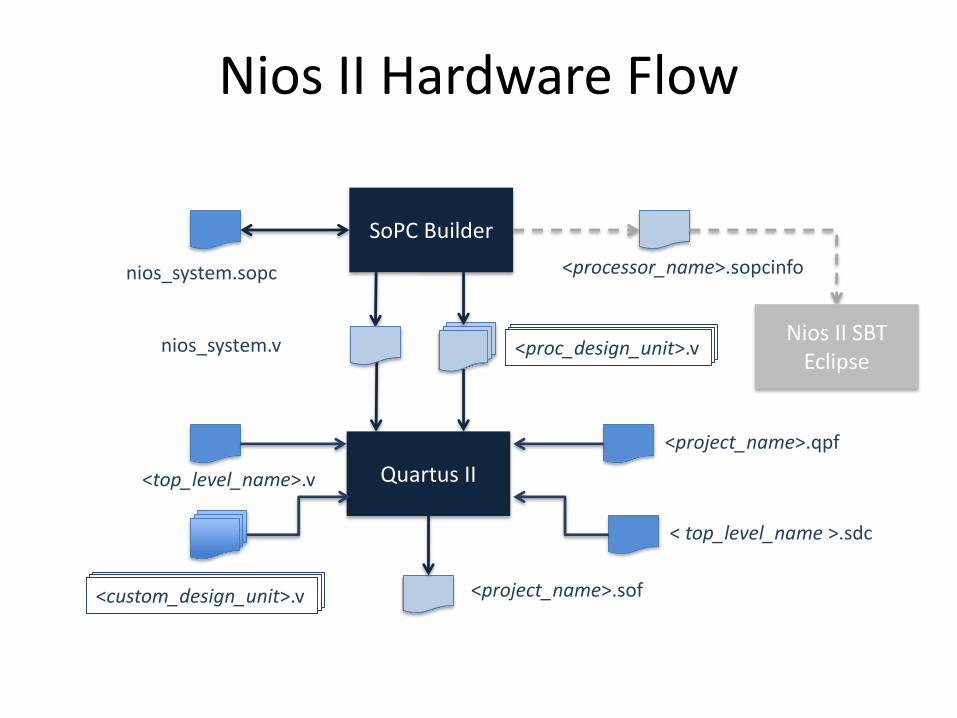
Nios II Hardware Flow
<proc_design_unit>.v<proc_design_unit>.v
SoPC Builder
nios_system.sopc
Quartus II
<processor_name>.sopcinfo
Nios II SBTEclipse
nios_system.v
<top_level_name>.v
<project_name>.sof
<proc_design_unit>.v
<custom_design_unit>.v<custom_design_unit>.v<custom_design_unit>.v
<project_name>.qpf
< top_level_name >.sdc
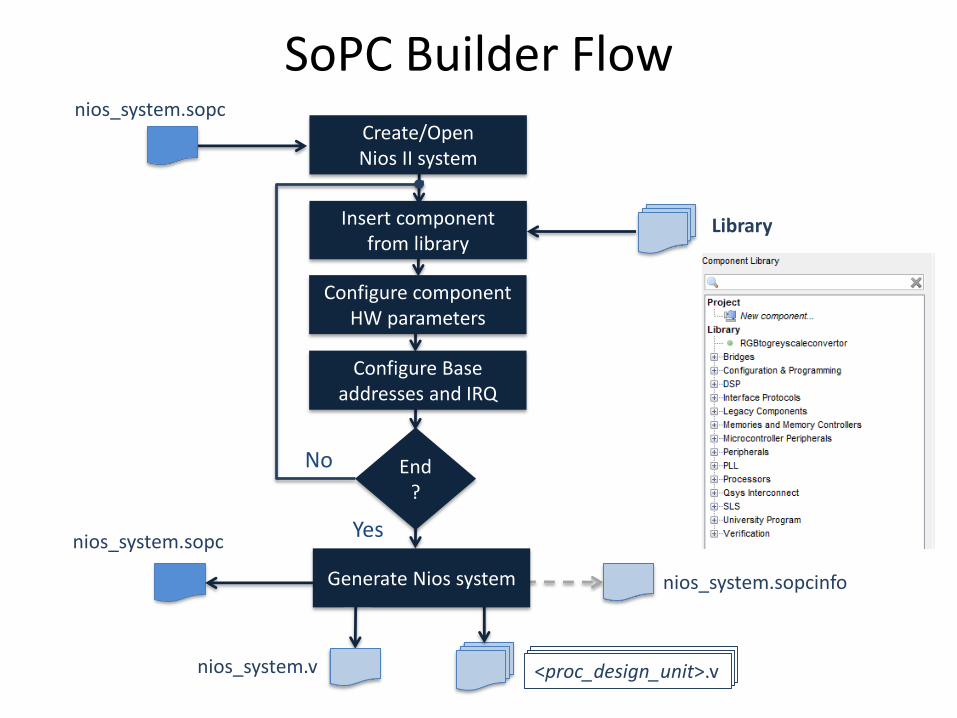
SoPC Builder Flow
<proc_design_unit>.v<proc_design_unit>.v
Create/OpenNios II system
nios_system.sopc
nios_system.v <proc_design_unit>.v
Insert componentfrom library
Configure component HW parameters
Configure Base addresses and IRQ
End?
Generate Nios system
nios_system.sopc
Library
nios_system.sopcinfo
No
Yes
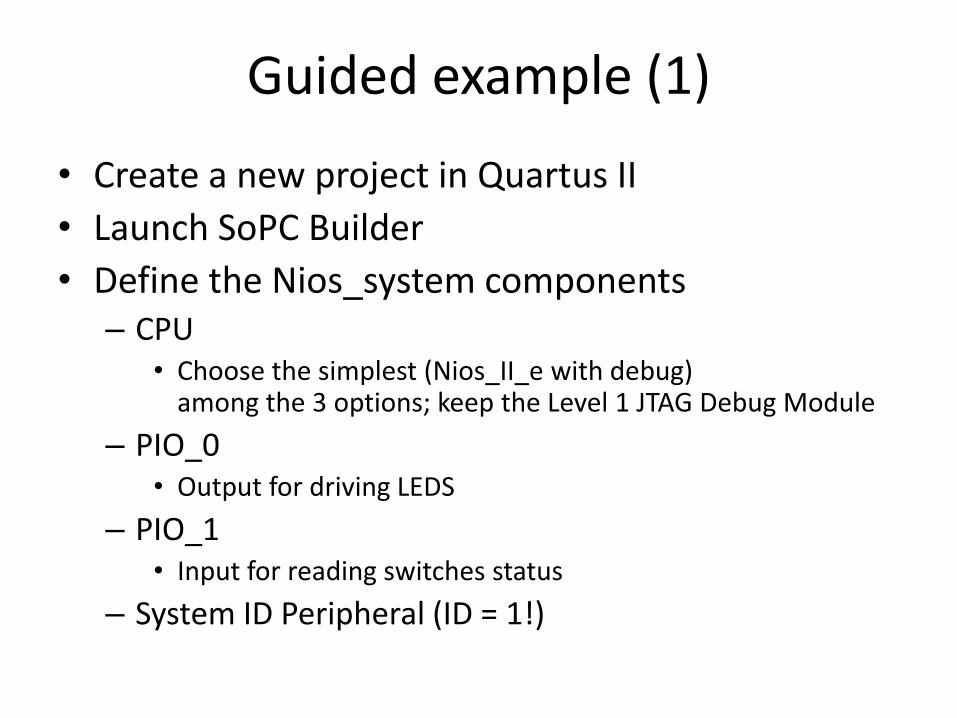
Guided example (1)
• Create a new project in Quartus II
• Launch SoPC Builder
• Define the Nios_system components– CPU
• Choose the simplest (Nios_II_e with debug)among the 3 options; keep the Level 1 JTAG Debug Module
– PIO_0• Output for driving LEDS
– PIO_1• Input for reading switches status
– System ID Peripheral (ID = 1!)
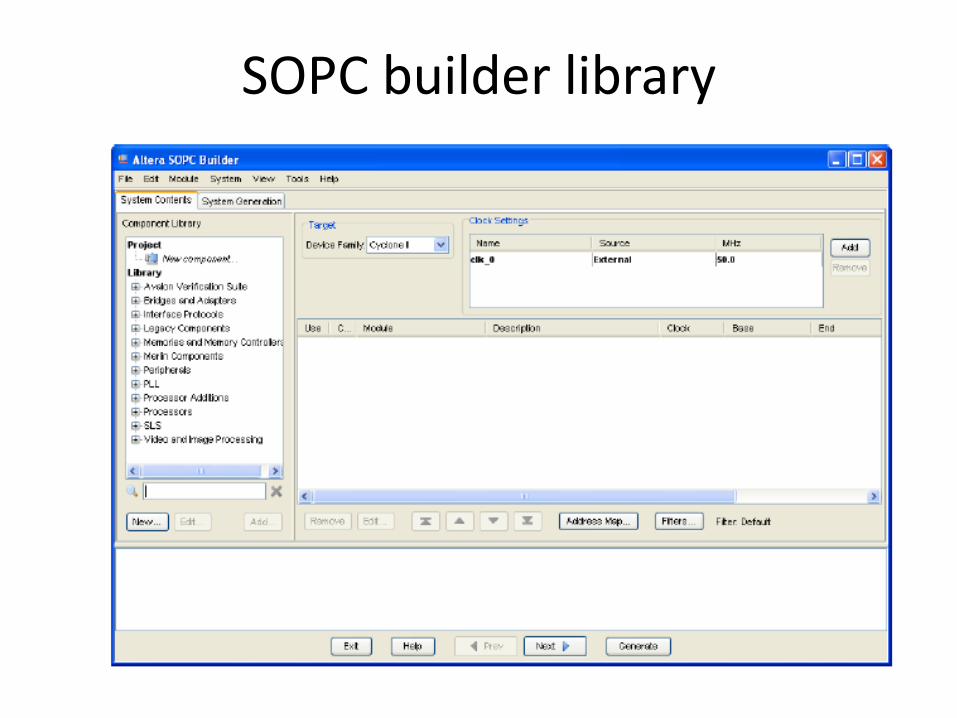
SOPC builder library
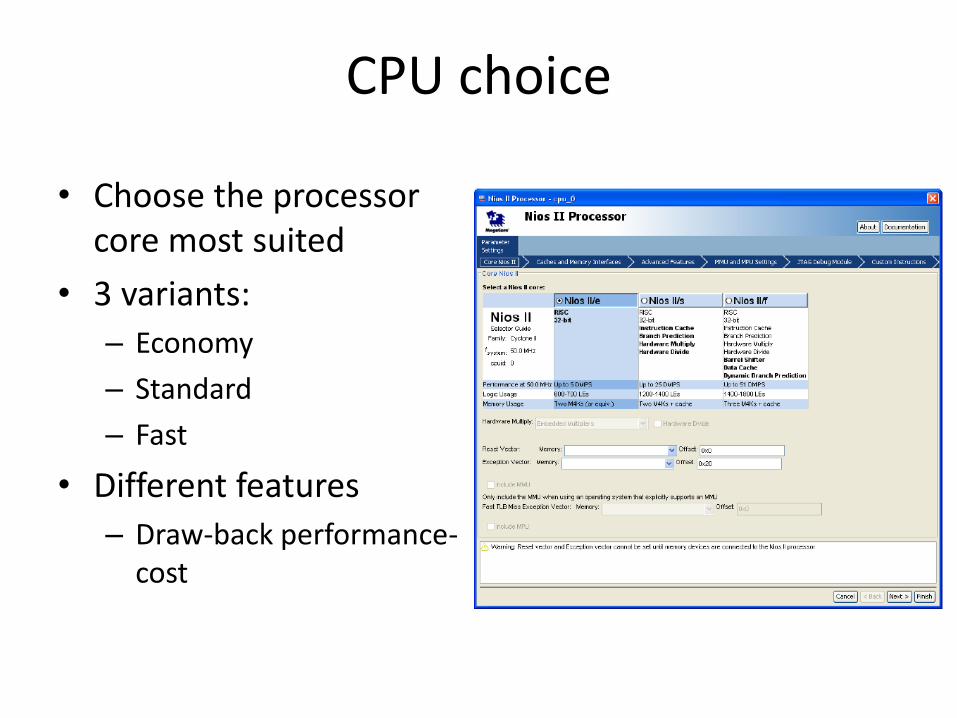
CPU choice
• Choose the processor core most suited
• 3 variants:
– Economy
– Standard
– Fast
• Different features
– Draw-back performance-cost
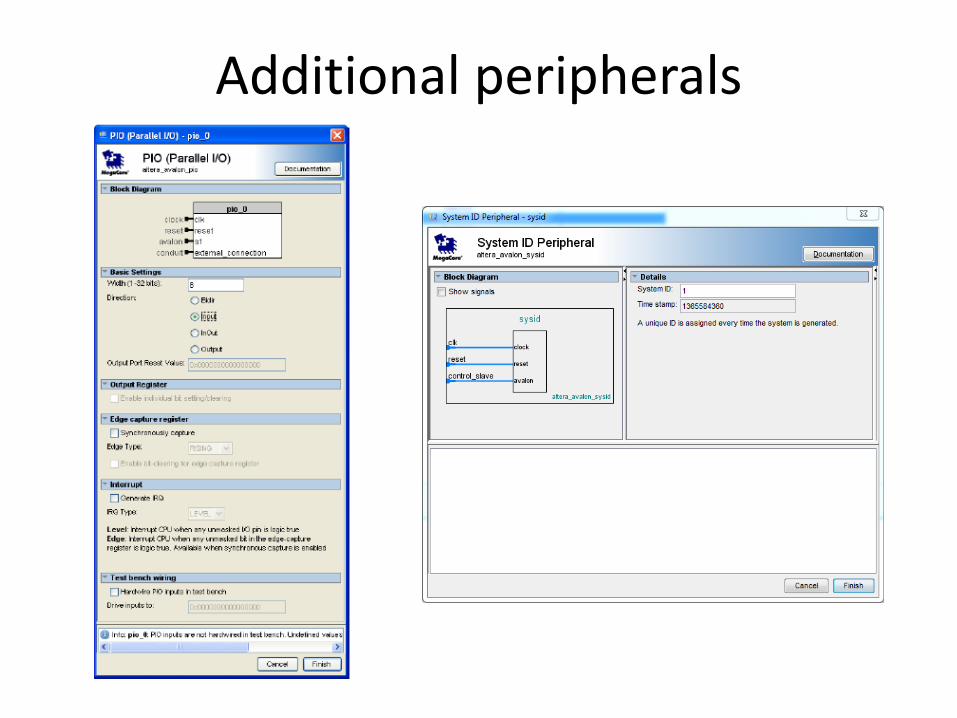
Additional peripherals
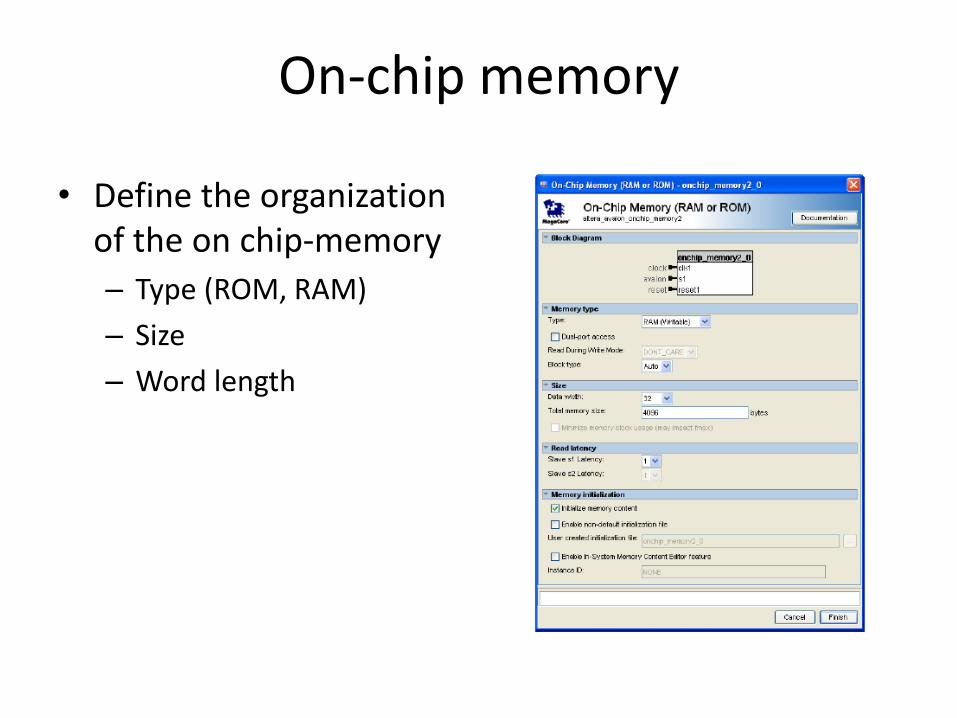
On-chip memory
• Define the organizationof the on chip-memory
– Type (ROM, RAM)
– Size
– Word length
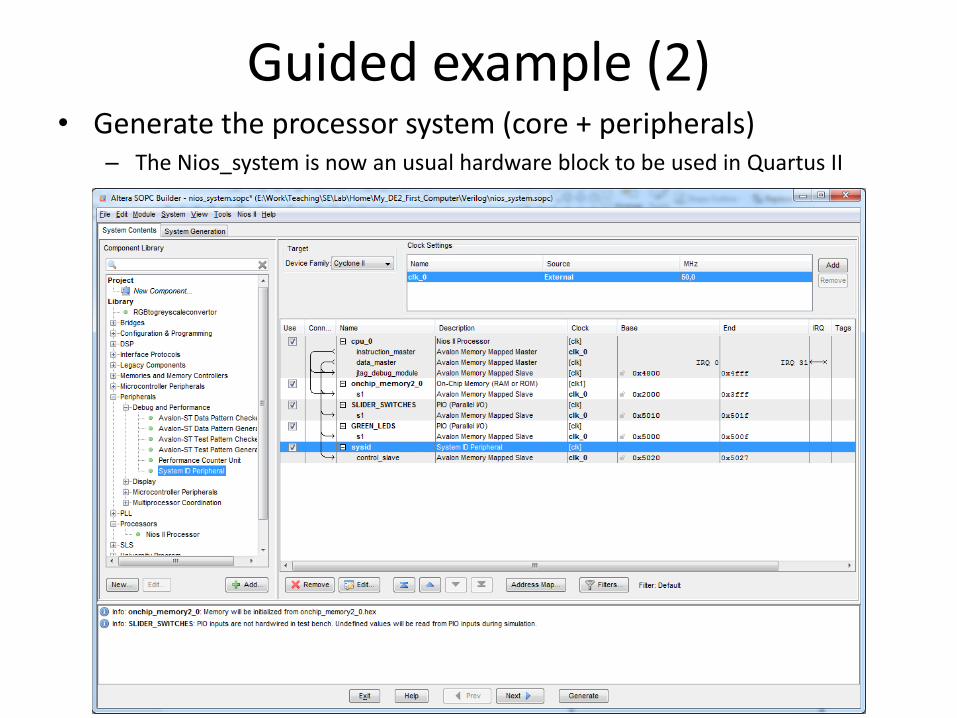
Guided example (2)• Generate the processor system (core + peripherals)
– The Nios_system is now an usual hardware block to be used in Quartus II
Guided example (3)
• Back to Quartus II
– Create the root module of the project
– Include the Nios_system module as hierarchical block (Verilog or schematic)
– Import pin assignment from de2.qsf
– Compile the project to make the hardware ready
Testing First Nios System
• Write a program that makes the GREEN LEDS to be controlled by the SLIDERS SWITCHES
• If successful, go back to SoPC Builder, add the JTAG-UART peripheral, regenerate the Nios system and compile the design again (top level entry does not need to be changed)
• Write a program that say Hello to the host telling him the sistem ID and timestamp– The file .sopcinfo needs to be updated as the Nios
system has been regenerated!
• That’s all folks!!