Embed Size (px)
Citation preview

World Wide Web
wwPerso
ore
y
merchant systemML
Int
serversecurity
ne
URL
HT
r
nacommunity system
Ja
Mozill
Publis
Chat
encryp
SSL
TCP/IP
nal
ISt
Prox
HT
Inte
vigator
a
hing
Single Sign-On Deployment Guide
Security
comp.sysdirectory server
http://wwwernet
ws
ML
electronic commerce
vaScriptProxycertificate
Publishing
tion
secure sockets layer

Netscape Communications Corporation ("Netscape") and its licensors retain all ownership rights to this document (the "Document"). Use of the Document is governed by applicable copyright law. Netscape may revise this Document from time to time without notice.
THIS DOCUMENT IS PROVIDED "AS IS" WITHOUT WARRANTY OF ANY KIND. IN NO EVENT SHALL NETSCAPE BE LIABLE FOR ANY LOSS OF PROFITS, LOSS OF BUSINESS, LOSS OF USE OR DATA, INTERRUPTION OF BUSINESS, OR FOR INDIRECT, SPECIAL, INCIDENTAL, OR CONSEQUENTIAL DAMAGES OF ANY KIND, ARISING FROM ANY ERROR IN THIS DOCUMENT.
The Document is copyright © 1997 Netscape Communications Corporation. All rights reserved.
Netscape and Netscape Navigator are registered trademarks of Netscape Communications Corporation in the United States and other countries. Netscape's logos and Netscape product and service names are also trademarks of Netscape Communications Corporation, which may be registered in other countries. Other product and brand names are trademarks of their respective owners.
The downloading, export or reexport of Netscape software or any underlying information or technology must be in full compliance with all United States and other applicable laws and regulations. Any provision of Netscape software or documentation to the U.S. Government is with restricted rights as described in the license agreement accompanying Netscape software.
.
©Netscape Communications Corporation 1997All Rights Reserved
Printed in USA99 98 97 10 9 8 7 6 5 4 3 2 1
Netscape Communications Corporation 501 East Middlefield Road, Mountain View, CA 94043
Recycled and Recyclable Paper

Single Sign-On Deployment Guide
Planning and Deploying a Single Sign-On Solution 1Introduction to Single Sign-On ........................................................................2
Client Authentication and Single Sign-On ..................................................4
Basic Authentication ................................................................................5
Strong Authentication ..............................................................................7
Netscape Products That Support Single Sign-On .......................................9
Planning a Single Sign-On Solution ...............................................................10
Planning Your LDAP Directory .................................................................10
Certificates, DNs, and LDAP Lookups ..................................................11
LDAP Tree Hierarchy and Entry Attributes ..........................................12
Integration Issues ...................................................................................13
Establishing the CA Hierarchy ...................................................................13
Planning the CA Hierarchy ...................................................................14
Verifying Certificate Chains ...................................................................17
Determining Which CA Certificates to Install ......................................20
Examples ................................................................................................21
Mapping DNs to an LDAP Entry ...............................................................21
Planning Access Control ............................................................................22
Establishing Security Policies .....................................................................24
Security Policy Architecture ..................................................................24
Client Software Policies .........................................................................25
Dealing with Export Restrictions ...............................................................25
Setting Up Netscape Servers for Single Sign-On ...........................................27
Setting Up the Directory Server .................................................................28
Install a Directory Server .......................................................................28
Add an Entry for the Certificate Authority ...........................................29
Set Up an Entry with Write Access .......................................................29
Add Entries for the Users ......................................................................30
Get a Server Certificate ..........................................................................30
Enable Encryption .................................................................................30
Setting Up the Certificate Server ................................................................31
Install a Certificate Server ......................................................................32
Chapter , 3

Configure the Certificate Server to Work with the Directory Server ..33
Specify How the Certificate Server Matches DNs to Directory Entries 37
Setting Up the Enterprise Server ...............................................................41
Install an Enterprise Server ...................................................................41
Generate a Key Pair and Request a Server Certificate ........................41
Set Client Authentication and Encryption Preferences ........................45
Restrict Access .......................................................................................47
Configure Directory Service ..................................................................49
Set Up the certmap.conf File ................................................................51
Setting Up the Messaging Server ...............................................................54
Setting Up Netscape Clients for Single Sign-On ...........................................55
Using Mission Control to Configure Communicator for Single Sign-On .55
Configuring the Certificate Database for Communicator ....................56
Configuring SSL and Password Settings for Communicator ................57
Configuring User Certificate Setting for Communicator ......................58
Using the Administration Toolkit to Configure Navigator 3.x .................60
Configuring the Certificate Database for Navigator 3.x .......................60
Configuring SSL and Password Settings for Navigator 3.x ..................61
Issuing Client Certificates ...............................................................................62
Using the Verification Gateway Interface .................................................62
Guiding Users Through the Request Process ...........................................63
Testing Your Setup Before Full Deployment ................................................65
Appendix A Netscape’s Use of Public-Key Cryptography .............. 67
Public-Private Key Pairs ................................................................................. 67
Certificates ....................................................................................................... 68
Types of Certificates ................................................................................... 69
Keeping Track of Certificates .................................................................... 71
4 Single Sign-On Deployment Guide
Digital Signatures ............................................................................................74
Getting a Certificate ........................................................................................76
Authenticating a User’s Identity .....................................................................78
Appendix B Single Sign-On and Future Versions of SuiteSpot Servers 83
Proxy Server ....................................................................................................83
Directory Server ..............................................................................................84
Catalog/Compass Server .................................................................................84
Calendar Server ...............................................................................................84
References 85Public-Key Cryptography ...............................................................................85
SuiteSpot Servers .............................................................................................85
Certificates .......................................................................................................85
Verification Gateway Interface (VGI) ............................................................86
Mission Control ...............................................................................................86
Third-Party Solutions ......................................................................................86
Feedback and Help ........................................................................................87
Chapter , 5

6 Single Sign-On Deployment Guide
Planning and Deploying a Single Sign-OnSolution
Intranet users are commonly required to use a separate password to authenticate themselves to each server they need to access in the course of their work. Multiple passwords are an ongoing headache for both users and system administrators. Users have difficulty keeping track of different passwords, tend to choose poor ones, and tend to write them down in obvious
places. Administrators must keep track of a separate password database on each server and deal with potential security problems related to the fact that passwords are sent over the network routinely and frequently.
Solving this problem requires some way for a user to log in once, using a single password, and get authenticated access to all servers that user is authorized to use--without sending any passwords over the network. This capability is known as single sign-on.
Netscape supports single sign-on for Navigator 3.x, Communicator, Communicator Professional Edition, and most of the SuiteSpot 3.x servers. Netscape’s approach to single sign-on involves the use of digital certificates to authenticate users to servers. For Netscape products, single sign-on is an authentication mechanism that replaces more cumbersome multiple-password authentication without affecting existing access-control mechanisms.
This document introduces single sign-on for network administrators and describes how to plan and deploy a single sign-on solution using Netscape products.
• Introduction to Single Sign-On
• Planning a Single Sign-On Solution
• Setting Up Netscape Servers for Single Sign-On
• Setting Up Netscape Clients for Single Sign-On
Chapter , Planning and Deploying a Single Sign-On Solution 1

Introduction to Single Sign-On
• Issuing Client Certificates
• Testing Your Setup Before Full Deployment
This document assumes that you are familiar with basic concepts of public-key cryptography, including public and private keys, certificates, and digital signatures. For a brief introduction, see Appendix A, “Netscape’s Use of Public-Key Cryptography.”
To give Netscape comments on this guide or on any aspect of single sign-on, please send email to sso-feedback. This address is strictly for collecting feedback; you will not receive a personal response.
For information about getting technical help with any Netscape product, see Netscape Tech Support.
Introduction to Single Sign-OnWhen a user requests a resource from a server, the server collects the access-control lists (ACLs) associated with that resource and evaluates them. If the server’s evaluation of the ACLs requires identification of the user, the server requests client authentication, in the form of either a name and password or a digital certificate presented according to the Secure Sockets Layer (SSL) protocol.
After the server has established the user’s identity, optionally including user/group information stored in a Lightweight Directory Access Protocol (LDAP) directory, it continues its evaluation of the ACLs and authorizes or denies access to the requested information according to the user’s access privileges.
Figure 1 illustrates the basic elements of the ACL evaluation process. Netscape’s approach to single sign-on replaces client authentication based on passwords sent over the network with client authentication based on the Secure Sockets Layer (SSL) and certificates.
2 Single Sign-On Deployment Guide

Introduction to Single Sign-On
Figure 1 Single sign-on uses certificate-based authentication
This approach has several benefits for users and administrators:
• Ease of use. Users can log in once and get authenticated access to all servers for which that user is authorized, without being interrupted by repeated requests for passwords.
• Password limited to local machine. To log in, the user types a single password that protects the private-key database on the local machine. Passwords are not sent over the network.
• Simplified management. Administrators can control who is allowed access to which servers by controlling the lists of certificate authorities maintained by client and server software. These lists are shorter than lists of user names and passwords and don’t change as often.
• Access control not affected. Single sign-on involves replacing client authentication mechanisms, not access-control mechanisms. Administrators don’t need to change existing ACLs that may have been originally set up to work with basic password authentication.
Client authentication based on name and password is often called basic authentication. There are several ways of simplifying basic authentication, for example by requiring users to use the same password for different servers or by keeping track of passwords automatically. Although Netscape products support such approaches, these are not true single sign-on as described in this document. Netscape’s single sign-on solution requires the use of certificate-based authentication, sometimes called strong authentication.
Chapter , Planning and Deploying a Single Sign-On Solution 3

Introduction to Single Sign-On
A certificate is an electronic document used to identify an individual, company, or other entity. Certificate authorities (CAs) are entities that validate identities and issue certificates. CAs are either independent third parties or organizations running their own certificate-issuing server software (such as Netscape Certificate Server). For more information about certificates and public-key cryptography, see Appendix A, “Netscape’s Use of Public-Key Cryptography.”
The following sections introduce the use of single sign-on with Netscape products:
• Client Authentication and Single Sign-On
• Netscape Products That Support Single Sign-On
Client Authentication and Single Sign-On
Information sent from one computer to another over a TCP/IP network can pass through numerous other computers before it reaches its destination, making it theoretically possible to eavesdrop or even replace information along the way. In addition, users don’t have any assurance that a web site they visit is what it purports to be, and server administrators don’t know which users visit their web sites.
Although such security risks don’t matter for most casual uses of the Internet, they are not acceptable within an enterprise intranet or extranet. Administrators can address some of these risks by using client and server software that provides some form of authentication. For example, if you must type your name and password before accessing a server, the server uses that information and an internal database to authenticate your identity--to confirm that you are who you say you are.
Authentication by itself, however, doesn’t address threats to privacy or data integrity. The Secure Sockets Layer (SSL) standard supported by Netscape products addresses the need for authentication, privacy, and data integrity. SSL is a protocol that runs above TCP/IP and below HTTP, LDAP, IMAP, NNTP, and other high-level network protocols. SSL allows an SSL-enabled server to authenticate itself to an SSL-enabled client, allows the client to authenticate itself to the server, and allows both machines to establish an encrypted connection.
4 Single Sign-On Deployment Guide

Introduction to Single Sign-On
A server-authenticated SSL connection makes it extremely difficult to eavesdrop on the connection, modify the data without detection, or impersonate the identity of the server. However, unless the client as well as the server is authenticated, any user can establish a connection and gain access to the resources managed by the server.
Client authentication is an essential element of network security within most intranets or extranets. The sections that follow contrast the two forms of client authentication introduced in Figure 1:
• Basic Authentication. Almost all server software permits client authentication by means of a name and password. This form of authentication may take place in the clear (that is, without encryption) or over a server-authenticated and encrypted SSL connection.
• Strong Authentication. Client authentication based on certificates, as implemented by Netscape, requires SSL. This is the form of authentication used to support single sign-on for Netscape products.
This guide does not discuss the step-by-step details of the SSL handshake and server and client authentication mechanisms. For more information about SSL, see Chapter 4, “Understanding Encryption and SSL,” in Managing Netscape Servers.
Basic Authentication
Figure 2 shows the basic steps involved in authenticating a client by means of a name and password. Note that the figure doesn’t take into account the details of the underlying SSL connection, if there is one. In the figure, the following is assumed:
• The user has already decided to trust the server, either without authentication or on the basis of server authentication via SSL.
• The user has requested a resource.
• The server has requested client authentication in the process of evaluating its access-control lists (ACLs) for the requested resource.
Chapter , Planning and Deploying a Single Sign-On Solution 5

Introduction to Single Sign-On
Figure 2 Using a password to authenticate a client to a server
These are the steps shown in Figure 2:
1. In response to an authentication request from the server, the client displays a dialog box requesting the user’s name and password for that server. The user must supply a name and password separately for each new server the user wishes to use during a work session.
2. The client sends the name and password across the network, either in the clear or over an encrypted SSL connection.
3. The server looks up the name and password in its local password database and, if they match, accepts them as evidence authenticating the user’s identity.
4. The server continues evaluating its ACLs (optionally making use of information stored in the LDAP directory, in company databases, and so on), determines whether the identified user is permitted to access the requested resource, and if so allows the client to access it.
With this arrangement, the user must supply a new password for each server, and the administrator must keep track of the name and password for each user, typically on separate servers.
As shown in the next section, single sign-on replaces the first three steps with a mechanism that allows the user to supply just one password (which is not sent across the network) and allows the administrator to control user authentication centrally with the aid of the Certificate Server and the Directory Server.
6 Single Sign-On Deployment Guide

Introduction to Single Sign-On
Strong Authentication
Netscape’s approach to single sign-on uses a single certificate rather than multiple passwords to authenticate a client to multiple servers. A certificate identifies an individual, a server, or some other entity. To authenticate a user to a server, a client digitally signs a randomly generated piece of data and sends both the certificate and the signed data across the network, as shown in Figure 3. For the purposes of this discussion, the digital signature associated with some data can be thought of as evidence provided by the client to the server. The server authenticates the user’s identity on the strength of this evidence.
As in Figure 2, in Figure 3 it is assumed that the user has already decided to trust the server and has requested a resource, and that the server has requested client authentication in the process of evaluating its access control lists (ACLs) for the requested resource.
Figure 3 Using a certificate to authenticate a client to a server
Unlike the process shown in Figure 2, the process shown in Figure 3 requires the use of SSL and takes place after the initial server authentication. It is also assumed that the client has a valid certificate that can be used to identify the client to the server. This process is called “strong authentication” because it is based on what the user has (the certificate) as well as what the user knows (the password that protects the private key).
These are the steps shown in Figure 3:
Chapter , Planning and Deploying a Single Sign-On Solution 7

Introduction to Single Sign-On
1. The client software, in this case Communicator or Navigator 3.x, maintains a database of the private keys that correspond to the public keys published in any certificates issued for that client. The client asks for the password to this database the first time the client needs to access it during a given session, for example the first time the user attempts to access an SSL-enabled server that requires certificate-based client authentication. After entering this password once, the user doesn’t need to enter it again for the rest of the session, even when accessing other SSL-enabled servers.
2. The client unlocks the private-key database, retrieves the private key for the user’s certificate, and uses that private key to digitally sign some data that has been randomly generated for this purpose on the basis of input from both the client and the server. This data and the digital signature constitute “evidence” of the private key’s validity. The digital signature can be created only with that private key and can be validated with the corresponding public key against the data that was signed, which is unique to the SSL session.
3. The client sends both the user’s certificate and the evidence (the randomly generated piece of data that has been digitally signed) across the network.
4. The server uses the certificate and the evidence to authenticate the user’s identity. (For a detailed discussion of the way this works, see Appendix A, “Netscape’s Use of Public-Key Cryptography.”)
5. The server maps the user’s identity to a unique entry in the LDAP directory and checks that the entry contains the same certificate that was presented to the server. This step assumes that the Certificate Server has been configured to publish each certificate it issues in the directory. To disallow authentication for a particular user, (for example, someone who has left the company), the administrator simply removes the person’s certificate from the LDAP directory. This single action prevents that person from accessing any of the company’s servers, even if the person’s certificate hasn’t expired.
6. If the LDAP lookup is successful, the server continues evaluating its ACLs (optionally making use of information stored in the LDAP directory, in company databases, and so on), determines whether the identified user is permitted to access the requested resource, and if so allows the client to access it.
8 Single Sign-On Deployment Guide

Introduction to Single Sign-On
As you can see by comparing Figure 3 to Figure 2, the use of certificates in single sign-on replaces the authentication portion of the interaction between the client and the server. Instead of requiring a user to enter multiple passwords throughout the day, single sign-on requires the user to enter the private-key database password just once. For the rest of the session, the client presents the user’s certificate to authenticate the user to each new server it encounters. Existing access-control mechanisms based on the authenticated user identity are not affected.
Netscape Products That Support Single Sign-On
The single sign-on solution described in this guide works with the following Netscape products:
• Client software:
• Navigator 3.x
• Communicator 4.x
• Communicator Professional Edition 4.x
• Client administration software:
• Administration Toolkit (for use with Navigator 3.x)
• Mission Control (for use with Communicator and Communicator Professional Edition)
• SuiteSpot software
• Netscape Certificate Server 1.x
• Netscape Directory Server 1.x
• Netscape Enterprise Server 3.x
• Messaging Server 3.x
• Collabra Server 3.x
Chapter , Planning and Deploying a Single Sign-On Solution 9

Planning a Single Sign-On Solution
The Administration Server doesn’t support single sign-on for administrators, although it is used to set up other servers to support single sign-on for users.
It is possible to deploy a single sign-on solution with the aid of a third-party certificate authority rather than managing your own certificates with the Certificate Server. However, this guide assumes you are using some version of the Certificate Server.
The Directory Server is a special case. For more information about the single sign-on support provided by the Directory Server and future support by other SuiteSpot servers, see Appendix B, “Single Sign-On and Future Versions of SuiteSpot Servers.”
Planning a Single Sign-On SolutionThe sections that follow summarize some of the tasks involved in planning a single sign-on solution:
• Planning Your LDAP Directory
• Establishing the CA Hierarchy
• Mapping DNs to an LDAP Entry
• Planning Access Control
• Establishing Security Policies
• Dealing with Export Restrictions
Planning Your LDAP Directory
As shown in Figure 3, looking up a user’s certificate in the LDAP directory is the last step in the client authentication process used to support single sign-on. To support single sign-on, you need to do three things when setting up your directory:
• Make sure the distinguished name (DN) to be used in the user’s certificate can be mapped to the user’s entry in the directory tree. This is discussed later in this document under Mapping DNs to an LDAP Entry.
10 Single Sign-On Deployment Guide
Planning a Single Sign-On Solution
• Include an attribute for the user’s certificate in the attributes for your user entries.
• Limit access to the portion of each entry that contains the user’s certificate.
In the planning stage, you should also consider the following:
• Certificates, DNs, and LDAP Lookups
• LDAP Tree Hierarchy and Entry Attributes
• Integration Issues
Certificates, DNs, and LDAP Lookups
This section highlights some aspects of certificates that are important to take into account when you are planning your LDAP directory. For more information on certificates, see Appendix A, “Netscape’s Use of Public-Key Cryptography.”
A certificate binds a distinguished name (DN) to a public key. A DN is the string representation of an entity’s name. For example, this might be a typical DN for an employee of Netscape Communications Corporation:
uid=doe,[email protected],cn=John Doe,o=Netscape Communications Corp.,c=US
The abbreviations before each equal sign have these meanings:
• uid: user ID
• e: email address
• cn: the user’s common name
• o: organization
• c: country
SuiteSpot servers use a file called certmap.conf to determine which parts of the DN to use to look up the user’s entry in the LDAP directory. Deploying a single sign-on solution involves configuring certmap.conf so that the server compares the user’s certificate presented for authentication with the certificate listed in the user’s entry.
Chapter , Planning and Deploying a Single Sign-On Solution 11

Planning a Single Sign-On Solution
It’s very important to make sure that the DN used to identify the user in the user’s certificate can be mapped to the user’s unique entry in the LDAP directory. The directory doesn’t need all the information in the DN to identify a user, but it needs enough to be able to identify the user uniquely. For example, the information the server extracts from the DN must include information, such as an email address or an employee ID number, that distinguishes two people with the same name.
LDAP Tree Hierarchy and Entry Attributes
Data in an LDAP directory is arranged in a directory tree. This hierarchy is extremely flexible, but once you have decided on the particular arrangement, it can be difficult and costly to change it. Therefore, it’s important to consider carefully the long-term implications of potential directory tree structures before you actually begin implementing one.
It’s also important to think about the kinds of information the directory will contain. This decision affects both the tree hierarchy and the attributes of each entry. For example, entries for people require different treatment than entries for servers or other devices. Therefore, these two kinds of entries are typically located in different branches of the directory tree. In addition, the kind of entry, or object class, used for people contains different categories of information, or attributes, than the object class for servers.
As discussed later in this document (Using the Verification Gateway Interface), you can use a Verification Gateway Interface (VGI) script to automate the issuing of certificates. VGI provides a way to write code that checks information provided by the requester and determines whether the request is valid. Thinking about the information provided in certificate requests that might be processed by VGI scripts may help you determine the appropriate attributes for the user entries in your directory.
Another consideration as you plan user attributes is the trade-off between information stored in the user’s certificate and information stored in the LDAP directory. In general, keeping only the minimal static information required to identify a user in the certificate is a good way to ensure that the certificate can be as permanent as possible. Information that changes, such as employee status, department, or physical location, can be stored in the LDAP entry. This approach makes it possible to issue someone a single certificate that remains valid until its expiration date and doesn’t need to be revoked or reissued, with attendant overhead, every time the person’s status changes.
12 Single Sign-On Deployment Guide
Planning a Single Sign-On Solution
In some businesses, however, approaches that require short-term certificates for specific purposes may be preferable despite the additional certificate management overhead.
Integration Issues
It likely that much of the information you need to populate your LDAP directory already exists elsewhere in your organization, for example in databases maintained by HR or the payroll department. Before you settle on a tree structure, entry attribute, and other details of your LDAP directory, you should determine what potential sources of information already exist and which ones can be regarded as authoritative, for example for the purpose of creating user IDs. You may also be able to take advantage of this information when you create certificates using VGI scripts (see Using the Verification Gateway Interface). For example, a VGI script can use a user ID to populate a certificate with the user’s legal name and other information from another source, such as an HR database.
You should make long-term plans for integrating sources of information into the LDAP directory, not only for the initial setup but also for keeping the information current. For information about integrating HR applications and other sources of information, go to the Directory Server area of Server Central.
You may also want to consider eventually linking in your company’s telephone system, badging system, Unix and NT logins, and so on. To fully integrate single sign-on authentication with forms of access not directly controlled by Netscape servers, you can use solutions provided by third parties specifically for such purposes. For information about Netscape partners that provide single sign-on solutions, see Netscape Security Partners.
Establishing the CA Hierarchy
As an administrator, you control which users’ certificates are trusted by what servers for single sign-on within your organization. You achieve this control by setting up lists of trusted CA certificates maintained by clients and servers. If you intend to issue your own certificates using the Certificate Server, you can also control the process of requesting and issuing certificates.
This section describes three aspects of setting up your CA lists and gives some examples:
Chapter , Planning and Deploying a Single Sign-On Solution 13

Planning a Single Sign-On Solution
• Planning the CA Hierarchy
• Verifying Certificate Chains
• Determining Which CA Certificates to Install
• Examples
Planning the CA Hierarchy
In some organizations, you may want to delegate the responsibility for issuing certificates. For example, the certificate base may be too large for a single CA to maintain. Also, there may be geographical separations between organizational units, or you may want to apply different issuing policies to different sections of the organization.
You can delegate this responsibility by setting up subordinate CAs. The X.509 standard includes a model for setting up a hierarchy of CAs, as shown in Figure 4. Each CA is identified by a CA certificate, which is a certificate that identifies the CA and contains the public key corresponding to the CA’s signing key. A CA certificate is used to validate all the other certificates signed by the authority.
Figure 4 Example of a hierarchy of certificate authorities
14 Single Sign-On Deployment Guide
Planning a Single Sign-On Solution
In this model, the root CA is at the top of the hierarchy and has a self-signed certificate. The CAs that are directly subordinate to the root CA have CA certifi-cates signed by the root CA. CAs under the subordinate CAs in the hierarchy have their CA certificates signed by the higher-level subordinate CAs.
You have a great deal of flexibility in terms of the way you set up the CA hierarchy for your organization. In general, it’s a good idea to use a root CA that issues only subordinate CA certificates, because this gives you the greatest flexibility if you decide to change the structure later on.
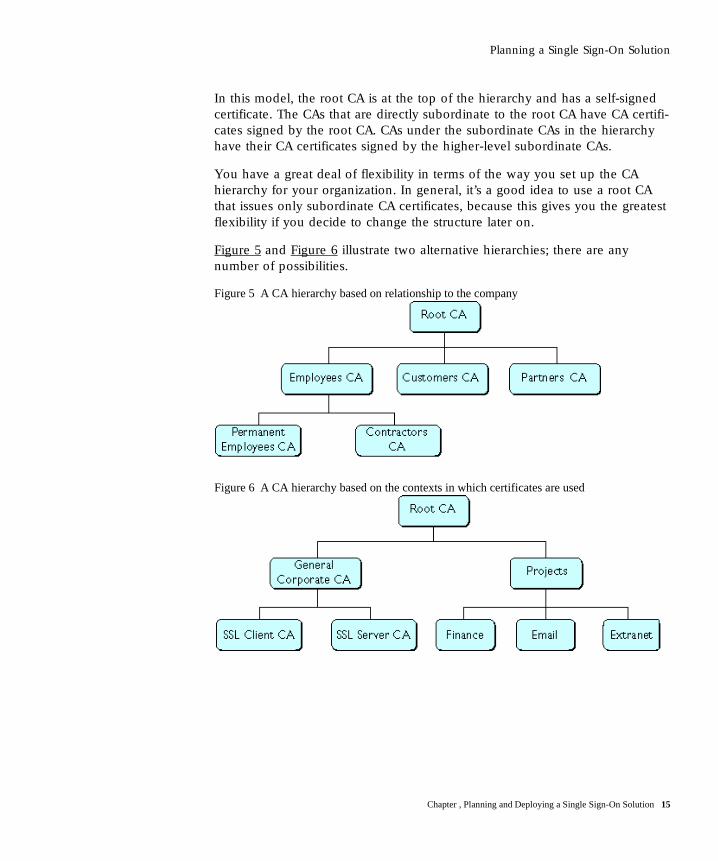
Figure 5 and Figure 6 illustrate two alternative hierarchies; there are any number of possibilities.
Figure 5 A CA hierarchy based on relationship to the company
Figure 6 A CA hierarchy based on the contexts in which certificates are used
Chapter , Planning and Deploying a Single Sign-On Solution 15

Planning a Single Sign-On Solution
CA hierarchies are reflected in certificate chains. A certificate chain is series of certificates issued by successive CAs. Figure 7 shows a certificate chain leading from a certificate that identifies some entity through two subordinate CA certifi-cates to the CA certificate for the root CA (based on the CA hierarchy shown in Figure 4).
Figure 7 Example of a certificate chain
A certificate chain traces a path of certificates from a branch in the hierarchy to the root of the hierarchy. In a certificate chain, the following occur:
• Each certificate is followed by the certificate of its issuer.
• Each certificate contains the name (DN) of that certificate’s issuer, which is the same as the subject name of the next certificate in the chain.
In Figure 7, the Engineering CA certificate contains the DN of the CA (that is, USA CA), that issued that certificate. USA CA’s DN is also the subject name of the next certificate in the chain.
16 Single Sign-On Deployment Guide

Planning a Single Sign-On Solution
• Each certificate is signed with the private key of its issuer. The signature can be verified with the public key in the issuer’s certificate, which is the next certificate in the chain.
In Figure 7, the public key in the certificate for the USA CA can be used to verify the USA CA’s digital signature on the certificate for the Engineering CA.
The root authority’s certificate is self-signed. That is, it is signed using the private key corresponding to the public key in the certificate. Because root CA certificates are self-signed, you should load these certificates from a trusted source, such as the CA’s own web site. Be careful when accepting any root CA certificate.
Verifying Certificate Chains
Certificate chain verification is the process of making sure a given certificate chain is well-formed, valid, all properly signed, and trustworthy. Netscape software uses the following procedure for forming and verifying a certificate chain, starting with the certificate being presented for authentication:
1. The certificate validity period is checked against the current time provided by the verifier’s system clock.
2. The issuer's certificate is located. The source can either be the verifier’s local certificate database (on that client or server) or the certificate chain provided by the subject (for example, over an SSL connection).
3. The certificate signature is verified using the public key in the issuer's certif-icate.
4. If the issuer's certificate is trusted by the verifier in the verifier's local database, verification stops successfully here. Otherwise, the issuer's certif-icate is checked to make sure it contains the appropriate subordinate CA indication in the Netscape certificate type extension, and chain verification returns to step 1 to start again, but with this new certificate. Figure 8 presents an example of this process.
Chapter , Planning and Deploying a Single Sign-On Solution 17

Planning a Single Sign-On Solution
Figure 8 Verifying a certificate chain all the way to the root CA
Figure 8 shows what happens when only Root CA is included in the verifier’s local database. If a certificate for one of the intermediate CAs shown in Figure 8, such as Engineering CA, is found in the verifier’s local database, verification stops with that certificate, as shown in Figure 9.
18 Single Sign-On Deployment Guide

Planning a Single Sign-On Solution
Figure 9 Verifying a certificate chain to an intermediate CA
Expired validity dates, an invalid signature, or the absence of a certificate for the issuing CA at any point in the certificate chain causes authentication to fail. For example, Figure 10 shows how verification fails if neither the Root CA certificate nor any of the intermediate CA certificates are included in the verifier’s local database.
Chapter , Planning and Deploying a Single Sign-On Solution 19

Planning a Single Sign-On Solution
Figure 10 A certificate chain that can’t be verified
For detailed information about the way a CA’s digital signature is verified, see Appendix A, “Netscape’s Use of Public-Key Cryptography.”
Determining Which CA Certificates to Install
You should install the CA certificates that make up the client or server’s own certificate chain. These certificates are used when making SSL connections to form the certificate chain that is sent along with the certificate. In general, you do not need to mark these intermediate CA certificates as trusted.
You should install the certificates of CAs that you trust to sign client or server certificates and subordinate CA certificates. For most CA policies, a client or server should install the root CA certificate and mark it as trusted; the client will then accept certificates signed by the root CA and all of its subordinate CAs. Additional subordinate CA certificates do not need to be installed at all if the corresponding root CA is installed and has been marked as trusted.
20 Single Sign-On Deployment Guide
Planning a Single Sign-On Solution
For information about installing CA certificates in Navigator 3.x and Communi-cator using the Administration Toolkit and Mission Control, see Setting Up Netscape Clients for Single Sign-On. For information about installing CA certifi-cates in servers, see Setting Up Netscape Servers for Single Sign-On.
Examples
This section continues the CA hierarchy example in Figure 7, assuming that the CA certificates for the intermediate CAs contain the Netscape Certificate Type extension with the subordinate CA indications. References to client or server here apply to any of the products listed in Netscape Products That Support Single Sign-On.
• A server in Europe whose server certificate is signed by the Europe CA should install at least the following certificates in its local database: its own certificate, the Europe CA certificate, the Root CA certificate. These are the certificates in its certificate chain.
• If a client or server keeps the Root CA certificate in its local database and marks it as trusted, the client or server will accept certificates signed by all of the subordinate CAs: USA CA, Europe CA, and Asia CA (without user-intervention dialog boxes on the client). If a new subordinate CA, Australia CA, is added, the server automatically accepts certificates signed by the new subordinate CA.
• If a server in Europe wishes to accept only those certificates issued by Europe CA, it can load the Europe CA certificate into its local database, mark that CA as trusted, and mark the Root CA as untrusted.
Mapping DNs to an LDAP Entry
After checking that a client certificate chains up to a trusted CA, a SuiteSpot server uses the certmap.conf file to look up the user’s entry in the directory and check the certificate presented for authentication against the certificate listed in the user’s entry. You edit one or more CA mappings in this file to determine how certificates issued by each CA should look up user entries. Specifically, certmap.conf provides three kinds of information for each CA:
1. It maps the distinguished name (DN) in the certificate to a branch point in the LDAP directory.
Chapter , Planning and Deploying a Single Sign-On Solution 21

Planning a Single Sign-On Solution
2. It tells the server what values to use from the DN in the certificate (such as the user’s name, email address, and so on) for the purpose of searching the directory.
3. It specifies whether or not the server goes through an additional verification process. If the certmap.conf file is configured to support single sign-on, this process involves matching the certificate presented for authentication with the certificate stored in the user’s LDAP directory entry. This step allows you to revoke a certificate by removing it from the user’s entry in the directory. This prevents authentication even if the certificate is otherwise valid.
If it finds more than one matching entry, the server can verify the client's certificate by comparing it with certificates for the matching entries in the LDAP directory. If the client certificate doesn't match any certificates in the matching entries or if the matching entries don't contain certificates, the certificate mapping (and thus client authentication) fails.
After the server finds a matching entry and certificate in the LDAP directory, it can use that information to determine the appropriate kind of authorization for the client. For example, some servers use information from a user’s entry to determine group membership, which in turn can be used during evaluation of ACLs to determine what resources the user is authorized to access.
For information about setting up Netscape servers to look up client certificates in an LDAP directory, see Set Up the certmap.conf File later in this document.
Planning Access Control
As part of your single sign-on solution, you can control access to each SuiteSpot server or to specific resources (that is, directories, files, and file types) on the server. When a server receives a request for a resource, it evaluates a hierarchy of rules called access-control entries (ACEs) to determine whether to allow or deny access to the requested resource. The collection of ACEs is called an access-control list (ACL).
By default, the server has one ACL file that contains multiple ACLs, which can be associated with specific resources. You can modify the ACL file for each server to exercise fine-grained control over the kind of resources each user or group of users is allowed. If you highly specialized access control needs, such
22 Single Sign-On Deployment Guide

Planning a Single Sign-On Solution
as using a separate database or defining a custom method of client authentication, you can use the Enterprise Server ACL API to manipulate ACLs, read and write ACL files, and evaluate and test access control to resources on the Enterprise server. For more information about the ACL API, see the separate document Access Control Programmer’s Guide.
If a server has not yet authenticated the user’s identity and the evaluation of an ACL requires it, the server must authenticate the user’s identity before proceeding with the evaluation. Access control can be managed based on the user’s identity (and membership in one or more groups) or according to the host IP address of the requesting client. For the purposes of single sign-on, you should base access control on the user’s identity.
In addition to its ACLs, each server that you set up for single sign-on uses a list of users, typically sorted into groups, to determine access rights. The list of users and groups is stored either in a database on the server or in an LDAP directory such as the Directory Server.
For any given resource, you can allow or deny access to everyone in the database or directory, or you can allow or deny access to specific people. As part of the planning process, you should identify and name any groups that you want to define and document your decisions. At a minimum, you should determine the formal name of each group, the general permissions you want each group to have, and the people you know you will want to include in each group. During deployment, you must make sure the database or directory has users and groups in it before you attempt to set access control.
As you plan your groups, keep the following guidelines in mind:
• Avoid high levels of nesting within groups. That is, avoid situations in which one group is a member of another group, which is in turn a member of another group, and so on. This kind of nesting can severely affect performance. In general you should avoid more than two levels of nesting.
• Do not create circular groups. That is, avoid situations in which group 1 is a member of group 2 and group 2 is a member of group 1. This kind of arrangement can severely degrade performance.
In addition to using ACLs to control access, you can also use CGI scripts to customize the information presented to a user. For example, after you configure the Enterprise Server to interact with a particular directory service for the purposes of checking a client’s certificate, you get access to several environmental variables from within CGI scripts, including the UID of the user.
Chapter , Planning and Deploying a Single Sign-On Solution 23
Planning a Single Sign-On Solution
This allows you to present the user with customized information from virtually any source, including corporate databases that are completely separate from the server on which the script runs.
For more information about planning access control, see the Administrator’s Guide for each server you plan to include in your single sign-on deployment. For information about setting up access control and configuring the directory service for the Enterprise Server, see Restrict Access later in this document.
Establishing Security Policies
Security policies related to single sign-on fall into two broad categories:
• Security Policy Architecture
• Client Software Policies
Security Policy Architecture
Security policy architecture involves decisions made by administrators that affect systems and procedures. For example, administrators are responsible for setting up the trusted CAs and certificate chains for users. Different CAs may be appropriate for different groups of users. For information about CAs and CA hierarchies, see .
Access control is another important part of the security policy architecture for any single sign-on solution. For a brief discussion of access control issues, see Planning Access Control.
Administrators also decide whether to issue certificates manually or to issue them automatically with the aid of a Verification Gateway Interface (VGI) script. If certificates are issued manually, an administrator or some other designated individual must check each request and verify the identity of the requester. The way this verification occurs is a policy question. For example, the administrator could require the requester to verify a request number, to meet the issuer in person, or to hand-deliver certain notarized documents. Issuing certificates manually may be necessary for certain individuals who are granted special access, but it can be cumbersome in large organizations that need to issue thousands of certificates.
24 Single Sign-On Deployment Guide

Planning a Single Sign-On Solution
VGI provides a general-purpose mechanism that allows a Certificate Server to process certificate requests programmatically. For information about VGI scripts, see Using the Verification Gateway Interface.
Important Policies related to physical security are always important for network security. For single sign-on, the physical security of server backups is essential, especially backups of the Certificate Server. If the security of Certificate Server backups is compromised, your entire network is vulnerable. Make sure you keep your server backups locked up and tightly controlled.
Client Software Policies
You can implement client security policies related to single sign-on by using Mission Control to control client software settings. With Communicator Professional Edition, you can also use Mission Control to change those settings dynamically over time.
You can use Mission Control to configure proxy server settings, determine how often the user will be asked for the password for the private-key database, set up CA lists, configure SSL, and control almost any other Communicator preference or setting. You can also lock some or all of your custom settings, thereby preventing users from altering them.
You can use the Administrator’s Toolkit to set up client copies of Navigator 3.x in a similar fashion; however, you can’t change these settings after you have deployed the software.
See Setting Up Netscape Clients for Single Sign-On for more information about configuring client software.
Dealing with Export Restrictions
Netscape software products with encryption features are considered by the United States government to be tools capable of being used for purposes that are unlawful or against U.S. national interests. Their distribution may be regulated by 15 CFR Parts 730 through 774, published by the US Department of Commerce (Bureau of Export Administration) as the Export Administration Regulations (EAR). If your company has offices in several different countries, the kind of software you can deploy in some or all of those offices will be affected by these export control regulations.
Chapter , Planning and Deploying a Single Sign-On Solution 25

Planning a Single Sign-On Solution
The laws of other countries may also affect the kind of software you can deploy. For example, software that supports encryption of any kind is not permitted in France without prior authorization from the French government. Similar restrictions for import and domestic use also may come into existence in other countries. Further, the US Government prohibits outright the export of any Netscape product with encryption to the following pariah countries: Cuba, Iran, Iraq, Libya, North Korea, Sudan, and Syria.
Encryption strength is described in terms of the size (in bits) of the keys used to perform the encryption.128-bit encryption provides significantly better cryptographic protection than 40-bit encryption. Roughly speaking, 128-bit encryption is 3 X 1026 times stronger than 40-bit encryption, which is not considered "strong" in the cryptographic community. It should be noted, however, that Netscape products use a different key for each encrypted SSL session, regardless of key size. Thus, even if intruders devoted significant resources and time toward breaking a key for one encrypted session, the discovered key would be useless for other sessions.
Netscape provides three versions of each release of its client software:
• The domestic version, for use in the United States and Canada only, supports encryption-key lengths of up to 128 bits (for RC2 and RC4 algorithms) and 168 bits (for Triple DES). It supports S/MIME encryption with key lengths of up to 128 bits (for RC2) and 168 bits (for DES). The domestic client uses this stronger encryption with server software that can support it; otherwise, as when communicating with international versions of Netscape server software, the client uses 40-bit encryption
• The international version, for export to countries other than the United States, Canada, France, and the pariah countries noted above, supports SSL and S/MIME encryption but with key lengths generally limited to 40 bits (for RC2 and RC4 algorithms; DES is not supported). However, the international version of Communicator 4.02 or later also supports conditional 128-bit or 168-bit SSL encryption, on a per-session basis, when communicating with a Netscape server that presents a valid Global Server ID server certificate (see below).
• The French version, for export to France, supports 40-bit SSL encryption only (for RC2 and RC4; DES is not supported). The French version does not support S/MIME encryption.
Netscape provides two versions of each release of its server software that supports SSL:
26 Single Sign-On Deployment Guide

Setting Up Netscape Servers for Single Sign-On
• The domestic version, for use in the United States and Canada and by international banks that have obtained a valid Global Server ID server certificate, supports SSL encryption with key lengths of up to 128 bits (for RC2 and RC4) and 168 bits (for Triple DES).
• The international version, for export to countries other than the United States, Canada, and the pariah countries noted above, supports 40-bit SSL encryption only (for RC2 and RC4; DES is not supported).
Banks can obtain a special server SSL certificate from VeriSign called a Global Server ID. This certificate allows banks to use domestic versions of Netscape server software outside the United States and Canada. These servers ordinarily support 128-bit or 168-bit encryption with domestic versions of Communicator only, and automatically use 40-bit SSL encryption with international versions. However, if a server presents a valid Global Server ID to an international version of Communicator 4.0 or later, Communicator will “step up” to the stronger SSL encryption for that session with that server. Note that the physical location of the server is irrelevant; an international version of Communicator that connects to a domestic server in the United States, for example, can step up to stronger encryption only if the server presents a Global Server ID.
Setting Up Netscape Servers for Single Sign-OnBefore you set up any Netscape servers for single sign-on, you should read through the sections that follow and make sure you understand the issues involved and the dependencies among servers. When you are ready to begin deploying a single sign-on solution, make sure you experiment with some of the options involved and test your setup thoroughly before deploying single sign-on for larger groups of people, as discussed in Testing Your Setup Before Full Deployment later in this document.
These sections discuss some of the tasks involved in using SuiteSpot 3.0 servers to deploy a single sign-on solution:
• Setting Up the Directory Server
• Setting Up the Certificate Server
• Setting Up the Enterprise Server
• Setting Up the Messaging Server
Chapter , Planning and Deploying a Single Sign-On Solution 27

Setting Up Netscape Servers for Single Sign-On
Additional details on setting up the servers listed here and information on setting up other SuiteSpot servers for single sign-on will be provided in later versions of this guide.
Setting Up the Directory Server
Some aspects of configuring the Directory Server to support single sign-on depend on the configuration of the Certificate Server, and vice versa. Before you complete the tasks described in this section, make sure you read and understand Setting Up the Certificate Server.
To set up the Directory Server to work with the Certificate Server, you must perform the following tasks:
• Install a Directory Server
• Add an Entry for the Certificate Authority
• Set Up an Entry with Write Access
• Add Entries for the Users
• Get a Server Certificate
• Enable Encryption
Install a Directory Server
If you have not yet installed a Directory Server, follow the installation instructions in the Directory Server Administrator’s Guide.
Important After you click “Install a New Netscape Directory Server” from the Server Selector, you are presented with a form that allows you to select the initial settings for the Directory Server, including whether you want encryption enabled. Do not click the button that enables encryption when you first install the Directory Server. Before enabling encryption, you must configure the Directory Server as described in the sections that follow and install and configure the Certificate Server as described in Setting Up the Certificate Server.
28 Single Sign-On Deployment Guide

Setting Up Netscape Servers for Single Sign-On
Add an Entry for the Certificate Authority
To add an entry for your Certificate Server’s CA, use the forms-based interface (the HTTP gateway) provided with the Directory Server. For information on using this interface to add entries, see the Netscape Directory Server Administrator’s Guide.
When adding the entry, select the entry type based on the distinguished name of the CA:
• If the CA’s distinguished name begins with the cn component, create a new Person entry for the CA. (If you select a different type of entry, the interface may not allow you to specify a value for the cn component.)
• If the CA’s distinguished name begins with the ou component, create a new Organizational Unit entry for the CA.
When you configure the Certificate Server to work with the directory server, you can set up the Certificate Server to update the CA entry automatically with information identifying it as a CA. The CA entry must belong to the certificationAuthority object class, and it must have the caCertificate;binary attribute.
For more details on setting up the Certificate Server to update the CA entry with the correct information, see step 7 in Configure the Certificate Server to Work with the Directory Server.
Make sure to follow step 7 in the procedure. If you do not and if the CA entry does not belong to the certificationAuthority object class, the CA certificate will not be published to the directory.
Set Up an Entry with Write Access
As part of the process of configuring the Certificate Server to work with the Directory Server, you need to specify a distinguished name that has write access to the directory. You can do either of the following:
• Give write access to the CA’s distinguished name (see the Directory Server Administrator’s Guide for instructions).
• Use the distinguished name of an existing entry that has write access.
In either case, you need to know the password for this distinguished name. (When you start the Certificate Server, you will be prompted for this password.)
Chapter , Planning and Deploying a Single Sign-On Solution 29

Setting Up Netscape Servers for Single Sign-On
Also, when you configure the Certificate Server to work with the Directory Server, you need to specify this distinguished name as the “Access DN” (the DN used to access the directory server). For details, see step 5 in Configure the Certificate Server to Work with the Directory Server.
Add Entries for the Users
You need to add an entry for each user for whom you want a certificate published. If the user does not have an entry in the directory, the user’s certificate will not be published.
Use the tools provided with the Directory Server to add an entry for each user. These entries must belong to an object class (for example, the inetOrgPerson object class) that allows the userCertificate;binary attribute.
Depending on the way you organize your directory tree, you may also need to include an indexed LDAP attribute called CmapLdapAttr, which contains the subject DNs from all certificates belonging to the user. For more information about CmapLdapAttr, see the discussion of default properties of the certmap.conf file in Set Up the certmap.conf File.
Get a Server Certificate
Although not required for the Directory Server to support single sign-on for other servers, you may wish to get a server certificate for the Directory Server and enable SSL. This ensures that all information passing between the directory and clients on your network will be encrypted.
You can get a server certificate either from one of the third-party CAs listed at Certificate Authority Services or from your own Certificate Server after it is set up. In either case, you must also make sure the Directory Server has a copy of the appropriate CA’s certificate in its list of trusted CAs.
Enable Encryption
After the Certificate Server is set up to work with the Directory Server and you have obtained a server certificate for the Directory Server, you should enable encryption for the Directory Server. To do so, check the Encryption settings in the Server Manager for the Directory Server and make sure SSL encryption is enabled.
30 Single Sign-On Deployment Guide

Setting Up Netscape Servers for Single Sign-On
Setting Up the Certificate Server
To support single sign-on, you configure the Certificate Server to publish certif-icates to the Directory Server. The Directory Server acts as a common distri-bution point for information about users and other entities on the network.
The following kinds of distinguished names arise in the context of the operation of the Certificate Server:
• Certificate authority (CA) DN. Each instance of the certificate server represents a single abstract agency called a CA, also known as an issuer. The certificate authority has a distinguished name. This name appears as the issuer name in each certificate issued by the CA.
• Subject DN. The subjects of the CA are the entities that have certificates issued by the CA. Each of the subjects of the CA has a distinguished name. This name appears as the subject name in the subject's certificate.
• SSL server DN. The Certificate Server itself uses SSL for encryption and for the authentication of privileged clients. The Certificate Server has a distinguished name that appears in its own server SSL certificate. Usually the Certificate Server's SSL certificate is issued by the CA, but this is not required.
• Directory access DN. The Certificate Server binds and authenticates to the Directory Server using a directory access DN, also called the bind DN, that is specified in the certificate server's local configuration and is associated with the password entered at the time the Certificate Server is started. This name can be the same as or distinct from the issuer's certificate authority DN. This DN must be afforded the necessary access rights as a principal in the directory to perform the operations described below.
If you configure the Certificate Server to use the Directory Server, the following operations are performed automatically:
• When the Certificate Server starts up, it publishes the CA’s certificate to the Directory Server.
• When the Certificate Server issues a new certificate, the certificate is published to the Directory Server.
• When a certificate is revoked, the certificate is removed from the Directory Server.
Chapter , Planning and Deploying a Single Sign-On Solution 31

Setting Up Netscape Servers for Single Sign-On
• When the certificate revocation list is created or updated (either through a form in Certificate Server or through a certificate revocation), the list is published to the Directory Server.
Expired certificates are not automatically removed from the directory. In certain situations, you may need to manually trigger updates to the directory. For instructions, see Chapter 18, “Updating the Directory,” of the Certificate Server Administrator’s Guide.
Some aspects of configuring the Certificate Server to support single sign-on depend on the configuration of the Directory Server, and vice versa. Before you complete the tasks described in this section, make sure you read and under-stand Setting Up the Directory Server.
To set up the Certificate Server to work with the Directory Server, you must perform the following tasks:
• Install a Certificate Server
• Configure the Certificate Server to Work with the Directory Server
• Specify How the Certificate Server Matches DNs to Directory Entries
Install a Certificate Server
If you have not yet installed a Certificate Server, follow the installation instruc-tions in the Certificate Server Administrator’s Guide. You should also follow the instructions for obtaining and setting up the initial certificates required by the Certificate Server: a signing certificate for signing the certificates it issues, the CA root certificate, and a server certificate for server authentication via SSL.
A Certificate Server should normally be maintained on its own separate server hardware with appropriate resources to support the scalability you expect for your organization. Using a separate machine for the Certificate Server also improves its performance. The Certificate Server should also have its own dedicated Administration Server.
Important Plan carefully for the Certificate Server’s physical security before you deploy the Certificate Server for general use within your organization. Access to both the machine it runs on and backup media should be tightly controlled. If the physical security of the Certificate Server or its backups is compromised, your entire network is vulnerable.
32 Single Sign-On Deployment Guide
Setting Up Netscape Servers for Single Sign-On
Before you set up the Certificate Server to use the Directory Server, you must set up the Directory Server as described in Setting Up the Directory Server. When you have completed the configuration described there, follow the steps described in the sections that follow.
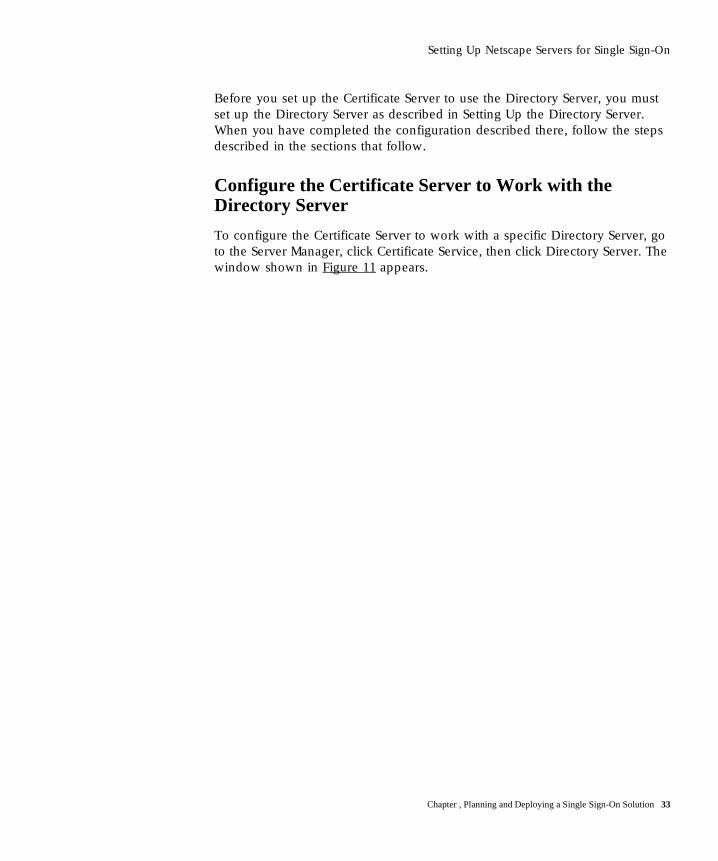
Configure the Certificate Server to Work with the Directory Server
To configure the Certificate Server to work with a specific Directory Server, go to the Server Manager, click Certificate Service, then click Directory Server. The window shown in Figure 11 appears.
Chapter , Planning and Deploying a Single Sign-On Solution 33

Setting Up Netscape Servers for Single Sign-On
Figure 11 Certificate Server directory configuration
34 Single Sign-On Deployment Guide

Setting Up Netscape Servers for Single Sign-On
Chapter , Planning and Deploying a Single Sign-On Solution 35

Setting Up Netscape Servers for Single Sign-On
To configure the Certificate Server to work with your Directory Server, follow these steps:
1. Click Yes under “Enable updates to Directory Server.”
2. In the Directory Server Host field, enter the hostname of your Directory Server.
3. In the Directory Server Port field, enter the port number of your Directory Server.
4. If you specified a secure port in the previous step, click Yes under “Is this a Secure port.”
5. Scroll down if necessary to the Access DN field and enter the directory access DN--that is, the entry in the directory server that has write permission to the directory. (For details, see Set Up an Entry with Write Access.)
Whenever you start the Certificate Server, you will be prompted to enter the password for this DN.
6. If you use exactly the same structure and conventions for distinguished names in the Directory Server and in the Certificate Server, follow these steps:
• Under “Components to form the subject’s DN in the directory,” select all components.
• Under “Components to match attributes in the directory,” do not select any components.
For more information about these settings, see Specify How the Certificate Server Matches DNs to Directory Entries.
7. To add the object class certificationAuthority to the CA’s entry in the directory (if the entry does not already belong to this class), click Yes under “Convert issuer’s entry to certificationAuthority.”
The certificationAuthority object class represents a CA. Entries of this class must contain a CA certificate. If you click the Yes radio button, the CA certificate is automatically published to the directory.
36 Single Sign-On Deployment Guide

Setting Up Netscape Servers for Single Sign-On
If you click No, the CA certificate will not be published to the directory if it does not already belong to the certificationAuthority object class.
8. If you want the individual errors logged during Directory Server updates, click Yes under “Log individual errors in Directory Server updates.”
By default, a single error is logged if problems occur during a directory server update. If you want more detail on the problems (for example, if you want to know which specific entries could not be updated and why they could not be updated), select this option.
9. Click OK.
10. Click Save and Apply, and stop and start the Certificate Server for your changes to take effect.
Specify How the Certificate Server Matches DNs to Directory Entries
When you issue or update certificate information, the Certificate Server updates the certificate information in the corresponding directory entry. The Certificate Server uses the subject name in the certificate to find the directory entry that needs to be updated.
Subject names in certificates are in distinguished-name format. The Certificate Server uses parts of these subject names to construct a distinguished name that it can use as the base DN for searching the directory. Each attribute value assertion (AVA) in a distinguished name, such as cn=Jane Doe, is represented by a DER-encoded ISO Object Identifier (OID) for the attribute tag and the DER encoding of the value.
For use with LDAP, the subject name in the certificate is translated to its string form as defined by RFC 1779. The LDAP search operation recognizes the string forms of the DN attribute tags listed in Table 1. (Case is ignored.)
Table 1
Attribute tag Represents
cn Common name
ou Organization unit
o Organization
Chapter , Planning and Deploying a Single Sign-On Solution 37

Setting Up Netscape Servers for Single Sign-On
The Certificate Server begins its search by forming the base DN from a selection of AVAs across the subject’s distinguished name in the certificate. It selects the AVAs according to the settings in the section labeled “Components to form the subject’s DN in the directory” of the Certificate Server Directory Configuration form. This part of the form is shown in Figure 12. Note that in this form, “components” mean the same thing as “DN attribute tags.”
l Locality
st State or province
c Country
uid User ID
mail Electronic mail address
e Electronic mail address
Table 1
Attribute tag Represents
38 Single Sign-On Deployment Guide

Setting Up Netscape Servers for Single Sign-On
Figure 12 Using the Certificate Server Directory Configuration form to specify a directory search
The choice of which AVAs from the subject name in the certificate should be used in the base DN is determined by the structure of the directory tree in the LDAP directory. With some directory structures, specifying an individual branch of the tree may be sufficient to identify an entry uniquely. With others, it may be necessary to use additional information that is provided in subject name AVAs but doesn’t correspond to branches of the tree. The search based on this additional information uses attributes of directory entries that correspond to the attribute tags used in AVAs. The Certificate Server uses the settings in the section of the form labeled “Components to match attributes in the directory” to identify the AVAs it should use for this part of the search.
For example, suppose this is the subject name in the certificate:
cn=Jane Doe,ou=My Division,o=My Company,c=US
The Certificate Server can use some or all of these four AVAs to build a distinguished name used to search the directory.
Chapter , Planning and Deploying a Single Sign-On Solution 39

Setting Up Netscape Servers for Single Sign-On
For example, if you set up the Certificate Server to use all of the AVAs in the sample subject name given above, the Certificate Server uses the following distinguished name as the base DN of its search for Jane Doe:
cn=Jane Doe,ou=My Division,o=My Company,c=US
Note that any attribute tags that are not used in the subject name (such as l, st, and e in this example) are ignored. A subject name does not need to have all of the attribute tags (or “components”) that you select in the Certificate Server Directory Configuration form.
Any unselected attribute tags are not used to build the distinguished name. In the previous example, if you did not select the OU component in the Certificate Server Directory Configuration form, the Certificate Server uses this distinguished name as the base for the directory search:
cn=Jane Doe,o=My Company,c=US
In general, under “Components to match attributes in the directory,” you should select components only if the corresponding AVA in a subject name can be used to distinguish between directory entries.
For example, if you selected CN, OU, O, and C under “Components to form the subject’s DN in the directory,” select L under “Components to match attributes in the directory” only if its value can be used to distinguish between entries with identical cn, ou, o, and c values.
If you always get a single, distinct matching entry from the DN, you do not need to select any checkboxes under “Components to match attributes in the directory.”
With certain directory tree structures, the AVAs used to form subject’s DN in the directory might match more than one entry. For example, this base DN
cn=Jane Doe,ou=My Division,o=My Company,c=US
might match two directory entries with the common name Jane Doe. In this case, the Certificate Server needs additional information from the subject name used in the certificate to determine which entry corresponds to the subject of the certificate.
For example, suppose that the two Jane Doe entries in the directory are distinguished by the value of the mail attribute (one entry’s mail value is janedoe1, the other entry’s mail value is janedoe2). Since the mail attribute corresponds to the e (email) attribute type in a distinguished name, you can set
40 Single Sign-On Deployment Guide

Setting Up Netscape Servers for Single Sign-On
up the subject names of certificates to include the e attribute type. (The e attribute tag is the only one converted to a different tag, mainly for compatibility. The other attribute tags are not converted.)
By default, the e, l, and st attribute tags are not included in the standard set of certificate request forms. You can either add these attribute tags to the forms, or you can use a VGI script to use these attribute types when populating the subject name in the certificate issuance forms.
Setting Up the Enterprise Server
Some aspects of configuring the Enterprise Server to support single sign-on depend on the configuration of the Certificate Server and the Directory Server. Before you complete the tasks described in this section, make sure you read and understand Setting Up the Certificate Server.
To set up the Enterprise Server for single sign-on, you must perform the following tasks:
• Install an Enterprise Server
• Generate a Key Pair and Request a Server Certificate
• Set Client Authentication and Encryption Preferences
• Restrict Access
• Configure Directory Service
• Set Up the certmap.conf File
Install an Enterprise Server
If you have not yet installed an Enterprise Server, follow the installation instructions in the Enterprise Server Administrator’s Guide.
Generate a Key Pair and Request a Server Certificate
Before you can turn SSL on for any server, you need to generate a public-private key pair and obtain a certificate for the server. To generate a public-private key pair, follow these steps:
Chapter , Planning and Deploying a Single Sign-On Solution 41

Setting Up Netscape Servers for Single Sign-On
1. In the Administration Server, click Keys & Certificates button near the top of the window.
2. In the left frame, click Generate Key, which displays the Generate Key form.
3. Click the Help button, and follow the instructions for generating a public-private key pair from the command line. As part of this process, you will be prompted for a password. Remember this password; you will need to use it to start up the server in secure mode.
After you have generated the key pair, follow the steps after Figure 13 to request a certificate.
42 Single Sign-On Deployment Guide

Setting Up Netscape Servers for Single Sign-On
Figure 13 The Administration Server’s Request Certificate form
Chapter , Planning and Deploying a Single Sign-On Solution 43
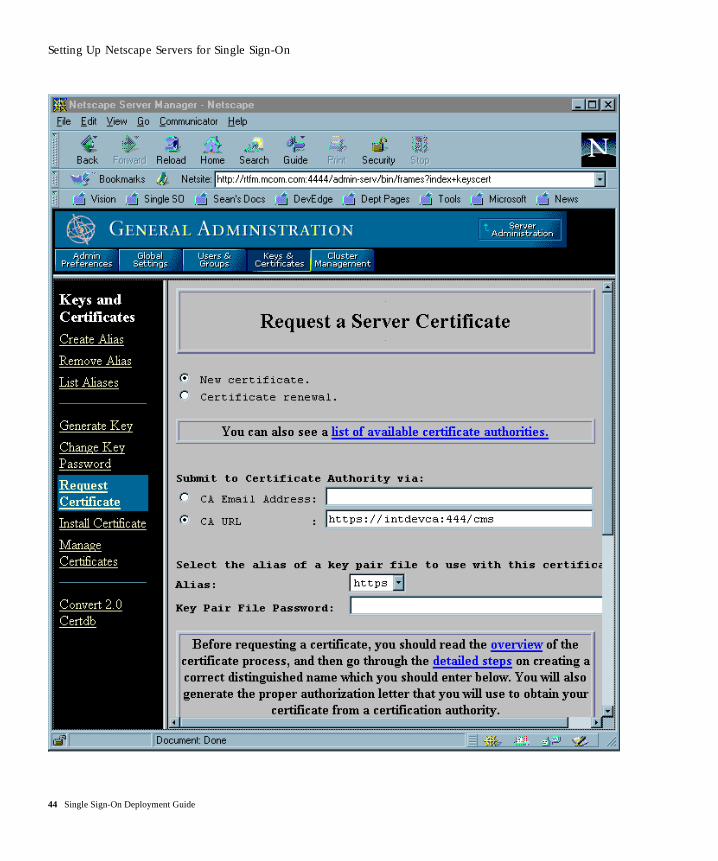
Setting Up Netscape Servers for Single Sign-On
44 Single Sign-On Deployment Guide

Setting Up Netscape Servers for Single Sign-On
1. In the left frame, click Request Certificate, which displays the Request Certificate form shown in Figure 13.
2. Fill in the request form (including the location of the key-pair file you just generated) and submit the request to a CA. You can either submit the request through email to a third-party CA or through a URL for a CA within your organization that uses the Netscape Certificate Server.
3. After the CA issues you a certificate, you need to install it. In the left frame, click Install Certificate to display the Install Certificate form.
4. Install the certificate, either by specifying a file or pasting it into the appropriate field, and click the This Server button. After you submit the form, the certificate is added to your server’s certificate database.
5. Get a copy of the certificate authority’s CA certificate and install this certificate using the same form. Be sure to click the Trusted Certificate Authority button.
After you complete the steps described in this section, see Set Up the certmap.conf File for instructions on supporting certificate lookup in the LDAP directory.
Set Client Authentication and Encryption Preferences
There are two ways to configure client authentication for the Enterprise Server:
• Always require a client to present a valid certificate to access any part of the server. You set this across-the-board client authentication mode from the Encryption Preferences form as described in this section.
• Specify which users are allowed what kinds of access. This can be useful, for example, if you want all users to be able to access the main index.html file and require a certificate only if the user decides to follow some link on that page. For details, see Restrict Access.
These approaches can be combined. For example, you can turn on across-the-board client authentication and also require that the user identified by the certificate conform to the server’s access-control rules.
To set up across-the-board client authentication, follow these steps:
Chapter , Planning and Deploying a Single Sign-On Solution 45

Setting Up Netscape Servers for Single Sign-On
1. Go to Server Preferences in the Server Manager and click Encryption On/Off. You can turn on SSL encryption from here. (Note that it’s possible to require SSL client authentication without turning on SSL encryption.)
2. Click Encryption Preferences. The form shown in Figure 14 appears.
3. Click the Yes button under “Require client certificates (regardless of access control).”
You typically leave the checkboxes labeled “SSL version 2” and “SSL version 3” checked and leave the default cipher settings for SSL 2.0 and SSL 3.0. For more information about ciphers and other aspects of SSL, see the chapter on encryption and SSL in the Enterprise Server Administrator’s Guide or check the server’s online help.
Figure 14 Encryption preferences for the Enterprise Server
46 Single Sign-On Deployment Guide

Setting Up Netscape Servers for Single Sign-On
Restrict Access
To restrict access to specific users and groups, go to the Server Manager, click Restrict Access under Server Preferences, and use the forms available there to specify users, groups, and access-control rules.
The main Access-Control List Management form has three sections:
• Pick a resource lets you specify a wildcard pattern (such as *.html) for restricted files or directories or choose a directory or a filename to restrict. You can also browse for a file or directory by clicking the Browse button.
• Pick an existing ACL provides access to the ACLs you've created.
• Type in the ACL name allows you to create named ACLs. Use this option only if you're familiar with ACL files and the obj.conf configuration file--you'll need to manually edit obj.conf if you want to apply named ACLs to resources.
Figure 15 shows an example of a simple access-control rule: All people in the authentication database--for example, all employees in a company--are allowed to access the specified directory. To see these windows for yourself, follow these steps:
1. Click the Browse button under “Pick an existing ACL” to select a directory for which to set rules.
2. Click the Edit Access Control button to view the access-control rules for that directory.
3. Click the “Access control is on” checkbox to turn on access control.
4. Click the underlined word in the Users/Groups column to see the User/Group window in Figure 15.
Chapter , Planning and Deploying a Single Sign-On Solution 47

Setting Up Netscape Servers for Single Sign-On
Figure 15 Access-control form for User/Group
48 Single Sign-On Deployment Guide
Setting Up Netscape Servers for Single Sign-On
The SSL radio button must be selected, as shown in the figure, to support single sign-on. The selections “Authenticated people only” and “All in the authentication database” ensure that only people with entries in the database will have the specified rights (read, write, or whatever is specified under “Rights”) to the server. As shown in the figure, you typically set the Authentication Database to the Default LDAP setting.
To view the windows that specify the rest of an access-control rule, click the other underlined entries in the Access Control Rules columns, including Action (the action enforced by the rule, such as Allow or Deny), Rights (read, write, and other rights that the action allows or denies), and so on. Clicking an underlined entry displays a corresponding window in the lower part of the frame where you can specify the relevant information. You can also combine rules; for example, you can combine a read rule for one group of users with a separate rule that also gives write access to a smaller group of people in the authentication database.
When you are setting up and testing your rules, it’s important to consider the way they interact. For example, if one rule allows everyone to read a resource, an additional rule that allows particular users or groups to read it will not prevent everyone else from accessing it too. Make sure you test for the false negative of any rule you set up. For instance, if you want only certain people to have read access, make sure to test not only whether they can get access, but whether other people can’t.
For more information on specifying access-control rules, click the Help button in any of the windows available from the main Access Control List Management form.
Configure Directory Service
To interact with the Directory Server for the purposes of single sign-on, for example to look up a user’s certificate in directory, you must configure the Enterprise Server for the appropriate directory service. To specify the directory, go to the Server Manager, click Configure Directory Service, and use the form presented there to specify the host name, port, and base DN for the Directory Server you want to use. Figure 16 shows an example.
Chapter , Planning and Deploying a Single Sign-On Solution 49

Setting Up Netscape Servers for Single Sign-On
Figure 16 The Configure Directory Service form
When you have set up your Enterprise Server to talk to the LDAP server as shown, you also get access to the following environmental variables from within CGI scripts:
• REMOTE_USER is set to the UID of the user, such as jsmith. This is the most useful variable. For example, you can use it to check the LDAP directory for the user’s manager, phone number, and so on, or you can customize the
50 Single Sign-On Deployment Guide

Setting Up Netscape Servers for Single Sign-On
information presented to different users. Because this variable is typically used in CGI scripts, you may not have to change existing CGI scripts to support single sign-on.
• CLIENT_CERT contains an encoded copy of the user's certificate.
• AUTH_TYPE is set to ssl when appropriate.
• HTTPS is set to on when appropriate.
• HTTPS_KEYSIZE is the number of bits in the encryption key, for example, 128.
• HTTPS_SECRETKEYSIZE is the number of bits in the secret key, usually 40 for export, 128 for US.
Set Up the certmap.conf File
You need to edit the certmap.conf file so that the server will look up user entries correctly in your LDAP directory and locate the certificates you expect your users to have.
Format of the certmap.conf File
The certmap.conf file contains one or more named mappings, each applying to a different CA. A mapping has the following syntax:
certmap name issuerDN
name:property [value]
The first line specifies a name for the entry and the DN of the issuer of the client certificate. The name is arbitrary; you can define it to be whatever you want.
Important The issuerDN must exactly match the issuer DN of the CA that issued the client certificate. For example, the following two issuer DN lines differ only in the spaces separating the AVAs, but the server treats these two entries as different:
certmap moz ou=Mozilla Certificate Authority,o=Netscape,c=US
certmap moz ou=Mozilla Certificate Authority, o=Netscape, c=US
The second and subsequent lines in the named mapping match properties with values. The certmap.conf file has six default properties:
Chapter , Planning and Deploying a Single Sign-On Solution 51
Setting Up Netscape Servers for Single Sign-On
• DNComps is a list of comma-separated DN attribute tags used to determine where in the LDAP directory the server should start searching for directory entries that match the user's information (that is, the owner of the client certificate). The server gathers values for these tags from the client certificate and uses the values to form an LDAP DN, which then determines where the server starts its search in the LDAP directory. For example, if you set DNComps to use the o and c DN attribute tags, the server starts the search from the o=org, c=country entry in the LDAP directory, where org and country are replaced with values from the DN in the certificate.
• If there isn't a DNComps entry in the mapping, the server uses either the CmapLdapAttr setting or the entire subject DN in the client certificate.
• If the DNComps entry is present but has no value, the server searches the entire LDAP tree for entries matching the filter.
The following component tags are supported for DNComps: cn, ou, o, c, l, st, e, and mail. Case is ignored. You can use e or mail, but not both.
• FilterComps is a list of comma-separated DN attribute tags used to create a filter by gathering information from the user's DN in the client certificate. The server uses the values for these tags to form the search criteria for matching entries in the LDAP directory. If the server finds one or more entries in the LDAP directory that match the user's information gathered from the certificate, the search is successful and the server optionally performs a verification. For example, if FilterComps is set to use the e and uid attribute tags (FilterComps=e,uid), the server searches the directory for an entry whose values for e and uid match the user's information gathered from the client certificate. Email addresses and user IDs are good filters because they are usually unique entries in the directory.
The filter needs to be specific enough to match one and only one entry in the LDAP database. The following component tags are supported for FilterComps: cn, ou, o, c, l, st, e, and mail. Case is ignored. You can use e or mail, but not both.
• verifycert tells the server whether it should compare the client's certificate with the certificate found in the user’s LDAP entry. It takes two values: on and off. Netscape recommends that you set this to on for a complete single sign-on solution. This ensures that the server will not authenticate the client unless the certificate presented exactly matches the certificate stored in the directory. To revoke a user’s certificate, you can just remove it from the user’s LDAP entry.
52 Single Sign-On Deployment Guide

Setting Up Netscape Servers for Single Sign-On
• CmapLdapAttr is the name of the entry attribute in the LDAP directory that contains subject DNs from all certificates belonging to the user. Because this attribute isn't a standard LDAP attribute, you have to extend the LDAP schema to include it (see the Directory Server Administrator’s Guide for detail). If the CmapLdapAttr property exists in the certmap.conf file, the server searches the entire LDAP directory for an entry whose attribute (named with this property) matches the subject’s full DN (taken from the certificate). If the search doesn’t yield any entries, the server retries the search using the DNComps and FilterComps mappings. The search will take place more quickly if CmapLdapAttr is an indexed LDAP attribute.
This approach to matching a certificate to an LDAP entry is useful when it’s difficult to match entries using DNComps and FilterComps.
• Library is the pathname to a shared library or DLL. You need to use this property only if you want to extend or replace the standard functions that perform the actual mapping on the basis of information in the certmap.conf file. (This is typically not necessary unless you have very specialized mapping requirements.) For information about these functions and how to extend or replace them, see the Certificate Mapping API.
• InitFn is the name of an init function from a custom library. You need to use this property only if you want to extend or replace the standard functions that perform the actual mapping on the basis of information in the certmap.conf file. (This is typically not necessary unless you have very specialized mapping requirements.) For information about these functions and how to extend or replace them, see the Certificate Mapping API.
The certmap.conf file should have at least one entry. The following examples illustrate two different ways you can use the certmap.conf file to support single sign-on.
Configuration Example #1
Here is a simple certmap.conf file with only one "default" mapping:
certmap default default
default:DNComps ou, o, c
default:FilterComps e, uid
default:verifycert on
Chapter , Planning and Deploying a Single Sign-On Solution 53

Setting Up Netscape Servers for Single Sign-On
Using this example, the server starts its search at the LDAP branch point containing the entry ou=orgunit, o=org, c=country, where the italics represent values from the subject’s DN in the client certificate.
The server then uses the values for email address and user ID from the certificate to search for a match in the LDAP directory before authenticating the user. When it finds an entry, the server verifies the certificate by comparing the one the client sent to the one stored in the directory.
Configuration Example #2
Here is another example file:
certmap default default
default:DNComps
default:FilterComps e, uid
certmap MyCA ou=MySpecialTrust,o=MyOrg,c=US
MyCA:DNComps ou,o,c
MyCA:FilterComps e
MyCA:verifycert on
This file has two mappings: a default one and another for MyCA. When the server gets a certificate from anyone other than MyCA, the server uses the default mapping, which starts at the top of the LDAP tree and searches for an entry matching the client’s email address and user ID. If the certificate is from MyCA, the server starts its search at the LDAP branch containing the organizational unit and searches for matching email addresses. Also note that if the certificate is from MyCA, the server verifies the certificate; other certificates are not verified.
Important The issuer DN (that is, the CA’s information) in the certificate must be identical to the issuer DN listed in the first line of the mapping. Even an extra space after a comma will cause a mismatch.
Setting Up the Messaging Server
If you plan to set up the Messaging Server for single sign-on, you should plan to use IMAP. The Messaging Server supports SSL and client authentication for IMAP but not for POP3. You can use Mission Control or the Administration Toolkit to configure the client software to support IMAP rather than POP3.
54 Single Sign-On Deployment Guide

Setting Up Netscape Clients for Single Sign-On
More details about setting up the Messaging Server for single sign-on will be provided in future versions of this document. For complete information about installing and setting up the Messaging Server, see the Messaging Server Administrator’s Guide or the online documentation.
Setting Up Netscape Clients for Single Sign-OnAs discussed under Planning a Single Sign-On Solution, you need to decide what CAs you want to trust for which groups of users before you begin single sign-on deployment. Once you have made those decisions, you can use the Administration Toolkit or Mission Control to implement them and to enable SSL.
• Using Mission Control to Configure Communicator for Single Sign-On
• Using the Administration Toolkit to Configure Navigator 3.x
Using Mission Control to Configure Communicator for Single Sign-On
Mission Control and Communicator Professional Edition allow you not only to set up Communicator’s initial list of CA certificates and other settings related to single sign-on but also to change them dynamically at a later date. These two products provide the most flexible Netscape solution for client deployment.
It’s also possible to use Mission Control with the standard Communicator product to configure the CA list and other settings when you initially deploy client software. You must use Communicator Professional Edition to take advantage of Mission Control’s dynamic update capabilities.
The following sections describe how to use Mission Control to configure Communicator settings related to single sign-on:
• Configuring the Certificate Database for Communicator
• Configuring SSL and Password Settings for Communicator
• Configuring User Certificate Setting for Communicator
Chapter , Planning and Deploying a Single Sign-On Solution 55

Setting Up Netscape Clients for Single Sign-On
For complete Mission Control documentation, see the Netscape Mission Control Guide.
Configuring the Certificate Database for Communicator
To set up the CA certificates for the standard version of Communicator before deploying copies to users, you can either use JavaScript in the local configuration file or you can use the Security Info window to customize a single certificate database (the file named cert7.db on Windows and Unix systems, or Certificate7 on Mac OS) and distribute that file to users with the rest of Communicator.
To set up the CA certificates for Communicator Professional Edition, you can use either of the methods just discussed, or you can use JavaScript in the AutoConfig file. Using the AutoConfig file offers you the greatest flexibility, since you can change the database dynamically. the Netscape Mission Control Guide.
for details on how to do this.
The simplest way to set up the CA databases is to use the Security Info window to modify a single certificate database, then distribute the cert7.db file with each client copy.
Important Before you attempt to modify a certificate database, make sure you start from a clean installation of Communicator with a new user profile, so that none of your personal certificate information is included in the certificate database you generate.
To delete and edit CA list entries from within Communicator, follow these steps:
1. Click the Security button on the Navigator toolbar.
2. In the Security Info window, click Signers.
3. Delete or edit a certificate signer (CA certificates) by selecting the CA’s name and clicking the appropriate button. Note that when you select a CA name and click Edit, you can select options that determine whether Communicator will accept this CA for certifying network sites, email users, or software developers (code signers). To set up a CA that you want
56 Single Sign-On Deployment Guide

Setting Up Netscape Clients for Single Sign-On
Communicator to recognize for the purposes of single sign-on, you must, at a minimum, click the checkbox labeled “Accept this Certificate Authority for Certifying network sites.”
4. Click OK.
To add a CA associated with your own Certificate Server to the list of CAs, go to the Certificate Server and click “Accept this authority in your Navigator.” To add a third-party CA to the list, go that CA’s web page and click the URL for adding that CA to the client software’s CA list.
Once you have added a new CA to the list, make sure that you select the CA’s name, click Edit, and select the appropriate options as described in step 3 above.
When you have modified the CA list to your satisfaction, locate the cert7.db file in the /Communicator/Users/username subdirectory for the new user profile you have modified (the bookmark.htm file is located in the same directory).
To associate the new CA list with the Communicator software you initially deploy with Mission Control, you need to copy the cert7.db into the appropriate Default directories of your custom InstallBuilder directory. For example, for the 32-bit version of Communicator, you would replace the file /32-bit/Navigator 4x/Program/Default/cert7.db with your custom cert7.db file.
For detailed information about customizing Communicator and setting up an AutoConfig file for use by Communicator Professional Edition, see the Mission Control documentation.
Configuring SSL and Password Settings for Communicator
You can use Mission Control to customize numerous Communicator preferences and settings related to security. At a minimum, you should support SSL and password protection for the private-key database in copies of Communicator that need to support single sign-on.
The Configuration Editor that comes with Mission Control generates a JavaScript file. If you are familiar with JavaScript, you can edit this file further to refine the settings at a level of detail that’s not possible with the Configuration Editor.
Chapter , Planning and Deploying a Single Sign-On Solution 57

Setting Up Netscape Clients for Single Sign-On
For example, the following lines of JavaScript in the configuration file set up Communicator to ask for a password the first time it’s needed during a session (for example, when Communicator first needs to present a certificate and signed data for client authentication after being launched) and to enable both SSL 2.0 and SSL 3.0:
with (PrefConfig) {lockPref("security.ask_for_password", 1);lockPref("security.enable_ssl2", true);lockPref("security.enable_ssl3", true);}
The term lockpref before each setting indicates that the setting will be locked, so the user won’t be able to change it. In the second line, changing the 1 to 0 causes Communicator to ask for a password every time it’s needed during a session. If you replace the second line with these lines, Communicator asks for a password every 30 minutes:
lockPref("security.ask_for_password", 2);lockPref("security.password_lifetime",30);
It’s also possible to set up the configuration file to specify which ciphers SSL uses with the client and whether Communicator warns the user when entering or leaving an encrypted site. For details on these and other security-related settings that you can set with Mission Control, see the Netscape Mission Control Guide.
For more information about ciphers and other aspects of SSL, see the chapter on encryption and SSL in any server’s Administrator’s Guide or check the server’s online help.
Configuring User Certificate Setting for Communicator
If you expect that your users will have more than one client SSL certificate, you may want to use Mission Control to configure Navigator so that it will automatically select the appropriate certificate to authenticate itself to a particular server. This configuration may be useful even if a user has only one certificate, since it causes Communicator to use the available certificate without bothering the user with a dialog box that permits only one choice. This section describes how to configure this setting.
58 Single Sign-On Deployment Guide
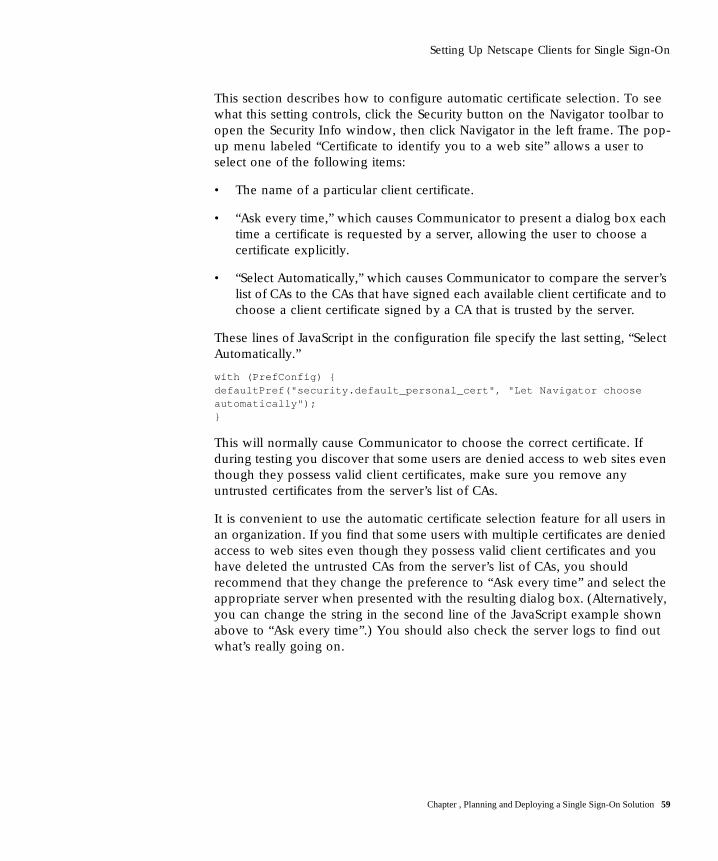
Setting Up Netscape Clients for Single Sign-On
This section describes how to configure automatic certificate selection. To see what this setting controls, click the Security button on the Navigator toolbar to open the Security Info window, then click Navigator in the left frame. The pop-up menu labeled “Certificate to identify you to a web site” allows a user to select one of the following items:
• The name of a particular client certificate.
• “Ask every time,” which causes Communicator to present a dialog box each time a certificate is requested by a server, allowing the user to choose a certificate explicitly.
• “Select Automatically,” which causes Communicator to compare the server’s list of CAs to the CAs that have signed each available client certificate and to choose a client certificate signed by a CA that is trusted by the server.
These lines of JavaScript in the configuration file specify the last setting, “Select Automatically.”
with (PrefConfig) {defaultPref("security.default_personal_cert", "Let Navigator choose automatically");}
This will normally cause Communicator to choose the correct certificate. If during testing you discover that some users are denied access to web sites even though they possess valid client certificates, make sure you remove any untrusted certificates from the server’s list of CAs.
It is convenient to use the automatic certificate selection feature for all users in an organization. If you find that some users with multiple certificates are denied access to web sites even though they possess valid client certificates and you have deleted the untrusted CAs from the server’s list of CAs, you should recommend that they change the preference to “Ask every time” and select the appropriate server when presented with the resulting dialog box. (Alternatively, you can change the string in the second line of the JavaScript example shown above to “Ask every time”.) You should also check the server logs to find out what’s really going on.
Chapter , Planning and Deploying a Single Sign-On Solution 59

Setting Up Netscape Clients for Single Sign-On
Using the Administration Toolkit to Configure Navigator 3.x
You can use the Administration Toolkit to configure Navigator 3.x so that it supports single sign-on. However, each copy of Navigator 3.x can be configured only once; the Administration Toolkit does not support dynamic control of Navigator settings. To control and lock down client settings dynamically after initial client deployment, use Mission Control and Communicator Professional Edition.
Configuring the Certificate Database for Navigator 3.x
You can use the Administration Toolkit to populate the CA list (as well as other settings) in individual user copies of Navigator 3.x. To set up the list initially, you modify a single certificate database, then distribute the cert5.db file with each client copy.
Important Before you attempt to modify a certificate database, make sure you start from a clean installation of Navigator with a new user profile, so that none of your personal certificate information is included in the certificate database you generate.
To delete and edit CA list entries from within Navigator, follow these steps:
1. Choose Security Preferences from the Options menu.
2. In the Preferences window, click Site Certificates.
3. Choose Certificate Authorities from the pop-up menu near the top of the window.
4. Delete or edit a certificate signer (CA certificates) by selecting the CA’s name and clicking the appropriate button. Note that when you select a CA name and click Edit, Navigator displays another window that allows you to determine whether Navigator will accept this CA for certifying network sites. To set up a CA that you want Navigator to recognize for the purposes of single sign-on, you must, at a minimum, click the checkbox labeled “Allow connections to sites certified by this authority.”
5. Click OK.
60 Single Sign-On Deployment Guide

Setting Up Netscape Clients for Single Sign-On
To add a CA associated with your own Certificate Server to the list of CAs, go to the Certificate Server and click “Accept this authority in your Navigator.” To add a third-party CA to the list, go that CA’s web page and click the URL for adding that CA to the client software’s CA list.
Once you have added a new CA to the list, make sure that you select the CA’s name, click Edit, and select the appropriate options as described in step 4 above.
When you have modified the CA list to your satisfaction, locate the cert5.db file in the /Netscape/Users/username subdirectory for the new user profile you have modified (the bookmark.htm file is located in the same subdirectory). To associate the new CA list with the Navigator software you deploy with the Administration Toolkit, you need to copy the cert5.db into the appropriate directories in the zip files containing the files to be installed.
One way to update the CA database dynamically after you have deployed Navigator 3.x is to write a login script that replaces the user’s cert5.db file with a modified version. The most reliable way to update the CA database dynamically is to use Mission Control and Communicator Professional Edition.
Configuring SSL and Password Settings for Navigator 3.x
The Administration Toolkit allows you to create a special file (its name varies by platform) that contains lock settings for Navigator 3.x. You can edit this file to ensure that the settings for SSL and the private-key database are set up correctly to support single sign-on.
Each setting in the configuration file used by the Administration Toolkit consists of a key-value pair. For example, the following key-value pairs ensure that Navigator supports SSL versions 2 and 3:
Enable SSL v2 = yesEnable SSL v3 = yes
This key-value pair ensures that Navigator asks the user for the private-key database the first time the private key is required in each new session:
Default Ask for password=0
A setting of 1 instead of 0 indicates that Navigator should ask for the password each time it is requested.
Chapter , Planning and Deploying a Single Sign-On Solution 61

Issuing Client Certificates
For detailed information about editing Navigator 3.x settings and deploying customized copies, see the Administration Toolkit documentation.
Issuing Client CertificatesAt present, users must explicitly request certificates for client authentication. Users are also responsible for backing up the private key. This is technically a good arrangement from a security point of view, because the user’s private key remains on the user’s machine and is never sent across the network.
However, this approach requires careful explanation to users and testing with users, because they must complete the required steps accurately and completely before they can begin using their certificates. Before issuing client certificates across a large organization, you should plan the process carefully and test it with a small pilot group of users. One of the issues you must deal with is the bootstrapping problem--that is, how to authenticate users initially when they first request a certificate. Some organizations may be able to use the Unix login and password for this purpose.
These sections discuss the two main issues you need to address before issuing certificates to users:
• Using the Verification Gateway Interface
• Guiding Users Through the Request Process
Using the Verification Gateway Interface
One of the security policies implemented by administrators is the decision whether to issue certificates manually or via the Verification Gateway Interface (VGI). Issuing certificates manually means that an administrator or some other designated individual checks each request and verifies the identity of the requester, for example by requiring the requester to verify the request number by telephone, to meet with the issuer in person, or to hand-deliver specific notarized documents. The manual approach may be necessary for certain individuals who are granted special access, but it can be cumbersome in large organizations that need to issue thousands of certificates.
62 Single Sign-On Deployment Guide
Issuing Client Certificates
VGI provides a general-purpose mechanism that allows a Certificate Server to process certificate requests programmatically. For example, given the user ID, a VGI script can prepopulate other fields in the certificate, such as the user’s full legal name and department number, by extracting this information from an HR database, an LDAP directory, or some other source. It’s also possible to require the user to type in an existing Unix login name and password, which the VGI script can verify before issuing the certificate.
For more information about using VGI, see Chapter 22, “Writing an AutoVerification Program,” in the Certificate Server Administrator’s Guide.
Certificate Server utilities and basic VGI examples are available at these FTP addresses:
• Windows 95/NT: ftp://ftp1.mcom.com/private/certificate/1.0/TeMporARY/ex101eiu.exe
• Solaris: ftp://ftp1.mcom.com/private/certificate/1.0/TeMporARY/certificateextras-1_01-export-us_sparc-sun-solaris2_4_tar.gz
• IRIX: ftp://ftp1.mcom.com/private/certificate/1.0/TeMporARY/certificateextras-1_01-export-us_mips-sgi-irix5_3_tar.gz
More complex VGI examples illustrating the use of information in an LDAP directory to populate a certificate may be found on DevEdge at LDAP VGI Sample Code.
Guiding Users Through the Request Process
After you have created your directory and populated it with user entries, you must guide your users through the process of authenticating themselves and requesting certificates. Users must do this themselves because the private keys required for their certificates are generated by each user’s copy of the client software. One of the most important issues at this stage is the so-called bootstrapping problem--how to authenticate a user when that person first requests a certificate. This is an important part of your single sign-on deployment, since impersonation at this stage would compromise security no matter how you configure client and server software.
One way to deal with this is to require users to authenticate themselves when requesting a certificate by entering a Unix or NT login and password. As suggested in the previous section, it’s possible to write a VGI script to verify
Chapter , Planning and Deploying a Single Sign-On Solution 63

Issuing Client Certificates
that these are correct before issuing a certificate. It may be more convenient for your organization to check some other form of identification, such as an employee number, in a similar way.
Another issue to consider is how the user will back up the private key for a newly issued certificate. This can be an especially serious consideration if you are issuing certificates that can also be used for signing and encrypting email. Problems arise if the user deletes the private key for his or her certificate and doesn’t have a backup, or if the user forgets the password for the Communicator certificate and private key databases. In these cases the user will never be able to read stored email that other people have encrypted with the public key for that certificate. There is nothing the system administrator can do about this after the fact: messages can’t be decrypted, for all practical purposes, without the private key.
One way to deal with this problem is to require users to back up their private key as soon as Communicator generates it. Communicator automatically suggests this, but there’s no way for the administrator to enforce this backup. Another solution is to require each user to back up the private key to a single server maintained by the administrator. This won’t help if the user forgets the password, but it can provide a simple key-recovery system if the user’s private key is lost or damaged, and the administrator can check whether the backup has taken place.
Future versions of Netscape software will support more sophisticated key-recovery systems that will assist administrators when users forget their passwords, lose their backups, leave the company, and so on. For example, such as system might require some minimum number of people among a specified group of administrators or other personnel to agree and provide special passwords to recover a user’s private key from a central repository. This kind of scheme, sometimes called an m of n scheme, ensures that keys can be recovered in emergencies without unduly compromising the user’s privacy.
When issuing certificates for use with SuiteSpot 3.0, it’s generally preferable to issue just one certificate for each user. You can ensure that each user gets only one certificate by writing a VGI script that checks whether the user’s entry in the LDAP directory already includes a certificate before issuing one to the user. Future versions of SuiteSpot will provide better support for multiple certificates.
You should think carefully about the request process and test it on a small group of users before you start to rely on it for issuing certificates to large numbers of people. For example, these steps might be appropriate for some organizations:
64 Single Sign-On Deployment Guide

Testing Your Setup Before Full Deployment
1. The user goes to a certificate request page.
2. The user generates the public-private key pair, provides identifying information in a form, and submits the public key and the information to a Certificate Server.
3. After the user submits the required information, a VGI script processes the information. This can include checking a Unix login and hashed password against the equivalent information in an LDAP database or checking whether a certificate is already listed in the directory for that user. It can also include populating some fields of the certificate, such as the user’s legal name or the company’s full name, with information from other sources.
4. If the VGI script determines that the user can be issued a certificate, the Certificate Server informs the user.
5. The user downloads the certificate from the Certificate Server into the client’s certificate database.
6. The user backs up the certificate, for example onto a floppy disk or onto a designated server.
7. If necessary, the user also downloads the CA certificate into the client’s certificate database and marks the certificate as trusted.
8. The user tests the newly issued client certificate by visiting a special test page on a server.
Testing Your Setup Before Full DeploymentBefore you deploy your single sign-on solution within your organization, you should set up the servers and some clients and try different scenarios. You need to test the relationships among servers, asking questions like these: Is the Certificate Server publishing certificates correctly to the Directory Server? Does the Enterprise Server check for the presence of the certificate in the directory before authenticating a client? If you remove a certificate from the entry in the directory for a particular user, does client authentication then fail for that user (as it should)? Do your access-control rules work the way you expect them to?
Chapter , Planning and Deploying a Single Sign-On Solution 65

Testing Your Setup Before Full Deployment
Keep in mind the need to reissue certificates when they expire. You should consider how often you want to do this before you set the expiration dates for the certificates you plan to issue.
It’s possible to test your single sign-on configuration with existing deployments before switching a server over completely to single sign-on. The only requirement is that the server not currently use its secure port. You can add the secure port and configure it for single sign-on, then ask a select group of test users to access the server using https://. This allows you to test a frequently accessed server without disrupting service.
Once you have experimented in a very limited setting and performed appropriate tests, you should deploy to a very small group of real users--perhaps a dozen, perhaps a hundred, depending on the size of your company and the complexity of the network. You may want to repeat some of the tests with this small initial group.
Do not deploy to a larger group of users until you have worked out all the problems that arise in your initial tests and your first group of users is using single sign-on successfully.
66 Single Sign-On Deployment Guide

ANetscape’s Use of Public-Key
Cryptography
Public-key cryptography and related standards underlie key security features of many Netscape products, including signed and encrypted email, object signing, single sign-on, and SSL. This document introduces some basic concepts of public-key cryptography that underlie Netscape security features.
• Public-Private Key Pairs
• Certificates
• Digital Signatures
• Getting a Certificate
• Authenticating a User’s Identity
For a comprehensive discussion of these topics, see Applied Cryptography by Bruce Schneier (Wiley, 1996).
Public-Private Key PairsPublic-key cryptography involves a pair of keys--a public key and a private key--associated with an entity that needs to authenticate its identity electronically or to sign or encrypt data. Each public key is published as part of
Chapter , Netscape’s Use of Public-Key Cryptography67

Certificates
a certificate, and the corresponding private key is kept secret. Data encrypted with your public key can be decrypted only with your private key. Figure 17 shows a simplified view of the way this works.
Figure 17 Using public and private keys for encryption
The scheme shown in Figure 17 lets you freely distribute a public key, and only you will be able to read data encrypted using this key. In general, to send encrypted data to someone, you encrypt the data with that person’s public key, and the person receiving the encrypted data decrypts it with the corresponding private key.
As it happens, the reverse is also true: data encrypted with your private key can be decrypted only with your public key. This would not be a desirable way to encrypt sensitive data, however, because it means that anyone with your public key, which is by definition published, could decrypt the data. Nevertheless, private-key encryption is useful, because it means you can use your private key to sign data with your digital signature. Client software such as Communicator (with the aid of your public key) can then confirm that the message was signed with your private key and that it hasn’t been tampered with since being signed. For more information about the way this works, see Digital Signatures.
CertificatesA certificate is an electronic document used to identify an individual, company, or other entity. Certificate authorities (CAs) are entities that validate identities and issue certificates. They can be either independent third parties or organizations running their own certificate-issuing server software (such as Netscape Certificate Server). The methods used to validate an identity vary depending on the policies of a given CA. In general, before issuing a
68 Single Sign-On Deployment Guide

Certificates
certificate, the CA must use its published verification procedures for that type of certificate to ensure that an entity requesting a certificate is in fact who it claims to be.
Before submitting a request for a certificate to a CA, client software such as Communicator generates a public key and the corresponding private key. The certificate issued by the CA binds the public key to the name of the requesting entity (such as the name of an employee or a server). Certificates help prevent the use of fake public keys for impersonation.
A certificate is like a driver’s license, a passport, or any other personal ID that provides generally recognized proof of a person’s identity. A certificate always includes a public key, the name of the entity it identifies, an expiration date, the name of the CA that issued the certificate, a serial number, and other information. Most importantly, a certificate always includes the digital signature of the issuing CA. The CA’s digital signature allows the certificate to function as a “letter of introduction” for users who know and trust the CA but don’t know the entity identified by the certificate.
Types of Certificates
Communicator recognizes five kinds of certificates. The first two in this list are used with the Secure Sockets Layer (SSL), a standard protocol for authentication and encryption over TCP/IP networks:
• Client SSL certificates. Used to identify clients to servers via SSL.
• Server SSL certificates. Used to identify servers to clients via SSL.
• S/MIME certificates. Used for signed and encrypted email.
• Object-signing certificates. Used to identify signers of Java code, JavaScript scripts, or other signed files.
• CA certificates. Used to identify CAs.
Navigator 3.x and earlier versions recognize only SSL certificates and CA certificates. Communicator recognizes all five. It’s also possible to issue a single certificate that can function as both an S/MIME certificate and a client SSL certificate.
Chapter , Netscape’s Use of Public-Key Cryptography69

Certificates
Any certificate binds a distinguished name (DN) to a public key. A DN is the string representation of an entity’s name. It consists of a series of comma-separated attribute-value assertions (AVAs). Here is an example:
uid=doe,[email protected],cn=John Doe,o=Netscape Communications Corp.,c=US
Each attribute tag, such as uid, labels a value, such as doe. The attribute tags used in a DN may vary somewhat from one organization to another, but the combination of AVAs must be unique to the entity the certificate identifies.
Every certificate includes the following information:
• information about the user’s public key, including the algorithm used and a representation of the key itself
• the certificate’s serial number
• the period during which the certificate is valid (for example, between 1:00 p.m. on November 15, 1996 and 1:00 p.m. November 15, 1997)
• the DN of the certificate subject (for example, in a client SSL certificate this would be the user’s DN), also called the subject name
• the DN of the CA that issued the certificate
• the algorithm used by the CA to create its own digital signature
• the CA’s digital signature, obtained by hashing all of the data in the certificate together and encrypting it with the CA's private key
A certificate can also contain extensions, not listed here, that provide additional data used by the client or server. For example, certificates used with Netscape products include the Netscape certificate type extension, which indicates the type of certificate--that is, whether it is a client SSL certificate, a server SSL certificate, a certificate for signing email, and so on. Certificate extensions can also be used for a variety of other purposes.
70 Single Sign-On Deployment Guide

Certificates
Keeping Track of Certificates
When a user receives a client SSL certificate, it is typically installed in the user’s copy of Communicator or other client software. Communicator supports the public-key cryptography standard known as PKCS #12, which governs key portability. This means, for example, that you can move your certificates (and the corresponding private keys) from one computer to another on floppy disks.
Communicator also supports PKCS #11, which governs communication with devices like smartcards and PCMCIA cards. This support means that Communicator can exchange information with smartcards in smartcard readers attached to client machines. For example, Communicator can use certificates and private keys stored on smartcards as well as those stored within Communicator itself.
Navigator 3.x doesn’t support PKCS #11 or PKCS #12, although it is possible, for example, to manually move certificate (cert5.db) and key (key.db) database files from a central directory on the network into the Navigator directory (on Windows 95) or equivalent.
To validate a certificate, Netscape client software relies in part on its list of accepted CAs. A CA can be a publicly recognized independent company (such as those listed at Certificate Authority Services), or it can be an individual or department recognized only within a corporation’s intranet or extranet (such as the internal Netscape CA). The user can add CAs to the list of trusted CAs and, if necessary, delete CAs that the user decides not to trust. If a certificate cannot be traced back to one of the CAs on Communicator’s list, the user identified by that certificate can’t be authenticated by a server that supports single sign-on.
To view your current list of CAs in Communicator, click the Security button near the top of the Navigator window, then click Signers under Certificates. The list of certificate signers (that is, CAs recognized by your copy of Communicator for validating certificates) looks like the one shown in Figure 18.
Chapter , Netscape’s Use of Public-Key Cryptography71

Certificates
Figure 18 Viewing CA certificates in the Security Info window
Communicator’s list of certificate signers is just a collection of CA certificates--that is, certificates issued by CAs for the purpose of identifying themselves. You can select a CA and use the Edit button to control the kind of certificates (such as SSL or email) certified by that CA that you are willing to accept. You can also use the Delete button to delete a CA from the list.
Mission Control allows network administrators to set up this initial list for copies of Communicator and also to modify it dynamically for copies of Communicator Professional Edition. Since both Communicator and Navigator 3.x come with a default list of CAs, it may also be necessary to remove some of them if an administrator wants users to trust only certain CAs, such as those operated by a company.
72 Single Sign-On Deployment Guide

Certificates
In Navigator 3.x, you can view the list of all installed certificates by choosing Security Preferences from the Options menu, then clicking Site Certificates. To view the CA list only, choose Certificate Authorities from the pop-up menu near the top of the window. You can then edit or delete any particular CA listing much as you can in Communicator.
Servers maintain similar lists of CAs. To view the list of CAs for a given server, follow these steps from within the Administration Server:
1. Click the Keys & Certificates tab.
2. Click Manage Certificates in the left frame.
3. Using the pop-up menu, select the server whose certificates you want to see, then click OK.
The frame that appears next is shown in Figure 19. It includes all certificates in the server’s database, including CA certificates. When you click the name of a certificate listed as a CA, a dialog box appears that allows you to delete the certificate, trust the CA, or not trust the CA.
Chapter , Netscape’s Use of Public-Key Cryptography73

Digital Signatures
Figure 19 A server’s list of certificates
For an overview of the way certificates are used to confirm a signer’s identity, see Authenticating a User’s Identity.
Digital SignaturesWhen Netscape software signs data, such as an email message or Java code, it first creates a one-way hash of that data. A one-way hash (also called a message digest) is a number of fixed length with the following characteristics:
• The value of the hash is unique for the hashed data. Any change in the data, even deleting or altering a single character, results in a different value.
• The content of the hashed data cannot, for all practical purposes, be deduced from the hash--which is why it is called “one-way.”
74 Single Sign-On Deployment Guide

Digital Signatures
As explained in Public-Private Key Pairs, it’s possible to use your private key for encryption and your public key for decryption. Although this is not desirable when you are encrypting sensitive information, it is a crucial part of digitally signing any data. Instead of encrypting the data itself, the signing software creates a one-way hash of the data, then uses your private key to encrypt the hash. The encrypted hash is known as the signer’s digital signature.
Figure 20 shows a simplified view of the way a digital signature can be used to validate the integrity of signed data.
Figure 20 Using a digital signature to validate data integrity
Figure 20 shows two items transferred to the recipient of some signed data: the original data and the digital signature, which is a one-way hash (of the original data) that has been encrypted with the signer’s private key. To validate the integrity of the data, Communicator first uses the signer’s public key to decrypt the hash. It then uses the same hashing algorithm that was used to generate the original one-way hash to generate a new one-way hash of the same data. (Information about the hashing algorithm used is also sent with the digital signature, although this isn’t shown in the figure.) Finally, Communicator compares the new hash against the original hash. If the two hashes match, the data has not changed since it was signed. If they don’t match, the data may have been tampered with since it was signed, or the signature may have been created with a private key that doesn’t correspond to the public key presented by the signer.
Chapter , Netscape’s Use of Public-Key Cryptography75
Getting a Certificate
If the two hashes match, the recipient can be certain that the public key in the signer’s certificate corresponds to the signer’s private key. To confirm the identity of the signer, however, also involves confirming the validity of the digital signature of the CA who issued the signer’s certificate. For a discussion of the way this works, see Authenticating a User’s Identity.
The significance of a digital signature is comparable to the significance of a handwritten signature. Once you have signed some data, it is difficult to deny doing so later--assuming that the private key has not been compromised or out of the owner’s control. This quality of digital signatures is described as nonrepudiation. In some situations, a digital signature may be as legally binding as a handwritten signature. Therefore, signers should take great care to ensure that they can stand behind any data they sign.
Getting a CertificateThe public key and the corresponding private key are created locally by the server or client software that requests the certificate. To help ensure that the private key isn’t compromised, it remains on the local machine, and client software or the system administrator submits the public key along with other information to the certificate authority (CA) that issues the certificate. The CA may be an independent company that issues certificates for a fee or an administrator running a Netscape Certificate Server within an organization. The CA verifies the identity of the requester according to the CA’s security policies, then issues the certificate.
In addition to the public key, DN, and other information, every certificate includes the name and digital signature of the CA that issued it, as shown in Figure 21.
Figure 21 shows a simplified view of the way a user named John Doe might use Communicator to obtain a client SSL certificate from a CA. The details of this procedure vary depending on the kind of certificate requested, the software doing the requesting, and the security policies of the CA. However, the overall process works basically the same way for any software (including Communicator, Navigator 3.x, and SuiteSpot servers) used to request any kind of certificate.
76 Single Sign-On Deployment Guide

Getting a Certificate
Figure 21 Using Communicator to request a client certificate
As shown in the figure, John Doe provides the CA with proof of his identity, typically including an email address, employee number, or other information that uniquely identifies him for the purposes of the CA. This is often done by filling in a form. Communicator automatically generates a public-private key pair, sends the public key and information provided by the user to the CA, and stores the private key in the local private-key database. (If this is the first private key it has generated for the user’s profile, Communicator also asks the user to specify a password, which it uses from that point on to protect the private-key database.)
Chapter , Netscape’s Use of Public-Key Cryptography77

Authenticating a User’s Identity
The CA uses the information provided by John Doe to confirm his identity. For highly sensitive certificates, the confirmation process may require notarized documents or a personal interview; in other cases it may simply involve providing a Unix or NT login and password, or some other information known only to the user and the network administrator.
The CA can optionally pass some of the information provided by the user to a Verification Gateway Interface (VGI) script that populates the certificate with data drawn from a database. For example, the VGI script might fill in the company’s legal name and the user’s legal name, thus avoiding problems related to typos, nicknames, and so on. After the CA has verified John Doe’s identity according to the requirements of the certificate type, the CA creates a certificate that includes a DN for John Doe; a public key; other information, such as the dates during which the certificate is valid and the certificate’s serial number; and most importantly, the CA’s digital signature on the certificate.
The CA’s digital signature allows John Doe to use the certificate as a “letter of introduction” to servers that trust the CA. The CA’s signature is obtained by encrypting a one-way hash of John Doe’s certificate with the CA’s private key. For more details about the way a digital signature is created, see Digital Signatures.
Authenticating a User’s IdentitySSL-enabled servers can be configured to require client authentication, or cryptographic evidence of the user’s identity. When a server configured this way requests client authentication during the SSL handshake, the client sends the server both a certificate and a separate piece of digitally signed data to authenticate itself. The server uses the digitally signed data to validate the public key in the certificate and to authenticate the identity the certificate claims to represent.
Both Communicator and Navigator 3.x create a digital signature in this situation by first creating a one-way hash from a piece of randomly generated data, called the nonce. (The client and the server both contribute toward the creation of the nonce, which is unique to each SSL session.) The hash of the nonce is then encrypted with the private key that corresponds to the public key in the certificate being presented to the server.
78 Single Sign-On Deployment Guide

Authenticating a User’s Identity
To authenticate the binding between the public key and the person or other entity identified by the certificate that contains the public key, a server configured to support single sign-on as described in this guide must receive a “yes” answer to the five questions shown in Figure 22. The server’s list of trusted CAs, on the right side of the figure, determines which certificates the server will accept.
Figure 22 How a server authenticates a user’s certificate
The server goes through these steps to authenticate the user’s identity:
1. Does the user’s public key validate the user’s digital signature? The server checks that the user’s digital signature can be validated with the public key in the certificate. If so, the server has established that the public key asserted to belong to John Doe matches the private key used to create the signature and that the nonce has not been tampered with since it was signed.
Chapter , Netscape’s Use of Public-Key Cryptography79

Authenticating a User’s Identity
However, at this point the binding between the public key and the DN specified in the certificate has not yet been established. The certificate might have been created by someone attempting to impersonate the user. To authenticate the binding between the public key and the DN, the server must also complete steps 3 and 4.
2. Is today’s date within the validity period? The server checks the certificate’s validity period. If the current date and time are outside of that range, the authentication process won’t go any further. If the current date and time are within the certificate’s validity period, the server goes on to step 3.
3. Is the issuing CA a trusted CA? Each SSL-enabled server maintains a list of trusted CA certificates. If the DN of the issuing CA matches the DN of a CA on the list of trusted CAs, the answer to this question is yes, and the server goes on to step 4. If the issuing CA is not on the list, the client will not be authenticated unless it can verify a certificate chain ending in a CA that is on the list (see Verifying Certificate Chains for details). Administrators can control which certificates are trusted or not trusted within their organizations by controlling the lists of CA certificates maintained by clients and servers.
4. Does the issuing CA’s public key validate the issuer’s digital signature? The server uses the public key from the CA’s certificate (which it found in its list of trusted CAs in step 3) to validate the CA’s digital signature on the certificate being presented. If the information in the certificate has changed since it was signed by the CA or if the public key doesn’t correspond to the private key used by the CA to sign the certificate, the server won’t authenticate the user’s identity. If the CA’s digital signature can be validated, the server treats the user’s certificate as a valid “letter of introduction” from that CA and proceeds to step 5.
5. Is the user’s certificate listed in the LDAP entry for the user? This step allows a system administrator to revoke a user’s certificate even if it passes the tests in all the other steps. To revoke a certificate, the administrator simply removes it from the user’s entry in the LDAP directory. All servers that are set up to perform this step will then refuse to authenticate that certificate or establish a connection.
80 Single Sign-On Deployment Guide

Authenticating a User’s Identity
If the answer to all five questions is yes, the server considers the client to be authenticated, checks what resources the client is permitted to access according to the server’s access control lists (ACLs), and establishes a connection with appropriate access. If the answer to any of the questions is no, the user identified by the certificate cannot be authenticated, and the user is not allowed to access the server.
Chapter , Netscape’s Use of Public-Key Cryptography81

Authenticating a User’s Identity
82 Single Sign-On Deployment Guide

BSingle Sign-On and Future Versions of
SuiteSpot Servers
SuiteSpot 3.0 servers that support the single sign-on solution described in this guide are listed in Netscape Products That Support Single Sign-On. This appendix summarizes single sign-on issues for other SuiteSpot 3.0 servers and plans for future support:
• Proxy Server
• Directory Server
• Catalog/Compass Server
• Calendar Server
Netscape’s support for single sign-on currently doesn’t include the user’s SMTP password, network password, OS password, database passwords, Kerberos passwords, and so on. For information about third-party solutions that extend single sign-on to these kinds of resources, see Netscape Security Partners.
Proxy ServerProxy Server 2.5 supports SSL tunneling, which means that an SSL connection can be established between a client and a server via the Proxy Server. If the Proxy Server is not configured for client authentication, this will happen transparently between a client and a server that both support single sign-on as
Chapter , Single Sign-On and Future Versions of SuiteSpot Servers 83

Directory Server
described in this guide. If the Proxy Server is configured for authentication via name and password, the user will have to type in a separate password before being allowed to access the server.
Although the standard configuration for Proxy Server 2.5 doesn’t support client authentication with certificates, it is possible to configure the server as a reverse proxy (web server stand-in), in which case the Unix version does support client-based authentication to Proxy Server 2.5. Future versions of Proxy Server will fully support certificate-based client authentication and single sign-on.
Directory ServerDirectory Server 1.x doesn’t support single sign-on for users who are using the directory to look up information. These versions of the Directory Server do support looking up a user’s certificate in the directory entry for the user on behalf of other servers that support single sign-on. This is shown as step 5 in Figure 3.
Directory Server 3.x will fully support single sign-on.
Catalog/Compass ServerCatalog Server 1.0 doesn’t support single sign-on. Future versions, which will be known as Compass Server, will fully support it.
Calendar ServerCalendar Server 1.0 doesn’t support single sign-on. A future version will support it.
84 Single Sign-On Deployment Guide

References
Public-Key CryptographyFor a comprehensive technical discussion of public-key cryptography and cryptographic algorithms, see Bruce Schneier, Applied Cryptography (Wiley, 1996).
For public-key cryptography standard (PKCS) documentation and other information about cryptography and networks, see RSA Data Security.
SuiteSpot ServersDocumentation for SuiteSpot servers can be viewed online by clicking Help in any server window. Most SuiteSpot documentation is also available in the form of printed manuals for each server.
Server Central provides general information about SuiteSpot servers.
Server Training Center provides online training in the installation and configuration of SuiteSpot servers.
Access Control Programmer’s Guide Detailed information about using the ACL API with the Enterprise Server to manipulate ACLs, read and write ACL files, and evaluate and test access control to resources.
CertificatesCertificates. Overview of information related to certificates.
Netscape Certificate Server. Certificate Server's public page on Server Central.
Certificate Authority Services. A listing of some certificate authorities that issue certificates for Netscape products.
Chapter , References 85

Verification Gateway Interface (VGI)
Certificate Mapping API. Detailed information about customizing the way a server uses the certmap.conf file to locate a user’s entry in an LDAP directory.
Verification Gateway Interface (VGI)Certificate Server utilities and basic VGI examples are available at these FTP addresses:
• Windows 95/NT: ftp://ftp1.mcom.com/private/certificate/1.0/TeMporARY/ex101eiu.exe
• Solaris: ftp://ftp1.mcom.com/private/certificate/1.0/TeMporARY/certificateextras-1_01-export-us_sparc-sun-solaris2_4_tar.gz
• IRIX: ftp://ftp1.mcom.com/private/certificate/1.0/TeMporARY/certificateextras-1_01-export-us_mips-sgi-irix5_3_tar.gz
More complex VGI examples illustrating the use of information in an LDAP directory to prepopulate a certificate may be found on DevEdge at http://developer.netscape.com/one/security/certs/ldapvgi/.
Mission ControlNetscape Mission Control. Summary of product information for Mission Control.
Netscape Mission Control Guide. Documentation for Mission Control.
Third-Party SolutionsTo fully integrate single sign-on authentication with forms of access not directly controlled by Netscape servers, you can use solutions provided by third parties specifically for such purposes. For information about Netscape partners that provide such single sign-on solutions, see Netscape Security Partners.
86 Single Sign-On Deployment Guide

Feedback and Help
Feedback and HelpTo give Netscape comments on this guide or on any aspect of single sign-on, please send email to sso-feedback. This address is strictly for collecting feedback; you will not receive a personal response.
For information about getting technical help with any Netscape product, see Netscape Tech Support.
Chapter , References 87

Feedback and Help
88 Single Sign-On Deployment Guide


![Edinburgh Research Explorer · queries goes to hash index lookups used in hash-join opera-tions [16]. By accelerating hash index lookups, a functionality that is essential in modern](https://img.pdfslide.us/doc/110x75/60bdb9bcc0af1064d6068dc7/edinburgh-research-queries-goes-to-hash-index-lookups-used-in-hash-join-opera-tions.jpg)