Embed Size (px)
Citation preview
ShowCase 9.0 Installation Guide
© Dell Services 2011
ShowCase 9.0 Install Guide
ShowCase 9.0 Installation Guide 1.0
© Dell Services 2011
2
Table of Contents
Table of Contents .............................................................................................................................2 Section 1: Technical Questions or Issues ....................................................................................3
Section 2: PC Requirements .......................................................................................................3 Section 3: Pre-Installation Steps .................................................................................................3 Section 4: Install ShowCase 9.0 ..................................................................................................4 Section 5: Install the Software Patch (REQUIRED) ..................................................................9 Section 6: Configuring the Data Source for DAAC .................................................................12
Section 7: Opening a Query Created in a Different Version ....................................................14
ShowCase 9.0 Installation Guide 1.0
© Dell Services 2011
3
Section 1: Technical Questions or Issues
For any questions or issues, please contact:
Tenet Helpdesk: 1.800.639.7575 Option: 5 then 6
Section 2: PC Requirements
The following are the PC Requirements:
Operating system: Microsoft Windows XP Professional, Windows 2000 Professional, Microsoft Windows VISTA, Windows 7 32 or 64 bit
Web Browser: Internet Explorer 6 or higher, or Mozilla Firefox 1.5 or higher. (Netscape Navigator is not supported)
Microprocessor: Intel Pentium, 1.8 GHz or higher
Memory: 512 MB RAM more than the minimum required by your operating system
Disk space: At least 200MB or greater
Section 3: Pre-Installation Steps
1. Users must save their queries prior to upgrading to 9.0: Please refer to the following installation guidelines for instructions.
2. Remove all other versions of ShowCase:
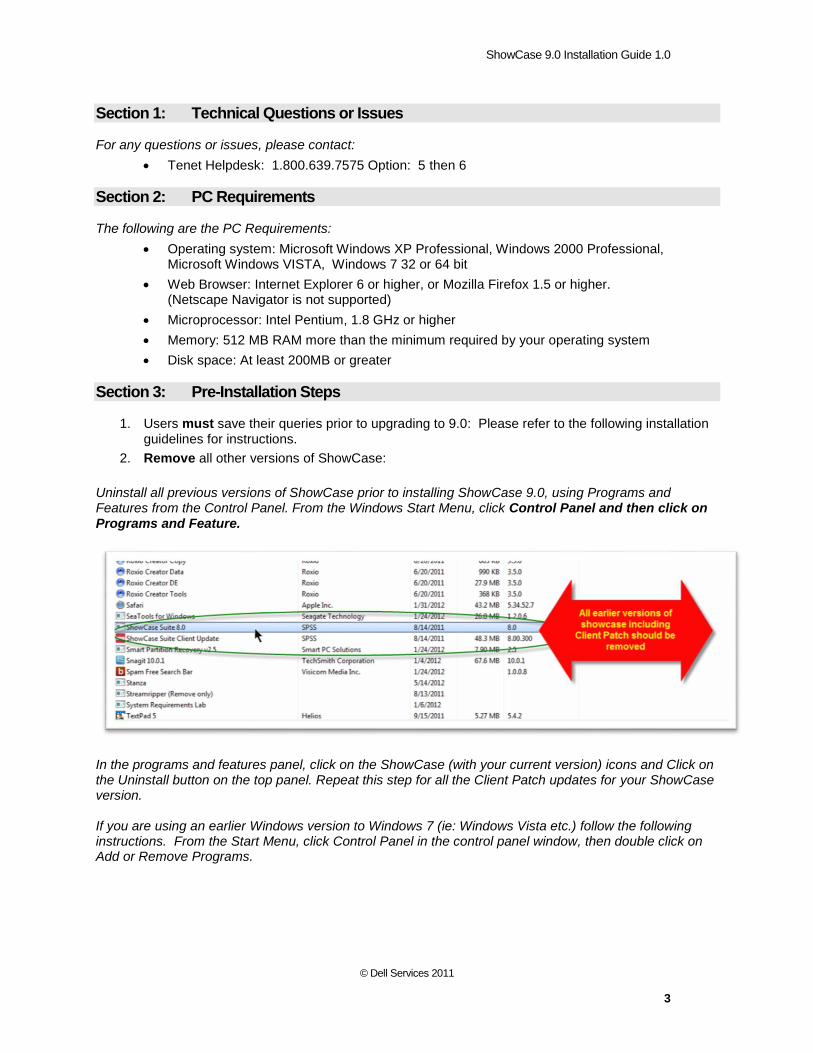
Uninstall all previous versions of ShowCase prior to installing ShowCase 9.0, using Programs and Features from the Control Panel. From the Windows Start Menu, click Control Panel and then click on Programs and Feature.
In the programs and features panel, click on the ShowCase (with your current version) icons and Click on the Uninstall button on the top panel. Repeat this step for all the Client Patch updates for your ShowCase version.
If you are using an earlier Windows version to Windows 7 (ie: Windows Vista etc.) follow the following instructions. From the Start Menu, click Control Panel in the control panel window, then double click on Add or Remove Programs.
ShowCase 9.0 Installation Guide 1.0
© Dell Services 2011
4
Section 4: Install ShowCase 9.0
Before beginning the installation, ensure that all Windows applications are closed.
1. Insert the ShowCase Suite 9.0 CD into the CD-ROM drive.
2. Browse to the following folder. “ShowCase 9.0” “Client Main Install” “en” “Client”. Then click on setup.exe
3. Click “Yes” to on the next screen to give the application permission to install on the computer.
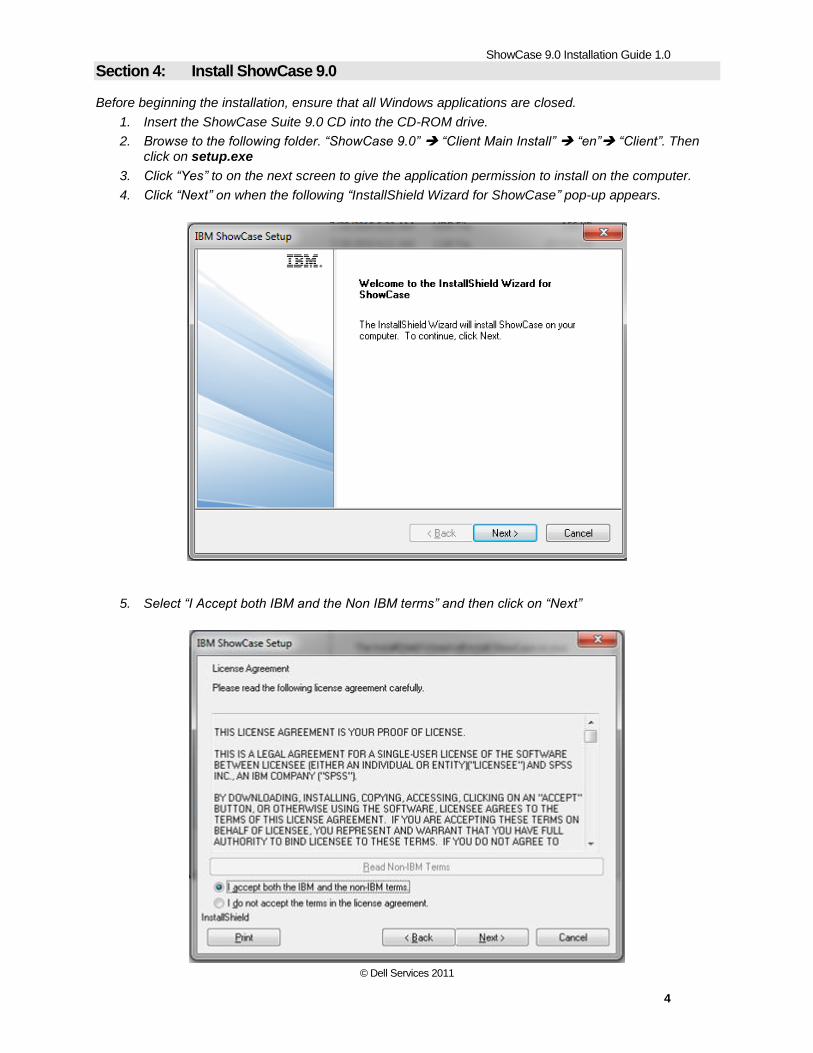
4. Click “Next” on when the following “InstallShield Wizard for ShowCase” pop-up appears.
5. Select “I Accept both IBM and the Non IBM terms” and then click on “Next”
ShowCase 9.0 Installation Guide 1.0
© Dell Services 2011
5
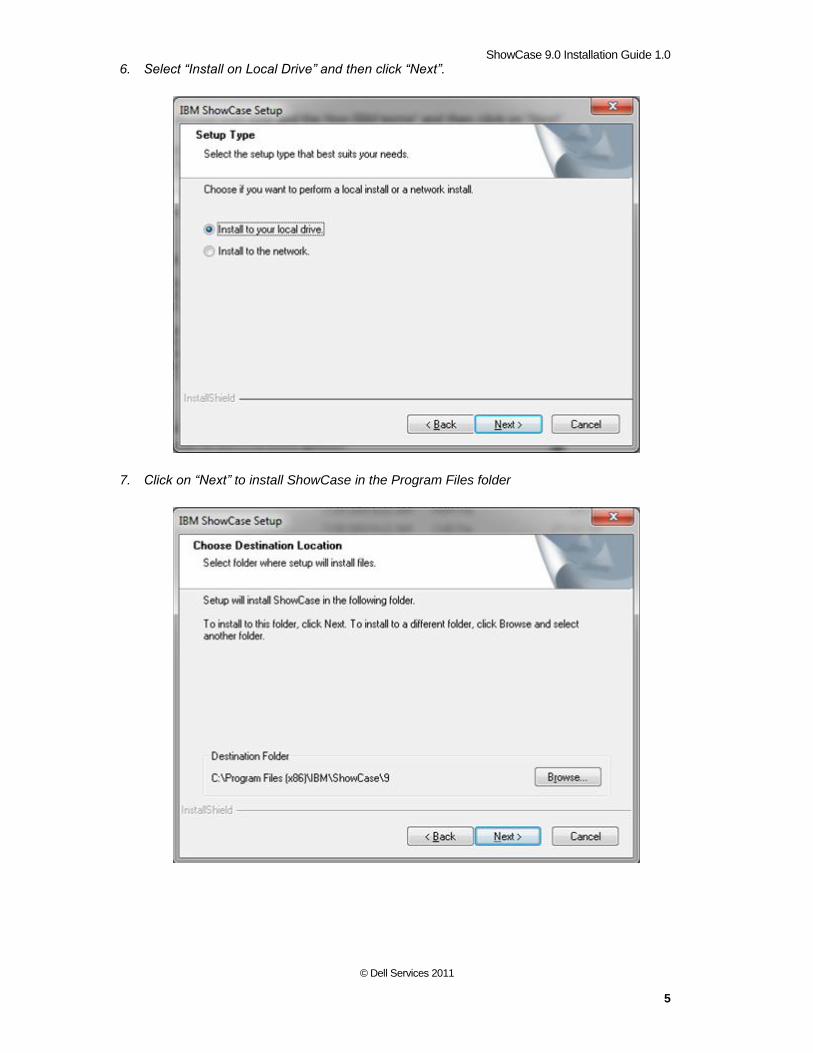
6. Select “Install on Local Drive” and then click “Next”.
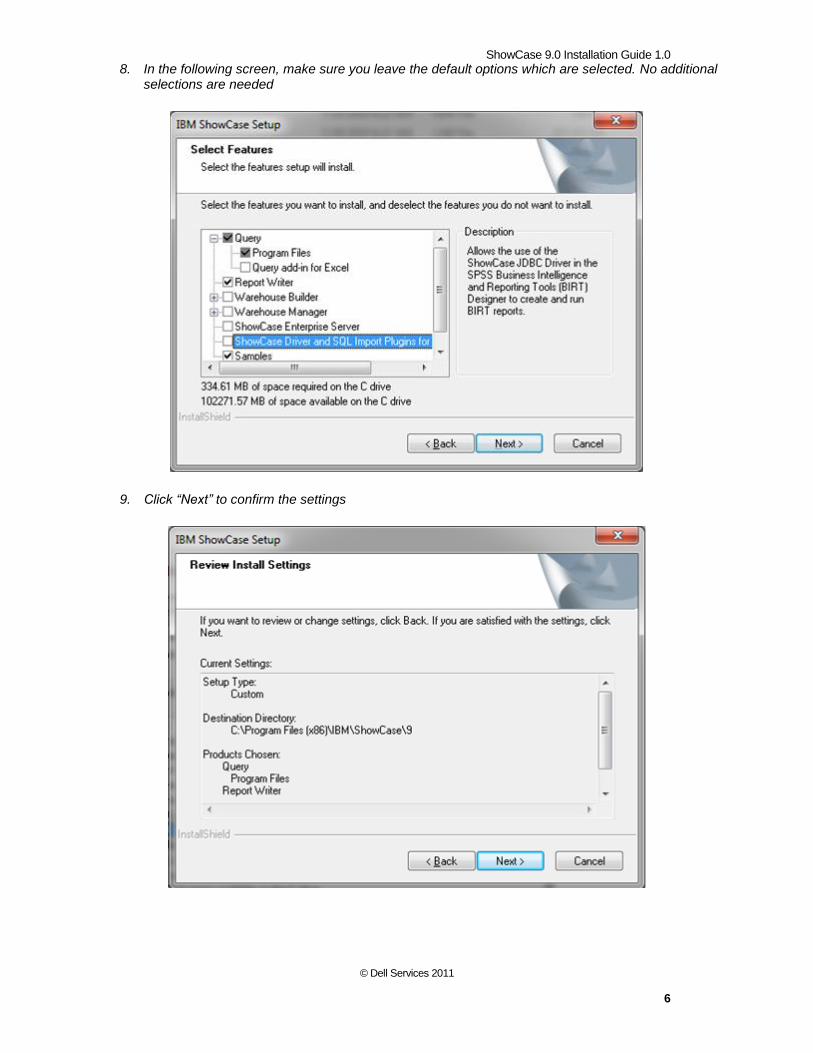
7. Click on “Next” to install ShowCase in the Program Files folder
ShowCase 9.0 Installation Guide 1.0
© Dell Services 2011
6
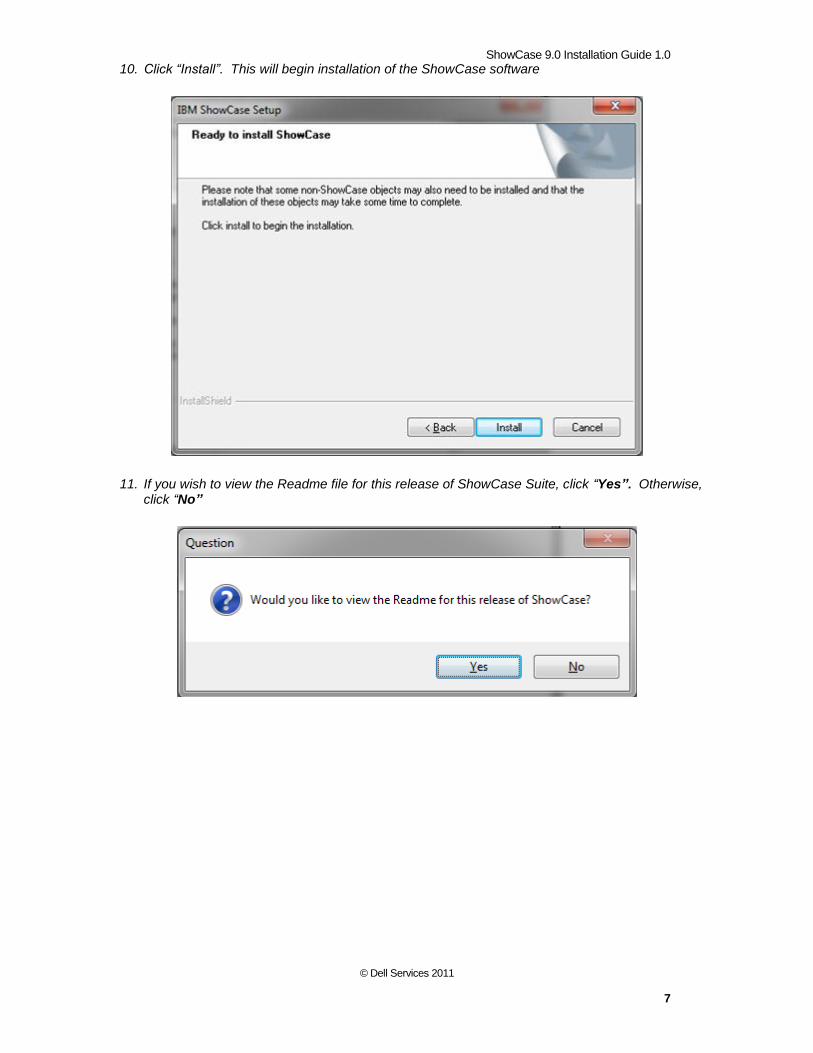
8. In the following screen, make sure you leave the default options which are selected. No additional selections are needed
9. Click “Next” to confirm the settings
ShowCase 9.0 Installation Guide 1.0
© Dell Services 2011
7
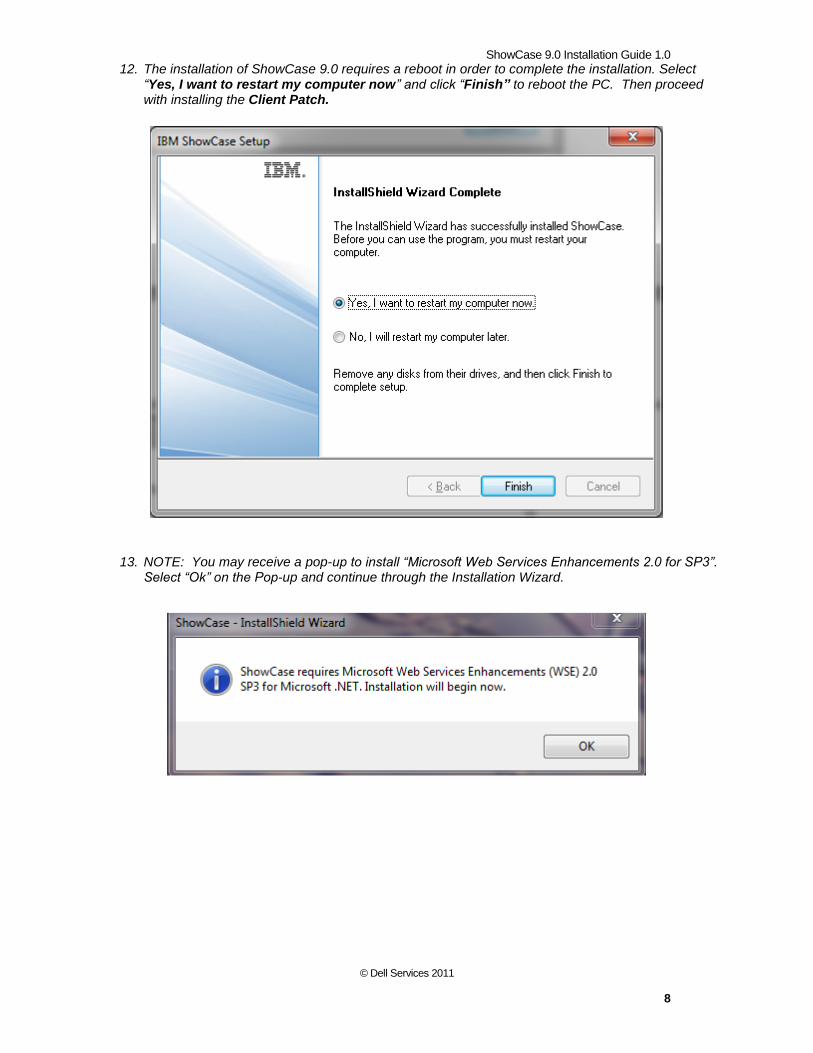
10. Click “Install”. This will begin installation of the ShowCase software
11. If you wish to view the Readme file for this release of ShowCase Suite, click “Yes”. Otherwise, click “No”
ShowCase 9.0 Installation Guide 1.0
© Dell Services 2011
8
12. The installation of ShowCase 9.0 requires a reboot in order to complete the installation. Select “Yes, I want to restart my computer now” and click “Finish” to reboot the PC. Then proceed with installing the Client Patch.
13. NOTE: You may receive a pop-up to install “Microsoft Web Services Enhancements 2.0 for SP3”. Select “Ok” on the Pop-up and continue through the Installation Wizard.
ShowCase 9.0 Installation Guide 1.0
© Dell Services 2011
9
Section 5: Install the Software Patch (REQUIRED)
After re-booting the system, the Client Patch will need to be installed using the following steps:
1. After installing the ShowCase Suite 9.0, the client patch must also be installed
2. Browse to the “Client Patch” folder on the install CD
3. Double-click on the patch file: “SC9003.exe”
4. Select “Yes” to allow the application to make changes on the computer
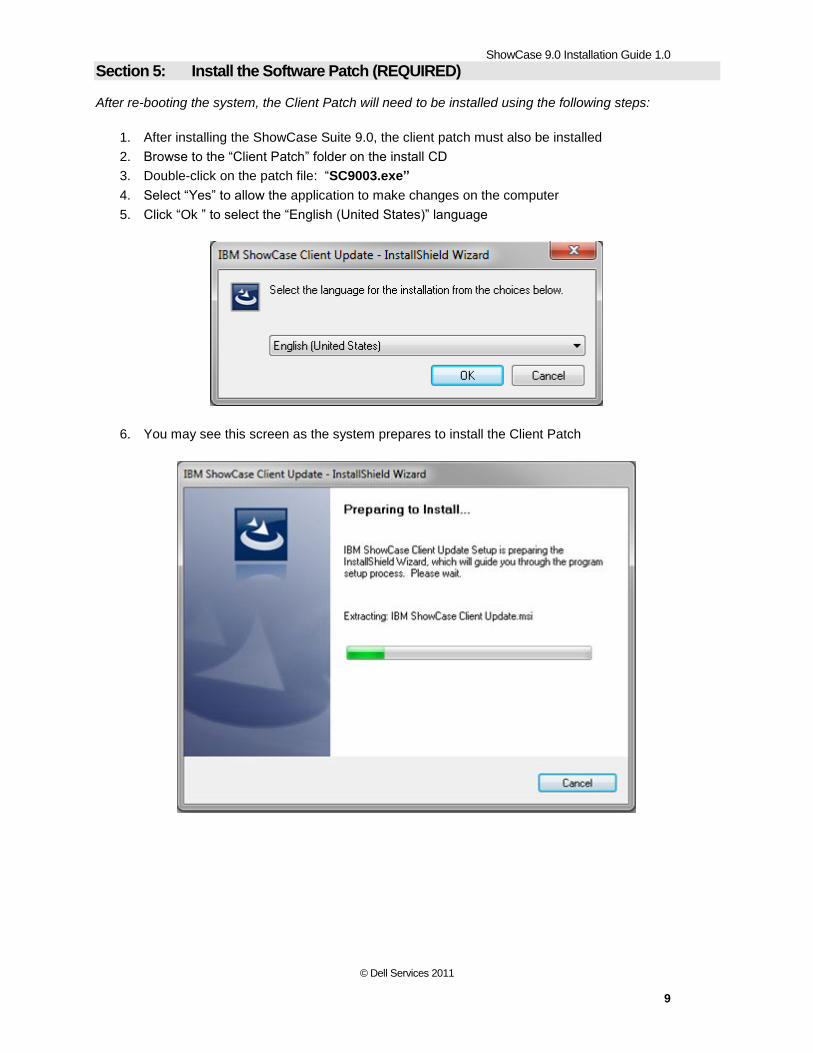
5. Click “Ok ” to select the “English (United States)” language
6. You may see this screen as the system prepares to install the Client Patch
ShowCase 9.0 Installation Guide 1.0
© Dell Services 2011
10
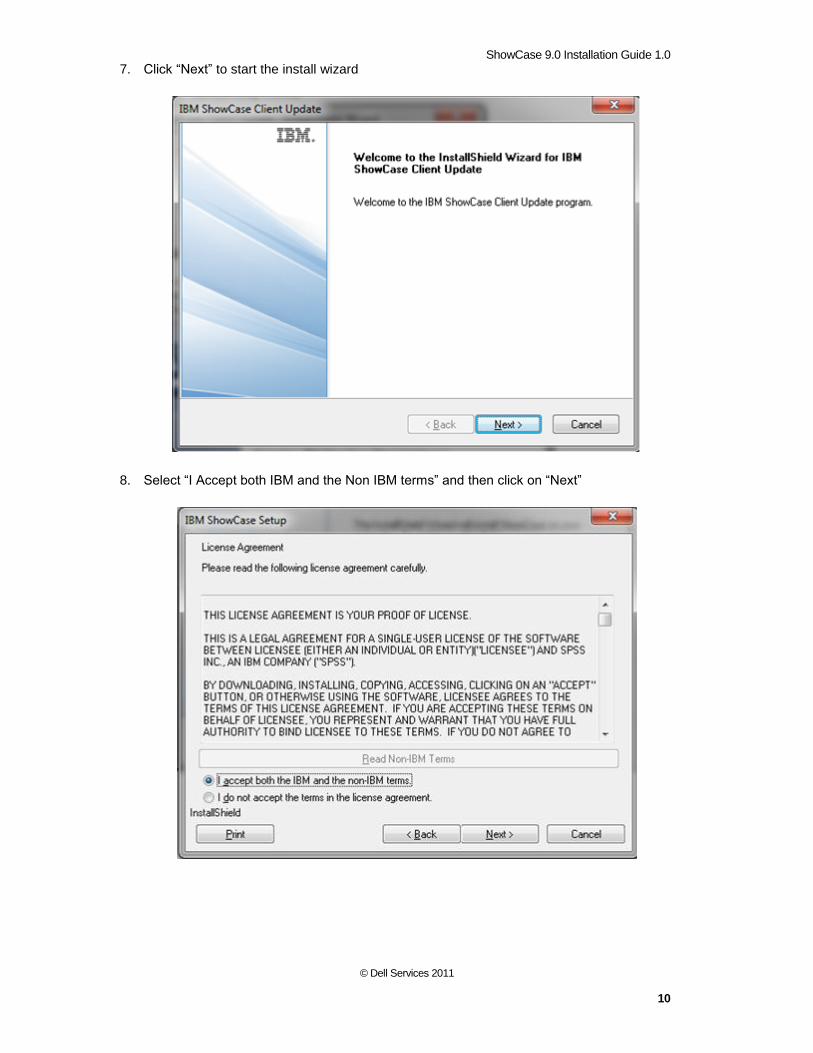
7. Click “Next” to start the install wizard
8. Select “I Accept both IBM and the Non IBM terms” and then click on “Next”

ShowCase 9.0 Installation Guide 1.0
© Dell Services 2011
11
9. Select “Update Local Drive” and then click “Next”
10. Click “Next” to start copying the patch files
ShowCase 9.0 Installation Guide 1.0
© Dell Services 2011
12
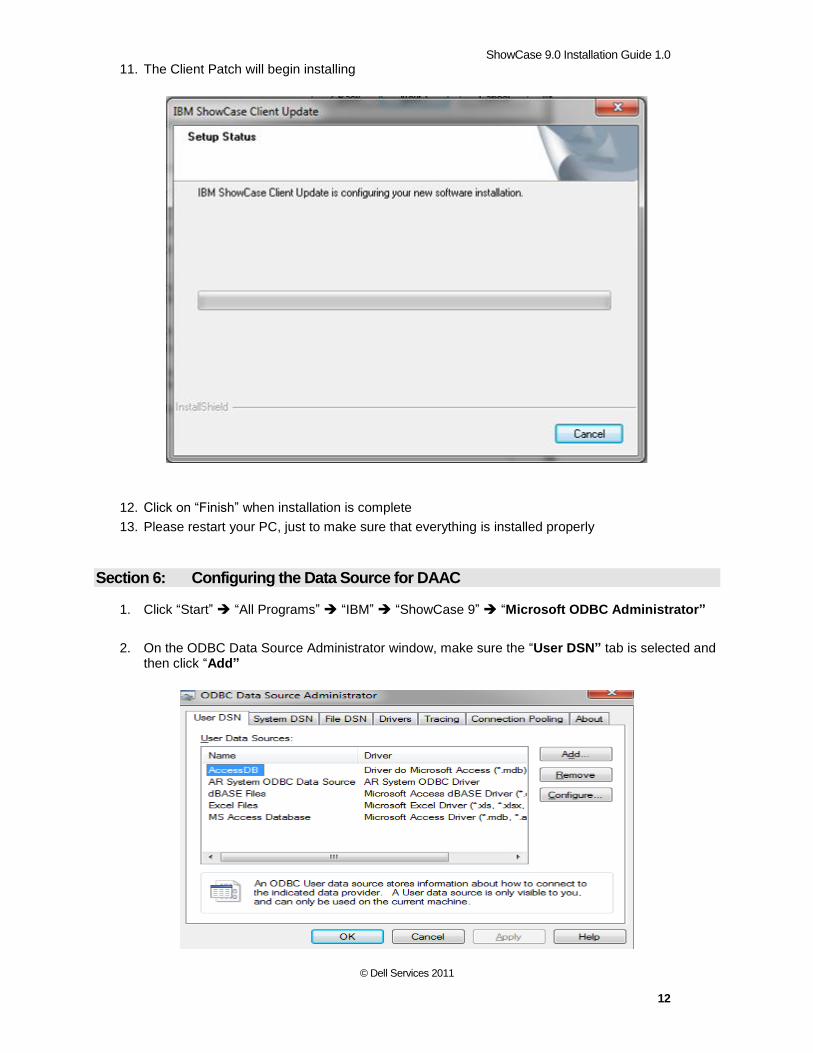
11. The Client Patch will begin installing
12. Click on “Finish” when installation is complete
13. Please restart your PC, just to make sure that everything is installed properly
Section 6: Configuring the Data Source for DAAC
1. Click “Start” “All Programs” “IBM” “ShowCase 9” “Microsoft ODBC Administrator”
2. On the ODBC Data Source Administrator window, make sure the “User DSN” tab is selected and then click “Add”
ShowCase 9.0 Installation Guide 1.0
© Dell Services 2011
13
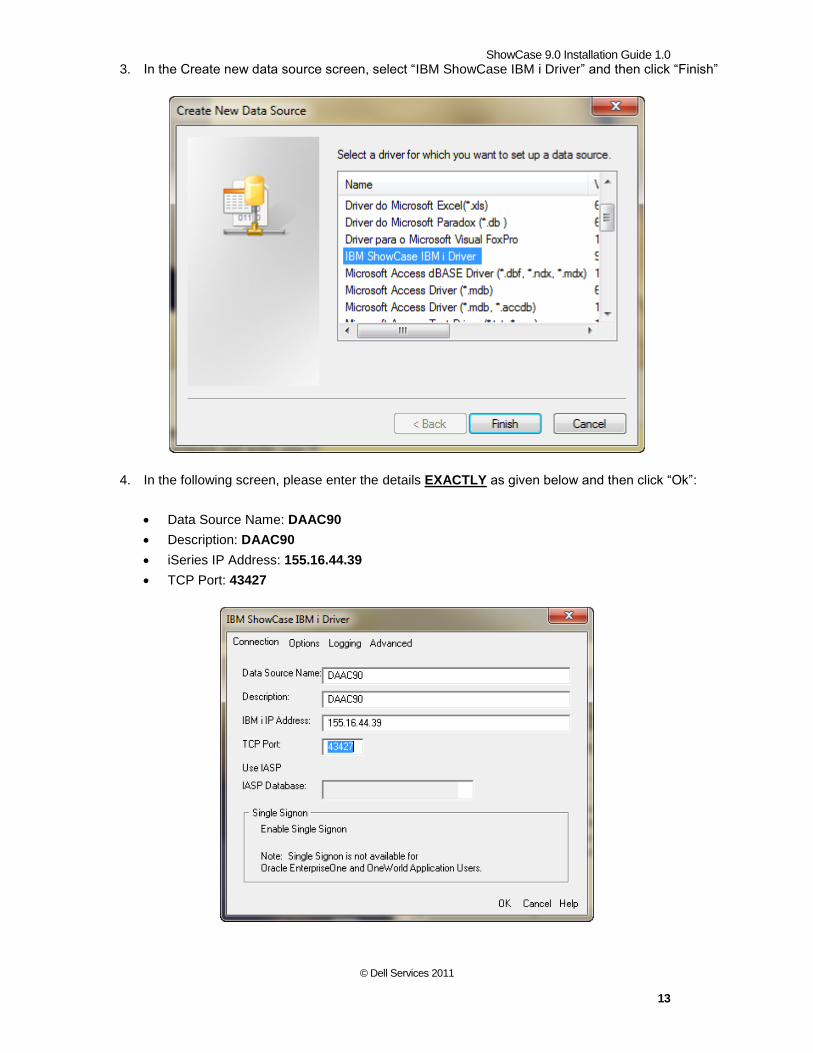
3. In the Create new data source screen, select “IBM ShowCase IBM i Driver” and then click “Finish”
4. In the following screen, please enter the details EXACTLY as given below and then click “Ok”:
Data Source Name: DAAC90
Description: DAAC90
iSeries IP Address: 155.16.44.39
TCP Port: 43427
ShowCase 9.0 Installation Guide 1.0
© Dell Services 2011
14
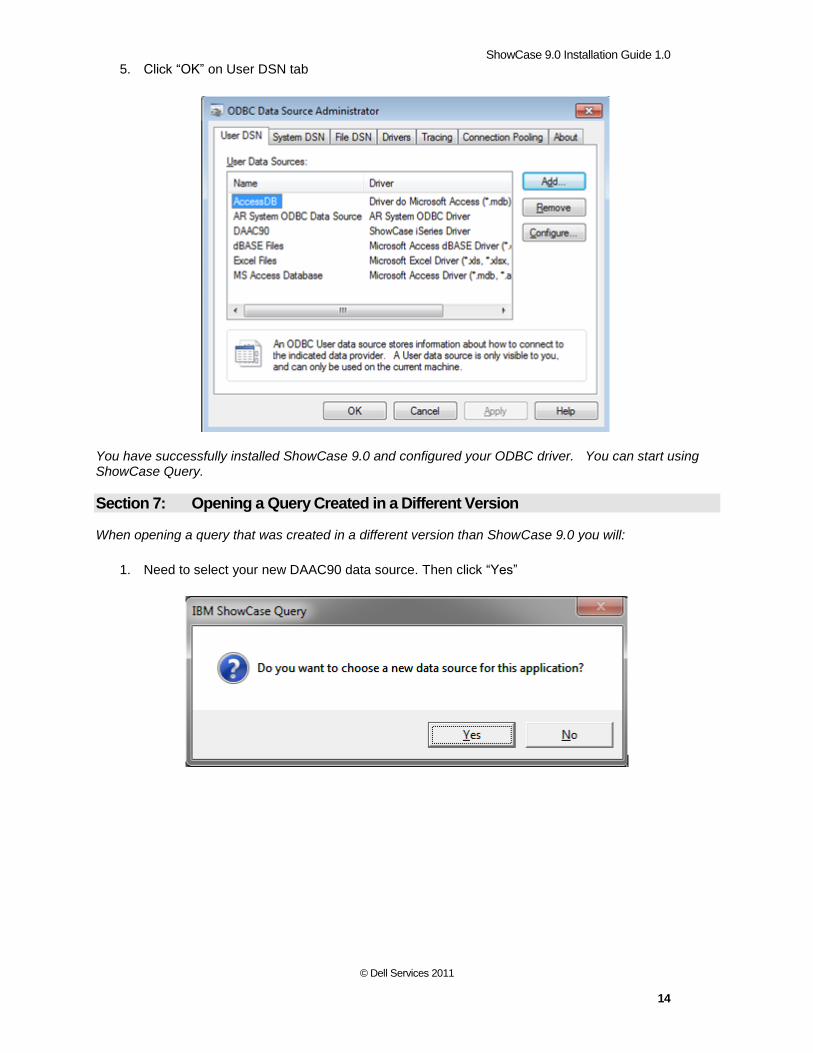
5. Click “OK” on User DSN tab
You have successfully installed ShowCase 9.0 and configured your ODBC driver. You can start using ShowCase Query.
Section 7: Opening a Query Created in a Different Version
When opening a query that was created in a different version than ShowCase 9.0 you will:
1. Need to select your new DAAC90 data source. Then click “Yes”
ShowCase 9.0 Installation Guide 1.0
© Dell Services 2011
15
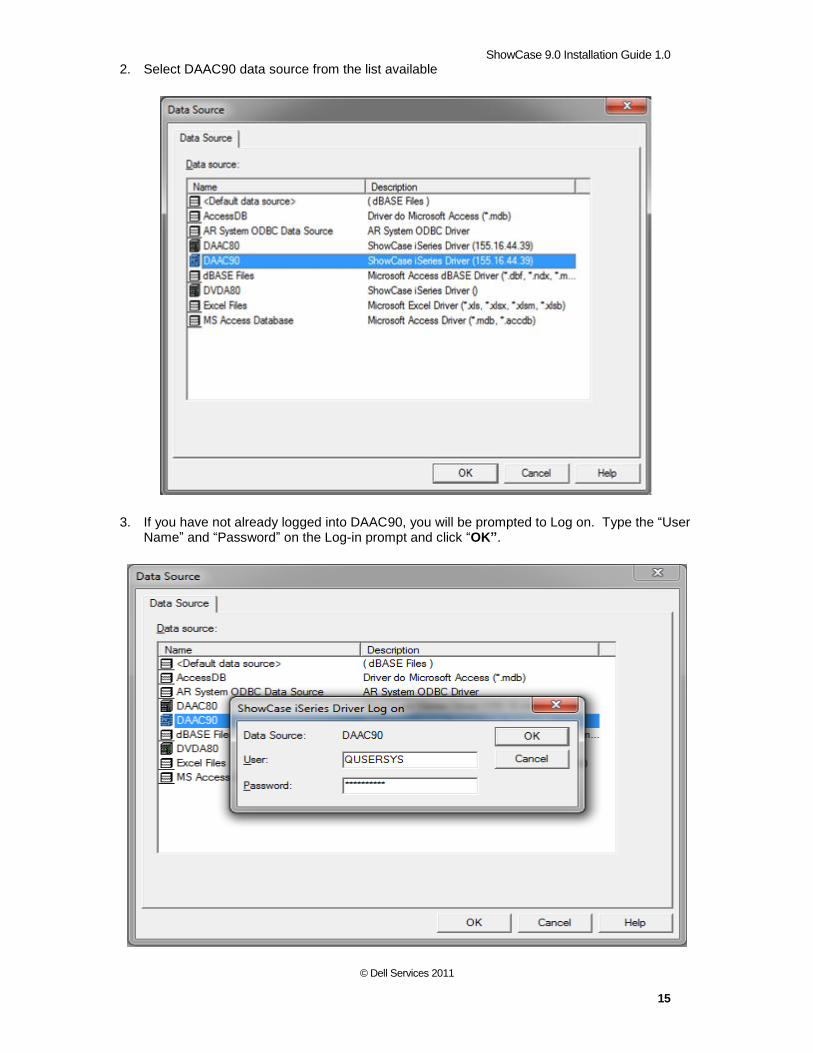
2. Select DAAC90 data source from the list available
3. If you have not already logged into DAAC90, you will be prompted to Log on. Type the “User Name” and “Password” on the Log-in prompt and click “OK”.