Embed Size (px)
Citation preview
Target age range: 8 – 11 years
Duration of lesson: approxmately 1 hour
Size of class: approximately 15 students
Kids should have a basic understanding of how to
work with computers and how to do the simple
functions on Scratch that were covered in Lesson
Plan 1 (changing the appearance of the stage and
sprite, creating more than one sprite, giving simple
commands to sprites).
Setup
Skills Required

Objectives• Students should review the concepts they
learned on Day 1 to make sure that they retained the information.
• They should become engaged in the material that they are to learn in this lesson.
• Students should be able to use:• Other control functions:
• Forever• If/Else• Repeat• Broadcast
• Sensing
If/Else: http://scratch.mit.edu/projects/dill1233/1214042
Sensing: http://scratch.mit.edu/projects/dill1233/1214042
Materials
Resources for this Lesson
• A computer for each student (with Scratch installed) OR for every two students
• Speakers/headphones so that students can hear sounds
• A projector and accompanying screen

Review and Engaging theStudents
We strongly recommend going over all of the things learned on day 1 to make sure the kids remember and have absorbed the information.
If you have completely new students, one option is peer programming: partner a new student with a student who attended the previous lesson. The idea is that the more experienced student will better understand Scratch since they have to explain what they already know to a newbie.
To engage the students, you can show them the If/Else and Sensing programs, found in “Resources for This Lesson.”
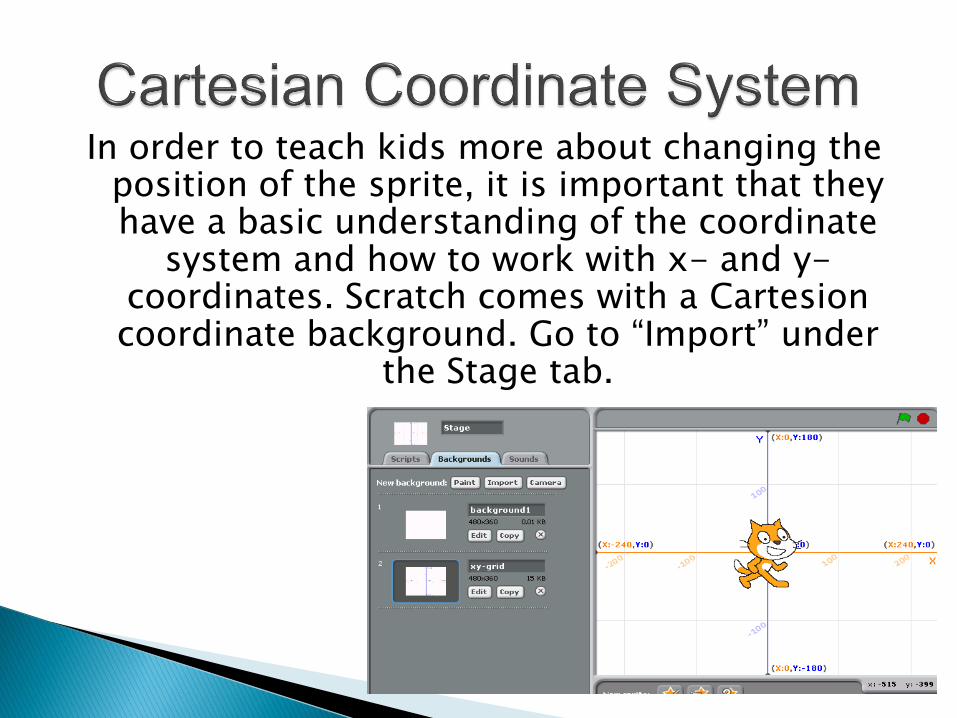
In order to teach kids more about changing the position of the sprite, it is important that they have a basic understanding of the coordinate
system and how to work with x- and y-coordinates. Scratch comes with a Cartesioncoordinate background. Go to “Import” under
the Stage tab.
Make sure they know that the purpose of the coordinate plane is to know the position of objects using the
horizontal and vertical lines (“axis”).
First, it is important to relay that “y” denotes the vertical position and “x” denotes the horizontal position. They
are always told in the format,
(x, y)Go through the meaning of positive and negative x and y coordinates. Go through a few examples to make sure
they understand the basic theory of it.
This may take anywhere from 5 – 20 minutes depending on the knowledge level of the kids. They may loose
interest, but it is important that they at least know the meaning of “set x,y to 0” for later on.
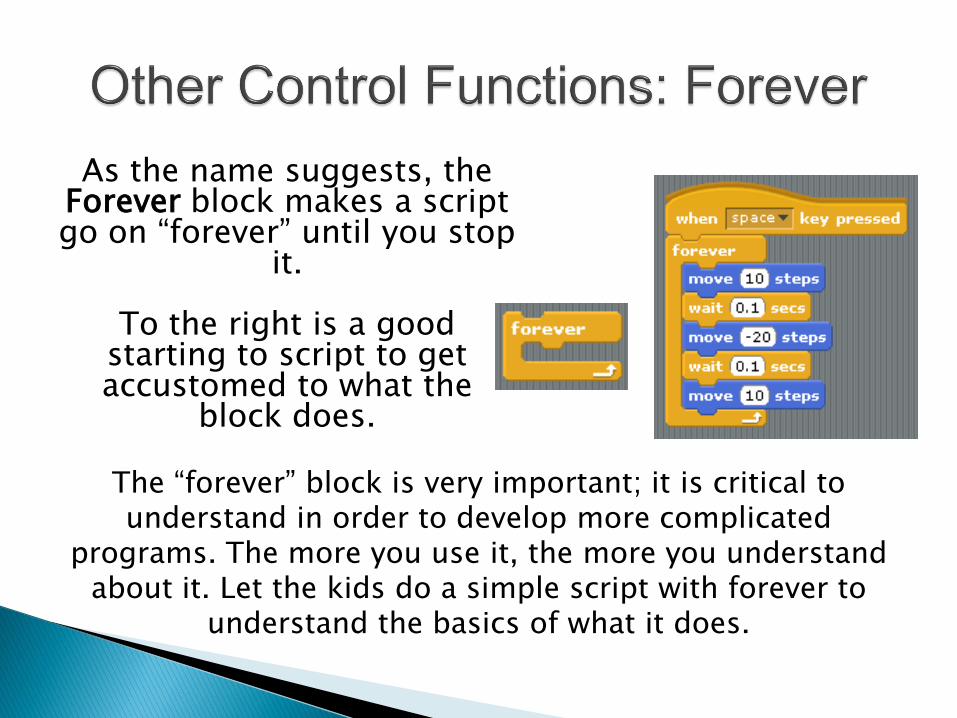
As the name suggests, the Forever block makes a script go on “forever” until you stop
it.
To the right is a good starting to script to get accustomed to what the
block does.
The “forever” block is very important; it is critical to understand in order to develop more complicated
programs. The more you use it, the more you understand about it. Let the kids do a simple script with forever to
understand the basics of what it does.
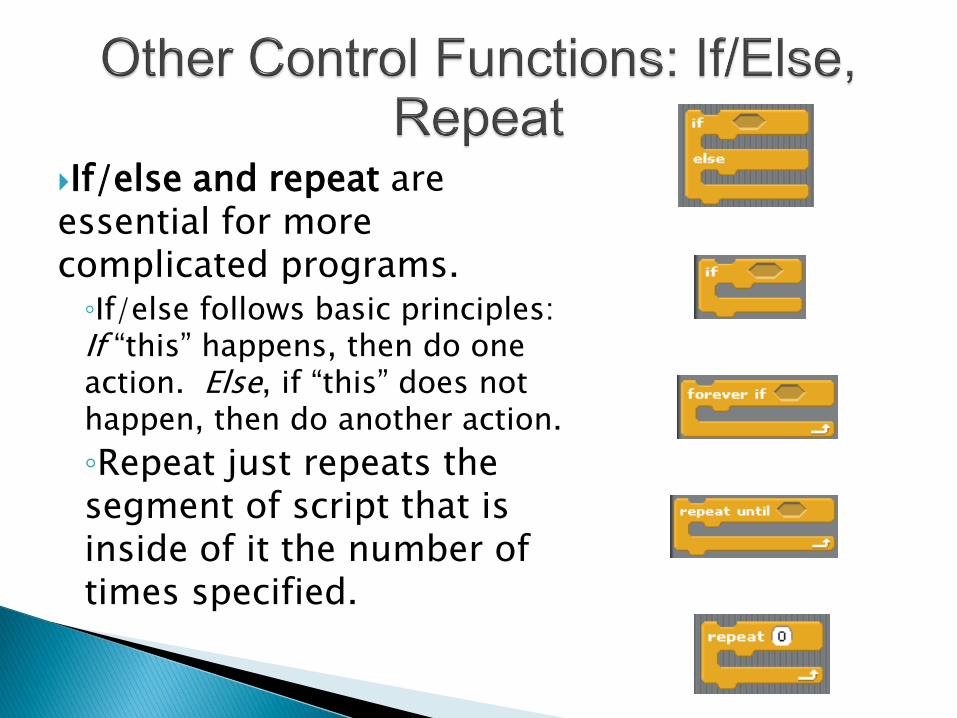
If/else and repeat are essential for more complicated programs.
◦If/else follows basic principles: If “this” happens, then do one action. Else, if “this” does not happen, then do another action.
◦Repeat just repeats the segment of script that is inside of it the number of times specified.

Here is an example of a program that
uses If/Else and Repeat. We use the two
dragons found in the “fantasy” folder of
importable sprites. Set the rotation of
the dragon to left and right.
Two scripts need to be made. The first
script allows the dragon to bob up and
down smoothly, and the second checks
whether or not the space key is pressed
(which utilizies a block from Sensing)
to let the dragon breath fire.
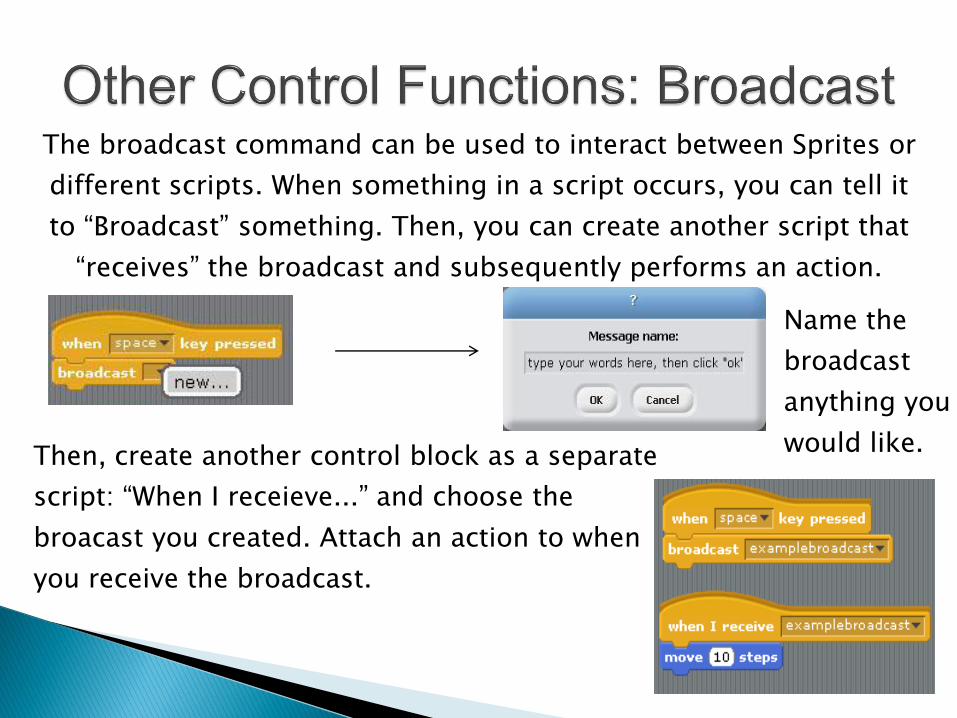
The broadcast command can be used to interact between Sprites or
different scripts. When something in a script occurs, you can tell it
to “Broadcast” something. Then, you can create another script that
“receives” the broadcast and subsequently performs an action.
Name the
broadcast
anything you
would like.Then, create another control block as a separate
script: “When I receieve...” and choose the
broacast you created. Attach an action to when
you receive the broadcast.
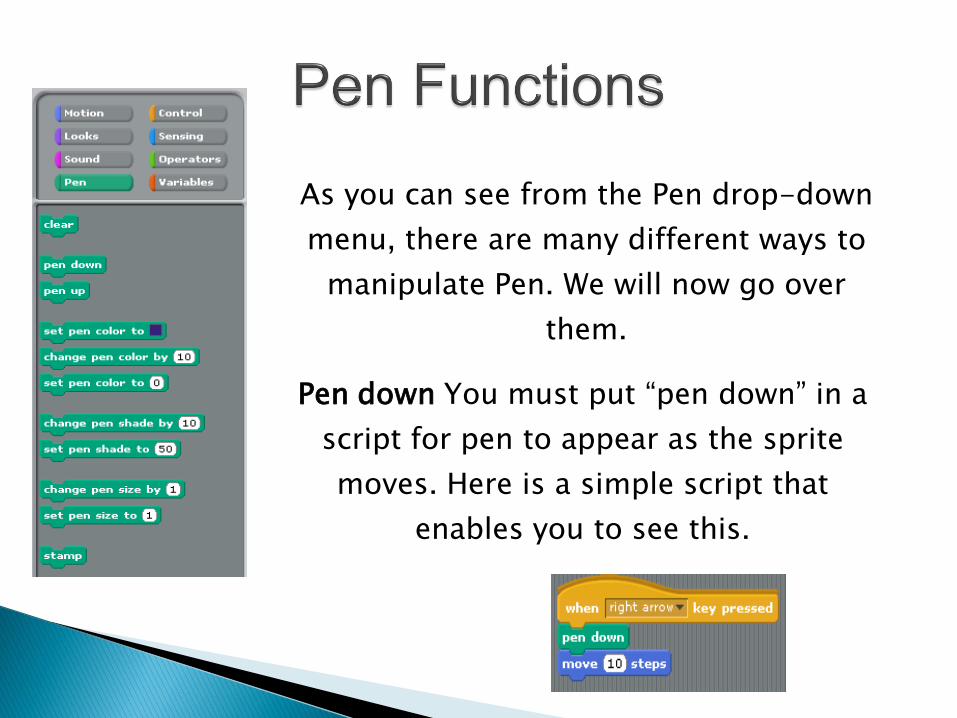
As you can see from the Pen drop-down
menu, there are many different ways to
manipulate Pen. We will now go over
them.
Pen down You must put “pen down” in a
script for pen to appear as the sprite
moves. Here is a simple script that
enables you to see this.
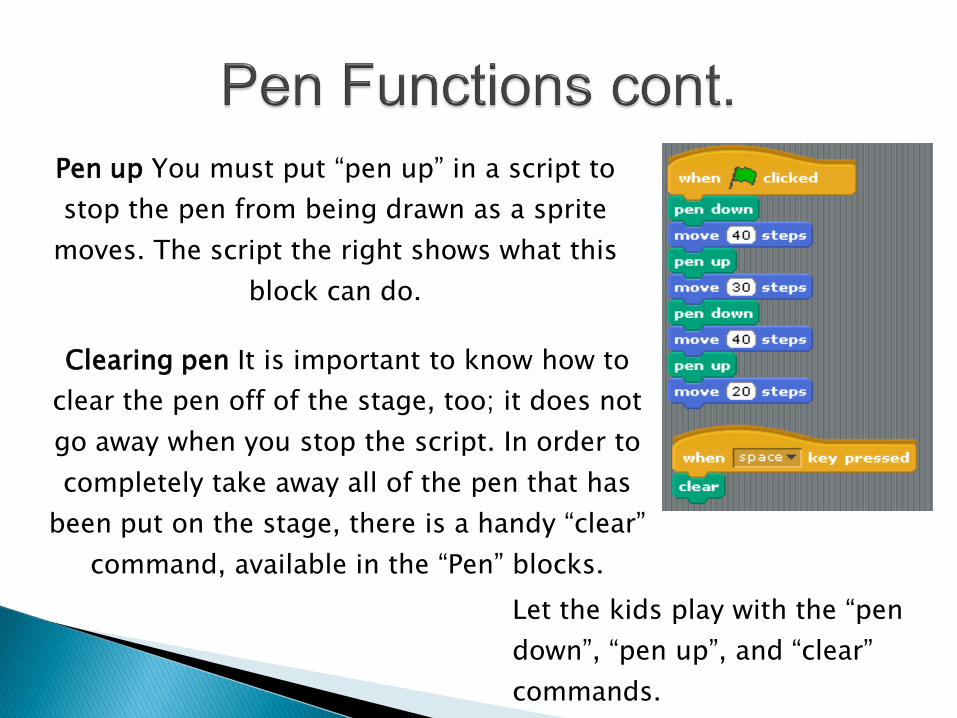
Pen up You must put “pen up” in a script to
stop the pen from being drawn as a sprite
moves. The script the right shows what this
block can do.
Clearing pen It is important to know how to
clear the pen off of the stage, too; it does not
go away when you stop the script. In order to
completely take away all of the pen that has
been put on the stage, there is a handy “clear”
command, available in the “Pen” blocks.
Let the kids play with the “pen
down”, “pen up”, and “clear”
commands.
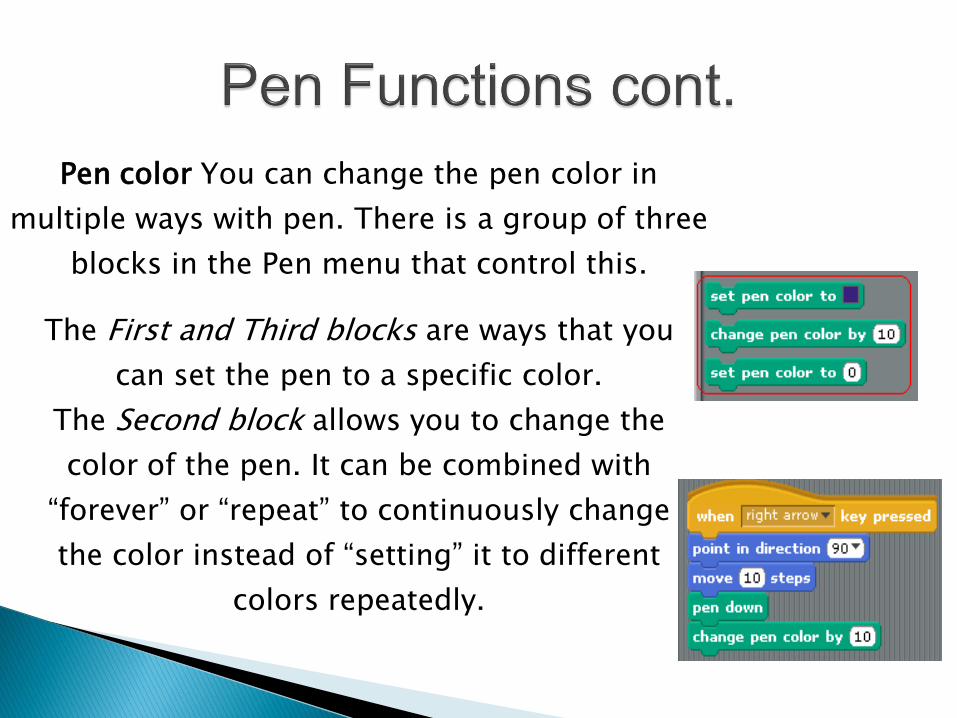
Pen color You can change the pen color in
multiple ways with pen. There is a group of three
blocks in the Pen menu that control this.
The First and Third blocks are ways that you
can set the pen to a specific color.
The Second block allows you to change the
color of the pen. It can be combined with
“forever” or “repeat” to continuously change
the color instead of “setting” it to different
colors repeatedly.
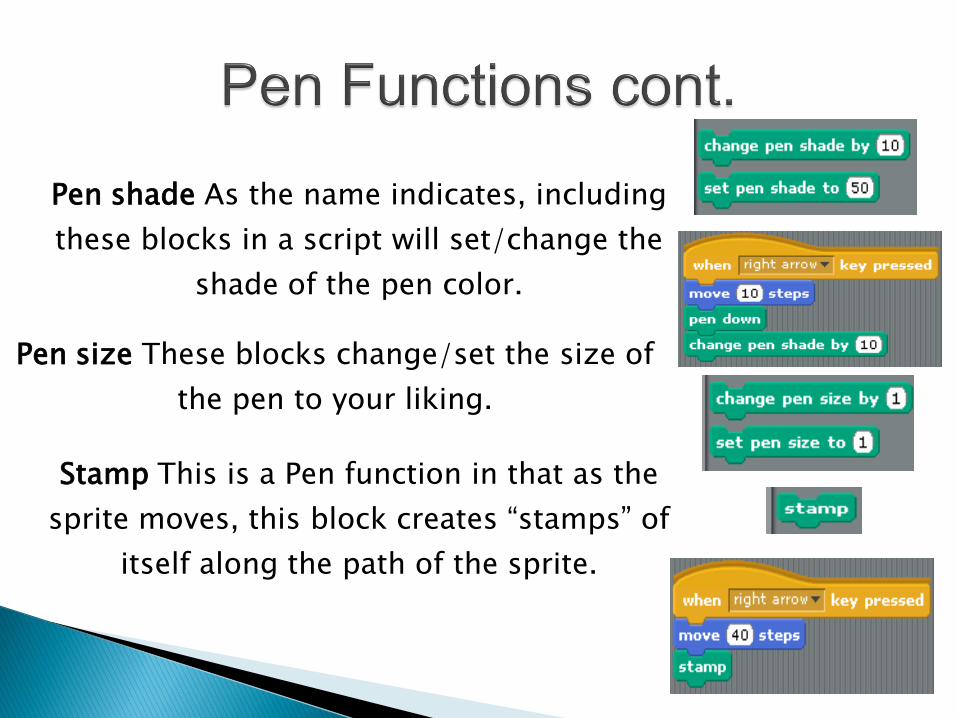
Pen shade As the name indicates, including
these blocks in a script will set/change the
shade of the pen color.
Pen size These blocks change/set the size of
the pen to your liking.
Stamp This is a Pen function in that as the
sprite moves, this block creates “stamps” of
itself along the path of the sprite.
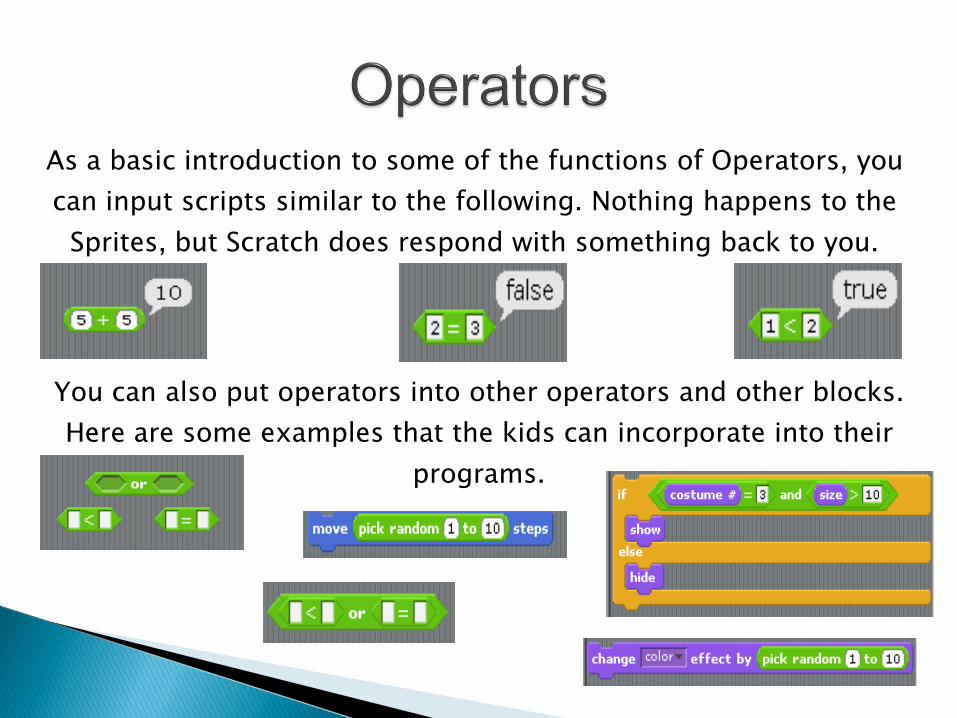
As a basic introduction to some of the functions of Operators, you
can input scripts similar to the following. Nothing happens to the
Sprites, but Scratch does respond with something back to you.
You can also put operators into other operators and other blocks.
Here are some examples that the kids can incorporate into their
programs.
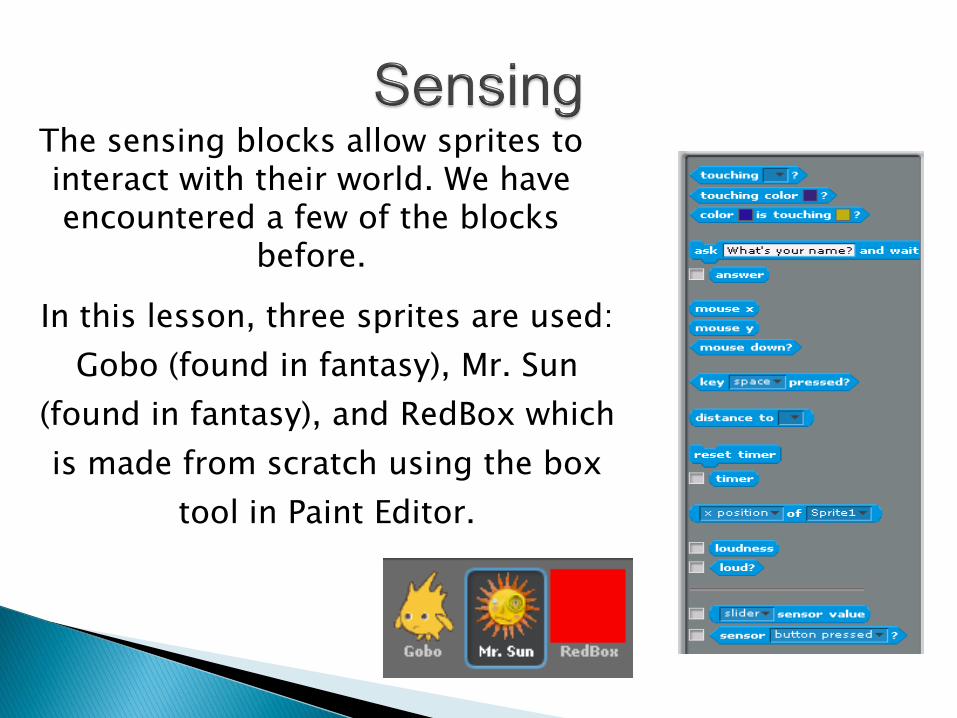
The sensing blocks allow sprites to interact with their world. We have encountered a few of the blocks
before.
In this lesson, three sprites are used:
Gobo (found in fantasy), Mr. Sun
(found in fantasy), and RedBox which
is made from scratch using the box
tool in Paint Editor.
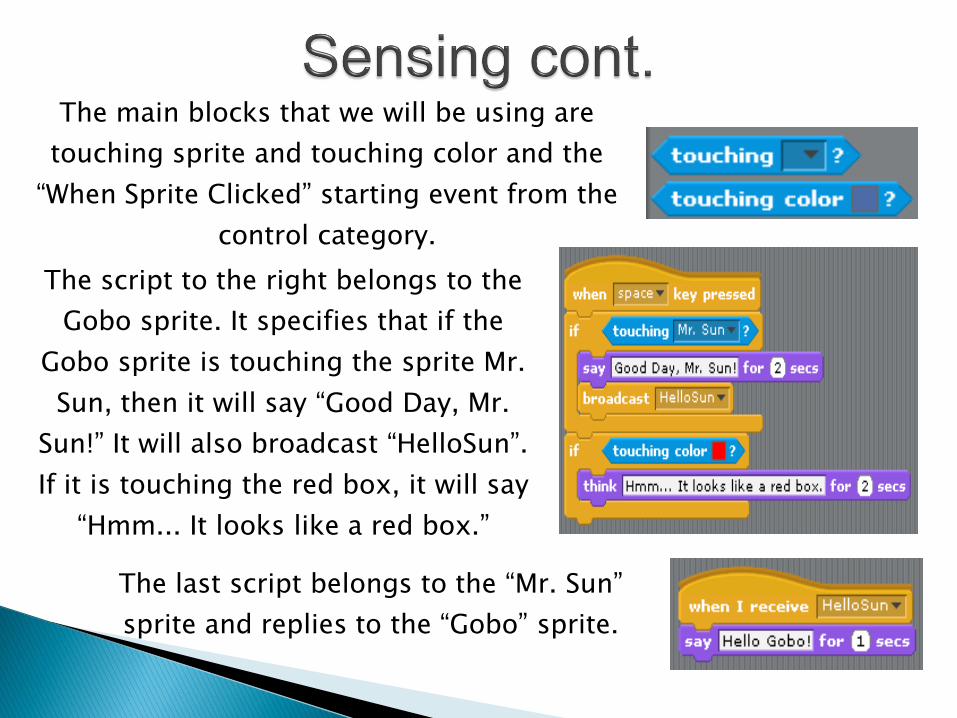
The main blocks that we will be using are
touching sprite and touching color and the
“When Sprite Clicked” starting event from the
control category.
The script to the right belongs to the
Gobo sprite. It specifies that if the
Gobo sprite is touching the sprite Mr.
Sun, then it will say “Good Day, Mr.
Sun!” It will also broadcast “HelloSun”.
If it is touching the red box, it will say
“Hmm... It looks like a red box.”
The last script belongs to the “Mr. Sun”
sprite and replies to the “Gobo” sprite.