Embed Size (px)
Citation preview
Created November 2014
Setting up & Using the SNLxl Add-‐In
1
Table of Contents
Before Getting Started ........................................................................................................... 2
Determining if Your Excel Version is 32-‐bit or 64-‐bit ................................................. 2 Downloading & Installing SNLxl Add-‐In ........................................................................... 3
Unique Features of the SNLxl Add-‐In ................................................................................ 8 The Data Wizard ................................................................................................................................ 8 The SNL Template Library .......................................................................................................... 15 The Help Section ............................................................................................................................. 18
2
Before Getting Started The SNL Excel Add-‐In will only work on Windows operating systems and with certain versions of Excel. Please make sure your computer meets the following requirements before installing the SNL Excel Add-‐in: Supported Operating Systems:
• Windows XP; Windows Vista (32-‐bit); Windows 7 (32-‐bit & 64-‐bit)
Supported Excel Versions: • 2003; 2007; 2010 (32-‐bit & 64-‐bit)
If you are access SNL Metals and Mining off-‐campus, you may want to use York University’s VPN client. More details can be found on this webpage.
Determining if Your Excel Version is 32-‐bit or 64-‐bit Excel 2003 & 2007 Users
• If you are using either of these programs, download the SNLxl 32-‐bit version Excel 2010 Users
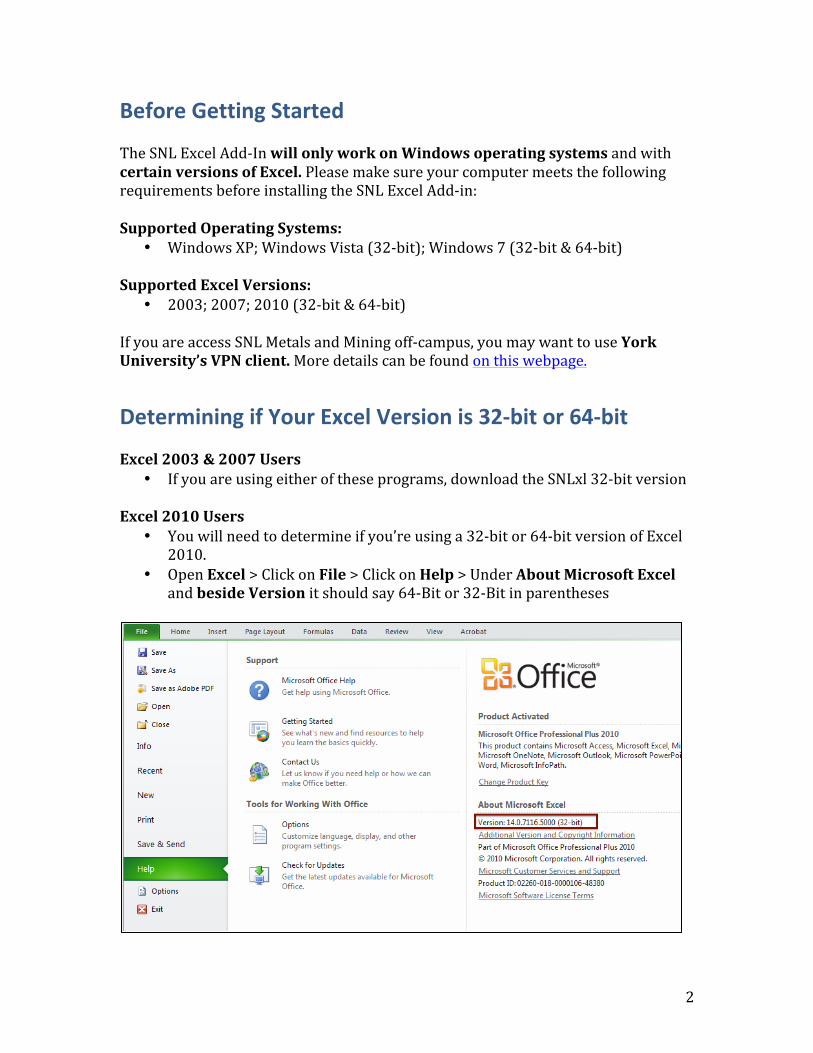
• You will need to determine if you’re using a 32-‐bit or 64-‐bit version of Excel 2010.
• Open Excel > Click on File > Click on Help > Under About Microsoft Excel and beside Version it should say 64-‐Bit or 32-‐Bit in parentheses
3
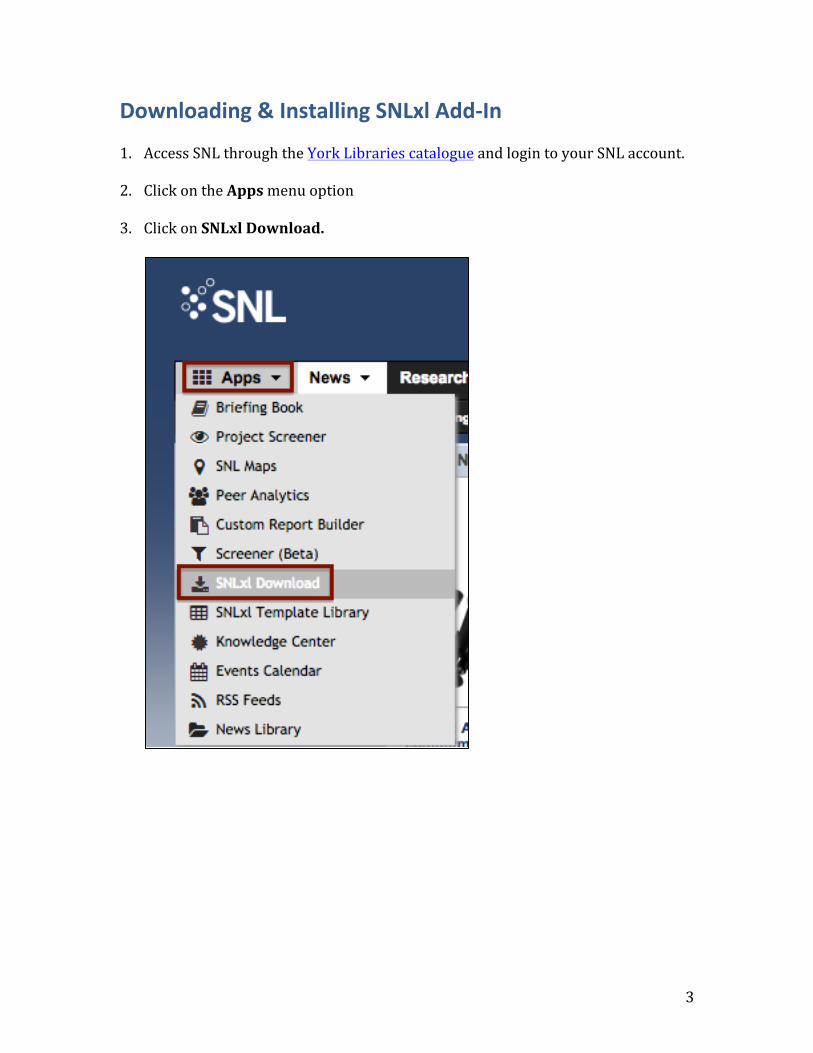
Downloading & Installing SNLxl Add-‐In 1. Access SNL through the York Libraries catalogue and login to your SNL account.
2. Click on the Apps menu option 3. Click on SNLxl Download.
4
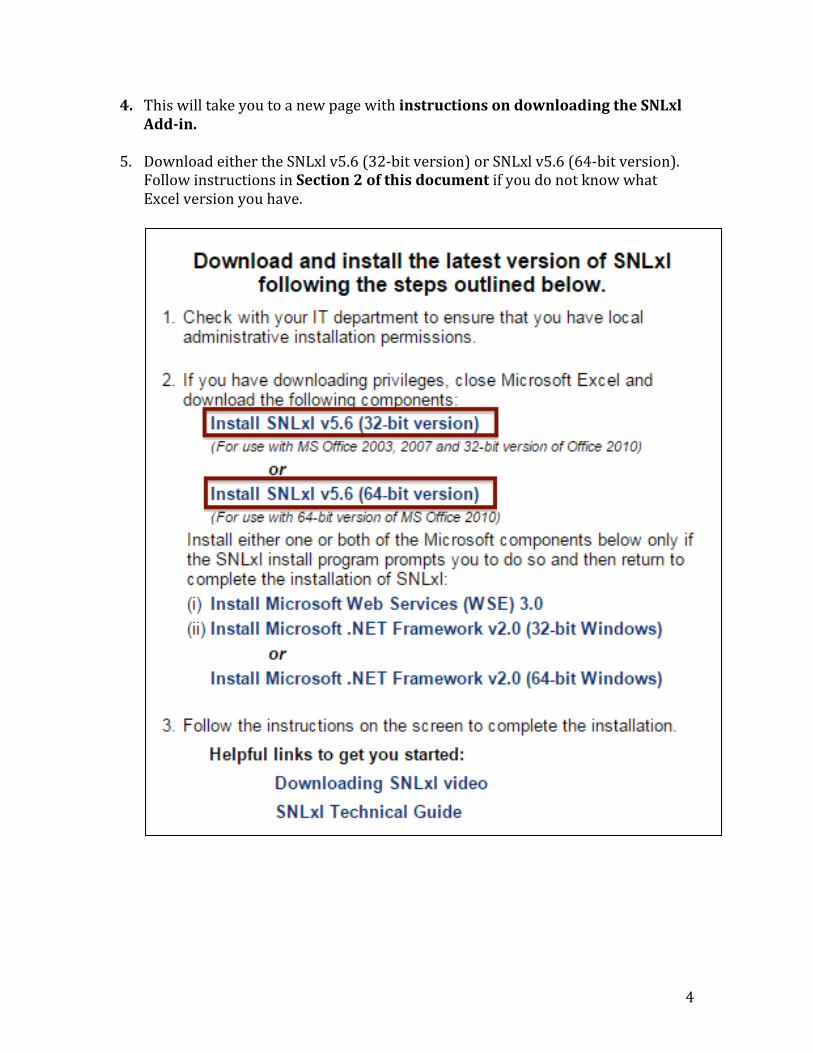
4. This will take you to a new page with instructions on downloading the SNLxl Add-‐in.
5. Download either the SNLxl v5.6 (32-‐bit version) or SNLxl v5.6 (64-‐bit version).
Follow instructions in Section 2 of this document if you do not know what Excel version you have.

5
6. Open the file after it has downloaded completely and click Run.
7. The SNLxl Setup Wizard will appear. However, another dialog box may appear
as well. Check Step 8 for more information if an additional dialog box appears.

6
8. Once you open the SNLxl Setup Wizard, the program may prompt you to open
and install additional program(s). If you are prompted to install one of the below programs, go back to the SNLxl download information page and install the additional required program(s) first and then return to the SNL Wizard. You will be asked to download the following potentially:
o Microsoft Web Services (WSE) 3.0 o Microsoft .NET Framework v2.0 (32-‐bit Windows) o Microsoft .NET Framework v2.0 (64-‐bit Windows)

7
9. After you have followed the instructions on the SNL Wizard and successfully installed the Add-‐in, open Excel on your computer. You should now see the SNL Financial ribbon in your Excel program.
10. If you do not see the SNL Financial ribbon, try quitting and opening Excel a few times. Contact the SNL Helpdesk if you still don’t see it for additional help.
11. To use the SNL Financial ribbon, click on the SNL Financial ribbon > Click on
the Log In icon > A dialog box will pop up > Enter the same login information you use for the SNL Metals and Mining database.
12.

8
Unique Features of the SNLxl Add-‐In The SNLxl Add-‐In is a powerful tool. Three important sections to be aware of are:
1. The Data Wizard 2. The SNL Template Library 3. The Help section
The Data Wizard
1. The Data Wizard will allow you to query the SNL Metals and Mining database and create custom reports in Excel. To get started, click on the Data Wizard icon in the SNL Financial ribbon.
2. This will open up a dialog box, where you can start entering your search
criteria and building your custom reports:
9
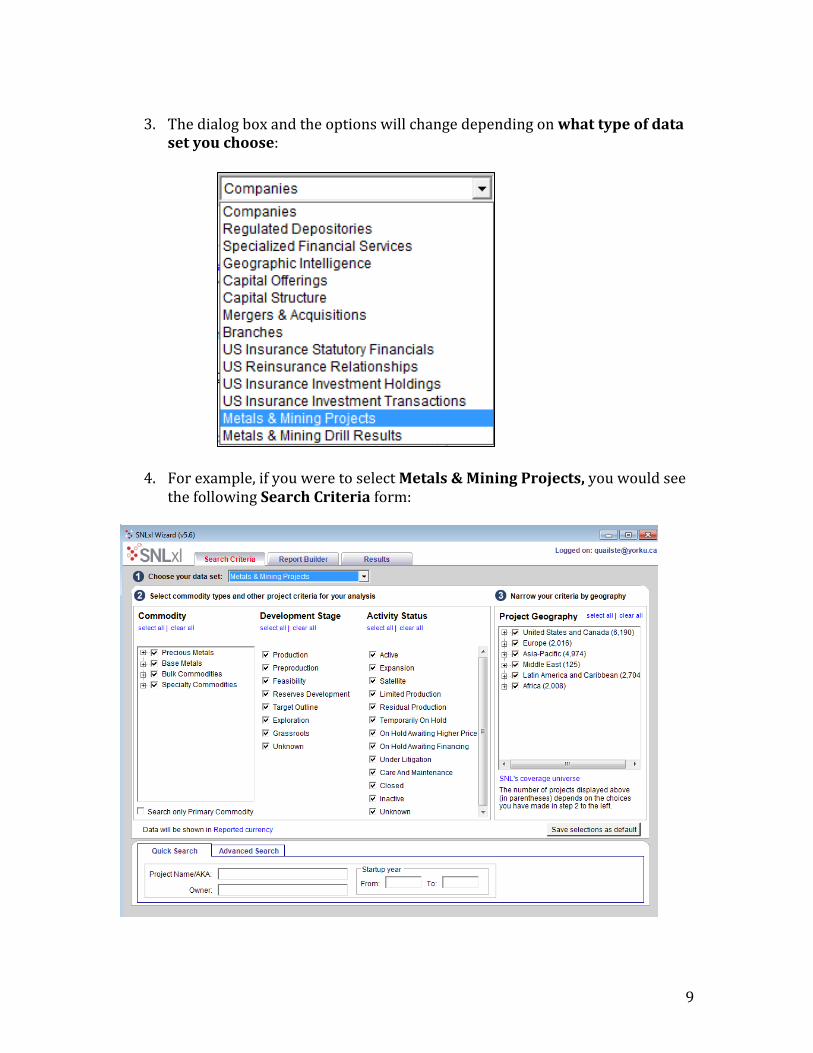
3. The dialog box and the options will change depending on what type of data
set you choose:
4. For example, if you were to select Metals & Mining Projects, you would see the following Search Criteria form:

10
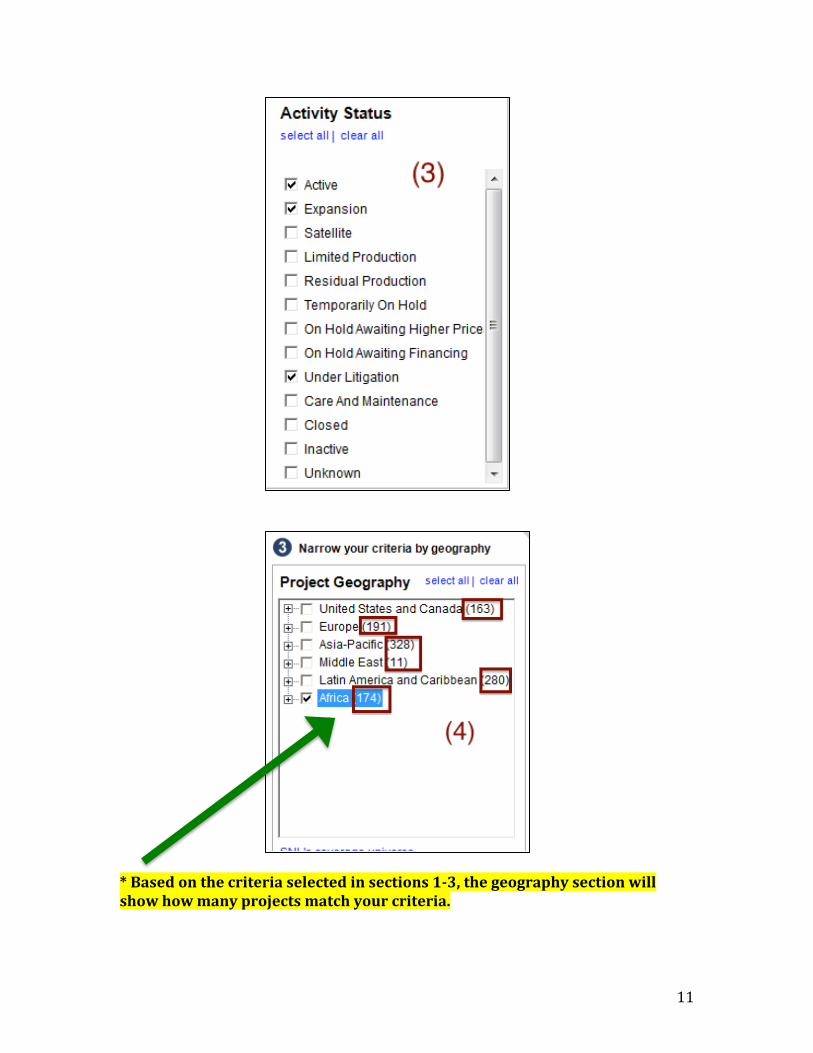
5. On the above form, you are able to select desired criteria such as (1) commodity types (2) development stages (3) activity status (4) project geography
11
* Based on the criteria selected in sections 1-‐3, the geography section will show how many projects match your criteria.
12
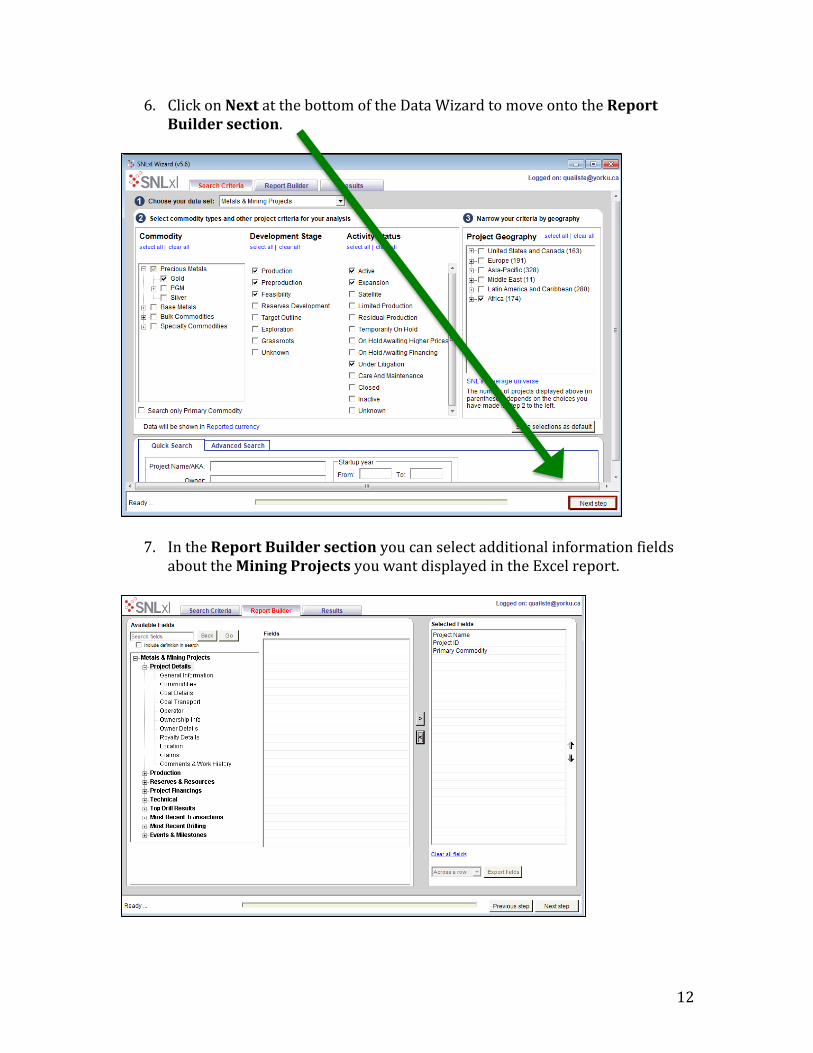
6. Click on Next at the bottom of the Data Wizard to move onto the Report Builder section.
7. In the Report Builder section you can select additional information fields about the Mining Projects you want displayed in the Excel report.
13
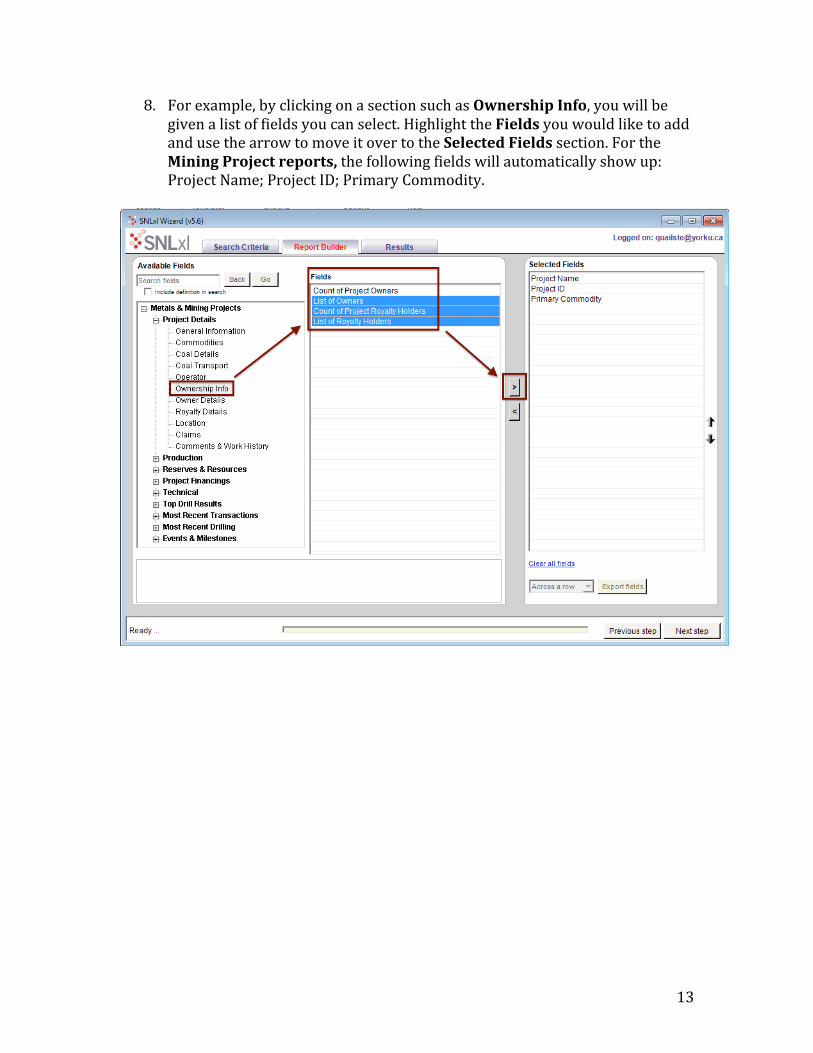
8. For example, by clicking on a section such as Ownership Info, you will be given a list of fields you can select. Highlight the Fields you would like to add and use the arrow to move it over to the Selected Fields section. For the Mining Project reports, the following fields will automatically show up: Project Name; Project ID; Primary Commodity.
14
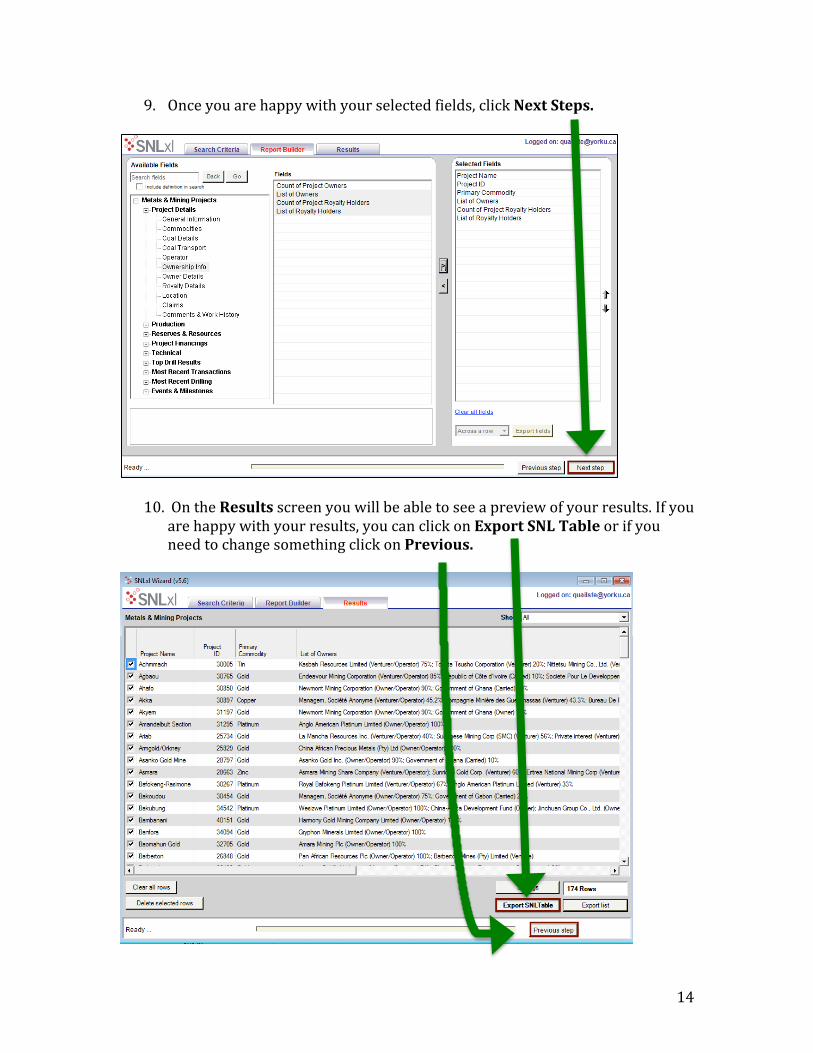
9. Once you are happy with your selected fields, click Next Steps.
10. On the Results screen you will be able to see a preview of your results. If you are happy with your results, you can click on Export SNL Table or if you need to change something click on Previous.

15
The SNL Template Library
1. The SNL Template Library contains pre-‐existing report templates that you can download and refresh by changing specific criteria in the templates.
2. Click on the SNL Template Library icon. A dialog box will pop up.
3. In the dialog box, there are two ways to access the Metals & Mining templates: (1) under Template Type, use the dropdown menu to select Metals & Mining. (2) under Industry, you can check off Metals & Mining.
16
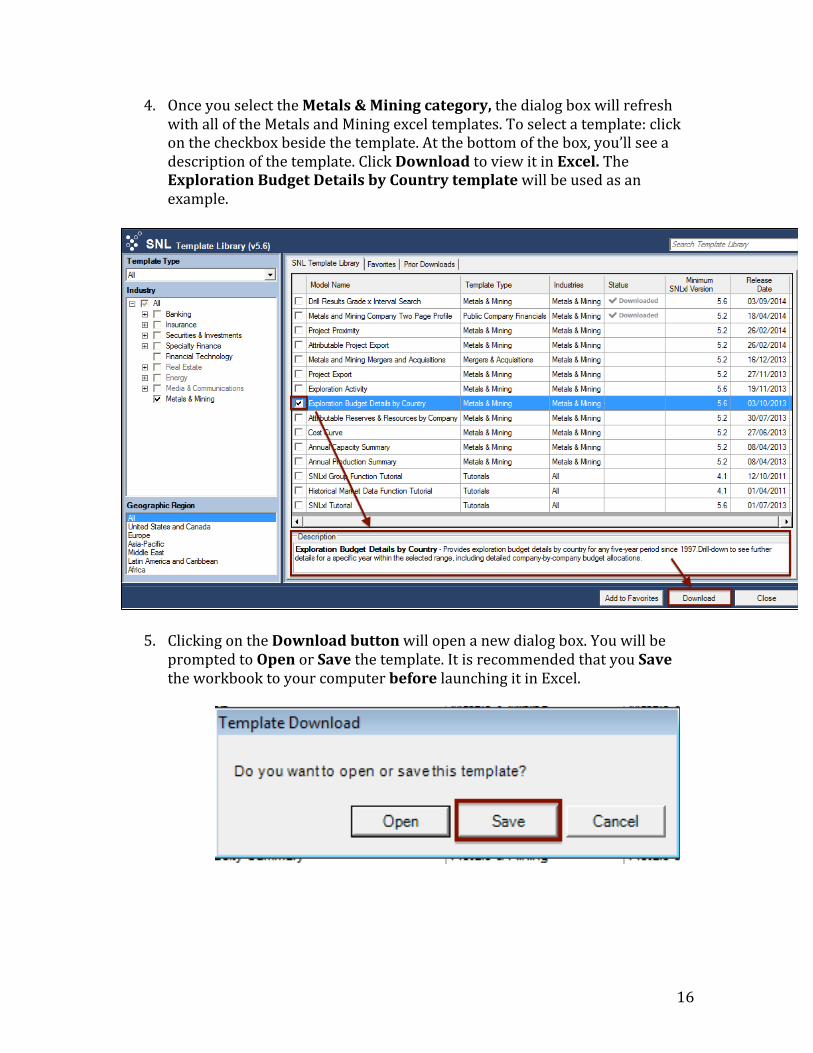
4. Once you select the Metals & Mining category, the dialog box will refresh with all of the Metals and Mining excel templates. To select a template: click on the checkbox beside the template. At the bottom of the box, you’ll see a description of the template. Click Download to view it in Excel. The Exploration Budget Details by Country template will be used as an example.
5. Clicking on the Download button will open a new dialog box. You will be prompted to Open or Save the template. It is recommended that you Save the workbook to your computer before launching it in Excel.
17
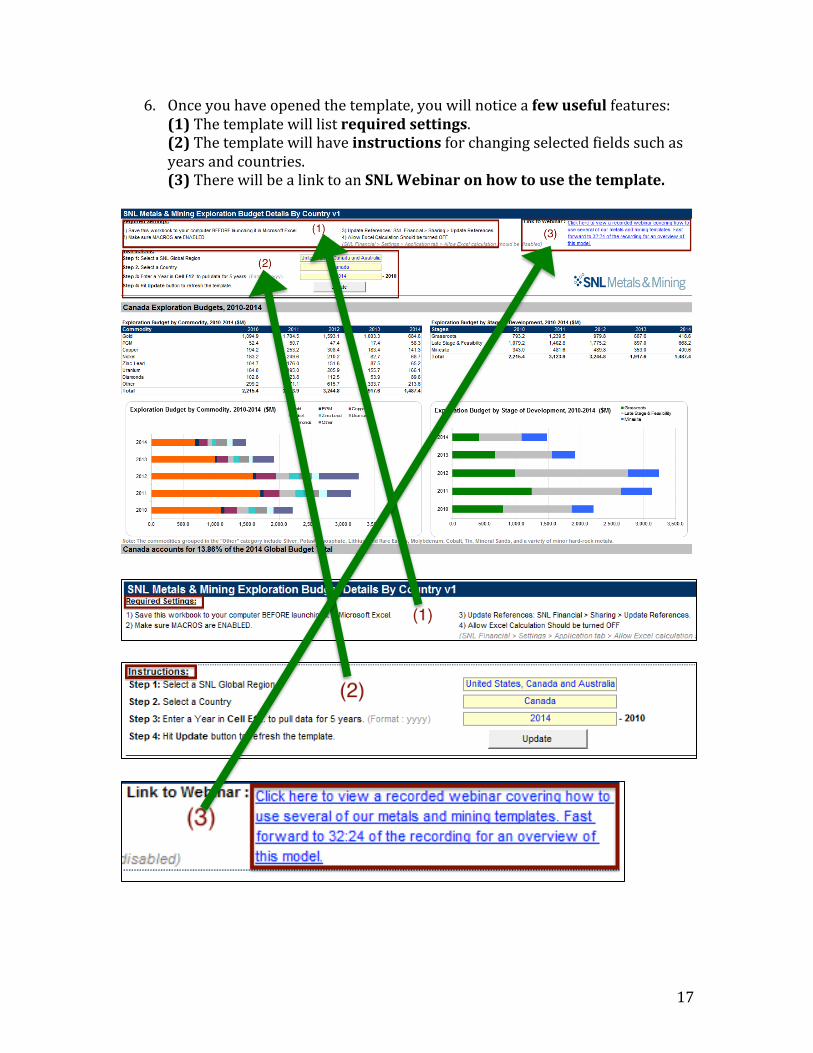
6. Once you have opened the template, you will notice a few useful features: (1) The template will list required settings. (2) The template will have instructions for changing selected fields such as years and countries. (3) There will be a link to an SNL Webinar on how to use the template.

18
The Help Section
1. To access the Help section, click on the Help icon in the SNL Financial Ribbon.
2. This will open up a webpage and take you to the SNL sign-‐in page. Input your personal login information.
19
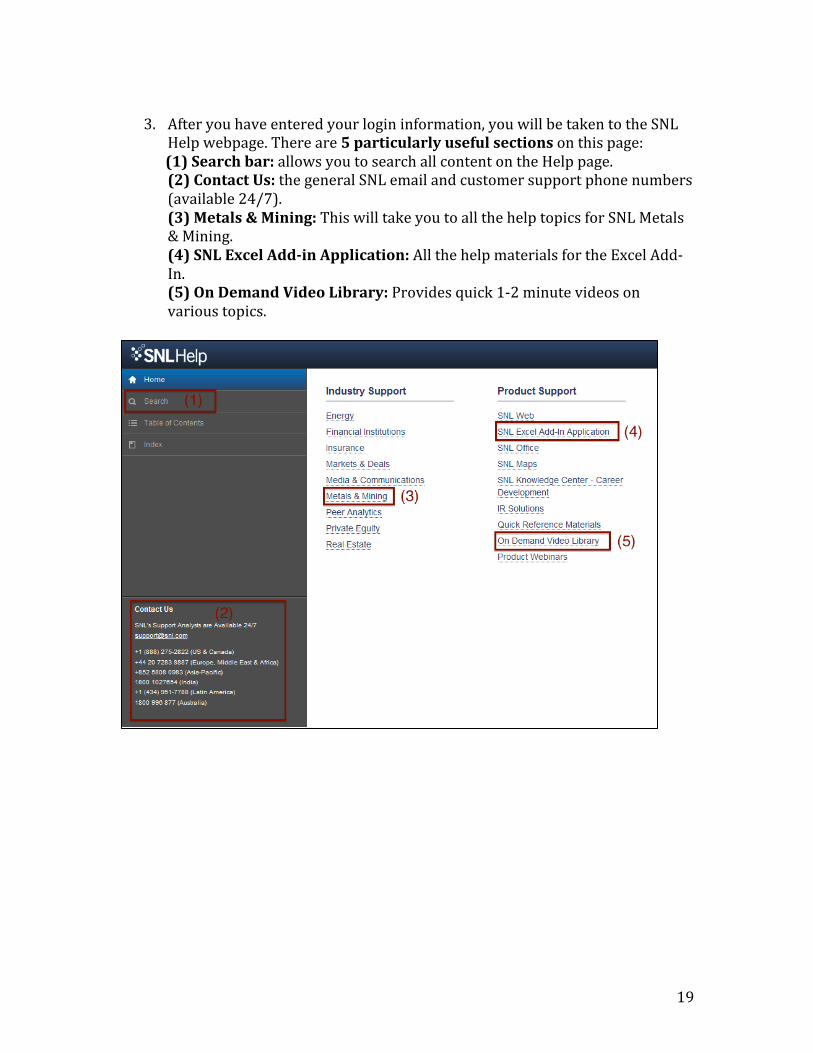
3. After you have entered your login information, you will be taken to the SNL
Help webpage. There are 5 particularly useful sections on this page: (1) Search bar: allows you to search all content on the Help page.
(2) Contact Us: the general SNL email and customer support phone numbers (available 24/7). (3) Metals & Mining: This will take you to all the help topics for SNL Metals & Mining. (4) SNL Excel Add-‐in Application: All the help materials for the Excel Add-‐In. (5) On Demand Video Library: Provides quick 1-‐2 minute videos on various topics.