Embed Size (px)
Citation preview
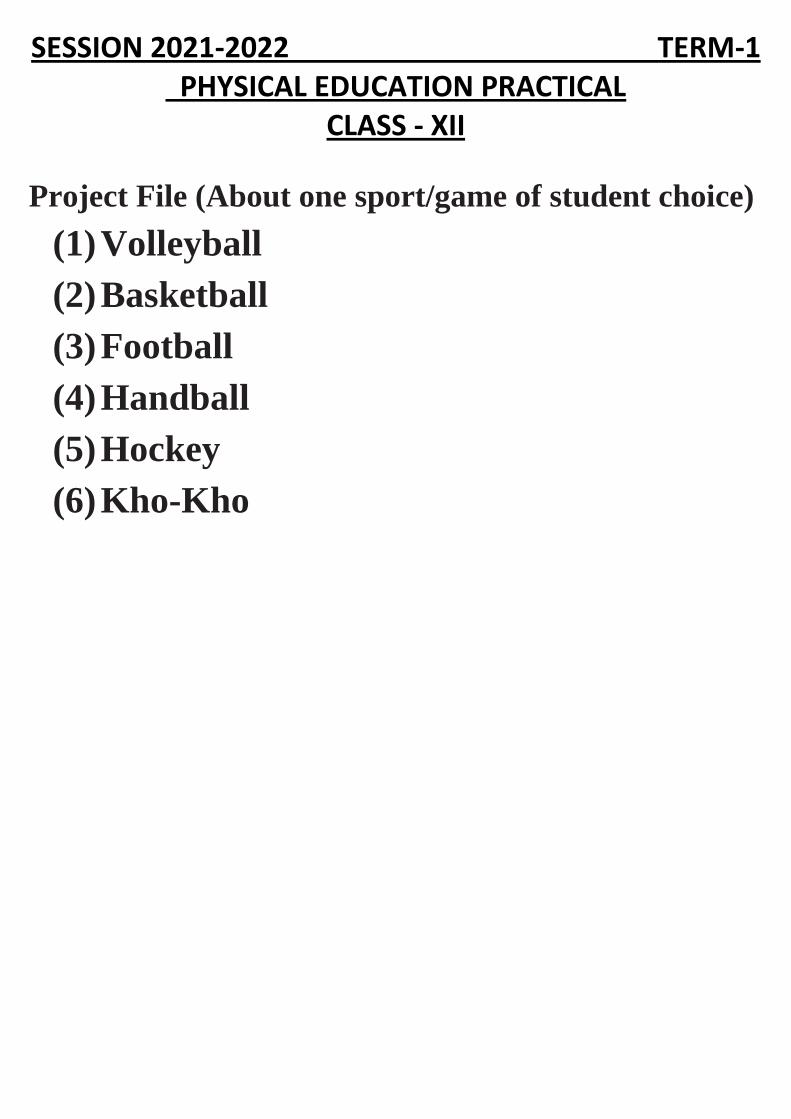
SESSION 2021-2022 TERM-1PHYSICAL EDUCATION PRACTICAL
CLASS - XII
Project File (About one sport/game of student choice)
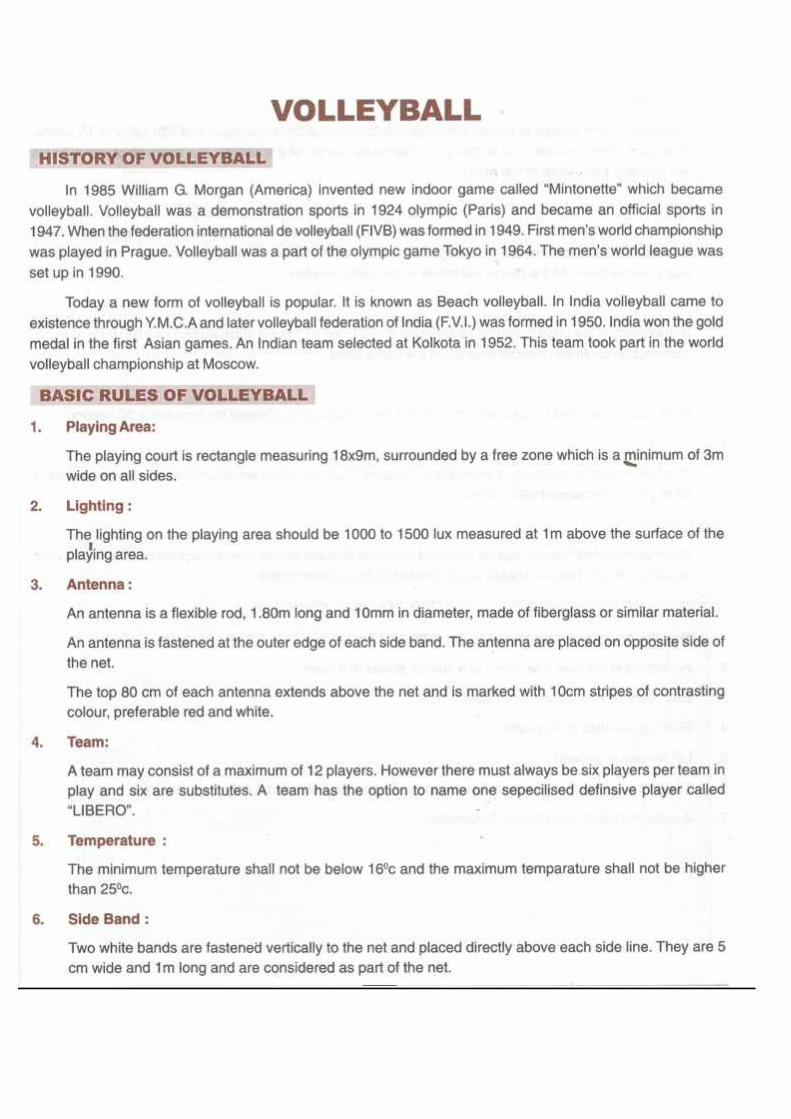
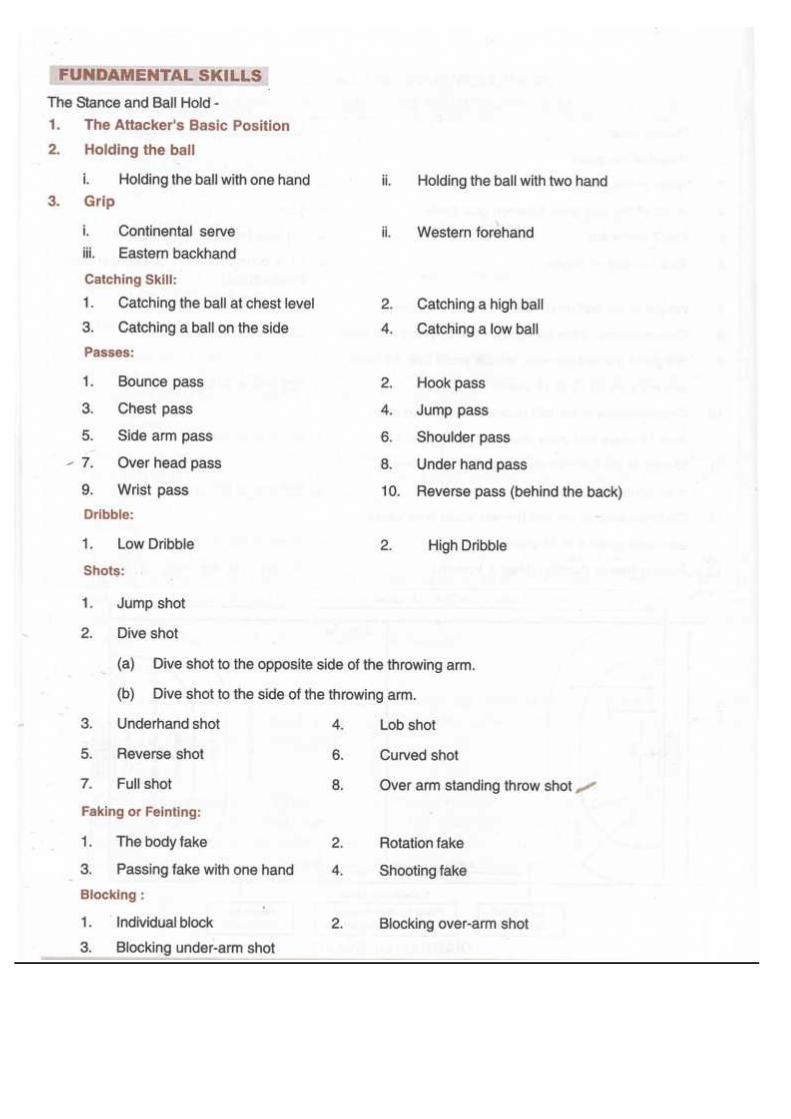
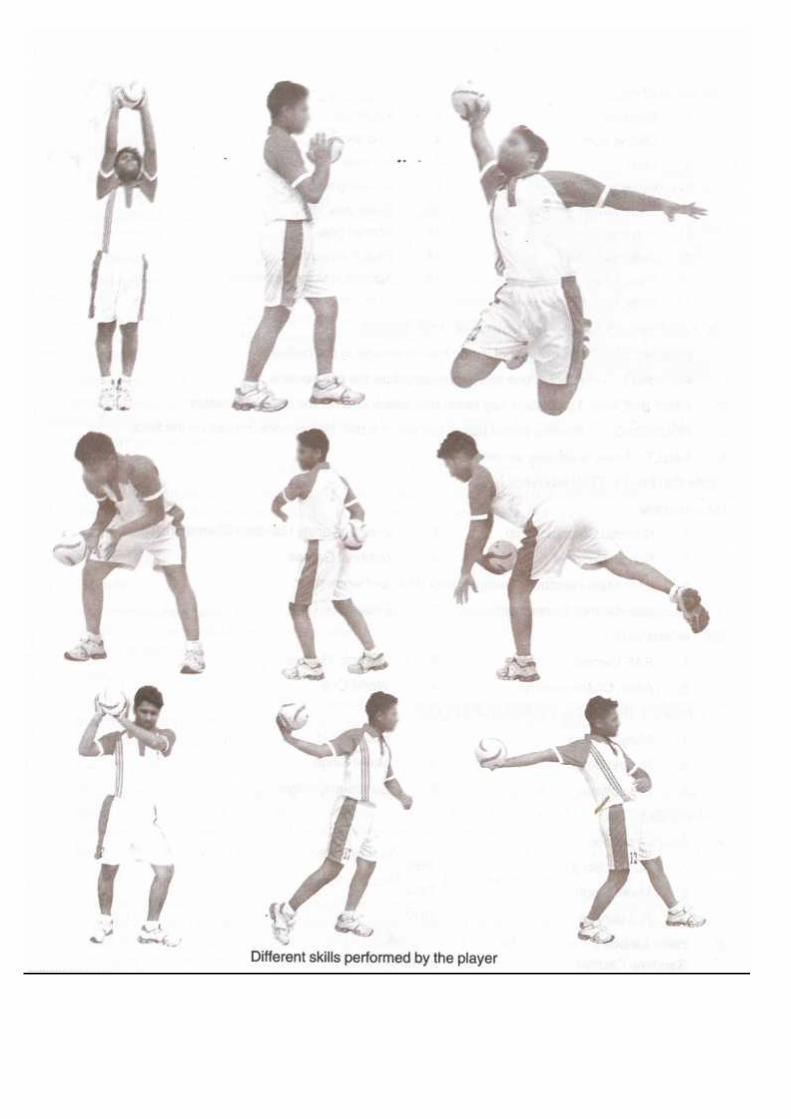
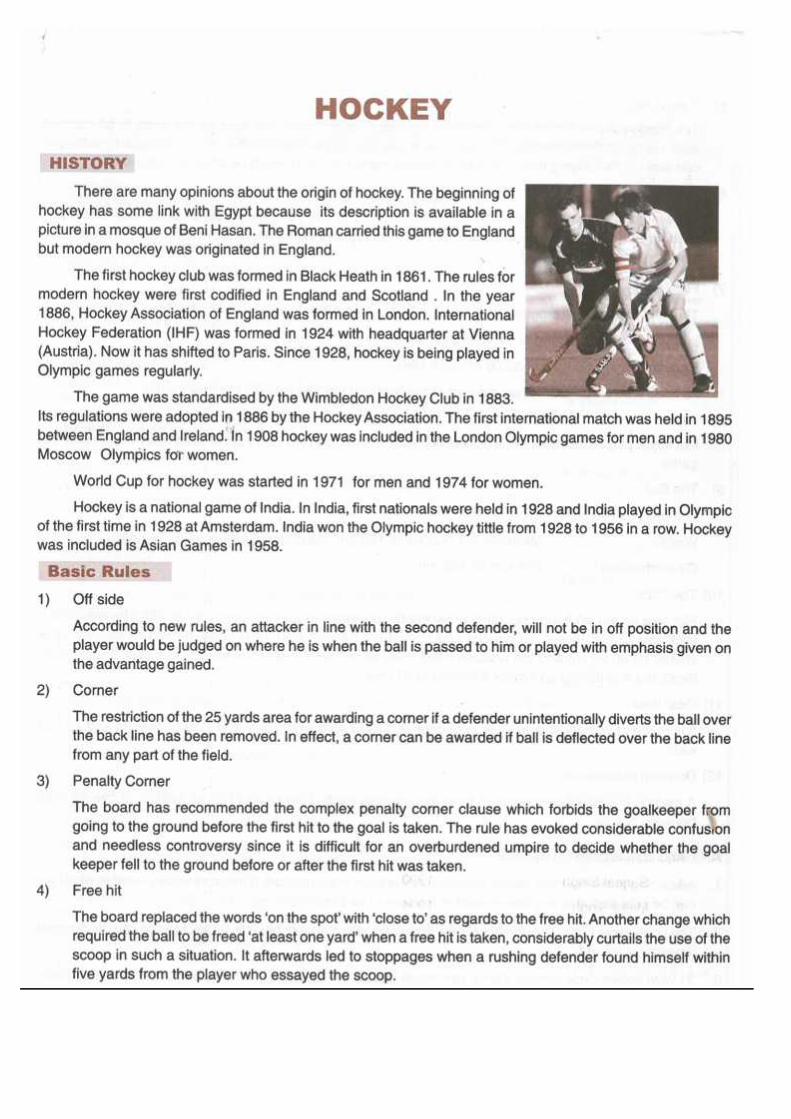
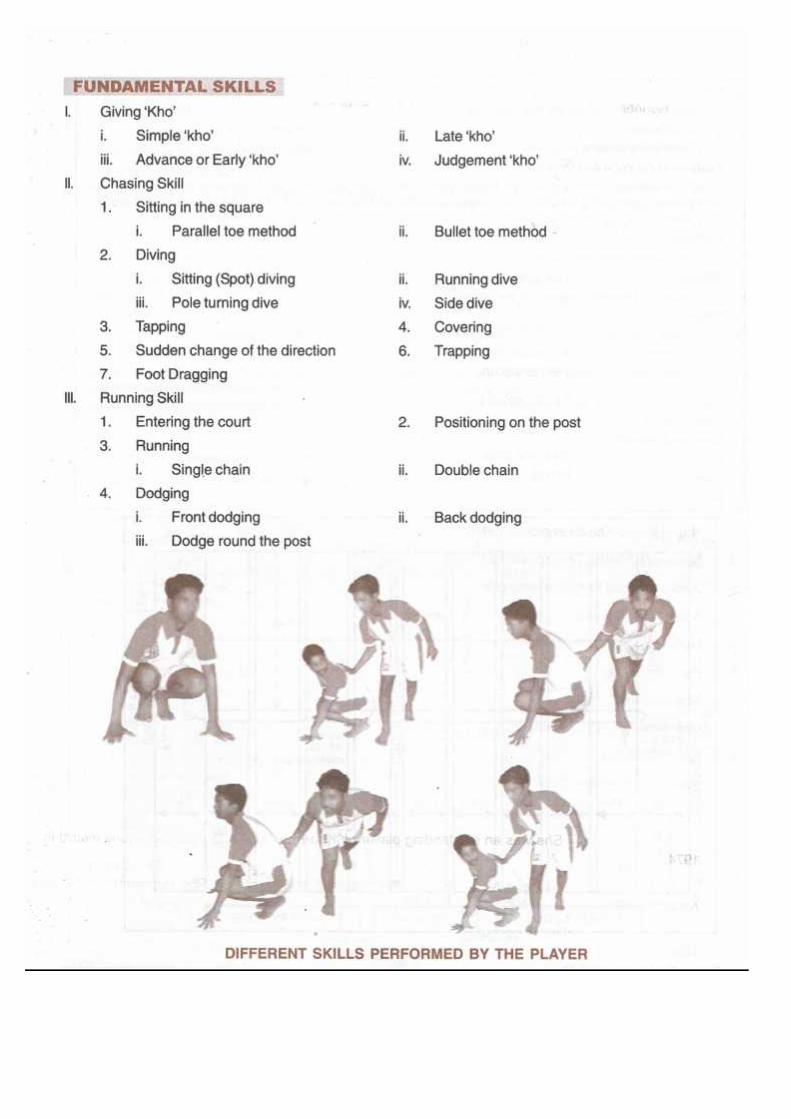
(1)Volleyball(2)Basketball(3)Football(4)Handball(5)Hockey(6)Kho-Kho


SESSION 2021-2022 TERM-2Practical-1: Fitness tests administration for all items.
Motor fitness is a term that describes an athlete’s ability to perform effectively during sports or any other physicalactivity.Motor Fitness Test –
1. 50 M Standing Start 2. 600 M Run/Walk3. Sit & Reach Test 4. Partial Curl Up5. Push Ups (Boys) 6. Modified Push Ups (Girls)7. Standing Broad Jump 8. Shuttle Run (4x10 M)
1. 50 M Standing Start
i. Purpose: The aim of this test is to determine acceleration and speed.ii. Equipment required: measuring tape or marked track, stopwatch, cone markers, flat and clear surface of
at least 70 meters.iii. Procedure: The test involves running a single maximum sprint over 50 meters, with the time recorded. A
thorough warm-up should be given, including some practice starts and accelerations. Start from astationary standing position (hands cannot touch the ground), with one foot in front of the other. The frontfoot must be behind the starting line. Once the subject is ready and motionless, the starter gives theinstructions "set" then "go." The tester should provide hints for maximizing speed (such as keeping lowdriving hard with the arms and legs) and the participant should be encouraged to not slow down beforecrossing the finish line.
iv. Results: Two trials are allowed, and the best time is recorded to the nearest 2 decimal places. The timingstarts from the first movement (if using a stopwatch) or when the timing system is triggered, and finisheswhen the chest crosses the finish line and/or the finishing timing gate is triggered.
v. Target population: soccer other sports in which speed over a similar distance is important.vi. Reliability: Reliability is greatly improved if timing gates are used. Also weather conditions and the
running surface can affect the results, and these conditions should be recorded with the results- If possible,set up the track with a crosswind to minimize the effect of wind.
2. 600 M Run/Walki. Purpose: The aim of this test is to determine acceleration and speed.
ii. Equipment required: oval or 400m running track, stopwatch recording sheets.iii. Procedure:, The aim of this test is to complete the 600 meter course in quickest possible time. To start, all
participants line up behind the starting line. On the command 'go,' the clock will start, and they will beginrunning at their own pace. Cheering or calling out the elapsed time is also permitted to encourage theparticipants to achieve their best time.
iv. Scoring: The total time taken to run 600m is recorded.v. Reliability: The reliability of this test would depend on practice and pacing strategies and motivation
level. There should be good reliability if these issues are addressed.vi. Advantages: Large groups can be tested at once, and it is a very cheap and simple test to perform-vii. Disadvantages: Practice and pacing are required to maximize the subject performance, and also the test
results can be affected greatly by motivation.
3. Sit and Reach Test
The sit and reach test was first propounded by Wells and Dillon in 1952. This test is widely used as normal test offlexibility.
i. Purpose: The sit and reach test is a significant test to measure the flexibility of hip region including thelower back and hamstring muscles. Generally it is noted that owing to the lack of flexibility in this regionthere is greater risk of injury. It is also entangled with lumbar lordosis and lower back pain.
ii. Equipment’s Required:iii. Sit and reach box or a makeshift ruler and a box may be used in which zero mark can be adjusted for each
individual according to their sitting reach level because there is a variation of lengths of individual’s armsand legs.
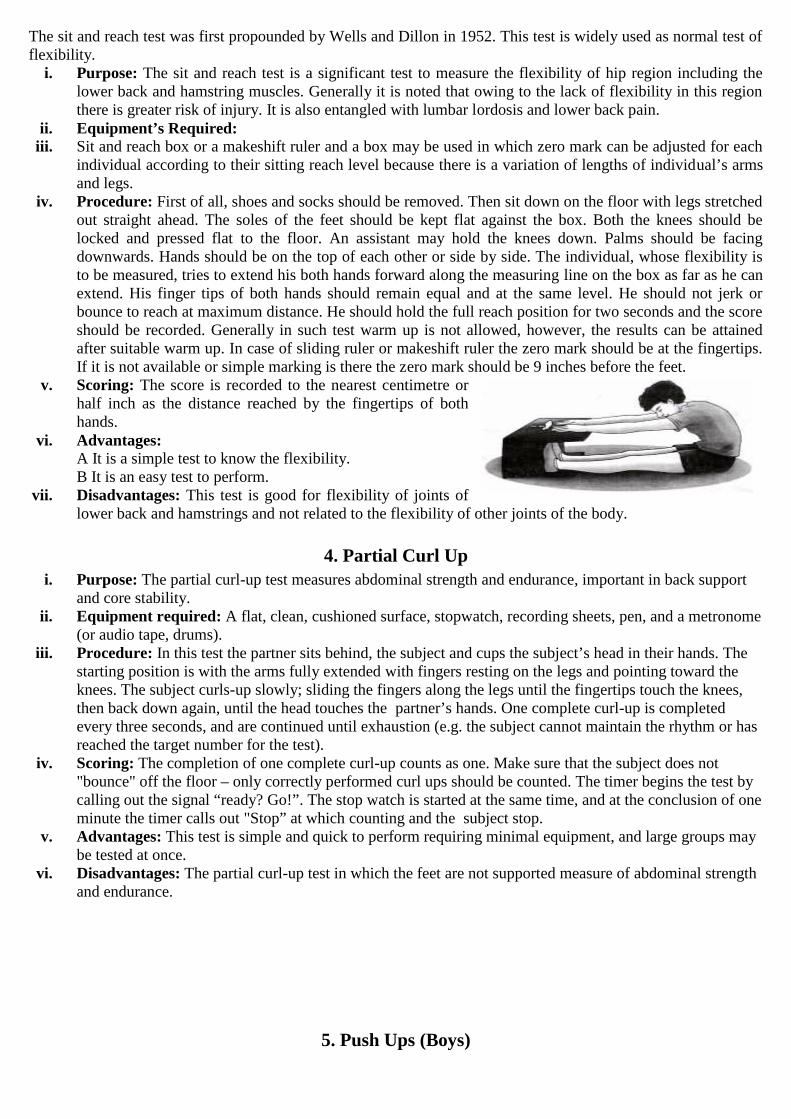
iv. Procedure: First of all, shoes and socks should be removed. Then sit down on the floor with legs stretchedout straight ahead. The soles of the feet should be kept flat against the box. Both the knees should belocked and pressed flat to the floor. An assistant may hold the knees down. Palms should be facingdownwards. Hands should be on the top of each other or side by side. The individual, whose flexibility isto be measured, tries to extend his both hands forward along the measuring line on the box as far as he canextend. His finger tips of both hands should remain equal and at the same level. He should not jerk orbounce to reach at maximum distance. He should hold the full reach position for two seconds and the scoreshould be recorded. Generally in such test warm up is not allowed, however, the results can be attainedafter suitable warm up. In case of sliding ruler or makeshift ruler the zero mark should be at the fingertips.If it is not available or simple marking is there the zero mark should be 9 inches before the feet.
v. Scoring: The score is recorded to the nearest centimetre orhalf inch as the distance reached by the fingertips of bothhands.
vi. Advantages:A It is a simple test to know the flexibility.B It is an easy test to perform.
vii. Disadvantages: This test is good for flexibility of joints oflower back and hamstrings and not related to the flexibility of other joints of the body.
4. Partial Curl Upi. Purpose: The partial curl-up test measures abdominal strength and endurance, important in back support
and core stability.ii. Equipment required: A flat, clean, cushioned surface, stopwatch, recording sheets, pen, and a metronome
(or audio tape, drums).iii. Procedure: In this test the partner sits behind, the subject and cups the subject’s head in their hands. The
starting position is with the arms fully extended with fingers resting on the legs and pointing toward theknees. The subject curls-up slowly; sliding the fingers along the legs until the fingertips touch the knees,then back down again, until the head touches the partner’s hands. One complete curl-up is completedevery three seconds, and are continued until exhaustion (e.g. the subject cannot maintain the rhythm or hasreached the target number for the test).
iv. Scoring: The completion of one complete curl-up counts as one. Make sure that the subject does not"bounce" off the floor – only correctly performed curl ups should be counted. The timer begins the test bycalling out the signal “ready? Go!”. The stop watch is started at the same time, and at the conclusion of oneminute the timer calls out "Stop” at which counting and the subject stop.
v. Advantages: This test is simple and quick to perform requiring minimal equipment, and large groups maybe tested at once.
vi. Disadvantages: The partial curl-up test in which the feet are not supported measure of abdominal strengthand endurance.
5. Push Ups (Boys)
i. Purpose: The aim of this test is to determine upper body strength and endurance.ii. Equipment required: Floor mat, PACER d with push up track.
iii. Procedure: start in the push-up position - with the hands and toes touching the floor, the body and legs arein a straight line, feet slightly apart, and the arms at shoulder width apart, extended and at a right angle tothe body. Keeping the back and knees straight, the subject lowers the body until there is a 9O-degree angleat the elbows, with the upper arms parallel to the floor. A partner holds their holds at the point of the 90-degree angle so that the subject being tested goes down only until their shoulder touches the partner's hand,then back up. The push-ups are done in time to a metronome or similar device with one complete push-upevery three seconds (1.5 seconds down and 1.5 seconds up,20 complete push-ups per minute).The subjectcontinues until they can do no more in rhythm (has not done the last three in rhythm) or has reached thetarget number of push-ups.
iv. Scoring: Record the number of correctly completed push-ups that were performed in time to the rhythm.v. Advantages: This test is easy and quick to perform.
6. Modified Push Ups (Girls)
i. Purpose: To measure the muscular strength of arms, upper body and the core.ii. Equipment required: Floor mat, PACER d with push up track.
iii. Procedure: The push-up begins in a kneeling position, with the hands and knees touching the ground. Theknees are kept slightly apart; the arms are at shoulder width apart, extended and at a right angle to thebody. Keeping the back straight and holding the core tight, the student lowers the body until there is a 90-degree angle at the elbows, then returns to the starting position with the arms extended. The action isrepeated until exhaustion or until the time limit is reached. In case of timed tests, the maximum numbers ofcorrect push-ups performed are noted.
iv. Benefits of Modified Push-Ups: There are many benefits to the Modified Push-Ups and just as manyreasons you should incorporate them into your workouts. Push-ups are one of the best exercises anyone cando, but women especially! All in one exercise, you get the benefit of toning your arms, chest, shoulders,and core. Push ups tone up basically your entire upper body all the while helping you to torch calories andreveal toned and tight arms, shoulders, and abs. Here are just a few benefits of modified push-ups:
7. Standing Broad Jump (Long Jump)
i. Purpose: To measure the explosive power of the legsii. Equipment required: The measure to measure distance jumped, non-slip floor for take-off, and soft
landing area preferred. Commercial Long jump Landing Mats are also available.iii. Procedure: A take-off line is marked on the ground. Subjects stands just behind the line with the feet
several inches apart. The subject swings the arms and bends the knees to take a jump. Landing should beon both legs. Three trails are given to the subject. The distance is measured from the take-off line to theheel or other part of body that touches the ground nearest to the take-off line. Best of three will be counted.
iv. Scoring: The measurement is taken from take-off line to the nearest point of contact on the landing (backof the heels). Record the longest distance jumped, the best of three attempts.
v. Advantages: This test is simple and quick to perform, requiring minimal equipment.vi. Disadvantages: There is some skill component in this test.
8. Shuttle Run (4×10 M)
i. Purpose: This is a test of speed, body control and the ability to change direction (agility).ii. Equipment required: Two wooden blocks for each runner (each block should measure 10 x 5 x 5 cm),
marker cones or marking tape, measurement tape, stopwatch, flat non-slip surface, with two lines 10meters apart.
iii. Procedure: Mark two lines 10 meters apart using marking tape or cones. The two blocks are placed on theline opposite the line they are going to start at. On the signal "ready" , the participant places their front footbehind the starting line. On the signal, "got" the participant sprints to the opposite line, picks up a block ofwood, runs back and places it on or beyond the starting line. Then turning without a rest, they run back toretrieve the second block and carry it back across the finish line- Two trials are performed.
iv. Scoring: Record the time to complete the test in seconds to the nearest one decimal place. The score is thebetter of the two times recorded. A trial is void if a block is dropped or thrown. ,
v. Advantages: This test can be conducted on large groups relatively quickly with minimal equipmentrequired.
Practical-2: Procedure for Asanas, Benefits & Contraindication for any twoAsanas for each lifestyle disease.
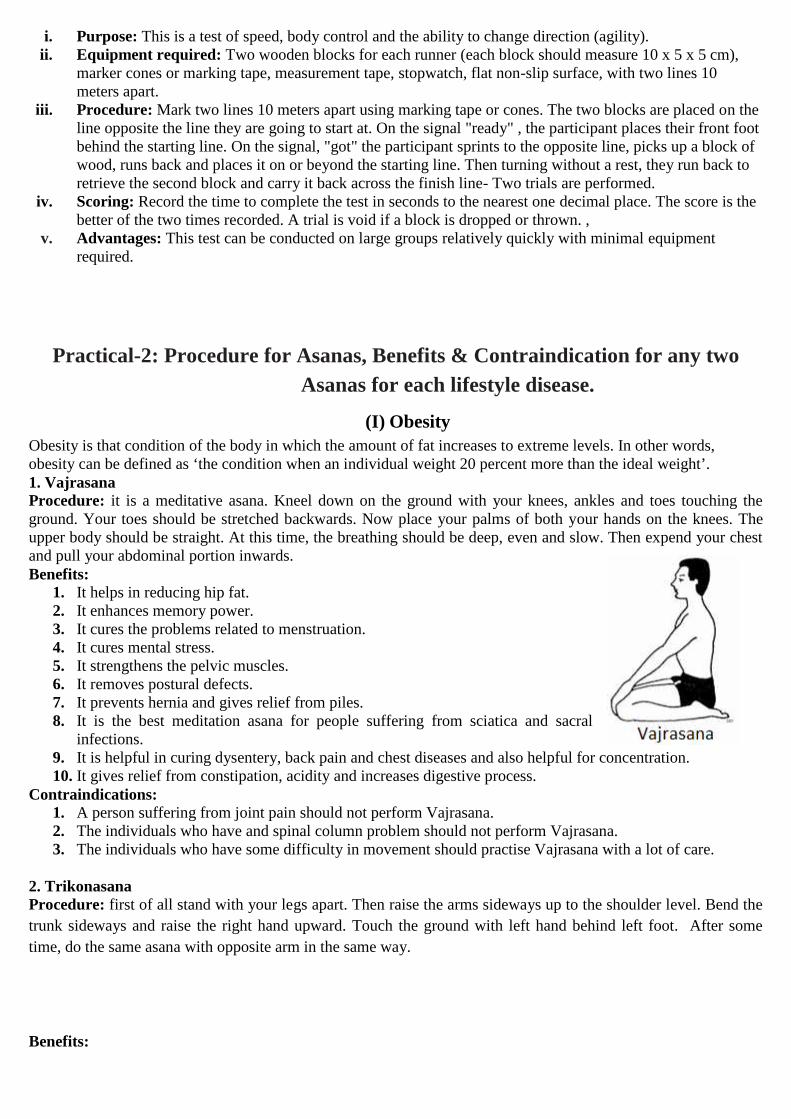
(I) ObesityObesity is that condition of the body in which the amount of fat increases to extreme levels. In other words,obesity can be defined as ‘the condition when an individual weight 20 percent more than the ideal weight’.1. VajrasanaProcedure: it is a meditative asana. Kneel down on the ground with your knees, ankles and toes touching theground. Your toes should be stretched backwards. Now place your palms of both your hands on the knees. Theupper body should be straight. At this time, the breathing should be deep, even and slow. Then expend your chestand pull your abdominal portion inwards.Benefits:
1. It helps in reducing hip fat.2. It enhances memory power.3. It cures the problems related to menstruation.4. It cures mental stress.5. It strengthens the pelvic muscles.6. It removes postural defects.7. It prevents hernia and gives relief from piles.8. It is the best meditation asana for people suffering from sciatica and sacral
infections.9. It is helpful in curing dysentery, back pain and chest diseases and also helpful for concentration.10. It gives relief from constipation, acidity and increases digestive process.
Contraindications:1. A person suffering from joint pain should not perform Vajrasana.2. The individuals who have and spinal column problem should not perform Vajrasana.3. The individuals who have some difficulty in movement should practise Vajrasana with a lot of care.
2. TrikonasanaProcedure: first of all stand with your legs apart. Then raise the arms sideways up to the shoulder level. Bend thetrunk sideways and raise the right hand upward. Touch the ground with left hand behind left foot. After sometime, do the same asana with opposite arm in the same way.
Benefits:
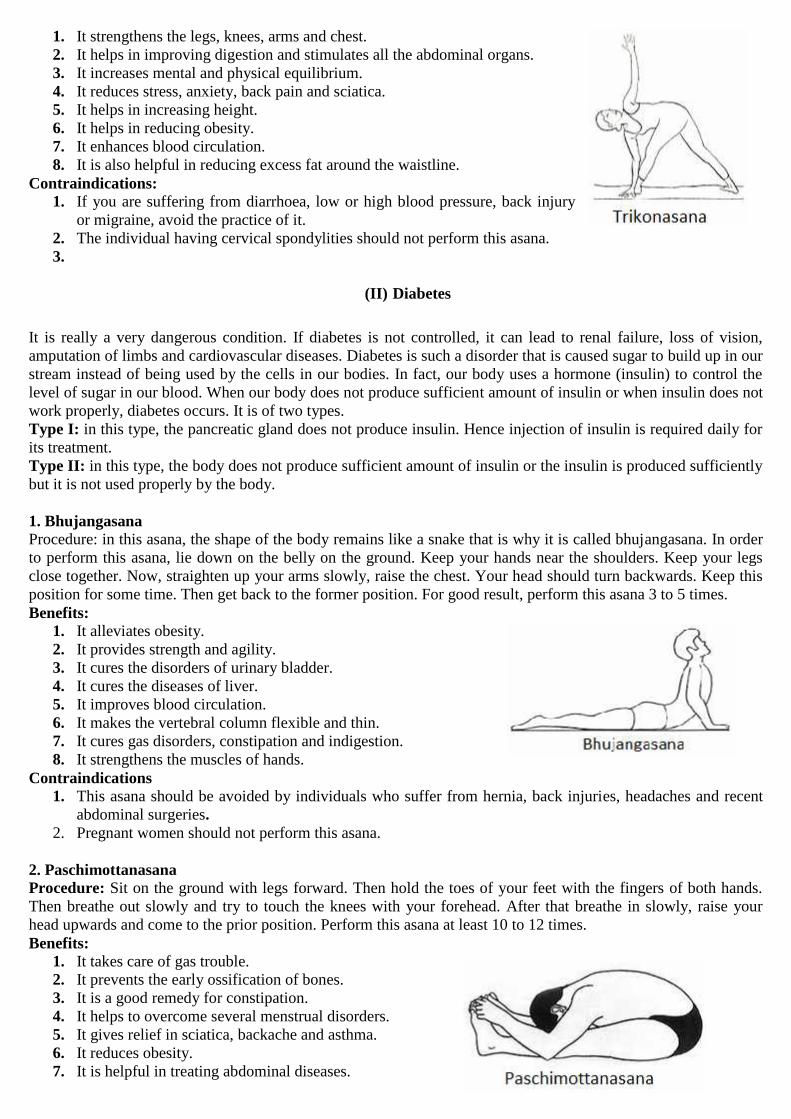
1. It strengthens the legs, knees, arms and chest.2. It helps in improving digestion and stimulates all the abdominal organs.3. It increases mental and physical equilibrium.4. It reduces stress, anxiety, back pain and sciatica.5. It helps in increasing height.6. It helps in reducing obesity.7. It enhances blood circulation.8. It is also helpful in reducing excess fat around the waistline.
Contraindications:1. If you are suffering from diarrhoea, low or high blood pressure, back injury
or migraine, avoid the practice of it.2. The individual having cervical spondylities should not perform this asana.3.
(II) Diabetes
It is really a very dangerous condition. If diabetes is not controlled, it can lead to renal failure, loss of vision,amputation of limbs and cardiovascular diseases. Diabetes is such a disorder that is caused sugar to build up in ourstream instead of being used by the cells in our bodies. In fact, our body uses a hormone (insulin) to control thelevel of sugar in our blood. When our body does not produce sufficient amount of insulin or when insulin does notwork properly, diabetes occurs. It is of two types.Type I: in this type, the pancreatic gland does not produce insulin. Hence injection of insulin is required daily forits treatment.Type II: in this type, the body does not produce sufficient amount of insulin or the insulin is produced sufficientlybut it is not used properly by the body.
1. BhujangasanaProcedure: in this asana, the shape of the body remains like a snake that is why it is called bhujangasana. In orderto perform this asana, lie down on the belly on the ground. Keep your hands near the shoulders. Keep your legsclose together. Now, straighten up your arms slowly, raise the chest. Your head should turn backwards. Keep thisposition for some time. Then get back to the former position. For good result, perform this asana 3 to 5 times.Benefits:
1. It alleviates obesity.2. It provides strength and agility.3. It cures the disorders of urinary bladder.4. It cures the diseases of liver.5. It improves blood circulation.6. It makes the vertebral column flexible and thin.7. It cures gas disorders, constipation and indigestion.8. It strengthens the muscles of hands.
Contraindications1. This asana should be avoided by individuals who suffer from hernia, back injuries, headaches and recent
abdominal surgeries.2. Pregnant women should not perform this asana.
2. PaschimottanasanaProcedure: Sit on the ground with legs forward. Then hold the toes of your feet with the fingers of both hands.Then breathe out slowly and try to touch the knees with your forehead. After that breathe in slowly, raise yourhead upwards and come to the prior position. Perform this asana at least 10 to 12 times.Benefits:
1. It takes care of gas trouble.2. It prevents the early ossification of bones.3. It is a good remedy for constipation.4. It helps to overcome several menstrual disorders.5. It gives relief in sciatica, backache and asthma.6. It reduces obesity.7. It is helpful in treating abdominal diseases.
8. It is helpful in curing skin diseases.9. Vertebra becomes flexible and healthy.
Contraindications1. If you are suffering from enlarged liver of spleen or acute appendicitis, you should never do this asana.2. Avoid practising this asana if you suffer from asthma ot any respiratory diseases.
If you have any back or spinal problem, make sure that you perform this asana only under expert guidance.
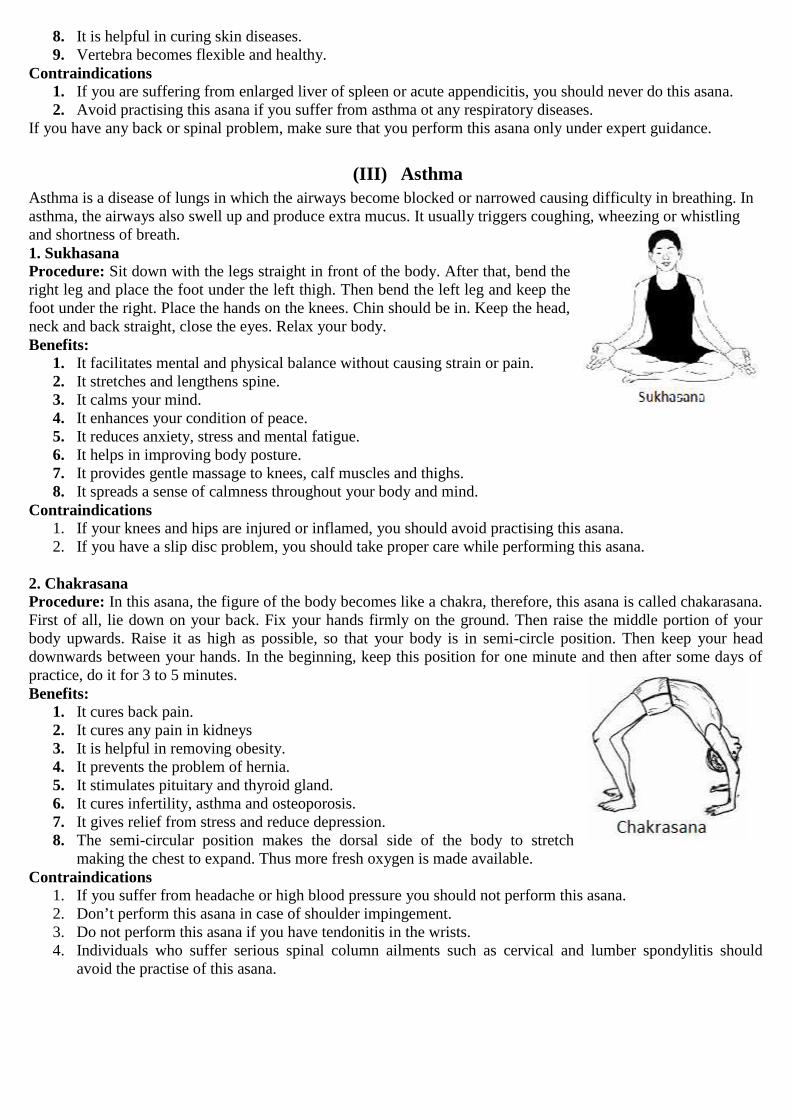
(III) AsthmaAsthma is a disease of lungs in which the airways become blocked or narrowed causing difficulty in breathing. Inasthma, the airways also swell up and produce extra mucus. It usually triggers coughing, wheezing or whistlingand shortness of breath.1. SukhasanaProcedure: Sit down with the legs straight in front of the body. After that, bend theright leg and place the foot under the left thigh. Then bend the left leg and keep thefoot under the right. Place the hands on the knees. Chin should be in. Keep the head,neck and back straight, close the eyes. Relax your body.Benefits:
1. It facilitates mental and physical balance without causing strain or pain.2. It stretches and lengthens spine.3. It calms your mind.4. It enhances your condition of peace.5. It reduces anxiety, stress and mental fatigue.6. It helps in improving body posture.7. It provides gentle massage to knees, calf muscles and thighs.8. It spreads a sense of calmness throughout your body and mind.
Contraindications1. If your knees and hips are injured or inflamed, you should avoid practising this asana.2. If you have a slip disc problem, you should take proper care while performing this asana.
2. ChakrasanaProcedure: In this asana, the figure of the body becomes like a chakra, therefore, this asana is called chakarasana.First of all, lie down on your back. Fix your hands firmly on the ground. Then raise the middle portion of yourbody upwards. Raise it as high as possible, so that your body is in semi-circle position. Then keep your headdownwards between your hands. In the beginning, keep this position for one minute and then after some days ofpractice, do it for 3 to 5 minutes.Benefits:
1. It cures back pain.2. It cures any pain in kidneys3. It is helpful in removing obesity.4. It prevents the problem of hernia.5. It stimulates pituitary and thyroid gland.6. It cures infertility, asthma and osteoporosis.7. It gives relief from stress and reduce depression.8. The semi-circular position makes the dorsal side of the body to stretch
making the chest to expand. Thus more fresh oxygen is made available.Contraindications
1. If you suffer from headache or high blood pressure you should not perform this asana.2. Don’t perform this asana in case of shoulder impingement.3. Do not perform this asana if you have tendonitis in the wrists.4. Individuals who suffer serious spinal column ailments such as cervical and lumber spondylitis should
avoid the practise of this asana.
(IV) HypertensionIt means increased blood pressure. It has become a worldwide health problem because a great number of peopleare facing the problem of hypertension throughout the world. Though, it is a fact that blood pressure increaseswith the advancement of age. In yesteryears, hypertension used to be considered a middle-age problem butnowadays, youngsters also suffer from this problem due to their faulty lifestyles.
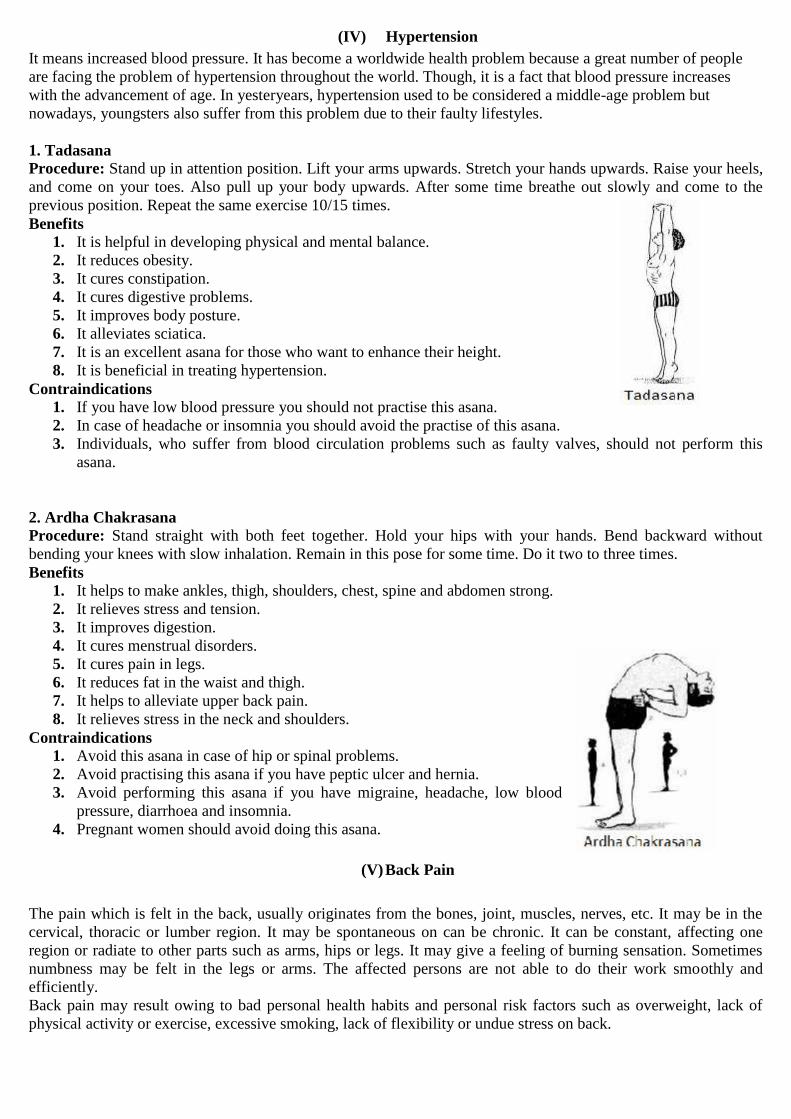
1. TadasanaProcedure: Stand up in attention position. Lift your arms upwards. Stretch your hands upwards. Raise your heels,and come on your toes. Also pull up your body upwards. After some time breathe out slowly and come to theprevious position. Repeat the same exercise 10/15 times.Benefits
1. It is helpful in developing physical and mental balance.2. It reduces obesity.3. It cures constipation.4. It cures digestive problems.5. It improves body posture.6. It alleviates sciatica.7. It is an excellent asana for those who want to enhance their height.8. It is beneficial in treating hypertension.
Contraindications1. If you have low blood pressure you should not practise this asana.2. In case of headache or insomnia you should avoid the practise of this asana.3. Individuals, who suffer from blood circulation problems such as faulty valves, should not perform this
asana.
2. Ardha ChakrasanaProcedure: Stand straight with both feet together. Hold your hips with your hands. Bend backward withoutbending your knees with slow inhalation. Remain in this pose for some time. Do it two to three times.Benefits
1. It helps to make ankles, thigh, shoulders, chest, spine and abdomen strong.2. It relieves stress and tension.3. It improves digestion.4. It cures menstrual disorders.5. It cures pain in legs.6. It reduces fat in the waist and thigh.7. It helps to alleviate upper back pain.8. It relieves stress in the neck and shoulders.
Contraindications1. Avoid this asana in case of hip or spinal problems.2. Avoid practising this asana if you have peptic ulcer and hernia.3. Avoid performing this asana if you have migraine, headache, low blood
pressure, diarrhoea and insomnia.4. Pregnant women should avoid doing this asana.
(V)Back Pain
The pain which is felt in the back, usually originates from the bones, joint, muscles, nerves, etc. It may be in thecervical, thoracic or lumber region. It may be spontaneous on can be chronic. It can be constant, affecting oneregion or radiate to other parts such as arms, hips or legs. It may give a feeling of burning sensation. Sometimesnumbness may be felt in the legs or arms. The affected persons are not able to do their work smoothly andefficiently.Back pain may result owing to bad personal health habits and personal risk factors such as overweight, lack ofphysical activity or exercise, excessive smoking, lack of flexibility or undue stress on back.

1. ArdhmatsyandrasanaProcedure: The left heel is kept under the right thigh and right leg is crossed over the left thigh. After that holdthe right toe with left hand and turn your head and back to the right side. In this position move the trunk sideways.Then perform the same asana in the reverse position.
Benefits:1. It keeps gall bladder and the prostate gland healthy.2. It enhances the stretchability of back muscles.3. It alleviates digestive ailments.4. It regulates the secretion of adrenaline and bile and thus is recommended
in yogic management of diabetes.5. It is also helpful in treating sinusitis, bronchitis, constipation, menstrual
disorders, urinary tract disorders and cervical spondylities.
Contraindications:1. Women, who are two or three months pregnant should avoid practising this asana.2. The individuals, who suffer from peptic ulcer, hernia or hypothyroidism, should practise this asana only
under expert guidance.3. The individuals who have the problem of sciatica or slipped disc may benefit from this asana but they need
to take great care while doing this asana.
2. ShalabhasanaProcedure: In order to perform shalbhasana, lie down in prostrate position. Spread the thigh backwards. Holdyour fists and extend arms. Keep your fists under the thigh and then raise your legs slowly as high as you can. Forbest results hold this position for two or three minutes and then lower your legs slowly. Repeat the same action forthree to five times.
Benefits1. It alleviates lower back pain.2. It helps in removing constipation.3. It improves posture.4. It stimulates abdominal organs.5. It helps in relieving stress.6. It provides relief to persons who have mild sciatica and slip disc
problem.7. It strengthens the muscles of the spine, buttocks and back of the arms and legs.
Contraindications1. People with a weak spine should avoid the practice of this asana.2. The individuals with a weak heart, high blood pressure and coronary problems should avoid practising this
asana.