Embed Size (px)
Citation preview
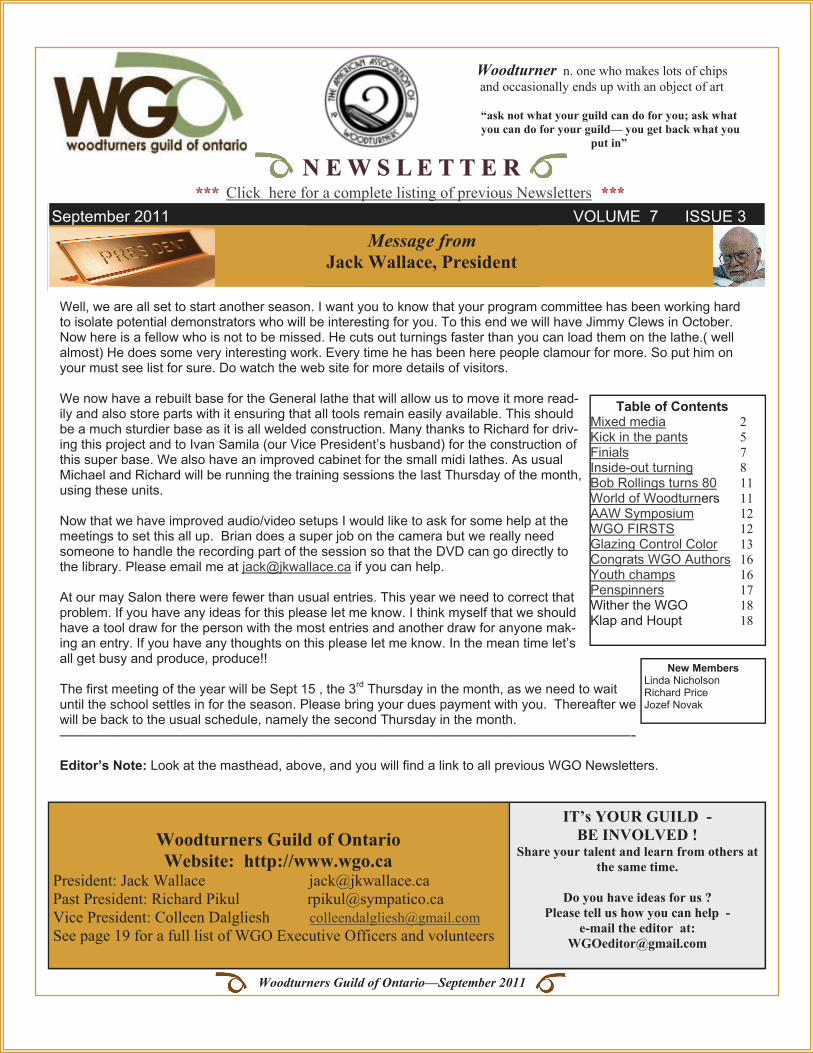
September 2011 VOLUME 7 ISSUE 3
Woodturner n. one who makes lots of chips and occasionally ends up with an object of art
“ask not what your guild can do for you; ask what you can do for your guild— you get back what you
put in”
Woodturners Guild of Ontario—September 2011
Woodturners Guild of Ontario Website: http://www.wgo.ca
President: Jack Wallace [email protected] Past President: Richard Pikul [email protected] Vice President: Colleen Dalgliesh [email protected] See page 19 for a full list of WGO Executive Officers and volunteers
IT’s YOUR GUILD - BE INVOLVED !
Share your talent and learn from others at the same time.
Do you have ideas for us ?
Please tell us how you can help - e-mail the editor at:
Message from Jack Wallace, President
N E W S L E T T E RN E W S L E T T E RN E W S L E T T E R
Well, we are all set to start another season. I want you to know that your program committee has been working hard to isolate potential demonstrators who will be interesting for you. To this end we will have Jimmy Clews in October. Now here is a fellow who is not to be missed. He cuts out turnings faster than you can load them on the lathe.( well almost) He does some very interesting work. Every time he has been here people clamour for more. So put him on your must see list for sure. Do watch the web site for more details of visitors. We now have a rebuilt base for the General lathe that will allow us to move it more read-ily and also store parts with it ensuring that all tools remain easily available. This should be a much sturdier base as it is all welded construction. Many thanks to Richard for driv-ing this project and to Ivan Samila (our Vice President’s husband) for the construction of this super base. We also have an improved cabinet for the small midi lathes. As usual Michael and Richard will be running the training sessions the last Thursday of the month, using these units. Now that we have improved audio/video setups I would like to ask for some help at the meetings to set this all up. Brian does a super job on the camera but we really need someone to handle the recording part of the session so that the DVD can go directly to the library. Please email me at [email protected] if you can help. At our may Salon there were fewer than usual entries. This year we need to correct that problem. If you have any ideas for this please let me know. I think myself that we should have a tool draw for the person with the most entries and another draw for anyone mak-ing an entry. If you have any thoughts on this please let me know. In the mean time let’s all get busy and produce, produce!! The first meeting of the year will be Sept 15 , the 3rd Thursday in the month, as we need to wait until the school settles in for the season. Please bring your dues payment with you. Thereafter we will be back to the usual schedule, namely the second Thursday in the month. ———————————————————————————————————————————- Editor’s Note: Look at the masthead, above, and you will find a link to all previous WGO Newsletters.
Table of Contents Mixed media Kick in the pants Finials Inside-out turning Bob Rollings turns 80 World of Woodturners AAW Symposium WGO FIRSTS Glazing Control Color Congrats WGO Authors Youth champs Penspinners Wither the WGO Klap and Houpt
2 5 7 8 11 11 12 12 13 16 16 17 18 18
New Members Linda Nicholson Richard Price Jozef Novak
********* Click here for a complete listing of previous Newsletters *********
2
Incorporate mixed-media into your world of woodturning; bolster the next Annual Salon with creativity! Quite simply, a mixed-media approach to woodturning involves the use of more than one medium in the creation of a finished product. Incorporating mixed-media into a turning can spark interest in the piece so that it becomes more than an ordinary bowl or box or platter. Introducing mixed-media into your work could be a way of having your turn-ing turn the heads of the judges at our Annual Salon. A mixed-media approach would necessarily trigger new learning opportunities and experimentation. For example, if I want to combine turned wood with clay, what might I make and what do I need to learn? Say that I decide to cre-ate a cheese tray. I might need to find out the following:
• How much does the wood I plan to use shrink as it dries over time, or how much does it fluctuate from sea-son to season?
• How much does the clay body I plan to use shrink during the processes of drying and firing twice? • How do I ensure a tight fit between the wooden platter and the recessed clay tile that I create?
These are just examples of eventualities that may impact on your efforts to work with different media, in this case, wood and clay; many other concerns related to the two media would also need to be addressed.
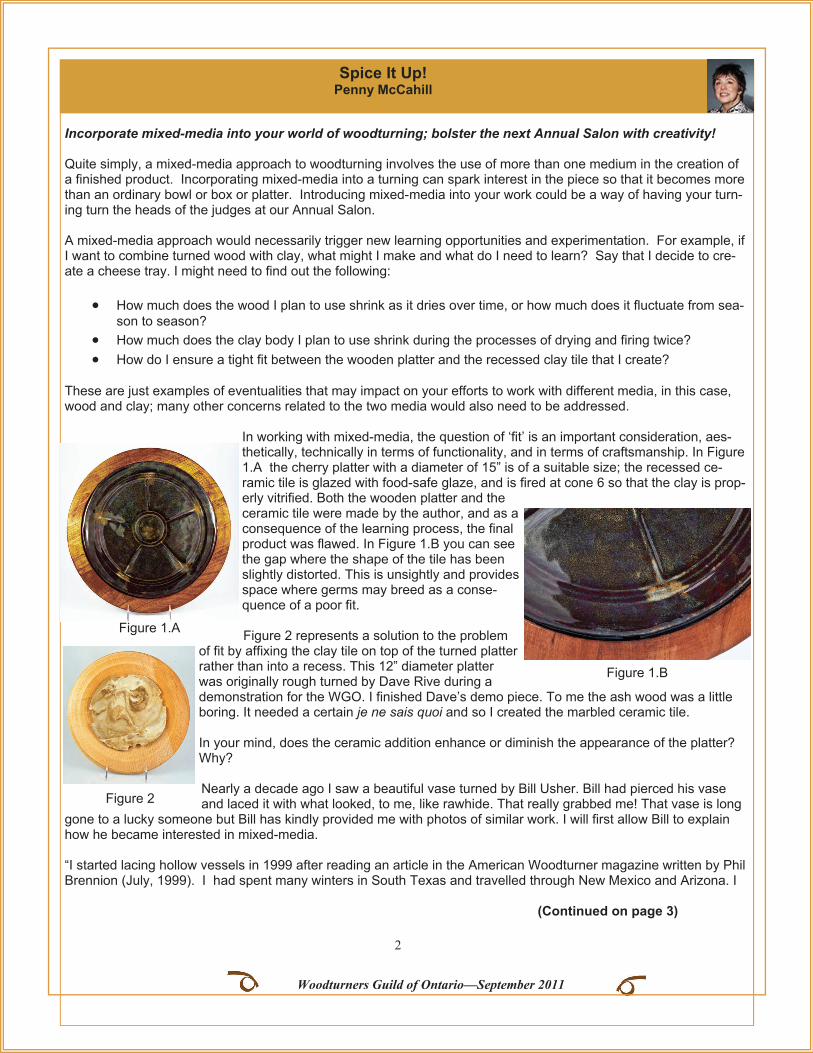
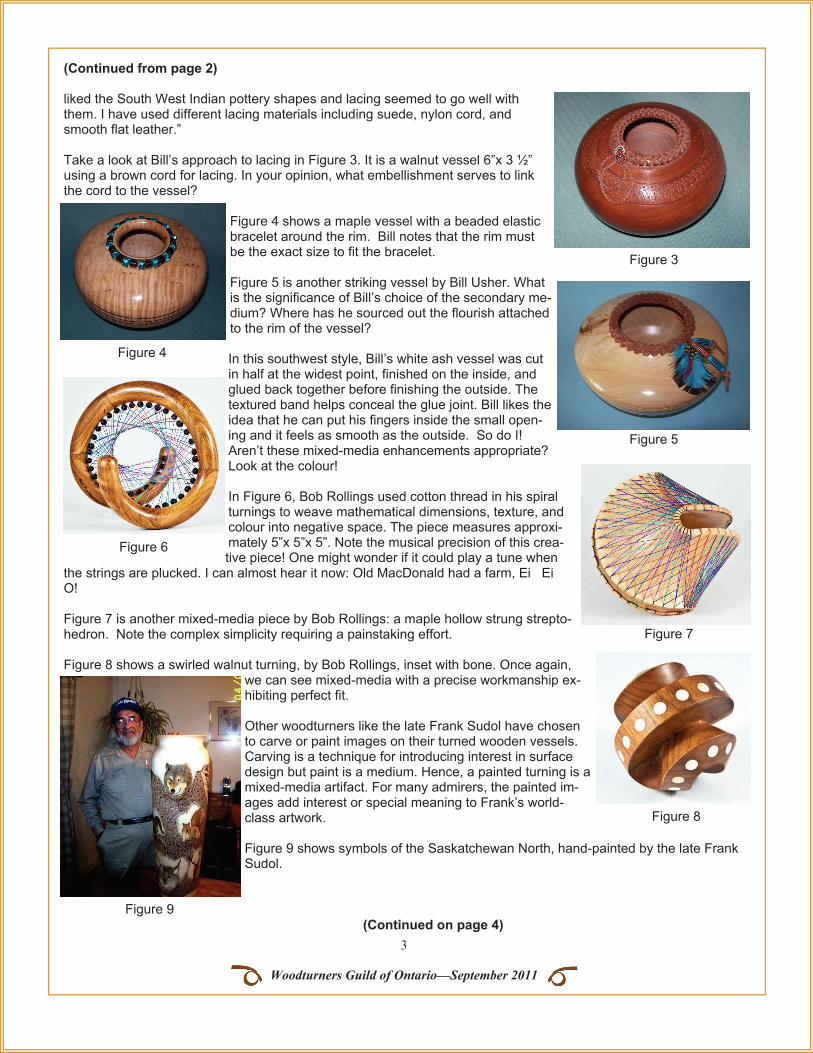
In working with mixed-media, the question of ‘fit’ is an important consideration, aes-thetically, technically in terms of functionality, and in terms of craftsmanship. In Figure 1.A the cherry platter with a diameter of 15” is of a suitable size; the recessed ce-ramic tile is glazed with food-safe glaze, and is fired at cone 6 so that the clay is prop-erly vitrified. Both the wooden platter and the ceramic tile were made by the author, and as a consequence of the learning process, the final product was flawed. In Figure 1.B you can see the gap where the shape of the tile has been slightly distorted. This is unsightly and provides space where germs may breed as a conse-quence of a poor fit. Figure 2 represents a solution to the problem
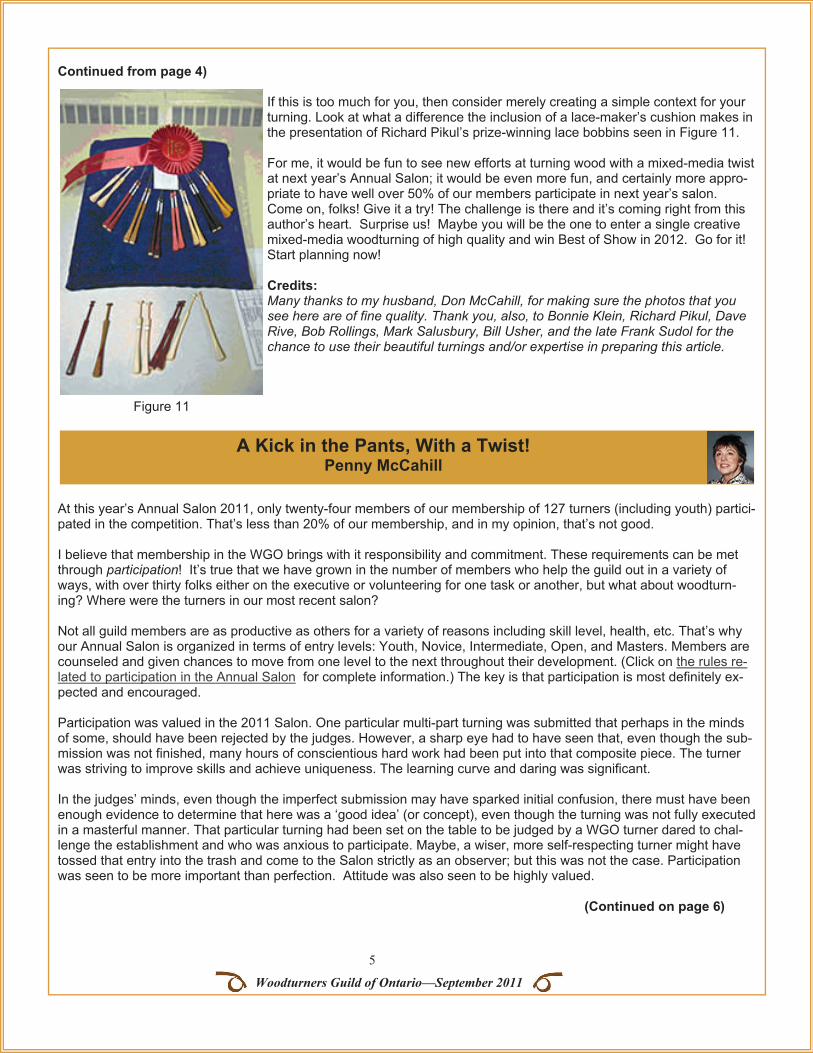
of fit by affixing the clay tile on top of the turned platter rather than into a recess. This 12” diameter platter was originally rough turned by Dave Rive during a demonstration for the WGO. I finished Dave’s demo piece. To me the ash wood was a little boring. It needed a certain je ne sais quoi and so I created the marbled ceramic tile. In your mind, does the ceramic addition enhance or diminish the appearance of the platter? Why? Nearly a decade ago I saw a beautiful vase turned by Bill Usher. Bill had pierced his vase and laced it with what looked, to me, like rawhide. That really grabbed me! That vase is long
gone to a lucky someone but Bill has kindly provided me with photos of similar work. I will first allow Bill to explain how he became interested in mixed-media. “I started lacing hollow vessels in 1999 after reading an article in the American Woodturner magazine written by Phil Brennion (July, 1999). I had spent many winters in South Texas and travelled through New Mexico and Arizona. I (Continued on page 3)
Woodturners Guild of Ontario—September 2011
Spice It Up! Penny McCahill
Figure 1.A
Figure 1.B
Figure 2
3
Woodturners Guild of Ontario—September 2011
(Continued from page 2)
liked the South West Indian pottery shapes and lacing seemed to go well with them. I have used different lacing materials including suede, nylon cord, and smooth flat leather.” Take a look at Bill’s approach to lacing in Figure 3. It is a walnut vessel 6”x 3 ½” using a brown cord for lacing. In your opinion, what embellishment serves to link the cord to the vessel?
Figure 4 shows a maple vessel with a beaded elastic bracelet around the rim. Bill notes that the rim must be the exact size to fit the bracelet. Figure 5 is another striking vessel by Bill Usher. What is the significance of Bill’s choice of the secondary me-dium? Where has he sourced out the flourish attached to the rim of the vessel? In this southwest style, Bill’s white ash vessel was cut in half at the widest point, finished on the inside, and glued back together before finishing the outside. The textured band helps conceal the glue joint. Bill likes the idea that he can put his fingers inside the small open-ing and it feels as smooth as the outside. So do I! Aren’t these mixed-media enhancements appropriate? Look at the colour! In Figure 6, Bob Rollings used cotton thread in his spiral turnings to weave mathematical dimensions, texture, and colour into negative space. The piece measures approxi-mately 5”x 5”x 5”. Note the musical precision of this crea-tive piece! One might wonder if it could play a tune when
the strings are plucked. I can almost hear it now: Old MacDonald had a farm, Ei Ei O! Figure 7 is another mixed-media piece by Bob Rollings: a maple hollow strung strepto-hedron. Note the complex simplicity requiring a painstaking effort. Figure 8 shows a swirled walnut turning, by Bob Rollings, inset with bone. Once again,
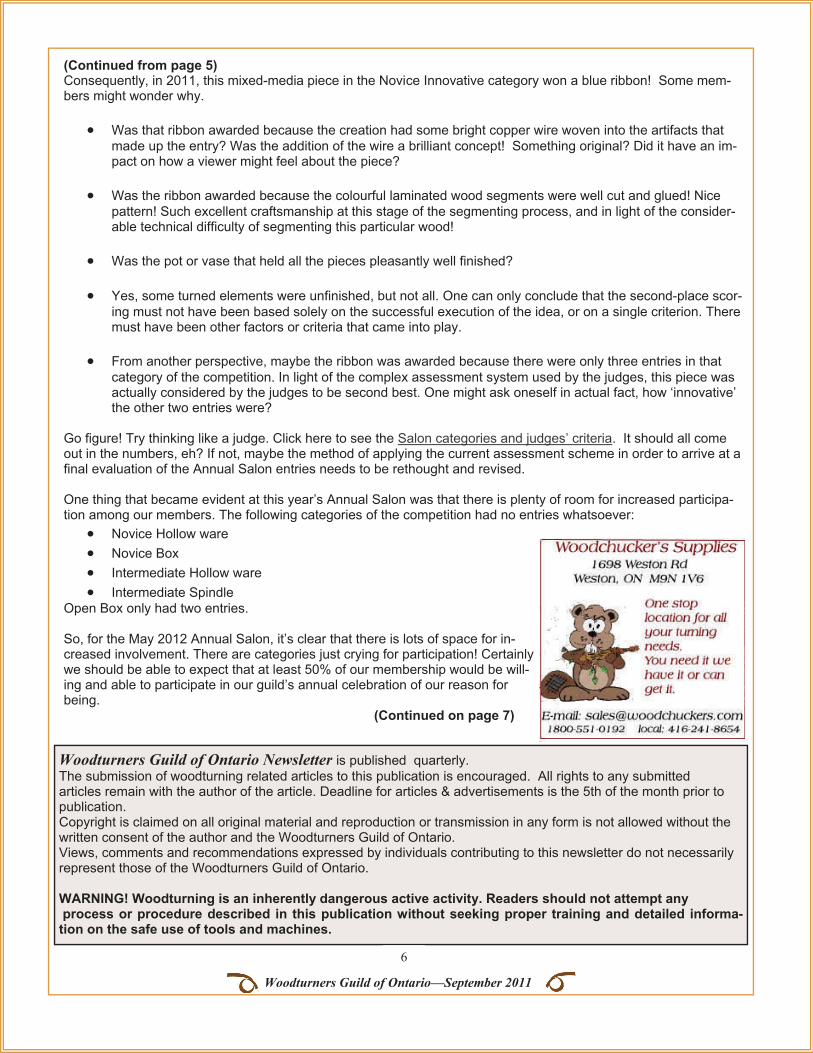
we can see mixed-media with a precise workmanship ex-hibiting perfect fit. Other woodturners like the late Frank Sudol have chosen to carve or paint images on their turned wooden vessels. Carving is a technique for introducing interest in surface design but paint is a medium. Hence, a painted turning is a mixed-media artifact. For many admirers, the painted im-ages add interest or special meaning to Frank’s world-class artwork. Figure 9 shows symbols of the Saskatchewan North, hand-painted by the late Frank Sudol.
(Continued on page 4)
Figure 3
Figure 4
Figure 5
Figure 6
Figure 7
Figure 8
Figure 9

4
Woodturners Guild of Ontario—September 2011
(Continued from page 3) Now it’s time to exercise your assessment and evaluation skills: In each of these examples pictured above, consider the design elements that have enhanced each final turned prod-uct. Use Bonnie Klein’s assessment scale as you reflect on the examples pictured above.
• How does the concept of each turning speak to notions of artistry, originality, and creativity? In Bill Usher’s work, how has mixed-media influenced the concept of his work?
• How is the execution of the idea revealed in the craftsmanship and finish of each product? How has a me-dium other than wood added to the execution of each piece?
• How do the size of the turning, the texturing, carving, laminations, and contours impact on the technical diffi-
culty of each piece? In Bob Rollings’ work, how does the use of string heighten the technical difficulty of the piece?
• Are the materials used in the production of each product appropriate for the execution of the artist’s concept or idea? How does paint enhance the final outcome of the late Frank Sudol’s work?
• How do the form, design, and balance of the various pieces make you feel? What does each piece feel like to you? Does the use of a second medium heighten the feeling that you have for any particular piece?
• What is your overall impression of each piece? Is it pleasing to the eye? Has the use of a second or third me-
dium heightened your overall impression for a particular piece? To explore the notion of mixed-media further, you are invited to visit the website of our guild’s co-founder, Mark Salus-bury, at http://www.salusburystudios.ca. Click on ‘platter forms’ and/or ‘mixed media’ on the menu on the left side of the home page and see what there is to inspire you amongst Mark’s amazing works. Now, here’s an exercise for you: Consider Figure 10, turned, carved, and pierced. Is there any significance in the fine copper wire that has been added to the piece? Does the wire enhance the turning or create a special feeling or mood? How might the turning be described when it is ‘dressed’ in fine copper? In an alternate version of such a flower, how might you have enhanced this simple turning using some form of mixed-media, assuming you would try to do it at all?
So, where does all this talk of mixed-media take us? Some turners will want to remain loyal to the traditional simplicity of a beautiful piece of wood, turned and finished to perfection; however, others may feel motivated to stretch their skills into other spheres of learning. It does-n’t matter what you do, just as long as you do it. What’s in the mix for you? If you are somewhat wildly stimulated by the notion of mixed-media, you may want to take notions of media a step further. How about using multimedia in the presenta-tion of one or more of your entries at next year’s Annual Salon? Imagine what a little audio-visual might add to the presentation of your turning efforts! For example, con-sider a pulsing strobe light bouncing off your jazzy pen.
(Continued on page 5) Figure 10
Woodturners Guild of Ontario—September 2011 5
Continued from page 4)
If this is too much for you, then consider merely creating a simple context for your turning. Look at what a difference the inclusion of a lace-maker’s cushion makes in the presentation of Richard Pikul’s prize-winning lace bobbins seen in Figure 11. For me, it would be fun to see new efforts at turning wood with a mixed-media twist at next year’s Annual Salon; it would be even more fun, and certainly more appro-priate to have well over 50% of our members participate in next year’s salon. Come on, folks! Give it a try! The challenge is there and it’s coming right from this author’s heart. Surprise us! Maybe you will be the one to enter a single creative mixed-media woodturning of high quality and win Best of Show in 2012. Go for it! Start planning now! Credits: Many thanks to my husband, Don McCahill, for making sure the photos that you see here are of fine quality. Thank you, also, to Bonnie Klein, Richard Pikul, Dave Rive, Bob Rollings, Mark Salusbury, Bill Usher, and the late Frank Sudol for the chance to use their beautiful turnings and/or expertise in preparing this article.
At this year’s Annual Salon 2011, only twenty-four members of our membership of 127 turners (including youth) partici-pated in the competition. That’s less than 20% of our membership, and in my opinion, that’s not good. I believe that membership in the WGO brings with it responsibility and commitment. These requirements can be met through participation! It’s true that we have grown in the number of members who help the guild out in a variety of ways, with over thirty folks either on the executive or volunteering for one task or another, but what about woodturn-ing? Where were the turners in our most recent salon? Not all guild members are as productive as others for a variety of reasons including skill level, health, etc. That’s why our Annual Salon is organized in terms of entry levels: Youth, Novice, Intermediate, Open, and Masters. Members are counseled and given chances to move from one level to the next throughout their development. (Click on the rules re-lated to participation in the Annual Salon for complete information.) The key is that participation is most definitely ex-pected and encouraged. Participation was valued in the 2011 Salon. One particular multi-part turning was submitted that perhaps in the minds of some, should have been rejected by the judges. However, a sharp eye had to have seen that, even though the sub-mission was not finished, many hours of conscientious hard work had been put into that composite piece. The turner was striving to improve skills and achieve uniqueness. The learning curve and daring was significant. In the judges’ minds, even though the imperfect submission may have sparked initial confusion, there must have been enough evidence to determine that here was a ‘good idea’ (or concept), even though the turning was not fully executed in a masterful manner. That particular turning had been set on the table to be judged by a WGO turner dared to chal-lenge the establishment and who was anxious to participate. Maybe, a wiser, more self-respecting turner might have tossed that entry into the trash and come to the Salon strictly as an observer; but this was not the case. Participation was seen to be more important than perfection. Attitude was also seen to be highly valued. (Continued on page 6)
Figure 11
A Kick in the Pants, With a Twist! Penny McCahill
9
Woodturners Guild of Ontario—September 2008
Woodturners Guild of Ontario Newsletter is published quarterly. The submission of woodturning related articles to this publication is encouraged. All rights to any submitted articles remain with the author of the article. Deadline for articles & advertisements is the 5th of the month prior to publication. Copyright is claimed on all original material and reproduction or transmission in any form is not allowed without the written consent of the author and the Woodturners Guild of Ontario. Views, comments and recommendations expressed by individuals contributing to this newsletter do not necessarily represent those of the Woodturners Guild of Ontario. WARNING! Woodturning is an inherently dangerous active activity. Readers should not attempt any process or procedure described in this publication without seeking proper training and detailed informa-tion on the safe use of tools and machines.
6
Woodturners Guild of Ontario—September 2011
(Continued from page 5) Consequently, in 2011, this mixed-media piece in the Novice Innovative category won a blue ribbon! Some mem-bers might wonder why.
• Was that ribbon awarded because the creation had some bright copper wire woven into the artifacts that made up the entry? Was the addition of the wire a brilliant concept! Something original? Did it have an im-pact on how a viewer might feel about the piece?
• Was the ribbon awarded because the colourful laminated wood segments were well cut and glued! Nice pattern! Such excellent craftsmanship at this stage of the segmenting process, and in light of the consider-able technical difficulty of segmenting this particular wood!
• Was the pot or vase that held all the pieces pleasantly well finished?
• Yes, some turned elements were unfinished, but not all. One can only conclude that the second-place scor-ing must not have been based solely on the successful execution of the idea, or on a single criterion. There must have been other factors or criteria that came into play.
• From another perspective, maybe the ribbon was awarded because there were only three entries in that
category of the competition. In light of the complex assessment system used by the judges, this piece was actually considered by the judges to be second best. One might ask oneself in actual fact, how ‘innovative’ the other two entries were?
Go figure! Try thinking like a judge. Click here to see the Salon categories and judges’ criteria. It should all come out in the numbers, eh? If not, maybe the method of applying the current assessment scheme in order to arrive at a final evaluation of the Annual Salon entries needs to be rethought and revised. One thing that became evident at this year’s Annual Salon was that there is plenty of room for increased participa-tion among our members. The following categories of the competition had no entries whatsoever:
• Novice Hollow ware • Novice Box • Intermediate Hollow ware • Intermediate Spindle
Open Box only had two entries. So, for the May 2012 Annual Salon, it’s clear that there is lots of space for in-creased involvement. There are categories just crying for participation! Certainly we should be able to expect that at least 50% of our membership would be will-ing and able to participate in our guild’s annual celebration of our reason for being. (Continued on page 7)
7
Woodturners Guild of Ontario—September 2011
(Continued from page 6) Now, here’s the twist in this kick: An idea for you! Why not plan to turn one piece for one or more of these ‘empty’ categories and at the same time, dress up your entries using mixed-media. Mixed-media is not essential, but it may add ‘a breath of fresh air’ to your turnings! With a little skill and artistry, mixed-media may help you find a way to a ribbon, especially in the innovative categories of next year’s competition. Mixed-media is a ticket to creativity! If you did not participate in this year’s Salon and would like to respond to this ‘kick’ by making a positive contribu-tion in 2012, maybe you’ll be inspired by my previous the article on mixed-media. It’s in this newsletter beginning on Page 2
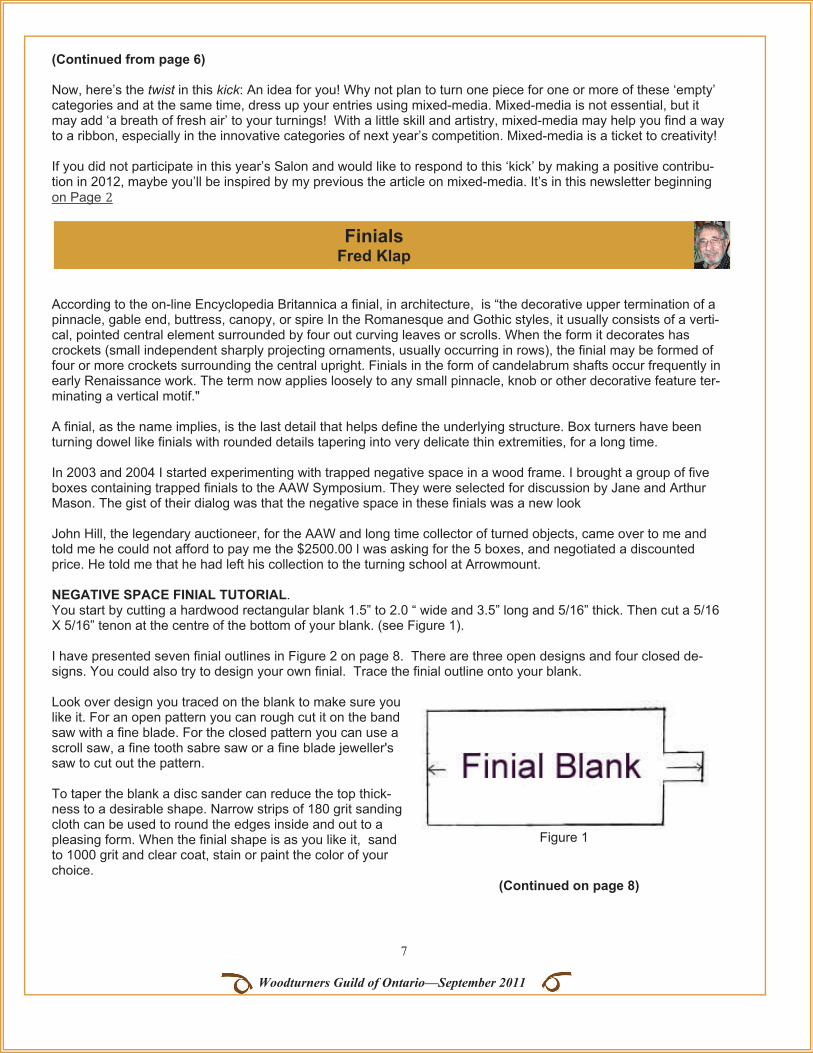
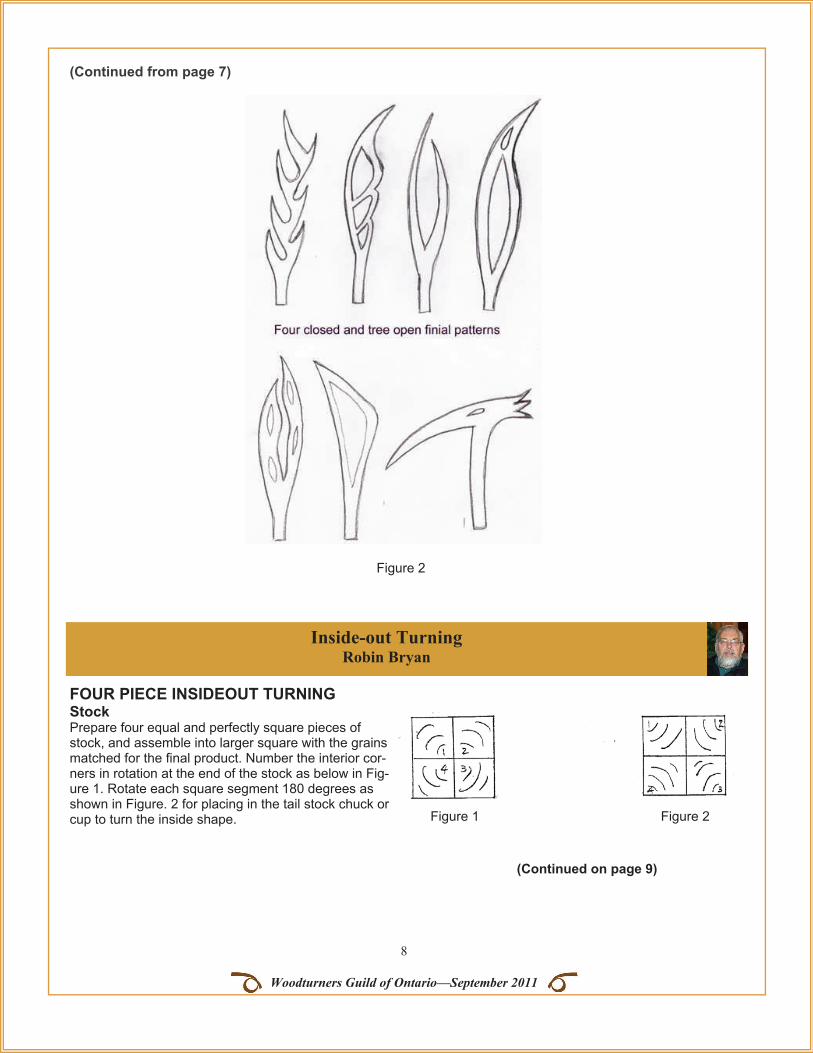
According to the on-line Encyclopedia Britannica a finial, in architecture, is “the decorative upper termination of a pinnacle, gable end, buttress, canopy, or spire In the Romanesque and Gothic styles, it usually consists of a verti-cal, pointed central element surrounded by four out curving leaves or scrolls. When the form it decorates has crockets (small independent sharply projecting ornaments, usually occurring in rows), the finial may be formed of four or more crockets surrounding the central upright. Finials in the form of candelabrum shafts occur frequently in early Renaissance work. The term now applies loosely to any small pinnacle, knob or other decorative feature ter-minating a vertical motif." A finial, as the name implies, is the last detail that helps define the underlying structure. Box turners have been turning dowel like finials with rounded details tapering into very delicate thin extremities, for a long time. In 2003 and 2004 I started experimenting with trapped negative space in a wood frame. I brought a group of five boxes containing trapped finials to the AAW Symposium. They were selected for discussion by Jane and Arthur Mason. The gist of their dialog was that the negative space in these finials was a new look John Hill, the legendary auctioneer, for the AAW and long time collector of turned objects, came over to me and told me he could not afford to pay me the $2500.00 l was asking for the 5 boxes, and negotiated a discounted price. He told me that he had left his collection to the turning school at Arrowmount. NEGATIVE SPACE FINIAL TUTORIAL. You start by cutting a hardwood rectangular blank 1.5” to 2.0 “ wide and 3.5” long and 5/16” thick. Then cut a 5/16 X 5/16” tenon at the centre of the bottom of your blank. (see Figure 1). I have presented seven finial outlines in Figure 2 on page 8. There are three open designs and four closed de-signs. You could also try to design your own finial. Trace the finial outline onto your blank. Look over design you traced on the blank to make sure you like it. For an open pattern you can rough cut it on the band saw with a fine blade. For the closed pattern you can use a scroll saw, a fine tooth sabre saw or a fine blade jeweller's saw to cut out the pattern. To taper the blank a disc sander can reduce the top thick-ness to a desirable shape. Narrow strips of 180 grit sanding cloth can be used to round the edges inside and out to a pleasing form. When the finial shape is as you like it, sand to 1000 grit and clear coat, stain or paint the color of your choice. (Continued on page 8)
Finials Fred Klap
Figure 1
12
Woodturners Guild of Ontario—September 2008
8
Woodturners Guild of Ontario—September 2011
(Continued from page 7)
FOUR PIECE INSIDEOUT TURNING Stock Prepare four equal and perfectly square pieces of stock, and assemble into larger square with the grains matched for the final product. Number the interior cor-ners in rotation at the end of the stock as below in Fig-ure 1. Rotate each square segment 180 degrees as shown in Figure. 2 for placing in the tail stock chuck or cup to turn the inside shape.
(Continued on page 9)
Inside-out Turning Robin Bryan
Figure 1 Figure 2
Figure 2
12
Woodturners Guild of Ontario—September 2008
9
Woodturners Guild of Ontario—September 2011
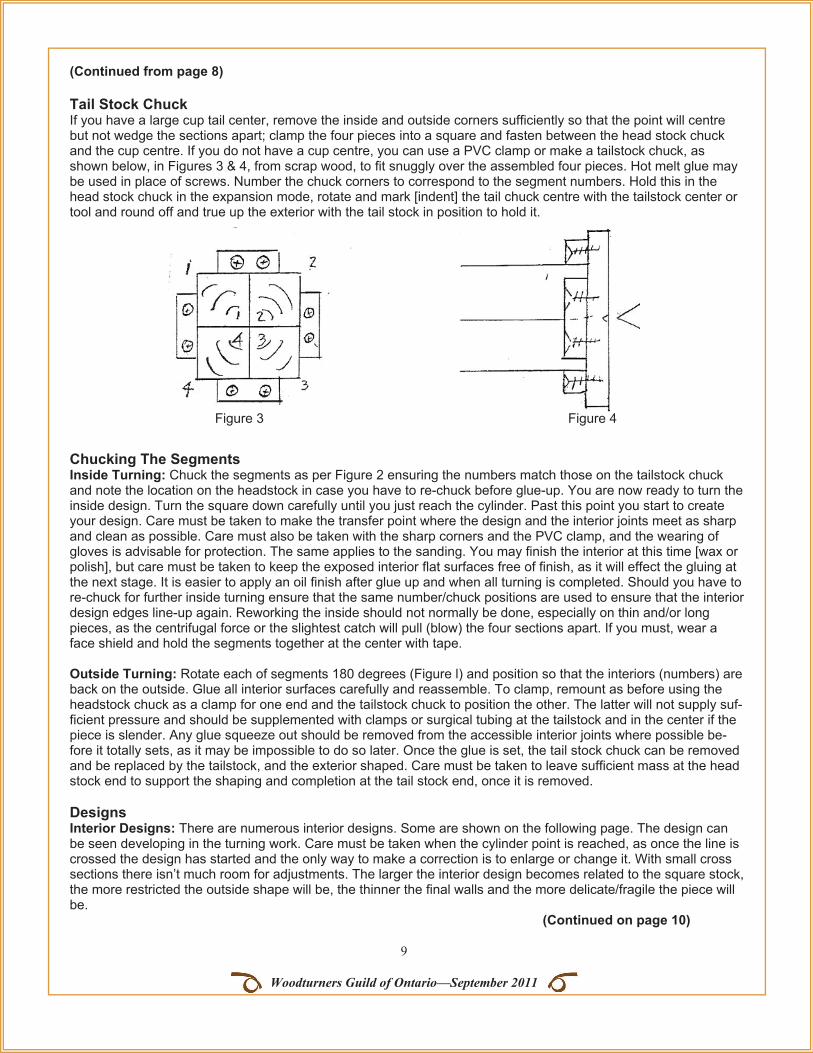
(Continued from page 8) Tail Stock Chuck If you have a large cup tail center, remove the inside and outside corners sufficiently so that the point will centre but not wedge the sections apart; clamp the four pieces into a square and fasten between the head stock chuck and the cup centre. If you do not have a cup centre, you can use a PVC clamp or make a tailstock chuck, as shown below, in Figures 3 & 4, from scrap wood, to fit snuggly over the assembled four pieces. Hot melt glue may be used in place of screws. Number the chuck corners to correspond to the segment numbers. Hold this in the head stock chuck in the expansion mode, rotate and mark [indent] the tail chuck centre with the tailstock center or tool and round off and true up the exterior with the tail stock in position to hold it. Chucking The Segments Inside Turning: Chuck the segments as per Figure 2 ensuring the numbers match those on the tailstock chuck and note the location on the headstock in case you have to re-chuck before glue-up. You are now ready to turn the inside design. Turn the square down carefully until you just reach the cylinder. Past this point you start to create your design. Care must be taken to make the transfer point where the design and the interior joints meet as sharp and clean as possible. Care must also be taken with the sharp corners and the PVC clamp, and the wearing of gloves is advisable for protection. The same applies to the sanding. You may finish the interior at this time [wax or polish], but care must be taken to keep the exposed interior flat surfaces free of finish, as it will effect the gluing at the next stage. It is easier to apply an oil finish after glue up and when all turning is completed. Should you have to re-chuck for further inside turning ensure that the same number/chuck positions are used to ensure that the interior design edges line-up again. Reworking the inside should not normally be done, especially on thin and/or long pieces, as the centrifugal force or the slightest catch will pull (blow) the four sections apart. If you must, wear a face shield and hold the segments together at the center with tape. Outside Turning: Rotate each of segments 180 degrees (Figure l) and position so that the interiors (numbers) are back on the outside. Glue all interior surfaces carefully and reassemble. To clamp, remount as before using the headstock chuck as a clamp for one end and the tailstock chuck to position the other. The latter will not supply suf-ficient pressure and should be supplemented with clamps or surgical tubing at the tailstock and in the center if the piece is slender. Any glue squeeze out should be removed from the accessible interior joints where possible be-fore it totally sets, as it may be impossible to do so later. Once the glue is set, the tail stock chuck can be removed and be replaced by the tailstock, and the exterior shaped. Care must be taken to leave sufficient mass at the head stock end to support the shaping and completion at the tail stock end, once it is removed. Designs Interior Designs: There are numerous interior designs. Some are shown on the following page. The design can be seen developing in the turning work. Care must be taken when the cylinder point is reached, as once the line is crossed the design has started and the only way to make a correction is to enlarge or change it. With small cross sections there isn’t much room for adjustments. The larger the interior design becomes related to the square stock, the more restricted the outside shape will be, the thinner the final walls and the more delicate/fragile the piece will be. (Continued on page 10)
Figure 3 Figure 4

12
Woodturners Guild of Ontario—September 2008
10
Woodturners Guild of Ontario—September 2011
(Continued from page 9) THREE AND SIX PIECE INSIDEOUT TURNING Stock Prepare plank with four parallel sides at 90 degrees. Set table saw blade or jointer fence at exactly 60 degrees and cut or plane off the edge of the plank. (Figure 5) Measure off the length of the diagonal just created onto the top of the plank, adjust the saw fence to cut off a length slightly wider than the width of the diagonal and cut off a length which will have a diamond shaped cross section. Mark the flat side and the newly cut side. Cut off 6¼ inch segments and assem-ble the marked points into a six sided piece (Figure 10). If there is space at the center you have more than 60 degrees and if there is space at the exterior you have less and must go back and adjust your blade angle accordingly until there are no gaps. Cut off as’ much stock as you need, and if using a jointer to set the angle, re-joint the outer edge before cutting the next piece on the table saw (Figure 6). To get sides of equal length and opposing angles of 60 and 120 de-grees and all stock identical, run all the segments through a thickness planer always with the marked sides down (Figure 7). Make sure you have extra lengths to use for making chucks.
(Continued on page 11)
Figure 5 Figure 6 Figure 7
12
Woodturners Guild of Ontario—September 2008
11
Woodturners Guild of Ontario—September 2011
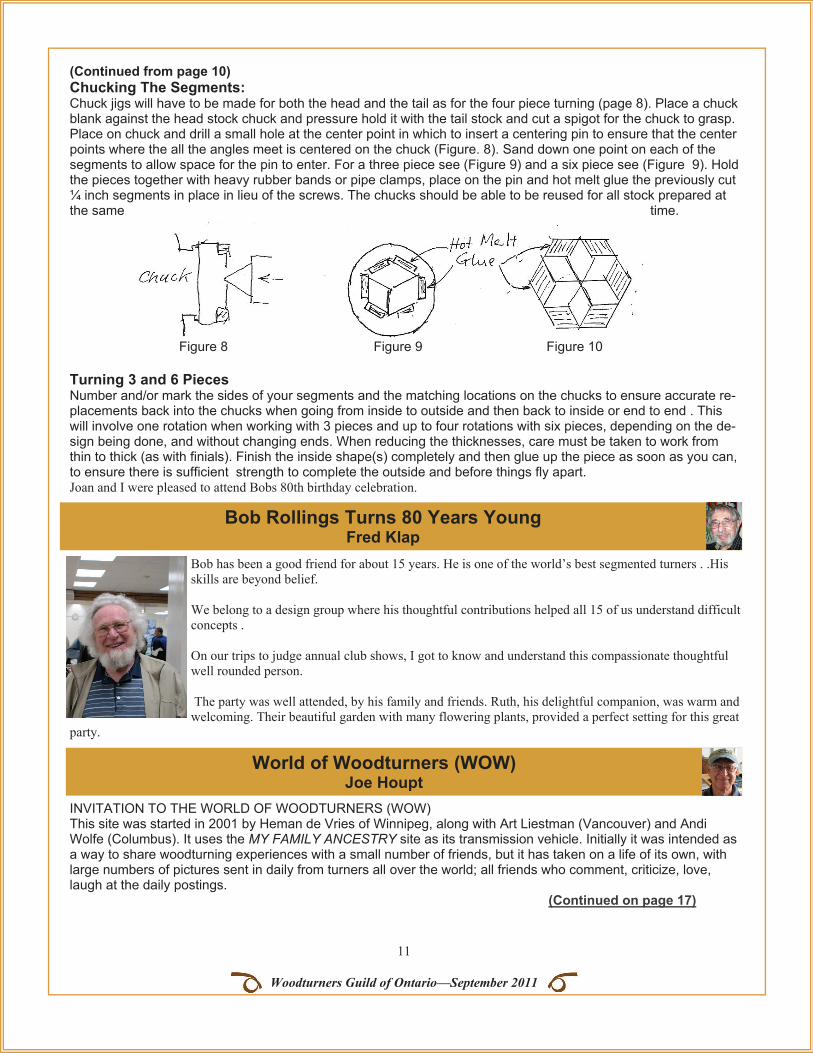
(Continued from page 10) Chucking The Segments: Chuck jigs will have to be made for both the head and the tail as for the four piece turning (page 8). Place a chuck blank against the head stock chuck and pressure hold it with the tail stock and cut a spigot for the chuck to grasp. Place on chuck and drill a small hole at the center point in which to insert a centering pin to ensure that the center points where the all the angles meet is centered on the chuck (Figure. 8). Sand down one point on each of the segments to allow space for the pin to enter. For a three piece see (Figure 9) and a six piece see (Figure 9). Hold the pieces together with heavy rubber bands or pipe clamps, place on the pin and hot melt glue the previously cut ¼ inch segments in place in lieu of the screws. The chucks should be able to be reused for all stock prepared at the same time. Turning 3 and 6 Pieces Number and/or mark the sides of your segments and the matching locations on the chucks to ensure accurate re-placements back into the chucks when going from inside to outside and then back to inside or end to end . This will involve one rotation when working with 3 pieces and up to four rotations with six pieces, depending on the de-sign being done, and without changing ends. When reducing the thicknesses, care must be taken to work from thin to thick (as with finials). Finish the inside shape(s) completely and then glue up the piece as soon as you can, to ensure there is sufficient strength to complete the outside and before things fly apart. Joan and I were pleased to attend Bobs 80th birthday celebration.
Bob has been a good friend for about 15 years. He is one of the world’s best segmented turners . .His skills are beyond belief. We belong to a design group where his thoughtful contributions helped all 15 of us understand difficult concepts . On our trips to judge annual club shows, I got to know and understand this compassionate thoughtful well rounded person. The party was well attended, by his family and friends. Ruth, his delightful companion, was warm and welcoming. Their beautiful garden with many flowering plants, provided a perfect setting for this great
party.
INVITATION TO THE WORLD OF WOODTURNERS (WOW) This site was started in 2001 by Heman de Vries of Winnipeg, along with Art Liestman (Vancouver) and Andi Wolfe (Columbus). It uses the MY FAMILY ANCESTRY site as its transmission vehicle. Initially it was intended as a way to share woodturning experiences with a small number of friends, but it has taken on a life of its own, with large numbers of pictures sent in daily from turners all over the world; all friends who comment, criticize, love, laugh at the daily postings. (Continued on page 17)
Figure 8 Figure 9 Figure 10
Bob Rollings Turns 80 Years Young Fred Klap
World of Woodturners (WOW) Joe Houpt
12
Woodturners Guild of Ontario—September 2008
12
Woodturners Guild of Ontario—September 2011
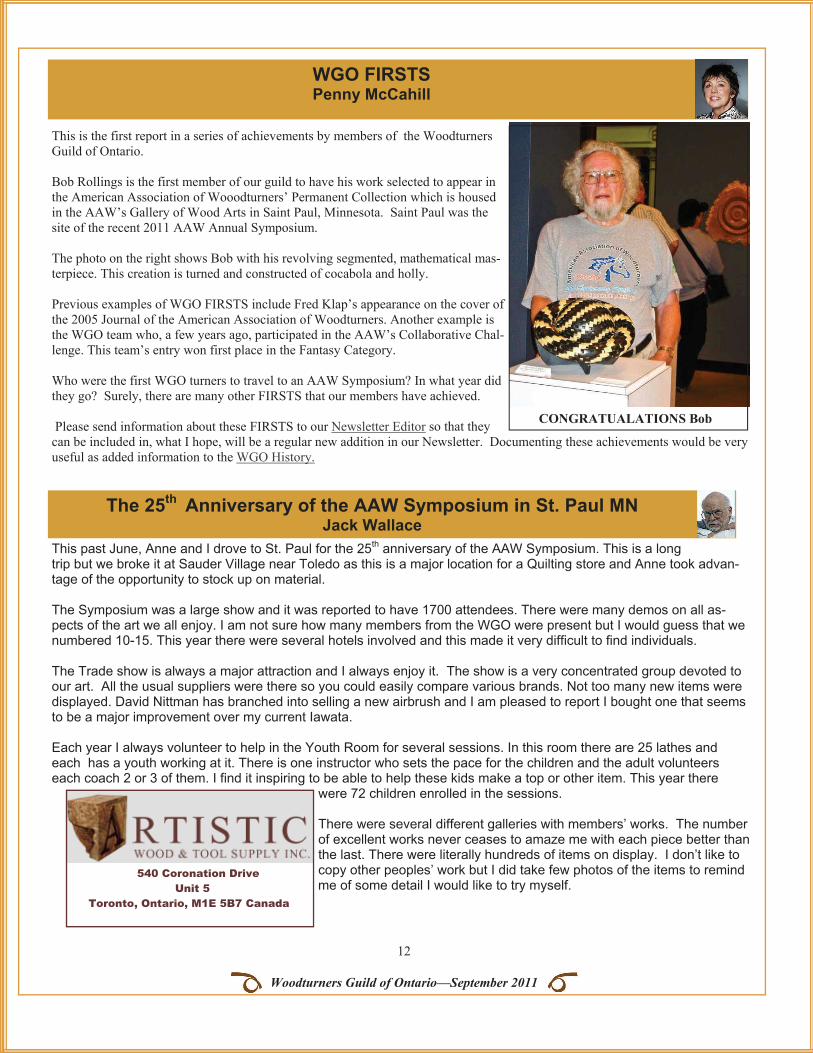
This is the first report in a series of achievements by members of the Woodturners Guild of Ontario. Bob Rollings is the first member of our guild to have his work selected to appear in the American Association of Wooodturners’ Permanent Collection which is housed in the AAW’s Gallery of Wood Arts in Saint Paul, Minnesota. Saint Paul was the site of the recent 2011 AAW Annual Symposium. The photo on the right shows Bob with his revolving segmented, mathematical mas-terpiece. This creation is turned and constructed of cocabola and holly. Previous examples of WGO FIRSTS include Fred Klap’s appearance on the cover of the 2005 Journal of the American Association of Woodturners. Another example is the WGO team who, a few years ago, participated in the AAW’s Collaborative Chal-lenge. This team’s entry won first place in the Fantasy Category. Who were the first WGO turners to travel to an AAW Symposium? In what year did they go? Surely, there are many other FIRSTS that our members have achieved. Please send information about these FIRSTS to our Newsletter Editor so that they can be included in, what I hope, will be a regular new addition in our Newsletter. Documenting these achievements would be very useful as added information to the WGO History.
This past June, Anne and I drove to St. Paul for the 25th anniversary of the AAW Symposium. This is a long trip but we broke it at Sauder Village near Toledo as this is a major location for a Quilting store and Anne took advan-tage of the opportunity to stock up on material. The Symposium was a large show and it was reported to have 1700 attendees. There were many demos on all as-pects of the art we all enjoy. I am not sure how many members from the WGO were present but I would guess that we numbered 10-15. This year there were several hotels involved and this made it very difficult to find individuals. The Trade show is always a major attraction and I always enjoy it. The show is a very concentrated group devoted to our art. All the usual suppliers were there so you could easily compare various brands. Not too many new items were displayed. David Nittman has branched into selling a new airbrush and I am pleased to report I bought one that seems to be a major improvement over my current Iawata. Each year I always volunteer to help in the Youth Room for several sessions. In this room there are 25 lathes and each has a youth working at it. There is one instructor who sets the pace for the children and the adult volunteers each coach 2 or 3 of them. I find it inspiring to be able to help these kids make a top or other item. This year there
were 72 children enrolled in the sessions. There were several different galleries with members’ works. The number of excellent works never ceases to amaze me with each piece better than the last. There were literally hundreds of items on display. I don’t like to copy other peoples’ work but I did take few photos of the items to remind me of some detail I would like to try myself.
The 25th Anniversary of the AAW Symposium in St. Paul MN Jack Wallace
WGO FIRSTS Penny McCahill
540 Coronation Drive Unit 5
Toronto, Ontario, M1E 5B7 Canada
CONGRATUALATIONS Bob
12
Woodturners Guild of Ontario—September 2008
13
Woodturners Guild of Ontario—September 2011
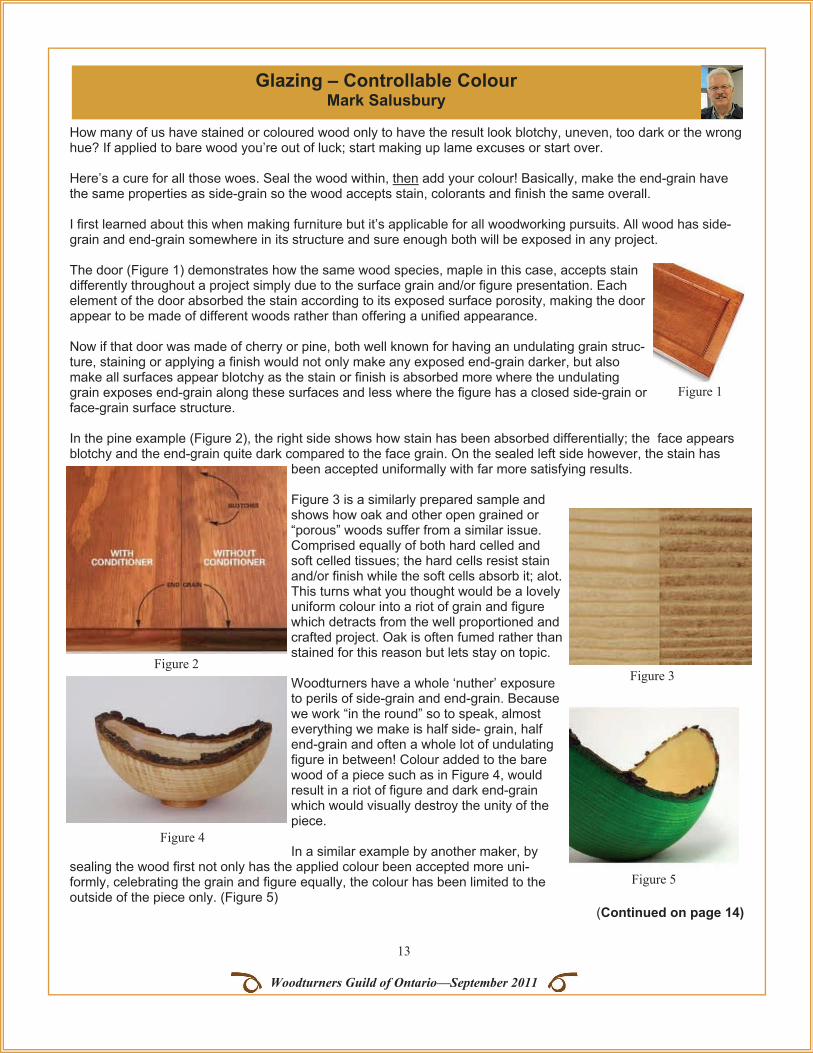
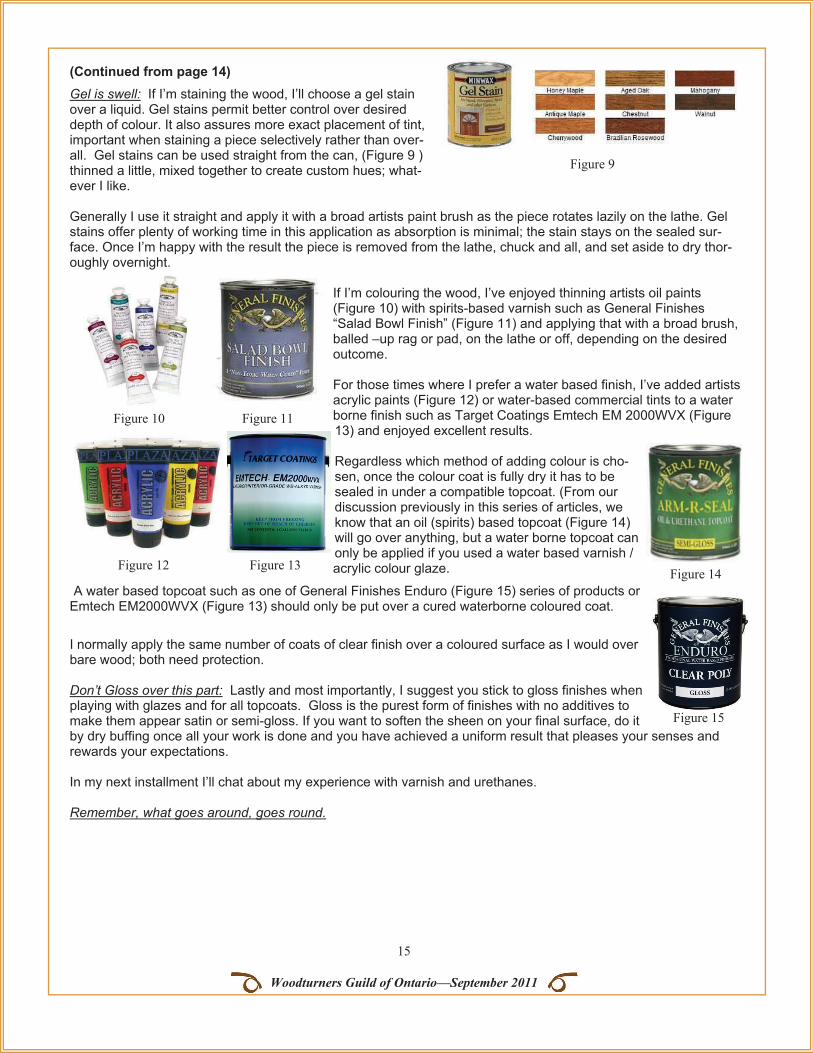
How many of us have stained or coloured wood only to have the result look blotchy, uneven, too dark or the wrong hue? If applied to bare wood you’re out of luck; start making up lame excuses or start over. Here’s a cure for all those woes. Seal the wood within, then add your colour! Basically, make the end-grain have the same properties as side-grain so the wood accepts stain, colorants and finish the same overall. I first learned about this when making furniture but it’s applicable for all woodworking pursuits. All wood has side-grain and end-grain somewhere in its structure and sure enough both will be exposed in any project. The door (Figure 1) demonstrates how the same wood species, maple in this case, accepts stain differently throughout a project simply due to the surface grain and/or figure presentation. Each element of the door absorbed the stain according to its exposed surface porosity, making the door appear to be made of different woods rather than offering a unified appearance. Now if that door was made of cherry or pine, both well known for having an undulating grain struc-ture, staining or applying a finish would not only make any exposed end-grain darker, but also make all surfaces appear blotchy as the stain or finish is absorbed more where the undulating grain exposes end-grain along these surfaces and less where the figure has a closed side-grain or face-grain surface structure. In the pine example (Figure 2), the right side shows how stain has been absorbed differentially; the face appears blotchy and the end-grain quite dark compared to the face grain. On the sealed left side however, the stain has
been accepted uniformally with far more satisfying results. Figure 3 is a similarly prepared sample and shows how oak and other open grained or “porous” woods suffer from a similar issue. Comprised equally of both hard celled and soft celled tissues; the hard cells resist stain and/or finish while the soft cells absorb it; alot. This turns what you thought would be a lovely uniform colour into a riot of grain and figure which detracts from the well proportioned and crafted project. Oak is often fumed rather than stained for this reason but lets stay on topic. Woodturners have a whole ‘nuther’ exposure to perils of side-grain and end-grain. Because we work “in the round” so to speak, almost everything we make is half side- grain, half end-grain and often a whole lot of undulating figure in between! Colour added to the bare wood of a piece such as in Figure 4, would result in a riot of figure and dark end-grain which would visually destroy the unity of the piece. In a similar example by another maker, by
sealing the wood first not only has the applied colour been accepted more uni-formly, celebrating the grain and figure equally, the colour has been limited to the outside of the piece only. (Figure 5) (Continued on page 14)
Glazing – Controllable Colour Mark Salusbury
Figure 1
Figure 2 Figure 3
Figure 4
Figure 5

12
Woodturners Guild of Ontario—September 2008
14
Woodturners Guild of Ontario—September 2011
(Continued from page 13) Sealed overall prior to colouring, the colour was not absorbed through to the inside surface, leaving it perfectly natural. Enter Conditioner: To make the end-grain accept stains and finishes the same as side-grain, manufacturers of commercial stains invented wood “conditioners”; thin solutions which we’re encouraged to apply liberally, let soak in and dry then apply our choice of stain or finish. (e.g. Figure 6) Wood conditioners are convenient and work very well, but you don’t really have to go to the ex-pense and displacement of yet another product in your paint cabinet. I make my own condi-tioner/sealer by thinning shellac or varnish, creating a solution that will be absorbed deeply where it can, fill the woods pours and dry to create a sealed shell within the woods surface structure. I use one of two products for wood conditioning. Zinsser Sealcoat, a dewaxed shellac/universal sanding sealer, or a light coloured var-nish / urethane (Figure 7). Whichever I choose I thin 5-15% by vol-ume. For dewaxed shellac, I use methyl hydrate. When using var-nish or urethane I thin with mineral spirits (Varsol) I prefer dewaxed shellac because it dries in a few hours, raises the grain slightly and sands easily to yield a silky smooth surface that accepts any base of colour or finish (alcohol, water or spirits) and adds no colour itself. I only use thinned varnish if my next step is to apply a tinted or un-tinted varnish rather than apply a stain or col-our and want the extra durability and resistance to alcohols the varnish offers. Preparation is everything: Typically I’ll sand the bare wood to 240 grit, making sure to eliminate all scratches and swirl marks, yielding a perfectly abraded surface. Then I apply my thinned shellac or varnish liberally, making sure all surfaces are covered so they glisten with moisture but no puddles, runs or dry looking patches. A uniform surface which can be set aside for drying, confi-dent that sanding can be done easily and quickly without having to correct any mistakes. Sanding is done with a flexible patch of fresh 400 – 600 grit abrasive, though a light sanding with 240 or 320 would work too. I’m after a smooth, uniform surface that has a little “tooth” to accept my stain, colour or tinted fin-ish. Oh yeah, I’m a control freak: By applying the colour or stain thinly and /or mixing it to a lighter shade, the amount of colour being applied can be easily controlled. Once the piece has dried, if I want a darker shade, I reapply until I’m satisfied. If I’m not happy with the hue, I’ll mix a little different colour and apply it over the first to achieve what I’m after. By gently scuff-sanding (400 – 800 grit) between colour coats and applying a different colour over the first, interesting effects and visual depths can be achieved. Play. Samples anyone? I find it very useful to make up a sample board of the exact same wood my project is made from, seal it just like my project piece, try different hues and stains on it, and make brief notes so I can “nail it” once I’m tackling the project. (Figure 8) (Continued on page 15)
Figure 7
Figure 6
Figure 8
12
Woodturners Guild of Ontario—September 2008
15
Woodturners Guild of Ontario—September 2011
(Continued from page 14) Gel is swell: If I’m staining the wood, I’ll choose a gel stain over a liquid. Gel stains permit better control over desired depth of colour. It also assures more exact placement of tint, important when staining a piece selectively rather than over-all. Gel stains can be used straight from the can, (Figure 9 ) thinned a little, mixed together to create custom hues; what-ever I like. Generally I use it straight and apply it with a broad artists paint brush as the piece rotates lazily on the lathe. Gel stains offer plenty of working time in this application as absorption is minimal; the stain stays on the sealed sur-face. Once I’m happy with the result the piece is removed from the lathe, chuck and all, and set aside to dry thor-oughly overnight.
If I’m colouring the wood, I’ve enjoyed thinning artists oil paints (Figure 10) with spirits-based varnish such as General Finishes “Salad Bowl Finish” (Figure 11) and applying that with a broad brush, balled –up rag or pad, on the lathe or off, depending on the desired outcome. For those times where I prefer a water based finish, I’ve added artists acrylic paints (Figure 12) or water-based commercial tints to a water borne finish such as Target Coatings Emtech EM 2000WVX (Figure 13) and enjoyed excellent results. Regardless which method of adding colour is cho-sen, once the colour coat is fully dry it has to be sealed in under a compatible topcoat. (From our discussion previously in this series of articles, we know that an oil (spirits) based topcoat (Figure 14) will go over anything, but a water borne topcoat can only be applied if you used a water based varnish / acrylic colour glaze.
A water based topcoat such as one of General Finishes Enduro (Figure 15) series of products or Emtech EM2000WVX (Figure 13) should only be put over a cured waterborne coloured coat.
I normally apply the same number of coats of clear finish over a coloured surface as I would over bare wood; both need protection. Don’t Gloss over this part: Lastly and most importantly, I suggest you stick to gloss finishes when playing with glazes and for all topcoats. Gloss is the purest form of finishes with no additives to make them appear satin or semi-gloss. If you want to soften the sheen on your final surface, do it by dry buffing once all your work is done and you have achieved a uniform result that pleases your senses and rewards your expectations. In my next installment I’ll chat about my experience with varnish and urethanes. Remember, what goes around, goes round.
Figure 11
Figure 12 Figure 13 Figure 14
Figure 9
Figure 10
Figure 15
12
Woodturners Guild of Ontario—September 2008
16
Woodturners Guild of Ontario—September 2011
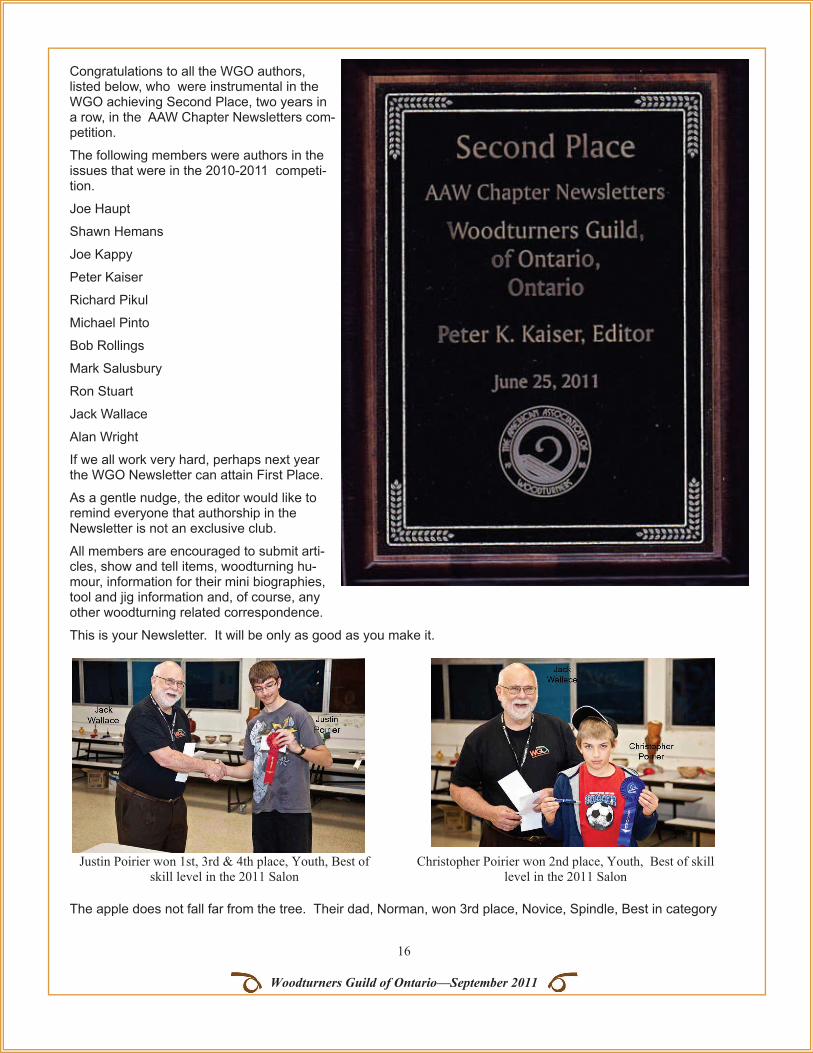
Congratulations to all the WGO authors, listed below, who were instrumental in the WGO achieving Second Place, two years in a row, in the AAW Chapter Newsletters com-petition.
The following members were authors in the issues that were in the 2010-2011 competi-tion.
Joe Haupt
Shawn Hemans
Joe Kappy
Peter Kaiser
Richard Pikul
Michael Pinto
Bob Rollings
Mark Salusbury
Ron Stuart
Jack Wallace
Alan Wright
If we all work very hard, perhaps next year the WGO Newsletter can attain First Place.
As a gentle nudge, the editor would like to remind everyone that authorship in the Newsletter is not an exclusive club.
All members are encouraged to submit arti-cles, show and tell items, woodturning hu-mour, information for their mini biographies, tool and jig information and, of course, any other woodturning related correspondence.
This is your Newsletter. It will be only as good as you make it.
The apple does not fall far from the tree. Their dad, Norman, won 3rd place, Novice, Spindle, Best in category
Justin Poirier won 1st, 3rd & 4th place, Youth, Best of skill level in the 2011 Salon
Christopher Poirier won 2nd place, Youth, Best of skill level in the 2011 Salon

12
Woodturners Guild of Ontario—September 2008
17
Woodturners Guild of Ontario—September 2011
The new year for the WGO commences in September and it is the second year for our group of turners, who ap-preciate the Art of the Pen. To some, pen turning can be distinguished from "real" turning, but they are misleading themselves. Every skill required for bowl turning is incorporated in the design and creation one of the many varie-ties of pens available today. Our job is to motivate each member to try pen turning and to inspire new ideas in those who have already been captured by this pleasure. We hope to show that the pen is mightier than bowl, or, at least, a nice diversion from other turning. I have been asked to give a demonstration on pen turning at WGO on November 10, 2011. This demo will give some history of pens, show the variety of materials available as kits and blanks (purchased and home-made), and my best approaches. All pen turners are available and very willing to share their skills, methodology and philosophy in this area. There are many members capable of showing us various methods and skills and materials. With this in mind, we will be organizing separate sessions for those that wish to pursue further knowledge. I have an email list of those inter-ested and will distribute details quickly to those on my list. If you have an interest, send me your email address and you will be added to this list. We also are seeking specific areas of interest. Personally, I was impressed by the Celtic Cross demo given by Carl Durance at the TWG, which he incorporated in pens, stopper, etc. What others demos should we entertain? The two I would like to see are closed-end pens and how do you put a feather into polyester resin, without ruining its fragile appearance. If you have suggestions, please forward to me, and we will try to satisfy each and every suggestion, either through a general demo or with a one on one with a member. We will advise as to the next Penspinners meeting, with date, time, location, and topics in September. See you then. (Continued from page 11) There is no obligation on the part of members except tp participate by viewing the site daily/hourly/weekly or when-ever you like. I look at the site occasionally, the postings are far too many for me. The comments are usually great, often repetitious and self-serving. The information in sections called POLLS, RECIPES, FILE CABINET, HIS-TORY, FILE CABINET has a wealth of material. I have the site come to me as an almost daily e-mail and look when I can. I was sponsored by Art Liestman when he was last here as a WGO demonstrator. Many WGO members are mem-bers of WOW and participate actively. I would be pleased to sponsor anyone. Send Joe an e-mail ([email protected]) ie Dear Joe, Please sponsor me to WOW membership. My name is---, My e-mail address is----, My date of birth (optional) is----
Penspinners Joseph Kappy

Woodturners Guild of Ontario—September 2011 18
Whither the WGO? Joe Houpt
The challenge for the guild program director is to arrange for a balanced year realizing that we have turners at every level of interest and expertise. Some want sessions in the turning basics, how to go from the log to the lathe, how to use the chain-saw, how to use the band saw, how to sharpen, how to spindle turn, how to side grain turn, how to stabilize, how to surface enhance, (drill, cut, burn, colour, inlay) how to segment, how to offset, how to work with stone, metal ---wonderfully, the list is endless! Demonstrations in the last several years have included spindle, bowl, hollow forms and segmented turning, natural edge bowls, platters, pepper mills, pens, tree ornaments, snap lid boxes, threads cutting, spinning tops, spoons, candle sticks, inside-outside turnings, surface treatments with oils, lacquers, epoxies, painting, limening, surface enhancements with dyeing, carving, painting, burning. We have seen elaborate Chinese balls, metal spinning, geometric forms, segmented turnings, band saw set -up, coring tools, various chucks, vacuum chucking, jigs for the lathe and band saw, chain saw use, unusual approaches to sharpening of tools, chains, band saw blades, basic metal working and unique tool produc-tion, wet wood management, CNC turning, and use of other materials such as alabaster.
Colleen Dalgliesh is our new Vice-President, in charge primarily in programming. Along with her enthusi-asm she brings a wealth of experience in sales and marketing. Colleen is not new to the executive volun-teer world. When her boys were younger she sat on the Markham Soccer Club's board as program director and marketing director - volunteer positions she held for several years.
Max Blum is a former University of Toronto Biochemist. After retiring from private analytical biochemistry work, he “saw the light” and started to make shavings. Max’s forte for the Guild has been to arrange, cajole, and convince excellent demonstrators, usually from our guild or surrounding Ontario clubs to demo on Thursday night club nights.
The line-up arranged for this coming turning season includes the ABC of segmented turnings (this turner from Kincardine is a great teacher, I saw him demo last year); goblets with captured rings; exquisite pen turning; potpourri in preparation for the holidays; and something for the cerebral, inquisitive and out-of-the box among our group
Visiting demonstrators are keen to come to Toronto. We coordinate with our “sister” clubs in Ontario and Montreal to put on a full large group week-end day of teaching (usually together with the Toronto Woodturners Guild) in the shop at Humber College fol-lowed by one or more days of small group hands-on sessions in a guild member’s shop. We are in the process of organizing a great year for the WGO. Starting off with Peter Rand on our opening night of WGO on Sep-tember 15. Check out his website, www.peterrand.ca – there will be something to look forward to on this day! October is looking bright as well when we see Jimmy Clewes in town and there will be a lot more in the coming months – stay tuned! And don’t forget our garage sale – if you have tools hanging around that you haven’t used in a while or that no longer satisfy you, get them in the sale; they are sure to bring a smile to another member!
Suggestion: pick up the book Woodturning Today – A Dramatic \Evolution celebrating the 25th anniversary of the Ameri-can Association of Woodturners to see where we have come from and where we are going. Now go out and make shav-ings.
————————————————————————————-
Editor’s Note: Max Blum told me that a recent WGO demonstrator, Sara Robinson, has an article in the August 2011 Journal of the American Association of Woodturners on the subject of Spalting. In this article there are two turned pieces by Fred Klap and one by Joe Houpt that are examples of spalted wood that they used.

Woodturners Guild of Ontario—September 2011 19
The People Who Make The WGO A Success President: Jack Wallace [email protected]
Vice President: Colleen Dalgliesh [email protected]
Programming Team Colleen Dalgliesh, Leader
Max Blum [email protected]
Hans Gulde [email protected]
Brian McCarin [email protected] John Gibbons no email address on file
Randy Andrews [email protected]
Victor Dewapenaere [email protected]
Paul Smith [email protected]
Treasurer: Robin Bryan [email protected]
Past President: Richard Pikul [email protected]
Secretary: Anthony de Boer [email protected]
Site Mgr, DHS: Michael Bonnycastle [email protected]
Site Mgr, Humber: Richard Pikul [email protected]
Members at large:
Richard Pikul [email protected] Webmaster
Garry Berry [email protected] Membership
Penny McCahill [email protected] History Project
Brian Rendall [email protected] History Project
Michael Bonnycastle [email protected] ad hoc duties
Larry Magee [email protected] ad hoc duties
Russell Wilson [email protected] ad hoc duties
Max Blum [email protected] Programming
Jack Gelber [email protected] Equipment mgr
Members in charge of functional teams:
Jim Chalmers [email protected] Refreshments:
Rod Sheridan [email protected] Library
Shawn Hermans no contact information listed Library
Siek Wassenaar [email protected] Library
Peter Kaiser [email protected] Newsletter
Len Harrison [email protected] DHS meeting prep
Brian Rendall [email protected] Videographer
Anthony Deboer [email protected] Videographer (fill in) Richard Pikul [email protected] Videographer (fill in)
Greg Mathieu No contact information listed Videographer (edit)
Tom Matthews [email protected] Data manager
Samm Brockhurst samm [email protected] Library