Embed Size (px)
Citation preview
Separation of the Components of a Mixture - Background B-1
Separation of the Components of a Mixture1 – Background Adapted from Reference 1. Updated: May 2015, Dr. Alemán
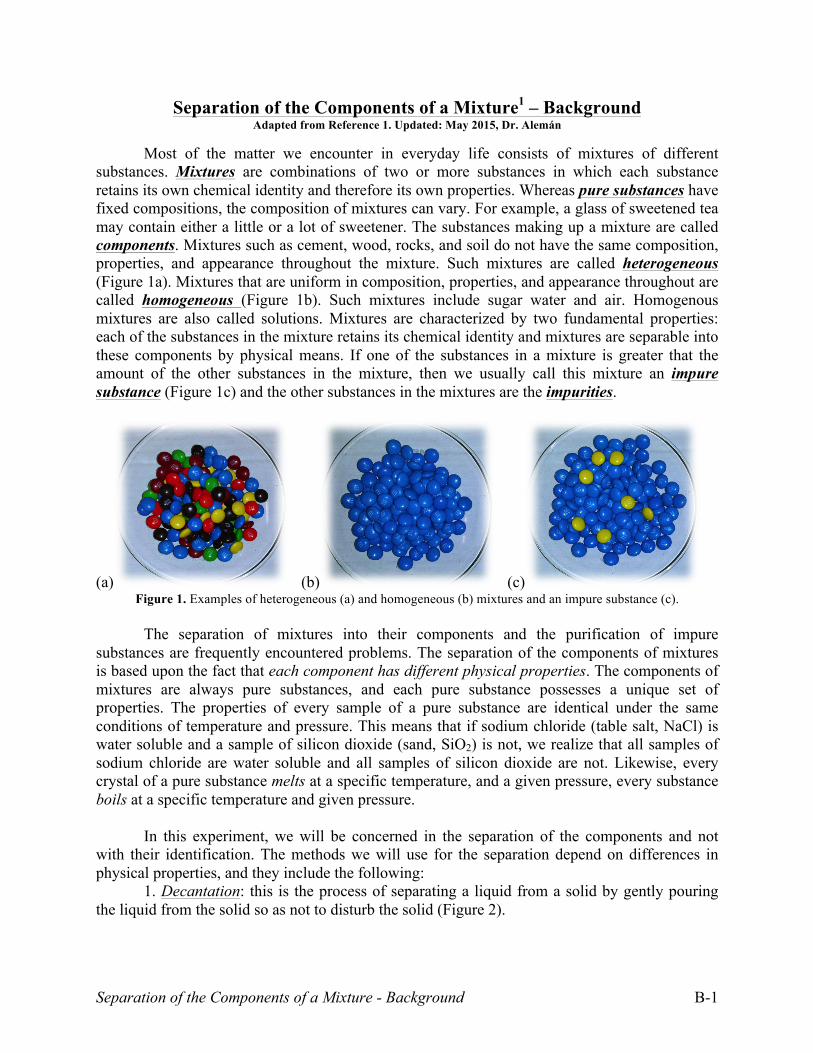
Most of the matter we encounter in everyday life consists of mixtures of different substances. Mixtures are combinations of two or more substances in which each substance retains its own chemical identity and therefore its own properties. Whereas pure substances have fixed compositions, the composition of mixtures can vary. For example, a glass of sweetened tea may contain either a little or a lot of sweetener. The substances making up a mixture are called components. Mixtures such as cement, wood, rocks, and soil do not have the same composition, properties, and appearance throughout the mixture. Such mixtures are called heterogeneous (Figure 1a). Mixtures that are uniform in composition, properties, and appearance throughout are called homogeneous (Figure 1b). Such mixtures include sugar water and air. Homogenous mixtures are also called solutions. Mixtures are characterized by two fundamental properties: each of the substances in the mixture retains its chemical identity and mixtures are separable into these components by physical means. If one of the substances in a mixture is greater that the amount of the other substances in the mixture, then we usually call this mixture an impure substance (Figure 1c) and the other substances in the mixtures are the impurities.
(a) (b) (c) Figure 1. Examples of heterogeneous (a) and homogeneous (b) mixtures and an impure substance (c).
The separation of mixtures into their components and the purification of impure
substances are frequently encountered problems. The separation of the components of mixtures is based upon the fact that each component has different physical properties. The components of mixtures are always pure substances, and each pure substance possesses a unique set of properties. The properties of every sample of a pure substance are identical under the same conditions of temperature and pressure. This means that if sodium chloride (table salt, NaCl) is water soluble and a sample of silicon dioxide (sand, SiO2) is not, we realize that all samples of sodium chloride are water soluble and all samples of silicon dioxide are not. Likewise, every crystal of a pure substance melts at a specific temperature, and a given pressure, every substance boils at a specific temperature and given pressure.
In this experiment, we will be concerned in the separation of the components and not
with their identification. The methods we will use for the separation depend on differences in physical properties, and they include the following:
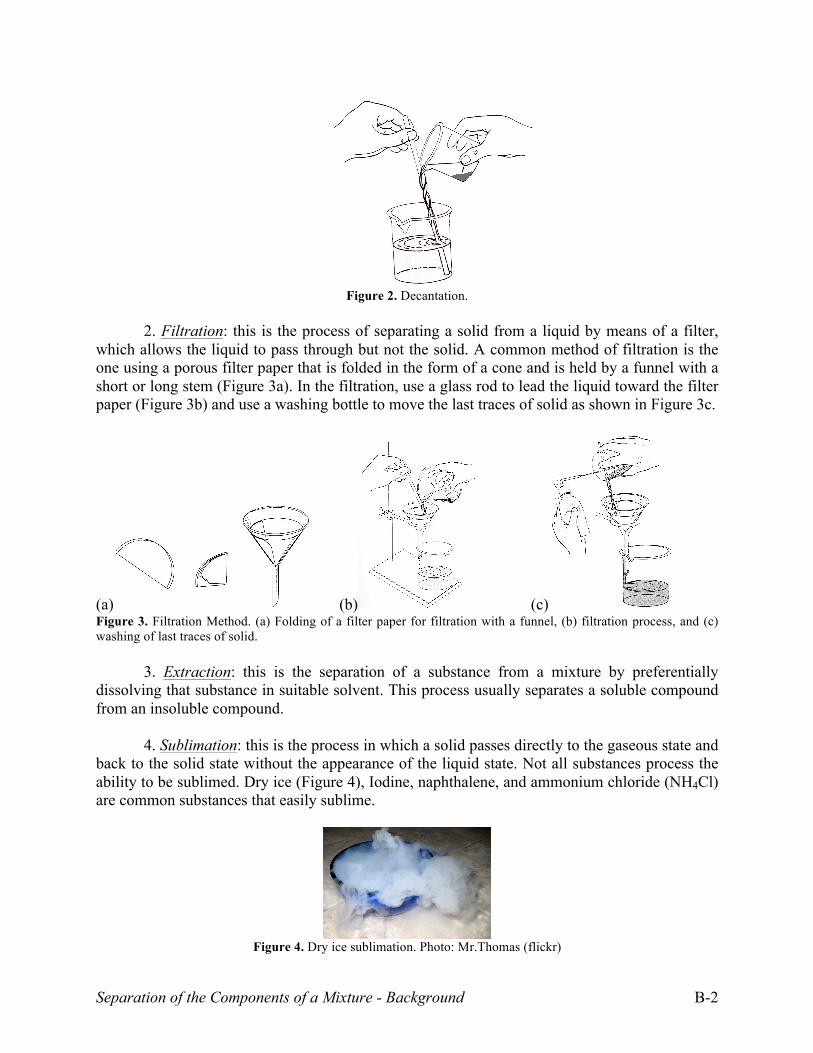
1. Decantation: this is the process of separating a liquid from a solid by gently pouring the liquid from the solid so as not to disturb the solid (Figure 2).
Separation of the Components of a Mixture - Background B-2
Figure 2. Decantation.
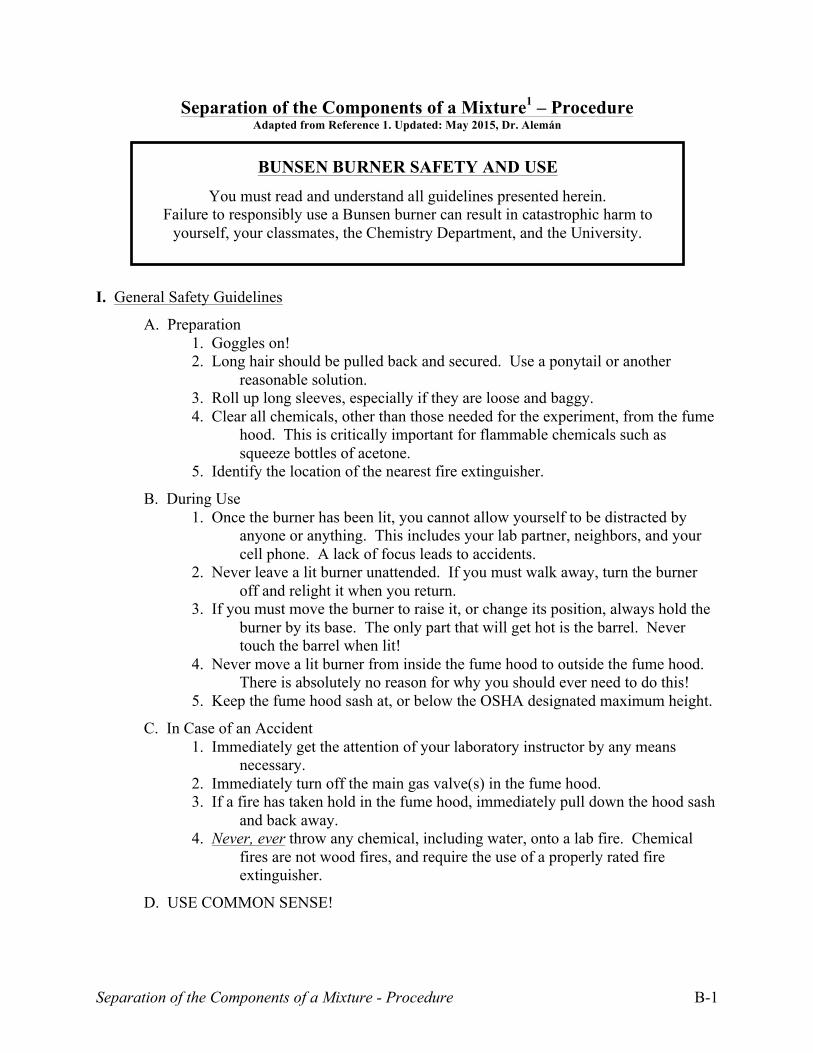
2. Filtration: this is the process of separating a solid from a liquid by means of a filter, which allows the liquid to pass through but not the solid. A common method of filtration is the one using a porous filter paper that is folded in the form of a cone and is held by a funnel with a short or long stem (Figure 3a). In the filtration, use a glass rod to lead the liquid toward the filter paper (Figure 3b) and use a washing bottle to move the last traces of solid as shown in Figure 3c.
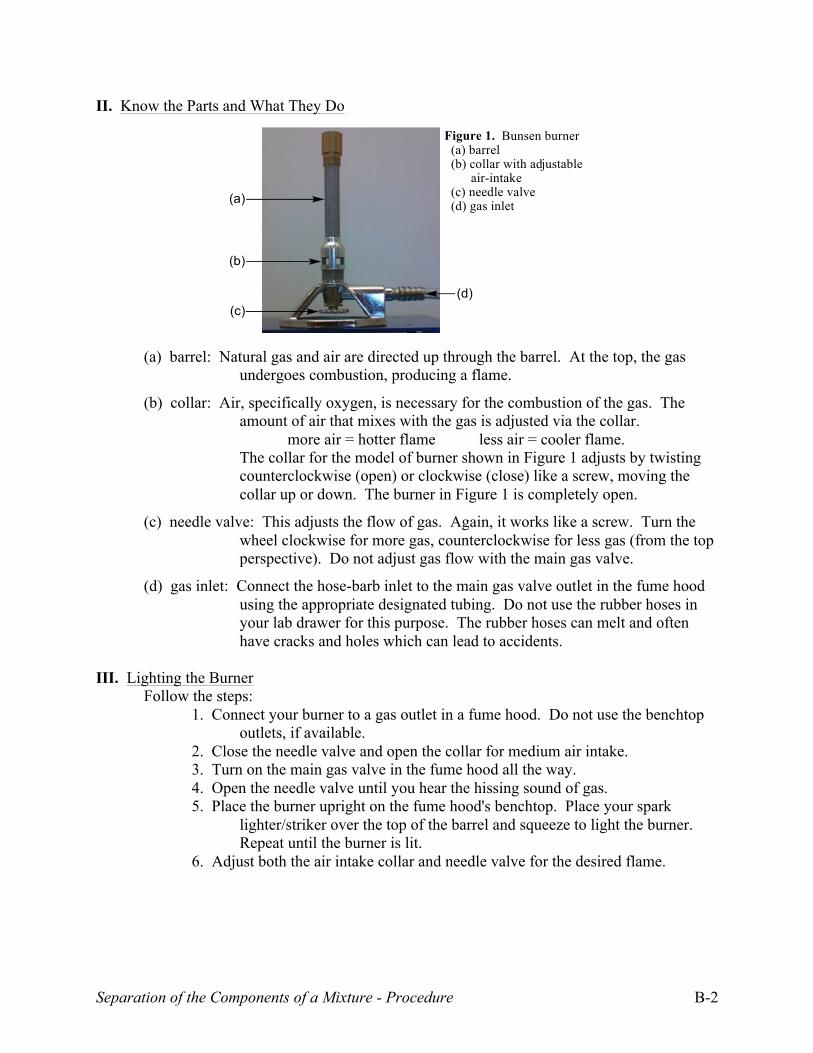
(a) (b) (c) Figure 3. Filtration Method. (a) Folding of a filter paper for filtration with a funnel, (b) filtration process, and (c) washing of last traces of solid. 3. Extraction: this is the separation of a substance from a mixture by preferentially dissolving that substance in suitable solvent. This process usually separates a soluble compound from an insoluble compound. 4. Sublimation: this is the process in which a solid passes directly to the gaseous state and back to the solid state without the appearance of the liquid state. Not all substances process the ability to be sublimed. Dry ice (Figure 4), Iodine, naphthalene, and ammonium chloride (NH4Cl) are common substances that easily sublime.
Figure 4. Dry ice sublimation. Photo: Mr.Thomas (flickr)!
Separation of the Components of a Mixture - Procedure B-1
Separation of the Components of a Mixture1 – Procedure Adapted from Reference 1. Updated: May 2015, Dr. Alemán
I. General Safety Guidelines
A. Preparation 1. Goggles on! 2. Long hair should be pulled back and secured. Use a ponytail or another
reasonable solution. 3. Roll up long sleeves, especially if they are loose and baggy.
4. Clear all chemicals, other than those needed for the experiment, from the fume hood. This is critically important for flammable chemicals such as squeeze bottles of acetone.
5. Identify the location of the nearest fire extinguisher.
B. During Use 1. Once the burner has been lit, you cannot allow yourself to be distracted by
anyone or anything. This includes your lab partner, neighbors, and your cell phone. A lack of focus leads to accidents.
2. Never leave a lit burner unattended. If you must walk away, turn the burner off and relight it when you return.
3. If you must move the burner to raise it, or change its position, always hold the burner by its base. The only part that will get hot is the barrel. Never touch the barrel when lit!
4. Never move a lit burner from inside the fume hood to outside the fume hood. There is absolutely no reason for why you should ever need to do this!
5. Keep the fume hood sash at, or below the OSHA designated maximum height.
C. In Case of an Accident 1. Immediately get the attention of your laboratory instructor by any means
necessary. 2. Immediately turn off the main gas valve(s) in the fume hood.
3. If a fire has taken hold in the fume hood, immediately pull down the hood sash and back away.
4. Never, ever throw any chemical, including water, onto a lab fire. Chemical fires are not wood fires, and require the use of a properly rated fire extinguisher.
D. USE COMMON SENSE!
BUNSEN BURNER SAFETY AND USE
You must read and understand all guidelines presented herein. Failure to responsibly use a Bunsen burner can result in catastrophic harm to
yourself, your classmates, the Chemistry Department, and the University.
Separation of the Components of a Mixture - Procedure B-2
II. Know the Parts and What They Do
(a) barrel: Natural gas and air are directed up through the barrel. At the top, the gas
undergoes combustion, producing a flame.
(b) collar: Air, specifically oxygen, is necessary for the combustion of the gas. The amount of air that mixes with the gas is adjusted via the collar.
more air = hotter flame less air = cooler flame. The collar for the model of burner shown in Figure 1 adjusts by twisting counterclockwise (open) or clockwise (close) like a screw, moving the collar up or down. The burner in Figure 1 is completely open.
(c) needle valve: This adjusts the flow of gas. Again, it works like a screw. Turn the wheel clockwise for more gas, counterclockwise for less gas (from the top perspective). Do not adjust gas flow with the main gas valve.
(d) gas inlet: Connect the hose-barb inlet to the main gas valve outlet in the fume hood using the appropriate designated tubing. Do not use the rubber hoses in your lab drawer for this purpose. The rubber hoses can melt and often have cracks and holes which can lead to accidents.
III. Lighting the Burner Follow the steps: 1. Connect your burner to a gas outlet in a fume hood. Do not use the benchtop
outlets, if available. 2. Close the needle valve and open the collar for medium air intake. 3. Turn on the main gas valve in the fume hood all the way. 4. Open the needle valve until you hear the hissing sound of gas. 5. Place the burner upright on the fume hood's benchtop. Place your spark
lighter/striker over the top of the barrel and squeeze to light the burner. Repeat until the burner is lit.
6. Adjust both the air intake collar and needle valve for the desired flame.
Separation of the Components of a Mixture - Procedure B-3
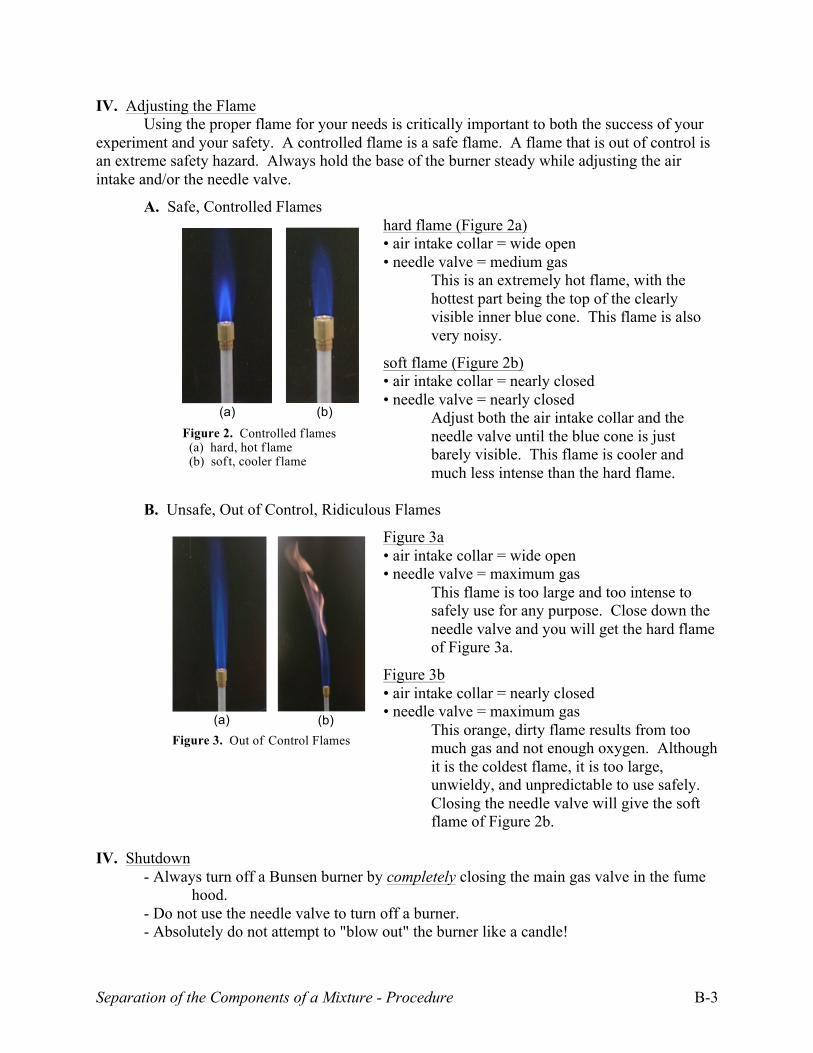
IV. Adjusting the Flame Using the proper flame for your needs is critically important to both the success of your
experiment and your safety. A controlled flame is a safe flame. A flame that is out of control is an extreme safety hazard. Always hold the base of the burner steady while adjusting the air intake and/or the needle valve.
A. Safe, Controlled Flames hard flame (Figure 2a) • air intake collar = wide open • needle valve = medium gas
This is an extremely hot flame, with the hottest part being the top of the clearly visible inner blue cone. This flame is also very noisy.
soft flame (Figure 2b) • air intake collar = nearly closed • needle valve = nearly closed
Adjust both the air intake collar and the needle valve until the blue cone is just barely visible. This flame is cooler and much less intense than the hard flame.
B. Unsafe, Out of Control, Ridiculous Flames
Figure 3a • air intake collar = wide open • needle valve = maximum gas
This flame is too large and too intense to safely use for any purpose. Close down the needle valve and you will get the hard flame of Figure 3a.
Figure 3b • air intake collar = nearly closed • needle valve = maximum gas
This orange, dirty flame results from too much gas and not enough oxygen. Although it is the coldest flame, it is too large, unwieldy, and unpredictable to use safely. Closing the needle valve will give the soft flame of Figure 2b.
IV. Shutdown - Always turn off a Bunsen burner by completely closing the main gas valve in the fume
hood. - Do not use the needle valve to turn off a burner. - Absolutely do not attempt to "blow out" the burner like a candle!
Separation of the Components of a Mixture - Procedure B-4
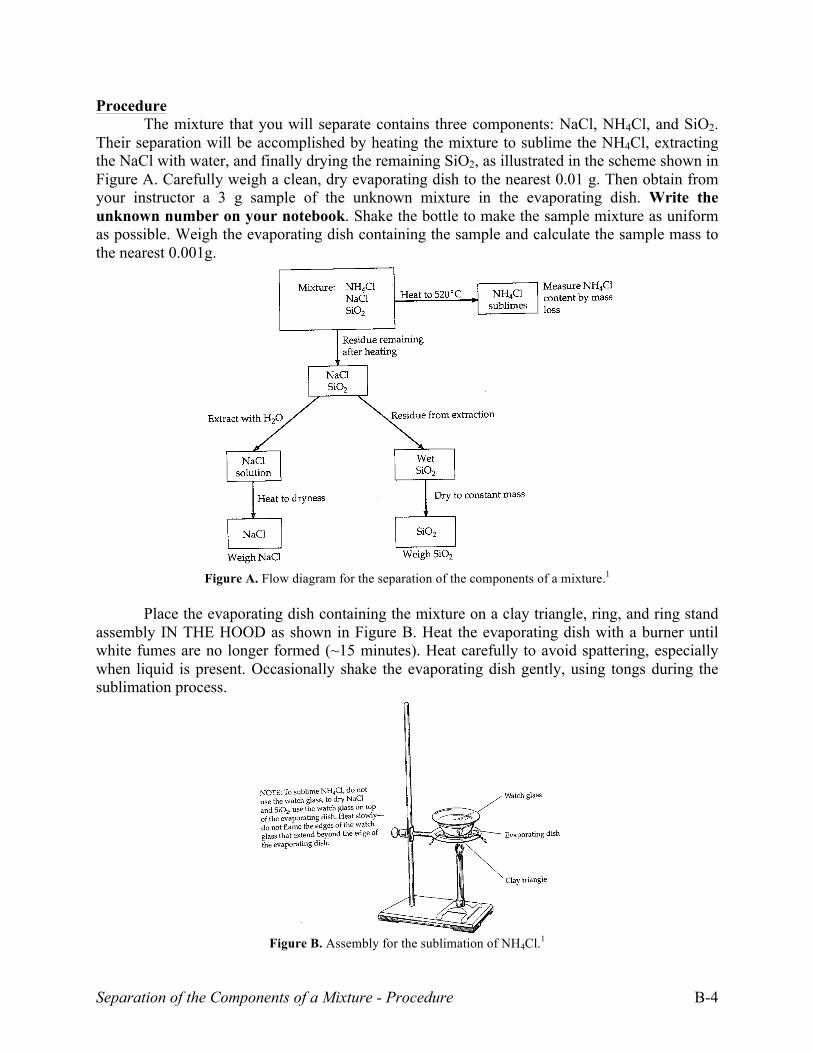
Procedure The mixture that you will separate contains three components: NaCl, NH4Cl, and SiO2. Their separation will be accomplished by heating the mixture to sublime the NH4Cl, extracting the NaCl with water, and finally drying the remaining SiO2, as illustrated in the scheme shown in Figure A. Carefully weigh a clean, dry evaporating dish to the nearest 0.01 g. Then obtain from your instructor a 3 g sample of the unknown mixture in the evaporating dish. Write the unknown number on your notebook. Shake the bottle to make the sample mixture as uniform as possible. Weigh the evaporating dish containing the sample and calculate the sample mass to the nearest 0.001g.
Figure A. Flow diagram for the separation of the components of a mixture.1
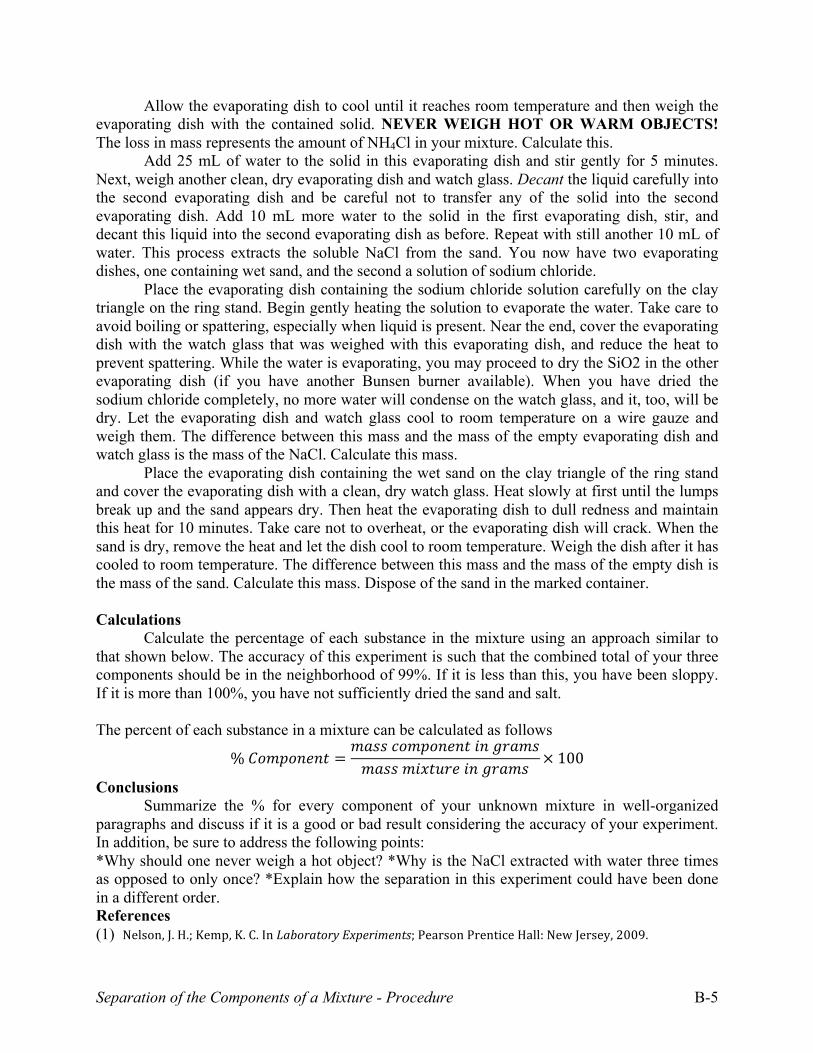
Place the evaporating dish containing the mixture on a clay triangle, ring, and ring stand
assembly IN THE HOOD as shown in Figure B. Heat the evaporating dish with a burner until white fumes are no longer formed (~15 minutes). Heat carefully to avoid spattering, especially when liquid is present. Occasionally shake the evaporating dish gently, using tongs during the sublimation process.
Figure B. Assembly for the sublimation of NH4Cl.1
Separation of the Components of a Mixture - Procedure B-5
Allow the evaporating dish to cool until it reaches room temperature and then weigh the evaporating dish with the contained solid. NEVER WEIGH HOT OR WARM OBJECTS! The loss in mass represents the amount of NH4Cl in your mixture. Calculate this. Add 25 mL of water to the solid in this evaporating dish and stir gently for 5 minutes. Next, weigh another clean, dry evaporating dish and watch glass. Decant the liquid carefully into the second evaporating dish and be careful not to transfer any of the solid into the second evaporating dish. Add 10 mL more water to the solid in the first evaporating dish, stir, and decant this liquid into the second evaporating dish as before. Repeat with still another 10 mL of water. This process extracts the soluble NaCl from the sand. You now have two evaporating dishes, one containing wet sand, and the second a solution of sodium chloride. Place the evaporating dish containing the sodium chloride solution carefully on the clay triangle on the ring stand. Begin gently heating the solution to evaporate the water. Take care to avoid boiling or spattering, especially when liquid is present. Near the end, cover the evaporating dish with the watch glass that was weighed with this evaporating dish, and reduce the heat to prevent spattering. While the water is evaporating, you may proceed to dry the SiO2 in the other evaporating dish (if you have another Bunsen burner available). When you have dried the sodium chloride completely, no more water will condense on the watch glass, and it, too, will be dry. Let the evaporating dish and watch glass cool to room temperature on a wire gauze and weigh them. The difference between this mass and the mass of the empty evaporating dish and watch glass is the mass of the NaCl. Calculate this mass. Place the evaporating dish containing the wet sand on the clay triangle of the ring stand and cover the evaporating dish with a clean, dry watch glass. Heat slowly at first until the lumps break up and the sand appears dry. Then heat the evaporating dish to dull redness and maintain this heat for 10 minutes. Take care not to overheat, or the evaporating dish will crack. When the sand is dry, remove the heat and let the dish cool to room temperature. Weigh the dish after it has cooled to room temperature. The difference between this mass and the mass of the empty dish is the mass of the sand. Calculate this mass. Dispose of the sand in the marked container. Calculations Calculate the percentage of each substance in the mixture using an approach similar to that shown below. The accuracy of this experiment is such that the combined total of your three components should be in the neighborhood of 99%. If it is less than this, you have been sloppy. If it is more than 100%, you have not sufficiently dried the sand and salt. The percent of each substance in a mixture can be calculated as follows
%!!"#$"%&%' = !"##!!"#$"%&%'!!"!!"#$%!"##!!"#$%&'!!"!!"#!" ×!100
Conclusions Summarize the % for every component of your unknown mixture in well-organized paragraphs and discuss if it is a good or bad result considering the accuracy of your experiment. In addition, be sure to address the following points: *Why should one never weigh a hot object? *Why is the NaCl extracted with water three times as opposed to only once? *Explain how the separation in this experiment could have been done in a different order. References (1) Nelson,(J.(H.;(Kemp,(K.(C.(In(Laboratory(Experiments;(Pearson(Prentice(Hall:(New(Jersey,(2009.(