Embed Size (px)
Citation preview
English
Rev. 1.0.0 / 2013-01-08
Installation
Video Management System
SeMSy® III Interface Server

SeMSy® III Interface Server
www.dallmeier.com 2
Information about copyright, trademarks, design patents
© 2013 Dallmeier electronic
The reproduction, distribution and utilization of this document as well as the communication of its contents to others without express authorization is prohibited. Offenders will be held liable for the payment of damages. All rights reserved in the event of the grant of a patent, utility model or design.
We reserve the right to make technical modifications.
The manufacturer accepts no liability for damage to property or pecuniary damages arising due to minor defects of the product or documentation, e.g. print or spelling errors, and for those not caused by intention or gross negligence of the manufacturer.
Dallmeier electronic GmbH & Co.KGCranachweg 193051 RegensburgGermany
All trademarks identified by ® are registeres trademarks of Dallmeier electronic.
All trademarks identified by *) are trademarks of the following owners:Intel and Core2Duo of Intel Corporation headquartered in Santa Clara, Californien, USAMicrosoft and Windows of Microsoft Corporation headquartered in Redmond, Washington, USA
Third-party trademarks are named for information purposes only.Dallmeier electronic respects the intellectual property of third parties and always attempts to ensure the complete identification of thirdparty trademarks and indication of the respective holder of rights. In case that protected rights are not indicated separately, this circumstance is no reason to assume that the respective trademark is unprotected.

SeMSy® III Interface Server
www.dallmeier.com 3
Table of Contents
1 Introduction ...................................................................................................41.1 Validity .............................................................................................................41.2 Documents ......................................................................................................41.3 Conventions ....................................................................................................4
2 System Requirements ..................................................................................5
3 Installation .....................................................................................................63.1 Server Installation ...........................................................................................63.2 Preparation Interface Clients ..........................................................................93.3 Installation Interface Clients ..........................................................................123.3.1 MySQL Connector ........................................................................................123.3.2 Interface Clients ............................................................................................143.3.3 Update Licence File ......................................................................................163.3.4 Adaptation of the Installation Path ................................................................163.3.5 Additional Installations Angel Eye-Client.......................................................17
4 First Start .....................................................................................................19

SeMSy® III Interface Server
www.dallmeier.com 4
1 Introduction
1.1 ValidityThis document applies to the software SeMSy® III Interface Server. The descriptions in this document are based on the software versions:
• Microsoft*) Windows*) 7• SeMSy® III Interface Server Installer
Figures in this document may differ from the actual product.
1.2 DocumentsInstallation (this document)The document Installation contains detailed descriptions of the installation and commis-sioning of the software. General information on the appropriate use is also provided.The target audience of this document is trained and authorized professionals (installers).
ConfigurationThe document Configuration contains descriptions on how to configure and operate the software. The target audience of this document is trained and authorized professionals (installers).
1.3 ConventionsThis following warning word and symbol indicates potential sources of danger.
NOTICE
NOTICE indicates practices for preventing property damage, incorrect con-figurations or faulty operations.
Various character formats are used to increase the clearness of the document:
Instruction are indicated with an arrow ().
Expressions in bold/italics generally indicate a control element on the user interface (but-tons, menu entries).
Paragraphs in italics provide information on basic principles, special features and efficient procedure as well as general recommendations.

SeMSy® III Interface Server
www.dallmeier.com 5
2 System Requirements
For the installation of the SeMSy® III Interface Server must meet the following require-ments:
Operating system Microsoft Windows XP SP 3/ Windows 7, each 32 bit versions
Processor (CPU) Intel*) Core*)2Quad 2,66 GHz
Random access memory (RAM) DDR3-RAM 4 GB
Graphics card VGA compatible
Resolution 1600 x 1200 or 1920 x 1080
Ethernet 100 Mbit/s
Space 200 MB
Miscellaneous SeMSy® III Setup Server

SeMSy® III Interface Server
www.dallmeier.com 6
3 Installation
3.1 Server InstallationThe SeMSy® III Installer setup will install all required components on the system.
Before starting note• that administrator rights are required.• that a SeMSy® III Setup Server must be available and accessible over the network.
NOTICE
Data loss!
An update to an existing installation is not possible.
When installing existing tables are cleared and the content is new!
Proceed as follows to install a SeMSy® III Interface Server:
Close all running applications. Start the required file in the folder Interface_Server_Installer
• 20120514_183828_trunk_esi_InfoGenesis.exe (InfoGenesis Installer)• 20120307_101635_trunk_esi_Micros.exe (Micros Installer)• 20110707_092524_trunk_esi_AngelEye.exe (Angel Eye Installer)
The welcome dialogue of the installer is displayed.
Fig. 3-1
Confirm with Next.

SeMSy® III Interface Server
www.dallmeier.com 7
The configuration name dialogue is displayed.
Fig. 3-2 Example selection
Select the required configuration type:• ig for Info Genesis• mi for Micros• ae for Angel Eye
NOTE
Faulty installation!
The type of the configuration must be identical to the previously used installer!
Confirm with Next.
The components dialogue is displayed.
Fig. 3-3
Select the required options.

SeMSy® III Interface Server
www.dallmeier.com 8
• dbms: Server installation (MySQL data base); absolutely required for initial installation• tools: Installing the MySQL utilities (MySQLAdmin); absolutely required for initial in-
stallation• tables: Creating the database tables
Confirm with Next.
The Ready to Install information dialogue is displayed.
Fig. 3-4
Click the Install button.
The installation will be executed.
The final dialogue is displayed.
Fig. 3-5
Click the Finish button.

SeMSy® III Interface Server
www.dallmeier.com 9
3.2 Preparation Interface ClientsBefore installing the interface client, they must be entered in the MySQL database.
Open the MySQL Query Browser.
Fig. 3-6
Connect to your SeMSy® database. Enter the connection data. Select semsy as Default schema (Name of the central SeMSy® III database). Confirm with OK.
The MySQL Browser is displayed.
Fig. 3-7
Select on the tab Schemata the entry semsy. Select the sub item interfaceclients. Double-click the entry interfaceclients.

SeMSy® III Interface Server
www.dallmeier.com 10
In the SQL query area the following is displayed.
Button QueryFig. 3-8
Click the Query button to start the database query.
After the database query the entrys in the table interfaceclients are displayed.
Fig. 3-9
Conform now the IP interface of the installed server type (in this case see Fig. 3-2 ig for infogenesis).

SeMSy® III Interface Server
www.dallmeier.com 11
Fig. 3-10
Then delete the remaining entries of the unused interface clients from the database.
The installation of the SeMSy® III Interface Server is complete.

SeMSy® III Interface Server
www.dallmeier.com 12
3.3 Installation Interface ClientsTo install the interface client, proceed as follows:
Before starting note,• that administrator rights are required.• that a SeMSy® III Setup Server must be available and accessible over the network.• that a suitable interface server installation must be present (as described above).
3.3.1 MySQL ConnectorThe application of the “SQL Connector” must be installed before installing the interface clients.
Close all running applications. Start the mysql.data.msi file.
The Welcome dialogue of the installer is displayed.
Fig. 3-11
Confirm with Next.

SeMSy® III Interface Server
www.dallmeier.com 13
The Choose Setup Type dialogue is displayed.
Fig. 3-12
Select Typical.
The confirmation for the installation is displayed.
Fig. 3-13
Click the Install button.
The installation of the MySQL Connectors is executed.

SeMSy® III Interface Server
www.dallmeier.com 14
The final dialogue is displayed.
Fig. 3-14
Deactivate the Register MySQL Connector Net 6.1.3 with Sun checkbox. Click the Finish button to complete the installation.
3.3.2 Interface ClientsAfter the successful installation of the MySQL Connectors the actual interface clients can be installed.
Start the InterfaceClients Setup.exe file.
The dialogue for selecting the installation language is displayed. Select the required language. Confirm with the OK button.
The welcome dialogue is displayed.
Fig. 3-15
Confirm with the Next button.

SeMSy® III Interface Server
www.dallmeier.com 15
The dialogue for selecting the installation directory is displayed.
Fig. 3-16
Select the required file.
Default path 64 bit systems: C:\Program Files (x86)\Dallmeier\SeMSy III\InterfaceClientsDefault path 32 bit systems: C:\Program Files\Dallmeier\SeMSy III\InterfaceClients
Confirm with Next.
The confirmation for the installation is displayed.
Fig. 3-17
Click the Install button.
The installation is executed.

SeMSy® III Interface Server
www.dallmeier.com 16
The final dialogue is displayed.
Fig. 3-18
Click the Finish button to complete the installation.
3.3.3 Update Licence FileIn order to use the new features in SeMSy® III the activation of the Interfaces module is required.
This can be done in two different ways:• By entering a code in the login dialogue (see documentation “Operation – SeMSy® III
Workstation Software”).• By entering the semsy3licence.lic file and exchange of the same in the di-
rectory C:\Program Files (x86)\Dallmeier\SeMSy III\opc (64 bit system) or C:\Program Files\Dallmeier\SeMSy III\opc (32 bit system).
The provision of the code or new “semsy3licence.lic” file is provided by Dallmeier.
3.3.4 Adaptation of the Installation PathThe client interface is a single executable file. Therefore, a conformitation of the directory path in SeMSy® III is required.
In order to do this proceed as follows:
Open the interfaces.xml file with a text editor.
The file is located in• C:\Program Files (x86)\Dallmeier\SeMSy III\opc\GUI\modules (64 bit systems)• C:\Program Files\Dallmeier\SeMSy III\opc\GUI\modules (32 bit systems)

SeMSy® III Interface Server
www.dallmeier.com 17
Fig. 3-19
Edit the entry in the processpath line.
64 bit systems: C:\Program Files (x86)\Dallmeier\SeMSy III\InterfaceClients\InterfaceClients.exe32 bit systems: C:\Program Files\Dallmeier\SeMSy III\InterfaceClients\InterfaceClients.exe
3.3.5 Additional Installations Angel Eye-ClientFor the Angel eye client additional components are required:• Crystal Reports Runtime for Visual Studio 2008 (V10.5.0.0 and higher)• Adobe Reader (V10.0 and higher)
Installation Crystal Reports Runtime64 bit systems:
Start the CRRedist2008_x64.msi file.32 bit systems
Start the CRRedist2008_x86.msi file.
The installation starts automatically and there are no further settings required.
Wait until the installation window has closed.
The installation is finished automatically.
Installation Adobe Reader Start the Adobe Reader10.0_en_US.msi file.

SeMSy® III Interface Server
www.dallmeier.com 18
The installations dialogue is displayed.
Fig. 3-20
The installation directory can not be changed.
Click the Install button.
The installation is executed.
The final dialogue is displayed.
Fig. 3-21
Click the Finish button to complete the installation.

SeMSy® III Interface Server
www.dallmeier.com 19
4 First Start
After the system restarts, the SeMSy® III Interface Server can be configured with the SeMSy Config Tool.
Start the SeMSy Config Tool.
The login dialogue is displayed.
Click the More>> button.
The advanced login dialogue is displayed.
Enter the User Name. Enter the Password. Enter the IP adress of the database (Database Host Name). Enter the Database Name. Enter the port number (Port No.) if required. Activate the Log In for Interface only checkbox.
Fig. 4-1
Click the LogIn button.
SeMSy® III Interface Server
www.dallmeier.com 20
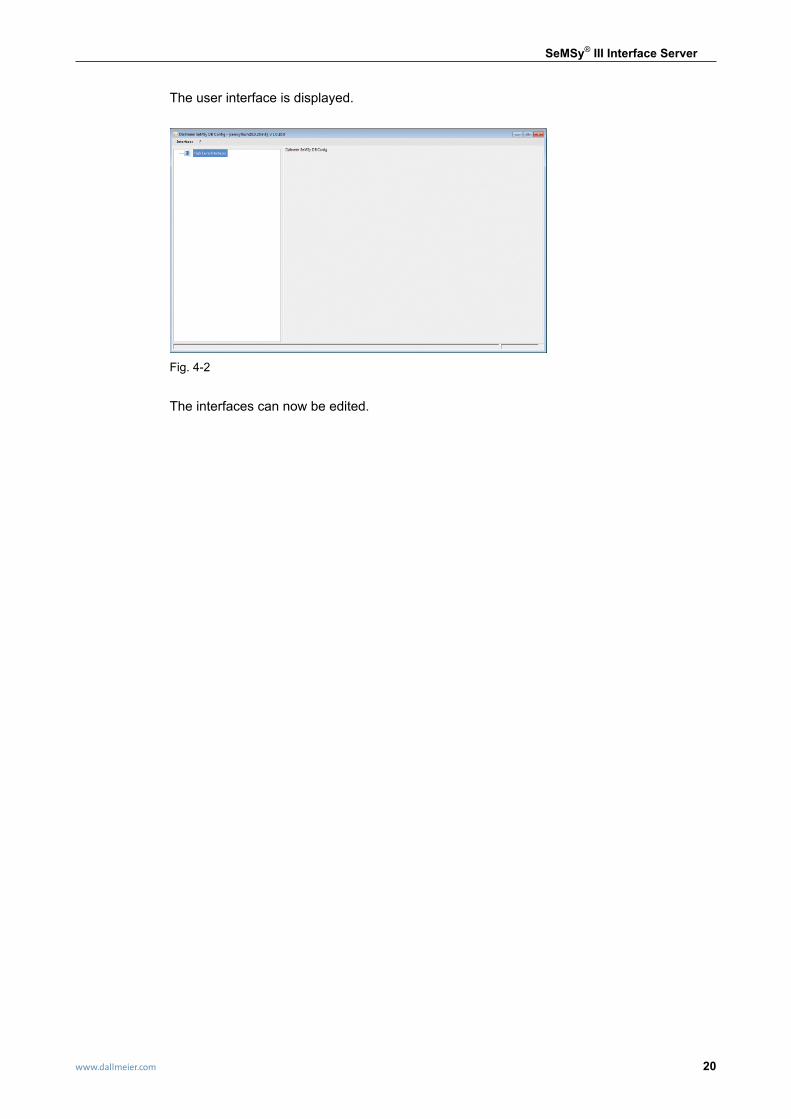
The user interface is displayed.
Fig. 4-2
The interfaces can now be edited.