Embed Size (px)
Citation preview

SEER*Abs v2.18
SEER*Abs Installation Guide
September 2021

ii
Table of Contents
Introduction ................................................................................................................................ 1
Installation Workflow .................................................................................................................. 2
Creating the initial Admin Installation of SEER*Abs ................................................................... 2
Customizing the Admin SEER*Abs Installation .......................................................................... 3
Creating a Custom Installer ........................................................................................................ 5
Creating an Abstractor’s Initial Installation .................................................................................. 6
Updating SEER*Abs when a New Version is Released .............................................................. 7
Updating the Admin Installation .................................................................................................. 7
Merging the Default and the Registry Configurations ................................................................. 8
Updating an Abstractor’s Installation .........................................................................................10
Appendix A – Tips on Merging Configuration Files ....................................................................11

1
Introduction
The SEER Abstracting Tool (SEER*Abs) is a highly configurable data collection tool for cancer
registrars. The software is distributed with sample record layouts and scripts (including a data
entry form for NAACCR records). The NAACCR layout can be used as distributed, however, it is
expected that most registries will customize default layouts and scripts.
SEER*Abs is designed to be used as an abstracting tool for a single abstractor. The typical
installation is a separate instance per abstractor. Multiple accounts can be created in a single
instance, however, two users cannot login to the same instance at the same time. Each instance of
SEER*Abs has a local database that is not shared by any other instance or software.
The SEER*Abs Installer must be used to install the initial deployment of SEER*Abs, to update the
SEER*Abs software when SEER releases new versions, and to deploy configuration changes
made by the registry’s IT staff. The different types of installations are described below.
• Admin Installations
o An instance of SEER*Abs used by registry IT staff for system maintenance. This
instance is used for the development of the registry’s configuration; it is never used
for data collection.
o To create the initial Admin Installation:
▪ Perform a Full Installation from the distribution version. The default
configuration settings will be set initially.
▪ Configure the layouts and scripts based on registry requirements.
o To update admin installations when new versions of SEER*Abs are released:
▪ Use the SEER*Abs Installer to incorporate changes to the SEER*Abs
application. Updates to the application would include new system features,
revisions to SEER edits, modifications to the CSv2 library, and bug fixes.
▪ Review corrections and changes made to the default configuration. If a
correction was made to a default layout or script, you may need to make
the same change in your registry’s configuration.
• Abstractor Installations
o An instance of SEER*Abs used by an abstractor. These instances are created by
a custom installation program made from the Admin Installation.
o If a new version of SEER*Abs is released by the SEER Program, the Admin
Installation must be updated before an abstractor installation can be updated.
Note that as of version 2.14, the application is distributed with its own embedded Java Runtime
Environment (JRE) and it is not a requirement to have Java installed on the computer anymore.
2
Installation Workflow
SEER*Abs can be used out-of-the-box to collect NAACCR Abstract data; it can be used with
minimal changes such as the addition or deletion of fields; or registry IT staff can implement a
heavily customized version. Changes to the configuration are made in the Admin Installation.
Those changes are distributed to the abstracting staff via a custom installation program.
The diagram below shows the workflow for installing SEER*Abs for the first time; and the workflow
for distributing upgrade to the SEER*Abs software and/or the registry’s configuration.
Creating the initial Admin Installation of SEER*Abs
SEER*Abs is shipped with a default configuration that must be updated to fit the needs of the
registry. The recommended process is to install SEER*Abs on the administrator’s workstation,
customize it on that machine, and then use the SEER*Abs installer to deploy the customized
version on abstractors’ laptops.
Upgrade Admin
Installation
using Default Installer
Manually apply Default Configuration
Changes to Registry Configuration
Create Customized
Installer
using Admin Installation
Upgrade Abstractor
Installation
using Customized Installer
Upgrade
Create Admin
Installation
using Default Installer
Customize Admin
Installation
Create a Custom Installer
Execute the Custom
Installer on the Abstractors’
Computers
First time installation

3
The admin installation creates a version of SEER*Abs that includes the installer sub-folder. The
installer sub-folder will become the registry’s version of the installer.
To install the admin version of SEER*Abs:
1. Go to the SEER website at http://seer.cancer.gov/seerabs
2. Click on the Download SEER*Abs link and follow the instruction online.
a. Extract the zip file into an empty folder (for example C:\seerabs).
b. This folder will become your registry’s distribution version. You should consider
employing version control software to protect changes made by registry staff.
c. An install-x.x folder will be created (x.x indicates the version). The install-x.x folder
will contain a lib folder and the files shown below.
3. Double-click seerabs-ip.exe in the install-x-x folder.
4. Select the Full Installation option and click Next.
5. The installer will auto-detect that this installation does not include a custom configuration
or database. Review the options and click Start.
6. Once the installation is complete, click Finish to close the installer.
The application should start automatically, if it doesn’t, double-click the seerabs.exe file in the
main SEER*Abs folder (C:\seerabs in the example above). You will be prompted to create an
Admin password. Please review the Getting Started section of the System Administration
Reference for instructions.
A default configuration and empty database will be created when you run SEER*Abs for the first
time. Configure the screen layouts, export scripts, synchronization scripts, and other components
of SEER*Abs for your registry.
Once the installation is completed, you can delete the.install-x.x sub-folder. Or you can keep it if
you wish; it contains the logs of the installation.
Customizing the Admin SEER*Abs Installation
The default configuration can be used as-is to collect data, but most registries create a custom
version of SEER*Abs. The extent of customization varies from registry to registry. Full
instructions for customizing the software are provided in the SEER*Abs: System Administration
Reference. The registry’s changes to record layouts and scripts are made in configuration files.
In addition, two databases are typically loaded in the Admin Installation so that they may be
deployed in the first installation distributed to abstractors.

4
• The reference database is a read-only database containing the pick lists (lookups),
physician list, and facility list. It may also contain patient data from the registry’s main
database. Registry configuration settings determine the amount and type of data that are
included in reference data. These data may include consolidated patient data from the
registry database, pathology records, or other types of records.
• The main database is a read/write database. In the initial installation, it should only
include user account information. Records created within SEER*Abs and Abstract Facility
Leads (AFL) are also stored in the main database. The initial installation should not
include AFLs because the same list of AFLs should not be distributed to more than one
abstractor; that could result in two abstractors abstracting the same case. The initial
installation should not include abstracts or other types of records created in SEER*Abs (if
you create test records in the Admin Installation, be careful not to distribute those records
to abstractors).
The folders listed below are deployed in a Full Installation:
• Configuration
• Reference Database
• Main Database
When the installer is used to Update an existing instance of SEER*Abs, the folders listed below
are copied if they exist in the installer:
• Configuration
• Reference Database
The main database is not copied when the installer is used in Update mode. The abstractor’s
main database contains the Abstract records that they created. It would be dangerous to over-
write their main database.
To customize the configuration of the admin installation:
1. Start SEER*Abs.
2. Login using the admin user account. You will be prompted to create the admin password.
3. Select Show > Configuration to access the Configuration Manager.
4. Follow the instructions displayed in the configuration pages and provided in the System
Administration Reference to do the following, as needed.
a. Define system properties in the main configuration.
b. Add and modify layouts for records, users, and other user interface components.
c. Add and modify scripts to load lookups, reference data, and to perform other tasks.
To create a reference database that will be deployed in the abstractor installations:
1. Start SEER*Abs.
2. Login using the admin user account.
3. Select Show > Synchronization to access the Synchronization page.

5
4. Select the appropriate import option in the Import Data section. The main configuration
determines the type of options that are available.
5. Select the types of data that you wish to include in the initial installation.
a. The options may include: Lookups, Physicians, Facilities, AFLs, consolidated data
(patient sets) and records from the main registry database.
b. Do not select AFLs.
6. Complete the import process. This may involve selecting data files, logging into the
registry database or selecting a Web Services server, depending on your registry’s
configuration settings.
7. Select Show > Search. Verify that all reference data were loaded correctly.
To create user accounts to deploy in the abstractor installations:
1. Start SEER*Abs.
2. Login using the admin user account.
3. Select Show > Users.
4. Click Add User and create a new account for each abstractor. Define an initial password
for each user. Provide this password to the abstractors. This password will only work one
time. They will be prompted to change the password the first time that they login.
In the future, you may create user accounts in the Admin Installation if you are preparing an
installation for a new abstractor. User Accounts are only installed when the abstractor uses the
Full Installation option. User Account information is not modified when an abstractor updates
their instance of SEER*Abs.
Creating a Custom Installer
Once the admin installation has been fully customized, it can be used to generate an installer to
distribute the registry’s version of SEER*Abs to the abstractors.
To create a custom installer:
1. Select File > Create Installer for Distribution (Admin Only).
2. Select the appropriate option for Configuration:
a. If you are creating an installer to deploy your registry’s version of SEER*Abs,
check the Configuration option. Any changes that you made to layouts and
scripts will be included.
b. If you want to create an installer with the original default configuration, uncheck
this option.
3. Select the appropriate option for Database.
a. Check Database if you wish to deploy lookups, facility lists, physician lists, and
reference data via the installer. The main and reference databases will be
deployed by the installer when a Full Installation is performed. Only the reference
database will be deployed when the installer is used in Update mode.
6
b. Uncheck the Database option if you do not want to deploy the main or reference
databases via the installer. This option may be used if you are including patient
data and cannot securely transfer the installer to the abstracting staff. The data
can be loaded into the abstractor’s version of the software using the
Synchronization page.
4. Select the Lookups checkbox to include the lookups in the installer (this option is not
useful if the Database option is selected since the Reference Database already contains
the lookups.
5. You can also modify the default installer filename; note that a suffix (usually the two or
three letters Registry abbreviation) can be defined in the main configuration file
(registry.abbreviation), if that suffix is not blank, it will be automatically added to the
filename. This is useful to distinguish between a default installer provided by IMS, which
will never have a suffix, and an installer that has been customized by the Registry.
6. Click OK.
7. The installer zip file will be created in the output folder. Select Show > Output Folder to
open the output folder.
Once the custom installer has been created, the next step is to use it to create or update the
abstractor installations on their laptops.
Creating an Abstractor’s Initial Installation
The “abstractor” installation is an instance of the application that is used only for abstracting. It is
usually created on laptops, but this is not a requirement. If installed on a network location, it can
only be accessed by one abstractor at a time. It is recommended that a separate instance of
SEER*Abs is created for each abstractor.
To create an abstractor installation:
1. Extract the custom installer zip file in an empty folder (C:\seerabs for example).
2. An install sub-folder will be created. It will be called install-x.x where x.x indicates the
version of SEER*Abs.
3. Run the seerabs-ip.exe program in the install sub-folder.
4. Use the Full Installation option.
5. Click Next.
6. The installer will auto-detect whether a custom configuration and/or database is included.
If they are available, the options will be checked by default. Click Next.
7. Review the target folder and options. Click Start to install the software.
8. Click Finish to close the installer.
9. The application should start automatically, if it doesn’t, double-click the seerabs.exe file in
the main SEER*Abs folder (C:\seerabs in this example). Login to verify that the
application starts properly and that the correct version was installed (select Help > About
to view the version information).
10. Delete the “install-x.x” folder.

7
Updating SEER*Abs when a New Version is Released
If a new version of SEER*Abs is released, the Admin Installation must be updated. A new custom
installer must be created and used to deploy the new version to abstractors.
To update the Admin Installation, you will use the SEER*Abs installer distributed with the new
version of the software.
The following processes occur when the installer is executed in “Update” mode:
1. Perform Backup (if the installer option is selected)
2. Override library files (jar and DLL files), PDF manuals, and other application files.
3. Run the update scripts. These scripts implement required changes to the database and/or
configuration files. However, they do not alter the registry’s configuration or data.
4. Update the SEER edits, if a new version of the SEER edits is available.
5. Overwrite the Configuration folder (if the installer option is selected). Not recommended if
your registry uses a customized version of SEER*Abs.
6. Overwrite the reference database folder (if the installer option is selected).
7. Update the lookups (if the lookups option is selected).
8. Create a mirror configuration folder (if the installer option is selected).
The update scripts in step 3 are a set of processes that must be performed to update the
application from one version to the next. There is a set associated with each version of
SEER*Abs. The installer determines which sets need to be executed based on the version of the
current installation and the target version.
The first step to deploy a new version of SEER*Abs is to update the admin installation.
Updating the Admin Installation
To update the Admin Installation of SEER*Abs:
1. Go to the SEER website at http://seer.cancer.gov/seerabs
2. Click on the Download SEER*Abs link and follow the instruction online.
3. Unzip the file into the main folder containing the admin instance of SEER*Abs. This will
create an install-x.x folder (x.x indicating the latest version). If the folder already contains
an install-x.x folder for the same version, it must be entirely replaced; the safest way to do
this is to delete the entire folder before unzipping the new.
4. Double-click seerabs-ip.exe in the install folder for the most recent version.
5. Optionally click View Changes and review the changes for the current version.
6. Select Update Existing Copy of SEER*Abs. Click Next.
7. Set the General Options.
a. Create a backup of the configuration.
b. Create a backup of the main database.

8
c. It is not necessary to back up the reference database. This database contains the
physician lists, facility list, and other data that are available at the registry.
8. On the Advanced Options tab, check Create a Mirror Configuration. This creates a
folder containing the new default configuration released with SEER*Abs.
9. Click Next.
10. Review the options. To make a change, click Back. Otherwise, click Start.
11. Click Finish when the update is complete.
12. If no manual merging step is required, the application will start automatically.
The Admin Installation has now been updated to the latest version of the software, but the
configuration has not been updated. In fact if required changes were made to the default
configuration, starting the application now would result in an error in the Login dialog. That’s
because updating SEER*Abs requires a manual step.
The following example illustrates why it is necessary to manually update configuration files:
Assume that the default abstract layout contains a Groovy script for calculating the Age at
DX from Date of Birth and Date of Diagnosis. Registry staff modify the script to show a
message if the age is < 20. Later, a calculation error is found in the default version of the
script and the default version is corrected.
The installer cannot auto-update the registry’s version of the Groovy script. It cannot over-
write the script because the registry would lose the extra functionality that was added. The
registry IT must manually review the changes made to the default version of the script and
implement the same changes in the registry’s script. This is referred to as “merging” the
changes into the registry configuration. An alternate approach would be to take the default
version and re-implement the registry functionality, but that is typically the more time
consuming approach.
Merging the Default and the Registry Configurations
Most of the changes to the default configuration are optional, and when they are required, the
installer will attempt to apply them automatically. But there are some rare changes that are
required and cannot be applied automatically.
Every change made to the default configuration has an entry on the top of the configuration file
with the version that the change was made. This serves two purposes:
1. It can be used to know what changed from one version to another one: once a
configuration file is modified to include registry-specific changes, it will always appear
different than the default version. When comparing the two files, it can become difficult to
know which changes are the updates in the default configuration and which ones are the
registry-specific ones. But if the top of the file indicates there were no changes to the
default file for the version that was just updated, then all the changes are registry-specific
changes, and no merging is necessary.

9
2. The histories are programmatically parsed and made available on the SEER website as
well as within the application, under the Version History menu item. They can also be
reviewed by clicking View Changes in the installer.
To update/merge the changes from the default configuration into the registry configuration:
1. Verify that merging is required:
a. Go to the SEER website at http://seer.cancer.gov/seerabs and click on Default
Configuration Version History link. Alternatively, click View Changes in the
installer and select the tab with the Configuration changes.
b. Verify that the new version includes revisions to the default configuration. If not,
manual merging is not required and you may delete the mirror configuration if it
was created during the update step. If manual merging is required, proceed to
step 2.
2. The mirror configuration created during the update step should be used. This folder is
named conf-x.x where x.x is the latest version. The folder will contain all files from the
default configuration.
3. Compare and merge each file in the mirror folder with its counterpart in the conf folder if
they are different. The recommended steps are listed below. Appendix A includes other
Tips on Merging Configuration Files.
a. Use a file comparison tool to compare the files.
b. The beginning of the mirror file will include a change log. Review this list carefully
and determine whether these changes need to be made in your configuration file.
c. Move through the two files to review the changes made in the new default
configuration.
d. Manually edit your configuration file to make necessary changes.
e. Delete the mirror version of the file or hide it from the comparison tool so that you
will know which files you have processed.
f. Repeat these steps for each file in the mirror folder.
4. At this point, all file should have been processed and the mirror folder can be deleted. The
conf folder now contains an updated version of the registry’s configuration.
5. Run SEER*Abs to verify that it successfully starts and check a few of the changes that
were merged.
Changes to the default configuration are usually done in major releases, but not minor releases.
It is recommended that you manually merge all changes, including the optional changes. These
changes may include bug fixes and new features that may be useful for your registry later, even if
you are not using them now.
Once the manual merging step is done, the next step is to create a customized installer to update
the abstractor installations.
10
Updating an Abstractor’s Installation
To update the abstractor Installations:
1. Extract the custom installer zip file into the abstractor’s SEER*Abs folder (C:\seerabs for
example).
2. An install sub-folder will be created. It will be called install-x.x where x.x indicates the
version of SEER*Abs. If the folder already contains an install-x.x folder for the same
version, it must be entirely replaced. It is recommended that you delete the old installer
folder before unzipping the new.
3. Double-click the seerabs-ip.exe file in the installer folder.
4. Select Update Existing Copy of SEER*Abs.
5. Click Next.
6. Set the General Options.
a. By default, the configuration and main database will be backed up. It is strongly
recommended that you backup the main database because it contains records
created by the abstractor.
b. You must select Update Configuration if this installer includes changes to the
registry’s layouts or scripts.
c. You must select Update Reference Database if this installer includes new
lookups, facility lists, physician lists, or reference data.
d. You must select Update Lookups if this installer includes updated lookups without
a full Reference Database.
7. Do not apply any changes on the Advanced Options tab. These options are only used
when updating the Admin Installation.
8. Click Next.
9. Review the options. If you need to make a change, click the Back button.
10. Click Start.
11. Click Finish when the update is complete.
12. The application should start automatically, if it doesn’t, double-click the seerabs.exe file in
the main SEER*Abs folder (C:\seerabs in the example above). Login to verify that the
application starts properly and that the correct version was installed (select Help > About
to view the version information).
13. Delete the “install-x.x” folder.

11
Appendix A – Tips on Merging Configuration Files
There are many tools available to compare to text files. A very good one is “Beyond Compare”
(http://www.scootersoftware.com/) but it requires a license. IMS evaluated another tool called
“WinMerge” (http://winmerge.org/) that is free. The rest of this section explains how to use
WinMerge, but please keep in mind that any tool can be use to merge the configuration files and
that using WinMerge does not come with any advantages compare to the other tools available
(except that it is free of course).
First download and install the application from http://winmerge.org/; start the application. It will
look like this:
There are a few default options that are worth modifying, select “Options” from the “Edit” menu.
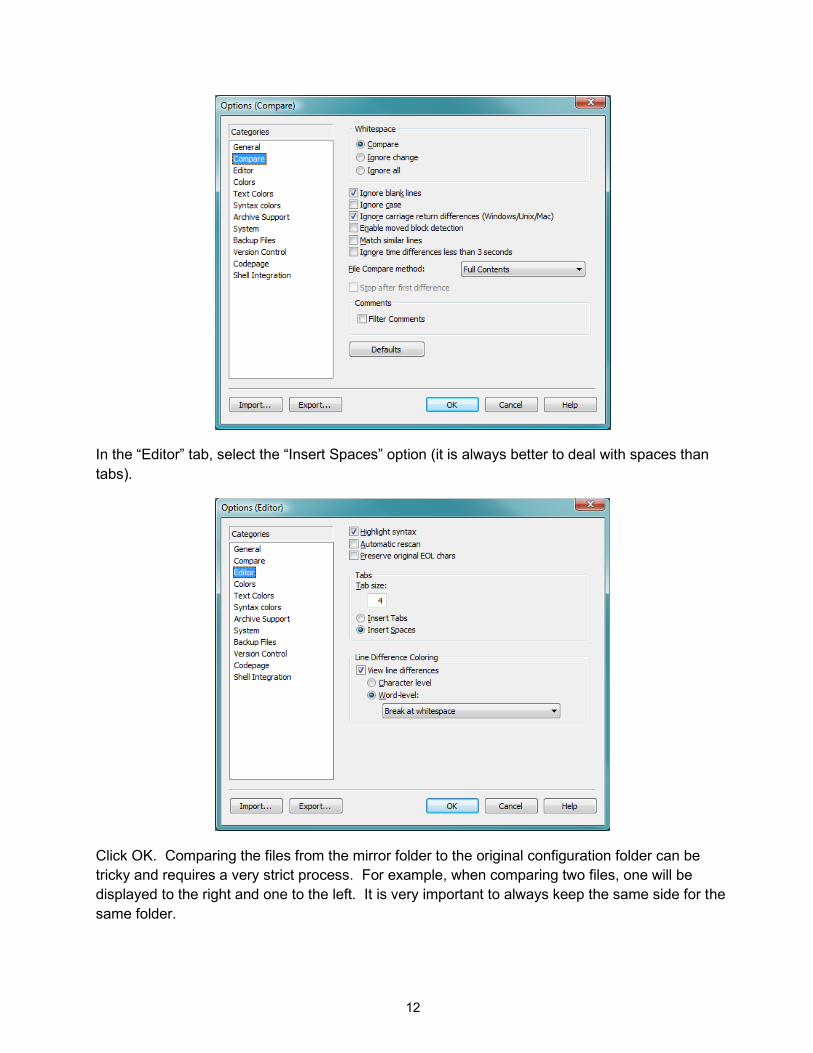
In the “Compare” tab, select “Ignore blank lines” and “Ignore carriage returns differences” (those
differences are not useful and can be very annoying).
12
In the “Editor” tab, select the “Insert Spaces” option (it is always better to deal with spaces than
tabs).
Click OK. Comparing the files from the mirror folder to the original configuration folder can be
tricky and requires a very strict process. For example, when comparing two files, one will be
displayed to the right and one to the left. It is very important to always keep the same side for the
same folder.

13
In this example, we will compare the mirror folder “E:\seerabs\conf-1-2\” to the original folder
“E:\seerabs\conf\”. We will always keep the mirror files on the left and the original file on the right;
that means the changes need to be applied to the file on the right.
Select the “Open files” option from the File menu item, select the mirror file for the Left box and
the original file for the Right box; when using the “Browse” button to select a file, always pay
attention to the current folder (do I want the mirror folder or do I want the original configuration
folder); WinMerge will open the last folder that was used to open a file, so it is very easy to invert
those directories, which would invert the Left and the Right file.
Each file in the mirror folder needs to be merged. There is no order in which the files need to
merged, but it is recommended to start with the “seerabs.properties” file since it is the most global
configuration file there is. After that it really does not matter which file is selected; it makes sense
to handle a single record type at once (so for example, one would merge the abstract layout file,
then the abstract extract script). The lookups file is also a very generic file and is a good
candidate to be merged among the first files. Once the two files are opened, the screen will look
like this:
14
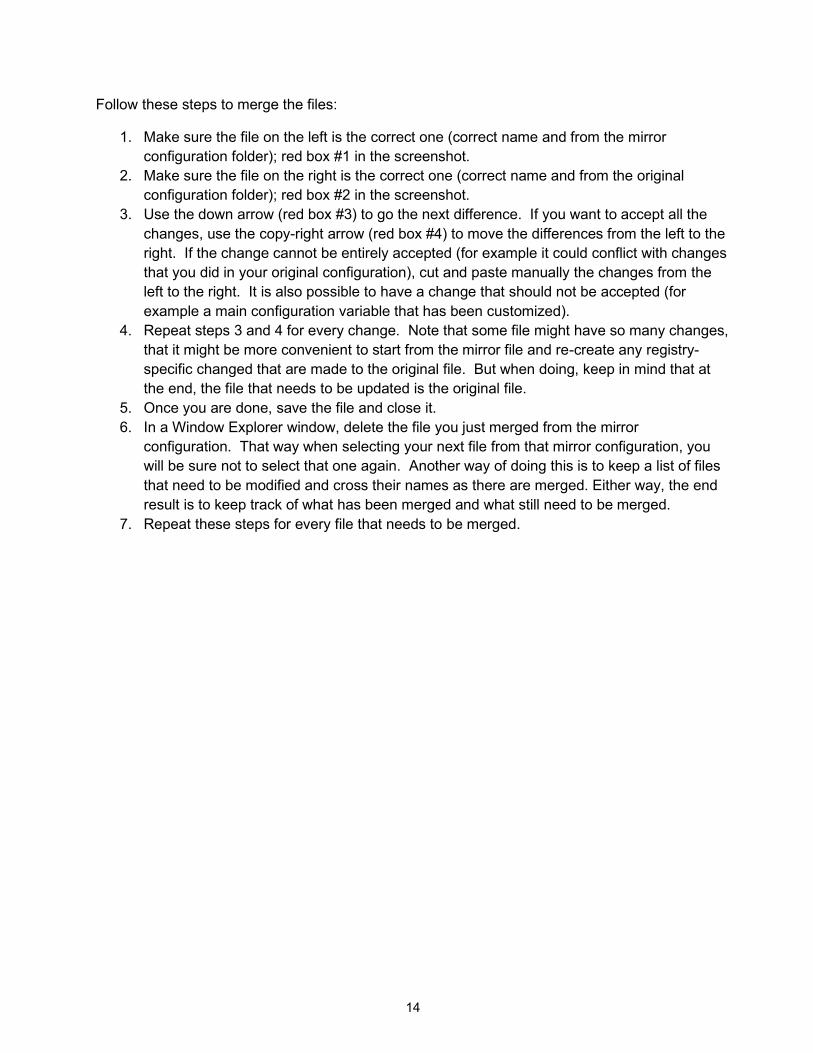
Follow these steps to merge the files:
1. Make sure the file on the left is the correct one (correct name and from the mirror
configuration folder); red box #1 in the screenshot.
2. Make sure the file on the right is the correct one (correct name and from the original
configuration folder); red box #2 in the screenshot.
3. Use the down arrow (red box #3) to go the next difference. If you want to accept all the
changes, use the copy-right arrow (red box #4) to move the differences from the left to the
right. If the change cannot be entirely accepted (for example it could conflict with changes
that you did in your original configuration), cut and paste manually the changes from the
left to the right. It is also possible to have a change that should not be accepted (for
example a main configuration variable that has been customized).
4. Repeat steps 3 and 4 for every change. Note that some file might have so many changes,
that it might be more convenient to start from the mirror file and re-create any registry-
specific changed that are made to the original file. But when doing, keep in mind that at
the end, the file that needs to be updated is the original file.
5. Once you are done, save the file and close it.
6. In a Window Explorer window, delete the file you just merged from the mirror
configuration. That way when selecting your next file from that mirror configuration, you
will be sure not to select that one again. Another way of doing this is to keep a list of files
that need to be modified and cross their names as there are merged. Either way, the end
result is to keep track of what has been merged and what still need to be merged.
7. Repeat these steps for every file that needs to be merged.