Embed Size (px)
Citation preview
User Manual
Model no. ZS5A
SEA-DOO® SEASCOOTER™ VS SUPERCHARGED
Daka Development Ltd.Tel: (852) 2756 3862Email: [email protected]: www.daka-designs.com
Europe Sales Office:
Daka Europe Limited Tel: +44 1628 478666Email: [email protected]
Daka Customer Service Center:
Tel: 1-800-361-2781Email: [email protected]
Daka Designs Limited ( Listed Company on the Singapore Stock Exchange )
Wholly Owned Subsidiaries:
For customer enquiries please contact:
www.daka-designs.com
© 2005 Daka Development Ltd. All rights reserved.
Design Registered • Patent Pending Printed in China
SEA-DOO® and BRP logo are trademarks of Bombardier Recreational Products Inc. or its affiliates, used under license to Daka Development Ltd.For more information on SEA-DOO® products visit www.seadoo.com
CAUTION:ELECTRICALLY OPERATED PRODUCT
Not recommended for children under 16 years of age. As with all electrical products, precautions should be observed during handling
and used to reduce the risk of electric shock.

Introduction
Parts diagram
WARNING
Getting started
Battery use
Care & Maintenance
Trouble Shooting
Technical Specifications
Contents Introduction
Thank you for having chosen the SEA-DOO®
SEASCOOTER™ VS Supercharged - the ultimate Dive Propulsion Vehicle (DPV).
Years of design and engineering have resulted in a personal water propeller that gives you power - twin speed for up to 3mph/4.8km/h for up to 90 minutes of use at a depth of up to 30m/100ft - but at the same time is compact and light.
There are many features incorporated in this sophisticated design, please take a little time to study this manual to learn about them all to get the most out of your SEASCOOTER™.
1
1
2
3
5
16
9
18
23

• Read the user's manual carefully.
• Never remove the grilles except for maintenance.
• Never stick body parts, clothing or other objects in the vicinity of the Propeller. Do not wear loose or flowing clothing or equipment that could be drawn into the Propeller.
• Particular care should be exercised when using the SEASCOOTER™ near anybody with long hair. Users with long hair should tie it up or wear a swimming cap when using the SEASCOOTER™.
• Always inspect the swimming area to ensure it is free of hazards or obstacles such as boats and swimmers before using the SEASCOOTER™.
• Always charge battery to its fullest before using the SEASCOOTER™. Ensure sufficient battery charge remains for return to shore or surface.
• Always wear a coast guard approved personal flotation device when using the SEASCOOTER™.
• Be aware of appropriate water levels, tidal changes, dangerous currents, weather changes and strong offshore winds. Always scout unfamiliar water.
• Do not use alcohol or mind-altering drugs prior to using this product.
2
1 Latch
2 Nose Cone
3 Inner Nose Cone
4 Vent Plug
5 Triggers
Handle6
Nozzle7
Propeller8
Protective Grilles9
Battery Housing10
Master Switch11
Battery Leads12
Battery13
Vent Hole14
Buoyancy Control Chamber15
Silicone Ring16
Pump17
18 Lubricant
3
Parts Diagram
111012
13
7
68
9
5
16 17 18
Fig.1
1
2 3
14
15
4
WARNING
Getting Started
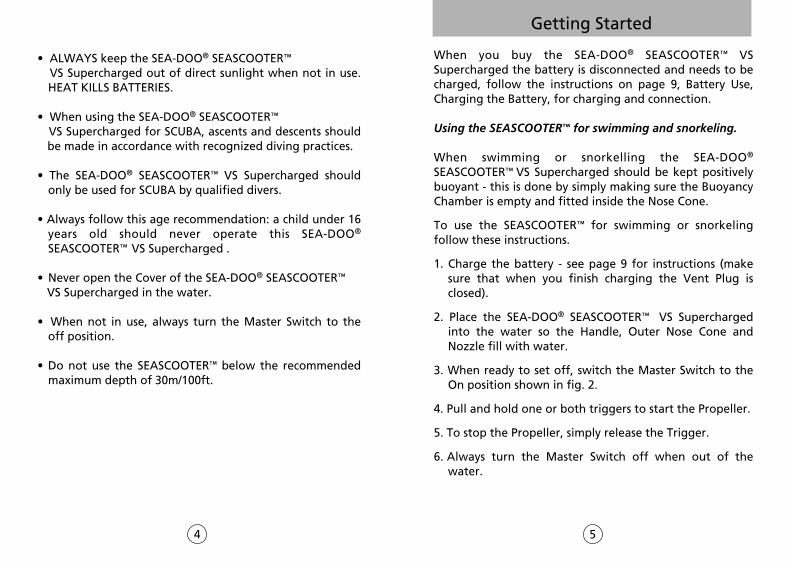
When you buy the SEA-DOO® SEASCOOTER™ VS Supercharged the battery is disconnected and needs to be charged, follow the instructions on page 9, Battery Use, Charging the Battery, for charging and connection.
Using the SEASCOOTER™ for swimming and snorkeling.
When swimming or snorkelling the SEA-DOO® SEASCOOTER™ VS Supercharged should be kept positively buoyant - this is done by simply making sure the Buoyancy Chamber is empty and fitted inside the Nose Cone.
To use the SEASCOOTER™ for swimming or snorkeling follow these instructions.
1. Charge the battery - see page 9 for instructions (make sure that when you finish charging the Vent Plug is closed).
2. Place the SEA-DOO® SEASCOOTER™ VS Supercharged into the water so the Handle, Outer Nose Cone and Nozzle fill with water.
3. When ready to set off, switch the Master Switch to the On position shown in fig. 2.
4. Pull and hold one or both triggers to start the Propeller.
5. To stop the Propeller, simply release the Trigger.
6. Always turn the Master Switch off when out of the water.
4 5
• ALWAYS keep the SEA-DOO® SEASCOOTER™
VS Supercharged out of direct sunlight when not in use. HEAT KILLS BATTERIES.
• When using the SEA-DOO® SEASCOOTER™ VS Supercharged for SCUBA, ascents and descents should
be made in accordance with recognized diving practices.
• The SEA-DOO® SEASCOOTER™ VS Supercharged should only be used for SCUBA by qualified divers.
• Always follow this age recommendation: a child under 16 years old should never operate this SEA-DOO® SEASCOOTER™ VS Supercharged .
• Never open the Cover of the SEA-DOO® SEASCOOTER™
VS Supercharged in the water.
• When not in use, always turn the Master Switch to the off position.
• Do not use the SEASCOOTER™ below the recommended maximum depth of 30m/100ft.

3. Open the Buoyancy Chamber and add a small amount of rocks or a lead weight (see fig. 5).
4. Replace the Buoyancy Chamber and the Nose Cone and latches and place the SEASCOOTER™ in the water. If the SEASCOOTER™ is neutrally buoyant will just float in the water.
Fig.2
Shown in "ON" positionRotate to turn "OFF"
6 7
Rotate 180o and remove to open
Fig.4Do not dive deeper than you would normally when snorkeling, to ensure you can get back to the surface safely.
Use of Variable Speed.
Your Seascooter features two speeds - for normal speed, pull the right trigger only. For the higher speed, pull both triggers together.
Using the SEA-DOO® SEASCOOTER™ VS Superchargedfor diving - adjusting the buoyancy.
Your SEASCOOTER™ can be used for diving up to 30m/100ft but will need to be adjusted for neutral buoyancy. The SEASCOOTER™ must never be adjusted for negative buoyancy to avoid it sinking if accidentally released.
To adjust for neutral buoyancy follow these instructions
1. Make sure the SEA-DOO® SEASCOOTER™ VS Supercharged master switch is in the Off position.
2. Remove the SEASCOOTER™ from the water, give a half turn to the Latches, remove them (see fig. 4) and remove the Buoyancy Control Chamber.
CAUTION
Fig.3
7. Proper posture when using the SEA-DOO®
SEASCOOTER™ VS Supercharged is important toachieve the maximum speed - see fig. 3 for the correct position of the SEA-DOO® SEASCOOTER™ VS Supercharged when using it.

Battery Use5. If the SEASCOOTER™ sinks, remove rocks until it is
neutrally buoyant. If the SEASCOOTER™ is still positively buoyant repeat
step 3, until it is neutrally buoyant.
8 9
Fig.5
CAUTIONIf the SEASCOOTER™ is later used for swimming or snorkeling be sure to remove the weight from the Buoyancy Chamber so the SEA-DOO® SEASCOOTER™ VS Supercharged has positive buoyancy.
CAUTION• The Battery Housing should always be ventilated
during charging to allow potentially explosive gasses to dissipate. Before removing/attaching any battery cables always allow two minutes for any gasses to dissipate.
• ALWAYS plug the charger jack into the charging socket first and then plug into the mains. When charging is complete, unplug the charger from the mains first and then from the charging socket.
• ALWAYS ensure the charger is DRY before plugging it into a live socket.
• NEVER place the battery in a sealed container when charging.
•Never charge battery near water.
• If in doubt of the state of the battery, recharge it until the indicator on the battery charger indicates a full charge.
• ALWAYS charge battery in a well-ventilated place where unit is out of reach of children.
• ALWAYS ensure the unit is dried thoroughly before opening the Nose Cone for charging or changing the battery.

10 11
Fig.6
Press here to release and pull to disconnect
Fig.7
Charging the battery
For battery charging follow these instructions.
1. Always ensure that the Master Switch is Off - see fig. 2.
2. Always ensure that the SEA-DOO® SEASCOOTER™
VS Supercharged is out of the water and placed in a dry area.
3. Give a half turn to the Latches and remove them from the Nose Cone as shown in fig. 4.
4. Remove the Outer Nose Cone and Buoyancy Control Chamber.
5. Open the Vent by unscrewing the Vent Plug.
6. Remove the Inner Nose Cone. To do this, first feed the silicone ring (provided with this manual) through the latch holes in the Inner Nose Cone and hook over the hooks on the Battery Housing (see fig. 6). Then screw the Pump Nozzle onto the Vent Hole and pump air into the Battery Chamber until the Inner Nose Cone pops off and then remove the silicone ring.
7. Allow two minutes for any gasses to dissipate.
8. Disconnect the battery cable from the housing cable (if not already disconnected - the cable will be disconnected when you buy your SEASCOOTER™) by pressing the locking feature, as shown in fig. 7.
9.Connect the battery cable to the charger cable.
10. Plug charger into mains, and turn on the supply. Do not replace the Nose Cone.
11. Charging will take 4 to 6 hours for a fully discharged battery. When the battery is charging the LED charger remains on, when the battery is charged the LED flashes.
12. Unplug the adapter from the mains.

Fig.8
Ensure sealing surface is clean
Ensure the seals are clean and lubricated
Seals
Close up viewof seals
Fig.9
Close up view
O Ring correctly fitted into groove and lubricated
Fig.10
12 13
13. Unplug the battery cable from the charger cable and reconnect to the housing cable.
14. Make sure the seals and sealing surfaces are clean and lubricated before replacing the Inner Nose Cone. See fig. 8.
15. Replace the Inner Nose Cone making sure the key is aligned correctly. See fig. 9.
16. Ensure the Vent O Ring is fitted correctly. See fig. 10.
17. Screw in the Vent Plug to seal the vent.
18. Replace the Buoyancy Control Chamber.
19. Replace the Outer Nose Cone making sure the key is aligned correctly and insert the Latches and lock the Nose Cone by giving them a half turn. See fig. 11.

Rotate 180o to close
Fig.11
Note: To charge a battery outside of the unit, simply connect to the charger , then plug the charging adapter into the mains. When the battery is charged, unplug the adapter first then the battery.
To replace a flat battery with a fully charged battery.
1. Follow the steps 1 to 6 on page 10, to open the SEASCOOTER™.
2. Unplug the battery at the socket by pressing the locking feature shown in fig. 7 on page 11.
3. Remove the flat battery.
4. Install and connect the charged battery in the correct position - the leads of the battery must be oriented as shown on the sticker on the battery, see fig. 12.
5. Follow steps 14 to 19 on page 12, to close the SEASCOOTER™.
Buying batteries
Additional standard or extended batteries can be purchased separately. Contact your dealer to purchase them.
14 15
Fig.12

Care And Maintenance
16 17
Battery Care
• The battery should be recharged as soon as possible after use.
• If the unit is not used for extended periods, the battery should be removed from the unit and charged overnight, every three months.
• Only use the charger supplied with the SEASCOOTER™.
• Never place the battery in a sealed container when charging.
• Never short circuit the battery or battery cable.
• Never place/store the battery near a radiator/fire, etc.
• To store the battery, remove it from the SEASCOOTER™ or separate it from the charger, insulate the battery terminals and keep in a place that is dry and cool.
• Ambient temperature for storage should be within the range -20oC to 40oC (-4oF to 104oF).
Care after using the SEASCOOTER™
• Always rinse the SEASCOOTER™ in fresh water and allow it to dry before storage.
• Whenever possible rinse the SEASCOOTER™ in fresh water immediately after use.
• To clean the SEASCOOTER™ do not use detergents, only use a damp cloth to wipe the unit clean.
• The Battery Housing interior should be kept dry at all times.
• If the Battery Housing interior ever gets wet, see page 22, Accidental Flooding for procedure.
• When storing the SEASCOOTER™ for extended periods of time, open the Vent Plug in the Inner Nose Cone.
• ALWAYS store your SEASCOOTER™ vertically when not in use to prevent deformation of the Propeller Nozzle.
Trouble Shooting
Fig.14
18 19
Fig.13
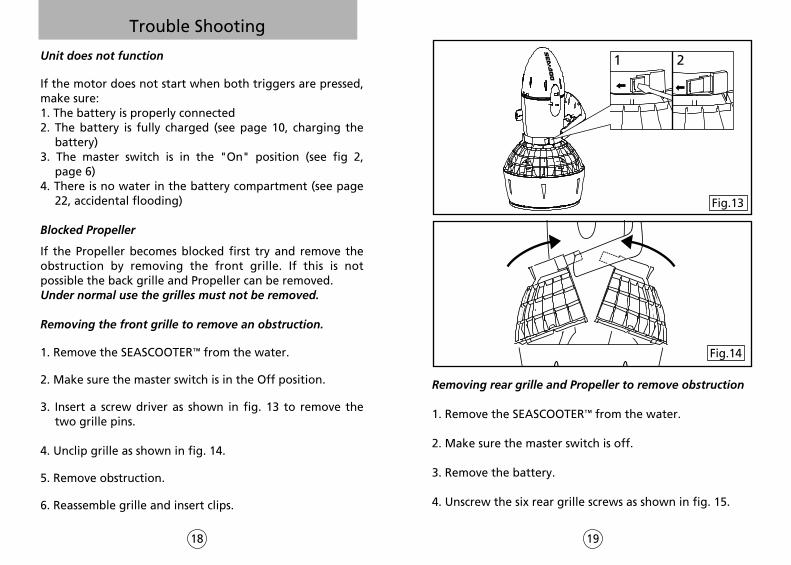
1 2Unit does not function
If the motor does not start when both triggers are pressed, make sure:1. The battery is properly connected2. The battery is fully charged (see page 10, charging the
battery) 3. The master switch is in the "On" position (see fig 2,
page 6)4. There is no water in the battery compartment (see page
22, accidental flooding)
Blocked Propeller
If the Propeller becomes blocked first try and remove the obstruction by removing the front grille. If this is not possible the back grille and Propeller can be removed.Under normal use the grilles must not be removed.
Removing the front grille to remove an obstruction.
1. Remove the SEASCOOTER™ from the water.
2. Make sure the master switch is in the Off position.
3. Insert a screw driver as shown in fig. 13 to remove the two grille pins.
4. Unclip grille as shown in fig. 14.
5. Remove obstruction.
6. Reassemble grille and insert clips.
Removing rear grille and Propeller to remove obstruction
1. Remove the SEASCOOTER™ from the water.
2. Make sure the master switch is off.
3. Remove the battery.
4. Unscrew the six rear grille screws as shown in fig. 15.

Fig.15
Fig.16
Nut
Washers
Drive pin
Propeller hub
Fig.18
20 21
Drive Pin In Position
Fig.17
5. Whilst holding the Propeller, use an M6 socket to remove the nut from the Propeller shaft (See fig. 16).
6. Slide the Propeller off the shaft, taking care not to loose the drive pin or washers.
7. Remove the blockage from the Propeller.
8. Replace the drive pin (if removed), see fig. 17, and Propeller. Turn the Propeller slowly until you locate the pin and push the Propeller fully on.
9. Replace the washer(s) and nut and tighten with the socket whilst holding the Propeller making sure it is securely fastened (See fig. 18).
10. Replace the grille
11. Replace the battery.
Sand or Grit on Seals
Sand or grit is the enemy of seals. Correct maintenance and care is essential. To remove sand or grit from the seals, rinse the seals in fresh water and apply fresh lubricant. If there is sand inside the Battery Housing, gently brush the sand from the unit taking care not to scratch the sealing surfaces.

22 23
Technical Specifications
Unit Dimensions 24 x 15.2 x 12.3” (612 x 385 x 312 mm)
Unit Weight 18 lbs (8.2 kg) (with rechargeable battery)
Battery Type 1 x rechargeable battery
Battery Life Approximately 1.5 hours
Depth rating 30m/100ft
Speed Up to 3.0 mph (4.8 km/h)
SEASCOOTER™ cuts out
To protect the electronic circuit of your SEASCOOTER™ from damage a safety mechanism has been built in that cuts the power if a wall or rock or other immovable object is hit. If this occurs simply wait for a short period to allow the SEASCOOTER™ to reset itself and resume use.
Accidental Flooding
Be sure to keep the seals sand and grit free to ensure they keep water out and to close the vent plug after accessing the battery chamber. However, should the seals not be clean or the vent plug left open and water enter the battery chamber, your SEASCOOTER will not be damaged as it is designed for protection against accidental flooding. If water enters the battery chamber the SEASCOOTER will automatically stop functioning. If this occurs:
1. Remove the unit from the water2. Open the battery chamber, remove the battery, and if
salt water has entered rinse it out with fresh water,3. Dry the battery chamber and battery thoroughly and
reassemble, ready for use.