Embed Size (px)
Citation preview
Science through LEGO Engineering Learning About Gears
Lesson 6 Exploring Gears
Suggested Time Lesson Overview Learning Objectives Teacher Background
One 30-minute session
Students will explore gears and gear ratios. Students will learn how to use gears properly, efficiently and effectively.
- Predicting directional motion of a string of gears. - Class discussion of different building methods. - Exploring gear setups, gear ratios, and directional changes. - Recording design and test results in Engineering Journal.
By the end of this lesson, students will be able to:
- Determine the correct way to set up gears. - Define gearing up and gearing down. - Know the advantages and disadvantages of gearing up or down. - Define engineering design as the process of creating solutions to
human problems through creativity and the application of math and science knowledge.
Introduction to Gears Gear Ratio: The gear ratio is the ratio of the number of teeth of the driver to the number of teeth of the follower. This ratio is also related to the difference between the diameters of the gears, i.e. the larger the gear the more teeth it has. Gearing Up: This method is used to speed up the motion of the follower gear. Gearing up will allow for more speed; however it also reduces the amount of torque or driving power. To do this, the driver gear should be larger than the follower gear. Gearing Down: This method is used to slow down the motion of the follower gear. Gearing down will allow for more torque or driving power, but it also reduces the speed. To do this, the driver gear should be smaller than the follower gear. Crown Gears: These are used when changing the rotation from one plane to another. Worm Gears:
Science through LEGO Engineering Learning About Gears
Lesson 6 Exploring Gears
2-5
Vocabulary
This gear system is used to transfer high torque. The system is also directionally constrained in that it can only be driven from the spur gear. Tooth-Rack Gears: This system is used to create linear motion. A spur gear is used to push or pull the rack gears along a surface. * info & technical terms* Engineering Design Engineers typically work together to solve the problems that face society. Engineering design is the process of creating solutions to human problems through creativity and the application of math and science knowledge. The basic steps within the design process include:
i. Identifying a problem – Observing a problem and seeing a need for a solution.
ii. Researching possible solutions – Coming up with ideas to address the problem.
iii. Picking the best solution – Determining which idea best addresses the problem. This decision may involve monetary, practicality, material, and property concerns.
iv. Building a prototype – Build a working model of the chosen design
v. Testing the prototype – Be sure the working model solves the problem and holds up to any important material property tests.
vi. Repeating any steps needed to improve the design – The engineering design process is not always a step-by-step process, as engineers often repeat steps or go back and forth between the other five steps.
Engineering – the process of creating solutions to human problems through creativity and the application of math and science knowledge. Gear Ratio – the ratio of the number of teeth of the driver to the number of teeth of the follower. Driver Gear – the first gear. It “drives” the other gears in the series. Follower Gear – the last gear. If “follows” the other gears in the series. Gearing Up – a large gear to a small gear. This results in the follower rotating much faster than the driver.
Science through LEGO Engineering Learning About Gears
Lesson 6 Exploring Gears
3-5
Materials
Gearing Down – a small gear to a big gear. This results in the follower rotating much slower than the driver. Acceleration – the speed increases over time. Speeding up. Deceleration – the speed decreases over time. Slowing down. Speed – the distance traveled over a certain period of time. V = ∆d/∆t Idler Gear – this gear is used to change the direction of the following gear. It is not used to change the speed of the follower. Crown Gear – this gear is used to change the direction of motion from one plane to another, or to go around a corner. Worm Gear – this gear is used to fix the driver direction of the gear system. Only the spur gear can be used to drive the system. Tooth-Rack Gear – this system changes the rotational motion of the spur gear into linear motion along a plane. *more terms related to activity For each student
- Engineer’s Journal Part 1 For each student pair
- WeDo kit For the class
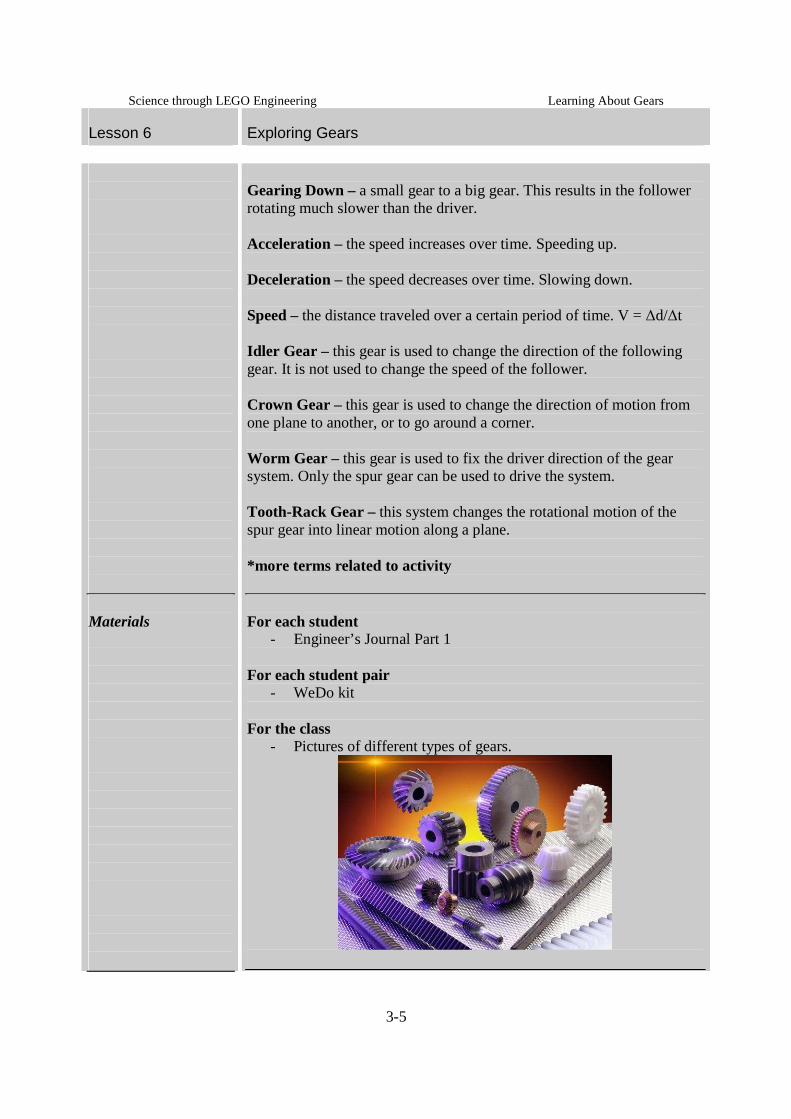
- Pictures of different types of gears.
Science through LEGO Engineering Learning About Gears
Lesson 6 Exploring Gears
4-5
Preparation Instructions for Teachers
- Distribute Engineering Journals
Exploring Gears
1. Begin with a class discussion on how gears are used. They are found in cars, elevators and escalators. Gears are used to transfer energy in the form of motion from one place to another. Explain that gears can speed up a process or slow it down.
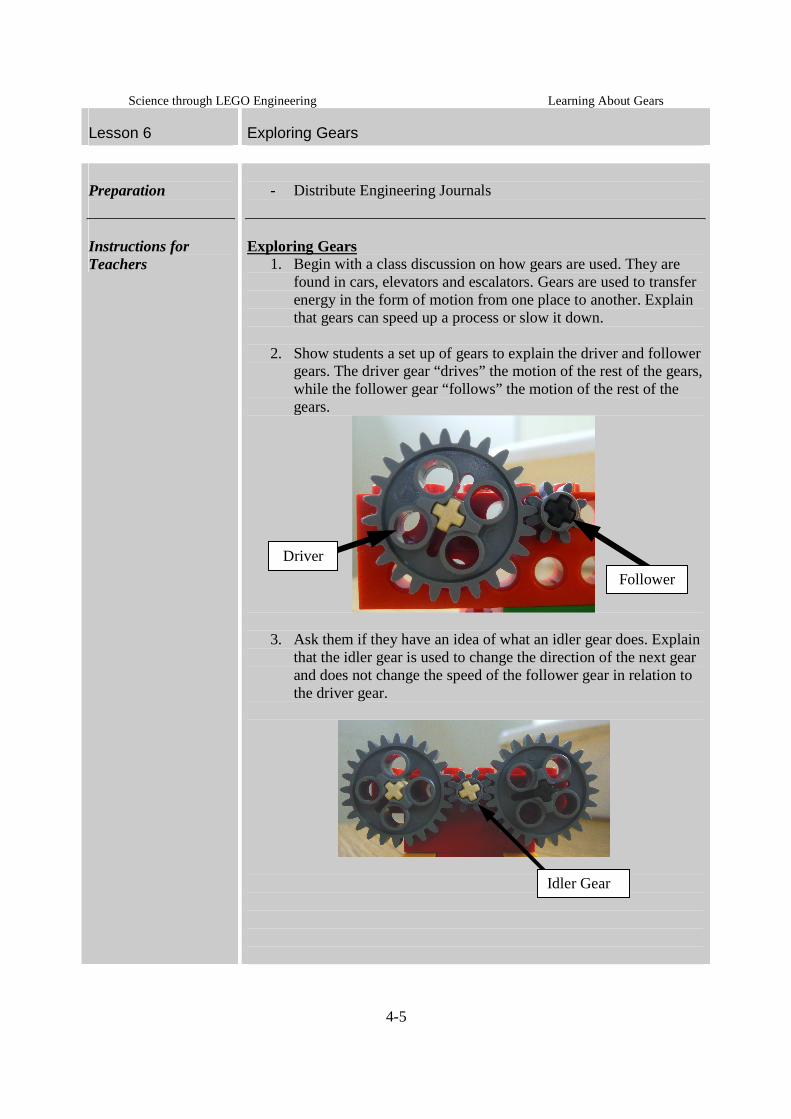
2. Show students a set up of gears to explain the driver and follower
gears. The driver gear “drives” the motion of the rest of the gears, while the follower gear “follows” the motion of the rest of the gears.
3. Ask them if they have an idea of what an idler gear does. Explain that the idler gear is used to change the direction of the next gear and does not change the speed of the follower gear in relation to the driver gear.
Driver
Follower
Idler Gear
Science through LEGO Engineering Learning About Gears
Lesson 6 Exploring Gears
5-5
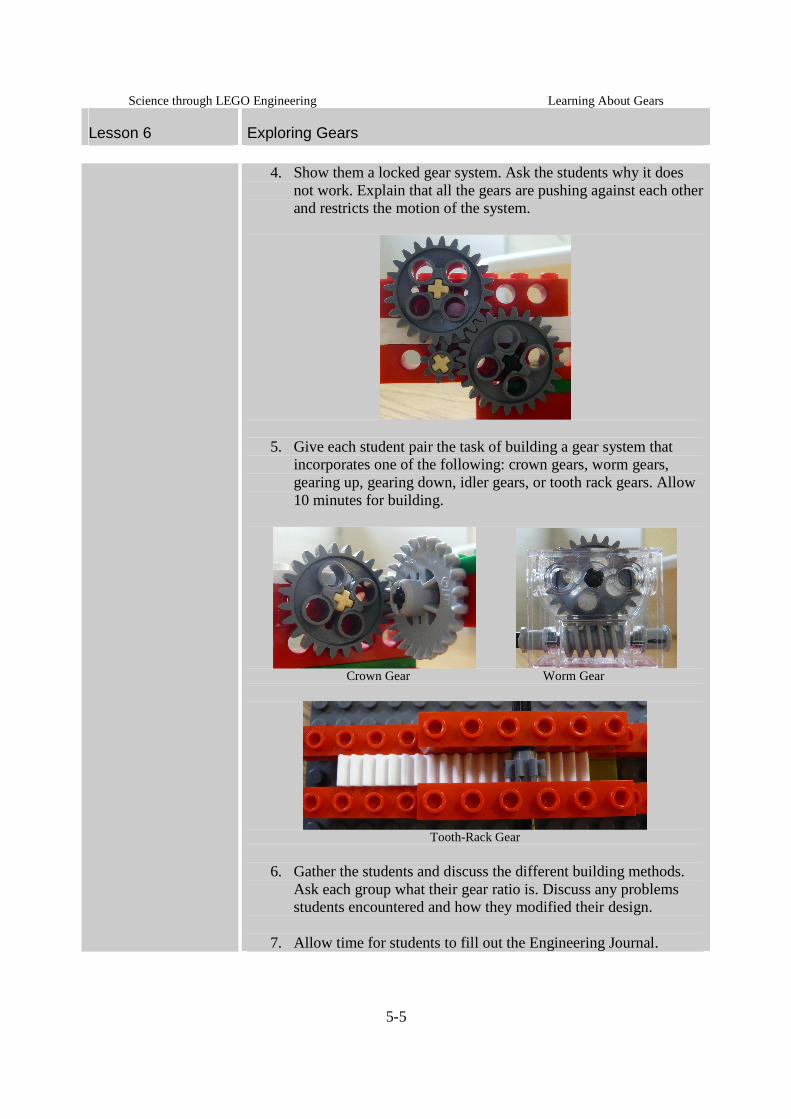
4. Show them a locked gear system. Ask the students why it does not work. Explain that all the gears are pushing against each other and restricts the motion of the system.
5. Give each student pair the task of building a gear system that incorporates one of the following: crown gears, worm gears, gearing up, gearing down, idler gears, or tooth rack gears. Allow 10 minutes for building.
Crown Gear Worm Gear
Tooth-Rack Gear
6. Gather the students and discuss the different building methods.
Ask each group what their gear ratio is. Discuss any problems students encountered and how they modified their design.
7. Allow time for students to fill out the Engineering Journal.