Embed Size (px)
Citation preview

www.textualcreations.ca
1Scaling an Inserted Image
Page 1
Do you ever find a need to scale an inserted image in TurboCAD and find that you haven’t got a clue how to go about it?
Well, it is simple with TurboCAD!
The best part of all is that no math is required.
1Scaling an Inserted Image
Page 2www.textualcreations.ca
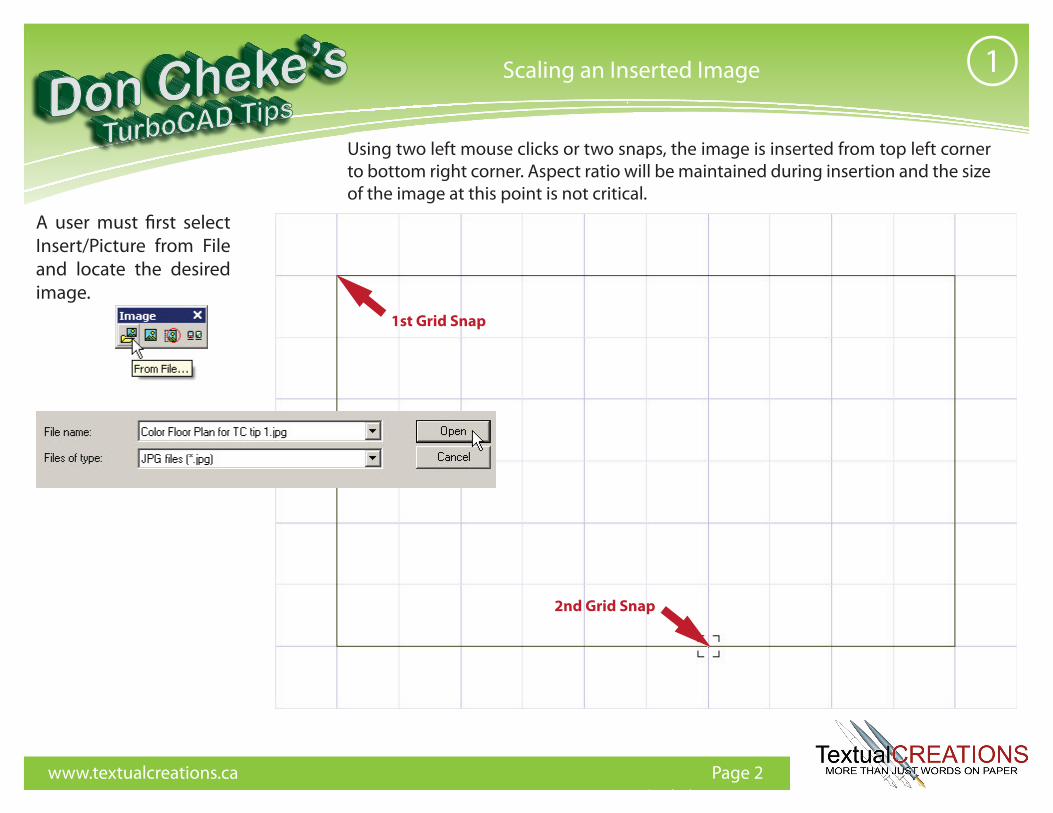
A user must first select Insert/Picture from File and locate the desired image.
Using two left mouse clicks or two snaps, the image is inserted from top left corner to bottom right corner. Aspect ratio will be maintained during insertion and the size of the image at this point is not critical.
1st Grid Snap
2nd Grid Snap
1Scaling an Inserted Image
Page 3www.textualcreations.ca
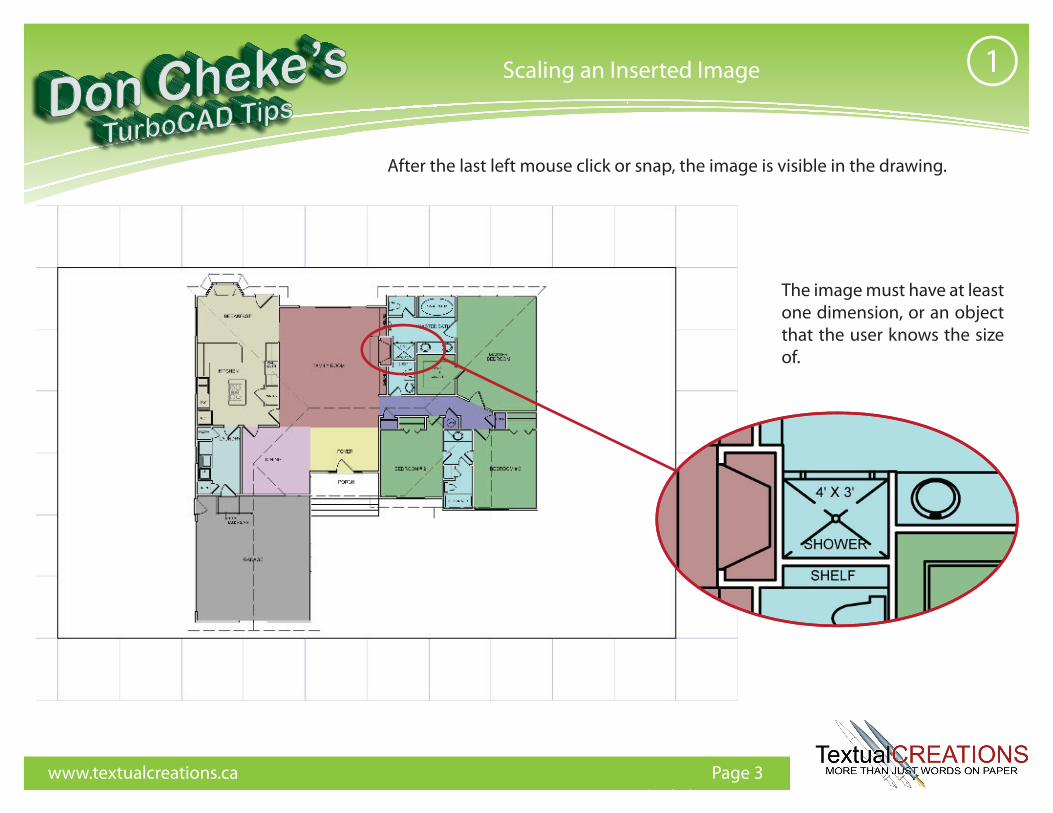
After the last left mouse click or snap, the image is visible in the drawing.
The image must have at least one dimension, or an object that the user knows the size of.
www.textualcreations.ca
1Scaling an Inserted Image
Page 4
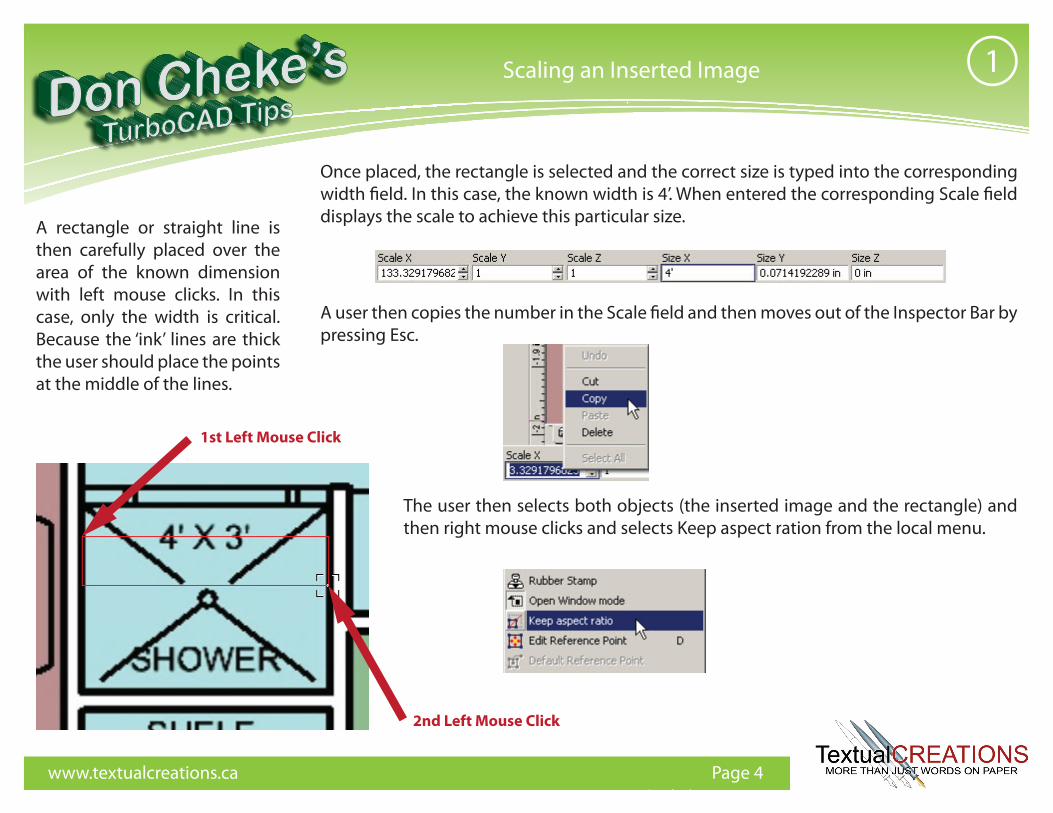
Once placed, the rectangle is selected and the correct size is typed into the corresponding width field. In this case, the known width is 4’. When entered the corresponding Scale field displays the scale to achieve this particular size.
A user then copies the number in the Scale field and then moves out of the Inspector Bar by pressing Esc.
The user then selects both objects (the inserted image and the rectangle) and then right mouse clicks and selects Keep aspect ration from the local menu.
1st Left Mouse Click
2nd Left Mouse Click
A rectangle or straight line is then carefully placed over the area of the known dimension with left mouse clicks. In this case, only the width is critical. Because the ‘ink’ lines are thick the user should place the points at the middle of the lines.
1Scaling an Inserted Image
Page 5www.textualcreations.ca
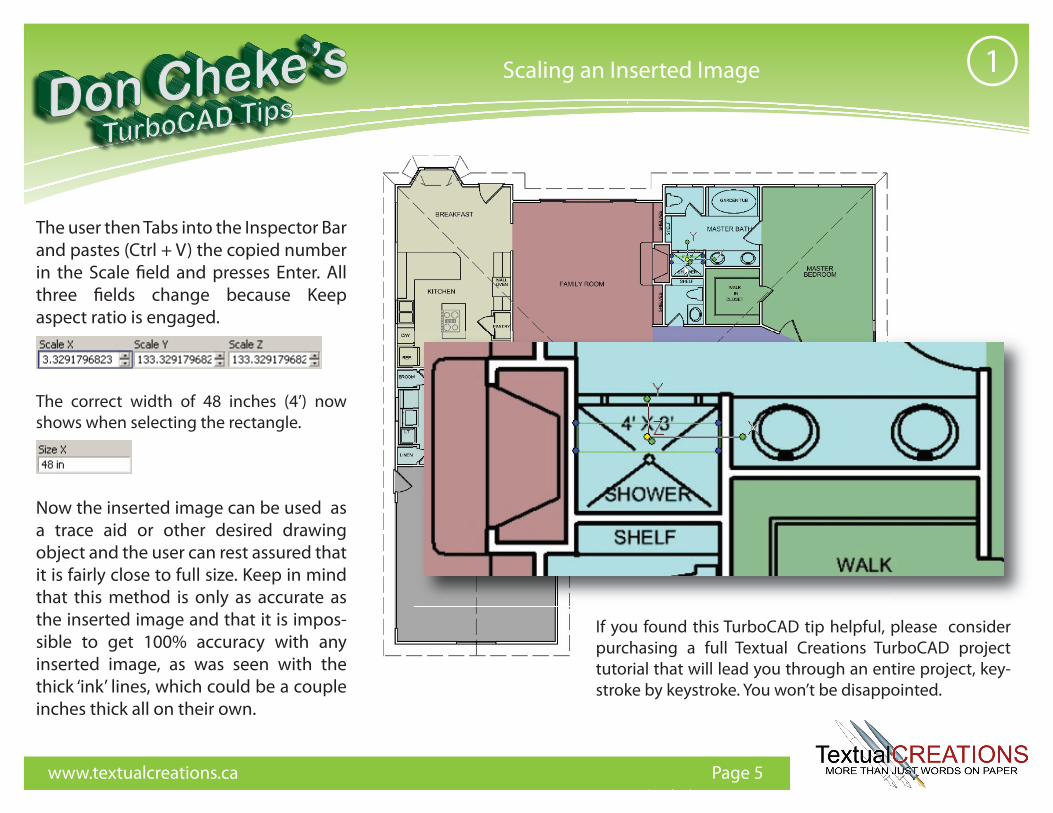
The user then Tabs into the Inspector Bar and pastes (Ctrl + V) the copied number in the Scale field and presses Enter. All three fields change because Keep aspect ratio is engaged.
The correct width of 48 inches (4’) now shows when selecting the rectangle.
Now the inserted image can be used as a trace aid or other desired drawing object and the user can rest assured that it is fairly close to full size. Keep in mind that this method is only as accurate as the inserted image and that it is impos-sible to get 100% accuracy with any inserted image, as was seen with the thick ‘ink’ lines, which could be a couple inches thick all on their own.
If you found this TurboCAD tip helpful, please consider purchasing a full Textual Creations TurboCAD project tutorial that will lead you through an entire project, key-stroke by keystroke. You won’t be disappointed.