Embed Size (px)
Citation preview
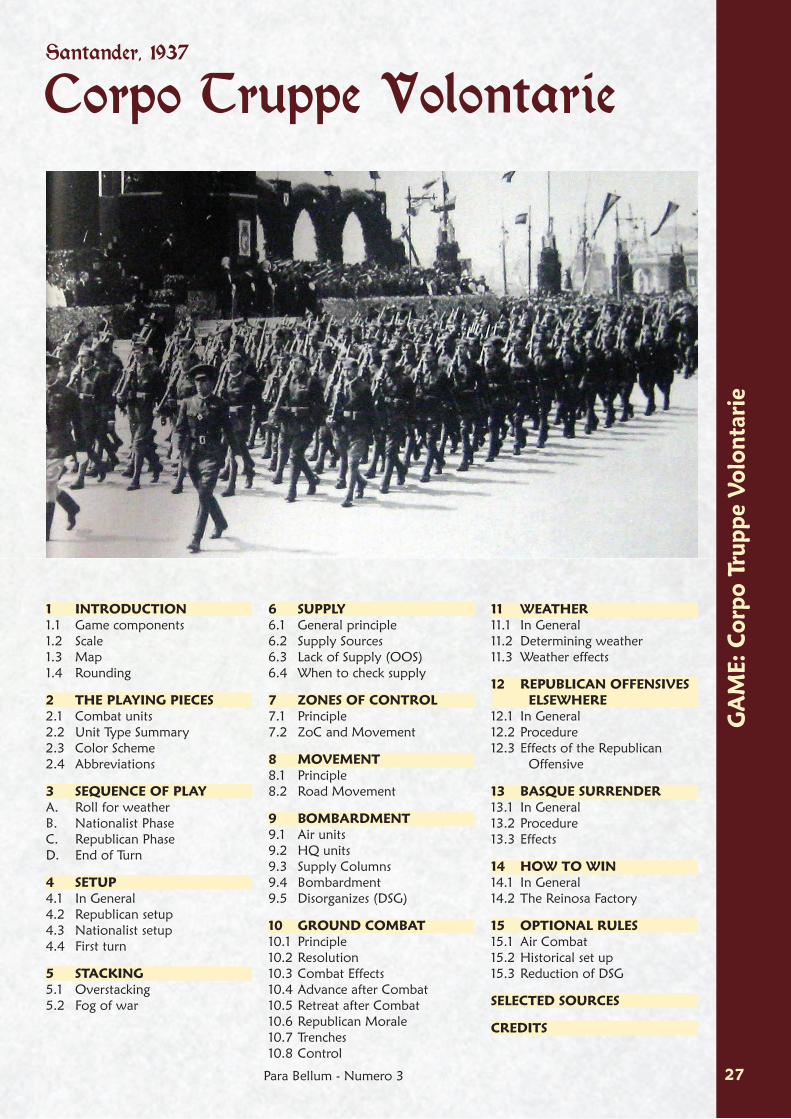
27Para Bellum - Numero 3
Corpo Truppe VolontarieSantander, 1937
GA
ME:
Cor
po T
rupp
e Vo
lont
arie
1 INTRODUCTION1.1 Game components1.2 Scale1.3 Map1.4 Rounding
2 THE PLAYING PIECES2.1 Combat units2.2 Unit Type Summary2.3 Color Scheme2.4 Abbreviations
3 SEQUENCE OF PLAYA. Roll for weatherB. Nationalist PhaseC. Republican PhaseD. End of Turn
4 SETUP4.1 In General4.2 Republican setup4.3 Nationalist setup4.4 First turn
5 STACKING5.1 Overstacking5.2 Fog of war
6 SUPPLY6.1 General principle6.2 Supply Sources6.3 Lack of Supply (OOS)6.4 When to check supply
7 ZONES OF CONTROL7.1 Principle7.2 ZoC and Movement
8 MOVEMENT8.1 Principle8.2 Road Movement
9 BOMBARDMENT9.1 Air units9.2 HQ units9.3 Supply Columns9.4 Bombardment9.5 Disorganizes (DSG)
10 GROUND COMBAT10.1 Principle10.2 Resolution10.3 Combat Effects10.4 Advance after Combat10.5 Retreat after Combat10.6 Republican Morale10.7 Trenches10.8 Control
11 WEATHER11.1 In General11.2 Determining weather11.3 Weather effects
12 REPUBLICAN OFFENSIVES ELSEWHERE
12.1 In General12.2 Procedure12.3 Effects of the Republican
Offensive
13 BASQUE SURRENDER13.1 In General13.2 Procedure13.3 Effects
14 HOW TO WIN14.1 In General14.2 The Reinosa Factory
15 OPTIONAL RULES15.1 Air Combat15.2 Historical set up 15.3 Reduction of DSG
SELECTED SOURCES
CREDITS
28
1 INTRODUCTIONCorpo Truppe Volontarie is a simulation of the Italo-Nationalist offensive against Santander in August 1937, during which the Italian Corpo Truppe Volontarie (the C.T.V.) played a key role.
1.1 Game componentsCorpo Truppe Volontarie includes:
One A2 (42x60 cm.) game-map,140 die-cut counters,a Player Aid Cards,this rule booklet.
At certain times during the game, players will need to use one or more six-sided dice (not included in the game).
1.2 ScaleGround units generally represent regiments and brigades. Each air support unit represents around 20-30 aircraft. A game turn equals two days of real time. There are a total of 7 game turns.
1.3 MapThe game map covers the area where the campaign of Santander was fought. A hexagon (hereafter termed a hex) represents about 6 km from side to side. Each hex has a four-digit code printed. Around the game map there are a series of boxes used to play Corpo Truppe Volontarie.1.3.1 If there is more than one type of terrain in a hex, the most present is considered.
Example. The hexes 1603 and 1618 are considered mountain hexagons.
1.3.2 The hexside between 1314 and 1215 is impassable.Santander (hex. 1211) can only be attacked by hexes 1110 and 1210.
1.4 RoundingIf not specified by the rules, when values are divided, fractions are always rounded up.In case of multiple units in the hex, first all the values are added together and then rounded.
2 THE PLAYING PIECES
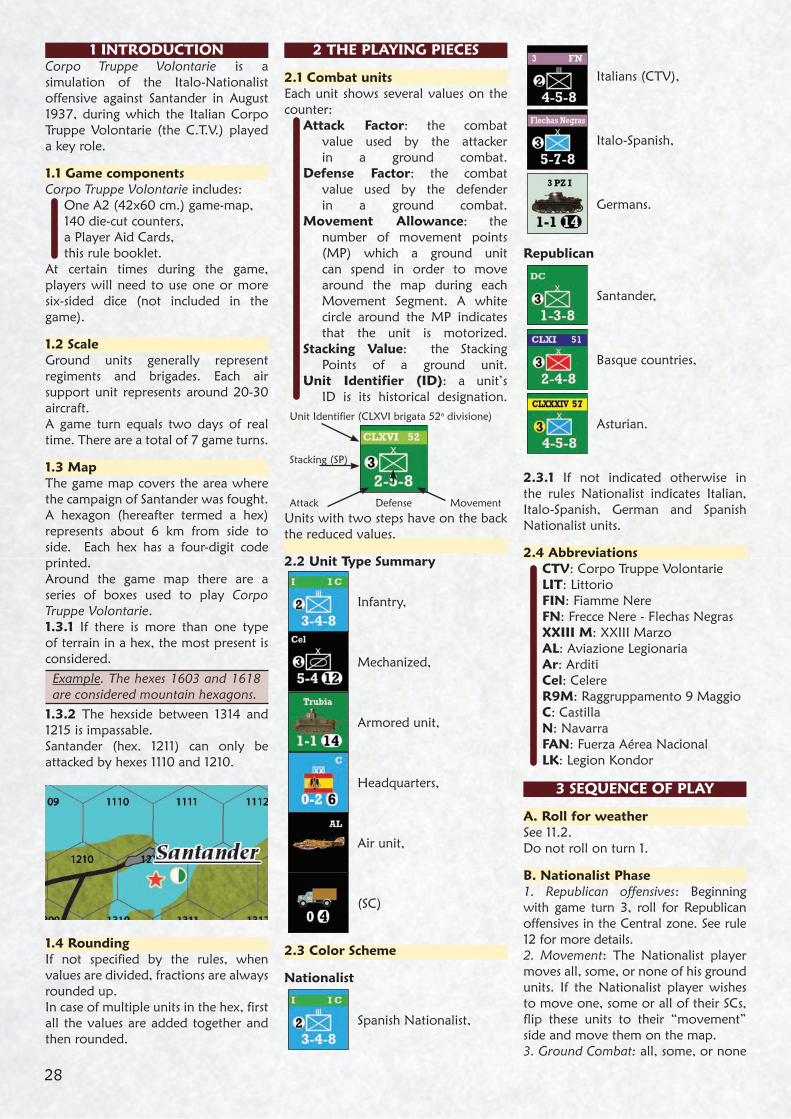
2.1 Combat unitsEach unit shows several values on the counter:
Attack Factor: the combat value used by the attacker in a ground combat.
Defense Factor: the combat value used by the defender in a ground combat.
Movement Allowance: the number of movement points (MP) which a ground unit can spend in order to move around the map during each Movement Segment. A white circle around the MP indicates that the unit is motorized.
Stacking Value: the Stacking Points of a ground unit.
Unit Identifier (ID): a unit’s ID is its historical designation.
Unit Identifier (CLXVI brigata 52a divisione)
Stacking (SP)
Attack Defense Movement
Units with two steps have on the back the reduced values.
2.2 Unit Type Summary
Infantry,
Mechanized,
Armored unit,
Headquarters,
Air unit,
(SC)
2.3 Color Scheme
Nationalist
Spanish Nationalist,
Italians (CTV),
Italo-Spanish,
Germans.
Republican
Santander,
Basque countries,
Asturian.
2.3.1 If not indicated otherwise in the rules Nationalist indicates Italian, Italo-Spanish, German and Spanish Nationalist units.
2.4 AbbreviationsCTV: Corpo Truppe VolontarieLIT: LittorioFIN: Fiamme NereFN: Frecce Nere - Flechas NegrasXXIII M: XXIII MarzoAL: Aviazione Legionaria Ar: Arditi Cel: Celere R9M: Raggruppamento 9 Maggio C: Castilla N: NavarraFAN: Fuerza Aérea Nacional LK: Legion Kondor
3 SEQUENCE OF PLAY
A. Roll for weatherSee 11.2.Do not roll on turn 1.
B. Nationalist Phase1. Republican offensives: Beginning with game turn 3, roll for Republican offensives in the Central zone. See rule 12 for more details.2. Movement: The Nationalist player moves all, some, or none of his ground units. If the Nationalist player wishes to move one, some or all of their SCs, flip these units to their “movement” side and move them on the map.3. Ground Combat: all, some, or none

Para Bellum - Numero 3 29
of the Nationalist ground units may attack enemy ground units which are adjacent to them. Air and HQ units may bombard during this phase.
C. Republican Phase1. Basque surrender: roll for Basque surrender. See rule 13 for more details.2. Movement: The Republican player performs the Movement of all, some, or none of his ground units. If the Republican player wishes to move its SC, flip that units to their “movement” side and move it.3. Ground Combat: all, some, or none of the Republican ground units may attack enemy ground units which are adjacent to them. Air and HQ units may bombard during this phase.
D. End of TurnWithdraw any “DSG” markers from the units on the map. Turn the HQs on the operative (flag) side. The Turn marker is advanced one space. If this was the last turn of the game, determine the victor.
4 SETUP
4.1 In GeneralThe Republican player sets up first all units (The frontline units) except the units of the 50, 55 and 57 Divisions (indicated by a yellow circle around the SV). Roll one die for each of 50, 55 and 57 Divisions. On a die roll of 1-4, the division is set up as a frontline unit. On a die roll of 5-6, the Division will be setup later as a reserve force. Then, the Nationalist player sets up his forces as he sees fit. Finally, the Republican player may set up any of the Divisions 57, 55 and/or 50) that rolled a 5 or a 6 during the first step.
4.2 Republican setupSet aside Republican breakdown battalions for later use (see 13.3 Basque Surrender). The Front line units must deploy in adjacent hexes north of the frontline (the red line on the map) so that all the frontline hexes are occupied by them or their ZoC. All Republican Basque units (those with the red center), except two brigades, MUST deploy within a maximum of three hexes of hexrow XX18. The other
two Basque brigades, if the Republican player wishes, may deploy anywhere in Republican controlled hexes.Republican armored units and independent Brigades (the DC and CLXXVII Brigades) may setup in any Republican controlled hex.The Republican player receives four trench markers (trinchera). He may deploy them (no more than one per hex) with any Republican units on the map.The Republican player receives one SC marker. He may deploy stacked or adjacent to any Republican HQ.
4.3 Nationalist setupAfter the Republican player has setup his frontline units, the Nationalist may deploy his units in any Nationalist controlled hexes (east and south of the frontline) but all the Front line hexes must be occupied by them or their ZoC. The nationalist player rolls a dieto see how many armored unitshas to deploy: 1-2 he receives the 3Pz1, 3-4 he receives the 3Pz1 and the 4T-26, 5-6 he receives the 3Pz1, the 4T-26 and the Italian L3/35. The Nationalist player receives four SC markers. He may deploy them stacked or adjacent to any Nationalist HQ.4.3.1 Now the Republican player can setup in any Republican controlled hex (including frontline hexes) the units belonging to the “reserve force” (the brigades belonging to the 50, 55 or 57 Divisions that rolled a 5-6 before).
4.3.2 Finally, place the LK, AL and FAN air units in the “available” box of the Nationalist air units box and place the Republican air markers in the “available” box of the Republican air units box.Place the weather marker in the box “Fair” of the weather track. Place the turn marker in box #1 of the turn record track.
4.4 First turnThe first turn of play all Nationalist attacks within the radius of the CTV HQ receive a modifier of one column to the right.
5 STACKINGIn a Clear and City hex, you may stack up to 6 SP (Stacking Points). In a Mountain/Hill hex, you may stack up to 4 SP.The unit’s SP value is indicated on the ground unit counter.HQs, SCs and Armored unit have no stacking value, but don’t stack more than one of them per hex (for each type).There is no limitation to who may stack with whom (Italian, Italo-Spanish, German and Spanish Nationalist units may stack with each other).
5.1 OverstackingAll units which are in a hex which is overstacked have their attack and defense factors halved (rounded down to the nearest whole number).5.1.1 All units in a hex whose total
30
stacking value is twice as much that allowed (for example: in hill hex, 8 SP) or more are immediately eliminated.
5.2 Fog of warYou can never examine an enemy stack.
6 SUPPLY
6.1 General principleA ground unit is considered supplied if it is able to trace a line of supply, of any length, to a friendly supply source hex.
6.2 Supply SourcesA faction’s supply sources are the road map-edge hexes exiting the map on that faction’s side of the map. Thus, the Nationalist board edges are the Eastern and Southern sides of the map. The Republican board edges are the Western map edges and the city of Santander (1211).6.2.1 Line of Supply Limitations. A line of supply may not pass through a enemy unit or a hex in enemy ZoC, unless the hex in question is occupied by a friendly ground unit.
6.3 Lack of Supply (OOS)The effects of lack of supply on each unit are as follows:The attack factor is halved, rounded down to the
nearest whole number (for example, half of 5 would be 2); the defense factor and movement allowance are halved, rounded up to the nearest whole number (for example, half of 5 would be 3).6.3.1 Out of supply (OOS) HQs can not use their bombardment value.Important: when a unit is halved because of lack of supply, it cannot get halved again if that unit gets a “DSG” result because of bombardment. Instead, it receives an additional level of DSG.
Example: an additional DSG result on an OOS unit is converted into a DSG 1.
6.4 When to check supplySupply is checked for both sides before each movement or ground combat segment.
7 ZONES OF CONTROL
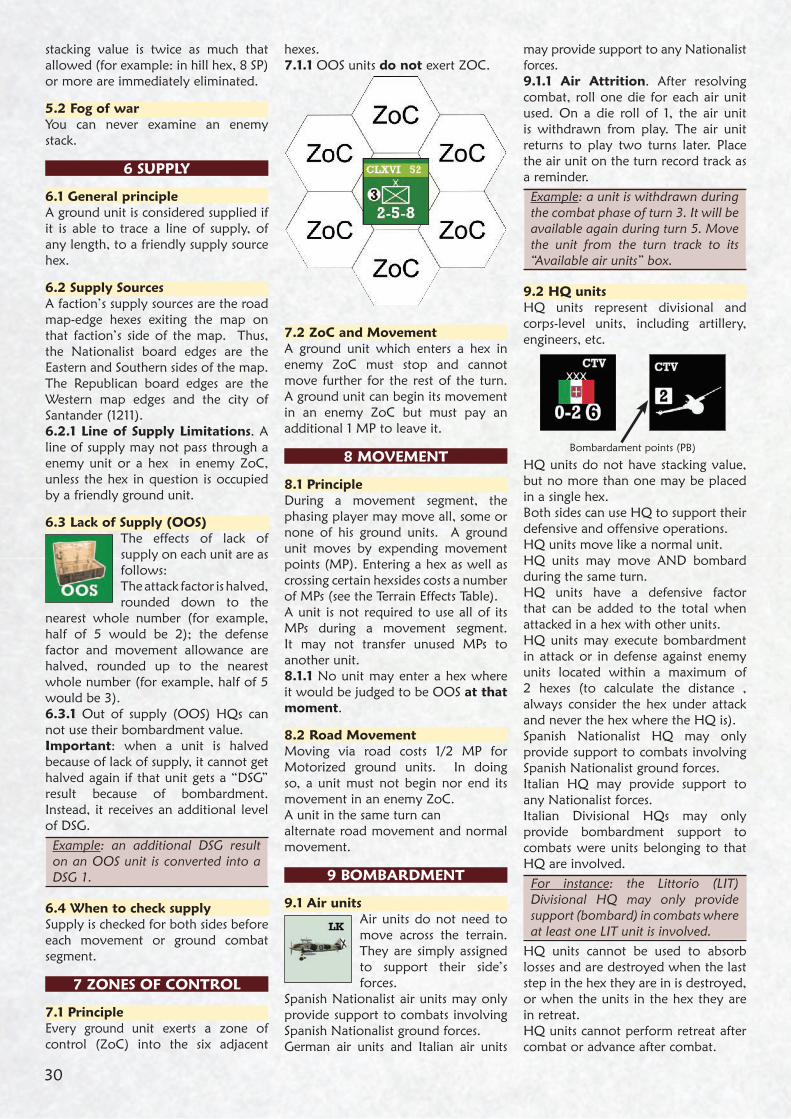
7.1 PrincipleEvery ground unit exerts a zone of control (ZoC) into the six adjacent
hexes.7.1.1 OOS units do not exert ZOC.
7.2 ZoC and MovementA ground unit which enters a hex in enemy ZoC must stop and cannot move further for the rest of the turn. A ground unit can begin its movement in an enemy ZoC but must pay an additional 1 MP to leave it.
8 MOVEMENT
8.1 PrincipleDuring a movement segment, the phasing player may move all, some or none of his ground units. A ground unit moves by expending movement points (MP). Entering a hex as well as crossing certain hexsides costs a number of MPs (see the Terrain Effects Table). A unit is not required to use all of its MPs during a movement segment. It may not transfer unused MPs to another unit.8.1.1 No unit may enter a hex where it would be judged to be OOS at that moment.
8.2 Road MovementMoving via road costs 1/2 MP for Motorized ground units. In doing so, a unit must not begin nor end its movement in an enemy ZoC. A unit in the same turn canalternate road movement and normal movement.
9 BOMBARDMENT
9.1 Air unitsAir units do not need to move across the terrain. They are simply assigned to support their side’s forces.
Spanish Nationalist air units may only provide support to combats involving Spanish Nationalist ground forces.German air units and Italian air units
may provide support to any Nationalist forces.9.1.1 Air Attrition. After resolving combat, roll one die for each air unit used. On a die roll of 1, the air unit is withdrawn from play. The air unit returns to play two turns later. Place the air unit on the turn record track as a reminder.
Example: a unit is withdrawn during the combat phase of turn 3. It will be available again during turn 5. Move the unit from the turn track to its “Available air units” box.
9.2 HQ unitsHQ units represent divisional and corps-level units, including artillery, engineers, etc.
Bombardament points (PB)
HQ units do not have stacking value, but no more than one may be placed in a single hex.Both sides can use HQ to support their defensive and offensive operations.HQ units move like a normal unit. HQ units may move AND bombard during the same turn.HQ units have a defensive factor that can be added to the total when attacked in a hex with other units. HQ units may execute bombardment in attack or in defense against enemy units located within a maximum of 2 hexes (to calculate the distance , always consider the hex under attack and never the hex where the HQ is).Spanish Nationalist HQ may only provide support to combats involving Spanish Nationalist ground forces.Italian HQ may provide support to any Nationalist forces. Italian Divisional HQs may only provide bombardment support to combats were units belonging to that HQ are involved.
For instance: the Littorio (LIT) Divisional HQ may only provide support (bombard) in combats where at least one LIT unit is involved.
HQ units cannot be used to absorb losses and are destroyed when the last step in the hex they are in is destroyed, or when the units in the hex they are in retreat. HQ units cannot perform retreat after combat or advance after combat.
Para Bellum - Numero 3 31
9.3 Supply ColumnsAt the beginning of the game, both units receive a certain number of supply columns (SC). These represent
basically large amounts of artillery ammunition. The Nationalist player has four SCs at the beginning of the game. He receives
one additional SC per turn, but he may never have more than eight SCs on the map. The Republican player receives 1 SC at the beginning of the game. He receives no additional SCs during the game. A SC is eliminated if an enemy unit enters the hex where it is.9.3.1 Using Supply Columns. Supply Columns (SC) count as additional Bombardmente point (PB) on the bombardment table. To be used, the SC must be stacked or adjacent to a bombarding HQ. A given HQs may use up any number of SCs per bombardment. Once used, SCs are withdrawn from the map.9.3.2 Movement of Supply Columns. Supply Columns have two sides: movement (depicting a truck) or combat (depicting shells). SCs that
moved during the movement phase cannot be used for Bombardment during that turn.
9.4 BombardmentDuring the combat phase, both players may use air markers and HQs to provide Support to its defensive or offensive operations. HQ and air units may bombard hexes prior to launching a ground attack on that hex.Air units and HQ units may only be used once per turn, either on the attack or on the defense.9.4.1 Both players must decide how many air and HQs units they are going to use to bombard a given hex (Attacker first). They then reveal if they will use Supply Columns (9.3.1), and how many (always the attacker first).If the air combat rule optional rule is used (15.1), roll for air combat. Any eliminated air units cannot add to that side’s total.9.4.2 Any air, division HQ and SC count 1 Bombardment point, a firing Corps HQ counts as two Bombardment points (PB). Subtract the final number of attacking Bombardment points from the number of defender Bombardment point.
Only the player with more PBs roll on the Bombardment Table and apply the result.
Example. The Nationalist player supports an attack with 2 air units (PB 2), a divisional HQ (PB 1) and uses a SC (PB 1), the Republican reacts with a corps HQ (PB 2).The Nationalist will roll a die on column 2 of the Bombardment Table.
If there were air units involved, roll for air unit recovery (9.1.1). Then resolve combat normally as explained in the combat section (rule 10).9.4.3 If attacking units from multiple hexes suffer a result of DSG, this affects all the units involved.
9.5 Disorganizes (DSG)A DSG result halves the combat factors and movement allowance of a given unit. Attack factors are rounded down (half of 3 is 1.5, which is rounded down to 1) while defence factors and movement allowance are rounded up (half of 3 is 1.5, which is rounded up to 2).9.5.1 The DSGs are cumulative, a unit with DSG that receives another DSG go to DSG1.
32
A unit with DSG2 that receives another DSG is eliminated.A unit with DSG2 surrender (is eliminated) if it is also OOS (6.3).
10 GROUND COMBAT
10.1 PrincipleA ground combat takes place between adjacent enemy units. A ground combat is never required. A ground unit can only attack once per Ground Combat Phase.A unit is not required to attack all units in its ZoC, but if it attacks a hex it must attack all units in that hex. A hex may be attacked by units in different adjacent hexes. These units may belong to different divisions.The player is not obliged to declare all attacks before starting to perform them.The maximum number of stacking points that can attack from each hex, is the stacking limit of the defending hex.
Example: A defending hex in mountain terrain can be attacked by 4 unit’s stacking points from each attacking hex.
10.2 ResolutionThe attacking player designates the hex which he wishes to attack as well as, among those adjacent to the hex, those of his units which will take part to the combat.∆1 Check the supply of the involved units.∆2 The attacker and defender decide if they are going to use air and HQ bombardment, then if they are going to use SC to enhance HQ fire. The attacker reveals first what he intends to do, followed by the defender. If both players decide to use air units, and they use the air combat optional rule (15.1), resolve air combat before determining the total number of air and HQ units bombarding the target hex.Resolve the bombardment (9.4). Determine air recovery (9.1.1). Withdraw used SCs from the map.After resolving the bombardment and determining which units receive DSG results, calculate combat odds.∆3 The attacker and defender sum up the attack and defense factors of their involved units.Apply any modifiers for DSG, terrain and supply.The combined attack strength of the participating attacking units is compared to the combined defense strength of the defending units (taking into consideration strength
modifications due to DSG, terrain and Supply Status), and this comparison is stated as a probability ratio (attacker/defender). Divide the total attacking strength by the total defending strength to determine a combat odds ratio, which is rounded off, always in favor of the defender, to the nearest ratio listed on the Combat Results Table.∆4 The attacker checks the Combat Results Table: at the intersection of the modified strength ratio and the roll of 1d6, he reads the combat result.∆5 Retreat after Combat: the defender may decide to trade up to one step loss for a retreat of one hex (see 10.5).10.2.1 Concentric Attack. If five of the six hexes adjacent to the defender are either occupied by an enemy unit or in the ZoC of an attacking enemy unit and none of these five hexes are occupied by a friendly unit, the attack is considered a concentric attack. Concentric attacks get a +1 drm.
Example: An attack on hex 2006 (Reinosa) coming from 2007 and 2105 is considered a concentric attack if there are no friendly units in hexes 1906, 2005 or 2106.
10.3 Combat EffectsThe result of the die roll on theCombat Results Table indicates the number of steps lost.To the left are those lost by the attacker,
Para Bellum - Numero 3 33
to the right by the defender.When a combat unit suffers 1 step loss it is flipped onto its back side. If it is a one-step unit, it is eliminated.Losses must be divided equally among the ground units in a stack. No unit can absorb a loss if at least one other unit in its stack has lost fewer steps.
10.4 Advance after CombatIf after a ground combat, the defender’s hex becomes vacant, the attacker may have all, some or none of his units which took part to the combat, advance into it. Units performing advance after combat may ignore enemy ZOCs when moving.10.4.1 Breakthrough. A result of B indicates a breakthrough.All the defender units are eliminated and the “Breakthrough” result of the CRT allows the attacker to advance up to three hexes. They may ignore enemy ZOC when performing breakthrough movement (but remember rule 8.1.1).
10.5 Retreat after CombatA unit or stack of defending ground units that suffers losses may trade one step loss (and only one) for one hex of retreat.
Example: a unit or stack which suffers one step loss may lose no steps and
retreat one hex, or may lose 1 step and remain in place.
10.5.1 Restrictions. A stack of units which retreats must retreat as a stack, into the same hex.A unit can retreat to a hex in enemy ZoC only if occupied by a friendly unit.A unit or stack of units which retreats into a hex already occupied by one or more friendly units may cause overstacking (see 5.1).All units that withdraw take a DSG.
10.6 Republican MoraleDue to the poor mora-le of certain Republican units, the Republican pla-yer must use the Republi-can Morale Table (RMT)
when a Republican stack or unit suf-fers losses. Roll 1 die and check the Republican Morale Table. The modifier indicated in the Morale table on the map (10.6.1) and any tro-op modifier must be added. The Asturias units (57 division) always have a -2 drm. The Basque units always have a drm of -1.10.6.1 Moral table. Place the “Morale” counter in the 0 box of the Modifier Republican Morale on the map at the beginning of the game. The counter increases by one each time the
Nationalists capture an objective hex and decreases by one each time the Republicans reconquer an objective hex or conquer a hex from the enemy side after a victorious attack (ie after an attack they enter the hex where there were enemy units).Morals can never go below 0 or above +5.
10.7 TrenchesTrench markers (“trinchera”) are received at the beginning of the game by the Republican player.
Units defending in a hex with a trench marker get a -1 drm on the bombardment die roll. Units defending a hex
containing a trench marker get a -1drm on the CRT.Trench markers are removed when the unit(s) occupying that hex retreat, are forced to retreat, or are destroyed.
10.8 ControlA player controls a hex if one of his ground units occupies it or was the last to occupy it.
11 WEATHER
11.1 In GeneralBad weather may affect ground and air operations.
11.2 Determining weatherDuring the weather determination phase of each game turn (except the first turn), roll one die: with a die roll of 1-5
the weather is Fair, with a die roll of 6 the weather is Rain. If the previous turn was Rain, add +1 to the die roll.Put the “weather” marker in the corresponding box of the weather track printed on the map.
11.3 Weather effectsRain affects air operations and movement of units. If the weather for the current game turn is “rain”, no air operations are possible that turn.Entering a mountain hex unit costs +1 MP during rain turns.
12 REPUBLICAN OFFENSIVES ELSEWHERE
12.1 In GeneralThe Republican central command promised that they would launch a major offensive to relieve pressure and to force Franco to move forces
34
from the North. The offensive took place in central Aragón, and aimed at conquering Zaragoza. The initial
Republican onslaught managed to surround the fortified town of Belchite. Although Franco sent part of their air force
and troops to relieve the besieged town, it did little to prevent the fall of Santander.
12.2 ProcedureBeginning with turn 3, roll one die to check if the Republican offensive takes place. On a die roll of 5-6, the offensive takes place on turn 3. If no offensive takes place, roll a die again at the beginning of turn 4. The offensive takes place on a die roll of 4-6. If no offensive takes place, then the offensive takes place automatically at the beginning of turn 5.
12.3 Effects of the Republican OffensivePlace the “Republican offensive marker” on the turn record track as a reminder. On the following turn, roll the die again at the beginning of the Nationalist game turn to determine the success of the Republican offensive elsewhere. On a die roll of 1-4, withdraw from play up to two infantry units (Italian or Spanish), and two available air units (either Italian, German or Spanish). On a die roll of 5-6, withdraw from play up to four infantry units (Italian or Spanish) and three available air units (either Italian, German or Spanish).
13 BASQUE SURRENDER
13.1 In GeneralOnce they lost the last remnants of Basque territory, the Basque Nationalists (the battalions formed by the PNV and ANV Basque Nationalist parties) lost any interest in the war and agreed to surrender with the Italian local commander. That was the so-called Santoña pact. The Basque surrender precipitated the collapse of the Santander front, with disastrous results in the long term for the Republican cause.
13.2 ProcedureIf the Republican Phase begins without at least one in supply Basque unit (units with the red center and the Ikurrina on the back) within 4 or less hexes of the XX18 hexrow, or more than half of the surviving Basque units areOOS, roll
one die. On a die roll of 1, 2, 3 or 4, the Basque Nationalist units reach an agreement with the Italian local commander and cease fighting. On a die roll of 5 or 6, they keep on fighting for another turn. If the Basque units do not surrender, roll again on each following turn until the Basque units surrender.
13.3 EffectsWhen the Basque forces cease fighting, immediately withdraw from play all surviving Basque brigades and replace them with breakdown battalions (marked “R”), up to a maximum of 5. Place one breakdown battalion per brigade in the same hex occupied by the brigade(s). This represents the battalions formed by Socialist and Anarchist Basque forces that kept on fighting despite of the surrender of the Basque Nationalists.
14 HOW TO WIN
14.1 In GeneralCertain hexes have a value in Victory Points (VPs). To win, it is
necessary to reach a minimum number of VPs.VP hexes are marked with a red star. Santander is worth 3 VPs. All other VP hexes are worth 1 VP. If the Nationalist player destroys 10 or more Brigade units (surrendered Basque brigades do not count) add +1 VP to the Italo-Nationalist total. The Nationalist player wins if he conquers up to 6 VPs on or before game turn 7.
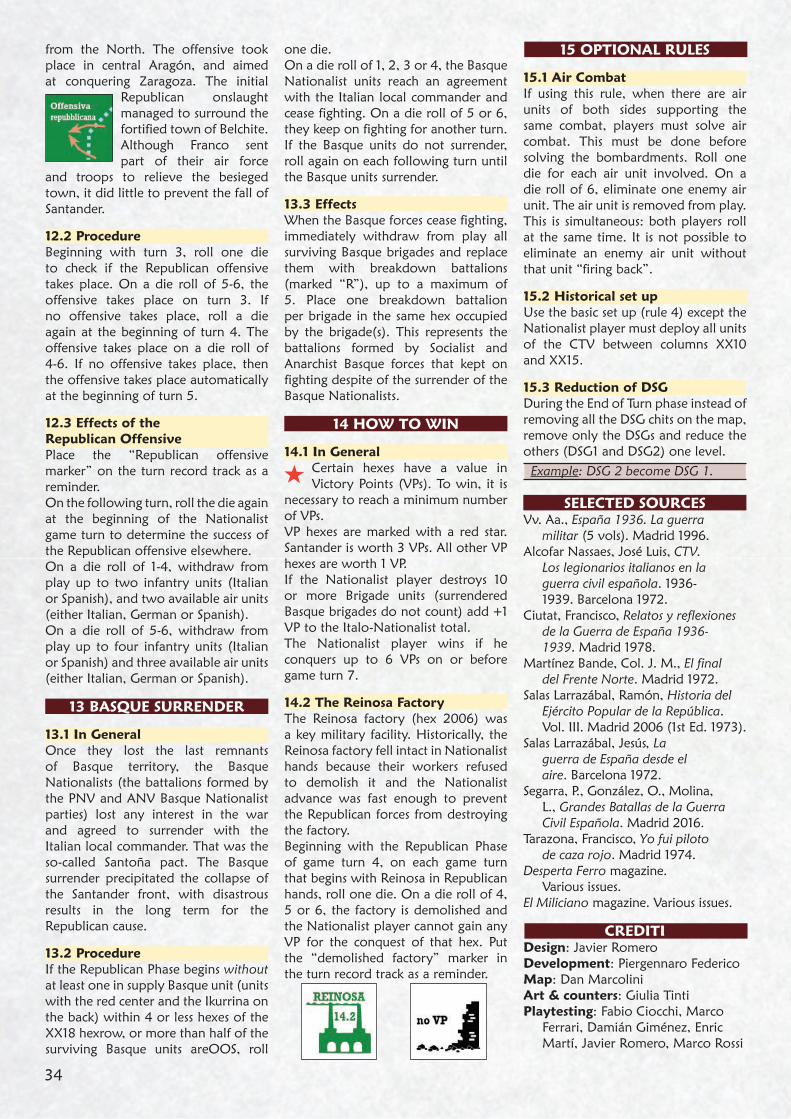
14.2 The Reinosa FactoryThe Reinosa factory (hex 2006) was a key military facility. Historically, the Reinosa factory fell intact in Nationalist hands because their workers refused to demolish it and the Nationalist advance was fast enough to prevent the Republican forces from destroying the factory. Beginning with the Republican Phase of game turn 4, on each game turn that begins with Reinosa in Republican hands, roll one die. On a die roll of 4, 5 or 6, the factory is demolished and the Nationalist player cannot gain any VP for the conquest of that hex. Put the “demolished factory” marker in the turn record track as a reminder.
15 OPTIONAL RULES
15.1 Air CombatIf using this rule, when there are air units of both sides supporting the same combat, players must solve air combat. This must be done before solving the bombardments. Roll one die for each air unit involved. On a die roll of 6, eliminate one enemy air unit. The air unit is removed from play. This is simultaneous: both players roll at the same time. It is not possible to eliminate an enemy air unit without that unit “firing back”.
15.2 Historical set upUse the basic set up (rule 4) except the Nationalist player must deploy all units of the CTV between columns XX10 and XX15.
15.3 Reduction of DSGDuring the End of Turn phase instead of removing all the DSG chits on the map, remove only the DSGs and reduce the others (DSG1 and DSG2) one level.
Example: DSG 2 become DSG 1.
SELECTED SOURCESVv. Aa., España 1936. La guerra
militar (5 vols). Madrid 1996.Alcofar Nassaes, José Luis, CTV.
Los legionarios italianos en la guerra civil española. 1936-1939. Barcelona 1972.
Ciutat, Francisco, Relatos y reflexiones de la Guerra de España 1936-1939. Madrid 1978.
Martínez Bande, Col. J. M., El final del Frente Norte. Madrid 1972.
Salas Larrazábal, Ramón, Historia del Ejército Popular de la República. Vol. III. Madrid 2006 (1st Ed. 1973).
Salas Larrazábal, Jesús, La guerra de España desde el aire. Barcelona 1972.
Segarra, P., González, O., Molina, L., Grandes Batallas de la Guerra Civil Española. Madrid 2016.
Tarazona, Francisco, Yo fui piloto de caza rojo. Madrid 1974.
Desperta Ferro magazine. Various issues.
El Miliciano magazine. Various issues.
CREDITIDesign: Javier RomeroDevelopment: Piergennaro FedericoMap: Dan MarcoliniArt & counters: Giulia TintiPlaytesting: Fabio Ciocchi, Marco
Ferrari, Damián Giménez, Enric Martí, Javier Romero, Marco Rossi


![[Manuale Militare Corpo a Corpo] Offensive Close Combat](https://img.pdfslide.us/doc/110x75/577cc7651a28aba711a0d02c/manuale-militare-corpo-a-corpo-offensive-close-combat.jpg)