Embed Size (px)
Citation preview
SALESFORCETIPSHEET1TIPSHEET2NEWNONPROFITTEMPLATECONTACT&ACCOUNTENTRY RILAND&WATERPARTNERSHIP
1 © 2009 Acorn nonprofit solutions
Salesforce Structure Overview Purpose Provides very basic instructions for manually entering contact and account information into Salesforce. Overview – Contacts and Accounts
In Salesforce, all individuals, including donors and members, are referred to as ‘Contacts’. The Contact record is used to track relationships with individuals such as donation activity, membership, communications, volunteer activity and relationships to other contacts, accounts and properties. The ‘Account’ record is used to track the same information and relationships with Contacts and Affiliated Contacts. An Account is an organization or, for individuals, their household.
Many types of reports and views can be created in Salesforce by sorting within
either Contacts or Accounts. The Account record for a household is a ‘roll up’ of the activity for all household members. For other types of organizations, a contact’s activity will be reflected in their Contact record along with the donations by their Account.
Each person has an individual Contact record. Each new Contact must always be
associated with an Account. Using the “Create New Contact and Account ” tab is the best method for manually entering new members to the database, as the names and address will be transferred into the automatically created matching new Account minimizing both entry time and errors.
This tipsheet does not address options for importing contact or account data.
Please check the online Salesforce training for the current import methods. This tipsheet focuses on entry for Household Accounts; a separate tipsheet
addresses Organization account entry and affiliated contacts versus the standard contact role for an organization.

SALESFORCETIPSHEET1TIPSHEET2NEWNONPROFITTEMPLATECONTACT&ACCOUNTENTRY RILAND&WATERPARTNERSHIP
2 © 2009 Acorn nonprofit solutions
Salesforce - Getting Started
1. It is best practice to utilize Internet Explorer, Google Chrome, or Apple Safari browsers when using Salesforce. The "New Contacts" tab and other s-control buttons in this Salesforce nonprofit template may not operate properly in Firefox.
2. Log in to salesforce.com using your username and password.
3. Look at the Force.com application selection in the upper right hand corner of the screen. If it is not already on “Membership Donation Management” choose this format by clicking on the pull down menu button and scrolling down and then clicking over this option name.
4. Look on the left hand side of the screen. If you don’t see a sidebar, click on the small arrow on the lower left-hand side of the screen to open up the sidebar that allows you to view your recent activity. In the RILWP template this should be locked on as shown below:
5. Finally, on the upper bar, in the upper right-hand corner, click on the first button
in order to maximize Salesforce on your computer screen.
SALESFORCETIPSHEET1TIPSHEET2NEWNONPROFITTEMPLATECONTACT&ACCOUNTENTRY RILAND&WATERPARTNERSHIP
3 © 2009 Acorn nonprofit solutions
6. If you are entering data from a Word, Excel, email or other electronic file, it is helpful to open up that file in a separate tab so that you can toggle between it and Salesforce for copying and pasting data. Manually Creating Contacts for a New SalesForce Database
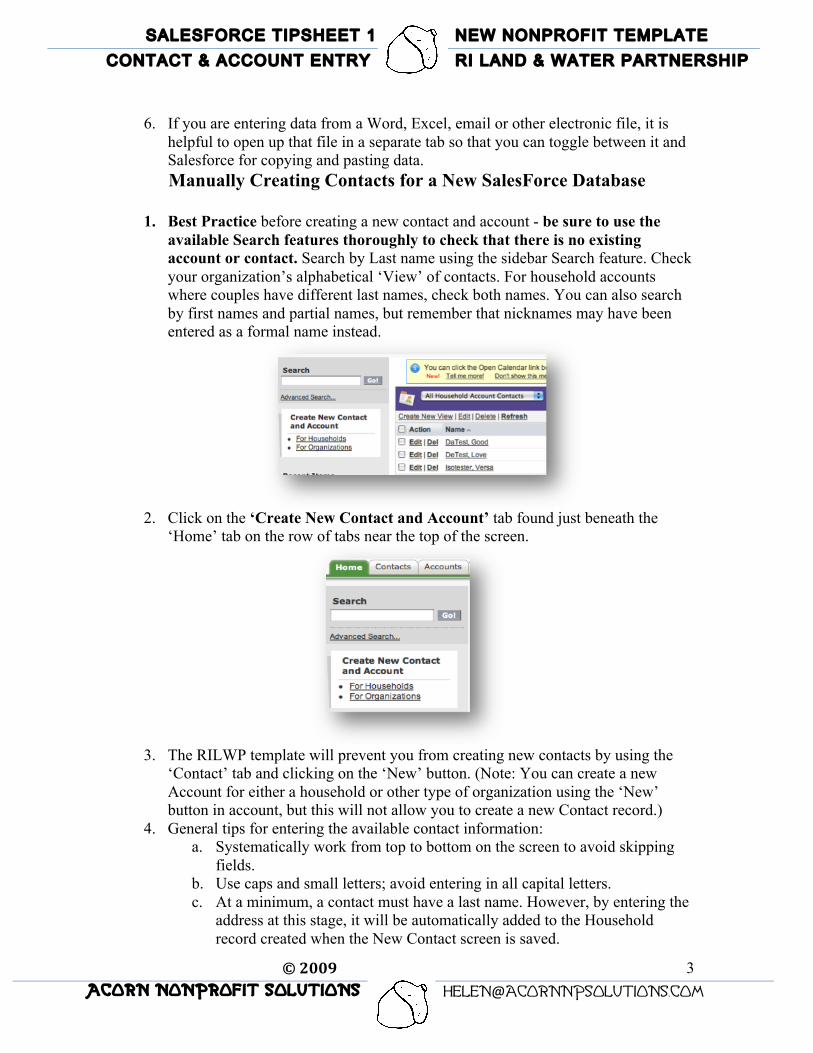
1. Best Practice before creating a new contact and account - be sure to use the
available Search features thoroughly to check that there is no existing account or contact. Search by Last name using the sidebar Search feature. Check your organization’s alphabetical ‘View’ of contacts. For household accounts where couples have different last names, check both names. You can also search by first names and partial names, but remember that nicknames may have been entered as a formal name instead.
2. Click on the ‘Create New Contact and Account’ tab found just beneath the
‘Home’ tab on the row of tabs near the top of the screen.
3. The RILWP template will prevent you from creating new contacts by using the
‘Contact’ tab and clicking on the ‘New’ button. (Note: You can create a new Account for either a household or other type of organization using the ‘New’ button in account, but this will not allow you to create a new Contact record.)
4. General tips for entering the available contact information: a. Systematically work from top to bottom on the screen to avoid skipping
fields. b. Use caps and small letters; avoid entering in all capital letters. c. At a minimum, a contact must have a last name. However, by entering the
address at this stage, it will be automatically added to the Household record created when the New Contact screen is saved.
SALESFORCETIPSHEET1TIPSHEET2NEWNONPROFITTEMPLATECONTACT&ACCOUNTENTRY RILAND&WATERPARTNERSHIP
4 © 2009 Acorn nonprofit solutions
d. Use the naming and abbreviation protocol used by your organization. It is advisable to use the address abbreviations accepted by the United States Postal Service for bulk mail purposes.
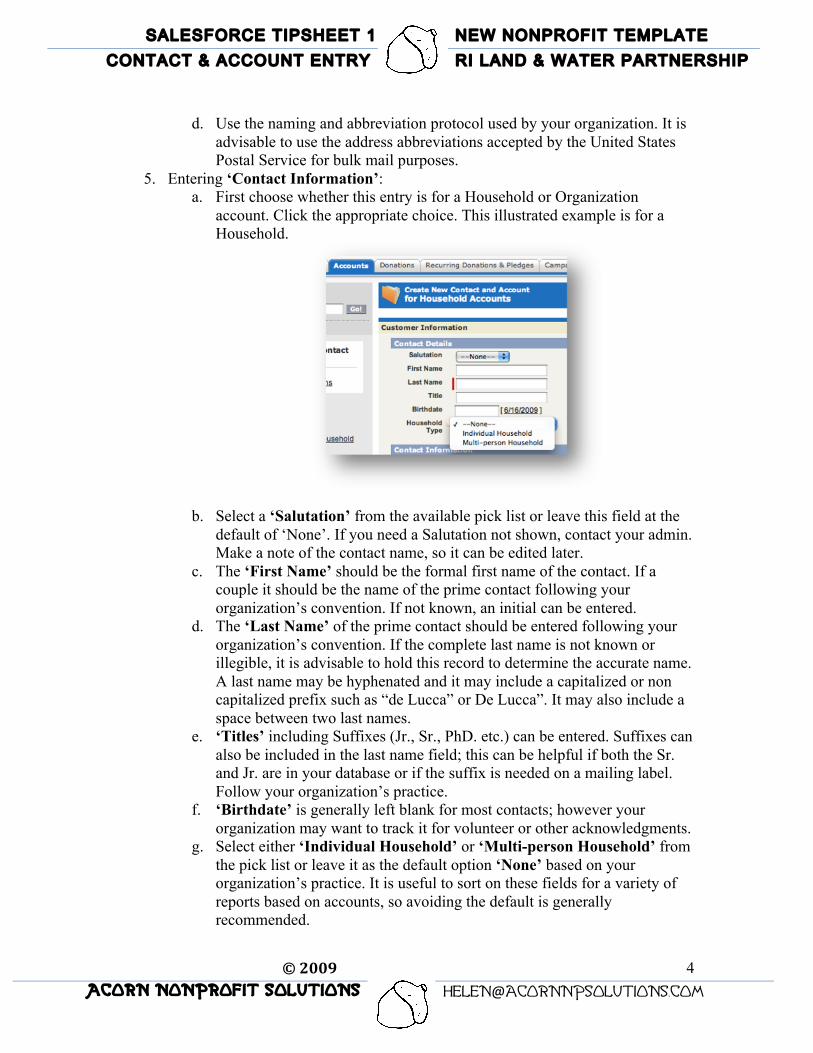
5. Entering ‘Contact Information’: a. First choose whether this entry is for a Household or Organization
account. Click the appropriate choice. This illustrated example is for a Household.
b. Select a ‘Salutation’ from the available pick list or leave this field at the
default of ‘None’. If you need a Salutation not shown, contact your admin. Make a note of the contact name, so it can be edited later.
c. The ‘First Name’ should be the formal first name of the contact. If a couple it should be the name of the prime contact following your organization’s convention. If not known, an initial can be entered.
d. The ‘Last Name’ of the prime contact should be entered following your organization’s convention. If the complete last name is not known or illegible, it is advisable to hold this record to determine the accurate name. A last name may be hyphenated and it may include a capitalized or non capitalized prefix such as “de Lucca” or De Lucca”. It may also include a space between two last names.
e. ‘Titles’ including Suffixes (Jr., Sr., PhD. etc.) can be entered. Suffixes can also be included in the last name field; this can be helpful if both the Sr. and Jr. are in your database or if the suffix is needed on a mailing label. Follow your organization’s practice.
f. ‘Birthdate’ is generally left blank for most contacts; however your organization may want to track it for volunteer or other acknowledgments.
g. Select either ‘Individual Household’ or ‘Multi-person Household’ from the pick list or leave it as the default option ‘None’ based on your organization’s practice. It is useful to sort on these fields for a variety of reports based on accounts, so avoiding the default is generally recommended.
SALESFORCETIPSHEET1TIPSHEET2NEWNONPROFITTEMPLATECONTACT&ACCOUNTENTRY RILAND&WATERPARTNERSHIP
5 © 2009 Acorn nonprofit solutions
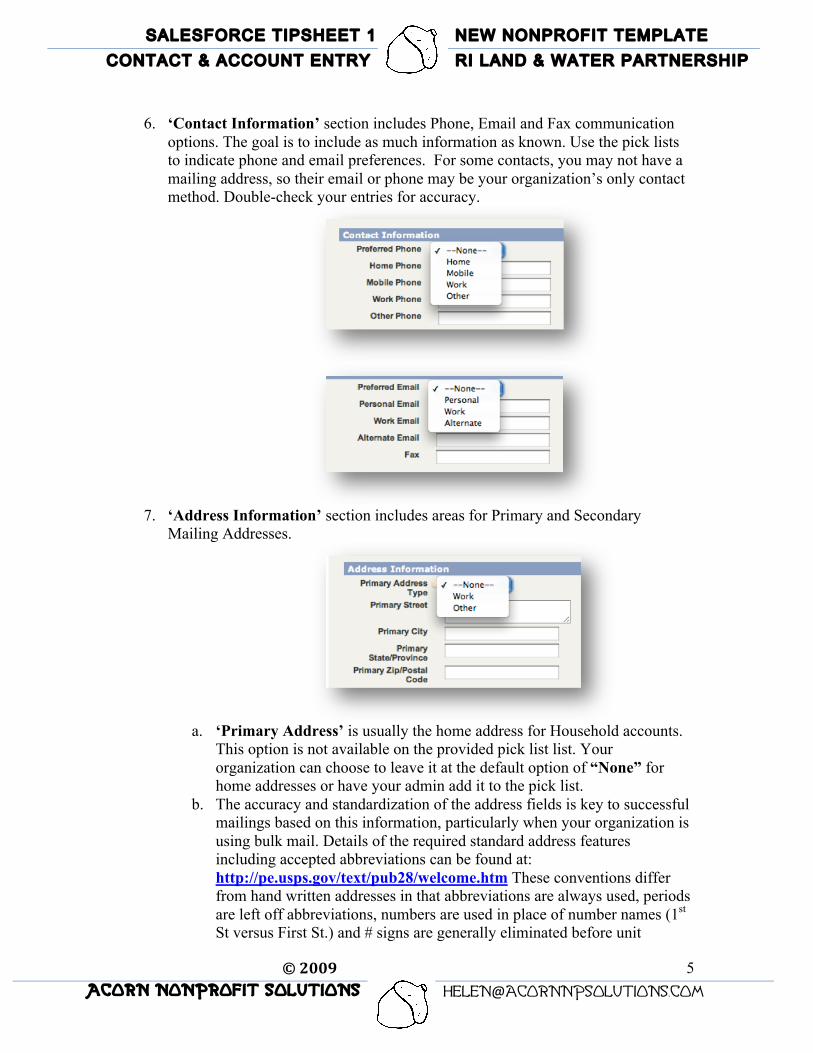
6. ‘Contact Information’ section includes Phone, Email and Fax communication options. The goal is to include as much information as known. Use the pick lists to indicate phone and email preferences. For some contacts, you may not have a mailing address, so their email or phone may be your organization’s only contact method. Double-check your entries for accuracy.
7. ‘Address Information’ section includes areas for Primary and Secondary
Mailing Addresses.
a. ‘Primary Address’ is usually the home address for Household accounts.
This option is not available on the provided pick list list. Your organization can choose to leave it at the default option of “None” for home addresses or have your admin add it to the pick list.
b. The accuracy and standardization of the address fields is key to successful mailings based on this information, particularly when your organization is using bulk mail. Details of the required standard address features including accepted abbreviations can be found at: http://pe.usps.gov/text/pub28/welcome.htm These conventions differ from hand written addresses in that abbreviations are always used, periods are left off abbreviations, numbers are used in place of number names (1st St versus First St.) and # signs are generally eliminated before unit
SALESFORCETIPSHEET1TIPSHEET2NEWNONPROFITTEMPLATECONTACT&ACCOUNTENTRY RILAND&WATERPARTNERSHIP
6 © 2009 Acorn nonprofit solutions
numbers. Your volunteer coordinator may have additional guidance on your organization’s practices in this area including whether a “Primary Street” may include more than one line.
c. If the address is missing a zip code, it can be looked up at: http://zip4.usps.com/zip4/welcome.jsp It can be handy to keep this open in a separate tab so you can easily refer to it. While SalesForce will accept a 5-digit zip code, it is a good practice to include the full nine-digit code, which can be found through this link. Please consult with your volunteer coordinator regarding your organization’s practice, as the nine digit codes may be required for bulk mail purposes now or in the future.
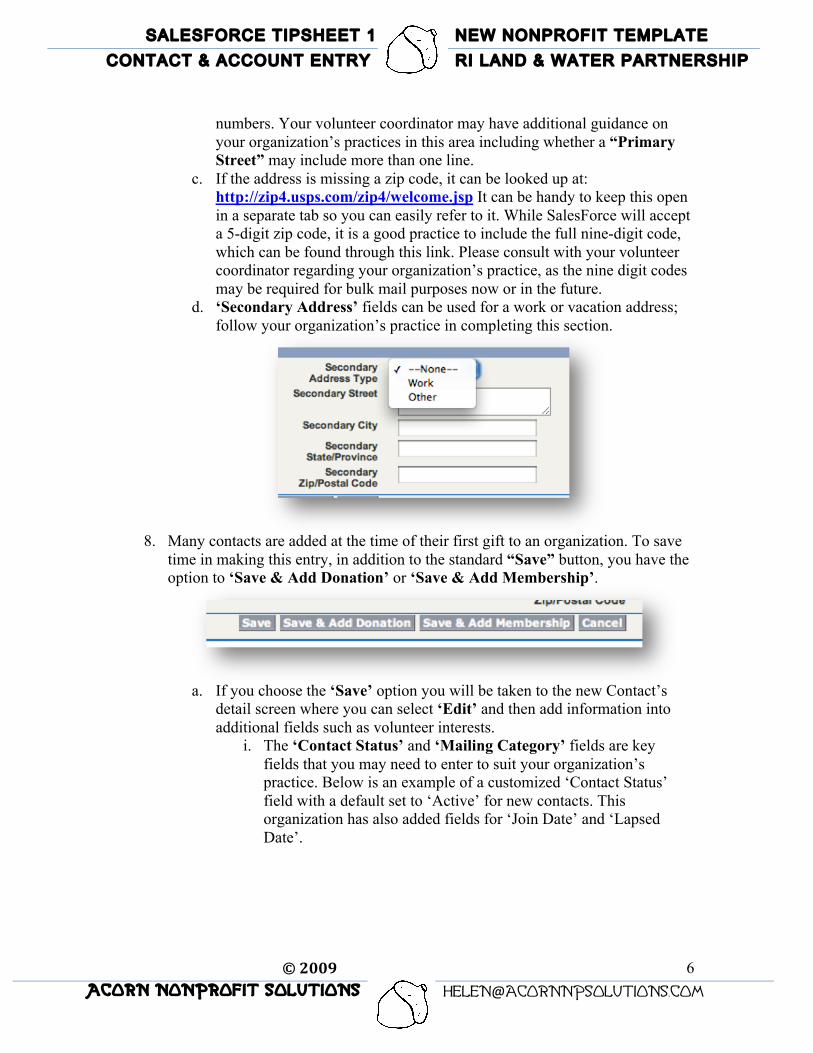
d. ‘Secondary Address’ fields can be used for a work or vacation address; follow your organization’s practice in completing this section.
8. Many contacts are added at the time of their first gift to an organization. To save
time in making this entry, in addition to the standard “Save” button, you have the option to ‘Save & Add Donation’ or ‘Save & Add Membership’.
a. If you choose the ‘Save’ option you will be taken to the new Contact’s
detail screen where you can select ‘Edit’ and then add information into additional fields such as volunteer interests.
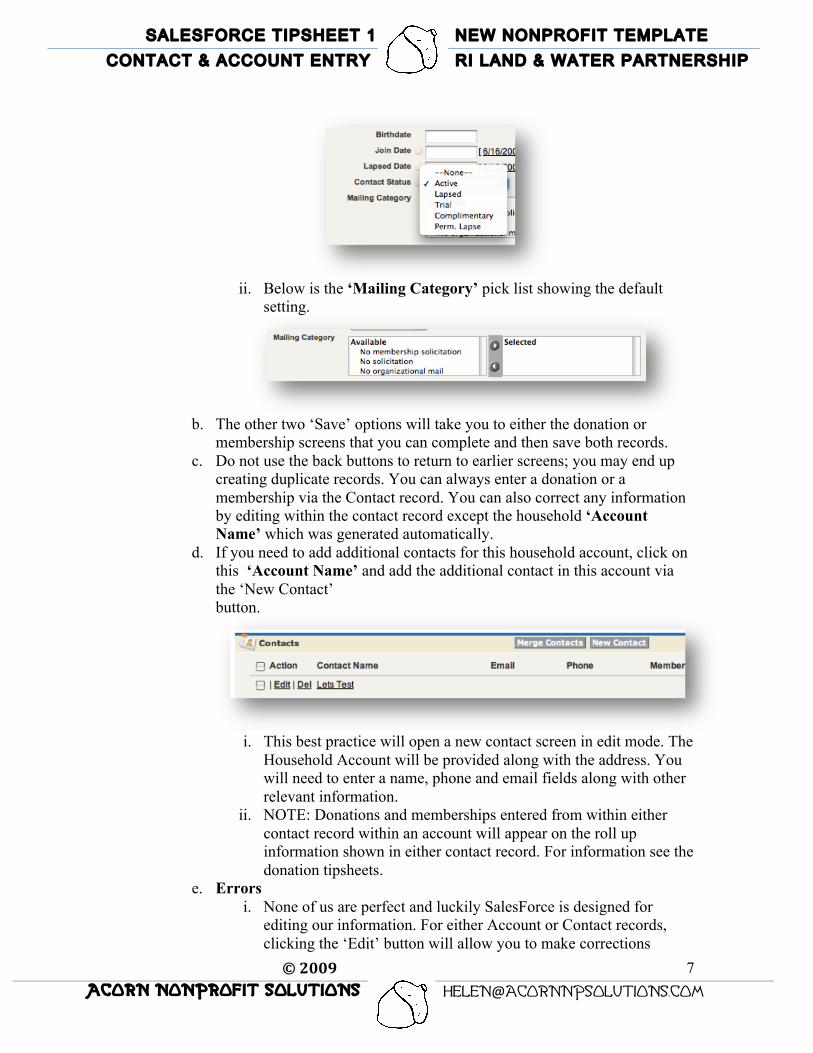
i. The ‘Contact Status’ and ‘Mailing Category’ fields are key fields that you may need to enter to suit your organization’s practice. Below is an example of a customized ‘Contact Status’ field with a default set to ‘Active’ for new contacts. This organization has also added fields for ‘Join Date’ and ‘Lapsed Date’.
SALESFORCETIPSHEET1TIPSHEET2NEWNONPROFITTEMPLATECONTACT&ACCOUNTENTRY RILAND&WATERPARTNERSHIP
7 © 2009 Acorn nonprofit solutions
ii. Below is the ‘Mailing Category’ pick list showing the default
setting.
b. The other two ‘Save’ options will take you to either the donation or
membership screens that you can complete and then save both records. c. Do not use the back buttons to return to earlier screens; you may end up
creating duplicate records. You can always enter a donation or a membership via the Contact record. You can also correct any information by editing within the contact record except the household ‘Account Name’ which was generated automatically.
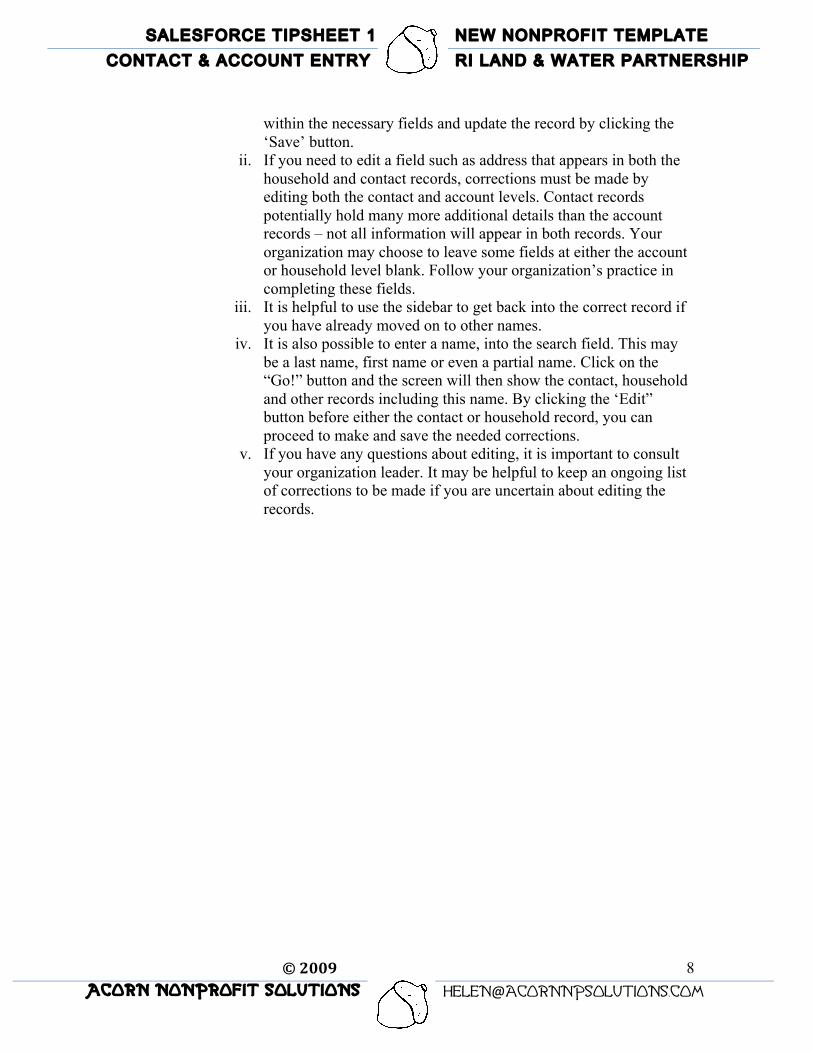
d. If you need to add additional contacts for this household account, click on this ‘Account Name’ and add the additional contact in this account via the ‘New Contact’ button.
i. This best practice will open a new contact screen in edit mode. The
Household Account will be provided along with the address. You will need to enter a name, phone and email fields along with other relevant information.
ii. NOTE: Donations and memberships entered from within either contact record within an account will appear on the roll up information shown in either contact record. For information see the donation tipsheets.
e. Errors i. None of us are perfect and luckily SalesForce is designed for
editing our information. For either Account or Contact records, clicking the ‘Edit’ button will allow you to make corrections
SALESFORCETIPSHEET1TIPSHEET2NEWNONPROFITTEMPLATECONTACT&ACCOUNTENTRY RILAND&WATERPARTNERSHIP
8 © 2009 Acorn nonprofit solutions
within the necessary fields and update the record by clicking the ‘Save’ button.
ii. If you need to edit a field such as address that appears in both the household and contact records, corrections must be made by editing both the contact and account levels. Contact records potentially hold many more additional details than the account records – not all information will appear in both records. Your organization may choose to leave some fields at either the account or household level blank. Follow your organization’s practice in completing these fields.
iii. It is helpful to use the sidebar to get back into the correct record if you have already moved on to other names.
iv. It is also possible to enter a name, into the search field. This may be a last name, first name or even a partial name. Click on the “Go!” button and the screen will then show the contact, household and other records including this name. By clicking the ‘Edit” button before either the contact or household record, you can proceed to make and save the needed corrections.
v. If you have any questions about editing, it is important to consult your organization leader. It may be helpful to keep an ongoing list of corrections to be made if you are uncertain about editing the records.