Embed Size (px)
Citation preview
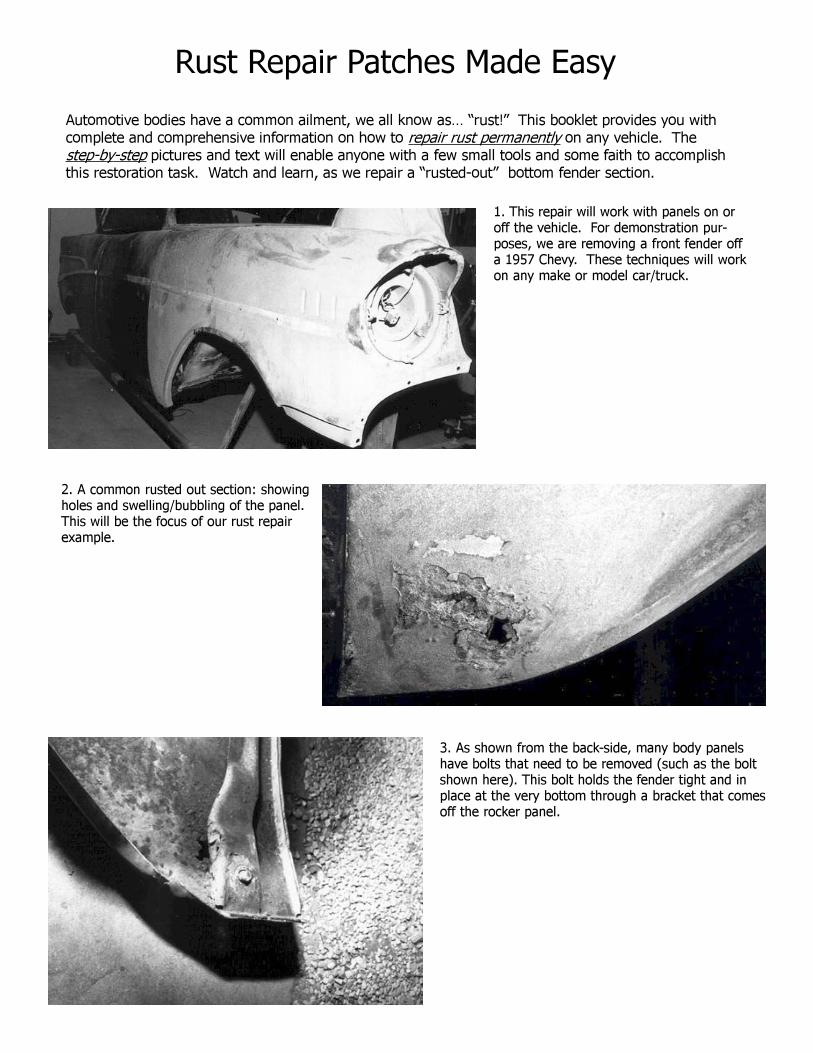
Automotive bodies have a common ailment, we all know as… “rust!” This booklet provides you with
complete and comprehensive information on how to repair rust permanently on any vehicle. Thestep-by-step pictures and text will enable anyone with a few small tools and some faith to accomplish
this restoration task. Watch and learn, as we repair a “rusted-out” bottom fender section.
Rust Repair Patches Made Easy
1. This repair will work with panels on oroff the vehicle. For demonstration pur-poses, we are removing a front fender offa 1957 Chevy. These techniques will workon any make or model car/truck.
2. A common rusted out section: showingholes and swelling/bubbling of the panel.This will be the focus of our rust repairexample.
3. As shown from the back-side, many body panelshave bolts that need to be removed (such as the boltshown here). This bolt holds the fender tight and inplace at the very bottom through a bracket that comesoff the rocker panel.
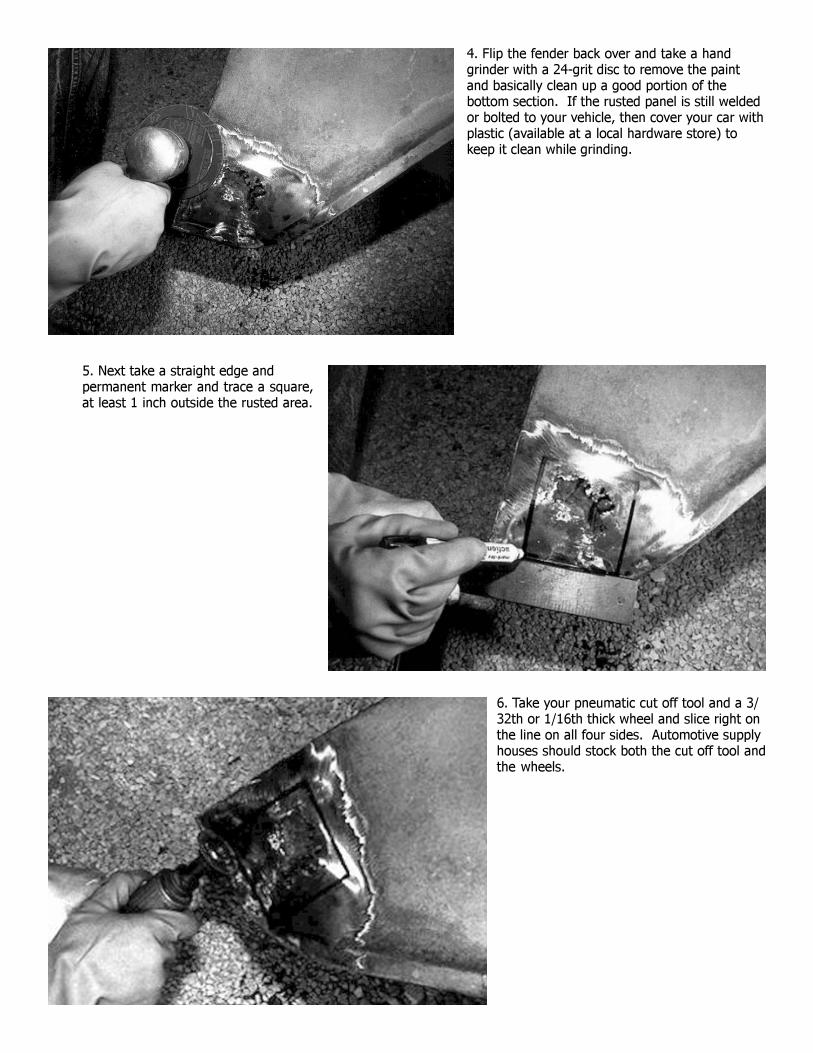
4. Flip the fender back over and take a handgrinder with a 24-grit disc to remove the paintand basically clean up a good portion of thebottom section. If the rusted panel is still weldedor bolted to your vehicle, then cover your car withplastic (available at a local hardware store) tokeep it clean while grinding.
5. Next take a straight edge andpermanent marker and trace a square,at least 1 inch outside the rusted area.
6. Take your pneumatic cut off tool and a 3/32th or 1/16th thick wheel and slice right onthe line on all four sides. Automotive supplyhouses should stock both the cut off tool andthe wheels.
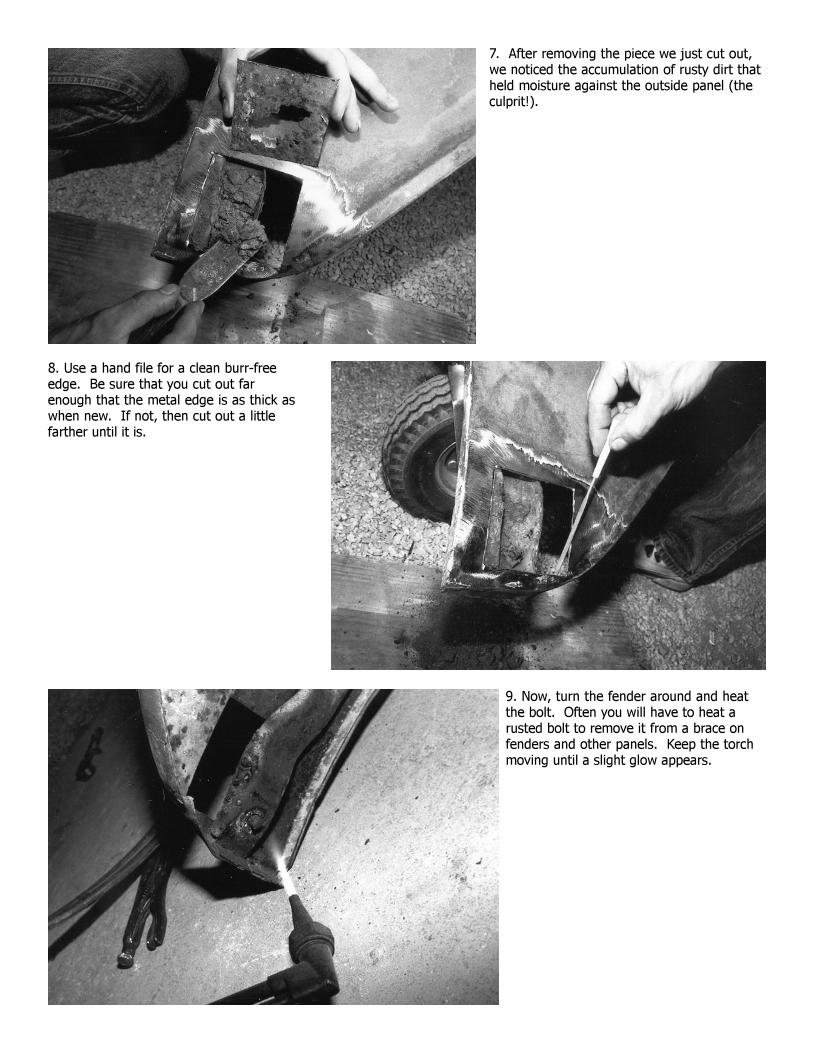
7. After removing the piece we just cut out,we noticed the accumulation of rusty dirt thatheld moisture against the outside panel (theculprit!).
8. Use a hand file for a clean burr-freeedge. Be sure that you cut out farenough that the metal edge is as thick aswhen new. If not, then cut out a littlefarther until it is.
9. Now, turn the fender around and heatthe bolt. Often you will have to heat arusted bolt to remove it from a brace onfenders and other panels. Keep the torchmoving until a slight glow appears.
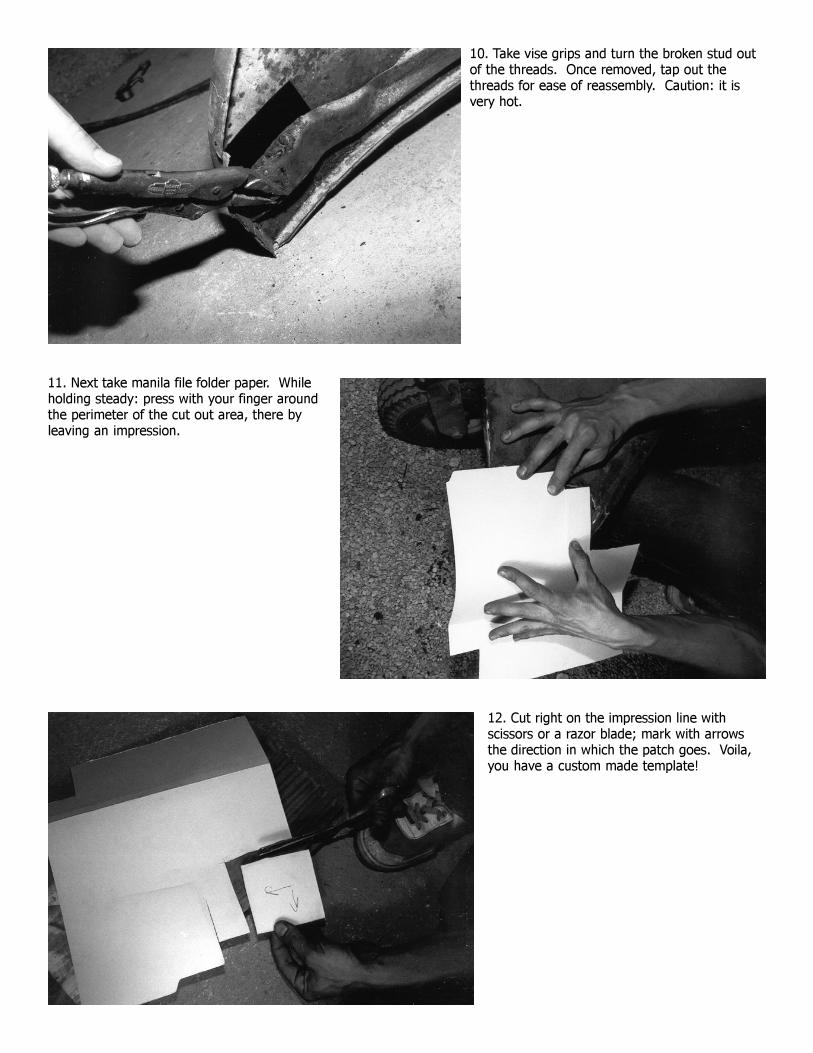
10. Take vise grips and turn the broken stud outof the threads. Once removed, tap out thethreads for ease of reassembly. Caution: it isvery hot.
11. Next take manila file folder paper. Whileholding steady: press with your finger aroundthe perimeter of the cut out area, there byleaving an impression.
12. Cut right on the impression line withscissors or a razor blade; mark with arrowsthe direction in which the patch goes. Voila,you have a custom made template!
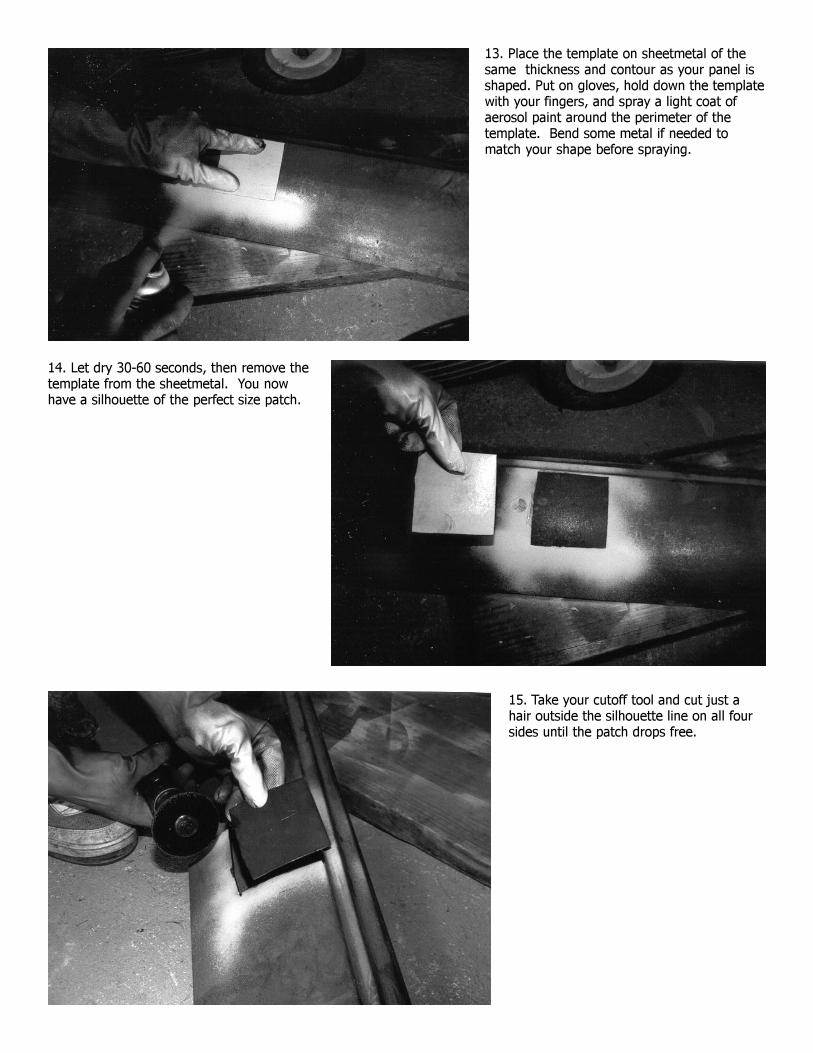
13. Place the template on sheetmetal of thesame thickness and contour as your panel isshaped. Put on gloves, hold down the templatewith your fingers, and spray a light coat ofaerosol paint around the perimeter of thetemplate. Bend some metal if needed tomatch your shape before spraying.
14. Let dry 30-60 seconds, then remove thetemplate from the sheetmetal. You nowhave a silhouette of the perfect size patch.
15. Take your cutoff tool and cut just ahair outside the silhouette line on all foursides until the patch drops free.
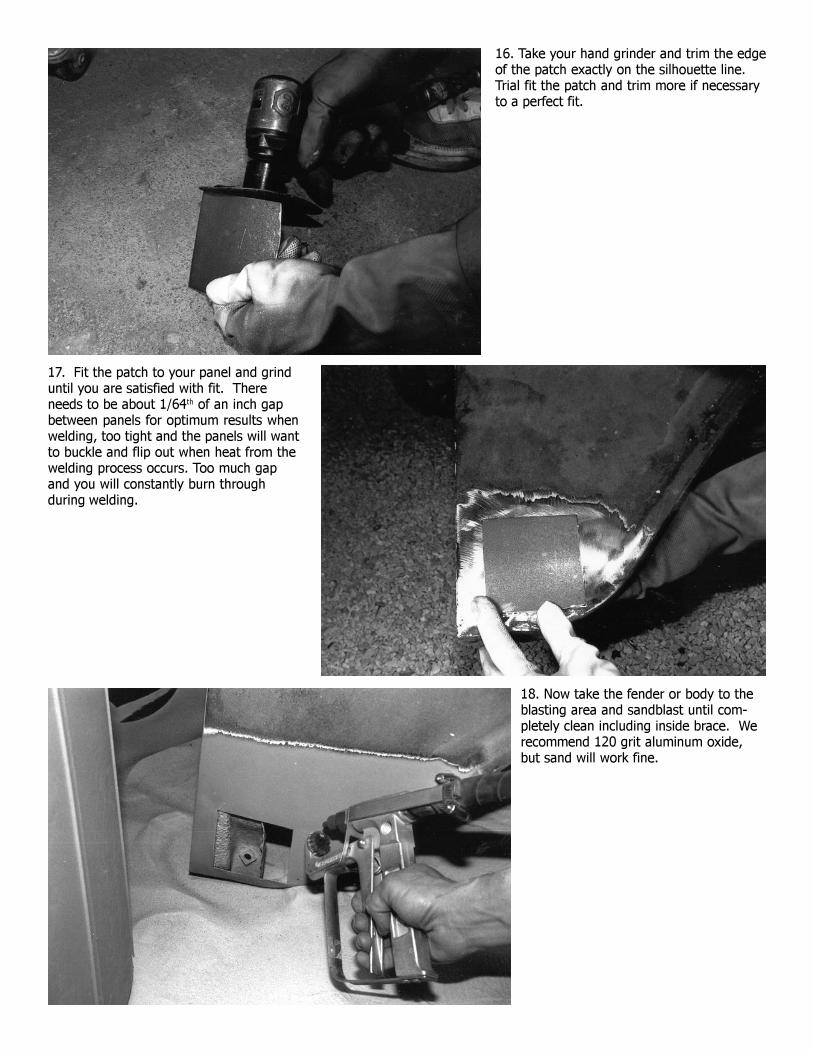
16. Take your hand grinder and trim the edgeof the patch exactly on the silhouette line.Trial fit the patch and trim more if necessaryto a perfect fit.
17. Fit the patch to your panel and grinduntil you are satisfied with fit. Thereneeds to be about 1/64th of an inch gapbetween panels for optimum results whenwelding, too tight and the panels will wantto buckle and flip out when heat from thewelding process occurs. Too much gapand you will constantly burn throughduring welding.
18. Now take the fender or body to theblasting area and sandblast until com-pletely clean including inside brace. Werecommend 120 grit aluminum oxide,but sand will work fine.
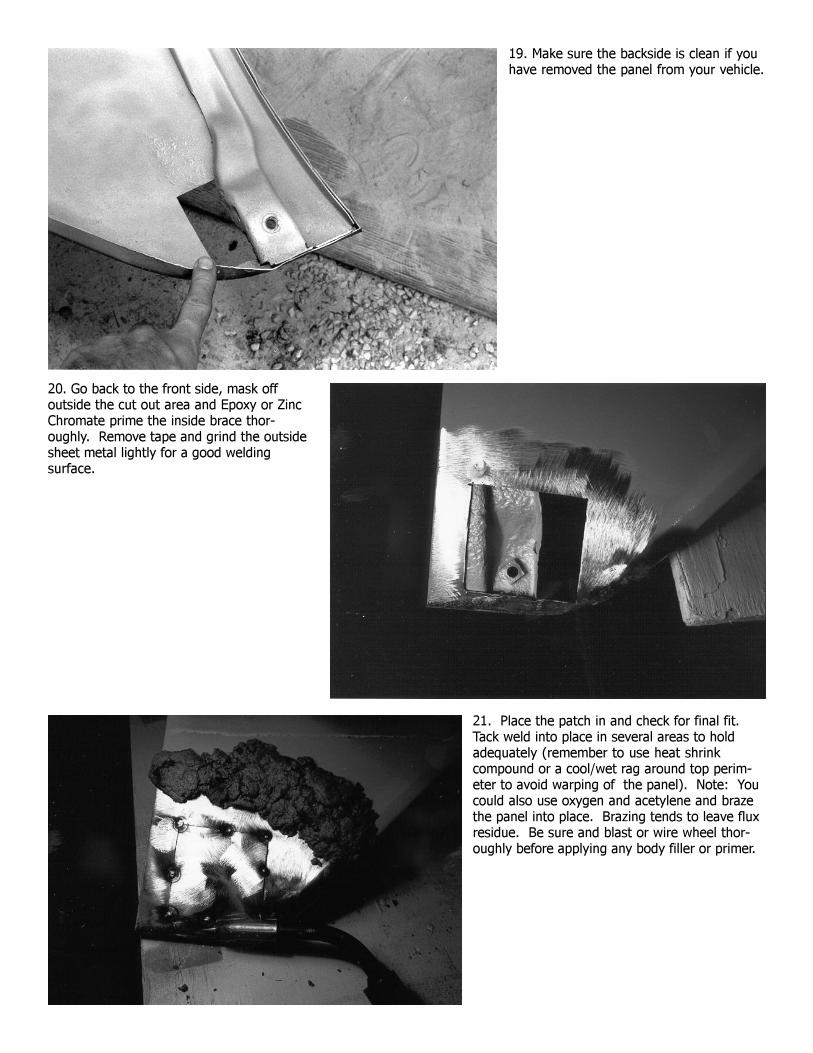
19. Make sure the backside is clean if youhave removed the panel from your vehicle.
20. Go back to the front side, mask offoutside the cut out area and Epoxy or ZincChromate prime the inside brace thor-oughly. Remove tape and grind the outsidesheet metal lightly for a good weldingsurface.
21. Place the patch in and check for final fit.Tack weld into place in several areas to holdadequately (remember to use heat shrinkcompound or a cool/wet rag around top perim-eter to avoid warping of the panel). Note: Youcould also use oxygen and acetylene and brazethe panel into place. Brazing tends to leave fluxresidue. Be sure and blast or wire wheel thor-oughly before applying any body filler or primer.
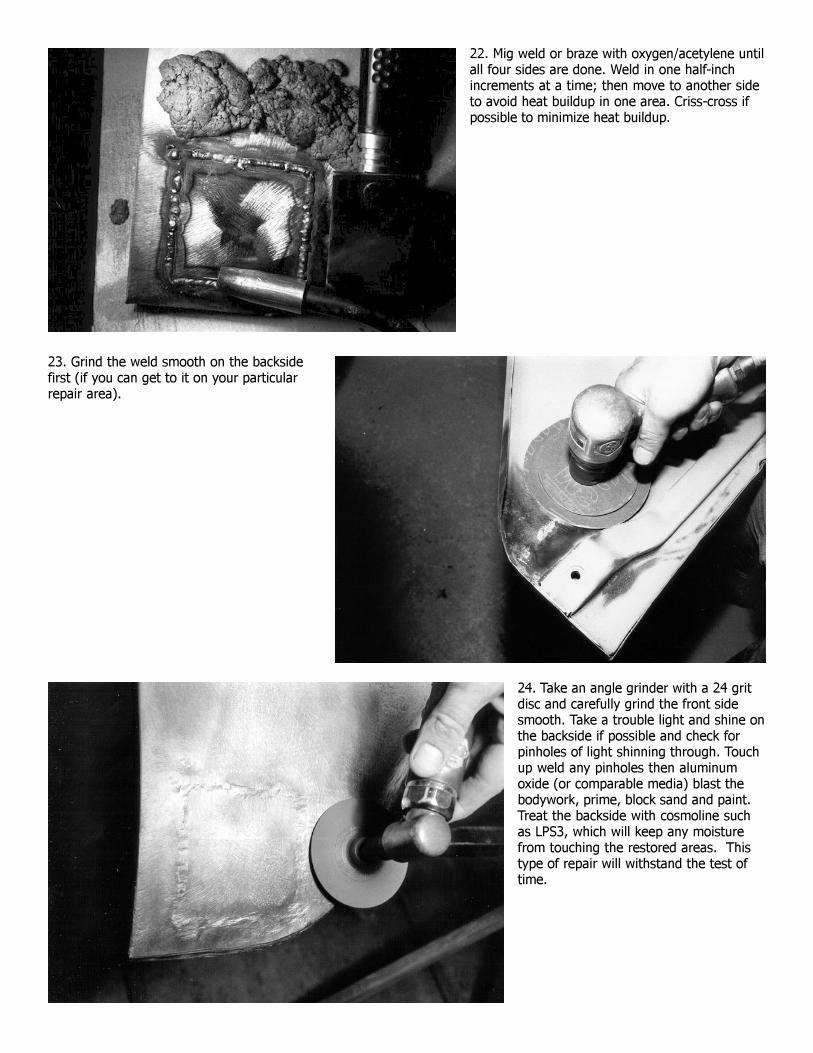
22. Mig weld or braze with oxygen/acetylene untilall four sides are done. Weld in one half-inchincrements at a time; then move to another sideto avoid heat buildup in one area. Criss-cross ifpossible to minimize heat buildup.
23. Grind the weld smooth on the backsidefirst (if you can get to it on your particularrepair area).
24. Take an angle grinder with a 24 gritdisc and carefully grind the front sidesmooth. Take a trouble light and shine onthe backside if possible and check forpinholes of light shinning through. Touchup weld any pinholes then aluminumoxide (or comparable media) blast thebodywork, prime, block sand and paint.Treat the backside with cosmoline suchas LPS3, which will keep any moisturefrom touching the restored areas. Thistype of repair will withstand the test oftime.