Embed Size (px)
Citation preview
Rupaya DocumentationRelease 5.0
Rupaya Core Team
Mar 01, 2019

Getting Started
1 What is Rupaya? 31.1 White Paper . . . . . . . . . . . . . . . . . . . . . . . . . . . . . . . . . . . . . . . . . . . . . . . 31.2 Roadmap . . . . . . . . . . . . . . . . . . . . . . . . . . . . . . . . . . . . . . . . . . . . . . . . . 3
2 Features 52.1 Specifications . . . . . . . . . . . . . . . . . . . . . . . . . . . . . . . . . . . . . . . . . . . . . . . 52.2 Masternodes . . . . . . . . . . . . . . . . . . . . . . . . . . . . . . . . . . . . . . . . . . . . . . . 5
3 How To Buy 73.1 Exchanges . . . . . . . . . . . . . . . . . . . . . . . . . . . . . . . . . . . . . . . . . . . . . . . . 7
3.1.1 CoinMarketCap . . . . . . . . . . . . . . . . . . . . . . . . . . . . . . . . . . . . . . . . . 73.1.2 Rupaya markets . . . . . . . . . . . . . . . . . . . . . . . . . . . . . . . . . . . . . . . . . 83.1.3 List of exchanges . . . . . . . . . . . . . . . . . . . . . . . . . . . . . . . . . . . . . . . . 8
4 Safety 94.1 Scams . . . . . . . . . . . . . . . . . . . . . . . . . . . . . . . . . . . . . . . . . . . . . . . . . . . 94.2 Ponzi Schemes . . . . . . . . . . . . . . . . . . . . . . . . . . . . . . . . . . . . . . . . . . . . . . 10
5 Links and Information 135.1 Links . . . . . . . . . . . . . . . . . . . . . . . . . . . . . . . . . . . . . . . . . . . . . . . . . . . 13
5.1.1 Official sites . . . . . . . . . . . . . . . . . . . . . . . . . . . . . . . . . . . . . . . . . . . 135.1.2 Chat . . . . . . . . . . . . . . . . . . . . . . . . . . . . . . . . . . . . . . . . . . . . . . . 135.1.3 Social media . . . . . . . . . . . . . . . . . . . . . . . . . . . . . . . . . . . . . . . . . . 135.1.4 Facebook . . . . . . . . . . . . . . . . . . . . . . . . . . . . . . . . . . . . . . . . . . . . 135.1.5 Twitter . . . . . . . . . . . . . . . . . . . . . . . . . . . . . . . . . . . . . . . . . . . . . . 145.1.6 Blogs . . . . . . . . . . . . . . . . . . . . . . . . . . . . . . . . . . . . . . . . . . . . . . 14
5.2 Tools . . . . . . . . . . . . . . . . . . . . . . . . . . . . . . . . . . . . . . . . . . . . . . . . . . . 145.2.1 Block explorers, statistics and visualizations . . . . . . . . . . . . . . . . . . . . . . . . . . 145.2.2 Masternode management . . . . . . . . . . . . . . . . . . . . . . . . . . . . . . . . . . . . 145.2.3 Price monitoring and statistics . . . . . . . . . . . . . . . . . . . . . . . . . . . . . . . . . 14
5.3 Glossary . . . . . . . . . . . . . . . . . . . . . . . . . . . . . . . . . . . . . . . . . . . . . . . . . 14
6 Getting Started 15
7 Wallet - How to install and use the Rupaya Wallet 177.1 Install the Newest Rupaya Core 5 Wallet . . . . . . . . . . . . . . . . . . . . . . . . . . . . . . . . 17
7.1.1 Requirements: . . . . . . . . . . . . . . . . . . . . . . . . . . . . . . . . . . . . . . . . . . 17
i

7.1.2 Install the Rupaya Core Wallet . . . . . . . . . . . . . . . . . . . . . . . . . . . . . . . . . 177.1.3 Updating the Wallet Default Settings . . . . . . . . . . . . . . . . . . . . . . . . . . . . . . 187.1.4 Enable Coin Control . . . . . . . . . . . . . . . . . . . . . . . . . . . . . . . . . . . . . . 187.1.5 Disable zRUPX Automint . . . . . . . . . . . . . . . . . . . . . . . . . . . . . . . . . . . 18
7.2 Bootstrap - Steps to Install a Bootstrap . . . . . . . . . . . . . . . . . . . . . . . . . . . . . . . . . 197.2.1 Downloading the Bootstrap from a PC or MAC . . . . . . . . . . . . . . . . . . . . . . . . 197.2.2 Download the Bootstrap from a Linux VPS Using a Bash Script . . . . . . . . . . . . . . . 197.2.3 Download the Bootstrap Manually from a Linux VPS . . . . . . . . . . . . . . . . . . . . . 20
7.3 Sending Coins - RUPX and zRUPX . . . . . . . . . . . . . . . . . . . . . . . . . . . . . . . . . . . 207.3.1 Sending RUPX . . . . . . . . . . . . . . . . . . . . . . . . . . . . . . . . . . . . . . . . . 217.3.2 Sending zRUPX . . . . . . . . . . . . . . . . . . . . . . . . . . . . . . . . . . . . . . . . . 21
7.4 Unlock all of your Masternode coins . . . . . . . . . . . . . . . . . . . . . . . . . . . . . . . . . . 227.5 Upgrade an Existing MasterNode VPS Hot Wallet . . . . . . . . . . . . . . . . . . . . . . . . . . . 227.6 Update an Existing MasterNode Cold Wallet . . . . . . . . . . . . . . . . . . . . . . . . . . . . . . 24
7.6.1 Install the Rupaya Core Wallet . . . . . . . . . . . . . . . . . . . . . . . . . . . . . . . . . 247.6.2 Start the MN from the Cold Wallet . . . . . . . . . . . . . . . . . . . . . . . . . . . . . . . 24
7.7 Verify the MasterNode Hot Wallet Started Successfully . . . . . . . . . . . . . . . . . . . . . . . . . 25
8 SSH: Getting Started with an SSH Client and SSH Keys 278.1 MAC Users - Using SSH . . . . . . . . . . . . . . . . . . . . . . . . . . . . . . . . . . . . . . . . . 27
8.1.1 Use Terminal to Connect to a Linux VPS without an SSH Key . . . . . . . . . . . . . . . . 278.1.2 Generate and Use SSH Keys with Terminal . . . . . . . . . . . . . . . . . . . . . . . . . . 27
8.2 PC Users - Using SSH . . . . . . . . . . . . . . . . . . . . . . . . . . . . . . . . . . . . . . . . . . 298.2.1 Download Putty and Connect to a Linux VPS without an SSH Key . . . . . . . . . . . . . . 298.2.2 Generate a New SSH Key . . . . . . . . . . . . . . . . . . . . . . . . . . . . . . . . . . . . 308.2.3 Use Putty to Connect to a Linux VPS WITH an SSH Key . . . . . . . . . . . . . . . . . . . 31
8.3 All Users - Disabling Password Logins and Root Login Access . . . . . . . . . . . . . . . . . . . . 328.3.1 Disabling password login capabilities . . . . . . . . . . . . . . . . . . . . . . . . . . . . . 338.3.2 Disabling root login access . . . . . . . . . . . . . . . . . . . . . . . . . . . . . . . . . . . 33
9 VPS: Order and Create a Linux VPS 359.1 Digital Ocean . . . . . . . . . . . . . . . . . . . . . . . . . . . . . . . . . . . . . . . . . . . . . . . 35
9.1.1 Create a Digital Ocean Account . . . . . . . . . . . . . . . . . . . . . . . . . . . . . . . . 359.1.2 Create a Linux VPS Droplet . . . . . . . . . . . . . . . . . . . . . . . . . . . . . . . . . . 359.1.3 Configure the External Firewall . . . . . . . . . . . . . . . . . . . . . . . . . . . . . . . . 369.1.4 Identify Available IPv6 Addresses . . . . . . . . . . . . . . . . . . . . . . . . . . . . . . . 369.1.5 Configure Secondary IPv6 Addresses . . . . . . . . . . . . . . . . . . . . . . . . . . . . . 38
9.2 Vultr . . . . . . . . . . . . . . . . . . . . . . . . . . . . . . . . . . . . . . . . . . . . . . . . . . . 399.2.1 Create a Vultr Account . . . . . . . . . . . . . . . . . . . . . . . . . . . . . . . . . . . . . 399.2.2 Create a Linux Virtual Private Server . . . . . . . . . . . . . . . . . . . . . . . . . . . . . . 399.2.3 Configure the External Firewall . . . . . . . . . . . . . . . . . . . . . . . . . . . . . . . . 399.2.4 Identify Available IPv6 Addresses . . . . . . . . . . . . . . . . . . . . . . . . . . . . . . . 409.2.5 Configure Secondary IPv6 Addresses . . . . . . . . . . . . . . . . . . . . . . . . . . . . . 42
10 MasterNodes 4510.1 Setup Overview . . . . . . . . . . . . . . . . . . . . . . . . . . . . . . . . . . . . . . . . . . . . . 45
10.1.1 Common Terminology . . . . . . . . . . . . . . . . . . . . . . . . . . . . . . . . . . . . . 4510.1.2 Running a MasterNode Hot wallet on a home computer is a bad idea . . . . . . . . . . . . . 46
10.2 Initial Setup . . . . . . . . . . . . . . . . . . . . . . . . . . . . . . . . . . . . . . . . . . . . . . . 4710.2.1 VPS and Hot wallet Setup . . . . . . . . . . . . . . . . . . . . . . . . . . . . . . . . . . . 4710.2.2 Cold Wallet Setup . . . . . . . . . . . . . . . . . . . . . . . . . . . . . . . . . . . . . . . . 5310.2.3 Verify the MasterNode Hot Wallet Started Successfully . . . . . . . . . . . . . . . . . . . . 57
10.3 Finishing Touches . . . . . . . . . . . . . . . . . . . . . . . . . . . . . . . . . . . . . . . . . . . . 5810.3.1 Configure the User rupxmn to Use SSH Keys . . . . . . . . . . . . . . . . . . . . . . . . . 58
ii
10.3.2 Disable Password Logins and Root Login Access . . . . . . . . . . . . . . . . . . . . . . . 5910.3.3 Configure Logrotate . . . . . . . . . . . . . . . . . . . . . . . . . . . . . . . . . . . . . . . 6010.3.4 Enable Hot Wallet Auto Start . . . . . . . . . . . . . . . . . . . . . . . . . . . . . . . . . . 61
10.4 Advanced Users - Initial Setup . . . . . . . . . . . . . . . . . . . . . . . . . . . . . . . . . . . . . . 6210.4.1 VPS and Hot wallet Setup . . . . . . . . . . . . . . . . . . . . . . . . . . . . . . . . . . . 6210.4.2 Cold Wallet Setup . . . . . . . . . . . . . . . . . . . . . . . . . . . . . . . . . . . . . . . . 6710.4.3 Verify the MasterNode Hot Wallet Started Successfully . . . . . . . . . . . . . . . . . . . . 70
10.5 Scripted MasterNode Setup . . . . . . . . . . . . . . . . . . . . . . . . . . . . . . . . . . . . . . . 7010.5.1 Scripted VPS and Hot wallet Setup . . . . . . . . . . . . . . . . . . . . . . . . . . . . . . . 7010.5.2 Cold Wallet Setup . . . . . . . . . . . . . . . . . . . . . . . . . . . . . . . . . . . . . . . . 7210.5.3 Verify the MasterNode Hot Wallet Started Successfully . . . . . . . . . . . . . . . . . . . . 75
10.6 Config File Templates . . . . . . . . . . . . . . . . . . . . . . . . . . . . . . . . . . . . . . . . . . 7610.6.1 Hot Wallet Configuration File . . . . . . . . . . . . . . . . . . . . . . . . . . . . . . . . . 7610.6.2 Cold Wallet Masternode Configuration File . . . . . . . . . . . . . . . . . . . . . . . . . . 7710.6.3 Cold Wallet Configuration File . . . . . . . . . . . . . . . . . . . . . . . . . . . . . . . . . 78
11 Marketing 8111.1 Media Kit . . . . . . . . . . . . . . . . . . . . . . . . . . . . . . . . . . . . . . . . . . . . . . . . . 81
11.1.1 Logo Explainer . . . . . . . . . . . . . . . . . . . . . . . . . . . . . . . . . . . . . . . . . 8111.1.2 Identity Style Guide . . . . . . . . . . . . . . . . . . . . . . . . . . . . . . . . . . . . . . . 8111.1.3 Rupaya Buzz . . . . . . . . . . . . . . . . . . . . . . . . . . . . . . . . . . . . . . . . . . 8111.1.4 Imagery . . . . . . . . . . . . . . . . . . . . . . . . . . . . . . . . . . . . . . . . . . . . . 8211.1.5 Media Contact . . . . . . . . . . . . . . . . . . . . . . . . . . . . . . . . . . . . . . . . . 8211.1.6 Key Links . . . . . . . . . . . . . . . . . . . . . . . . . . . . . . . . . . . . . . . . . . . . 82
iii

iv
Rupaya Documentation, Release 5.0
The Rupaya platform will encompass three main pillars in order to effectively solve the key payment and transactionchallenges facing South Asia.
• Owning Part of the Future (Governance Voting, Staking akin to interest)
• Improving the Payment Experience (method of payment for goods and services)
• Reducing Currency Transfer Fees
The South Asia region faces several unique challenges which hinder access to even the most basic banking and paymentsolutions. Issues such as regular electricity outages and a unreliable or nonexistent internet access impose severelimitations on traditional banking, as well as the use of many Western cryptocurrencies for remittance and paymentprocessing. The region also faces onerously high currency transfer fees. Our solution to allowing payments in the faceof poor electricity and internet connectivity centers on providing an excellent mobile wallet experience that is secureand robust. Further, we will research, develop, and deploy smart Point of Sale systems designed for e-commerceand brick & mortar businesses. These Point of Sale systems will leverage SwiftTX technology, already present inRupaya, for instant transactions and a fast and seamless customer experience. To solve the extremely high transfercurrency fees within the South Asia region we propose the creation of a dedicated RUPX/Fiat currency exchange. Thecost of sending Rupaya is exponentially lower than sending traditional fiat currency. A low cost RUPX/Fiat currencyexchange will enable the region to keep more of its money. Together the Rupaya solutions will empower people inSouth Asia and provide an increased opportunity for regional economic growth and vitality.
If you are new to cryptocurrencies, the most important change to understand is that transactions occur directly betweentwo parties without any central authority to facilitate the transaction. This also means that you are responsible for yourown security - there is no bank or credit card company to reverse a transaction if your funds are stolen or lost. In thissense, it is similar to cash or gold, but cryptocurrency can be spent locally and internationally with equal ease, if youare confident you are sending funds to the right destination. For these reasons, the Rupaya documentation has a strongfocus on safety and understanding the concepts and features that drive the Rupaya ecosystem. The videos, links anddocumentation below can help you get started, or use the table of contents on the left to find a specific topic of interest.
Getting Started 1

Rupaya Documentation, Release 5.0
2 Getting Started
CHAPTER 1
What is Rupaya?
Rupaya aims to be the most user-friendly and scalable payments-focused cryptocurrency in the world. The Rupayanetwork features instant transaction confirmation, double spend protection, anonymity equal to that of physical cash,a self-governing, self-funding model driven by incentivized full nodes and a clear roadmap for on-chain scaling to upto 400MB blocks using custom-developed open source hardware. While Rupaya is based on Bitcoin and compatiblewith many key components of the Bitcoin ecosystem, its two-tier network structure offers significant improvements intransaction speed, anonymity and governance. This section of the documentation describes these and many more keyfeatures that set Rupaya apart in the blockchain economy.
The documentation and links collected here can help you get started, or use the table of contents on the left to finda specific topic of interest. New users may be interested in getting started with an appropriate wallet, learning abouthow to buy Rupaya and where to spend Rupaya, learning about safety or joining one of the many Rupaya communitysites.
1.1 White Paper
The Rupaya White Paper describes the unique value proposition and key innovations in Rupaya from a practical andtheoretical perspective. The White Paper is provided as a PDF document that receives ongoing updates as new featuresare implemented.
White Paper Download
1.2 Roadmap
The Rupaya roadmap outlines key delivery milestones for future releases of Rupaya and includes specific technicaldetails describing how the development team plans to realize each challenge.
Rupaya Roadmap
3

Rupaya Documentation, Release 5.0
4 Chapter 1. What is Rupaya?
CHAPTER 2
Features
2.1 Specifications
• No premine
• Quark hashing algorithm
• Zerocoin privacy
• SwiftX transactions
• Decentralized Governance By Blockchain allows masternode owners to vote on budget proposals and decisionsthat affect Rupaya
2.2 Masternodes
5

Rupaya Documentation, Release 5.0
6 Chapter 2. Features
CHAPTER 3
How To Buy
Rupaya can be purchased and sold on a variety of exchanges.
• Exchanges are one of the most popular ways to trade cryptocurrency. A wide range of exchanges exist, eachoffering slightly different features. Some serve different markets, some are in direct competition, some havecheaper fees, and some are subject to more or less strict regulatory requirements. Most exchanges are central-ized, meaning they are operated by a single company, which may be obliged by the laws of the jurisdiction inwhich it operates to collect data on its customers. Others are decentralized, but as a result have higher escrow re-quirements since you are dealing peer-to-peer instead of with a trusted entity. Exchanges can be broadly brokendown into two categories: exchanges which accept national currency (fiat money) and exchanges which deal incryptocurrencies only. For safety, exchanges should not be used as wallets. Exchanges are for trading, not forsavings.
DISCLAIMER: This list is provided for informational purposes only. Services listed here have not been evaluated orendorsed by Rupaya Core and no guarantees are made as to the accuracy of this information. Please exercise discretionwhen using third-party services.
3.1 Exchanges
Cryptocurrency exchanges exist to convert national currency, also known as fiat money, into cryptocurrency. Manyexchanges do not accept fiat money, and exchange between various cryptocurrencies only. Trades are handled onmarkets, and trades are created between pairs of currencies, identified by their ticker codes. The volume traded on anexchange provides a good indication of how quickly a buy or sell order you place will be filled. This section introducessome of the most popular exchanges for trading Rupaya.
3.1.1 CoinMarketCap
CoinMarketCap lists all cryptocurrencies by their market capitalization. Click-ing one of these currencies allows you to view price charts, and clicking Markets allows you to view the marketsavailable and the trading pairs they offer.
7
Rupaya Documentation, Release 5.0
https://coinmarketcap.com/currencies/rupaya/#markets
3.1.2 Rupaya markets
The official Rupaya website also provides a list of major exchanges offering Rupaya.
http://www.rupx.io/
3.1.3 List of exchanges
The exchanges listed here are for informational purposes only and do not indicate endorsement or affiliation with anyparticular platform.
CryptoBridge https://crypto-bridge.org/
Information on CryptoBridge
Stocks.Exchange https://www.stex.com/
Information on STEX (Formally Stocks Exchange)
CryptoHub https://cryptohub.online/
Information on CryptoHub
Graviex https://graviex.net
Graviex is a part of the Gravio ecosystem, a blockchain-based communication platform. It offers extremely lowrates and fees for trading. RUPX can be traded against BTC, ETH, LTC and DOGE.
qTrade https://qtrade.io/
Information on qTrade
8 Chapter 3. How To Buy
CHAPTER 4
Safety
If you are new to cryptocurrencies, the most important change to understand in comparison with the traditional bank-ing system is that transactions occur directly between two parties without any central authority to facilitate thetransaction. This also means that you are responsible for your own security - there is no bank or credit card companyto reverse a transaction if your funds are stolen or lost. If you forget or lose your wallet file, recovery phrase or PIN,you will permanently and irrevocably lose access to your funds.
Rupaya is designed from the ground up to be fast, secure, fungible and private. In this sense, it is similar to cashor gold, but cryptocurrency can be spent locally and internationally with equal ease, if you are confident you aresending funds to the right destination. For these reasons, the Rupaya documentation has a strong focus on safety andunderstanding the concepts and features that drive the Rupaya ecosystem.
A few general safety guidelines:
• Do not trust any online service or person because they sound or look reputable. Always use an escrow serviceif you are buying peer-to- peer.
• Do not use exchanges as wallets. Exchanges are for trading, not for savings.
• Mobile wallets should be used for day-to-day purchases, but do not keep large amounts of funds in them.Transfer funds as necessary.
A list of known scams, fake wallets and Ponzi or pyramid schemes can be seen below. Do NOT trust them.
4.1 Scams
There are many “fake” Rupaya pages on the internet attempting to trick users into sending Rupaya or other cryptocur-rencies or “open a wallet”. Other scams include selling fake mining hardware, fake Rupaya or altcoins with a similarname, and Ponzi schemes (see below). Please be careful and do NOT trust any third parties listed here!!
Beware of fake Twitter accounts impersonating Rupaya! The official Twitter account is: https://twitter.com/rupayacoin
Please report these and any others scams you encounter as follows:
1. Report phishing and scams to Google: https://www.google.com/safebrowsing/report_phish
9
Rupaya Documentation, Release 5.0
2. Look up the registrar of the domain and send a complaint: https://www.whois.com/whois
3. Report phishing to Netcraft: https://www.netcraft.com
4. Report scams to the BadBitcoin Project: http://www.badbitcoin.org
5. If in doubt, use Crypto Scam Checker to see if already report and report there as well: https://fried.com/crypto-scam-checker
4.2 Ponzi Schemes
A Ponzi scheme, Pyramid scheme or Multi-level marketing are a fraudulent investment operations where the operatorprovides fabricated reports and generates returns for older investors through revenue paid by new investors. More andmore users must constantly join the scheme in order for it to continue operation, with ever greater numbers of peoplelosing money to the originators of the scheme.
• What is a Pyramid Scheme?
• How to spot a Ponzi Scheme
• BehindMLM - News and blog about Ponzi schemes
If you encounter a Ponzi scheme, follow the same reporting steps as above for scam websites!
List of known Ponzi schemes (there are many more - stay vigilant!):
OneCoin
• http://themerkle.com/dr-ruja-flees-sinking-ship-as-regulators-crack-down-on-onecoin/
• http://siliconangle.com/blog/2016/09/29/dodgy-cryptocurrency-onecoin-under-police-investigation-accused-of-being-a-ponzi-scheme/
• https://cointelegraph.com/news/one-coin-much-scam-onecoin-exposed-as-global-mlm-ponzi-scheme
• http://www.makemoneyexpert.com/online/network-marketing/reviews/onecoin/
• https://pageone.ng/2016/11/05/beware-onecoin-ponzi-scheme/
SwissCoin
• http://behindmlm.com/mlm-reviews/swisscoin-review-25-to-15000-eur-ponzi-points-investment/
• http://ethanvanderbuilt.com/2017/01/26/swisscoin-scam-warning/
• https://news.bitcoin.com/dissecting-swisscoin-cryptocurrency-ponzi-horizon/
The Billion Coin
• https://steemit.com/news/@rahmat/review-the-billion-coin-ponzi-scheme
• https://coins.newbium.com/post/728-scam-alert-the-billion-coins-scam-ponzi-scheme
• https://bitcointalk.org/index.php?topic=1592288.0
Sustaincoin
• http://www.scamvoid.com/check/sustaincoin.com
E-Dinar
• http://behindmlm.com/mlm-reviews/e-dinar-review-edr-unit-ponzi-points-cryptocurrency/
• https://www.scam.com/showthread.php?714218-E-dinar-coin
• https://bitcointalk.org/index.php?topic=1569896.0
DasCoin
10 Chapter 4. Safety
Rupaya Documentation, Release 5.0
• http://behindmlm.com/mlm-reviews/coin-leaders-review-dascoin-is-a-onecoin-ponzi-points-clone/
• https://bitcointalk.org/index.php?topic=1636850.0
BitConnect
• https://www.reddit.com/r/Bitconnect/comments/76fa9k/bitconnect_investigated_as_a_ponzi_scheme/
• https://www.youtube.com/watch?v=6fujWfmgRJU
• http://www.binaryoptionsarmy.com/2017/11/bitconnect-scam-review/
• https://satoshiwatch.com/hall-of-shame/bitconnect-coin/
HashOcean
• http://themerkle.com/bitcoin-scam-risk-warning-hashocean/
CryptoDouble
• http://themerkle.com/bitcoin-hyip-ponzi-scheme-alert-coindouble/
4.2. Ponzi Schemes 11

Rupaya Documentation, Release 5.0
12 Chapter 4. Safety
CHAPTER 5
Links and Information
5.1 Links
5.1.1 Official sites
• Website: http://rupx.io
• User documentation: https://docs.rupx.io
• Protocol documentation: https://github.com/rupaya-project/rupaya
• GitHub: https://github.com/rupaya-project/
• Roadmap: http://rupx.io/roadmap
5.1.2 Chat
• Rupaya Discord: https://discord.gg/UTms9DP
5.1.3 Social media
• Discord: https://discord.gg/UTms9DP
• Reddit: https://www.reddit.com/r/RupayaCoin
• Twitter: https://twitter.com/rupayacoin
• Facebook: https://www.facebook.com/rupayacoin
5.1.4 Facebook
• English (Official): https://www.facebook.com/rupayacoin
13
Rupaya Documentation, Release 5.0
5.1.5 Twitter
• Rupaya Official Account: https://twitter.com/rupayacoin
5.1.6 Blogs
• Medium: https://medium.com/@rupaya
5.2 Tools
5.2.1 Block explorers, statistics and visualizations
• https://hereismy.rupx.io/
• https://find.rupx.io/
5.2.2 Masternode management
• http://rupx5.mn.zone/
5.2.3 Price monitoring and statistics
• http://www.rupx.io
• https://coinmarketcap.com/currencies/rupaya
5.3 Glossary
51% Attack A condition in which more than half the computing power on a cryptocurrency network is controlled bya single miner or group of miners. That amount of power theoretically makes them the authority on the network.This means that every client on the network believes the attacker’s hashed transaction block.
14 Chapter 5. Links and Information

CHAPTER 6
Getting Started
Coming Soon. . .
15

Rupaya Documentation, Release 5.0
16 Chapter 6. Getting Started
CHAPTER 7
Wallet - How to install and use the Rupaya Wallet
Welcome to the Rupaya wallet instructions page. This section provides details on how to install the newest walletversion, how to download and install a bootstrap to speed up synchronization, how to consolidate RUPX coins into asingle wallet address to improve staking, how to consolidate zRUPX to a single RUPX wallet address, how to updatean existing MasterNode VPS Hot Wallet, how to update an existing MasterNode Cold wallet, and how to verify thatyour MasterNode started correctly.
7.1 Install the Newest Rupaya Core 5 Wallet
These instructions are intended for those that are installing the newest Rupaya Core 5 wallet on your personal Windowsor Mac computer.
7.1.1 Requirements:
• Windows 7 or higher, Mac OS, or Linux Ubuntu 16.04/18.04• Outgoing internet access to sync the blockchain and enable the MasterNode remotely
7.1.2 Install the Rupaya Core Wallet
1. Open the following URL in a web browser to download the appropriate wallet version for your system:
• https://github.com/rupaya-project/rupx/releases
2. Be sure that your existing wallet.dat and private keys are backed up from the old wallet. We strongly recommendbacking up your wallet.dat and private keys prior to starting this process.
For more instructions, watch this Video from a fellow Rupayan, David Coen, on how to export yourprivate keys:
17
Rupaya Documentation, Release 5.0
3. Close the existing Rupaya wallet, if you already have one installed and opened.
4. Open the new Rupaya wallet. The Rupaya-qt file should be located in the following default directory:
• Mac: /Users/USERNAME/Library/Application Support/RupayaCore• Windows: C:\Program Files\Rupaya
• Accept any pop ups asking to confirm if you want to continue with the installation
• When prompted, select Use the default data directory and click OK
• Mac: /Users/USERNAME/Library/Application Support/RupayaCore• Windows: C:\Users\USERNAME\AppData\Roaming\RupayaCore
• If prompted by security or antivirus software, click Allow Always
• The new wallet should now open and begin to synchronize with the network
7.1.3 Updating the Wallet Default Settings
Now that the new wallet is installed, let’s take care of updating some very important default wallet settings. Thesesteps are especially critical if you plan to setup a MasterNode.
7.1.4 Enable Coin Control
This feature will allow you to control your wallet inputs, to verify that all coins are consolidated into a single input, tochoose which inputs you send coins from, and to optimize staking.
1. Open the Rupaya Wallet and click on Settings
2. Select Options
3. Click on the Wallet tab
4. Click the check-box that says Enable coin control features
7.1.5 Disable zRUPX Automint
This feature will disable the auto minting of RUPX into zRUPX.
1. Open the Rupaya Wallet and click on Settings
2. Select Options
3. Click on the Main tab
4. Uncheck the check-box that says Enable zRUPX Automint
5. Click OK to close the wallet options.
NOTE: THIS IS A CRITICAL STEP FOR THOSE THAT PLAN TO RUN A MASTERNODE
Once completed, you can proceed to the next step to install the bootstrap, which will reduce the amount of timeit takes to synchronize the wallet with the network.
18 Chapter 7. Wallet - How to install and use the Rupaya Wallet
Rupaya Documentation, Release 5.0
7.2 Bootstrap - Steps to Install a Bootstrap
These instructions are intended for anyone that wants to speed up the synchronization process when installing thewallet for the first time or to resolve issues with a wallet that has forked onto the wrong chain.
7.2.1 Downloading the Bootstrap from a PC or MAC
This section is intended for those that want to install the bootstrap on a PC or MAC.
1. Close the Rupaya wallet. Be sure that it is completely closed before proceeding.
2. Open the following URL in a web browser to download the zip file containing the bootstrap:
• https://rupaya.ams3.cdn.digitaloceanspaces.com/bootstrap/rupx-bootstrap.zip
3. Open the file named rupx-bootstrap.zip using an unzip utility (i.e.Winzip or 7zip).
4. In the unzip utility, open the Rupaya folder and extract the blocks, chainstate, and zerocoin folders into theRupayaCore folder where your wallet is installed
• Mac: /Users/USERNAME/Library/Application Support/RupayaCore• Windows: C:\Users\USERNAME\AppData\Roaming\RupayaCore
• If prompted, confirm that you want to replace the existing file(s).
5. Restart the Rupaya wallet.
• The installation of the bootstrap is now complete.
7.2.2 Download the Bootstrap from a Linux VPS Using a Bash Script
This section is intended for those that want to install the bootstrap on a Linux VPS using a bash script, which willautomate the process.
Warning: Only do this on a Linux VPS Hot Wallet that does not contain RUPX or zRUPX, or you will lose yourcoins.
1. Login to the Linux VPS as the user that will be running the wallet.
2. Run the following commands, one at a time, to download and run the bash script:
• For those running the wallet as the user rupxmn, use the following commands:
wget https://raw.githubusercontent.com/BlockchainBrain/Rupaya_Bootstrap/master/→˓rupxmn-bootstrap.shbash rupxmn-bootstrap.sh
• For those running the wallet as the user root, use the following commands:
wget https://raw.githubusercontent.com/BlockchainBrain/Rupaya_Bootstrap/master/→˓root-bootstrap.shbash root-bootstrap.sh
• For those that used the bash script to setup the MasterNode, use the following commands:
7.2. Bootstrap - Steps to Install a Bootstrap 19
Rupaya Documentation, Release 5.0
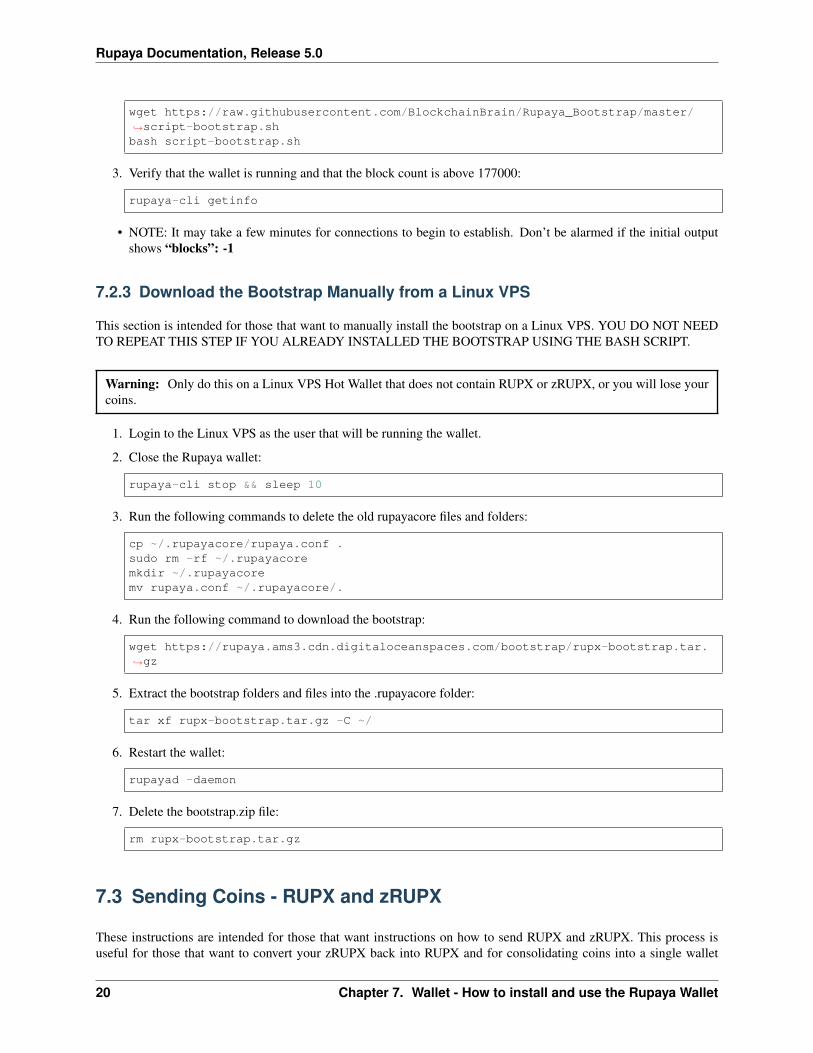
wget https://raw.githubusercontent.com/BlockchainBrain/Rupaya_Bootstrap/master/→˓script-bootstrap.shbash script-bootstrap.sh
3. Verify that the wallet is running and that the block count is above 177000:
rupaya-cli getinfo
• NOTE: It may take a few minutes for connections to begin to establish. Don’t be alarmed if the initial outputshows “blocks”: -1
7.2.3 Download the Bootstrap Manually from a Linux VPS
This section is intended for those that want to manually install the bootstrap on a Linux VPS. YOU DO NOT NEEDTO REPEAT THIS STEP IF YOU ALREADY INSTALLED THE BOOTSTRAP USING THE BASH SCRIPT.
Warning: Only do this on a Linux VPS Hot Wallet that does not contain RUPX or zRUPX, or you will lose yourcoins.
1. Login to the Linux VPS as the user that will be running the wallet.
2. Close the Rupaya wallet:
rupaya-cli stop && sleep 10
3. Run the following commands to delete the old rupayacore files and folders:
cp ~/.rupayacore/rupaya.conf .sudo rm -rf ~/.rupayacoremkdir ~/.rupayacoremv rupaya.conf ~/.rupayacore/.
4. Run the following command to download the bootstrap:
wget https://rupaya.ams3.cdn.digitaloceanspaces.com/bootstrap/rupx-bootstrap.tar.→˓gz
5. Extract the bootstrap folders and files into the .rupayacore folder:
tar xf rupx-bootstrap.tar.gz -C ~/
6. Restart the wallet:
rupayad -daemon
7. Delete the bootstrap.zip file:
rm rupx-bootstrap.tar.gz
7.3 Sending Coins - RUPX and zRUPX
These instructions are intended for those that want instructions on how to send RUPX and zRUPX. This process isuseful for those that want to convert your zRUPX back into RUPX and for consolidating coins into a single wallet
20 Chapter 7. Wallet - How to install and use the Rupaya Wallet
Rupaya Documentation, Release 5.0
input for better staking results.
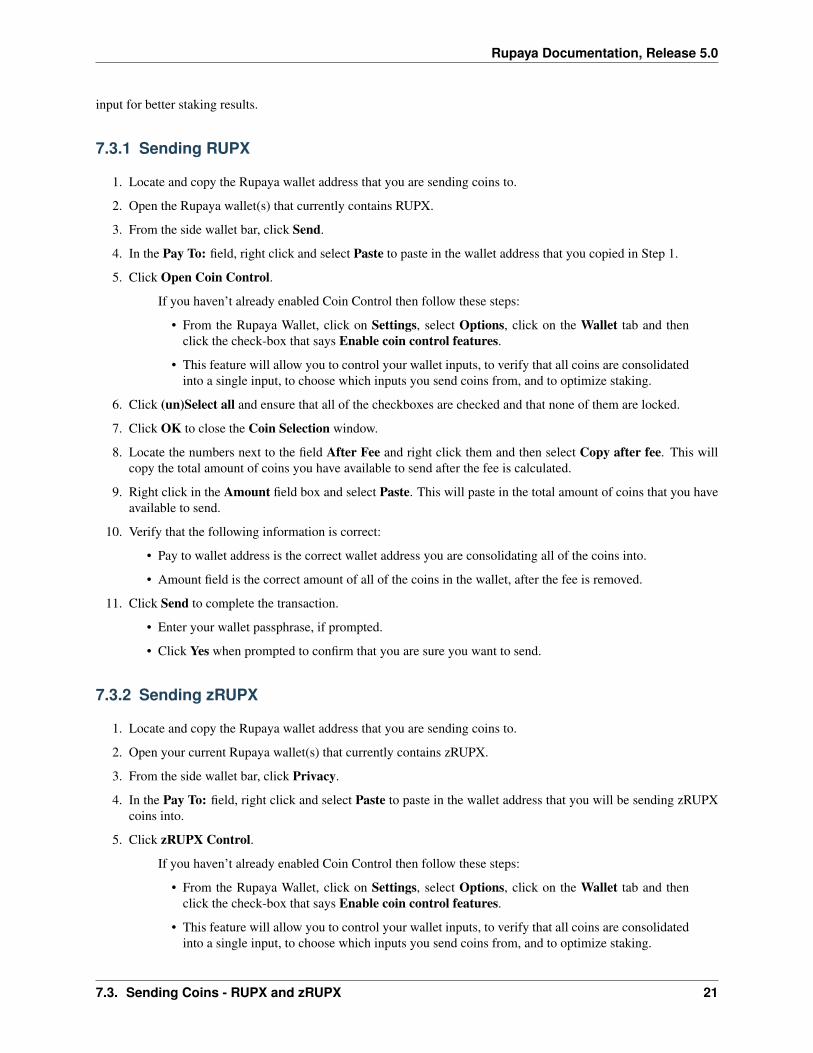
7.3.1 Sending RUPX
1. Locate and copy the Rupaya wallet address that you are sending coins to.
2. Open the Rupaya wallet(s) that currently contains RUPX.
3. From the side wallet bar, click Send.
4. In the Pay To: field, right click and select Paste to paste in the wallet address that you copied in Step 1.
5. Click Open Coin Control.
If you haven’t already enabled Coin Control then follow these steps:
• From the Rupaya Wallet, click on Settings, select Options, click on the Wallet tab and thenclick the check-box that says Enable coin control features.
• This feature will allow you to control your wallet inputs, to verify that all coins are consolidatedinto a single input, to choose which inputs you send coins from, and to optimize staking.
6. Click (un)Select all and ensure that all of the checkboxes are checked and that none of them are locked.
7. Click OK to close the Coin Selection window.
8. Locate the numbers next to the field After Fee and right click them and then select Copy after fee. This willcopy the total amount of coins you have available to send after the fee is calculated.
9. Right click in the Amount field box and select Paste. This will paste in the total amount of coins that you haveavailable to send.
10. Verify that the following information is correct:
• Pay to wallet address is the correct wallet address you are consolidating all of the coins into.
• Amount field is the correct amount of all of the coins in the wallet, after the fee is removed.
11. Click Send to complete the transaction.
• Enter your wallet passphrase, if prompted.
• Click Yes when prompted to confirm that you are sure you want to send.
7.3.2 Sending zRUPX
1. Locate and copy the Rupaya wallet address that you are sending coins to.
2. Open your current Rupaya wallet(s) that currently contains zRUPX.
3. From the side wallet bar, click Privacy.
4. In the Pay To: field, right click and select Paste to paste in the wallet address that you will be sending zRUPXcoins into.
5. Click zRUPX Control.
If you haven’t already enabled Coin Control then follow these steps:
• From the Rupaya Wallet, click on Settings, select Options, click on the Wallet tab and thenclick the check-box that says Enable coin control features.
• This feature will allow you to control your wallet inputs, to verify that all coins are consolidatedinto a single input, to choose which inputs you send coins from, and to optimize staking.
7.3. Sending Coins - RUPX and zRUPX 21
Rupaya Documentation, Release 5.0
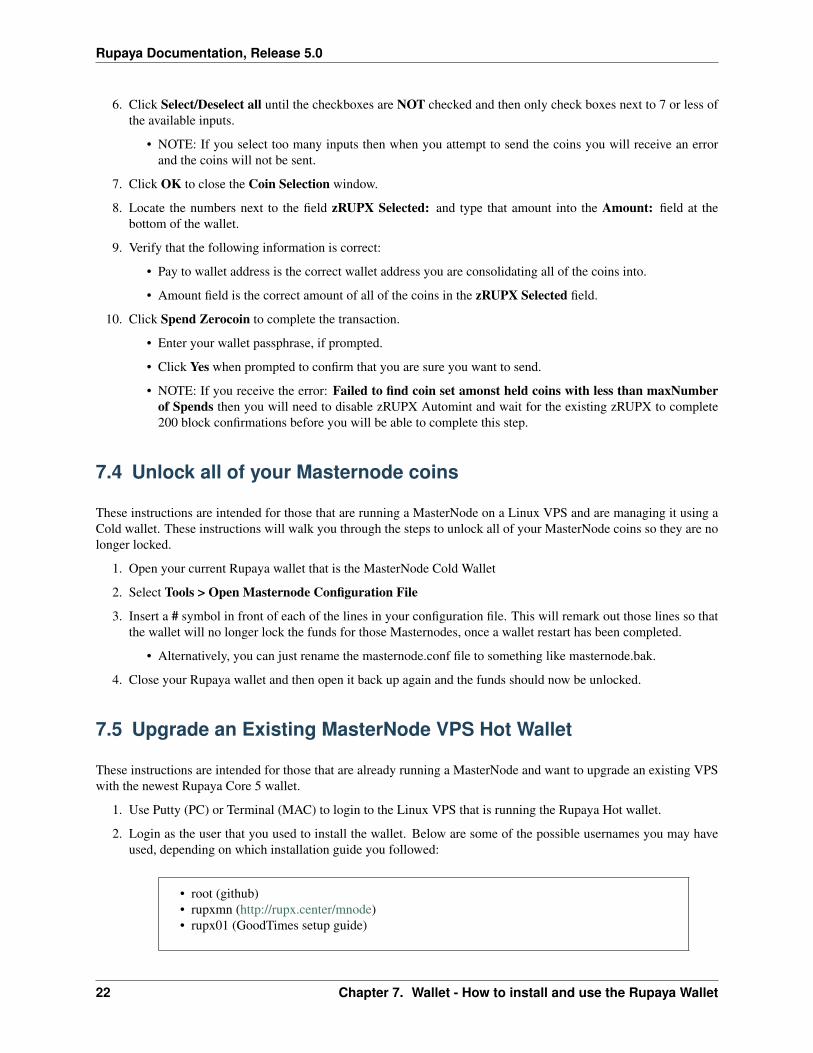
6. Click Select/Deselect all until the checkboxes are NOT checked and then only check boxes next to 7 or less ofthe available inputs.
• NOTE: If you select too many inputs then when you attempt to send the coins you will receive an errorand the coins will not be sent.
7. Click OK to close the Coin Selection window.
8. Locate the numbers next to the field zRUPX Selected: and type that amount into the Amount: field at thebottom of the wallet.
9. Verify that the following information is correct:
• Pay to wallet address is the correct wallet address you are consolidating all of the coins into.
• Amount field is the correct amount of all of the coins in the zRUPX Selected field.
10. Click Spend Zerocoin to complete the transaction.
• Enter your wallet passphrase, if prompted.
• Click Yes when prompted to confirm that you are sure you want to send.
• NOTE: If you receive the error: Failed to find coin set amonst held coins with less than maxNumberof Spends then you will need to disable zRUPX Automint and wait for the existing zRUPX to complete200 block confirmations before you will be able to complete this step.
7.4 Unlock all of your Masternode coins
These instructions are intended for those that are running a MasterNode on a Linux VPS and are managing it using aCold wallet. These instructions will walk you through the steps to unlock all of your MasterNode coins so they are nolonger locked.
1. Open your current Rupaya wallet that is the MasterNode Cold Wallet
2. Select Tools > Open Masternode Configuration File
3. Insert a # symbol in front of each of the lines in your configuration file. This will remark out those lines so thatthe wallet will no longer lock the funds for those Masternodes, once a wallet restart has been completed.
• Alternatively, you can just rename the masternode.conf file to something like masternode.bak.
4. Close your Rupaya wallet and then open it back up again and the funds should now be unlocked.
7.5 Upgrade an Existing MasterNode VPS Hot Wallet
These instructions are intended for those that are already running a MasterNode and want to upgrade an existing VPSwith the newest Rupaya Core 5 wallet.
1. Use Putty (PC) or Terminal (MAC) to login to the Linux VPS that is running the Rupaya Hot wallet.
2. Login as the user that you used to install the wallet. Below are some of the possible usernames you may haveused, depending on which installation guide you followed:
• root (github)• rupxmn (http://rupx.center/mnode)• rupx01 (GoodTimes setup guide)
22 Chapter 7. Wallet - How to install and use the Rupaya Wallet
Rupaya Documentation, Release 5.0
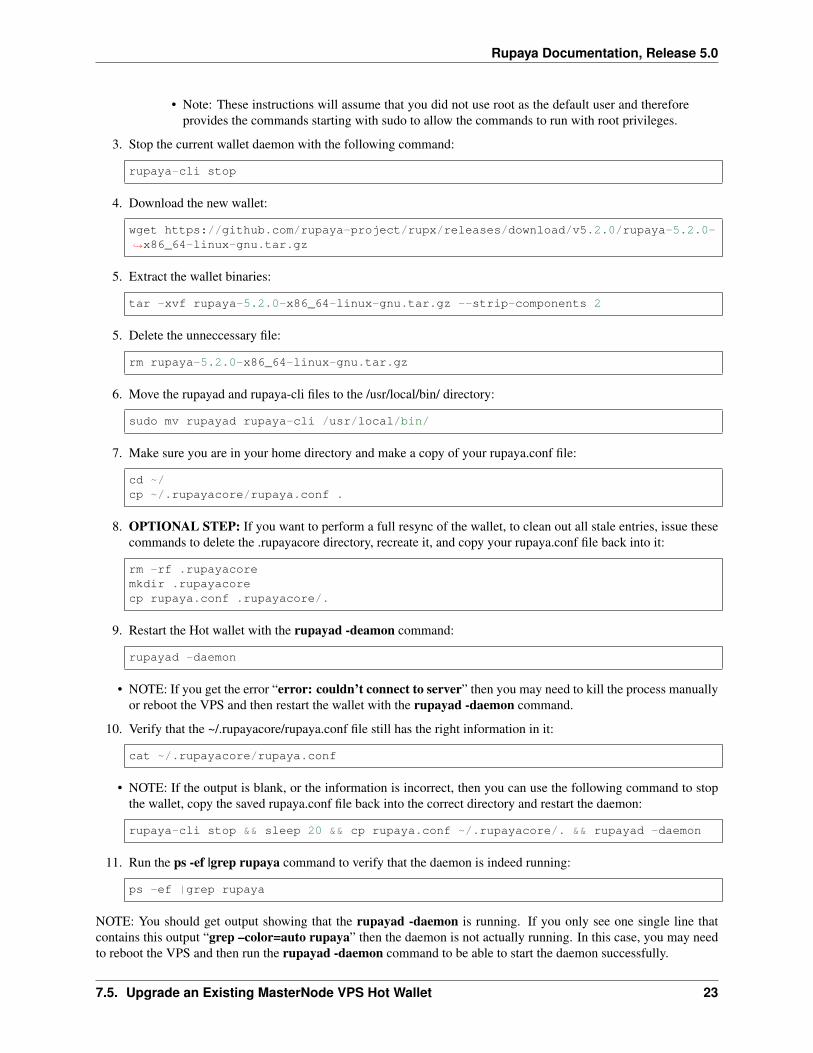
• Note: These instructions will assume that you did not use root as the default user and thereforeprovides the commands starting with sudo to allow the commands to run with root privileges.
3. Stop the current wallet daemon with the following command:
rupaya-cli stop
4. Download the new wallet:
wget https://github.com/rupaya-project/rupx/releases/download/v5.2.0/rupaya-5.2.0-→˓x86_64-linux-gnu.tar.gz
5. Extract the wallet binaries:
tar -xvf rupaya-5.2.0-x86_64-linux-gnu.tar.gz --strip-components 2
5. Delete the unneccessary file:
rm rupaya-5.2.0-x86_64-linux-gnu.tar.gz
6. Move the rupayad and rupaya-cli files to the /usr/local/bin/ directory:
sudo mv rupayad rupaya-cli /usr/local/bin/
7. Make sure you are in your home directory and make a copy of your rupaya.conf file:
cd ~/cp ~/.rupayacore/rupaya.conf .
8. OPTIONAL STEP: If you want to perform a full resync of the wallet, to clean out all stale entries, issue thesecommands to delete the .rupayacore directory, recreate it, and copy your rupaya.conf file back into it:
rm -rf .rupayacoremkdir .rupayacorecp rupaya.conf .rupayacore/.
9. Restart the Hot wallet with the rupayad -deamon command:
rupayad -daemon
• NOTE: If you get the error “error: couldn’t connect to server” then you may need to kill the process manuallyor reboot the VPS and then restart the wallet with the rupayad -daemon command.
10. Verify that the ~/.rupayacore/rupaya.conf file still has the right information in it:
cat ~/.rupayacore/rupaya.conf
• NOTE: If the output is blank, or the information is incorrect, then you can use the following command to stopthe wallet, copy the saved rupaya.conf file back into the correct directory and restart the daemon:
rupaya-cli stop && sleep 20 && cp rupaya.conf ~/.rupayacore/. && rupayad -daemon
11. Run the ps -ef |grep rupaya command to verify that the daemon is indeed running:
ps -ef |grep rupaya
NOTE: You should get output showing that the rupayad -daemon is running. If you only see one single line thatcontains this output “grep –color=auto rupaya” then the daemon is not actually running. In this case, you may needto reboot the VPS and then run the rupayad -daemon command to be able to start the daemon successfully.
7.5. Upgrade an Existing MasterNode VPS Hot Wallet 23
Rupaya Documentation, Release 5.0
Once the rupayad -daemon service is confirmed as running, the upgrade of your existing Hot wallet is complete.Please proceed to the next step to set up the Cold Wallet on your computer.
7.6 Update an Existing MasterNode Cold Wallet
These instructions are intended for those that were already running a MasterNode Cold wallet and want to update thewallet to the newest version.
7.6.1 Install the Rupaya Core Wallet
1. Open the following URL in a web browser to download the appropriate wallet version for your system:
• https://github.com/rupaya-project/rupx/releases
2. Be sure that your existing wallet.dat and private keys are backed up from the old wallet. We strongly recommendbacking up your wallet.dat and private keys prior to starting this process.
For more instructions, watch this Video from a fellow Rupayan, David Coen, on how to export yourprivate keys:
3. Close the existing Rupaya wallet, if you already have one installed and running.
4. Open the new Rupaya wallet. The Rupaya-qt file should be located in the following default directory:
• Mac: /Users/USERNAME/Library/Application Support/RupayaCore• Windows: C:\Program Files\Rupaya
• Accept any pop ups asking to confirm if you want to continue with the installation
• When prompted, select Use the default data directory and click OK
• Mac: /Users/USERNAME/Library/Application Support/RupayaCore• Windows: C:\Users\USERNAME\AppData\Roaming\RupayaCore
• If prompted by security or antivirus software, click Allow Always
• The new wallet should now open and begin to synchronize with the network
7.6.2 Start the MN from the Cold Wallet
Warning: It is very important that you let the MasterNode Hot wallet synchronize for a couple of hours prior tostarting it from the Cold wallet. If you attempt to start it before it is fully synchronized then it will expire after 60minutes. Both the Cold and Hot wallets need to be on same version/protocol to activate the MasterNode.
NOTE: If you can update and restart your MasterNode within 1 hour, then it won’t require a restart and should stayenabled. However, if you are updating to a wallet with a different protocol then you must re-activate your node fromthe Cold Wallet regardless of whether you did the migration in less than one hour.
1. There are three ways that you can start the MasterNode from the Cold Wallet. Below are the three options toactivate the MasterNode.
24 Chapter 7. Wallet - How to install and use the Rupaya Wallet
Rupaya Documentation, Release 5.0
• Option 1. Open the Masternodes tab, select the MasterNode that you want to start, and click the button Startalias
• Option 2. Open the Masternodes tab and click the button Start all
• Option 3. Open the Cold Wallet Debug Console and run the following command:
startmasternode alias false MN1
• In the example above, the alias of my MasterNode was MN1. In your case, it might be different and is based onwhat you entered as the first word in the masternode.conf file.
• You should get multiple lines of output. If one of the lines of output says “result” : successful” then you canproceed to the next step to verify the MasterNode started correctly on the VPS Hot wallet. If you did not get thesuccessful output then there is likely an issue with the masternode.conf file that needs to be resolved first.
Warning: Every time you start the MN, from the Cold Wallet, it starts the queue cycle over again. The queuecycle currently takes up to 36 hours for you to get a payout. DO NOT USE THIS COMMAND IF YOUR SYSTEMIS ALREADY STARTED OR IT WILL CAUSE YOU TO LOSE YOUR PLACE IN THE QUEUE CYCLE ANDTHE 36 HOUR WAIT WILL START OVER AGAIN.
If you received the output that shows the MasterNode started successfully then you can proceed to the next stepto verify that your MasterNode started correctly from the VPS Hot wallet.
7.7 Verify the MasterNode Hot Wallet Started Successfully
1. Login to the Linux VPS, via Putty or Terminal, as the user rupxmn (or the user that you used to install the Hotwallet).
2. Run the command cat ~/.rupayacore/debug.log | grep HotCold:
cat ~/.rupayacore/debug.log | grep HotCold
• If the MasterNode started correctly then you will receive the following output:
CActiveFundamentalnode::EnableHotColdFundamentalNode() - Enabled! You may shut down the cold daemon.
• Output from this command will only show up if your MasterNode started successfully. If you do not receive theexpected output, then your MasterNode did not start successfully.
• The most common cause of this issue is attempting to start the MasterNode before the Hot wallet is fullysynchronized. Wait a couple of hours and then try to start it from the Cold wallet again.
3. Run the following command to verify the status of the MasterNode:
rupaya-cli masternode status
• If you see status Not capable masternode: Hot node, waiting for remote activation, you need to wait a bitlonger for the blockchain to reach consensus. It’s common to take 60 to 120 minutes before activation can bedone.
• If you see status MasterNode successfully started as well as the HotCold output from the first command thenCONGRATULATIONS your MasterNode Hot wallet is now successfully enabled.
– NOTE: It will take a few hours until the first rewards start coming in. The time before the firstpayout will increase as more MasterNodes come online.
7.7. Verify the MasterNode Hot Wallet Started Successfully 25
Rupaya Documentation, Release 5.0
4. Check the MasterNode tracker website https://find.rupx.io/masternodes to see that your MasterNode(s) areshowing up on the site.
• You will need to search by your MN1 wallet address to locate it on the website.
• The site is refreshed every 5 minutes so don’t be surprised if it takes up to 5 minutes to show up on the website.
Congratulations! The initial setup process is complete and your MasterNode is fully operational! You canproceed to the Finishing Touches section to enable logrotate and Hot wallet auto start.
26 Chapter 7. Wallet - How to install and use the Rupaya Wallet
CHAPTER 8
SSH: Getting Started with an SSH Client and SSH Keys
8.1 MAC Users - Using SSH
8.1.1 Use Terminal to Connect to a Linux VPS without an SSH Key
These instructions are intended for Mac users that want to connect to a Linux VPS, without using an SSH Key. Thisstep is to be completed on the computer that you will be using to manage the Linux VPS.
• If you can already connect to the Linux VPS, using Terminal, then proceed to the next section to Generate andUse SSH Keys with Terminal.
1. Open a new Terminal window on your Mac:
ssh root@<public_mn_ip_address_here>
• Replace the variable <public_mn_ip_address_here> with your Linux VPS IP address
• Type yes to confirm that you want to connect using SSH
2. Type in root and hit ENTER to login as the root user.
3. Type in the root user password.
• NOTE: You may need to check the VPS provider website, or your email, to retrieve the root user password.
• NOTE: If you are connecting to a Digital Ocean VPS, then you will be prompted to change the root userpassword.
If you are able to login to the Linux VPS then this process is complete and you can proceed to next section toGenerate and Use SSH Keys with Terminal.
8.1.2 Generate and Use SSH Keys with Terminal
These instructions are intended for Mac users that want to generate an SSH key and start using it to connect to theLinux VPS. This step is to be completed on the computer that you will be using to manage the Linux VPS.
27
Rupaya Documentation, Release 5.0
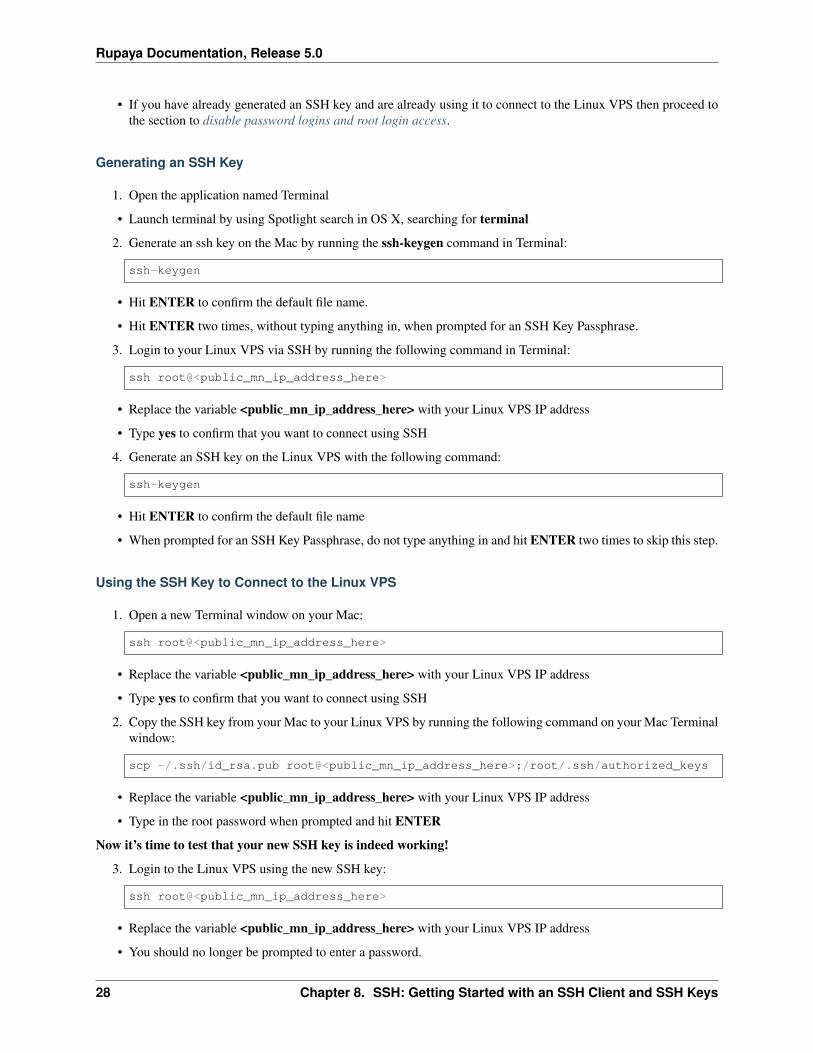
• If you have already generated an SSH key and are already using it to connect to the Linux VPS then proceed tothe section to disable password logins and root login access.
Generating an SSH Key
1. Open the application named Terminal
• Launch terminal by using Spotlight search in OS X, searching for terminal
2. Generate an ssh key on the Mac by running the ssh-keygen command in Terminal:
ssh-keygen
• Hit ENTER to confirm the default file name.
• Hit ENTER two times, without typing anything in, when prompted for an SSH Key Passphrase.
3. Login to your Linux VPS via SSH by running the following command in Terminal:
ssh root@<public_mn_ip_address_here>
• Replace the variable <public_mn_ip_address_here> with your Linux VPS IP address
• Type yes to confirm that you want to connect using SSH
4. Generate an SSH key on the Linux VPS with the following command:
ssh-keygen
• Hit ENTER to confirm the default file name
• When prompted for an SSH Key Passphrase, do not type anything in and hit ENTER two times to skip this step.
Using the SSH Key to Connect to the Linux VPS
1. Open a new Terminal window on your Mac:
ssh root@<public_mn_ip_address_here>
• Replace the variable <public_mn_ip_address_here> with your Linux VPS IP address
• Type yes to confirm that you want to connect using SSH
2. Copy the SSH key from your Mac to your Linux VPS by running the following command on your Mac Terminalwindow:
scp ~/.ssh/id_rsa.pub root@<public_mn_ip_address_here>:/root/.ssh/authorized_keys
• Replace the variable <public_mn_ip_address_here> with your Linux VPS IP address
• Type in the root password when prompted and hit ENTER
Now it’s time to test that your new SSH key is indeed working!
3. Login to the Linux VPS using the new SSH key:
ssh root@<public_mn_ip_address_here>
• Replace the variable <public_mn_ip_address_here> with your Linux VPS IP address
• You should no longer be prompted to enter a password.
28 Chapter 8. SSH: Getting Started with an SSH Client and SSH Keys
Rupaya Documentation, Release 5.0
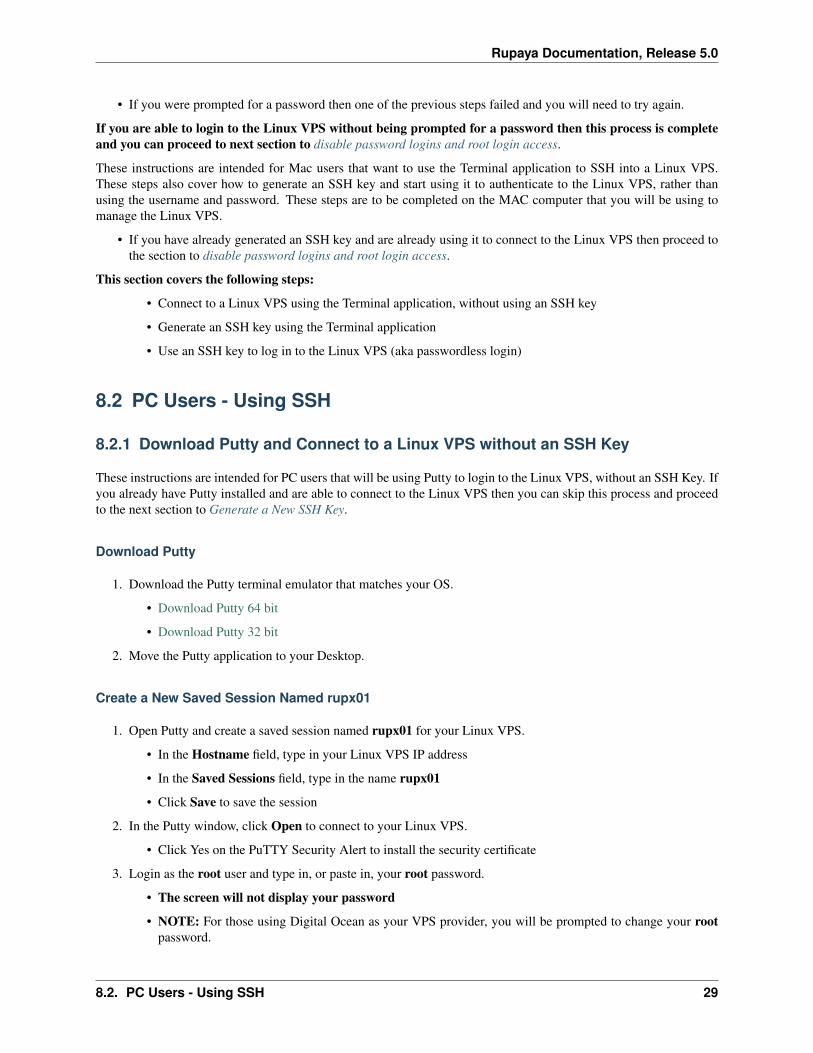
• If you were prompted for a password then one of the previous steps failed and you will need to try again.
If you are able to login to the Linux VPS without being prompted for a password then this process is completeand you can proceed to next section to disable password logins and root login access.
These instructions are intended for Mac users that want to use the Terminal application to SSH into a Linux VPS.These steps also cover how to generate an SSH key and start using it to authenticate to the Linux VPS, rather thanusing the username and password. These steps are to be completed on the MAC computer that you will be using tomanage the Linux VPS.
• If you have already generated an SSH key and are already using it to connect to the Linux VPS then proceed tothe section to disable password logins and root login access.
This section covers the following steps:
• Connect to a Linux VPS using the Terminal application, without using an SSH key
• Generate an SSH key using the Terminal application
• Use an SSH key to log in to the Linux VPS (aka passwordless login)
8.2 PC Users - Using SSH
8.2.1 Download Putty and Connect to a Linux VPS without an SSH Key
These instructions are intended for PC users that will be using Putty to login to the Linux VPS, without an SSH Key. Ifyou already have Putty installed and are able to connect to the Linux VPS then you can skip this process and proceedto the next section to Generate a New SSH Key.
Download Putty
1. Download the Putty terminal emulator that matches your OS.
• Download Putty 64 bit
• Download Putty 32 bit
2. Move the Putty application to your Desktop.
Create a New Saved Session Named rupx01
1. Open Putty and create a saved session named rupx01 for your Linux VPS.
• In the Hostname field, type in your Linux VPS IP address
• In the Saved Sessions field, type in the name rupx01
• Click Save to save the session
2. In the Putty window, click Open to connect to your Linux VPS.
• Click Yes on the PuTTY Security Alert to install the security certificate
3. Login as the root user and type in, or paste in, your root password.
• The screen will not display your password
• NOTE: For those using Digital Ocean as your VPS provider, you will be prompted to change your rootpassword.
8.2. PC Users - Using SSH 29
Rupaya Documentation, Release 5.0
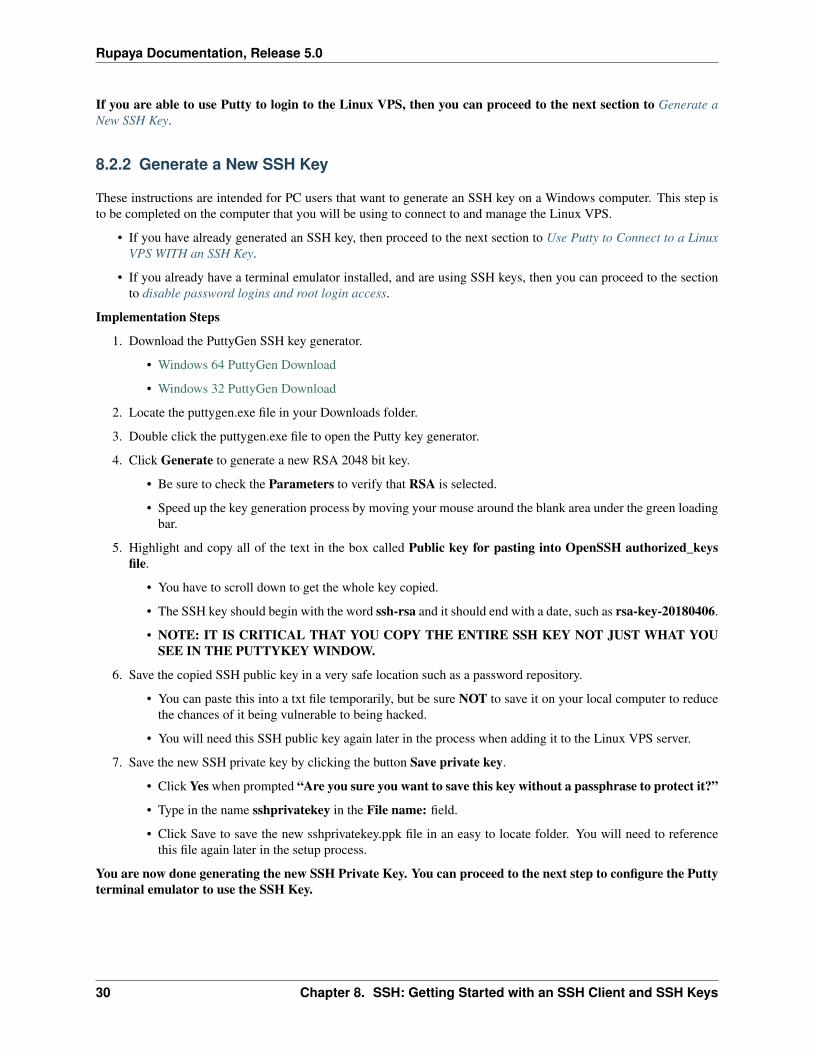
If you are able to use Putty to login to the Linux VPS, then you can proceed to the next section to Generate aNew SSH Key.
8.2.2 Generate a New SSH Key
These instructions are intended for PC users that want to generate an SSH key on a Windows computer. This step isto be completed on the computer that you will be using to connect to and manage the Linux VPS.
• If you have already generated an SSH key, then proceed to the next section to Use Putty to Connect to a LinuxVPS WITH an SSH Key.
• If you already have a terminal emulator installed, and are using SSH keys, then you can proceed to the sectionto disable password logins and root login access.
Implementation Steps
1. Download the PuttyGen SSH key generator.
• Windows 64 PuttyGen Download
• Windows 32 PuttyGen Download
2. Locate the puttygen.exe file in your Downloads folder.
3. Double click the puttygen.exe file to open the Putty key generator.
4. Click Generate to generate a new RSA 2048 bit key.
• Be sure to check the Parameters to verify that RSA is selected.
• Speed up the key generation process by moving your mouse around the blank area under the green loadingbar.
5. Highlight and copy all of the text in the box called Public key for pasting into OpenSSH authorized_keysfile.
• You have to scroll down to get the whole key copied.
• The SSH key should begin with the word ssh-rsa and it should end with a date, such as rsa-key-20180406.
• NOTE: IT IS CRITICAL THAT YOU COPY THE ENTIRE SSH KEY NOT JUST WHAT YOUSEE IN THE PUTTYKEY WINDOW.
6. Save the copied SSH public key in a very safe location such as a password repository.
• You can paste this into a txt file temporarily, but be sure NOT to save it on your local computer to reducethe chances of it being vulnerable to being hacked.
• You will need this SSH public key again later in the process when adding it to the Linux VPS server.
7. Save the new SSH private key by clicking the button Save private key.
• Click Yes when prompted “Are you sure you want to save this key without a passphrase to protect it?”
• Type in the name sshprivatekey in the File name: field.
• Click Save to save the new sshprivatekey.ppk file in an easy to locate folder. You will need to referencethis file again later in the setup process.
You are now done generating the new SSH Private Key. You can proceed to the next step to configure the Puttyterminal emulator to use the SSH Key.
30 Chapter 8. SSH: Getting Started with an SSH Client and SSH Keys

Rupaya Documentation, Release 5.0
8.2.3 Use Putty to Connect to a Linux VPS WITH an SSH Key
These instructions are intended for PC users that want to configure Putty to to use an SSH key to authenticate to theLinux VPS, without using the username and password. If you already have Putty configured to use an SSH key thenyou can skip this process and proceed to the next section to disable password logins and root login access.
Prerequisites:
1. Download Putty and Connect to a Linux VPS without an SSH Key
2. Generate a New SSH Key
Warning: Do not proceed with the following steps until the above prerequisites have been completed successfully.
Configure Putty to use an SSH Key
1. Follow these steps to add the SSH key into the rupx01 Putty session.
• Open Putty and click on the saved session named rupx01 and click Load
• Expand the SSH Category on the left side of the window
• Click on the Auth Category so that it is highlighted
• Click on Browse on the right, under to the field Private key file for authentication
• Browse to the folder that contains your SSH private key
• Select the sshprivatekey.ppk file and click Open
• Scroll back up on the left under Category and click on the word Session, at the top of the window, to bringback the Saved Sessions page
• Click on Save to save the SSH Key to the rupx01 session.
• NOTE: This step is very important. Make sure that your server rupx01 is loaded in the SavedSessions window and that you click Save. If this step is not completed successfully, then your SSHKey will not be saved to this session and you will have to repeat these steps again
2. In the Putty window, click Open to connect to your Linux VPS.
• Click Yes on the PuTTY Security Alert to install the security certificate
3. Login as the root user and type in, or paste in, your root password.
• The screen will not display your password
• NOTE: For those using Digital Ocean as your VPS provider, you will be prompted to change your rootpassword.
Configure the Linux VPS to use an SSH Key
You should be logged into the Linux VPS as the root user to complete the following steps:
1. Change directory into the /root/.ssh directory or create it if necessary:
cd /root/.ssh
• NOTE: If the directory does not already exist then use this command to create it:
8.2. PC Users - Using SSH 31

Rupaya Documentation, Release 5.0
mkdir /root/.ssh
2. Create and edit the file named authorized_keys with the following command:
nano /root/.ssh/authorized_keys
3. Paste the SSH public key into the authorized_keys file on the Linux VPS. This is the public key that yougenerated and then copied from the PuttyGen application.
• CRITICAL NOTE: The SSH key that you paste in should begin with the text ssh-rsa and should end witha date, such as rsa-key-20181012. If you do not get the entire key pasted into this file then the followingsteps will fail and you will have to repeat these steps.
4. Save and close the file by hitting Ctrl-X, and then type Y to confirm that you want to save it, and then hitENTER to confirm the file name.
• NOTE: Your new SSH key is now saved in the /root/.ssh/authorized_keys file. All future logins with theroot username will allow you to login without being prompted for a password.
Let’s test it!
5. Duplicate the current Putty session and login as the root user. This will verify that you can now login to theLinux VPS without entering a password.
• To duplicate the existing Putty session to the Linux VPS, click the icon of two computers on the top left ofthe Putty application window and then select Duplicate Session
• NOTE: You should be automatically logged in to the Linux VPS without having to type in the rootpassword
Warning: If you are not automatically logged in without typing in a password then you likely did not savethe SSH key into the putty session correctly, or you did not save the entire SSH key into the Linxu VPS file/root/.ssh/authorized_keys. You will need to walk through the steps to save the SSH key in the Putty session andto ensure that the ENTIRE SSH key is added to the authorized_keys file on the Linux VPS before you proceedwith the next section.
If you are able to use Putty to login to the Linux VPS without being prompted for a password then you are doneconfiguring your SSH keys and can proceed to the next section to disable password logins and root login access.
These instructions are intended for PC users that want to download the Putty terminal emulator, connect to a LinuxVPS without an SSH Key, generate an SSH key, and configure Putty to use the new SSH key. These steps are crucialfor properly securing your Linux VPS from brute force password attacks.
This section covers the following steps:
• Download the Putty terminal emulator
• Connect to a Linux VPS without using the Putty SSH client and without an SSH Key
• Generate an SSH key using PuttyGen
• Use an SSH key to log in to the Linux VPS (aka passwordless login)
8.3 All Users - Disabling Password Logins and Root Login Access
These instructions are intended for all users that want to reduce the risk of brute force login attacks by disablingpassword logins and root login access. These procedures will improve security on your Linux VPS by requiring the
32 Chapter 8. SSH: Getting Started with an SSH Client and SSH Keys
Rupaya Documentation, Release 5.0
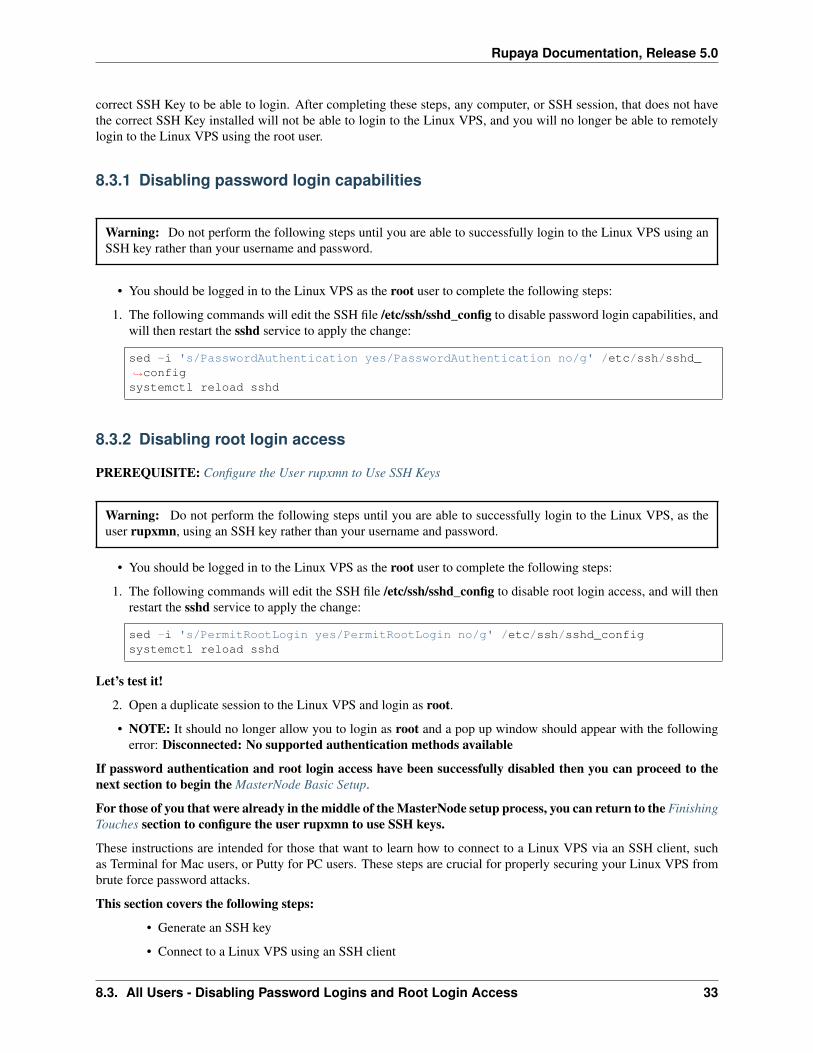
correct SSH Key to be able to login. After completing these steps, any computer, or SSH session, that does not havethe correct SSH Key installed will not be able to login to the Linux VPS, and you will no longer be able to remotelylogin to the Linux VPS using the root user.
8.3.1 Disabling password login capabilities
Warning: Do not perform the following steps until you are able to successfully login to the Linux VPS using anSSH key rather than your username and password.
• You should be logged in to the Linux VPS as the root user to complete the following steps:
1. The following commands will edit the SSH file /etc/ssh/sshd_config to disable password login capabilities, andwill then restart the sshd service to apply the change:
sed -i 's/PasswordAuthentication yes/PasswordAuthentication no/g' /etc/ssh/sshd_→˓configsystemctl reload sshd
8.3.2 Disabling root login access
PREREQUISITE: Configure the User rupxmn to Use SSH Keys
Warning: Do not perform the following steps until you are able to successfully login to the Linux VPS, as theuser rupxmn, using an SSH key rather than your username and password.
• You should be logged in to the Linux VPS as the root user to complete the following steps:
1. The following commands will edit the SSH file /etc/ssh/sshd_config to disable root login access, and will thenrestart the sshd service to apply the change:
sed -i 's/PermitRootLogin yes/PermitRootLogin no/g' /etc/ssh/sshd_configsystemctl reload sshd
Let’s test it!
2. Open a duplicate session to the Linux VPS and login as root.
• NOTE: It should no longer allow you to login as root and a pop up window should appear with the followingerror: Disconnected: No supported authentication methods available
If password authentication and root login access have been successfully disabled then you can proceed to thenext section to begin the MasterNode Basic Setup.
For those of you that were already in the middle of the MasterNode setup process, you can return to the FinishingTouches section to configure the user rupxmn to use SSH keys.
These instructions are intended for those that want to learn how to connect to a Linux VPS via an SSH client, suchas Terminal for Mac users, or Putty for PC users. These steps are crucial for properly securing your Linux VPS frombrute force password attacks.
This section covers the following steps:
• Generate an SSH key
• Connect to a Linux VPS using an SSH client
8.3. All Users - Disabling Password Logins and Root Login Access 33

Rupaya Documentation, Release 5.0
• Use an SSH key to log in to the Linux VPS (aka passwordless login)
• Disable password logins
• Disable root login access
34 Chapter 8. SSH: Getting Started with an SSH Client and SSH Keys
CHAPTER 9
VPS: Order and Create a Linux VPS
9.1 Digital Ocean
These instructions are intended for those that want to create a new Linux VPS using Digital Ocean. These instructionsalso cover how to configure the external firewall and add additional IPv6 addresses.
9.1.1 Create a Digital Ocean Account
1. Login to the Digital Ocean website and create an account.
• Use the following referrel, when you create your account, to get a $100 credit that lasts 60 days.
https://m.do.co/c/9b006c931f50
9.1.2 Create a Linux VPS Droplet
1. On the Dashboards page, click on the green Create button and select Droplets to start the creation process.
2. Under Create Droplets, select Ubuntu 16.04
3. Under Choose a Size, select $5/mo - 1GB
4. Under Choose a datacenter region, select the region that is closest to you.
5. Under Select Additional Options, click in the IPv6 check box to enable IPv6.
6. Under Add your SSH keys, add the SSH key that you created in the SSH: Getting Started with an SSH clientand SSH Keys section of the guide
7. Under Finalize and create, type in a hostname (i.e. rupx01) for the server and then click Create. The namewill not have any impact on the later installation steps.
• Once the new server has been created, it will show up under the Droplets menu bar under MANAGE.
35
Rupaya Documentation, Release 5.0
8. Access your email and locate the email from [email protected] to retrieve your server IPaddress and root password.
• Save the IP address and root user password in a seperate file. You will need them multiple times throughoutthe setup process.
9.1.3 Configure the External Firewall
1. On the left toolbar, under MANAGE, select the Networking page, then click on Firewalls and select CreateFirewall.
2. Type in a name for your new firewall policy. The name will not have any impact on the later installation steps.
3. Under Inbound Rules click on New Rule and select Custom.
4. In the Ports field type in 9050.
5. In a separate web browser tab, go to http://www.whatsmyip.org and copy the IP address that it displays in thetop of the window. This is your computers’ public IP address.
• NOTE: If your computers’ public IP address changes, or if you are connecting to the Linux VPS from adifferent location, then you will need to update this field to include the new public IP address.
6. In the SSH TCP port 22 field, that was created by default, edit the rule and delete All IPv4 and All IPv6 out ofthe Sources field.
7. In that same Sources field, paste in your computers’ public IP address, manually add a /32 at the end of the IPaddress and then hit Enter for the IP to be applied.
• NOTE: If the IP disappears then you didn’t hit enter correctly and you will have to repeat this step untilyour computers’ IP address shows up correctly in the Sources field.
8. Scroll down and under Apply to Droplets and type in the name of the droplet that you created.
9. Click Create Firewall
10. Select the new firewall that you just created and confirm that it is permitting SSH port 22 from your computer’spublic IP address and that it is permitting TCP port 9050 from All IPv4 and All IPv6 addresses.
9.1.4 Identify Available IPv6 Addresses
• OPTIONAL STEPS: The following steps are optional and are only required if you plan to run mutliple wallets,of the same coin, on this VPS.
1. From the VPS provider website, select Droplets from the left menu bar and then click on the server that youcreated, i.e. rupx01.
2. Click on Networking to open the Public network page.
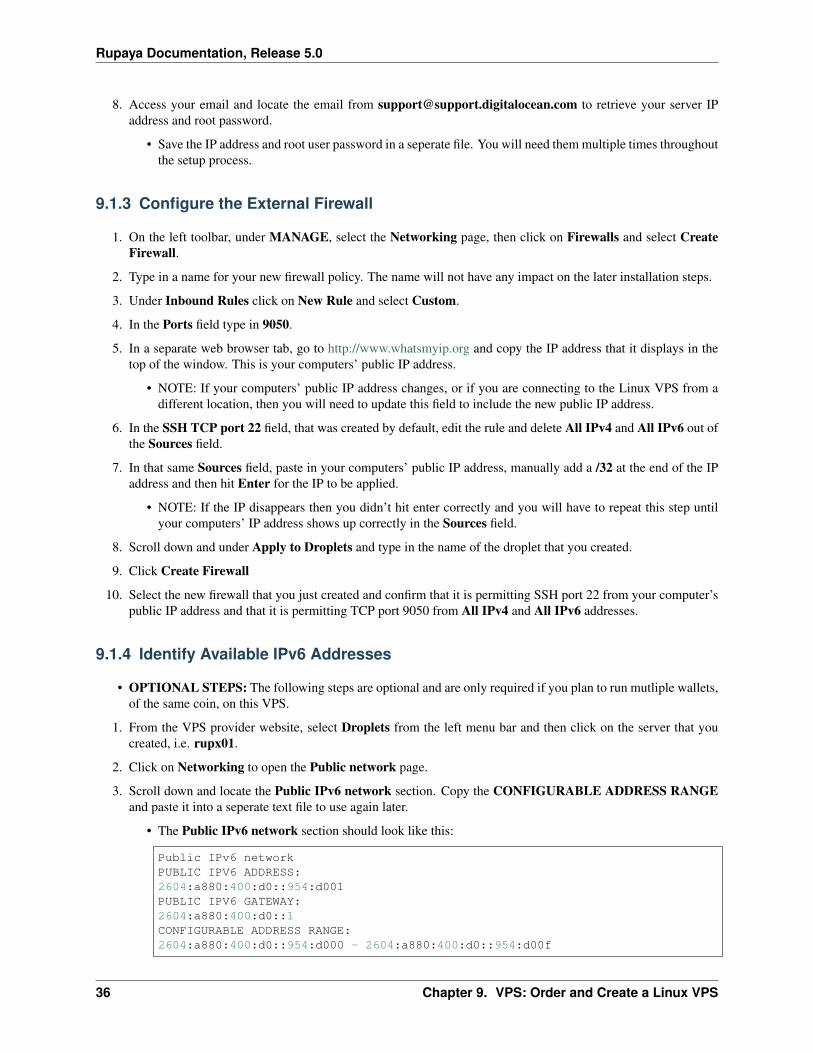
3. Scroll down and locate the Public IPv6 network section. Copy the CONFIGURABLE ADDRESS RANGEand paste it into a seperate text file to use again later.
• The Public IPv6 network section should look like this:
Public IPv6 networkPUBLIC IPV6 ADDRESS:2604:a880:400:d0::954:d001PUBLIC IPV6 GATEWAY:2604:a880:400:d0::1CONFIGURABLE ADDRESS RANGE:2604:a880:400:d0::954:d000 - 2604:a880:400:d0::954:d00f
36 Chapter 9. VPS: Order and Create a Linux VPS
Rupaya Documentation, Release 5.0
• In the above example, the range of usable IPv6 addresses are 2604:a880:400:d0::954:d000 -2604:a880:400:d0::954:d00f
• Based on that information, the following 16 IP’s are available to be used as IPv6 addresses:
– 2604:a880:400:d0::954:d000
– 2604:a880:400:d0::954:d001
– 2604:a880:400:d0::954:d002
– 2604:a880:400:d0::954:d003
– 2604:a880:400:d0::954:d004
– 2604:a880:400:d0::954:d005
– 2604:a880:400:d0::954:d006
– 2604:a880:400:d0::954:d007
– 2604:a880:400:d0::954:d008
– 2604:a880:400:d0::954:d009
– 2604:a880:400:d0::954:d00a
– 2604:a880:400:d0::954:d00b
– 2604:a880:400:d0::954:d00c
– 2604:a880:400:d0::954:d00d
– 2604:a880:400:d0::954:d00e
– 2604:a880:400:d0::954:d00f
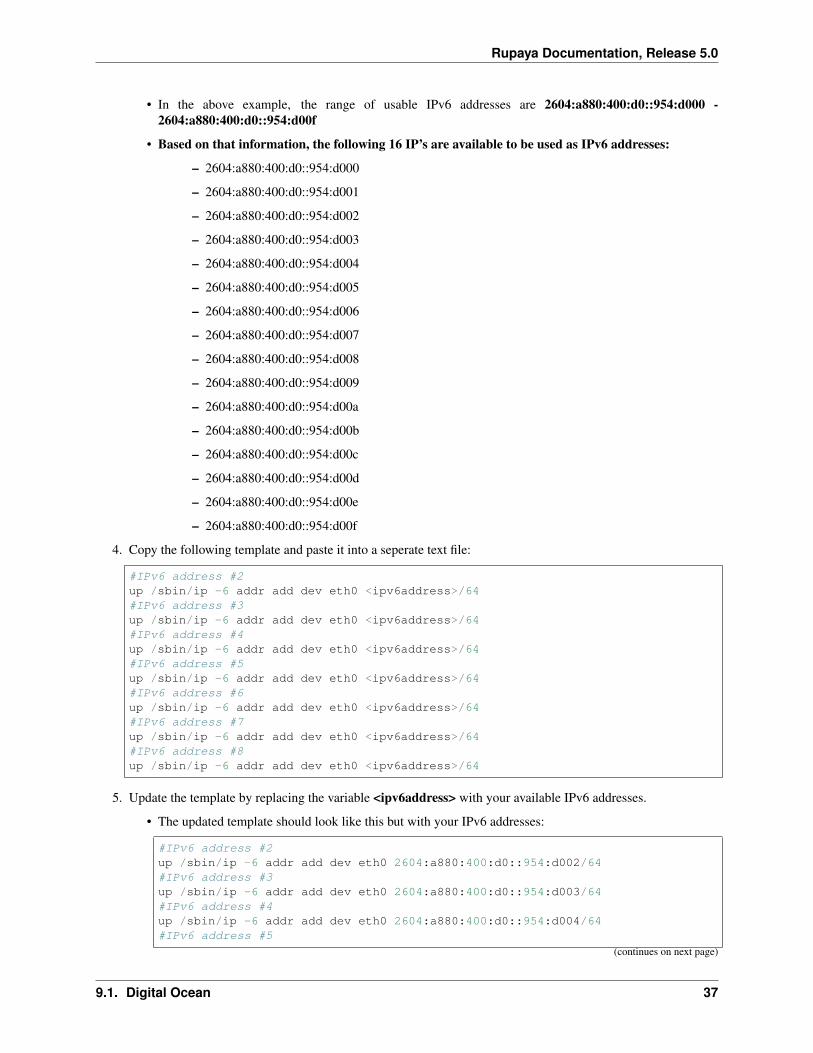
4. Copy the following template and paste it into a seperate text file:
#IPv6 address #2up /sbin/ip -6 addr add dev eth0 <ipv6address>/64#IPv6 address #3up /sbin/ip -6 addr add dev eth0 <ipv6address>/64#IPv6 address #4up /sbin/ip -6 addr add dev eth0 <ipv6address>/64#IPv6 address #5up /sbin/ip -6 addr add dev eth0 <ipv6address>/64#IPv6 address #6up /sbin/ip -6 addr add dev eth0 <ipv6address>/64#IPv6 address #7up /sbin/ip -6 addr add dev eth0 <ipv6address>/64#IPv6 address #8up /sbin/ip -6 addr add dev eth0 <ipv6address>/64
5. Update the template by replacing the variable <ipv6address> with your available IPv6 addresses.
• The updated template should look like this but with your IPv6 addresses:
#IPv6 address #2up /sbin/ip -6 addr add dev eth0 2604:a880:400:d0::954:d002/64#IPv6 address #3up /sbin/ip -6 addr add dev eth0 2604:a880:400:d0::954:d003/64#IPv6 address #4up /sbin/ip -6 addr add dev eth0 2604:a880:400:d0::954:d004/64#IPv6 address #5
(continues on next page)
9.1. Digital Ocean 37
Rupaya Documentation, Release 5.0
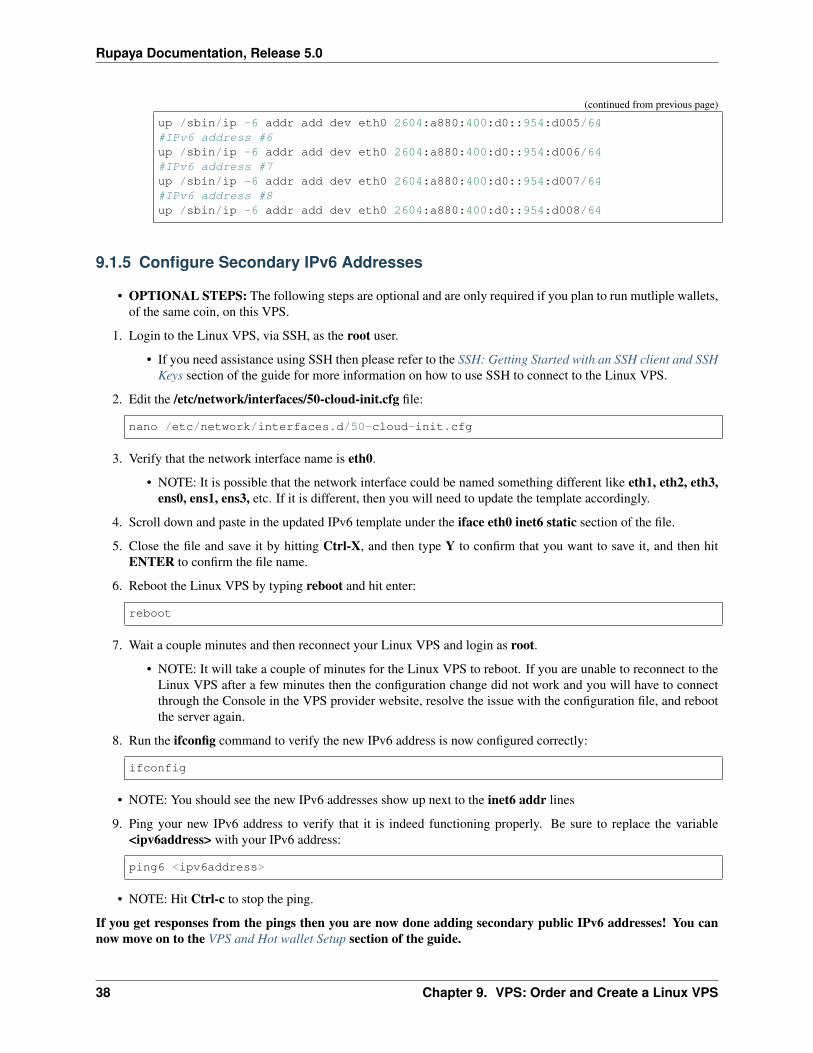
(continued from previous page)
up /sbin/ip -6 addr add dev eth0 2604:a880:400:d0::954:d005/64#IPv6 address #6up /sbin/ip -6 addr add dev eth0 2604:a880:400:d0::954:d006/64#IPv6 address #7up /sbin/ip -6 addr add dev eth0 2604:a880:400:d0::954:d007/64#IPv6 address #8up /sbin/ip -6 addr add dev eth0 2604:a880:400:d0::954:d008/64
9.1.5 Configure Secondary IPv6 Addresses
• OPTIONAL STEPS: The following steps are optional and are only required if you plan to run mutliple wallets,of the same coin, on this VPS.
1. Login to the Linux VPS, via SSH, as the root user.
• If you need assistance using SSH then please refer to the SSH: Getting Started with an SSH client and SSHKeys section of the guide for more information on how to use SSH to connect to the Linux VPS.
2. Edit the /etc/network/interfaces/50-cloud-init.cfg file:
nano /etc/network/interfaces.d/50-cloud-init.cfg
3. Verify that the network interface name is eth0.
• NOTE: It is possible that the network interface could be named something different like eth1, eth2, eth3,ens0, ens1, ens3, etc. If it is different, then you will need to update the template accordingly.
4. Scroll down and paste in the updated IPv6 template under the iface eth0 inet6 static section of the file.
5. Close the file and save it by hitting Ctrl-X, and then type Y to confirm that you want to save it, and then hitENTER to confirm the file name.
6. Reboot the Linux VPS by typing reboot and hit enter:
reboot
7. Wait a couple minutes and then reconnect your Linux VPS and login as root.
• NOTE: It will take a couple of minutes for the Linux VPS to reboot. If you are unable to reconnect to theLinux VPS after a few minutes then the configuration change did not work and you will have to connectthrough the Console in the VPS provider website, resolve the issue with the configuration file, and rebootthe server again.
8. Run the ifconfig command to verify the new IPv6 address is now configured correctly:
ifconfig
• NOTE: You should see the new IPv6 addresses show up next to the inet6 addr lines
9. Ping your new IPv6 address to verify that it is indeed functioning properly. Be sure to replace the variable<ipv6address> with your IPv6 address:
ping6 <ipv6address>
• NOTE: Hit Ctrl-c to stop the ping.
If you get responses from the pings then you are now done adding secondary public IPv6 addresses! You cannow move on to the VPS and Hot wallet Setup section of the guide.
38 Chapter 9. VPS: Order and Create a Linux VPS
Rupaya Documentation, Release 5.0
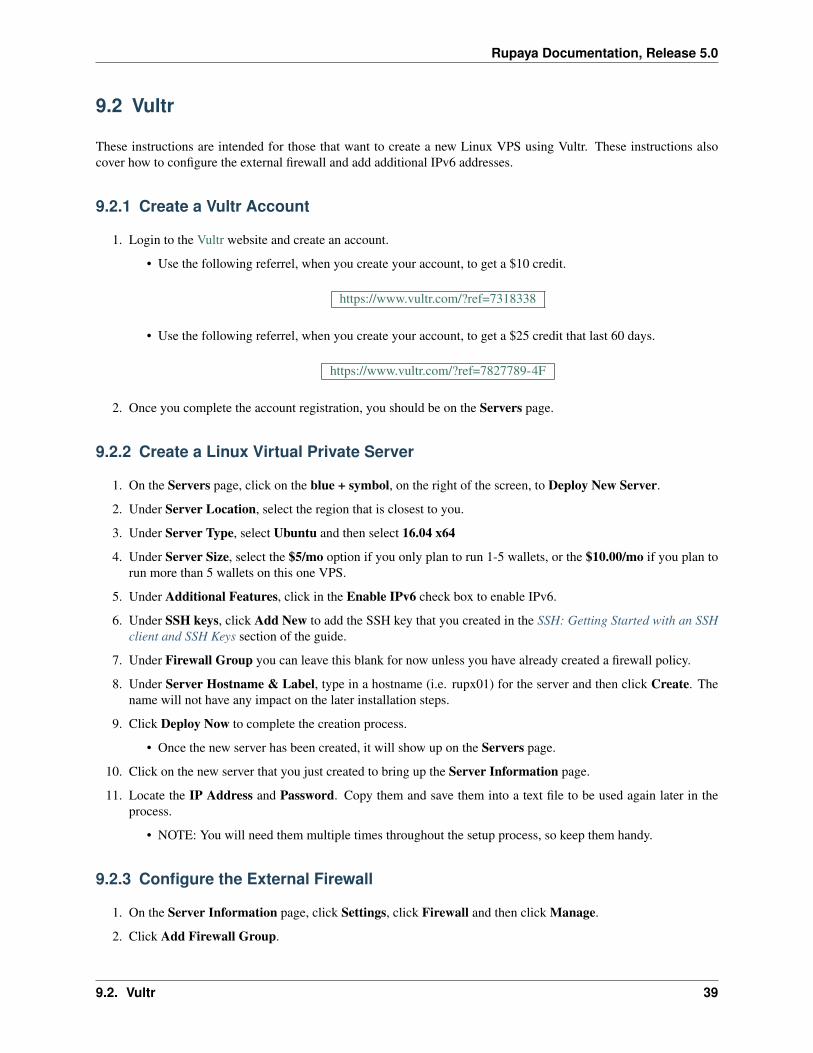
9.2 Vultr
These instructions are intended for those that want to create a new Linux VPS using Vultr. These instructions alsocover how to configure the external firewall and add additional IPv6 addresses.
9.2.1 Create a Vultr Account
1. Login to the Vultr website and create an account.
• Use the following referrel, when you create your account, to get a $10 credit.
https://www.vultr.com/?ref=7318338
• Use the following referrel, when you create your account, to get a $25 credit that last 60 days.
https://www.vultr.com/?ref=7827789-4F
2. Once you complete the account registration, you should be on the Servers page.
9.2.2 Create a Linux Virtual Private Server
1. On the Servers page, click on the blue + symbol, on the right of the screen, to Deploy New Server.
2. Under Server Location, select the region that is closest to you.
3. Under Server Type, select Ubuntu and then select 16.04 x64
4. Under Server Size, select the $5/mo option if you only plan to run 1-5 wallets, or the $10.00/mo if you plan torun more than 5 wallets on this one VPS.
5. Under Additional Features, click in the Enable IPv6 check box to enable IPv6.
6. Under SSH keys, click Add New to add the SSH key that you created in the SSH: Getting Started with an SSHclient and SSH Keys section of the guide.
7. Under Firewall Group you can leave this blank for now unless you have already created a firewall policy.
8. Under Server Hostname & Label, type in a hostname (i.e. rupx01) for the server and then click Create. Thename will not have any impact on the later installation steps.
9. Click Deploy Now to complete the creation process.
• Once the new server has been created, it will show up on the Servers page.
10. Click on the new server that you just created to bring up the Server Information page.
11. Locate the IP Address and Password. Copy them and save them into a text file to be used again later in theprocess.
• NOTE: You will need them multiple times throughout the setup process, so keep them handy.
9.2.3 Configure the External Firewall
1. On the Server Information page, click Settings, click Firewall and then click Manage.
2. Click Add Firewall Group.
9.2. Vultr 39

Rupaya Documentation, Release 5.0
3. Type in a name for your new firewall policy (i.e. rupx-fw) and click Add Firewall Group. The name will nothave any impact on the later installation steps.
4. Locate the existing SSH port 22 rule that was created by default, and in the Source field click the drop downmenu and select My IP.
5. Locate and click on the plus symbol + to Add Firewall Rule.
6. In the Protocol field, scroll up and select TCP
7. In the Ports field type in 9050 and leave the Sources field set to Anywhere.
8. Click on the IPv6 Rules menu bar on the left.
9. Locate the existing SSH port 22 rule that was created by default, and in the Protocol field, scroll up and selectTCP
10. In the Ports field type in 9050 and leave the Sources field set to Anywhere.
11. Click on the Linked Instances menu bar on the left and click the plus symbol + to the right of the VPS name,that you created in the previous steps.
12. Click OK when prompted if you are sure you want to add this server to the firewall group.
• NOTE: You should now see your VPS listed as a Linked Insance in the Manage Firewall Group page.
9.2.4 Identify Available IPv6 Addresses
• OPTIONAL STEPS: The following steps are optional and are only required if you plan to run mutliple wallets,of the same coin, on this VPS.
1. From the VPS provider website, select Servers from the left menu bar and then click on the server that youcreated (i.e. rupx01).
2. Click on Settings.
3. Locate the link that says configuration example and click it to open the Sample Network Configuration page.
4. Scroll down and locate the Ubuntu 16.xx, Ubuntu 17.04 section. Copy the contents of the configurationexample and paste it into a seperate text file. This template will be used to Populate the /etc/network/interfacesof the Linux VPS.
• The contents of the configuration example should look something like this:
auto loiface lo inet loopback
auto ens3iface ens3 inet static
address 149.28.32.252netmask 255.255.254.0gateway 149.28.32.1dns-nameservers 108.61.10.10post-up ip route add 169.254.0.0/16 dev ens3
iface ens3 inet6 staticaddress 2001:19f0:5:5e83:5400:01ff:fedf:1adcnetmask 64dns-nameservers 2001:19f0:300:1704::6
• Using the above example, I would recommend using the following range of IPv6 addresses, assuming you want to apply at least 8 additional IP addresses on the server.**
40 Chapter 9. VPS: Order and Create a Linux VPS
Rupaya Documentation, Release 5.0
– 2001:19f0:5:5e83:5400:01ff:fedf:1
– 2001:19f0:5:5e83:5400:01ff:fedf:2
– 2001:19f0:5:5e83:5400:01ff:fedf:3
– 2001:19f0:5:5e83:5400:01ff:fedf:4
– 2001:19f0:5:5e83:5400:01ff:fedf:5
– 2001:19f0:5:5e83:5400:01ff:fedf:6
– 2001:19f0:5:5e83:5400:01ff:fedf:7
– 2001:19f0:5:5e83:5400:01ff:fedf:8
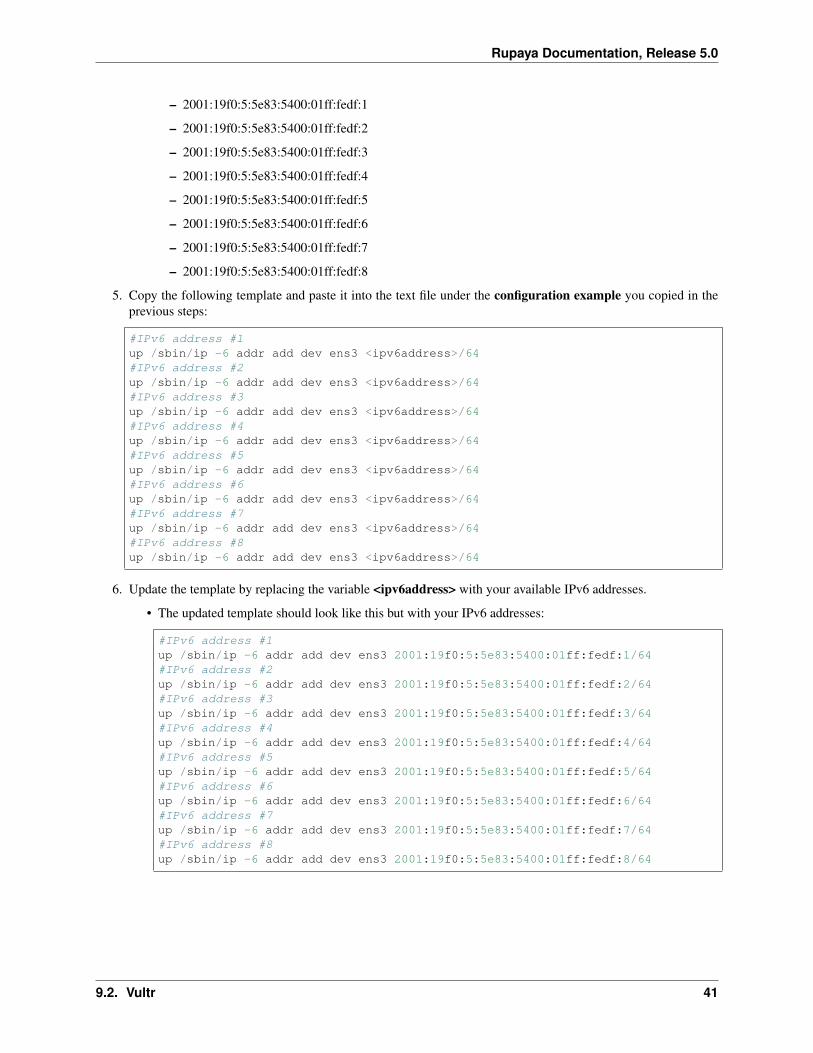
5. Copy the following template and paste it into the text file under the configuration example you copied in theprevious steps:
#IPv6 address #1up /sbin/ip -6 addr add dev ens3 <ipv6address>/64#IPv6 address #2up /sbin/ip -6 addr add dev ens3 <ipv6address>/64#IPv6 address #3up /sbin/ip -6 addr add dev ens3 <ipv6address>/64#IPv6 address #4up /sbin/ip -6 addr add dev ens3 <ipv6address>/64#IPv6 address #5up /sbin/ip -6 addr add dev ens3 <ipv6address>/64#IPv6 address #6up /sbin/ip -6 addr add dev ens3 <ipv6address>/64#IPv6 address #7up /sbin/ip -6 addr add dev ens3 <ipv6address>/64#IPv6 address #8up /sbin/ip -6 addr add dev ens3 <ipv6address>/64
6. Update the template by replacing the variable <ipv6address> with your available IPv6 addresses.
• The updated template should look like this but with your IPv6 addresses:
#IPv6 address #1up /sbin/ip -6 addr add dev ens3 2001:19f0:5:5e83:5400:01ff:fedf:1/64#IPv6 address #2up /sbin/ip -6 addr add dev ens3 2001:19f0:5:5e83:5400:01ff:fedf:2/64#IPv6 address #3up /sbin/ip -6 addr add dev ens3 2001:19f0:5:5e83:5400:01ff:fedf:3/64#IPv6 address #4up /sbin/ip -6 addr add dev ens3 2001:19f0:5:5e83:5400:01ff:fedf:4/64#IPv6 address #5up /sbin/ip -6 addr add dev ens3 2001:19f0:5:5e83:5400:01ff:fedf:5/64#IPv6 address #6up /sbin/ip -6 addr add dev ens3 2001:19f0:5:5e83:5400:01ff:fedf:6/64#IPv6 address #7up /sbin/ip -6 addr add dev ens3 2001:19f0:5:5e83:5400:01ff:fedf:7/64#IPv6 address #8up /sbin/ip -6 addr add dev ens3 2001:19f0:5:5e83:5400:01ff:fedf:8/64
9.2. Vultr 41
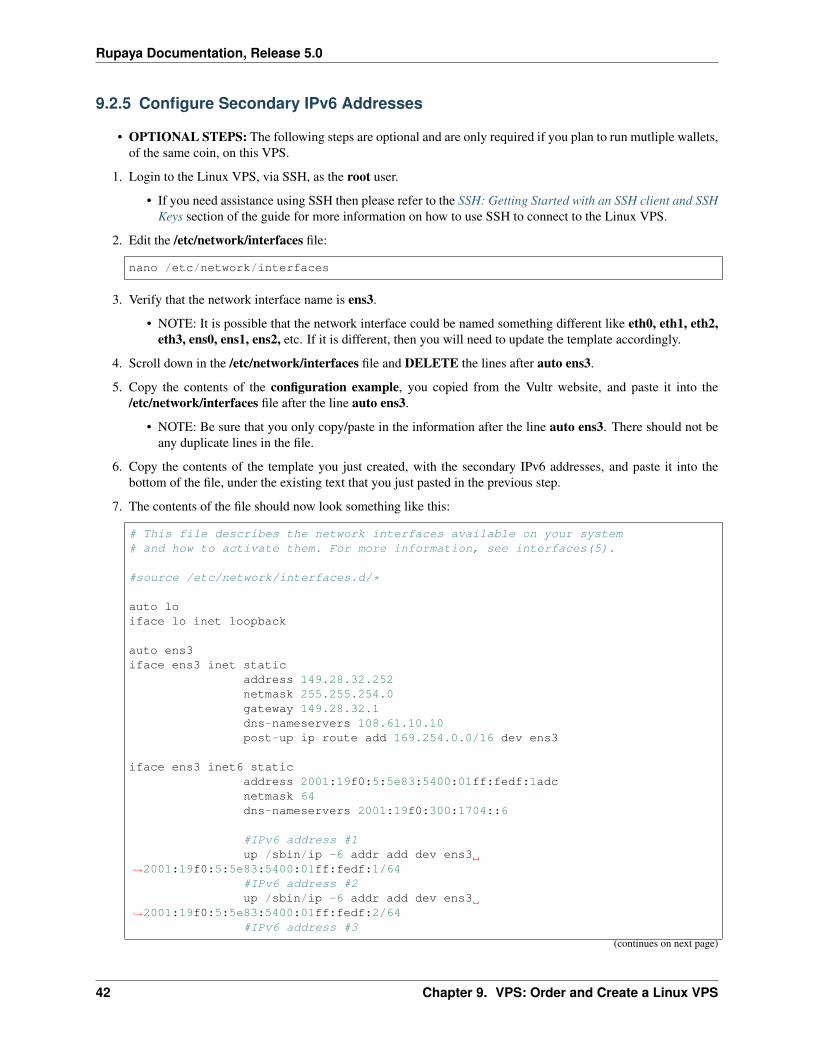
Rupaya Documentation, Release 5.0
9.2.5 Configure Secondary IPv6 Addresses
• OPTIONAL STEPS: The following steps are optional and are only required if you plan to run mutliple wallets,of the same coin, on this VPS.
1. Login to the Linux VPS, via SSH, as the root user.
• If you need assistance using SSH then please refer to the SSH: Getting Started with an SSH client and SSHKeys section of the guide for more information on how to use SSH to connect to the Linux VPS.
2. Edit the /etc/network/interfaces file:
nano /etc/network/interfaces
3. Verify that the network interface name is ens3.
• NOTE: It is possible that the network interface could be named something different like eth0, eth1, eth2,eth3, ens0, ens1, ens2, etc. If it is different, then you will need to update the template accordingly.
4. Scroll down in the /etc/network/interfaces file and DELETE the lines after auto ens3.
5. Copy the contents of the configuration example, you copied from the Vultr website, and paste it into the/etc/network/interfaces file after the line auto ens3.
• NOTE: Be sure that you only copy/paste in the information after the line auto ens3. There should not beany duplicate lines in the file.
6. Copy the contents of the template you just created, with the secondary IPv6 addresses, and paste it into thebottom of the file, under the existing text that you just pasted in the previous step.
7. The contents of the file should now look something like this:
# This file describes the network interfaces available on your system# and how to activate them. For more information, see interfaces(5).
#source /etc/network/interfaces.d/*
auto loiface lo inet loopback
auto ens3iface ens3 inet static
address 149.28.32.252netmask 255.255.254.0gateway 149.28.32.1dns-nameservers 108.61.10.10post-up ip route add 169.254.0.0/16 dev ens3
iface ens3 inet6 staticaddress 2001:19f0:5:5e83:5400:01ff:fedf:1adcnetmask 64dns-nameservers 2001:19f0:300:1704::6
#IPv6 address #1up /sbin/ip -6 addr add dev ens3
→˓2001:19f0:5:5e83:5400:01ff:fedf:1/64#IPv6 address #2up /sbin/ip -6 addr add dev ens3
→˓2001:19f0:5:5e83:5400:01ff:fedf:2/64#IPv6 address #3
(continues on next page)
42 Chapter 9. VPS: Order and Create a Linux VPS
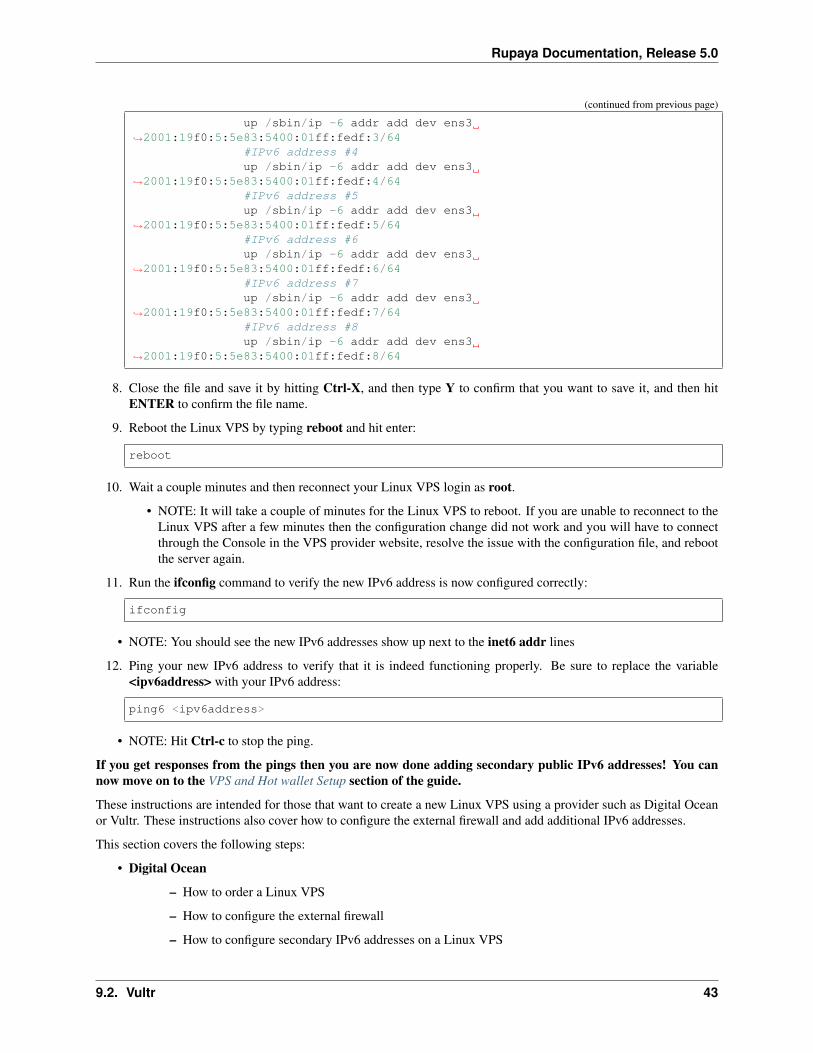
Rupaya Documentation, Release 5.0
(continued from previous page)
up /sbin/ip -6 addr add dev ens3→˓2001:19f0:5:5e83:5400:01ff:fedf:3/64
#IPv6 address #4up /sbin/ip -6 addr add dev ens3
→˓2001:19f0:5:5e83:5400:01ff:fedf:4/64#IPv6 address #5up /sbin/ip -6 addr add dev ens3
→˓2001:19f0:5:5e83:5400:01ff:fedf:5/64#IPv6 address #6up /sbin/ip -6 addr add dev ens3
→˓2001:19f0:5:5e83:5400:01ff:fedf:6/64#IPv6 address #7up /sbin/ip -6 addr add dev ens3
→˓2001:19f0:5:5e83:5400:01ff:fedf:7/64#IPv6 address #8up /sbin/ip -6 addr add dev ens3
→˓2001:19f0:5:5e83:5400:01ff:fedf:8/64
8. Close the file and save it by hitting Ctrl-X, and then type Y to confirm that you want to save it, and then hitENTER to confirm the file name.
9. Reboot the Linux VPS by typing reboot and hit enter:
reboot
10. Wait a couple minutes and then reconnect your Linux VPS login as root.
• NOTE: It will take a couple of minutes for the Linux VPS to reboot. If you are unable to reconnect to theLinux VPS after a few minutes then the configuration change did not work and you will have to connectthrough the Console in the VPS provider website, resolve the issue with the configuration file, and rebootthe server again.
11. Run the ifconfig command to verify the new IPv6 address is now configured correctly:
ifconfig
• NOTE: You should see the new IPv6 addresses show up next to the inet6 addr lines
12. Ping your new IPv6 address to verify that it is indeed functioning properly. Be sure to replace the variable<ipv6address> with your IPv6 address:
ping6 <ipv6address>
• NOTE: Hit Ctrl-c to stop the ping.
If you get responses from the pings then you are now done adding secondary public IPv6 addresses! You cannow move on to the VPS and Hot wallet Setup section of the guide.
These instructions are intended for those that want to create a new Linux VPS using a provider such as Digital Oceanor Vultr. These instructions also cover how to configure the external firewall and add additional IPv6 addresses.
This section covers the following steps:
• Digital Ocean
– How to order a Linux VPS
– How to configure the external firewall
– How to configure secondary IPv6 addresses on a Linux VPS
9.2. Vultr 43

Rupaya Documentation, Release 5.0
• Vultr
– How to order a Linux VPS
– How to configure the external firewall
– How to configure secondary IPv6 addresses on a Linux VPS
44 Chapter 9. VPS: Order and Create a Linux VPS
CHAPTER 10
MasterNodes
10.1 Setup Overview
This guide will walk you through the steps required to setup a Rupaya MasterNode Hot Wallet on a Linux server andto setup a Cold wallet on a Windows or Mac computer.
This guide assumes that you have a basic understanding of how to navigate the Linux OS for the setup of the Mas-terNode, and that you have an understanding of either a Windows or Mac OS for the setup of the Cold wallet.
10.1.1 Common Terminology
Hosted masternode
• Professional service that manages the installation and maintenance of the MasterNode server. Running a mas-ternode on your own does require an intermediate understanding of blockchains and server configuration, andwhile we do provide guides and tools to make this as easy as possible, we understand that many may still preferto have someone take care of all the setup and maitenance. Several members of the blockchain community haveemerged to provide dedicated hosting solutions for a fee. No technical experience is required as you need onlyprovide them with payment for the collateral and hosting services to receive the block rewards.
Self-operated masternode
• Personally managing the installation and maintenance of a MasterNode server. Users with the required skills,or the desire to learn more about the inner workings of the Rupaya network, may choose to run their ownMasterNode on a server of their choosing. There are several steps involved in this process and the user assumesthe responsibility to set up, configure, maintain, and secure your masternode collateral. The following pageswill get you started on your journey to understanding the masternode role and setting up your first masternode.
Hot Wallet
In this guide, we refer to the Hot wallet as the Rypaya wallet that is running on a Linux or Windows VPS.
• The VPS runs the MasterNode server.
• The VPS requires a public IP address statically configured on it.
45
Rupaya Documentation, Release 5.0
• The Hot wallet provides services to the blockchain network, for which it’s rewarded with coins.
• It’s referred to as Hot because it’s connected to and running on the public internet 24/7, directlyaccessible on the peer-to-peer port (TCP 9050).
• Because this wallet is always running, it is much more vulnerable to attack than a Cold wallet. Thisis why is is highly recommended to use a Cold wallet to receive the MasterNode rewards.
Cold Wallet
The Cold wallet can run on Windows, OSX, or Linux. It holds the RUPX collateral (20000 RUPX) andreceives the MasterNode rewards.
• The Cold wallet is used to both activate the MasterNode server and to collect the rewards for its’services.
• The Cold wallet is normally run at home, behind a firewall, on a Windows, OSX or Linux computer.
• After the Cold Wallet is used to activate the MasterNode, the Cold wallet can be closed and can evenbe run without direct connectivity to the internet, making it a more secure wallet.
• If you close the Cold Wallet, or disconnect it from the Internet, the MasterNode rewards will stillshow up the next time the wallet is synchronized with the network.
MasterNode Address
This is the public wallet address that is created in the Cold Wallet. It is the address you will use to hold thecallateral coins when you create the MasterNode. It will also be the address that receives the MasterNoderewards.
Virtual Private Server (VPS)
In this guide, the VPS is referring to the Linux server that will be running the MasterNode Hot wallet.
Block Count
The current Rupaya Block Count can be verified by browsing to the Rupaya Blockchain Explorer andlooking for the number in the Current Block box in the top left of the website.
• http://find.rupx.io
• https://hereismy.rupx.io
Rupaya Wallet Debug Console
In the Rupaya Cold wallet, click on Tools and select Debug Console. The Debug Console will allow youto run commands to verify the following:
• Current wallet version and how many active connections are established - getinfo
• MasterNode status - masternode status
• Remotely start your MasterNode - startmasternode alias false MN1
• Check the current Block Count - getblockcount
• Check the current Block Hash. - getblockhash <blockcount>
• Export your wallet Private Key - dumpprivkey <walletaddress>
10.1.2 Running a MasterNode Hot wallet on a home computer is a bad idea
Some people want to save a few bucks and run a MasterNode Hot wallet at home on a retired PC or Laptop. Here’swhy that is not a good idea:
46 Chapter 10. MasterNodes
Rupaya Documentation, Release 5.0
• The purpose of a MasterNode is to be a highly available system that is always reachable, has low networklatency, and high bandwidth. These are rarely found in the average home.
• Static IP addresses are also harder to get for residential users or they cost extra money.
• You could loose out on MasterNode rewards if your node loses connectivity due to an Internet or computeroutage.
• Running old PCs and Laptops at home also costs energy, creates noise and they can be a fire risk when running24/7.
• Your IP address can be traced back to your home, therefore it is unsafe. This gives potential thieves and hackersa target.
Recommendation: Get a $5 a month Linux VPS from a provider such as Digital Ocean, Vultr, or AWS and saveyourself from the possible loss of revenue when your home Internet or home computer goes down.
10.2 Initial Setup
10.2.1 VPS and Hot wallet Setup
These instructions are intended for those that are setting up a MasterNode Hot wallet on a Linux VPS. This wallet andserver will run 24/7 and will provide transaction confirmation services to the network. Each time the MasterNode HotWallet is used to complete a block, it will be rewarded with a set amount of coins. The Hot Wallet runs with an emptywallet balance, and forwards all MasterNode payouts to the Cold Wallet, reducing the risk of losing the funds if theVPS is comprimised.
Order and Create a Linux VPS
For more detailed instructions on how to create a Linux VPS and how to configure the external firewall,go to the VPS: Order and Create a Linux VPS section of the guide.
1. Identify a VPS provider and order a Linux Ubuntu 16.04 or 18.04 x64 server. A VPS that meets the followingrequirements should cost around $5 per month.
Recommended VPS Providers:
• Digital Ocean• Vultr• Linode• Amazon Web Services (AWS)
VPS Minimum Requirements:
• Linux - Ubuntu 16.04/18.04 - 64 Bit OS• 1GB of RAM• 20GB of disk space• Dedicated Public IP Address
2. Login to the VPS provider website and configure the external firewall to allow SSH port 22 and the RupayaWallet TCP port 9050.
10.2. Initial Setup 47
Rupaya Documentation, Release 5.0
3. Document the IP address of the VPS that you just created. This will be used in the next section to connect to theserver.
Connect to and Configure a Linux VPS
1. Login to the Linux VPS, via SSH, as the root user.
• When connecting to the Linux VPS, you will need an SSH client, such as Putty, if you want to have copyand paste functionality. Otherwise you will have to type all of the following commands out manually!
• If you need assistance using SSH, to connect to the VPS, then please refer to the SSH: Getting Started withan SSH client and SSH Keys section of the guide.
2. Install Linux updates. Run the following commands one at a time:
apt install makeapt install aptitude -yapt-get update -yapt-get upgrade -y
• NOTE: If a pop up window appears asking “What would you like to do about menu.list?” then select theoption: keep the local version currently installed
3. OPTIONAL STEP: Install fail2ban and create modifiable configs for fail2ban and its jail settings. Run thesecommands one at a time to install basic ssh protection with fail2ban:
apt-get install fail2ban -ycp /etc/fail2ban/fail2ban.conf /etc/fail2ban/fail2ban.localcp /etc/fail2ban/jail.conf /etc/fail2ban/jail.local
• (If you are using Ubuntu 16.04 then Fail2ban is setup to protect SSH by default, for other distributions pleasesee fail2ban’s extensive documentation)
4. OPTIONAL STEP: Install tzdata. Run the following command to install the application that will allow you toselect your clock timezone:
apt install tzdata
5. OPTIONAL STEP: Set your time zone. Run the following command to set your preferred time zone:
dpkg-reconfigure tzdata
6. Configure a virtual swap space on the VPS to avoid running out of memory:
fallocate -l 3000M /mnt/3000MB.swapdd if=/dev/zero of=/mnt/3000MB.swap bs=1024 count=3072000mkswap /mnt/3000MB.swapswapon /mnt/3000MB.swapchmod 600 /mnt/3000MB.swapecho '/mnt/3000MB.swap none swap sw 0 0' >> /etc/fstab
7. Configure the VPS internal firewall to allow SSH port 22 and the Rupaya Wallet port 9050:
apt-get -qq install ufwufw default deny incomingufw default allow outgoingufw allow 22/tcpufw limit 22/tcp
(continues on next page)
48 Chapter 10. MasterNodes
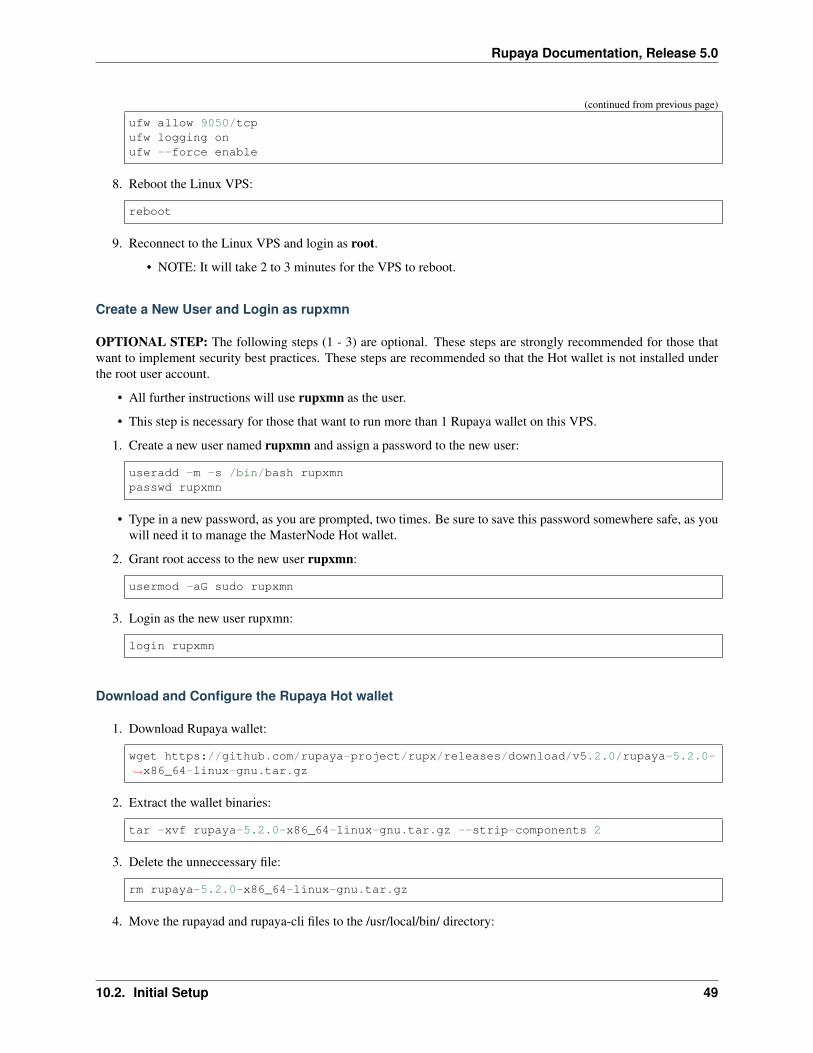
Rupaya Documentation, Release 5.0
(continued from previous page)
ufw allow 9050/tcpufw logging onufw --force enable
8. Reboot the Linux VPS:
reboot
9. Reconnect to the Linux VPS and login as root.
• NOTE: It will take 2 to 3 minutes for the VPS to reboot.
Create a New User and Login as rupxmn
OPTIONAL STEP: The following steps (1 - 3) are optional. These steps are strongly recommended for those thatwant to implement security best practices. These steps are recommended so that the Hot wallet is not installed underthe root user account.
• All further instructions will use rupxmn as the user.
• This step is necessary for those that want to run more than 1 Rupaya wallet on this VPS.
1. Create a new user named rupxmn and assign a password to the new user:
useradd -m -s /bin/bash rupxmnpasswd rupxmn
• Type in a new password, as you are prompted, two times. Be sure to save this password somewhere safe, as youwill need it to manage the MasterNode Hot wallet.
2. Grant root access to the new user rupxmn:
usermod -aG sudo rupxmn
3. Login as the new user rupxmn:
login rupxmn
Download and Configure the Rupaya Hot wallet
1. Download Rupaya wallet:
wget https://github.com/rupaya-project/rupx/releases/download/v5.2.0/rupaya-5.2.0-→˓x86_64-linux-gnu.tar.gz
2. Extract the wallet binaries:
tar -xvf rupaya-5.2.0-x86_64-linux-gnu.tar.gz --strip-components 2
3. Delete the unneccessary file:
rm rupaya-5.2.0-x86_64-linux-gnu.tar.gz
4. Move the rupayad and rupaya-cli files to the /usr/local/bin/ directory:
10.2. Initial Setup 49
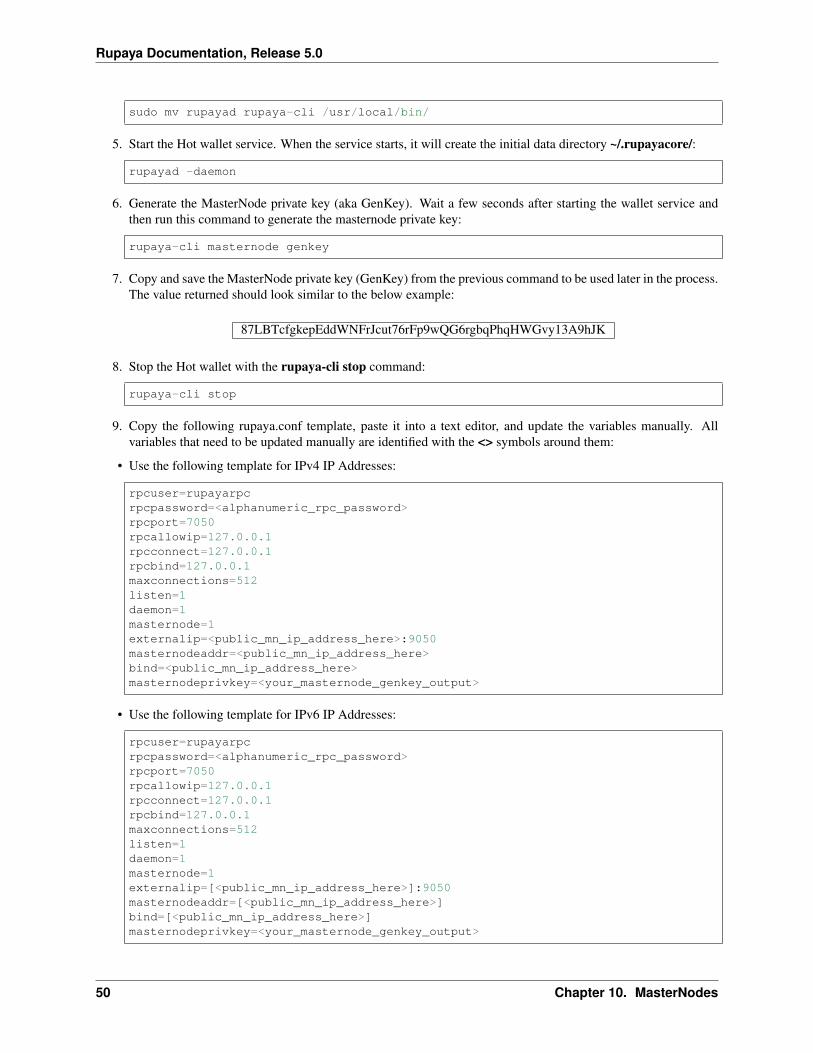
Rupaya Documentation, Release 5.0
sudo mv rupayad rupaya-cli /usr/local/bin/
5. Start the Hot wallet service. When the service starts, it will create the initial data directory ~/.rupayacore/:
rupayad -daemon
6. Generate the MasterNode private key (aka GenKey). Wait a few seconds after starting the wallet service andthen run this command to generate the masternode private key:
rupaya-cli masternode genkey
7. Copy and save the MasterNode private key (GenKey) from the previous command to be used later in the process.The value returned should look similar to the below example:
87LBTcfgkepEddWNFrJcut76rFp9wQG6rgbqPhqHWGvy13A9hJK
8. Stop the Hot wallet with the rupaya-cli stop command:
rupaya-cli stop
9. Copy the following rupaya.conf template, paste it into a text editor, and update the variables manually. Allvariables that need to be updated manually are identified with the <> symbols around them:
• Use the following template for IPv4 IP Addresses:
rpcuser=rupayarpcrpcpassword=<alphanumeric_rpc_password>rpcport=7050rpcallowip=127.0.0.1rpcconnect=127.0.0.1rpcbind=127.0.0.1maxconnections=512listen=1daemon=1masternode=1externalip=<public_mn_ip_address_here>:9050masternodeaddr=<public_mn_ip_address_here>bind=<public_mn_ip_address_here>masternodeprivkey=<your_masternode_genkey_output>
• Use the following template for IPv6 IP Addresses:
rpcuser=rupayarpcrpcpassword=<alphanumeric_rpc_password>rpcport=7050rpcallowip=127.0.0.1rpcconnect=127.0.0.1rpcbind=127.0.0.1maxconnections=512listen=1daemon=1masternode=1externalip=[<public_mn_ip_address_here>]:9050masternodeaddr=[<public_mn_ip_address_here>]bind=[<public_mn_ip_address_here>]masternodeprivkey=<your_masternode_genkey_output>
50 Chapter 10. MasterNodes
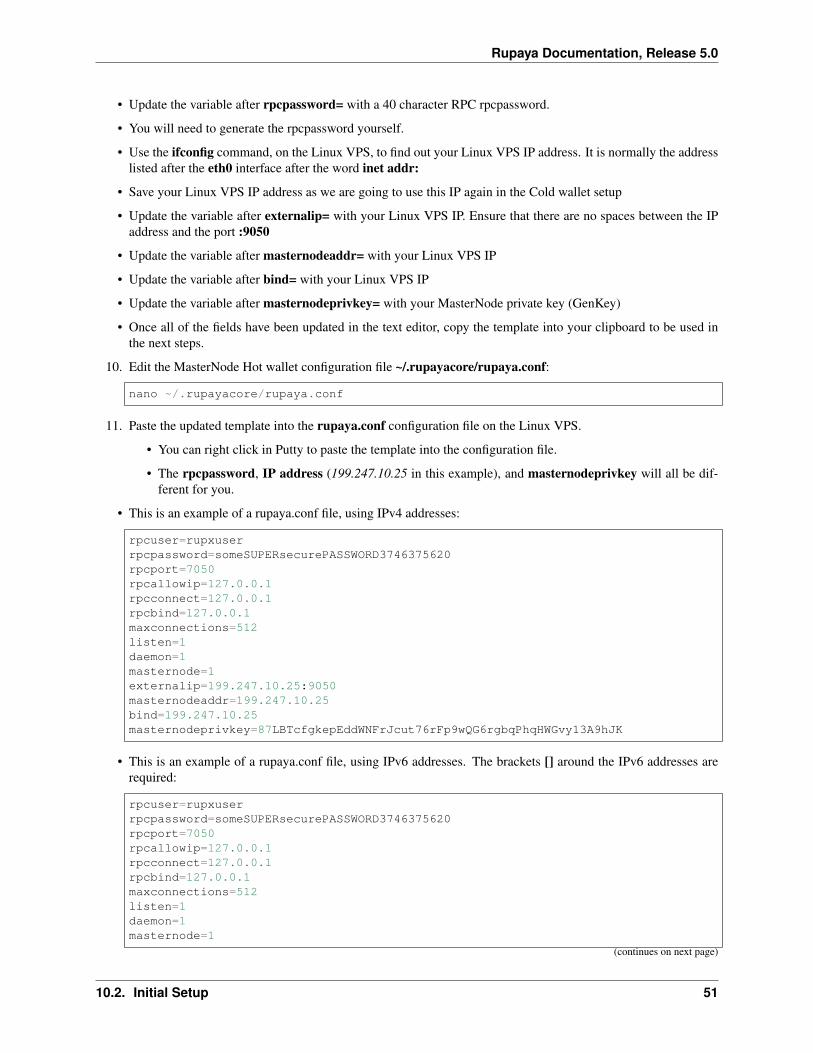
Rupaya Documentation, Release 5.0
• Update the variable after rpcpassword= with a 40 character RPC rpcpassword.
• You will need to generate the rpcpassword yourself.
• Use the ifconfig command, on the Linux VPS, to find out your Linux VPS IP address. It is normally the addresslisted after the eth0 interface after the word inet addr:
• Save your Linux VPS IP address as we are going to use this IP again in the Cold wallet setup
• Update the variable after externalip= with your Linux VPS IP. Ensure that there are no spaces between the IPaddress and the port :9050
• Update the variable after masternodeaddr= with your Linux VPS IP
• Update the variable after bind= with your Linux VPS IP
• Update the variable after masternodeprivkey= with your MasterNode private key (GenKey)
• Once all of the fields have been updated in the text editor, copy the template into your clipboard to be used inthe next steps.
10. Edit the MasterNode Hot wallet configuration file ~/.rupayacore/rupaya.conf:
nano ~/.rupayacore/rupaya.conf
11. Paste the updated template into the rupaya.conf configuration file on the Linux VPS.
• You can right click in Putty to paste the template into the configuration file.
• The rpcpassword, IP address (199.247.10.25 in this example), and masternodeprivkey will all be dif-ferent for you.
• This is an example of a rupaya.conf file, using IPv4 addresses:
rpcuser=rupxuserrpcpassword=someSUPERsecurePASSWORD3746375620rpcport=7050rpcallowip=127.0.0.1rpcconnect=127.0.0.1rpcbind=127.0.0.1maxconnections=512listen=1daemon=1masternode=1externalip=199.247.10.25:9050masternodeaddr=199.247.10.25bind=199.247.10.25masternodeprivkey=87LBTcfgkepEddWNFrJcut76rFp9wQG6rgbqPhqHWGvy13A9hJK
• This is an example of a rupaya.conf file, using IPv6 addresses. The brackets [] around the IPv6 addresses arerequired:
rpcuser=rupxuserrpcpassword=someSUPERsecurePASSWORD3746375620rpcport=7050rpcallowip=127.0.0.1rpcconnect=127.0.0.1rpcbind=127.0.0.1maxconnections=512listen=1daemon=1masternode=1
(continues on next page)
10.2. Initial Setup 51
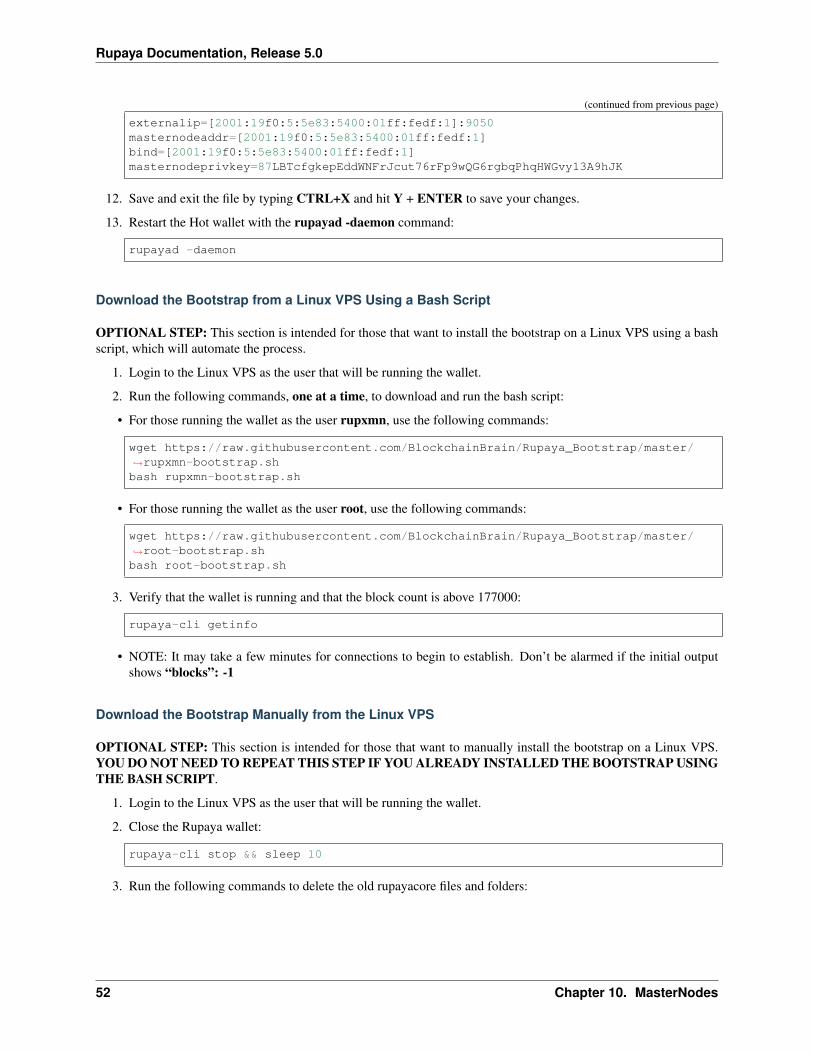
Rupaya Documentation, Release 5.0
(continued from previous page)
externalip=[2001:19f0:5:5e83:5400:01ff:fedf:1]:9050masternodeaddr=[2001:19f0:5:5e83:5400:01ff:fedf:1]bind=[2001:19f0:5:5e83:5400:01ff:fedf:1]masternodeprivkey=87LBTcfgkepEddWNFrJcut76rFp9wQG6rgbqPhqHWGvy13A9hJK
12. Save and exit the file by typing CTRL+X and hit Y + ENTER to save your changes.
13. Restart the Hot wallet with the rupayad -daemon command:
rupayad -daemon
Download the Bootstrap from a Linux VPS Using a Bash Script
OPTIONAL STEP: This section is intended for those that want to install the bootstrap on a Linux VPS using a bashscript, which will automate the process.
1. Login to the Linux VPS as the user that will be running the wallet.
2. Run the following commands, one at a time, to download and run the bash script:
• For those running the wallet as the user rupxmn, use the following commands:
wget https://raw.githubusercontent.com/BlockchainBrain/Rupaya_Bootstrap/master/→˓rupxmn-bootstrap.shbash rupxmn-bootstrap.sh
• For those running the wallet as the user root, use the following commands:
wget https://raw.githubusercontent.com/BlockchainBrain/Rupaya_Bootstrap/master/→˓root-bootstrap.shbash root-bootstrap.sh
3. Verify that the wallet is running and that the block count is above 177000:
rupaya-cli getinfo
• NOTE: It may take a few minutes for connections to begin to establish. Don’t be alarmed if the initial outputshows “blocks”: -1
Download the Bootstrap Manually from the Linux VPS
OPTIONAL STEP: This section is intended for those that want to manually install the bootstrap on a Linux VPS.YOU DO NOT NEED TO REPEAT THIS STEP IF YOU ALREADY INSTALLED THE BOOTSTRAP USINGTHE BASH SCRIPT.
1. Login to the Linux VPS as the user that will be running the wallet.
2. Close the Rupaya wallet:
rupaya-cli stop && sleep 10
3. Run the following commands to delete the old rupayacore files and folders:
52 Chapter 10. MasterNodes

Rupaya Documentation, Release 5.0
cp ~/.rupayacore/rupaya.conf .sudo rm -rf ~/.rupayacoremkdir ~/.rupayacoremv rupaya.conf ~/.rupayacore/.
4. Run the following command to download the bootstrap:
wget https://rupaya.ams3.cdn.digitaloceanspaces.com/bootstrap/rupx-bootstrap.tar.→˓gz
5. Extract the bootstrap folders and files into the .rupayacore folder:
tar xf rupx-bootstrap.tar.gz -C ~/
6. Restart the wallet:
rupayad -daemon
7. Delete the bootstrap.zip file:
rm rupx-bootstrap.tar.gz
Verify the Hot wallet is synchronizing with the blockchain
1. Run the rupaya-cli getinfo command to make sure that you see active connections:
rupaya-cli getinfo
• NOTE: It may take a few minutes for connections to begin to establish. Don’t be alarmed if the initial outputshows “blocks”: -1
2. Run the rupaya-cli getblockcount command every few minutes until you see the blocks increasing:
rupaya-cli getblockcount
• NOTE: If your block count is NOT increasing then you will need to stop the Hot wallet with the rupaya-clistop command and then reindex with the rupayad -reindex command.
• NOTE: If you did the reindex and you continue to have issues with establishing connections then checkthat the VPS provider external firewall is setup correctly to allow TCP port 9050 from anywhere. If thatis not setup correctly then you will not be able to proceed beyond this step.
If your block count is indeed increasing, then you can proceed to the next step to setup the Cold wallet.
10.2.2 Cold Wallet Setup
These instructions are intended for those that are installing the new Rupaya Core 5 wallet on your personal Windowsor Mac computer. The Cold wallet is where the MasterNode collateral will be locked. After the setup is complete,this wallet will be the one receiving the MasterNode rewards. This wallet will not have to run 24/7, once the setup iscomplete.
10.2. Initial Setup 53

Rupaya Documentation, Release 5.0
Requirements:
• Windows 7 or higher, Mac OS, or Linux Ubuntu 16.04/18.04• Outgoing internet access to sync the blockchain and enable the MasterNode remotely
Install the Rupaya Cold Wallet
1. Open the following URL in a web browser to download the appropriate wallet version for your system:
• https://github.com/rupaya-project/rupx/releases
2. Be sure that your existing wallet.dat and private keys are backed up from the old wallet. We strongly recommendbacking up your wallet.dat and private keys prior to starting this process.
For more instructions, watch this Video from a fellow Rupayan, David Coen, on how to export yourprivate keys:
3. Close the existing Rupaya wallet, if you already have one installed and running.
4. Open the new Rupaya wallet. The Rupaya-qt file should be located in the following default directory:
• Mac: /Users/USERNAME/Library/Application Support/RupayaCore• Windows: C:\Program Files\Rupaya
• Accept any pop ups asking to confirm if you want to continue with the installation
• When prompted, select Use the default data directory and click OK
• Mac: /Users/USERNAME/Library/Application Support/RupayaCore• Windows: C:\Users\USERNAME\AppData\Roaming\RupayaCore
• If prompted by security or antivirus software, click Allow Always
• The new wallet should now open and begin to synchronize with the network
Create a MN1 Wallet Address and Send it the 20000 Collateral Coins
1. Create a receiving address named MN1. This wallet address will be used for the MasterNode collateral funds.
• Go to File -> Receiving addresses
• Click New, type in a label and press Ok.
• Select the row of the newly added address and click Copy to store the destination address in the clipboard.
• You can name the wallet with a description such as “MN1” by right clicking it and selecting “Edit”.
2. Send EXACTLY 20000 RUPX coins to the MN1 address. Double check you’ve got the correct address beforetransferring the funds.
• After sending, you can verify the balance in the Transactions tab. This can take a few minutes to beconfirmed by the network.
54 Chapter 10. MasterNodes
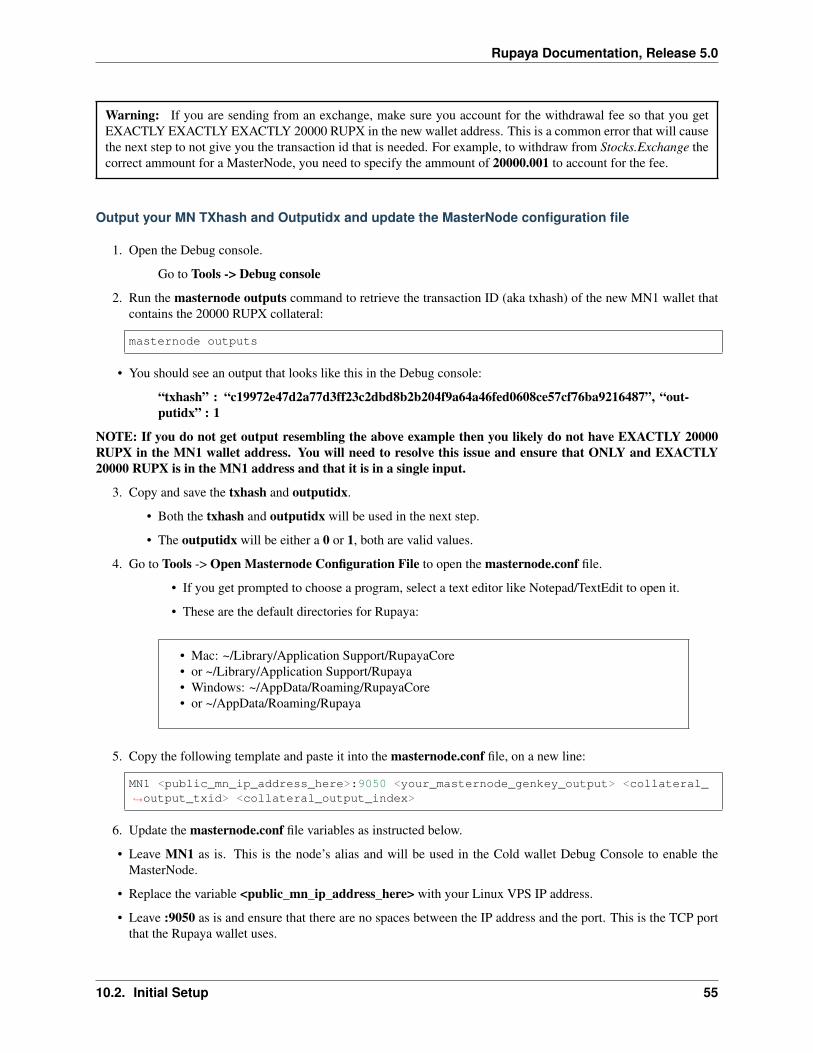
Rupaya Documentation, Release 5.0
Warning: If you are sending from an exchange, make sure you account for the withdrawal fee so that you getEXACTLY EXACTLY EXACTLY 20000 RUPX in the new wallet address. This is a common error that will causethe next step to not give you the transaction id that is needed. For example, to withdraw from Stocks.Exchange thecorrect ammount for a MasterNode, you need to specify the ammount of 20000.001 to account for the fee.
Output your MN TXhash and Outputidx and update the MasterNode configuration file
1. Open the Debug console.
Go to Tools -> Debug console
2. Run the masternode outputs command to retrieve the transaction ID (aka txhash) of the new MN1 wallet thatcontains the 20000 RUPX collateral:
masternode outputs
• You should see an output that looks like this in the Debug console:
“txhash” : “c19972e47d2a77d3ff23c2dbd8b2b204f9a64a46fed0608ce57cf76ba9216487”, “out-putidx” : 1
NOTE: If you do not get output resembling the above example then you likely do not have EXACTLY 20000RUPX in the MN1 wallet address. You will need to resolve this issue and ensure that ONLY and EXACTLY20000 RUPX is in the MN1 address and that it is in a single input.
3. Copy and save the txhash and outputidx.
• Both the txhash and outputidx will be used in the next step.
• The outputidx will be either a 0 or 1, both are valid values.
4. Go to Tools -> Open Masternode Configuration File to open the masternode.conf file.
• If you get prompted to choose a program, select a text editor like Notepad/TextEdit to open it.
• These are the default directories for Rupaya:
• Mac: ~/Library/Application Support/RupayaCore• or ~/Library/Application Support/Rupaya• Windows: ~/AppData/Roaming/RupayaCore• or ~/AppData/Roaming/Rupaya
5. Copy the following template and paste it into the masternode.conf file, on a new line:
MN1 <public_mn_ip_address_here>:9050 <your_masternode_genkey_output> <collateral_→˓output_txid> <collateral_output_index>
6. Update the masternode.conf file variables as instructed below.
• Leave MN1 as is. This is the node’s alias and will be used in the Cold wallet Debug Console to enable theMasterNode.
• Replace the variable <public_mn_ip_address_here> with your Linux VPS IP address.
• Leave :9050 as is and ensure that there are no spaces between the IP address and the port. This is the TCP portthat the Rupaya wallet uses.
10.2. Initial Setup 55
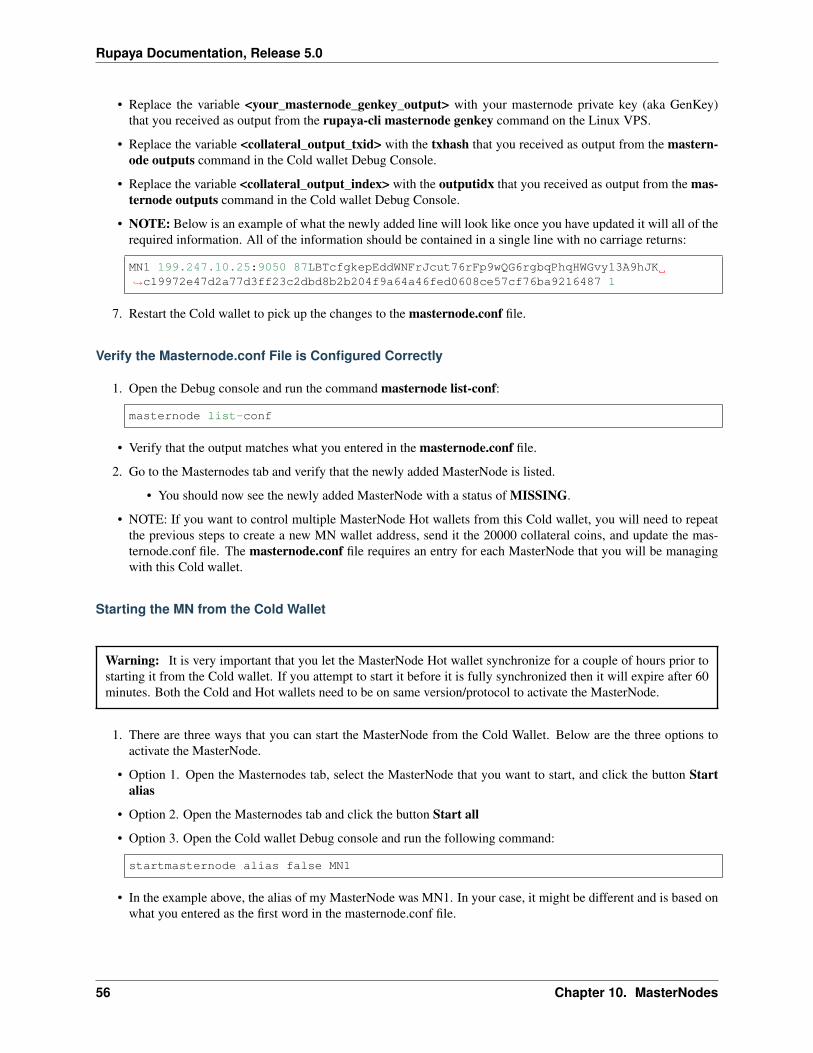
Rupaya Documentation, Release 5.0
• Replace the variable <your_masternode_genkey_output> with your masternode private key (aka GenKey)that you received as output from the rupaya-cli masternode genkey command on the Linux VPS.
• Replace the variable <collateral_output_txid> with the txhash that you received as output from the mastern-ode outputs command in the Cold wallet Debug Console.
• Replace the variable <collateral_output_index> with the outputidx that you received as output from the mas-ternode outputs command in the Cold wallet Debug Console.
• NOTE: Below is an example of what the newly added line will look like once you have updated it will all of therequired information. All of the information should be contained in a single line with no carriage returns:
MN1 199.247.10.25:9050 87LBTcfgkepEddWNFrJcut76rFp9wQG6rgbqPhqHWGvy13A9hJK→˓c19972e47d2a77d3ff23c2dbd8b2b204f9a64a46fed0608ce57cf76ba9216487 1
7. Restart the Cold wallet to pick up the changes to the masternode.conf file.
Verify the Masternode.conf File is Configured Correctly
1. Open the Debug console and run the command masternode list-conf:
masternode list-conf
• Verify that the output matches what you entered in the masternode.conf file.
2. Go to the Masternodes tab and verify that the newly added MasterNode is listed.
• You should now see the newly added MasterNode with a status of MISSING.
• NOTE: If you want to control multiple MasterNode Hot wallets from this Cold wallet, you will need to repeatthe previous steps to create a new MN wallet address, send it the 20000 collateral coins, and update the mas-ternode.conf file. The masternode.conf file requires an entry for each MasterNode that you will be managingwith this Cold wallet.
Starting the MN from the Cold Wallet
Warning: It is very important that you let the MasterNode Hot wallet synchronize for a couple of hours prior tostarting it from the Cold wallet. If you attempt to start it before it is fully synchronized then it will expire after 60minutes. Both the Cold and Hot wallets need to be on same version/protocol to activate the MasterNode.
1. There are three ways that you can start the MasterNode from the Cold Wallet. Below are the three options toactivate the MasterNode.
• Option 1. Open the Masternodes tab, select the MasterNode that you want to start, and click the button Startalias
• Option 2. Open the Masternodes tab and click the button Start all
• Option 3. Open the Cold wallet Debug console and run the following command:
startmasternode alias false MN1
• In the example above, the alias of my MasterNode was MN1. In your case, it might be different and is based onwhat you entered as the first word in the masternode.conf file.
56 Chapter 10. MasterNodes
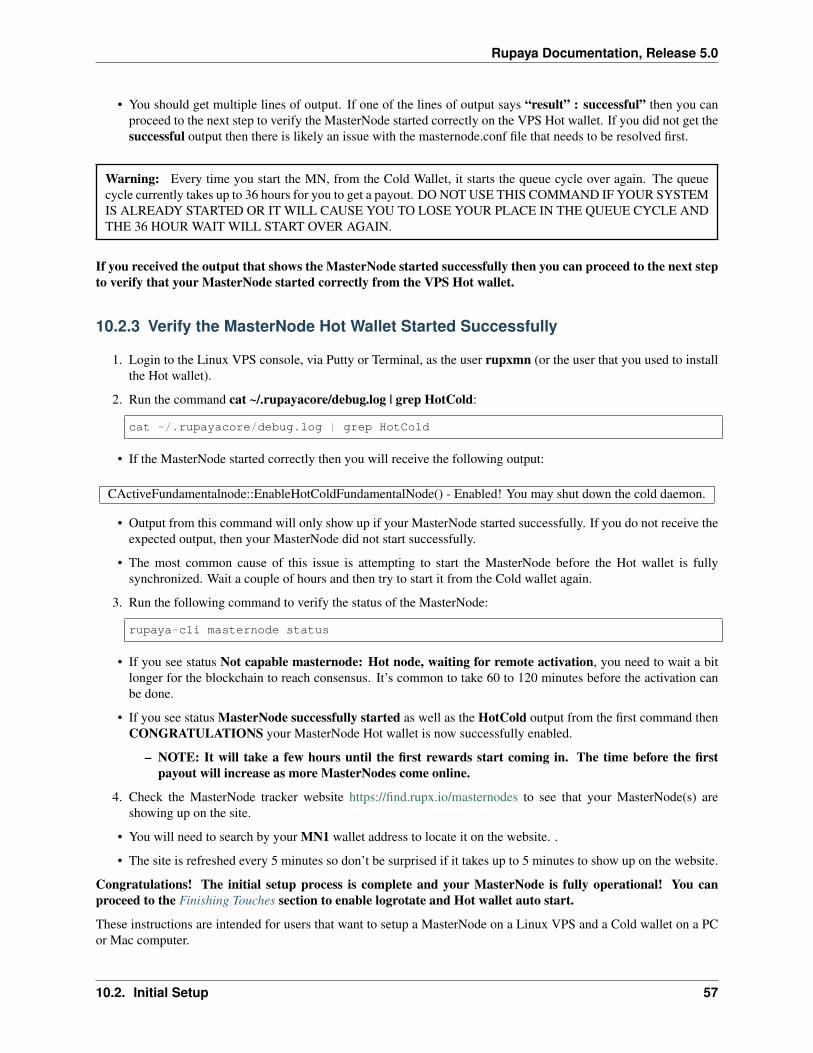
Rupaya Documentation, Release 5.0
• You should get multiple lines of output. If one of the lines of output says “result” : successful” then you canproceed to the next step to verify the MasterNode started correctly on the VPS Hot wallet. If you did not get thesuccessful output then there is likely an issue with the masternode.conf file that needs to be resolved first.
Warning: Every time you start the MN, from the Cold Wallet, it starts the queue cycle over again. The queuecycle currently takes up to 36 hours for you to get a payout. DO NOT USE THIS COMMAND IF YOUR SYSTEMIS ALREADY STARTED OR IT WILL CAUSE YOU TO LOSE YOUR PLACE IN THE QUEUE CYCLE ANDTHE 36 HOUR WAIT WILL START OVER AGAIN.
If you received the output that shows the MasterNode started successfully then you can proceed to the next stepto verify that your MasterNode started correctly from the VPS Hot wallet.
10.2.3 Verify the MasterNode Hot Wallet Started Successfully
1. Login to the Linux VPS console, via Putty or Terminal, as the user rupxmn (or the user that you used to installthe Hot wallet).
2. Run the command cat ~/.rupayacore/debug.log | grep HotCold:
cat ~/.rupayacore/debug.log | grep HotCold
• If the MasterNode started correctly then you will receive the following output:
CActiveFundamentalnode::EnableHotColdFundamentalNode() - Enabled! You may shut down the cold daemon.
• Output from this command will only show up if your MasterNode started successfully. If you do not receive theexpected output, then your MasterNode did not start successfully.
• The most common cause of this issue is attempting to start the MasterNode before the Hot wallet is fullysynchronized. Wait a couple of hours and then try to start it from the Cold wallet again.
3. Run the following command to verify the status of the MasterNode:
rupaya-cli masternode status
• If you see status Not capable masternode: Hot node, waiting for remote activation, you need to wait a bitlonger for the blockchain to reach consensus. It’s common to take 60 to 120 minutes before the activation canbe done.
• If you see status MasterNode successfully started as well as the HotCold output from the first command thenCONGRATULATIONS your MasterNode Hot wallet is now successfully enabled.
– NOTE: It will take a few hours until the first rewards start coming in. The time before the firstpayout will increase as more MasterNodes come online.
4. Check the MasterNode tracker website https://find.rupx.io/masternodes to see that your MasterNode(s) areshowing up on the site.
• You will need to search by your MN1 wallet address to locate it on the website. .
• The site is refreshed every 5 minutes so don’t be surprised if it takes up to 5 minutes to show up on the website.
Congratulations! The initial setup process is complete and your MasterNode is fully operational! You canproceed to the Finishing Touches section to enable logrotate and Hot wallet auto start.
These instructions are intended for users that want to setup a MasterNode on a Linux VPS and a Cold wallet on a PCor Mac computer.
10.2. Initial Setup 57
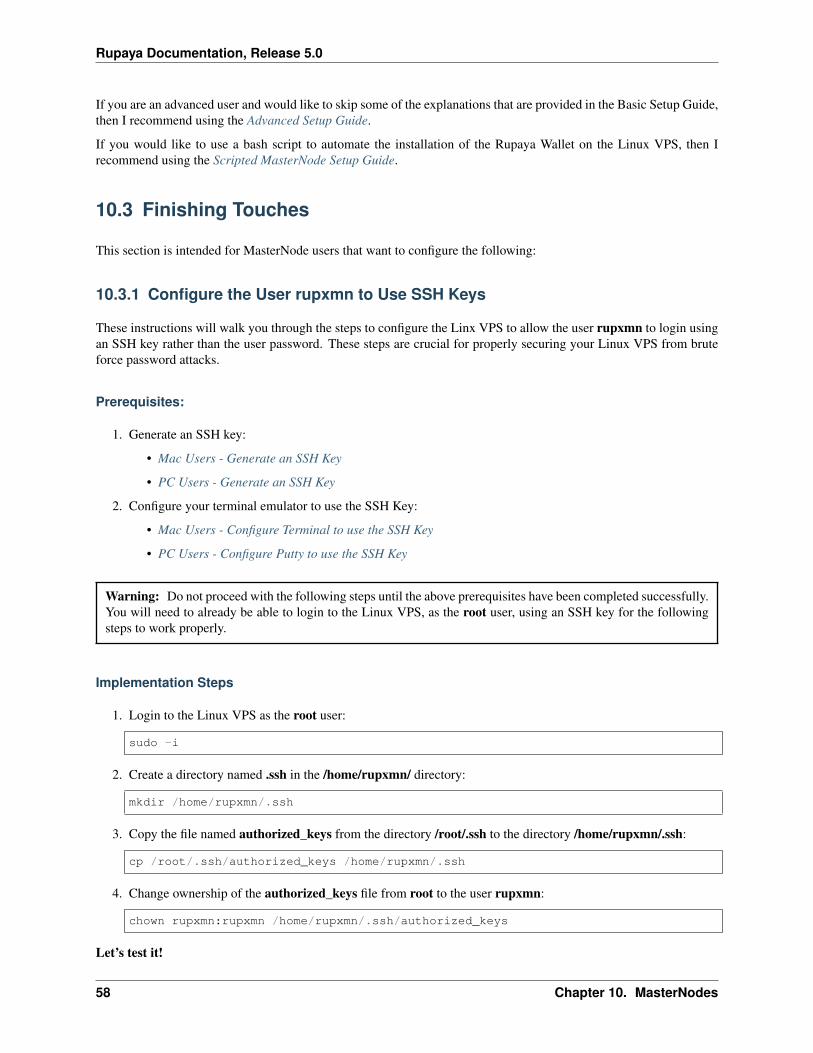
Rupaya Documentation, Release 5.0
If you are an advanced user and would like to skip some of the explanations that are provided in the Basic Setup Guide,then I recommend using the Advanced Setup Guide.
If you would like to use a bash script to automate the installation of the Rupaya Wallet on the Linux VPS, then Irecommend using the Scripted MasterNode Setup Guide.
10.3 Finishing Touches
This section is intended for MasterNode users that want to configure the following:
10.3.1 Configure the User rupxmn to Use SSH Keys
These instructions will walk you through the steps to configure the Linx VPS to allow the user rupxmn to login usingan SSH key rather than the user password. These steps are crucial for properly securing your Linux VPS from bruteforce password attacks.
Prerequisites:
1. Generate an SSH key:
• Mac Users - Generate an SSH Key
• PC Users - Generate an SSH Key
2. Configure your terminal emulator to use the SSH Key:
• Mac Users - Configure Terminal to use the SSH Key
• PC Users - Configure Putty to use the SSH Key
Warning: Do not proceed with the following steps until the above prerequisites have been completed successfully.You will need to already be able to login to the Linux VPS, as the root user, using an SSH key for the followingsteps to work properly.
Implementation Steps
1. Login to the Linux VPS as the root user:
sudo -i
2. Create a directory named .ssh in the /home/rupxmn/ directory:
mkdir /home/rupxmn/.ssh
3. Copy the file named authorized_keys from the directory /root/.ssh to the directory /home/rupxmn/.ssh:
cp /root/.ssh/authorized_keys /home/rupxmn/.ssh
4. Change ownership of the authorized_keys file from root to the user rupxmn:
chown rupxmn:rupxmn /home/rupxmn/.ssh/authorized_keys
Let’s test it!
58 Chapter 10. MasterNodes
Rupaya Documentation, Release 5.0
5. Open a duplicate session to the Linux VPS and login as the user rupxmn.
• You should now be logged in without having to enter your password.
• For PC users, be sure that the Putty session has the SSH key saved, or this step will fail.
If you are able to login to the Linux VPS with the user rupxmn, without having to type in your password, thenyou can proceed to the next section to disable password logins and root login access.
10.3.2 Disable Password Logins and Root Login Access
These instructions are intended for all users that want to reduce the risk of brute force login attacks by disablingpassword logins and root login access. These procedures will improve security on your Linux VPS by requiring thecorrect SSH Key to be able to login. After completing these steps, any computer, or SSH session, that does not havethe correct SSH Key installed will not be able to login to the Linux VPS, and you will no longer be able to remotelylogin to the Linux VPS using the root user.
Disabling password login capabilities
Warning: Do not perform the following steps until you are able to successfully login to the Linux VPS using anSSH key rather than your username and password.
1. Connect to the Linux VPS and login as the rupxmn user.
2. Elevate to the root user. This is necessary because the other steps in this process require elevated privileges:
sudo -i
3. The following commands will edit the SSH file /etc/ssh/sshd_config to disable password login capabilities, andwill then restart the sshd service to apply the change:
sed -i 's/PasswordAuthentication yes/PasswordAuthentication no/g' /etc/ssh/sshd_→˓configsystemctl reload sshd
Disabling root login access
Warning: Do not perform the following steps until you have created the user rupxmn and are able to login to theLinux VPS using an SSH key with that new user.
• You should be logged in to the Linux VPS as the root user to complete the following steps:
1. The following commands will edit the SSH file /etc/ssh/sshd_config to disable root login access, and will thenrestart the sshd service to apply the change:
sed -i 's/PermitRootLogin yes/PermitRootLogin no/g' /etc/ssh/sshd_configsystemctl reload sshd
Let’s test it!
2. Open a duplicate session to the Linux VPS and login as root.
10.3. Finishing Touches 59
Rupaya Documentation, Release 5.0
• NOTE: It should no longer allow you to login as root and a pop up window should appear with the followingerror: Disconnected: No supported authentication methods available
If password authentication and root login access have been successfully disabled then you can proceed to thenext section to configure logrotate.
10.3.3 Configure Logrotate
This section is intended for MasterNode users that want to configure automatic log rotation. This is to prevent the logfiles from filling up the Linux VPS hard drive. If you do not occassionally clean up the log files then your Linux VPShard drive will eventually fill up and the server will crash. Completing the steps in this section will configure yourLinux VPS to automatically clean up the logs every 30 days, rather than having to do it manually. This is a necessarystep for anyone running a MasterNode.
1. Connect to your Linux VPS and login as rupxmn.
2. Elevate to root level privelege:
sudo -i
3. Run the following command to create and edit the file /etc/logrotate.d/rupaya:
nano /etc/logrotate.d/rupaya
• If prompted, select Nano as your text editor
4. Copy the following text and paste it into the file.
• Use this template if you are running the wallet with the user rupxmn:
/home/rupxmn/.rupayacore/*.log {su root admsize 3Mdailymissingokrotate 30copytruncatedateextcompressnotifemptycreate
}
• Use this template if you are running the wallet with the user root:
/root/.rupayacore/*.log {su root admsize 3Mdailymissingokrotate 30copytruncatedateextcompressnotifemptycreate
}
60 Chapter 10. MasterNodes
Rupaya Documentation, Release 5.0
• Save and close the file by hitting Ctrl-X, and then type Y to confirm that you want to save it, and then hitENTER to confirm the file name.
5. Run the following command to initialize logrotate.
• Use this template if you are running the wallet with the user rupxmn:
logrotate /etc/logrotate.d/rupaya --state /home/rupxmn/logrotate-state --verbose
• Use this template if you are running the wallet with the user root:
logrotate /etc/logrotate.d/rupaya --state /root/logrotate-state --verbose
6. Run the following command to open and edit the crontab file:
crontab -e
• If prompted, select Nano as your text editor
7. Copy the following text and paste it on a new line at the bottom of the crontab file.
• Use this template if you are running the wallet with the user rupxmn:
0 1 * * * /usr/sbin/logrotate /etc/logrotate.d/rupaya --state /home/rupxmn/→˓logrotate-state
• Use this template if you are running the wallet with the user root:
0 1 * * * /usr/sbin/logrotate /etc/logrotate.d/rupaya --state /root/logrotate-→˓state
• Save and close the file by hitting Ctrl-X, and then type Y to confirm that you want to save it, and then hitENTER to confirm the file name.
• This above line added to the crontab file will configure the Linux VPS to initialize logrotate when the LinuxVPS is rebooted.
Now that logrotate is configured, you can proceed to the next section to automatically start the MasterNode Hotwallet when the Linux VPS reboots
10.3.4 Enable Hot Wallet Auto Start
This section is intended for MasterNode users that want to configure the Linux VPS to automatically start the Mas-terNode Hot wallet when the Linux VPS is rebooted.
1. Connect to your Linux VPS and login as rupxmn.
2. Elevate to root level privelege:
sudo -i
3. Run the following command to create and edit the file /etc/cron.d/resetrupaya. This file will be used to tell theserver to restart the Hot wallet upon bootup:
nano /etc/cron.d/resetrupaya
4. Copy the following text and paste it into the resetrupaya file. This will create a cronjob that will start the Hotwallet automatically in the event that the server is rebooted:
• For those running the wallet as the user rupxmn, use the following template:
10.3. Finishing Touches 61
Rupaya Documentation, Release 5.0
@reboot rupxmn sleep 5 && /usr/local/bin/rupayad
• For those running the wallet as the user root, use the following template:
@reboot root sleep 5 && /usr/local/bin/rupayad
• Save and close the file by hitting Ctrl-X, and then type Y to confirm that you want to save it, and then hitENTER to confirm the file name.
5. Reboot the Linux VPS to test and verify that the Hot wallet will restart upon boot:
reboot
6. Wait a couple minutes and then reconnect your Linux VPS and login as rupxmn.
• It will take a couple of minutes for the Linux VPS to reboot.
7. Run the command ps -ef |grep rupayad to verify the Hot wallet is running:
ps -ef |grep rupayad
• You should get two lines of output that look something like this:
rupxmn 988 1 96 17:32 ? 00:00:31 /usr/local/bin/rupayadrupxmn 1122 1111 0 17:32 pts/0 00:00:00 grep --color=auto rupayad
• If you only get one line of text with the output grep –color=auto rupaya then the wallet is not running and youwill need to walk through the above steps again.
8. Run the command rupaya-cli getblockcount to verify that your Hot wallet is indeed running and that yourblock count is increasing:
rupaya-cli getblockcount
9. Verify that your MasterNode is still showing up on the MasterNode tracker website. The site is refreshed every5 minutes so check it a few times just to be sure.
• https://find.rupx.io/masternodes
If the MasterNode Hot wallet automatically restarts after a reboot then you have successfully completed thissection. CONGRATULATIONS!! The setup of your MasterNode is now fully complete!
NOTE: There is no need to proceed to the next section since all of the configuration steps have been completed.
10.4 Advanced Users - Initial Setup
10.4.1 VPS and Hot wallet Setup
These instructions are intended for advanced users that are setting up a MasterNode Hot wallet on a Linux VPS anddon’t want to waste time with all those pesky details and explanations.
Order and setup a Linux VPS
1. Identify a VPS provider and order a Linux Ubuntu 16.04 or 18.04 x64 server.
Recommended VPS Providers:
62 Chapter 10. MasterNodes
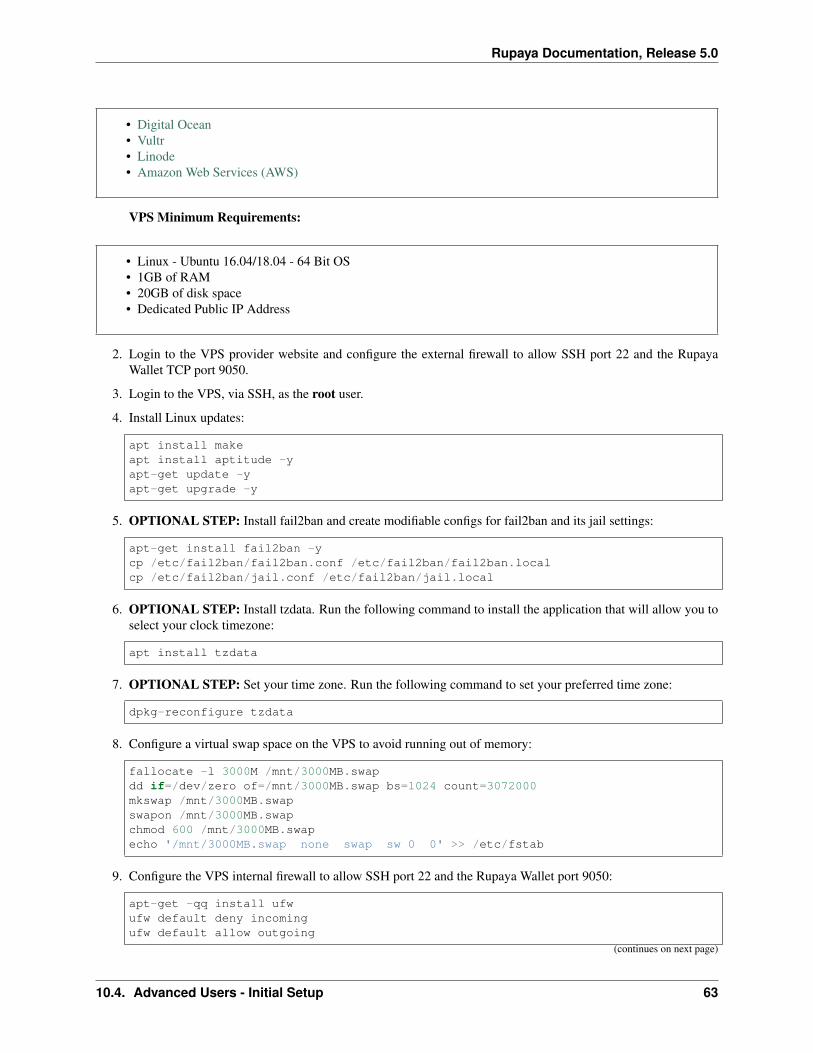
Rupaya Documentation, Release 5.0
• Digital Ocean• Vultr• Linode• Amazon Web Services (AWS)
VPS Minimum Requirements:
• Linux - Ubuntu 16.04/18.04 - 64 Bit OS• 1GB of RAM• 20GB of disk space• Dedicated Public IP Address
2. Login to the VPS provider website and configure the external firewall to allow SSH port 22 and the RupayaWallet TCP port 9050.
3. Login to the VPS, via SSH, as the root user.
4. Install Linux updates:
apt install makeapt install aptitude -yapt-get update -yapt-get upgrade -y
5. OPTIONAL STEP: Install fail2ban and create modifiable configs for fail2ban and its jail settings:
apt-get install fail2ban -ycp /etc/fail2ban/fail2ban.conf /etc/fail2ban/fail2ban.localcp /etc/fail2ban/jail.conf /etc/fail2ban/jail.local
6. OPTIONAL STEP: Install tzdata. Run the following command to install the application that will allow you toselect your clock timezone:
apt install tzdata
7. OPTIONAL STEP: Set your time zone. Run the following command to set your preferred time zone:
dpkg-reconfigure tzdata
8. Configure a virtual swap space on the VPS to avoid running out of memory:
fallocate -l 3000M /mnt/3000MB.swapdd if=/dev/zero of=/mnt/3000MB.swap bs=1024 count=3072000mkswap /mnt/3000MB.swapswapon /mnt/3000MB.swapchmod 600 /mnt/3000MB.swapecho '/mnt/3000MB.swap none swap sw 0 0' >> /etc/fstab
9. Configure the VPS internal firewall to allow SSH port 22 and the Rupaya Wallet port 9050:
apt-get -qq install ufwufw default deny incomingufw default allow outgoing
(continues on next page)
10.4. Advanced Users - Initial Setup 63
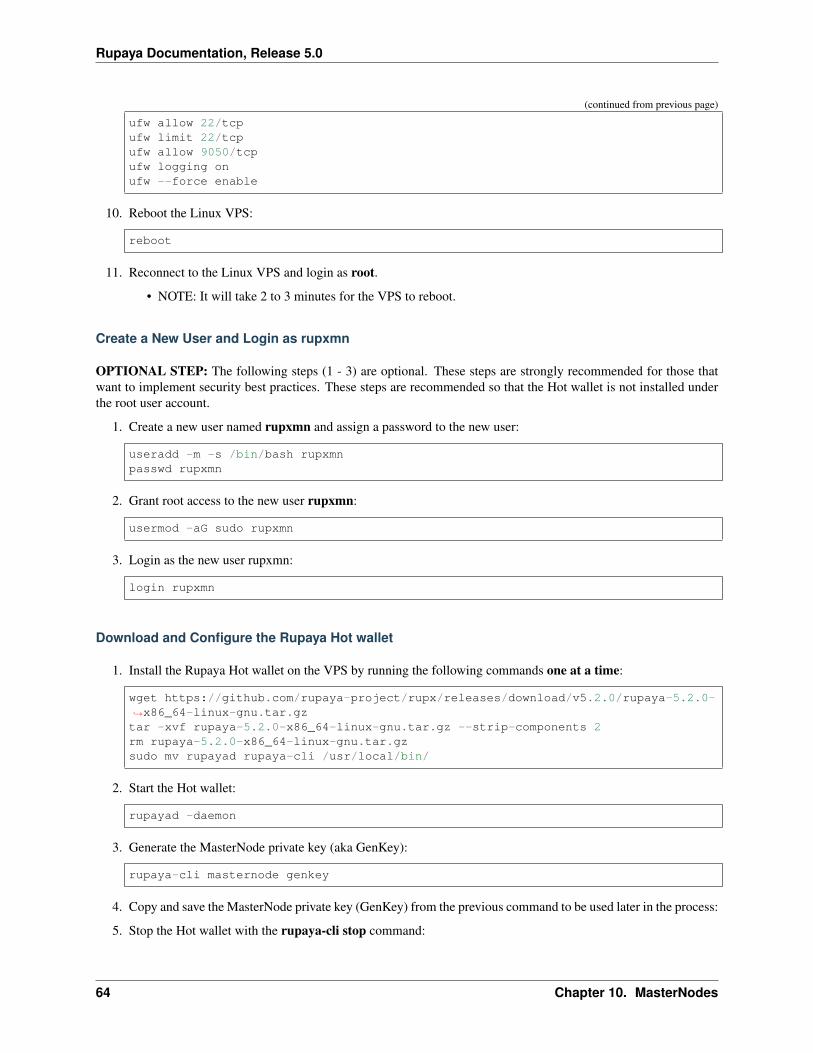
Rupaya Documentation, Release 5.0
(continued from previous page)
ufw allow 22/tcpufw limit 22/tcpufw allow 9050/tcpufw logging onufw --force enable
10. Reboot the Linux VPS:
reboot
11. Reconnect to the Linux VPS and login as root.
• NOTE: It will take 2 to 3 minutes for the VPS to reboot.
Create a New User and Login as rupxmn
OPTIONAL STEP: The following steps (1 - 3) are optional. These steps are strongly recommended for those thatwant to implement security best practices. These steps are recommended so that the Hot wallet is not installed underthe root user account.
1. Create a new user named rupxmn and assign a password to the new user:
useradd -m -s /bin/bash rupxmnpasswd rupxmn
2. Grant root access to the new user rupxmn:
usermod -aG sudo rupxmn
3. Login as the new user rupxmn:
login rupxmn
Download and Configure the Rupaya Hot wallet
1. Install the Rupaya Hot wallet on the VPS by running the following commands one at a time:
wget https://github.com/rupaya-project/rupx/releases/download/v5.2.0/rupaya-5.2.0-→˓x86_64-linux-gnu.tar.gztar -xvf rupaya-5.2.0-x86_64-linux-gnu.tar.gz --strip-components 2rm rupaya-5.2.0-x86_64-linux-gnu.tar.gzsudo mv rupayad rupaya-cli /usr/local/bin/
2. Start the Hot wallet:
rupayad -daemon
3. Generate the MasterNode private key (aka GenKey):
rupaya-cli masternode genkey
4. Copy and save the MasterNode private key (GenKey) from the previous command to be used later in the process:
5. Stop the Hot wallet with the rupaya-cli stop command:
64 Chapter 10. MasterNodes
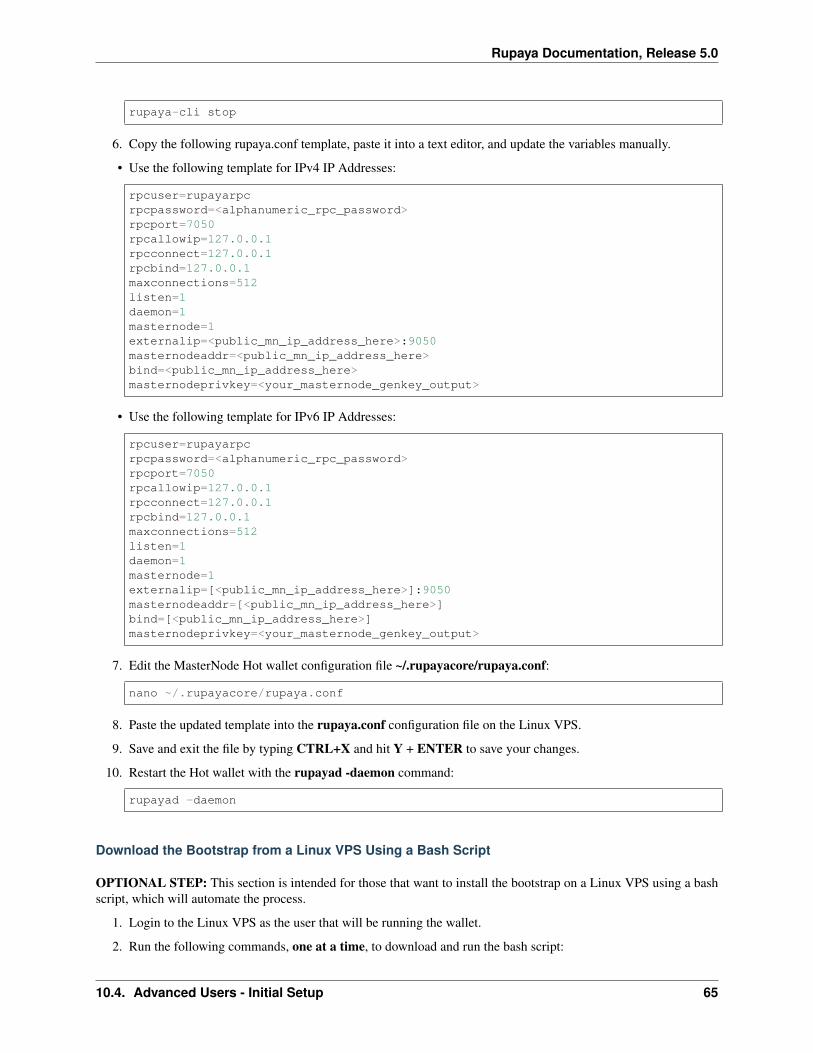
Rupaya Documentation, Release 5.0
rupaya-cli stop
6. Copy the following rupaya.conf template, paste it into a text editor, and update the variables manually.
• Use the following template for IPv4 IP Addresses:
rpcuser=rupayarpcrpcpassword=<alphanumeric_rpc_password>rpcport=7050rpcallowip=127.0.0.1rpcconnect=127.0.0.1rpcbind=127.0.0.1maxconnections=512listen=1daemon=1masternode=1externalip=<public_mn_ip_address_here>:9050masternodeaddr=<public_mn_ip_address_here>bind=<public_mn_ip_address_here>masternodeprivkey=<your_masternode_genkey_output>
• Use the following template for IPv6 IP Addresses:
rpcuser=rupayarpcrpcpassword=<alphanumeric_rpc_password>rpcport=7050rpcallowip=127.0.0.1rpcconnect=127.0.0.1rpcbind=127.0.0.1maxconnections=512listen=1daemon=1masternode=1externalip=[<public_mn_ip_address_here>]:9050masternodeaddr=[<public_mn_ip_address_here>]bind=[<public_mn_ip_address_here>]masternodeprivkey=<your_masternode_genkey_output>
7. Edit the MasterNode Hot wallet configuration file ~/.rupayacore/rupaya.conf:
nano ~/.rupayacore/rupaya.conf
8. Paste the updated template into the rupaya.conf configuration file on the Linux VPS.
9. Save and exit the file by typing CTRL+X and hit Y + ENTER to save your changes.
10. Restart the Hot wallet with the rupayad -daemon command:
rupayad -daemon
Download the Bootstrap from a Linux VPS Using a Bash Script
OPTIONAL STEP: This section is intended for those that want to install the bootstrap on a Linux VPS using a bashscript, which will automate the process.
1. Login to the Linux VPS as the user that will be running the wallet.
2. Run the following commands, one at a time, to download and run the bash script:
10.4. Advanced Users - Initial Setup 65
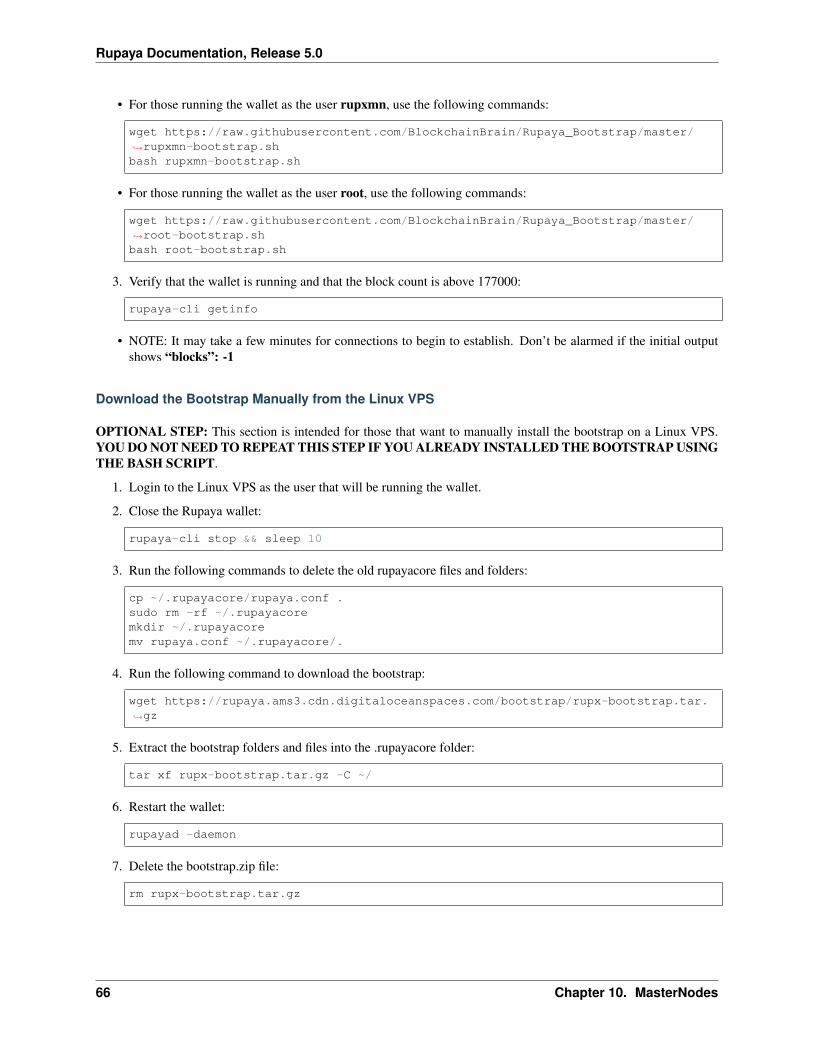
Rupaya Documentation, Release 5.0
• For those running the wallet as the user rupxmn, use the following commands:
wget https://raw.githubusercontent.com/BlockchainBrain/Rupaya_Bootstrap/master/→˓rupxmn-bootstrap.shbash rupxmn-bootstrap.sh
• For those running the wallet as the user root, use the following commands:
wget https://raw.githubusercontent.com/BlockchainBrain/Rupaya_Bootstrap/master/→˓root-bootstrap.shbash root-bootstrap.sh
3. Verify that the wallet is running and that the block count is above 177000:
rupaya-cli getinfo
• NOTE: It may take a few minutes for connections to begin to establish. Don’t be alarmed if the initial outputshows “blocks”: -1
Download the Bootstrap Manually from the Linux VPS
OPTIONAL STEP: This section is intended for those that want to manually install the bootstrap on a Linux VPS.YOU DO NOT NEED TO REPEAT THIS STEP IF YOU ALREADY INSTALLED THE BOOTSTRAP USINGTHE BASH SCRIPT.
1. Login to the Linux VPS as the user that will be running the wallet.
2. Close the Rupaya wallet:
rupaya-cli stop && sleep 10
3. Run the following commands to delete the old rupayacore files and folders:
cp ~/.rupayacore/rupaya.conf .sudo rm -rf ~/.rupayacoremkdir ~/.rupayacoremv rupaya.conf ~/.rupayacore/.
4. Run the following command to download the bootstrap:
wget https://rupaya.ams3.cdn.digitaloceanspaces.com/bootstrap/rupx-bootstrap.tar.→˓gz
5. Extract the bootstrap folders and files into the .rupayacore folder:
tar xf rupx-bootstrap.tar.gz -C ~/
6. Restart the wallet:
rupayad -daemon
7. Delete the bootstrap.zip file:
rm rupx-bootstrap.tar.gz
66 Chapter 10. MasterNodes
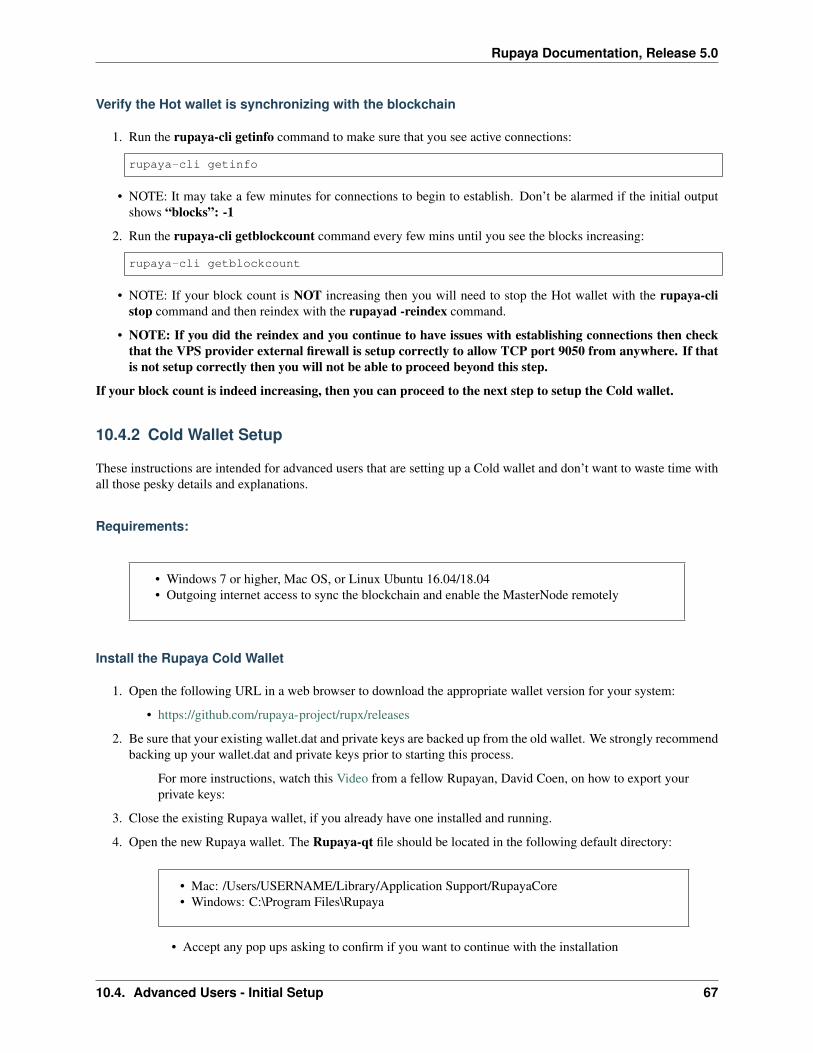
Rupaya Documentation, Release 5.0
Verify the Hot wallet is synchronizing with the blockchain
1. Run the rupaya-cli getinfo command to make sure that you see active connections:
rupaya-cli getinfo
• NOTE: It may take a few minutes for connections to begin to establish. Don’t be alarmed if the initial outputshows “blocks”: -1
2. Run the rupaya-cli getblockcount command every few mins until you see the blocks increasing:
rupaya-cli getblockcount
• NOTE: If your block count is NOT increasing then you will need to stop the Hot wallet with the rupaya-clistop command and then reindex with the rupayad -reindex command.
• NOTE: If you did the reindex and you continue to have issues with establishing connections then checkthat the VPS provider external firewall is setup correctly to allow TCP port 9050 from anywhere. If thatis not setup correctly then you will not be able to proceed beyond this step.
If your block count is indeed increasing, then you can proceed to the next step to setup the Cold wallet.
10.4.2 Cold Wallet Setup
These instructions are intended for advanced users that are setting up a Cold wallet and don’t want to waste time withall those pesky details and explanations.
Requirements:
• Windows 7 or higher, Mac OS, or Linux Ubuntu 16.04/18.04• Outgoing internet access to sync the blockchain and enable the MasterNode remotely
Install the Rupaya Cold Wallet
1. Open the following URL in a web browser to download the appropriate wallet version for your system:
• https://github.com/rupaya-project/rupx/releases
2. Be sure that your existing wallet.dat and private keys are backed up from the old wallet. We strongly recommendbacking up your wallet.dat and private keys prior to starting this process.
For more instructions, watch this Video from a fellow Rupayan, David Coen, on how to export yourprivate keys:
3. Close the existing Rupaya wallet, if you already have one installed and running.
4. Open the new Rupaya wallet. The Rupaya-qt file should be located in the following default directory:
• Mac: /Users/USERNAME/Library/Application Support/RupayaCore• Windows: C:\Program Files\Rupaya
• Accept any pop ups asking to confirm if you want to continue with the installation
10.4. Advanced Users - Initial Setup 67
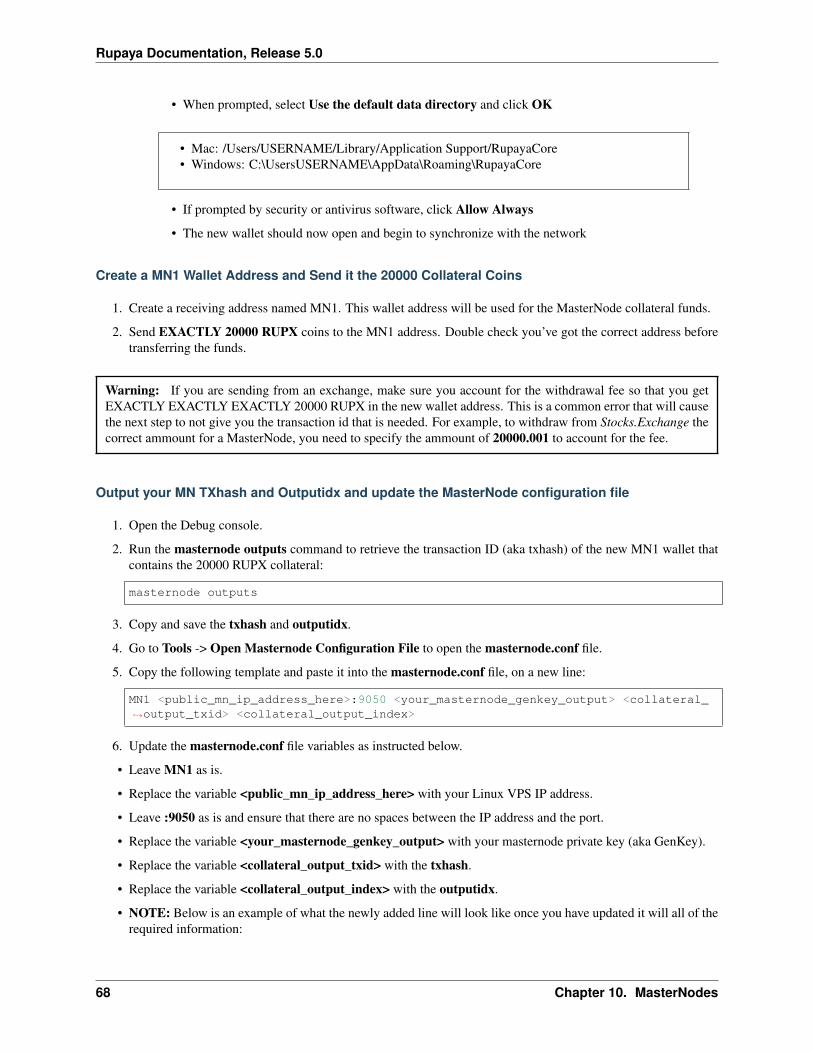
Rupaya Documentation, Release 5.0
• When prompted, select Use the default data directory and click OK
• Mac: /Users/USERNAME/Library/Application Support/RupayaCore• Windows: C:\UsersUSERNAME\AppData\Roaming\RupayaCore
• If prompted by security or antivirus software, click Allow Always
• The new wallet should now open and begin to synchronize with the network
Create a MN1 Wallet Address and Send it the 20000 Collateral Coins
1. Create a receiving address named MN1. This wallet address will be used for the MasterNode collateral funds.
2. Send EXACTLY 20000 RUPX coins to the MN1 address. Double check you’ve got the correct address beforetransferring the funds.
Warning: If you are sending from an exchange, make sure you account for the withdrawal fee so that you getEXACTLY EXACTLY EXACTLY 20000 RUPX in the new wallet address. This is a common error that will causethe next step to not give you the transaction id that is needed. For example, to withdraw from Stocks.Exchange thecorrect ammount for a MasterNode, you need to specify the ammount of 20000.001 to account for the fee.
Output your MN TXhash and Outputidx and update the MasterNode configuration file
1. Open the Debug console.
2. Run the masternode outputs command to retrieve the transaction ID (aka txhash) of the new MN1 wallet thatcontains the 20000 RUPX collateral:
masternode outputs
3. Copy and save the txhash and outputidx.
4. Go to Tools -> Open Masternode Configuration File to open the masternode.conf file.
5. Copy the following template and paste it into the masternode.conf file, on a new line:
MN1 <public_mn_ip_address_here>:9050 <your_masternode_genkey_output> <collateral_→˓output_txid> <collateral_output_index>
6. Update the masternode.conf file variables as instructed below.
• Leave MN1 as is.
• Replace the variable <public_mn_ip_address_here> with your Linux VPS IP address.
• Leave :9050 as is and ensure that there are no spaces between the IP address and the port.
• Replace the variable <your_masternode_genkey_output> with your masternode private key (aka GenKey).
• Replace the variable <collateral_output_txid> with the txhash.
• Replace the variable <collateral_output_index> with the outputidx.
• NOTE: Below is an example of what the newly added line will look like once you have updated it will all of therequired information:
68 Chapter 10. MasterNodes
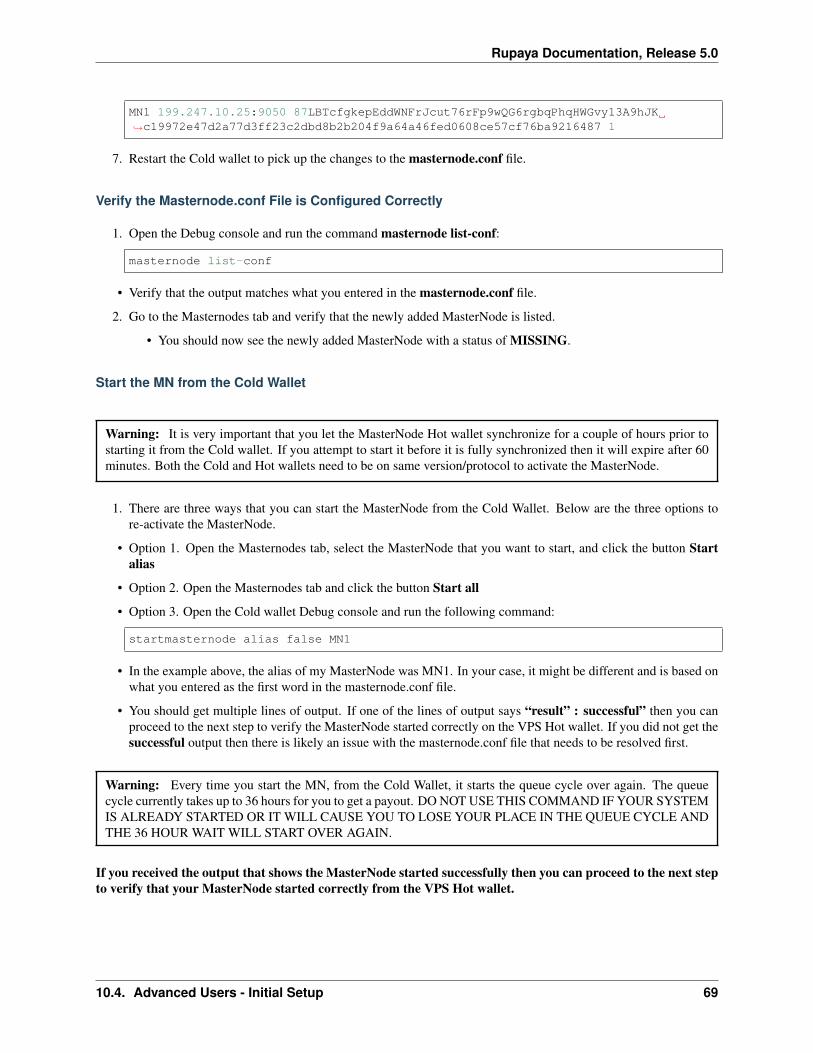
Rupaya Documentation, Release 5.0
MN1 199.247.10.25:9050 87LBTcfgkepEddWNFrJcut76rFp9wQG6rgbqPhqHWGvy13A9hJK→˓c19972e47d2a77d3ff23c2dbd8b2b204f9a64a46fed0608ce57cf76ba9216487 1
7. Restart the Cold wallet to pick up the changes to the masternode.conf file.
Verify the Masternode.conf File is Configured Correctly
1. Open the Debug console and run the command masternode list-conf:
masternode list-conf
• Verify that the output matches what you entered in the masternode.conf file.
2. Go to the Masternodes tab and verify that the newly added MasterNode is listed.
• You should now see the newly added MasterNode with a status of MISSING.
Start the MN from the Cold Wallet
Warning: It is very important that you let the MasterNode Hot wallet synchronize for a couple of hours prior tostarting it from the Cold wallet. If you attempt to start it before it is fully synchronized then it will expire after 60minutes. Both the Cold and Hot wallets need to be on same version/protocol to activate the MasterNode.
1. There are three ways that you can start the MasterNode from the Cold Wallet. Below are the three options tore-activate the MasterNode.
• Option 1. Open the Masternodes tab, select the MasterNode that you want to start, and click the button Startalias
• Option 2. Open the Masternodes tab and click the button Start all
• Option 3. Open the Cold wallet Debug console and run the following command:
startmasternode alias false MN1
• In the example above, the alias of my MasterNode was MN1. In your case, it might be different and is based onwhat you entered as the first word in the masternode.conf file.
• You should get multiple lines of output. If one of the lines of output says “result” : successful” then you canproceed to the next step to verify the MasterNode started correctly on the VPS Hot wallet. If you did not get thesuccessful output then there is likely an issue with the masternode.conf file that needs to be resolved first.
Warning: Every time you start the MN, from the Cold Wallet, it starts the queue cycle over again. The queuecycle currently takes up to 36 hours for you to get a payout. DO NOT USE THIS COMMAND IF YOUR SYSTEMIS ALREADY STARTED OR IT WILL CAUSE YOU TO LOSE YOUR PLACE IN THE QUEUE CYCLE ANDTHE 36 HOUR WAIT WILL START OVER AGAIN.
If you received the output that shows the MasterNode started successfully then you can proceed to the next stepto verify that your MasterNode started correctly from the VPS Hot wallet.
10.4. Advanced Users - Initial Setup 69
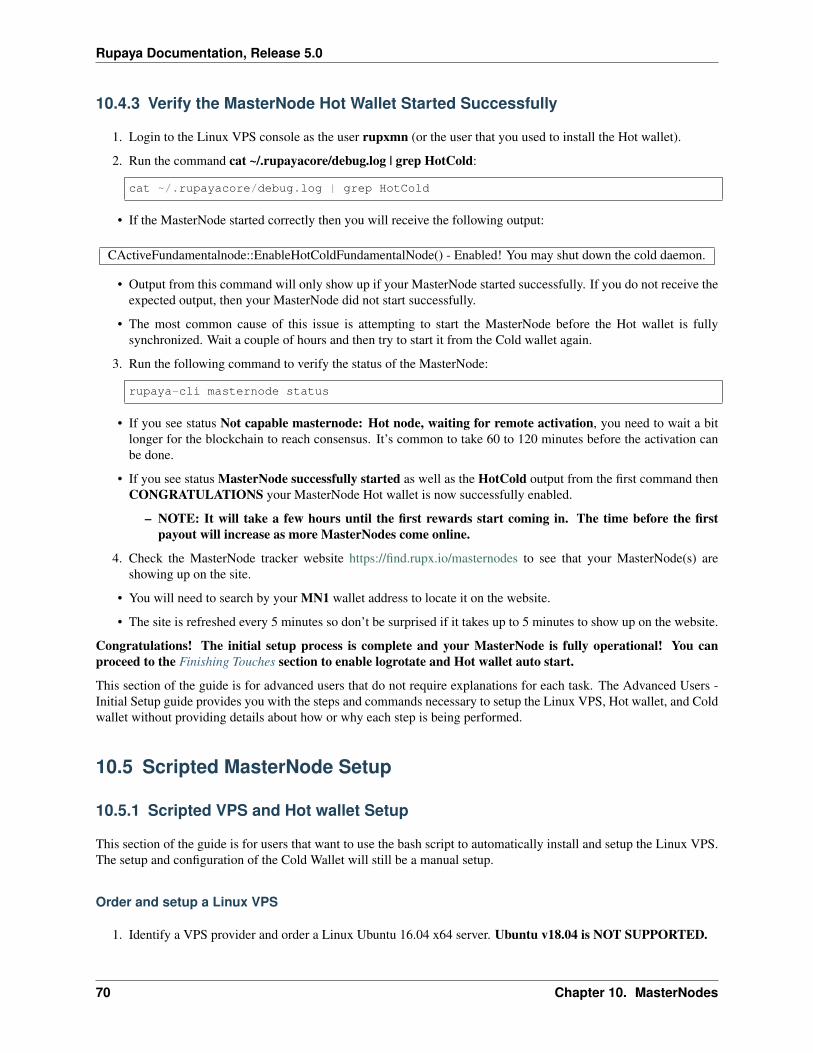
Rupaya Documentation, Release 5.0
10.4.3 Verify the MasterNode Hot Wallet Started Successfully
1. Login to the Linux VPS console as the user rupxmn (or the user that you used to install the Hot wallet).
2. Run the command cat ~/.rupayacore/debug.log | grep HotCold:
cat ~/.rupayacore/debug.log | grep HotCold
• If the MasterNode started correctly then you will receive the following output:
CActiveFundamentalnode::EnableHotColdFundamentalNode() - Enabled! You may shut down the cold daemon.
• Output from this command will only show up if your MasterNode started successfully. If you do not receive theexpected output, then your MasterNode did not start successfully.
• The most common cause of this issue is attempting to start the MasterNode before the Hot wallet is fullysynchronized. Wait a couple of hours and then try to start it from the Cold wallet again.
3. Run the following command to verify the status of the MasterNode:
rupaya-cli masternode status
• If you see status Not capable masternode: Hot node, waiting for remote activation, you need to wait a bitlonger for the blockchain to reach consensus. It’s common to take 60 to 120 minutes before the activation canbe done.
• If you see status MasterNode successfully started as well as the HotCold output from the first command thenCONGRATULATIONS your MasterNode Hot wallet is now successfully enabled.
– NOTE: It will take a few hours until the first rewards start coming in. The time before the firstpayout will increase as more MasterNodes come online.
4. Check the MasterNode tracker website https://find.rupx.io/masternodes to see that your MasterNode(s) areshowing up on the site.
• You will need to search by your MN1 wallet address to locate it on the website.
• The site is refreshed every 5 minutes so don’t be surprised if it takes up to 5 minutes to show up on the website.
Congratulations! The initial setup process is complete and your MasterNode is fully operational! You canproceed to the Finishing Touches section to enable logrotate and Hot wallet auto start.
This section of the guide is for advanced users that do not require explanations for each task. The Advanced Users -Initial Setup guide provides you with the steps and commands necessary to setup the Linux VPS, Hot wallet, and Coldwallet without providing details about how or why each step is being performed.
10.5 Scripted MasterNode Setup
10.5.1 Scripted VPS and Hot wallet Setup
This section of the guide is for users that want to use the bash script to automatically install and setup the Linux VPS.The setup and configuration of the Cold Wallet will still be a manual setup.
Order and setup a Linux VPS
1. Identify a VPS provider and order a Linux Ubuntu 16.04 x64 server. Ubuntu v18.04 is NOT SUPPORTED.
70 Chapter 10. MasterNodes
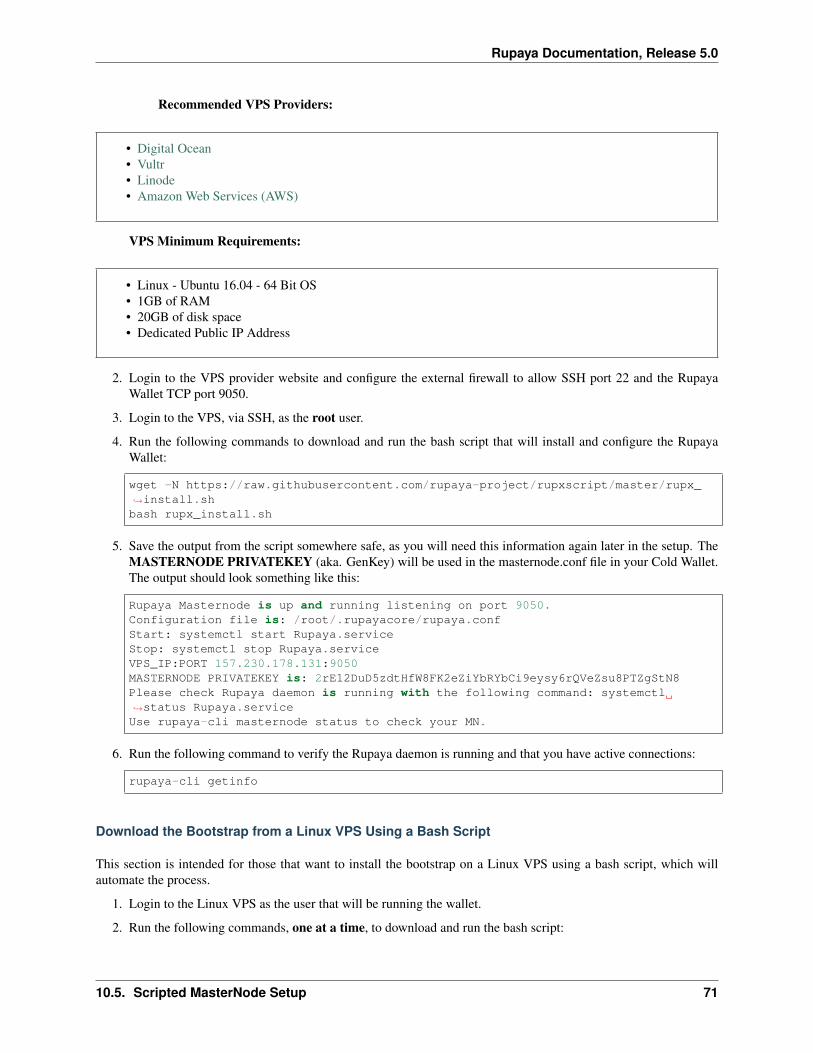
Rupaya Documentation, Release 5.0
Recommended VPS Providers:
• Digital Ocean• Vultr• Linode• Amazon Web Services (AWS)
VPS Minimum Requirements:
• Linux - Ubuntu 16.04 - 64 Bit OS• 1GB of RAM• 20GB of disk space• Dedicated Public IP Address
2. Login to the VPS provider website and configure the external firewall to allow SSH port 22 and the RupayaWallet TCP port 9050.
3. Login to the VPS, via SSH, as the root user.
4. Run the following commands to download and run the bash script that will install and configure the RupayaWallet:
wget -N https://raw.githubusercontent.com/rupaya-project/rupxscript/master/rupx_→˓install.shbash rupx_install.sh
5. Save the output from the script somewhere safe, as you will need this information again later in the setup. TheMASTERNODE PRIVATEKEY (aka. GenKey) will be used in the masternode.conf file in your Cold Wallet.The output should look something like this:
Rupaya Masternode is up and running listening on port 9050.Configuration file is: /root/.rupayacore/rupaya.confStart: systemctl start Rupaya.serviceStop: systemctl stop Rupaya.serviceVPS_IP:PORT 157.230.178.131:9050MASTERNODE PRIVATEKEY is: 2rE12DuD5zdtHfW8FK2eZiYbRYbCi9eysy6rQVeZsu8PTZgStN8Please check Rupaya daemon is running with the following command: systemctl→˓status Rupaya.serviceUse rupaya-cli masternode status to check your MN.
6. Run the following command to verify the Rupaya daemon is running and that you have active connections:
rupaya-cli getinfo
Download the Bootstrap from a Linux VPS Using a Bash Script
This section is intended for those that want to install the bootstrap on a Linux VPS using a bash script, which willautomate the process.
1. Login to the Linux VPS as the user that will be running the wallet.
2. Run the following commands, one at a time, to download and run the bash script:
10.5. Scripted MasterNode Setup 71
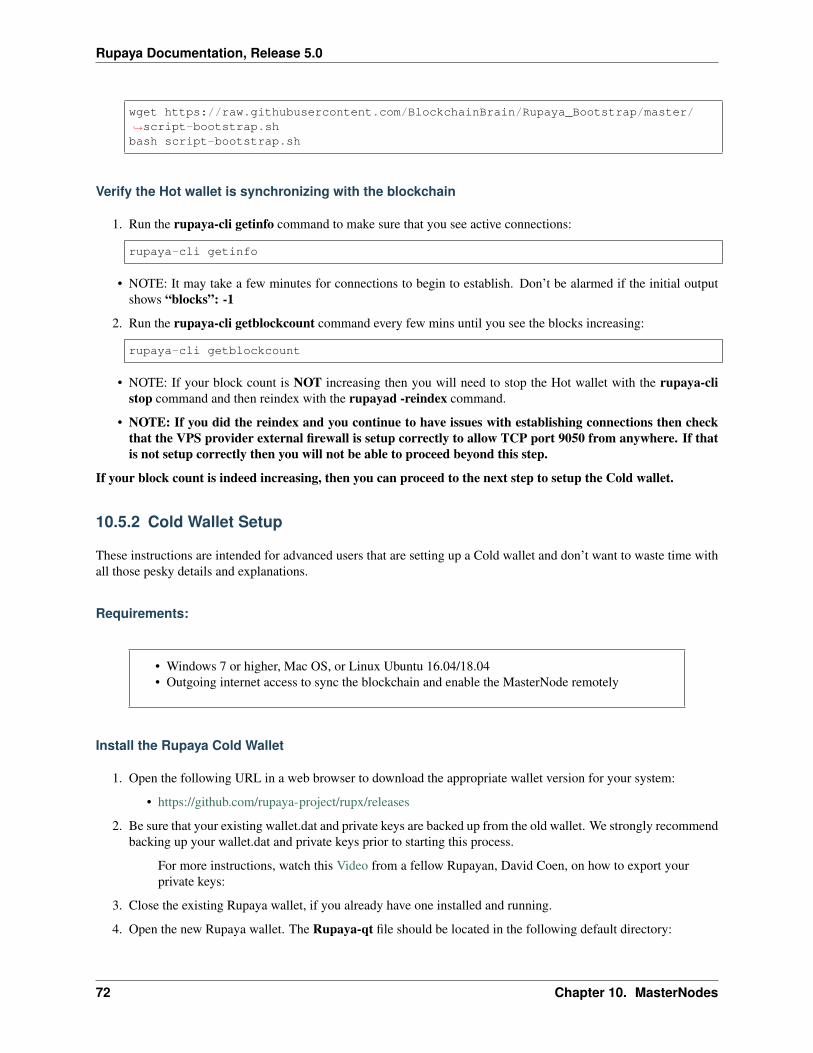
Rupaya Documentation, Release 5.0
wget https://raw.githubusercontent.com/BlockchainBrain/Rupaya_Bootstrap/master/→˓script-bootstrap.shbash script-bootstrap.sh
Verify the Hot wallet is synchronizing with the blockchain
1. Run the rupaya-cli getinfo command to make sure that you see active connections:
rupaya-cli getinfo
• NOTE: It may take a few minutes for connections to begin to establish. Don’t be alarmed if the initial outputshows “blocks”: -1
2. Run the rupaya-cli getblockcount command every few mins until you see the blocks increasing:
rupaya-cli getblockcount
• NOTE: If your block count is NOT increasing then you will need to stop the Hot wallet with the rupaya-clistop command and then reindex with the rupayad -reindex command.
• NOTE: If you did the reindex and you continue to have issues with establishing connections then checkthat the VPS provider external firewall is setup correctly to allow TCP port 9050 from anywhere. If thatis not setup correctly then you will not be able to proceed beyond this step.
If your block count is indeed increasing, then you can proceed to the next step to setup the Cold wallet.
10.5.2 Cold Wallet Setup
These instructions are intended for advanced users that are setting up a Cold wallet and don’t want to waste time withall those pesky details and explanations.
Requirements:
• Windows 7 or higher, Mac OS, or Linux Ubuntu 16.04/18.04• Outgoing internet access to sync the blockchain and enable the MasterNode remotely
Install the Rupaya Cold Wallet
1. Open the following URL in a web browser to download the appropriate wallet version for your system:
• https://github.com/rupaya-project/rupx/releases
2. Be sure that your existing wallet.dat and private keys are backed up from the old wallet. We strongly recommendbacking up your wallet.dat and private keys prior to starting this process.
For more instructions, watch this Video from a fellow Rupayan, David Coen, on how to export yourprivate keys:
3. Close the existing Rupaya wallet, if you already have one installed and running.
4. Open the new Rupaya wallet. The Rupaya-qt file should be located in the following default directory:
72 Chapter 10. MasterNodes
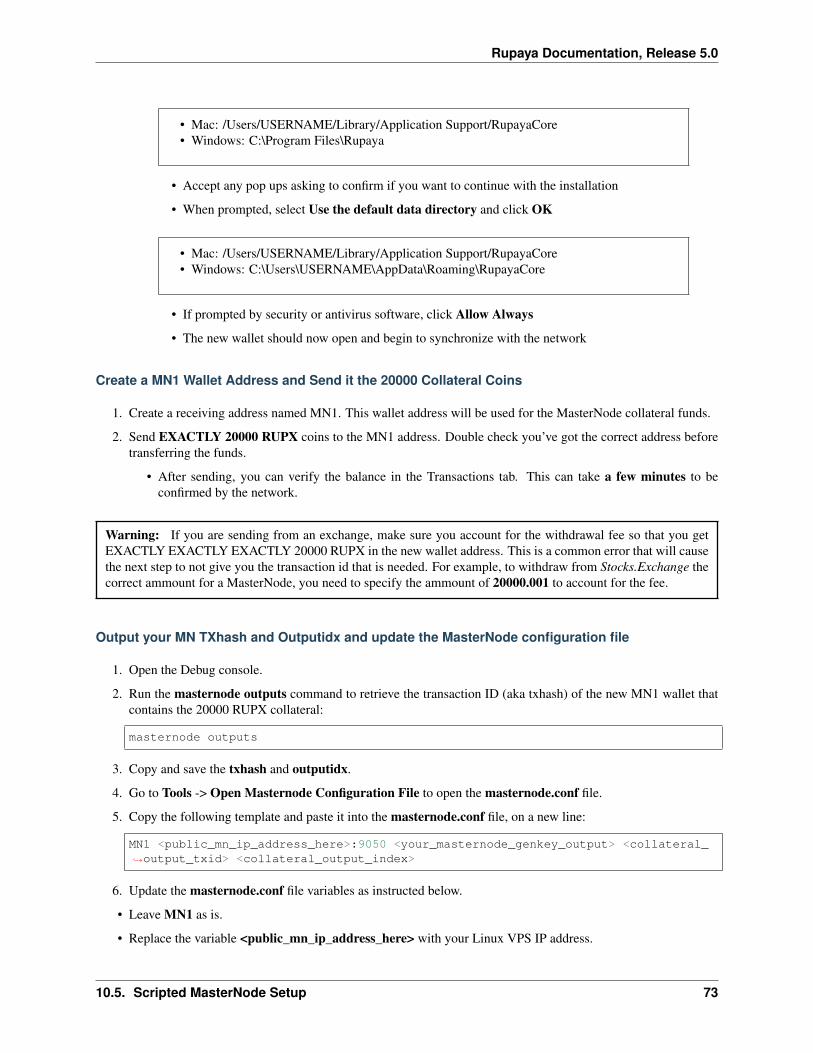
Rupaya Documentation, Release 5.0
• Mac: /Users/USERNAME/Library/Application Support/RupayaCore• Windows: C:\Program Files\Rupaya
• Accept any pop ups asking to confirm if you want to continue with the installation
• When prompted, select Use the default data directory and click OK
• Mac: /Users/USERNAME/Library/Application Support/RupayaCore• Windows: C:\Users\USERNAME\AppData\Roaming\RupayaCore
• If prompted by security or antivirus software, click Allow Always
• The new wallet should now open and begin to synchronize with the network
Create a MN1 Wallet Address and Send it the 20000 Collateral Coins
1. Create a receiving address named MN1. This wallet address will be used for the MasterNode collateral funds.
2. Send EXACTLY 20000 RUPX coins to the MN1 address. Double check you’ve got the correct address beforetransferring the funds.
• After sending, you can verify the balance in the Transactions tab. This can take a few minutes to beconfirmed by the network.
Warning: If you are sending from an exchange, make sure you account for the withdrawal fee so that you getEXACTLY EXACTLY EXACTLY 20000 RUPX in the new wallet address. This is a common error that will causethe next step to not give you the transaction id that is needed. For example, to withdraw from Stocks.Exchange thecorrect ammount for a MasterNode, you need to specify the ammount of 20000.001 to account for the fee.
Output your MN TXhash and Outputidx and update the MasterNode configuration file
1. Open the Debug console.
2. Run the masternode outputs command to retrieve the transaction ID (aka txhash) of the new MN1 wallet thatcontains the 20000 RUPX collateral:
masternode outputs
3. Copy and save the txhash and outputidx.
4. Go to Tools -> Open Masternode Configuration File to open the masternode.conf file.
5. Copy the following template and paste it into the masternode.conf file, on a new line:
MN1 <public_mn_ip_address_here>:9050 <your_masternode_genkey_output> <collateral_→˓output_txid> <collateral_output_index>
6. Update the masternode.conf file variables as instructed below.
• Leave MN1 as is.
• Replace the variable <public_mn_ip_address_here> with your Linux VPS IP address.
10.5. Scripted MasterNode Setup 73
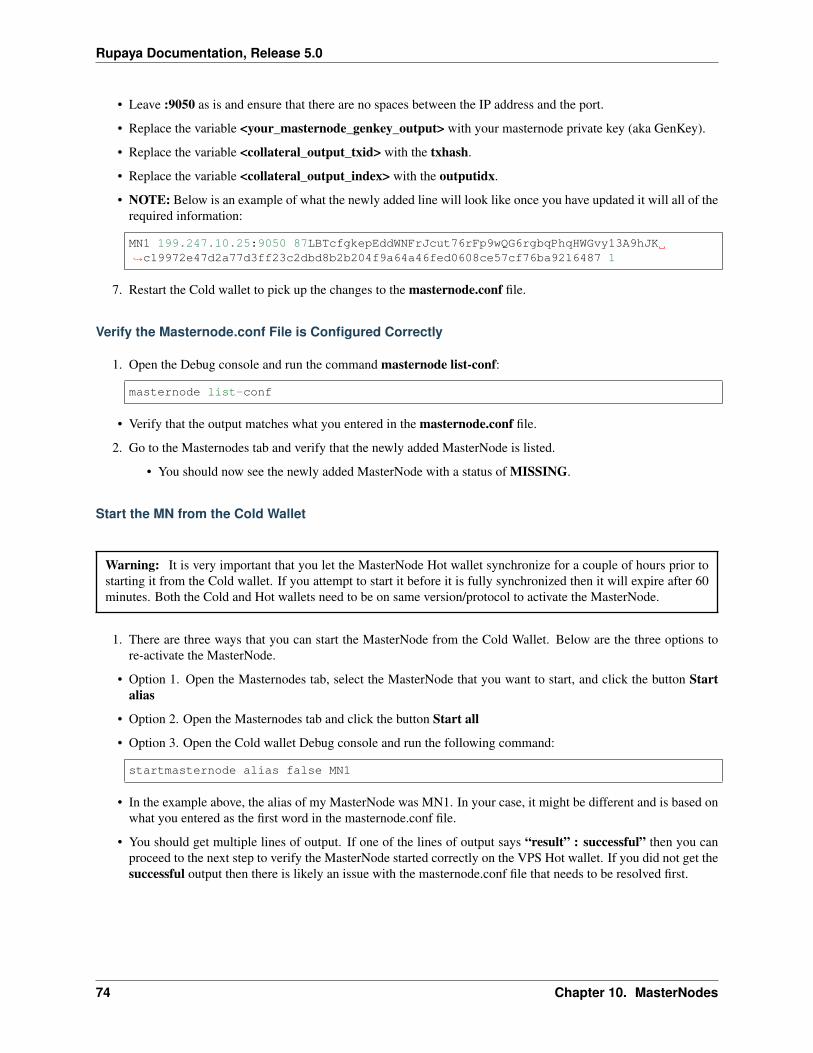
Rupaya Documentation, Release 5.0
• Leave :9050 as is and ensure that there are no spaces between the IP address and the port.
• Replace the variable <your_masternode_genkey_output> with your masternode private key (aka GenKey).
• Replace the variable <collateral_output_txid> with the txhash.
• Replace the variable <collateral_output_index> with the outputidx.
• NOTE: Below is an example of what the newly added line will look like once you have updated it will all of therequired information:
MN1 199.247.10.25:9050 87LBTcfgkepEddWNFrJcut76rFp9wQG6rgbqPhqHWGvy13A9hJK→˓c19972e47d2a77d3ff23c2dbd8b2b204f9a64a46fed0608ce57cf76ba9216487 1
7. Restart the Cold wallet to pick up the changes to the masternode.conf file.
Verify the Masternode.conf File is Configured Correctly
1. Open the Debug console and run the command masternode list-conf:
masternode list-conf
• Verify that the output matches what you entered in the masternode.conf file.
2. Go to the Masternodes tab and verify that the newly added MasterNode is listed.
• You should now see the newly added MasterNode with a status of MISSING.
Start the MN from the Cold Wallet
Warning: It is very important that you let the MasterNode Hot wallet synchronize for a couple of hours prior tostarting it from the Cold wallet. If you attempt to start it before it is fully synchronized then it will expire after 60minutes. Both the Cold and Hot wallets need to be on same version/protocol to activate the MasterNode.
1. There are three ways that you can start the MasterNode from the Cold Wallet. Below are the three options tore-activate the MasterNode.
• Option 1. Open the Masternodes tab, select the MasterNode that you want to start, and click the button Startalias
• Option 2. Open the Masternodes tab and click the button Start all
• Option 3. Open the Cold wallet Debug console and run the following command:
startmasternode alias false MN1
• In the example above, the alias of my MasterNode was MN1. In your case, it might be different and is based onwhat you entered as the first word in the masternode.conf file.
• You should get multiple lines of output. If one of the lines of output says “result” : successful” then you canproceed to the next step to verify the MasterNode started correctly on the VPS Hot wallet. If you did not get thesuccessful output then there is likely an issue with the masternode.conf file that needs to be resolved first.
74 Chapter 10. MasterNodes
Rupaya Documentation, Release 5.0
Warning: Every time you start the MN, from the Cold Wallet, it starts the queue cycle over again. The queuecycle currently takes up to 36 hours for you to get a payout. DO NOT USE THIS COMMAND IF YOUR SYSTEMIS ALREADY STARTED OR IT WILL CAUSE YOU TO LOSE YOUR PLACE IN THE QUEUE CYCLE ANDTHE 36 HOUR WAIT WILL START OVER AGAIN.
If you received the output that shows the MasterNode started successfully then you can proceed to the next stepto verify that your MasterNode started correctly from the VPS Hot wallet.
10.5.3 Verify the MasterNode Hot Wallet Started Successfully
1. Login to the Linux VPS console as the user rupxmn (or the user that you used to install the Hot wallet).
2. Run the command cat ~/.rupayacore/debug.log | grep HotCold:
cat ~/.rupayacore/debug.log | grep HotCold
• If the MasterNode started correctly then you will receive the following output:
CActiveFundamentalnode::EnableHotColdFundamentalNode() - Enabled! You may shut down the cold daemon.
• Output from this command will only show up if your MasterNode started successfully. If you do not receive theexpected output, then your MasterNode did not start successfully.
• The most common cause of this issue is attempting to start the MasterNode before the Hot wallet is fullysynchronized. Wait a couple of hours and then try to start it from the Cold wallet again.
3. Run the following command to verify the status of the MasterNode:
rupaya-cli masternode status
• If you see status Not capable masternode: Hot node, waiting for remote activation, you need to wait a bitlonger for the blockchain to reach consensus. It’s common to take 60 to 120 minutes before the activation canbe done.
• If you see status MasterNode successfully started as well as the HotCold output from the first command thenCONGRATULATIONS your MasterNode Hot wallet is now successfully enabled.
– NOTE: It will take a few hours until the first rewards start coming in. The time before the firstpayout will increase as more MasterNodes come online.
4. Check the MasterNode tracker website https://find.rupx.io/masternodes to see that your MasterNode(s) areshowing up on the site.
• You will need to search by your MN1 wallet address to locate it on the website.
• The site is refreshed every 5 minutes so don’t be surprised if it takes up to 5 minutes to show up on the website.
Congratulations! The initial setup process is complete and your MasterNode is fully operational! You canproceed to the Finishing Touches section to enable logrotate and Hot wallet auto start.
This section of the guide is for users that want to use the bash script to automatically install and setup the Linux VPS.The setup and configuration of the Cold Wallet will still be a manual setup.
10.5. Scripted MasterNode Setup 75
Rupaya Documentation, Release 5.0
10.6 Config File Templates
10.6.1 Hot Wallet Configuration File
This section is to provide MasterNode users with a template to use for the Hot wallet file rupaya.conf. This file isupdated during the setup of the Linux VPS and the Hot wallet. This section contains both a template and an exampleof what the file should look like once it is updated.
• The file rupaya.conf is located on the Linux VPS in the following directory:
– ~/.rupayacore/rupaya.conf
TEMPLATE
Below is the template for the Hot wallet rupaya.conf file. Copy and paste this template into a text editor, and updatethe variables manually. All variables that need to be updated manually are identified with the <> symbols around them.
• Use the following template for IPv4 IP Addresses:
rpcuser=rupayarpcrpcpassword=<alphanumeric_rpc_password>rpcport=7050rpcallowip=127.0.0.1rpcconnect=127.0.0.1rpcbind=127.0.0.1maxconnections=512listen=1daemon=1masternode=1externalip=<public_mn_ip_address_here>:9050masternodeaddr=<public_mn_ip_address_here>bind=<public_mn_ip_address_here>masternodeprivkey=<your_masternode_genkey_output>
• Use the following template for IPv6 IP Addresses:
rpcuser=rupayarpcrpcpassword=<alphanumeric_rpc_password>rpcport=7050rpcallowip=127.0.0.1rpcconnect=127.0.0.1rpcbind=127.0.0.1maxconnections=512listen=1daemon=1masternode=1externalip=[<public_mn_ip_address_here>]:9050masternodeaddr=[<public_mn_ip_address_here>]bind=[<public_mn_ip_address_here>]masternodeprivkey=<your_masternode_genkey_output>
• Update the variable after rpcpassword= with a 40 character RPC rpcpassword.
• You will need to generate the rpcpassword yourself.
• Use the ifconfig command, on the Linux VPS, to find out your Linux VPS IP address. It is normally the addresslisted after the eth0 interface after the word inet addr:
• Save your Linux VPS IP address as we are going to use this IP again in the Cold wallet setup
76 Chapter 10. MasterNodes
Rupaya Documentation, Release 5.0
• Update the variable after externalip= with your Linux VPS IP. Ensure that there are no spaces between the IPaddress and the port :9050
• Update the variable after masternodeaddr= with your Linux VPS IP
• Update the variable after bind= with your Linux VPS IP
• Update the variable after masternodeprivkey= with your MasterNode private key (GenKey)
• Once all of the fields have been updated in the text editor, copy the template into your clipboard to be used inthe next steps.
EXAMPLE
Below is what the file should look like once it is updated and pasted into the ~/.rupayacore/rupaya.conf file on theLinux VPS.
• The rpcpassword, IP address, and masternodeprivkey will all be different in your configuration file.
• This is an example of a rupaya.conf file, using IPv4 addresses:
rpcuser=rupxuserrpcpassword=someSUPERsecurePASSWORD3746375620rpcport=7050rpcallowip=127.0.0.1rpcconnect=127.0.0.1rpcbind=127.0.0.1maxconnections=512listen=1daemon=1masternode=1externalip=199.247.10.25:9050masternodeaddr=199.247.10.25bind=199.247.10.25masternodeprivkey=87LBTcfgkepEddWNFrJcut76rFp9wQG6rgbqPhqHWGvy13A9hJK
• This is an example of a rupaya.conf file, using IPv6 addresses. The brackets [] around the IPv6 addresses arerequired:
rpcuser=rupxuserrpcpassword=someSUPERsecurePASSWORD3746375620rpcport=7050rpcallowip=127.0.0.1rpcconnect=127.0.0.1rpcbind=127.0.0.1maxconnections=512listen=1daemon=1masternode=1externalip=[2001:19f0:5:5e83:5400:01ff:fedf:1]:9050masternodeaddr=[2001:19f0:5:5e83:5400:01ff:fedf:1]bind=[2001:19f0:5:5e83:5400:01ff:fedf:1]masternodeprivkey=87LBTcfgkepEddWNFrJcut76rFp9wQG6rgbqPhqHWGvy13A9hJK
10.6.2 Cold Wallet Masternode Configuration File
This section is to provide MasterNode users with a template to use for the Cold wallet file masternode.conf. This fileis updated during the setup of the Cold wallet. This section contains both a template and an example of what the fileshould look like once it is updated.
10.6. Config File Templates 77
Rupaya Documentation, Release 5.0
• The file masternode.conf is located on the computer running the Cold wallet and can be found in the followingdirectory:
– Mac: ~/Library/Application Support/Rupayacore
– Windows: ~/AppData/Roaming/Rupayacore
TEMPLATE
Below is a template for the masternode.conf file. Every word in this template is a variable that needs to be replacedwith your specific information:
alias IP:port masternodeprivkey collateral_output_txid collateral_output_index
• Replace alias with the node alias that you wish to use. For consistency sake, we recommend using MN1
• Replace IP with the external IP address of the Linux VPS MasterNode server.
• Replace port with 9050 which is the TCP port that is used by the wallet to establish connections.
• Replace masternodeprivkey with the masternode private key (aka GenKey) that you received as output fromthe rupaya-cli masternode genkey command on the Linux VPS.
• Replace collateral_output_txid with the txhash that you received as output from the masternode outputscommand in the Cold wallet Debug Console.
• Replace collateral_output_index with the outputidx that you received as output from the masternode outputscommand in the Cold wallet Debug Console.
EXAMPLE
Below is an example of what the newly added line in the masternode.conf file will look like once you have updatedit will all of the required information. All of the information should be contained in a single line with no carriagereturns:
MN1 199.247.10.25:9050 87LBTcfgkepEddWNFrJcut76rFp9wQG6rgbqPhqHWGvy13A9hJK→˓c19972e47d2a77d3ff23c2dbd8b2b204f9a64a46fed0608ce57cf76ba9216487 1
10.6.3 Cold Wallet Configuration File
This section is to provide users with a list of possible options that you can configure in the Cold wallet file rupaya.conf.These settings are optional and are not configured by default. By default, the wallet configuration file is blank.
• The file rupaya.conf is located on the computer running the Cold wallet and can be found in the followingdirectory:
– Mac: ~/Library/Application Support/Rupayacore
– Windows: ~/AppData/Roaming/Rupayacore
1. Disable staking:
staking=0
2. Enable staking:
staking=1
3. Disable zRUPX autominting:
78 Chapter 10. MasterNodes
Rupaya Documentation, Release 5.0
enablezeromint=0
4. Enable zRUPX autominting:
enablezeromint=1
5. Configure the wallet to auto mint 20% of staking rewards into zRUPX instead of RUPX. The number can bemodified from 1 - 100:
zeromintpercentage=20
6. Disable the wallet from writing to the debug.log. This will prevent the debug.log file from growing too largeand filling up your hard drive:
printtoconsole=1
This section is to provide users with the common templates that are used during the setup process.
Introduction
MasterNodes are servers with a pre-determined amount of collateral backing their power to validate transactions onthe network. Features of the MasterNode network include anonymous and instant transactions, as well as governanceof the development of the Rupaya network through a monthly budget and voting. This in itself is a first in the cryptoworld, and MasterNodes are necessary to achieve the privacy and speed that Rupaya offers.
Your MasterNode server, running the Rupaya Core Hot wallet, is enabled to validate transactions on the blockchain.For this validation service you are rewarded in two ways. The most straightforward way is in the case of MasterNodeRewards (set amount of currency). The second is through the governance system. Proposals are submitted and onlyMasterNode owners may vote on those proposals and thereby you help to control the growth and development of yourinvestment.
Requirements
• Collateral: 20000 RUPX
• Linux VPS to run the MasterNode Hot wallet
• Personal computer (i.e. PC or Mac) to run the Cold wallet
• Basic Linux skills
• Basic computer skills
Warning: It’s very common in this industry for scammers to offer “help” via remote screen sharing applica-tions (TeamViewer, Skype, Zoom, WebEx, etc). They will use nicknames like MasterNode Helper, MasterNodeSupport, Cryptopia Support and will pretend to be very helpful. If you allow someone to remotely access yourcomputer, then you are running the risk of them running commands such as dumpprivkey or sendtoaddress tosteal your funds. Please be aware and stay safe!
10.6. Config File Templates 79

Rupaya Documentation, Release 5.0
80 Chapter 10. MasterNodes

CHAPTER 11
Marketing
11.1 Media Kit
Our media kit contains important information about Rupaya. Media professionals, and anyone seeking backgroundinformation on Rupaya, can get the facts right here. Provided materials include approved logos, our brand style guide,fact sheets, recent press, and more.
11.1.1 Logo Explainer
The Rupaya Logo Explainer breaks down the meanings behind all of the design elements in the Rupaya logo. It isavailable as a downloadable PDF.
Rupaya Logo Explainer Download
11.1.2 Identity Style Guide
The Rupaya Identity Style Guide contains guidelines for the Rupaya logo, fonts, and colors. It is available as adownloadable PDF.
Rupaya Identity Style Guide Download
11.1.3 Rupaya Buzz
CoinDesk - The Fight Over Masternodes: The WTF New Way to Earn Money With Crypto
Kiewire News - Rupaya Announces Kickoff of Major Global Marketing Campaign
81
Rupaya Documentation, Release 5.0
11.1.4 Imagery
The Rupaya logos provided here are for use by media outlets and our approved partners. Other uses must be approvedby our marketing department. The Rupaya logo may only be used in the approved and provided colors, orienta-tions, and lockups. Appropriate clearspace must be adheared to. For the full, detailed usage guidelines be sure todownload the Identity Style Guide above.
Rupaya Logo Zip Download
11.1.5 Media Contact
Please direct all media inquiries to [email protected]
11.1.6 Key Links
TwitterMediumReddit
82 Chapter 11. Marketing