Embed Size (px)
Citation preview
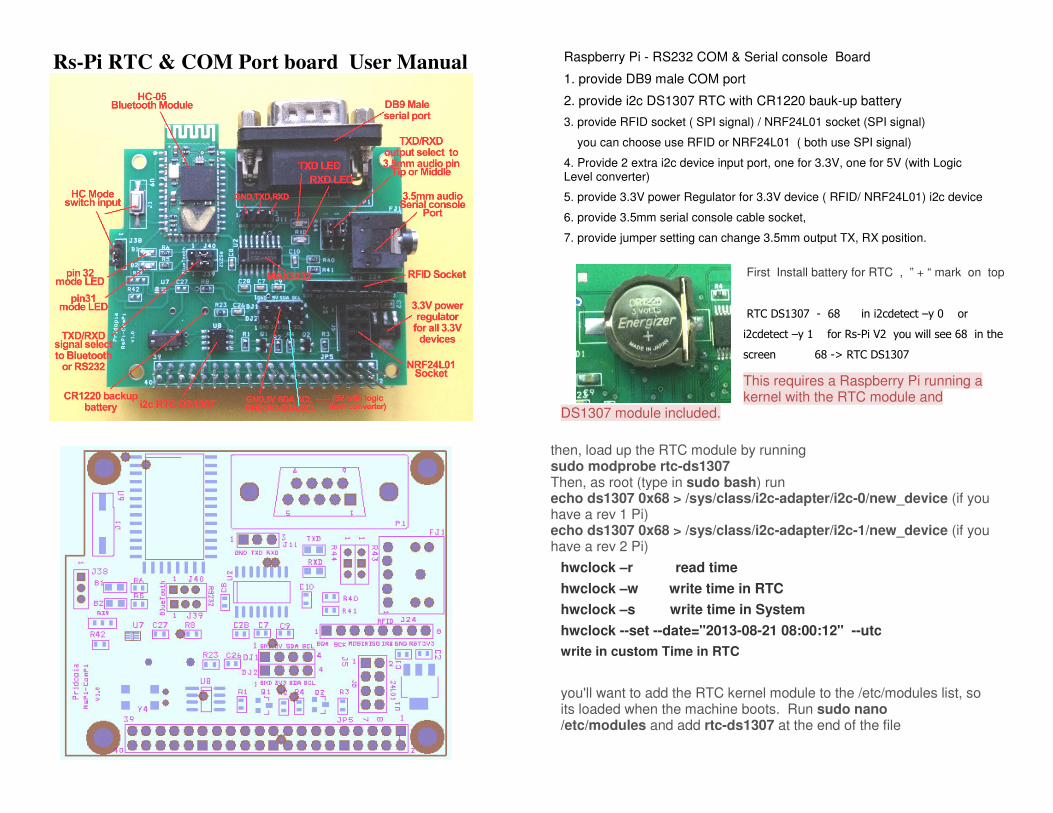
Rs-Pi RTC & COM Port board User Manual
Raspberry Pi - RS232 COM & Serial console Board
1. provide DB9 male COM port
2. provide i2c DS1307 RTC with CR1220 bauk-up battery
3. provide RFID socket ( SPI signal) / NRF24L01 socket (SPI signal)
you can choose use RFID or NRF24L01 ( both use SPI signal)
4. Provide 2 extra i2c device input port, one for 3.3V, one for 5V (with Logic Level converter)
5. provide 3.3V power Regulator for 3.3V device ( RFID/ NRF24L01) i2c device
6. provide 3.5mm serial console cable socket,
7. provide jumper setting can change 3.5mm output TX, RX position.
First Install battery for RTC , ” + “ mark on top
RTC DS1307 - 68 in i2cdetect –y 0 or
i2cdetect –y 1 for Rs-Pi V2 you will see 68 in the
screen 68 -> RTC DS1307
This requires a Raspberry Pi running a kernel with the RTC module and
DS1307 module included.
then, load up the RTC module by running sudo modprobe rtc-ds1307 Then, as root (type in sudo bash) run echo ds1307 0x68 > /sys/class/i2c-adapter/i2c-0/new_device (if you have a rev 1 Pi) echo ds1307 0x68 > /sys/class/i2c-adapter/i2c-1/new_device (if you have a rev 2 Pi)
hwclock –r read time
hwclock –w write time in RTC
hwclock –s write time in System
hwclock --set --date="2013-08-21 08:00:12" --utc
write in custom Time in RTC
you'll want to add the RTC kernel module to the /etc/modules list, so its loaded when the machine boots. Run sudo nano /etc/modules and add rtc-ds1307 at the end of the file
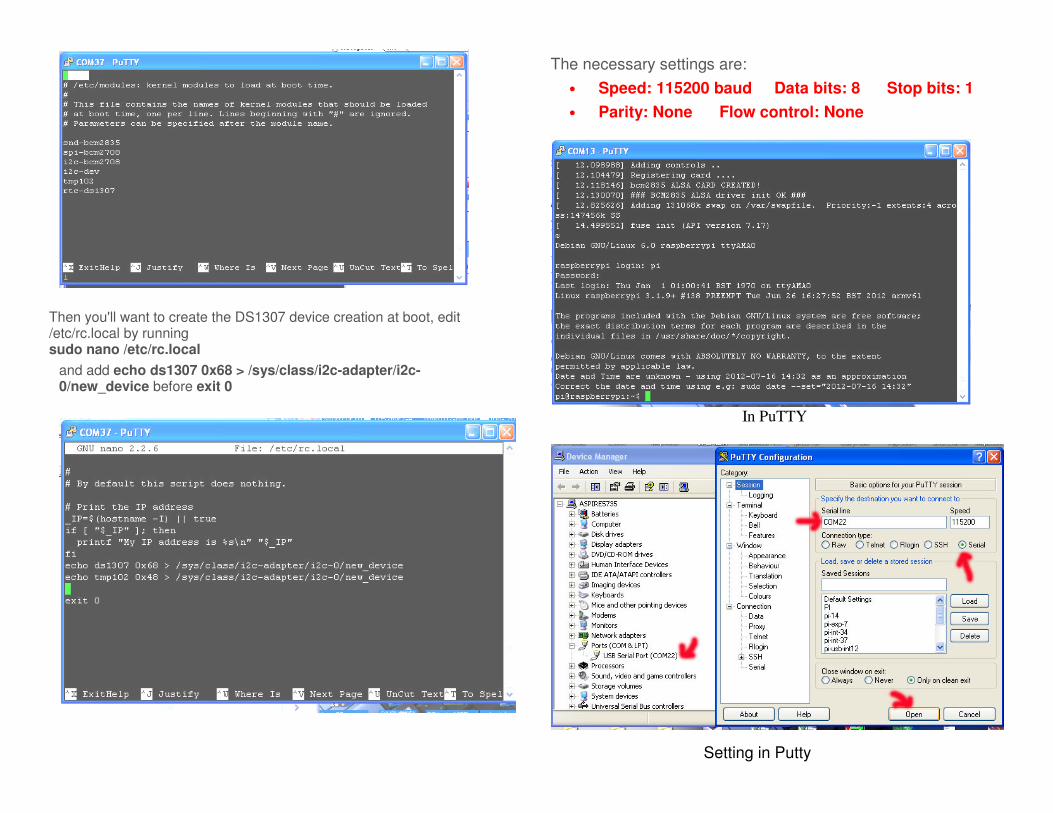
Then you'll want to create the DS1307 device creation at boot, edit /etc/rc.local by running sudo nano /etc/rc.local
and add echo ds1307 0x68 > /sys/class/i2c-adapter/i2c-0/new_device before exit 0
The necessary settings are:
• Speed: 115200 baud Data bits: 8 Stop bits: 1
• Parity: None Flow control: None
In PuTTY
Setting in Putty
Raspberry Pi Serial Port Usage
The serial port on the Raspberry Pi is configured as default for
console input/output. This allows you to login and interact with
the Raspberry Pi via the serial port but you cannot use the serial
port with your programs.
To use the serial port with other programs and hardware such
as modems, arduino boards etc you need to disable the console
login.
To Disable Serial Port Login
You need to edit two files in order to use the serial port with
your own programs.
When the Raspberry Pi boots, the bootup information is sent to
the serial port. You can disable this by editing
the/boot/cmdline.txt file
The contents of the file look like this
dwc_otg.lpm_enable=0 console=ttyAMA0,115200
kgdboc=ttyAMA0,115200 console=tty1 root=/dev/mmcblk0p2
rootfstype=ext4 elevator=deadline rootwait
Remove all references to ttyAMA0 so the file looks like this:
dwc_otg.lpm_enable=0 console=tty1 root=/dev/mmcblk0p2
rootfstype=ext4 elevator=deadline rootwait
Save the file to save your changes.
The second file to edit is /etc/inittab
Edit using: sudo nano /etc/inittab
The /etc/ inittab file has the command which enables the login
prompt which needs to be disabled.
Near the end of the file will be a line similar to this:
respawn:/sbin/getty -L ttyAMA0 115200 vt100
Disable this line by adding a # character to the beginning.
#respawn:/sbin/getty -L ttyAMA0 115200 vt100
Save the file.
You should then reboot your raspberry pi with the following
command
sudo shutdown -r now
You can now use your serial port with other applications on your
Raspberry Pi.
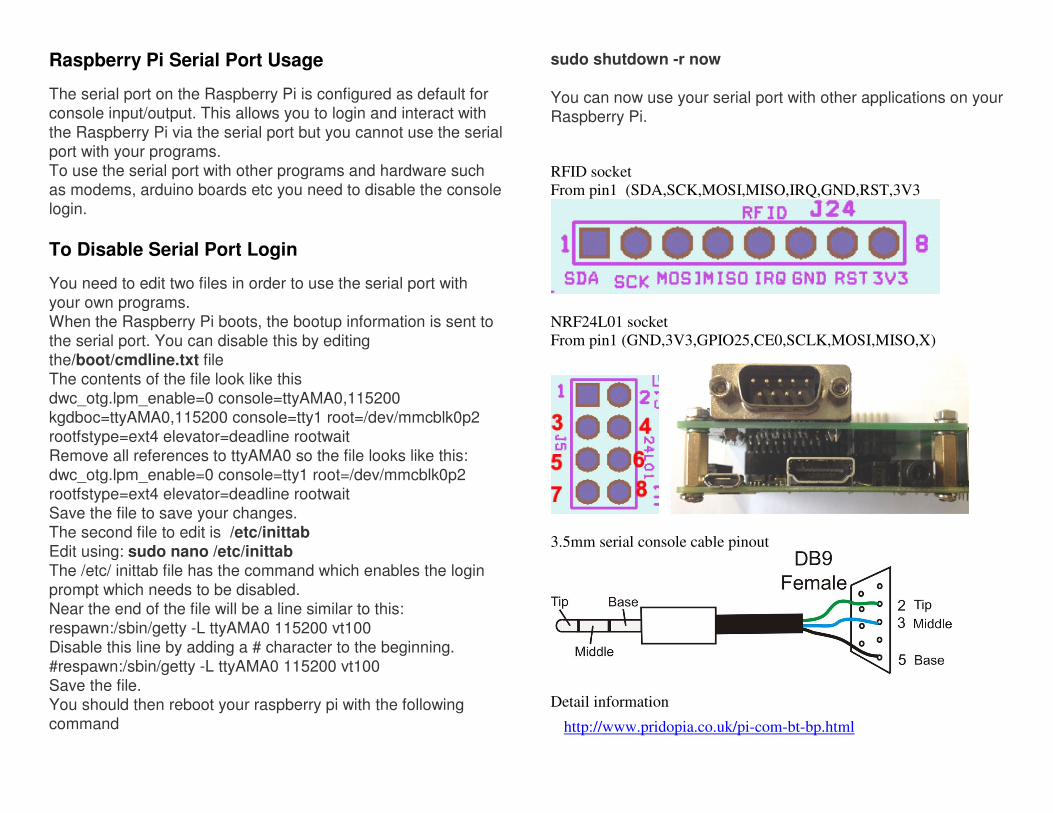
RFID socket
From pin1 (SDA,SCK,MOSI,MISO,IRQ,GND,RST,3V3
NRF24L01 socket
From pin1 (GND,3V3,GPIO25,CE0,SCLK,MOSI,MISO,X)
3.5mm serial console cable pinout
Detail information
http://www.pridopia.co.uk/pi-com-bt-bp.html
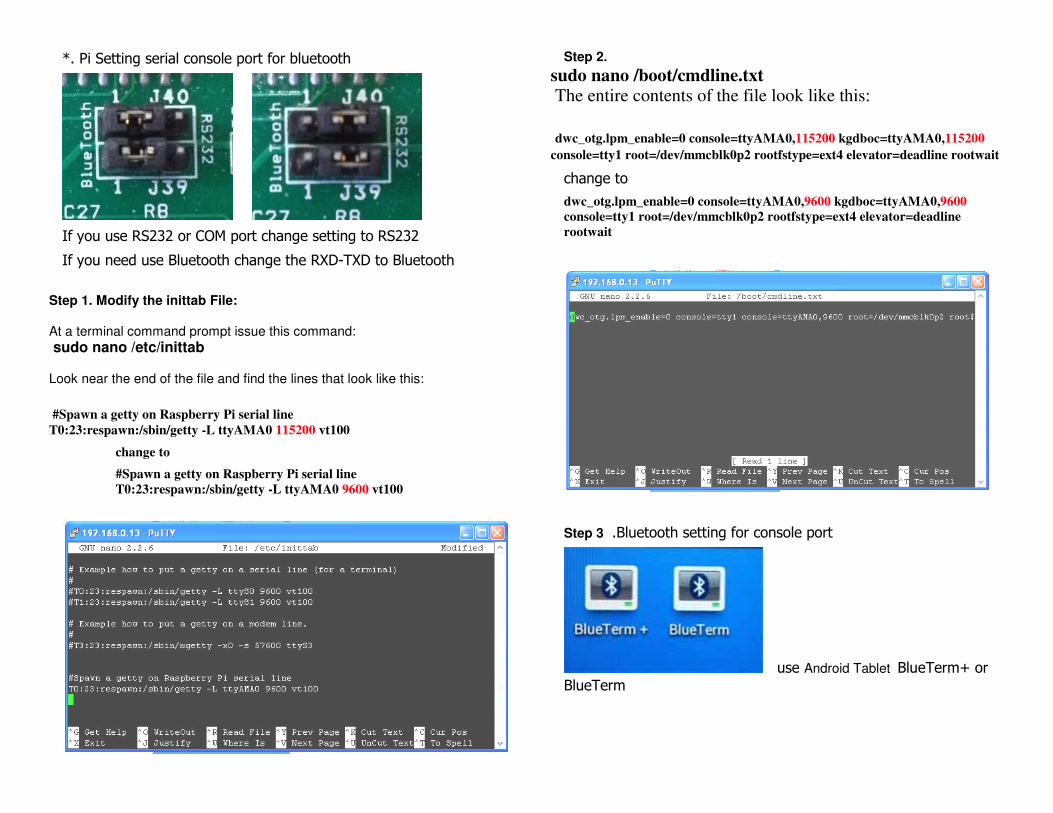
*. Pi Setting serial console port for bluetooth
If you use RS232 or COM port change setting to RS232
If you need use Bluetooth change the RXD-TXD to Bluetooth
Step 1. Modify the inittab File: At a terminal command prompt issue this command:
sudo nano /etc/inittab Look near the end of the file and find the lines that look like this: #Spawn a getty on Raspberry Pi serial line
T0:23:respawn:/sbin/getty -L ttyAMA0 115200 vt100
change to
#Spawn a getty on Raspberry Pi serial line
T0:23:respawn:/sbin/getty -L ttyAMA0 9600 vt100
Step 2.
sudo nano /boot/cmdline.txt The entire contents of the file look like this:
dwc_otg.lpm_enable=0 console=ttyAMA0,115200 kgdboc=ttyAMA0,115200
console=tty1 root=/dev/mmcblk0p2 rootfstype=ext4 elevator=deadline rootwait
change to
dwc_otg.lpm_enable=0 console=ttyAMA0,9600 kgdboc=ttyAMA0,9600
console=tty1 root=/dev/mmcblk0p2 rootfstype=ext4 elevator=deadline
rootwait
Step 3 .Bluetooth setting for console port
use Android Tablet BlueTerm+ or BlueTerm
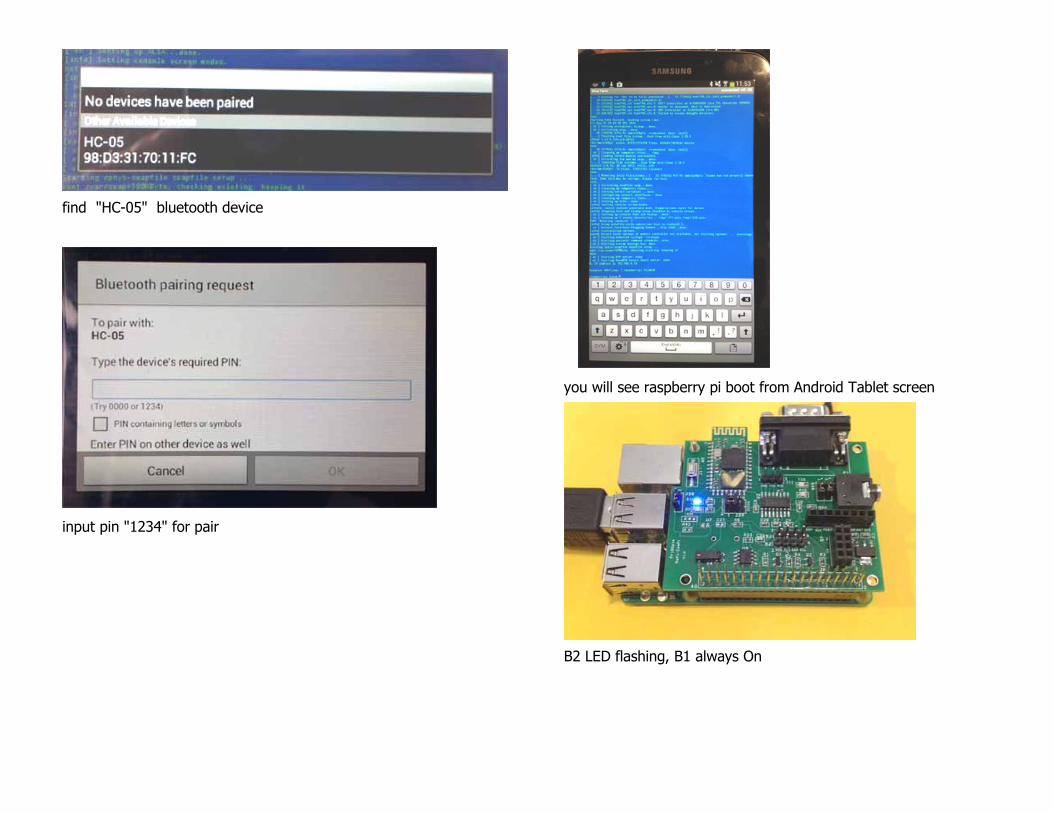
find "HC-05" bluetooth device
input pin "1234" for pair
you will see raspberry pi boot from Android Tablet screen
B2 LED flashing, B1 always On