Embed Size (px)
Citation preview

Round Casserole Carrier
Round Casserole Carrier
What a dish! This Round Casserole Carrier is perfect for sharing side dishes, desserts, and casseroles at the next potluck dinner or family gathering. Carry it in style by its sturdy handles. It has a thermal lining to keep dishes warm!
It's a wonderful item to make for craft sales or church bazaars, too. Your customers will snap up these casserole cuties for themselves, and for family members. This project was designed for a 9 inch 2 quart glass casserole dish. The finished size for this project is approximately 5 inches high and 12 inches wide.
Supplies needed: ** 1/2 yard Insul-Bright needled insulated lining ** 1/2 yard quilted cotton fabric ** 1/2 yard cotton print fabric ** 1 yard lightweight cotton canvas fabric
file:///F|/Source/ELProjects/html/pr1375.html (1 of 14) [7/6/2012 8:20:45 AM]
Round Casserole Carrier
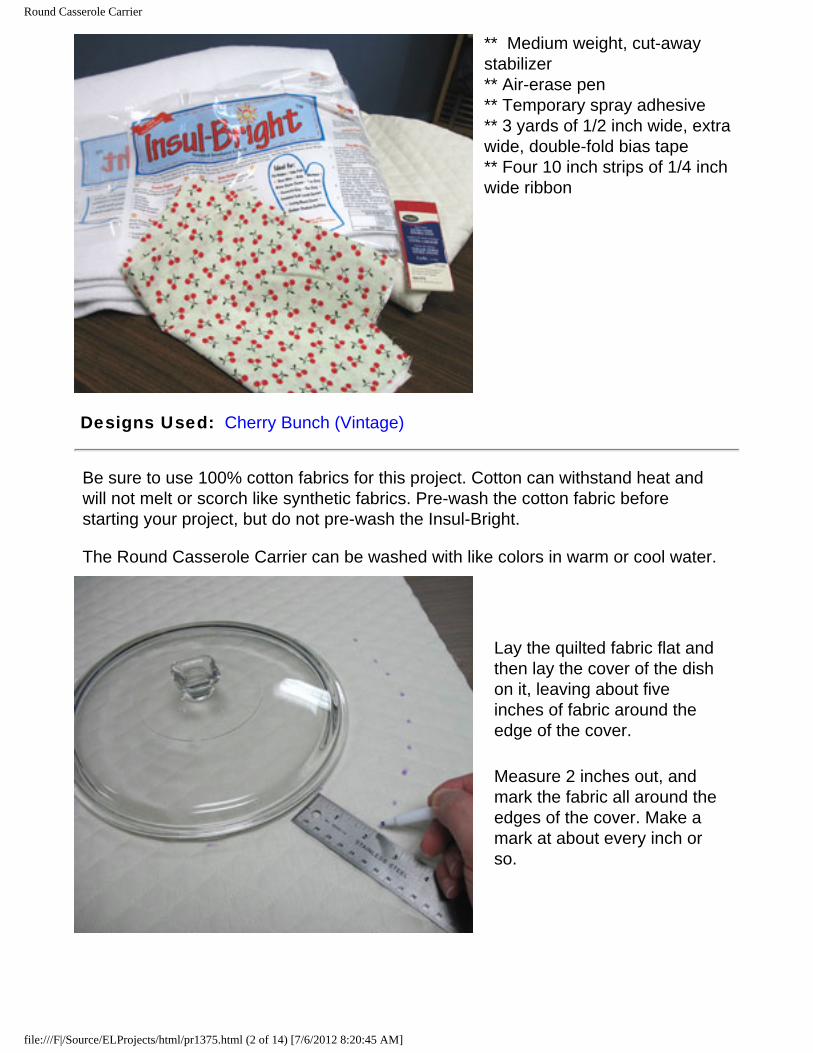
** Medium weight, cut-away stabilizer ** Air-erase pen ** Temporary spray adhesive ** 3 yards of 1/2 inch wide, extra wide, double-fold bias tape ** Four 10 inch strips of 1/4 inch wide ribbon
Designs Used: Cherry Bunch (Vintage)
Be sure to use 100% cotton fabrics for this project. Cotton can withstand heat and will not melt or scorch like synthetic fabrics. Pre-wash the cotton fabric before starting your project, but do not pre-wash the Insul-Bright. The Round Casserole Carrier can be washed with like colors in warm or cool water.
Lay the quilted fabric flat and then lay the cover of the dish on it, leaving about five inches of fabric around the edge of the cover.
Measure 2 inches out, and mark the fabric all around the edges of the cover. Make a mark at about every inch or so.
file:///F|/Source/ELProjects/html/pr1375.html (2 of 14) [7/6/2012 8:20:45 AM]

Round Casserole Carrier
Connect the dots by drawing a curved line.
Mark the center of the circle by measuring the diameter (directly across the middle) and dividing by two.
file:///F|/Source/ELProjects/html/pr1375.html (3 of 14) [7/6/2012 8:20:45 AM]

Round Casserole Carrier
Measure and mark 1 1/4 inch out from the center point. Repeat about every inch around the center point.
Connect these marks by drawing a curved line.
file:///F|/Source/ELProjects/html/pr1375.html (4 of 14) [7/6/2012 8:20:45 AM]

Round Casserole Carrier
Draw a line across the diameter of the circle. This line will be used for placing the designs and for cutting the circle later.
Using embroidery software, create paper templates of the design by printing at full size four times. Cut around the templates to make them a manageable size. Place the template within the large circle with the vertical axis line of the template aligned with the center point of the circle (along the radius).
Position the templates vertically by measuring 3 1/4 inches from the center of the template to the edge of the inner circle and the bottom edge of the fabric. Position the templates horizontally by measuring 3 1/2 inches from the center of the template to the center of the half circle lines. Poke a hole in the center of the templates and mark the fabric. Also, mark the horizontal and vertical axis lines.
file:///F|/Source/ELProjects/html/pr1375.html (5 of 14) [7/6/2012 8:20:45 AM]
Round Casserole Carrier
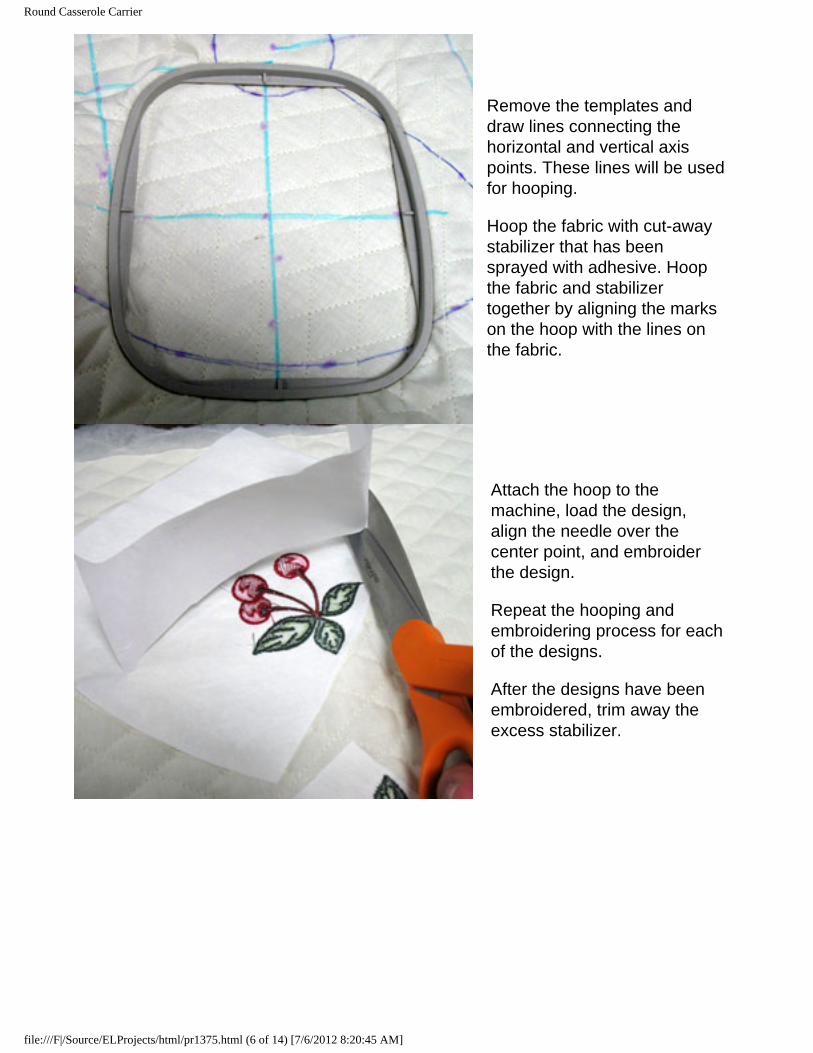
Remove the templates and draw lines connecting the horizontal and vertical axis points. These lines will be used for hooping. Hoop the fabric with cut-away stabilizer that has been sprayed with adhesive. Hoop the fabric and stabilizer together by aligning the marks on the hoop with the lines on the fabric.
Attach the hoop to the machine, load the design, align the needle over the center point, and embroider the design. Repeat the hooping and embroidering process for each of the designs. After the designs have been embroidered, trim away the excess stabilizer.
file:///F|/Source/ELProjects/html/pr1375.html (6 of 14) [7/6/2012 8:20:45 AM]
Round Casserole Carrier
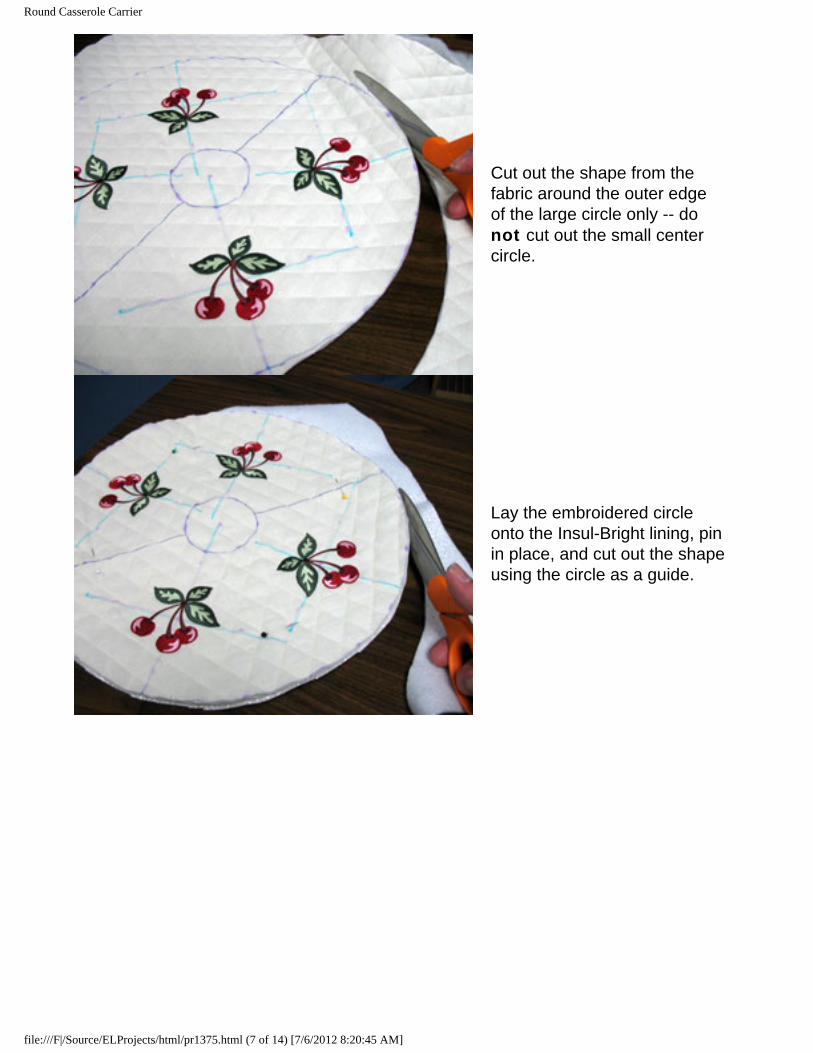
Cut out the shape from the fabric around the outer edge of the large circle only -- do not cut out the small center circle.
Lay the embroidered circle onto the Insul-Bright lining, pin in place, and cut out the shape using the circle as a guide.
file:///F|/Source/ELProjects/html/pr1375.html (7 of 14) [7/6/2012 8:20:45 AM]

Round Casserole Carrier
Repeat this process and cut the circle shape from the cotton print fabric and the lightweight canvas. These pieces are for the bottom portion of the carrier.
Lay the Insul-Bright, shiny side down on top of the lightweight canvas. Lay the embroidered circle on top and pin in place around the outer edge of the large circle and around the outer edge of the small circle.
file:///F|/Source/ELProjects/html/pr1375.html (8 of 14) [7/6/2012 8:20:45 AM]

Round Casserole Carrier
Cut around the embroidered circle and cut along the half circle lines and the inner circle.
Zigzag stitch around the outer edges of both half circle pieces to bind the layers together.
file:///F|/Source/ELProjects/html/pr1375.html (9 of 14) [7/6/2012 8:20:45 AM]

Round Casserole Carrier
Cut strips of the bias tape for the inner straight edges of the half circle pieces. Position the inner ends flush with the fabric and leave about 1/4 inch of excess on the outer ends.
Then, cut the four 10 inch long strips of the ribbon. Tie a knot at one end of the ribbon and then tuck about 1 inch of the other end in between the bias tape on the inner ends of the tape. Pin in place.
Sew the tape and ribbon in place by first sewing the inner end of the tape in place and continue along the inner edge of the tape.
To finish the half circles, add bias tape to the small half circles as well. Turn the ends of the tape under about 1/4 inch before sewing.
file:///F|/Source/ELProjects/html/pr1375.html (10 of 14) [7/6/2012 8:20:45 AM]

Round Casserole Carrier
To make the handles, cut two pieces of lightweight canvas to 4 x 31 inches. Fold the two long edges into the center of the fabric and press in place. Then, fold in half again, bringing the folded long edges together and press.
Sew a 1/8 inch seam along the long edges of both handles.
file:///F|/Source/ELProjects/html/pr1375.html (11 of 14) [7/6/2012 8:20:45 AM]

Round Casserole Carrier
To finish the bottom, lay the print fabric right side down, lay the Insul-Bright on top with the shiny side up, and then lay the canvas on top. Pin in place and zigzag stitch around the outer edge to bind the layers together.
Lay the bottom layers with the print side facing up. Measure in 5 3/4 inches from the outer edges of both the handles and mark.
Be sure to position the handles parallel to one another and check to be sure that the handles are not twisted.
file:///F|/Source/ELProjects/html/pr1375.html (12 of 14) [7/6/2012 8:20:45 AM]

Round Casserole Carrier
Sew the handles in place. Zigzag stitch over the very ends of the handles and then sew an "x" over the ends of the handles about 2 inches from the zigzag on both sides.
Align the top half circles and tie bows with the ribbon.
Lay the bottom portion flat with the handles facing down. Align the top portion on top, right side up, and pin in place. Make sure the handles are free so they do not get pinned.
file:///F|/Source/ELProjects/html/pr1375.html (13 of 14) [7/6/2012 8:20:45 AM]

Round Casserole Carrier
Add bias tape to the entire outer edge of the circles and sew in place by sewing along the inner edge of the tape.
A capital carrier! Ready to add a side dish, dessert, or casserole to share at the next potluck or family gathering. Click here for a printable version of these project instructions. You'll need to have Adobe Acrobat Reader installed on your computer. If you don't have it, you can download a free copy by clicking on the icon below.
file:///F|/Source/ELProjects/html/pr1375.html (14 of 14) [7/6/2012 8:20:45 AM]