Embed Size (px)
Citation preview
© April 2009
Snell & Wilcox Ltd., Southleigh Park House, Eastleigh Road, Havant, Hants, PO9 2PE, United Kingdom. For General Enquiries contact: Tel: +44 (0) 2392 489000 Fax: +44 (0)23 9245 1411
For Technical assistance contact: Tel: +44 (0) 2392 489058 Fax: +44 (0) 2392 489057 Web: http://www.snellwilcox.com/support
Ftp: ftp://ftp.snellwilcox.com/support
RollCall Control Panel
Installation & Operator’s Manual
RollCall Control Panel
Page 1
Contents Introduction........................................................................................................................................................ 2 Main Window...................................................................................................................................................... 5 Main Toolbar ...................................................................................................................................................... 6
Build Network ............................................................................................................................................ 6 Comms Window ........................................................................................................................................ 7 Preferences............................................................................................................................................... 9 Connect To.............................................................................................................................................. 13 About ....................................................................................................................................................... 13 Control Panel Manual.............................................................................................................................. 14 Software Releases .................................................................................................................................. 15
Network Browser ............................................................................................................................................. 17 Expand Tree............................................................................................................................................ 17 Collapse Tree.......................................................................................................................................... 17 Browser Icons.......................................................................................................................................... 18 Opening a Template................................................................................................................................ 18 Unit Upgrade ........................................................................................................................................... 19
Template Display............................................................................................................................................. 21 Template Toolbar .................................................................................................................................... 21 Cascade .................................................................................................................................................. 21 Tile Horizontally....................................................................................................................................... 21 Tile Vertically ........................................................................................................................................... 22 Stack ....................................................................................................................................................... 22 Minimize/Un-Minimize ............................................................................................................................. 22 Previous/Next .......................................................................................................................................... 22 Tabbed View ........................................................................................................................................... 22 Fullscreen................................................................................................................................................ 22 Rapid Page Selector ............................................................................................................................... 23 Slider Keyboard Edit ............................................................................................................................... 24
Connected Units .............................................................................................................................................. 25 Unit Toolbar............................................................................................................................................. 25

RollCall Control Panel
Page 2
Introduction
Overview The 32 bit Control Panel is a direct replacement for the 16 bit Control Panel. Unlike the 16 bit version, it does not require the RollCall Comms Manager (Commtrol) for its operation.
The Control Panel is written in Java and requires the Sun Java Runtime Environment (JRE) to be installed. JRE 1.6 or later is required.
The Control Panel can be run either as an applet or as an application.
Software Setup Information Enabling ClearType rendering When drawing text on the screen, the Control Panel (application or applet) uses the currently specified Windows rendering method. For the best appearance, it is recommended that ClearType rendering is used.
To enable ClearType rendering:
1. Open the Window properties dialog.
2. Click the Appearance tab, and then click Effects. The Effects dialog appears.
3. From the Use the following method to smooth edges of screen fonts drop-down list, select ClearType
Running the Control Panel as an Applet New IQ modular chassis are shipped with a Control Panel applet on board. Details of how to launch the applet are given in the IQ modular chassis documentation.
Some earlier chassis may have been supplied with a V 1.0.0 Control Panel Applet. Documentation for this version was supplied as part of the corresponding IQ modular chassis documentation.
Optimizing the applet’s display There are three Java System Properties that may be used to improve aspects of the Applet's performance:
Note:
RollCall Control Panel
Page 3
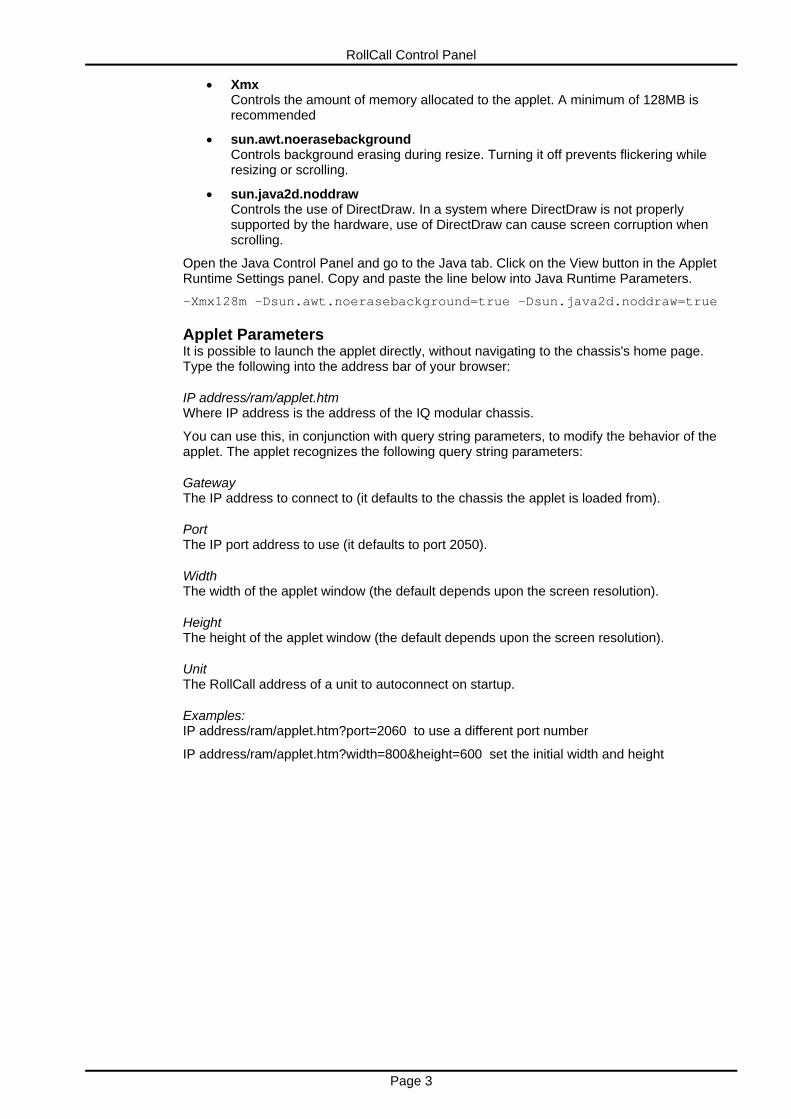
• Xmx Controls the amount of memory allocated to the applet. A minimum of 128MB is recommended
• sun.awt.noerasebackground Controls background erasing during resize. Turning it off prevents flickering while resizing or scrolling.
• sun.java2d.noddraw Controls the use of DirectDraw. In a system where DirectDraw is not properly supported by the hardware, use of DirectDraw can cause screen corruption when scrolling.
Open the Java Control Panel and go to the Java tab. Click on the View button in the Applet Runtime Settings panel. Copy and paste the line below into Java Runtime Parameters.
-Xmx128m -Dsun.awt.noerasebackground=true -Dsun.java2d.noddraw=true
Applet Parameters It is possible to launch the applet directly, without navigating to the chassis's home page. Type the following into the address bar of your browser:
IP address/ram/applet.htm Where IP address is the address of the IQ modular chassis.
You can use this, in conjunction with query string parameters, to modify the behavior of the applet. The applet recognizes the following query string parameters:
Gateway The IP address to connect to (it defaults to the chassis the applet is loaded from).
Port The IP port address to use (it defaults to port 2050).
Width The width of the applet window (the default depends upon the screen resolution).
Height The height of the applet window (the default depends upon the screen resolution).
Unit The RollCall address of a unit to autoconnect on startup.
Examples: IP address/ram/applet.htm?port=2060 to use a different port number
IP address/ram/applet.htm?width=800&height=600 set the initial width and height
RollCall Control Panel
Page 4
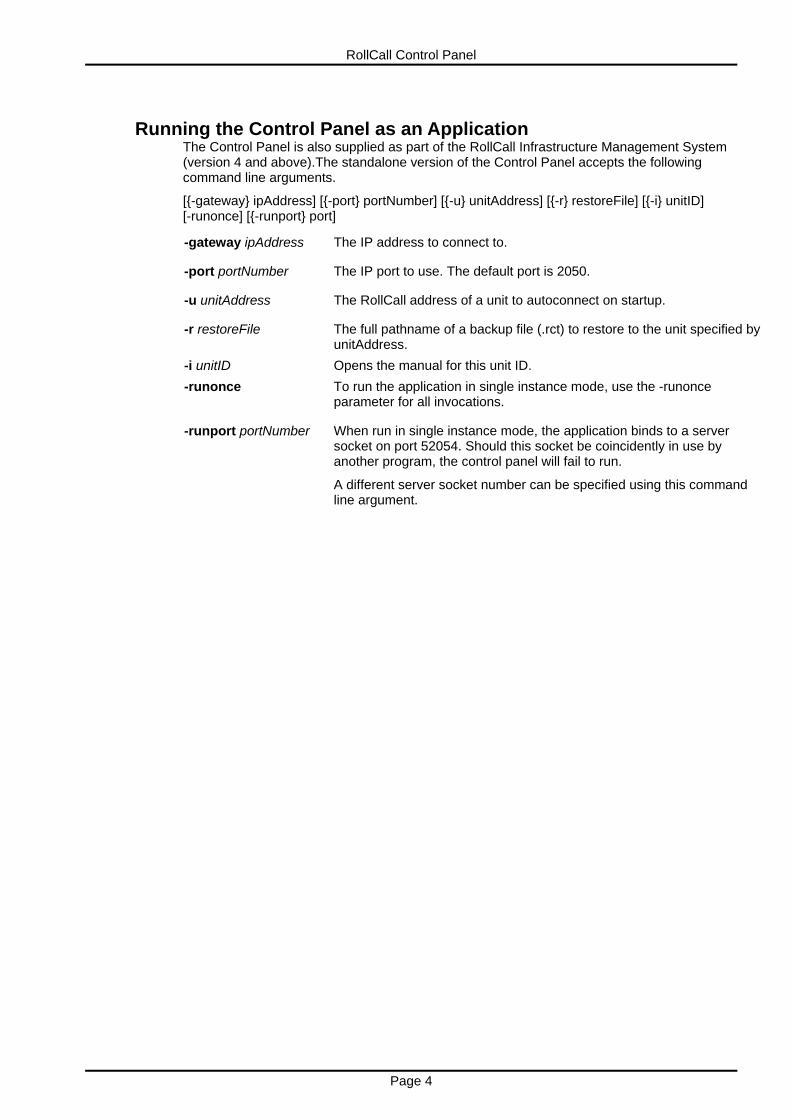
Running the Control Panel as an Application The Control Panel is also supplied as part of the RollCall Infrastructure Management System (version 4 and above).The standalone version of the Control Panel accepts the following command line arguments.
[{-gateway} ipAddress] [{-port} portNumber] [{-u} unitAddress] [{-r} restoreFile] [{-i} unitID] [-runonce] [{-runport} port]
-gateway ipAddress The IP address to connect to.
-port portNumber The IP port to use. The default port is 2050.
-u unitAddress The RollCall address of a unit to autoconnect on startup.
-r restoreFile The full pathname of a backup file (.rct) to restore to the unit specified by unitAddress.
-i unitID Opens the manual for this unit ID. -runonce To run the application in single instance mode, use the -runonce
parameter for all invocations.
-runport portNumber When run in single instance mode, the application binds to a server socket on port 52054. Should this socket be coincidently in use by another program, the control panel will fail to run.
A different server socket number can be specified using this command line argument.
RollCall Control Panel
Page 5
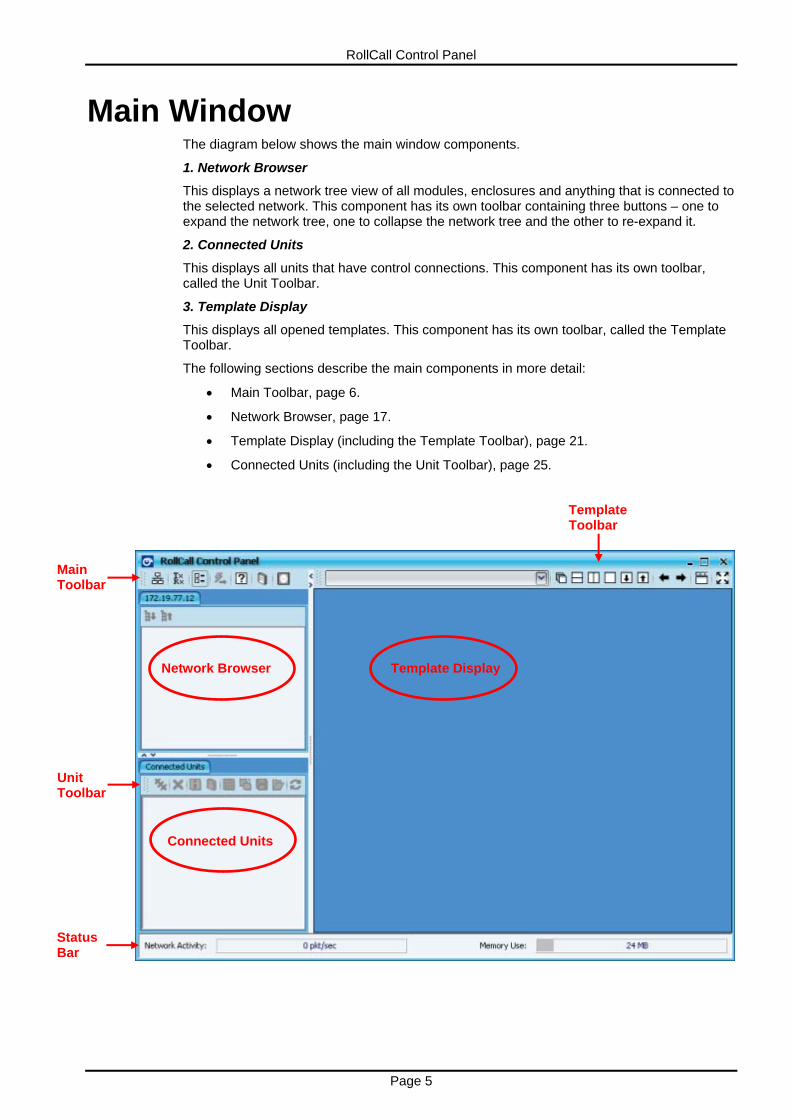
Main Window The diagram below shows the main window components.
1. Network Browser
This displays a network tree view of all modules, enclosures and anything that is connected to the selected network. This component has its own toolbar containing three buttons – one to expand the network tree, one to collapse the network tree and the other to re-expand it.
2. Connected Units
This displays all units that have control connections. This component has its own toolbar, called the Unit Toolbar.
3. Template Display
This displays all opened templates. This component has its own toolbar, called the Template Toolbar.
The following sections describe the main components in more detail:
• Main Toolbar, page 6.
• Network Browser, page 17.
• Template Display (including the Template Toolbar), page 21.
• Connected Units (including the Unit Toolbar), page 25.
Main Toolbar
Status Bar
Network Browser
Connected Units
Template Display
Unit Toolbar
Template Toolbar
RollCall Control Panel
Page 6
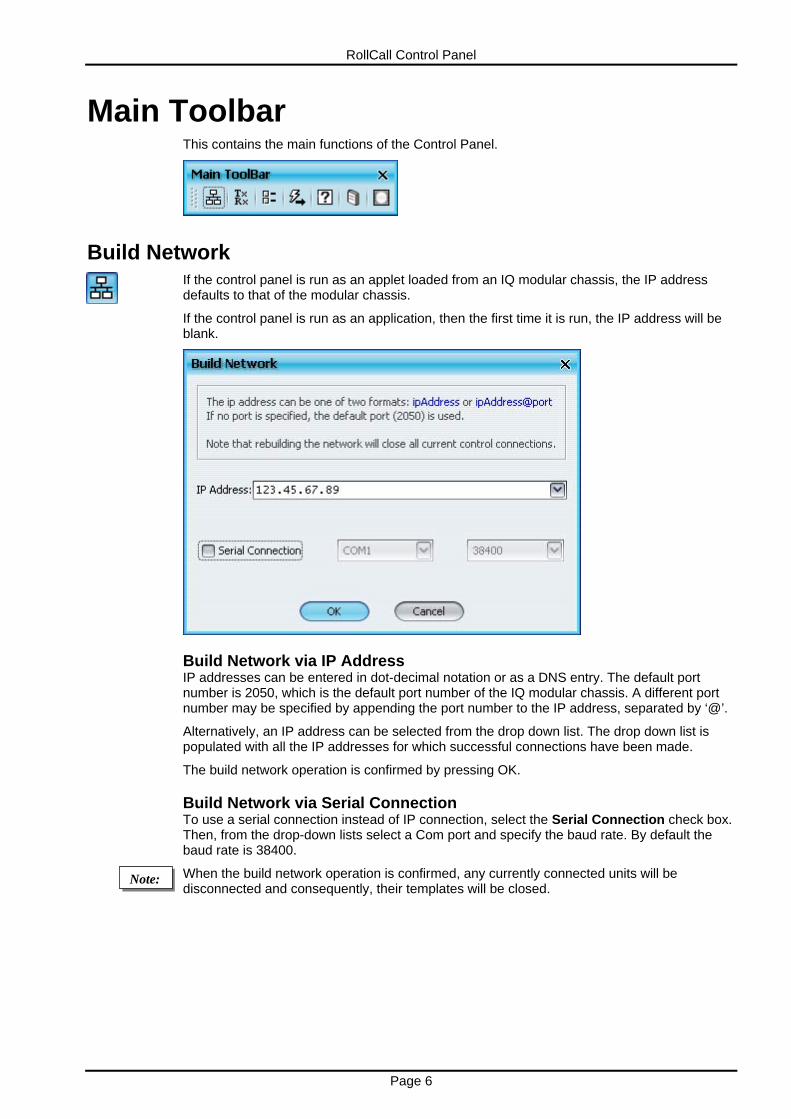
Main Toolbar This contains the main functions of the Control Panel.
Build Network If the control panel is run as an applet loaded from an IQ modular chassis, the IP address defaults to that of the modular chassis.
If the control panel is run as an application, then the first time it is run, the IP address will be blank.
Build Network via IP Address IP addresses can be entered in dot-decimal notation or as a DNS entry. The default port number is 2050, which is the default port number of the IQ modular chassis. A different port number may be specified by appending the port number to the IP address, separated by ‘@’.
Alternatively, an IP address can be selected from the drop down list. The drop down list is populated with all the IP addresses for which successful connections have been made.
The build network operation is confirmed by pressing OK.
Build Network via Serial Connection To use a serial connection instead of IP connection, select the Serial Connection check box. Then, from the drop-down lists select a Com port and specify the baud rate. By default the baud rate is 38400.
When the build network operation is confirmed, any currently connected units will be disconnected and consequently, their templates will be closed.
Note:
RollCall Control Panel
Page 7
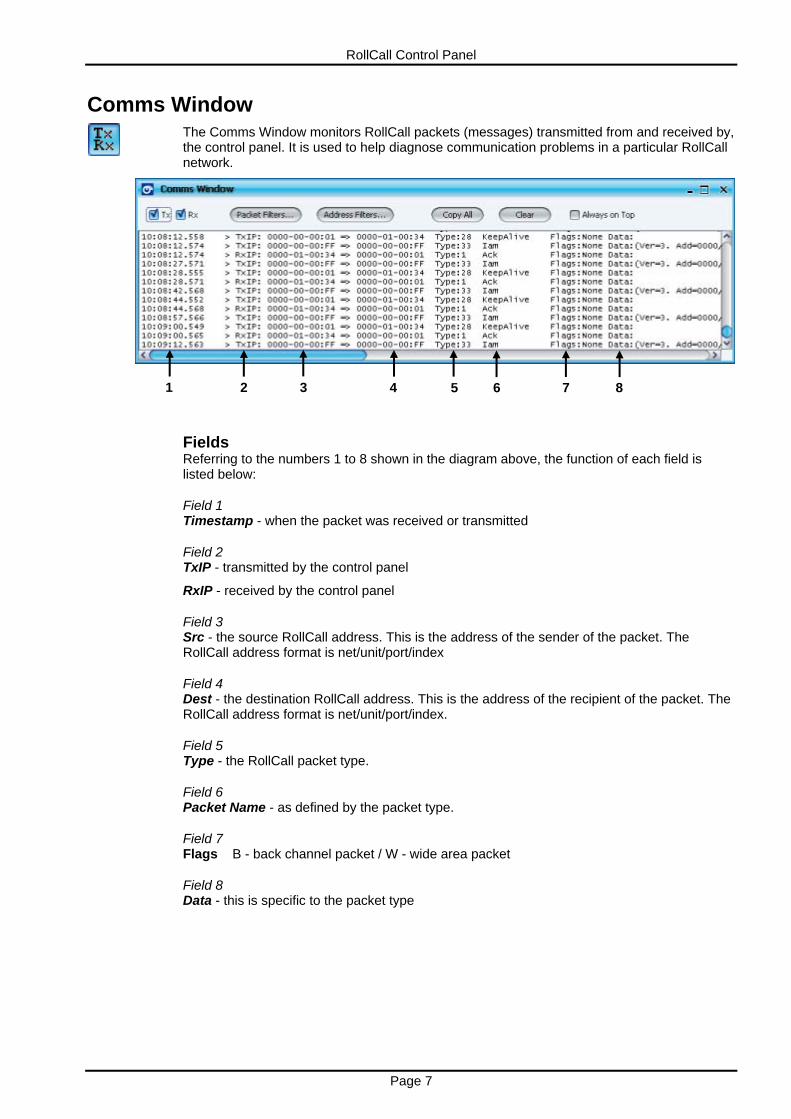
Comms Window The Comms Window monitors RollCall packets (messages) transmitted from and received by, the control panel. It is used to help diagnose communication problems in a particular RollCall network.
Fields Referring to the numbers 1 to 8 shown in the diagram above, the function of each field is listed below:
Field 1 Timestamp - when the packet was received or transmitted
Field 2 TxIP - transmitted by the control panel
RxIP - received by the control panel
Field 3 Src - the source RollCall address. This is the address of the sender of the packet. The RollCall address format is net/unit/port/index
Field 4 Dest - the destination RollCall address. This is the address of the recipient of the packet. The RollCall address format is net/unit/port/index.
Field 5 Type - the RollCall packet type.
Field 6 Packet Name - as defined by the packet type.
Field 7 Flags B - back channel packet / W - wide area packet
Field 8 Data - this is specific to the packet type
1 2 3 4 5 6 7 8
RollCall Control Panel
Page 8
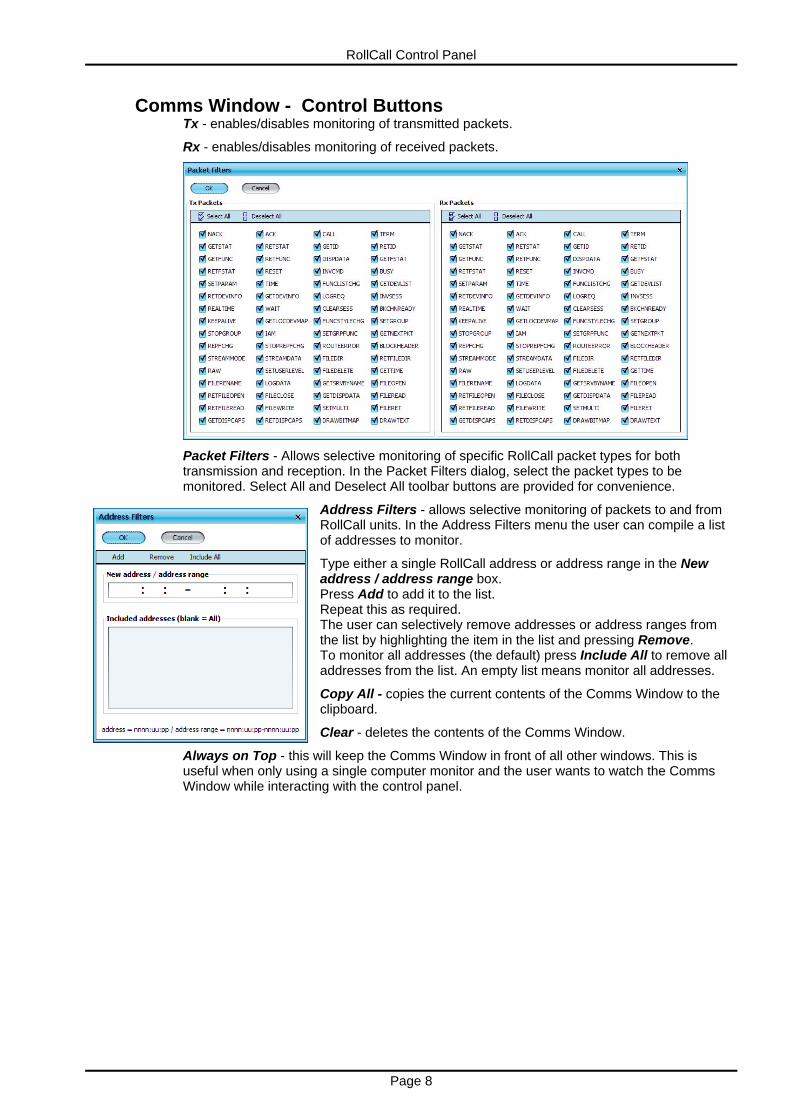
Comms Window - Control Buttons Tx - enables/disables monitoring of transmitted packets.
Rx - enables/disables monitoring of received packets.
Packet Filters - Allows selective monitoring of specific RollCall packet types for both transmission and reception. In the Packet Filters dialog, select the packet types to be monitored. Select All and Deselect All toolbar buttons are provided for convenience.
Address Filters - allows selective monitoring of packets to and from RollCall units. In the Address Filters menu the user can compile a list of addresses to monitor.
Type either a single RollCall address or address range in the New address / address range box. Press Add to add it to the list. Repeat this as required. The user can selectively remove addresses or address ranges from the list by highlighting the item in the list and pressing Remove. To monitor all addresses (the default) press Include All to remove all addresses from the list. An empty list means monitor all addresses.
Copy All - copies the current contents of the Comms Window to the clipboard.
Clear - deletes the contents of the Comms Window.
Always on Top - this will keep the Comms Window in front of all other windows. This is useful when only using a single computer monitor and the user wants to watch the Comms Window while interacting with the control panel.
RollCall Control Panel
Page 9
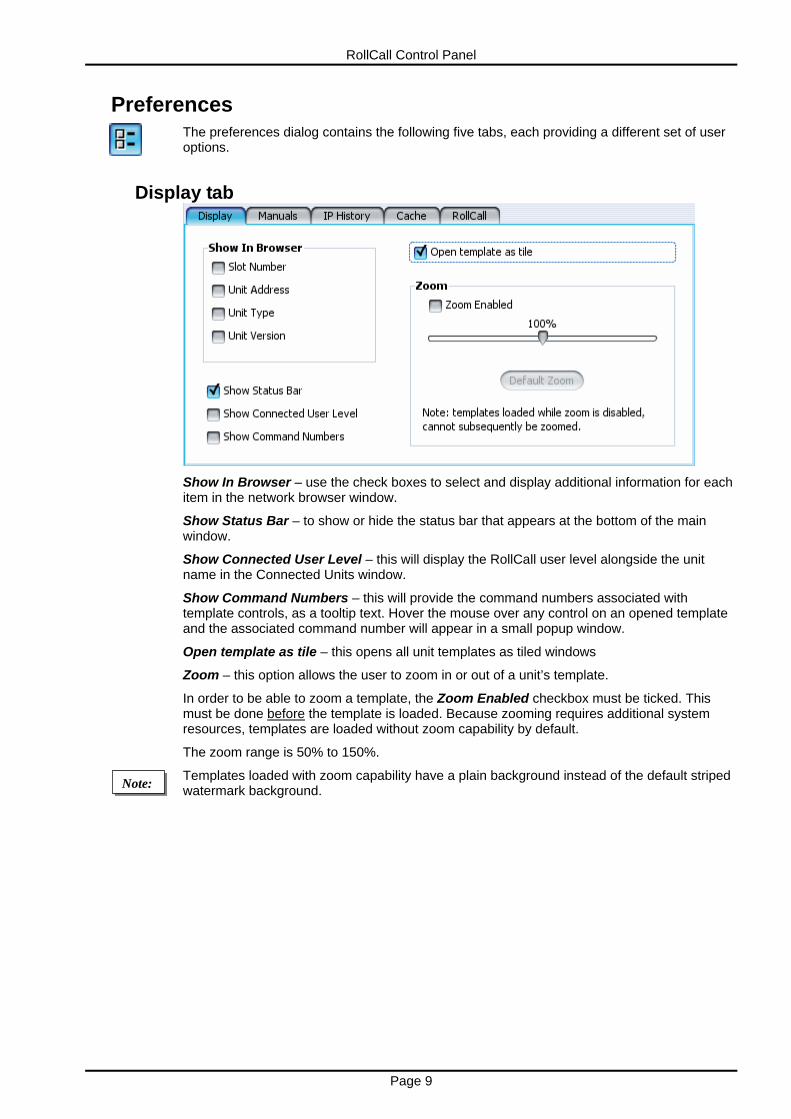
Preferences The preferences dialog contains the following five tabs, each providing a different set of user options.
Display tab
Show In Browser – use the check boxes to select and display additional information for each item in the network browser window.
Show Status Bar – to show or hide the status bar that appears at the bottom of the main window.
Show Connected User Level – this will display the RollCall user level alongside the unit name in the Connected Units window.
Show Command Numbers – this will provide the command numbers associated with template controls, as a tooltip text. Hover the mouse over any control on an opened template and the associated command number will appear in a small popup window.
Open template as tile – this opens all unit templates as tiled windows
Zoom – this option allows the user to zoom in or out of a unit’s template.
In order to be able to zoom a template, the Zoom Enabled checkbox must be ticked. This must be done before the template is loaded. Because zooming requires additional system resources, templates are loaded without zoom capability by default.
The zoom range is 50% to 150%.
Templates loaded with zoom capability have a plain background instead of the default striped watermark background. Note:
RollCall Control Panel
Page 10
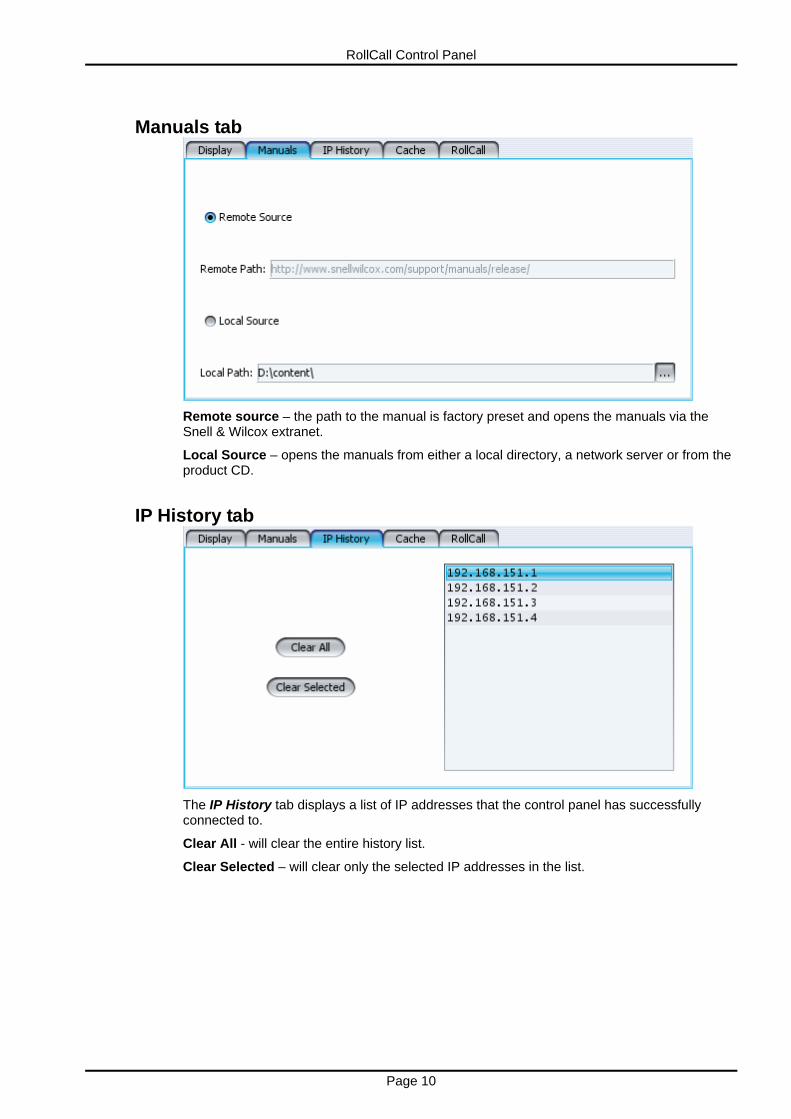
Manuals tab
Remote source – the path to the manual is factory preset and opens the manuals via the Snell & Wilcox extranet.
Local Source – opens the manuals from either a local directory, a network server or from the product CD.
IP History tab
The IP History tab displays a list of IP addresses that the control panel has successfully connected to.
Clear All - will clear the entire history list.
Clear Selected – will clear only the selected IP addresses in the list.
RollCall Control Panel
Page 11
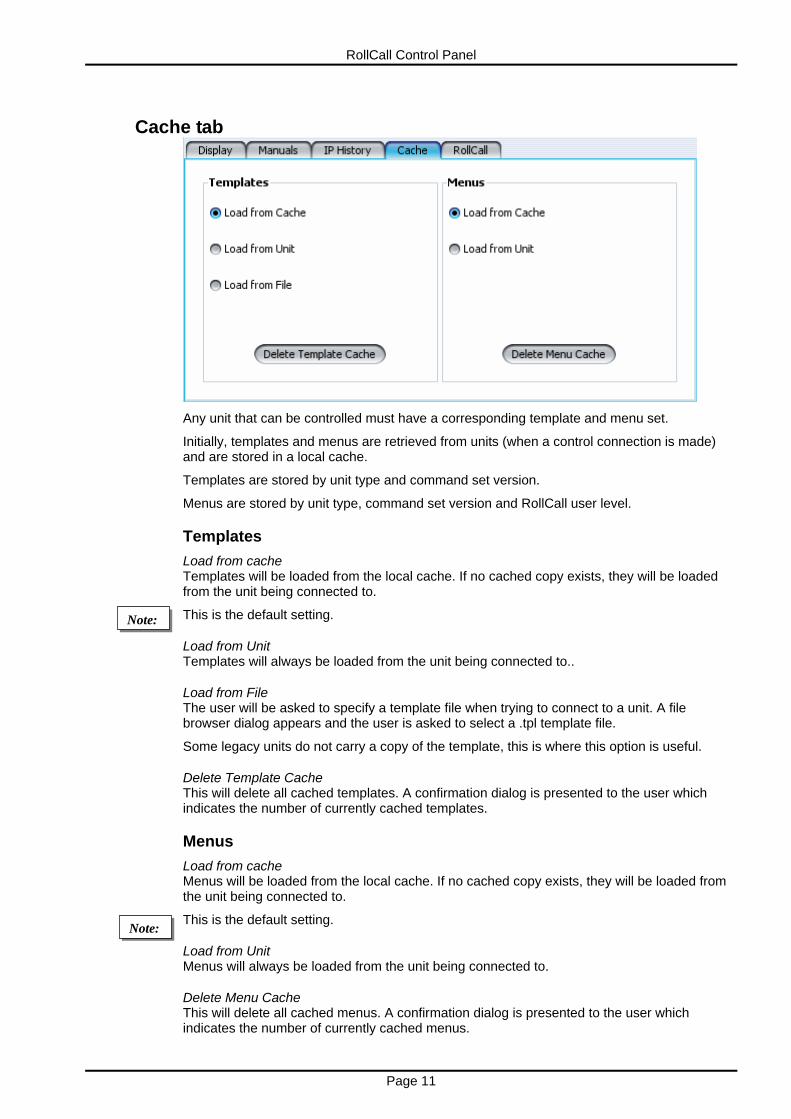
Cache tab
Any unit that can be controlled must have a corresponding template and menu set.
Initially, templates and menus are retrieved from units (when a control connection is made) and are stored in a local cache.
Templates are stored by unit type and command set version.
Menus are stored by unit type, command set version and RollCall user level.
Templates Load from cache Templates will be loaded from the local cache. If no cached copy exists, they will be loaded from the unit being connected to.
This is the default setting.
Load from Unit Templates will always be loaded from the unit being connected to..
Load from File The user will be asked to specify a template file when trying to connect to a unit. A file browser dialog appears and the user is asked to select a .tpl template file.
Some legacy units do not carry a copy of the template, this is where this option is useful.
Delete Template Cache This will delete all cached templates. A confirmation dialog is presented to the user which indicates the number of currently cached templates.
Menus Load from cache Menus will be loaded from the local cache. If no cached copy exists, they will be loaded from the unit being connected to.
This is the default setting.
Load from Unit Menus will always be loaded from the unit being connected to.
Delete Menu Cache This will delete all cached menus. A confirmation dialog is presented to the user which indicates the number of currently cached menus.
Note:
Note:
RollCall Control Panel
Page 12
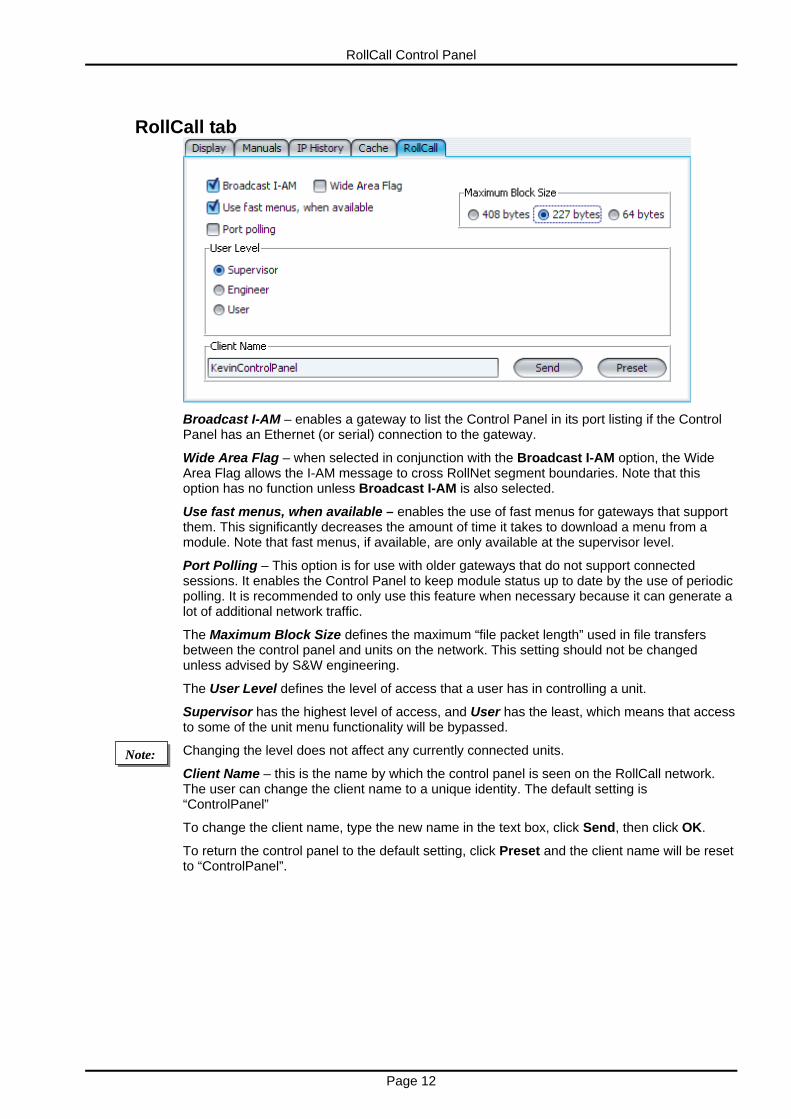
RollCall tab
Broadcast I-AM – enables a gateway to list the Control Panel in its port listing if the Control Panel has an Ethernet (or serial) connection to the gateway.
Wide Area Flag – when selected in conjunction with the Broadcast I-AM option, the Wide Area Flag allows the I-AM message to cross RollNet segment boundaries. Note that this option has no function unless Broadcast I-AM is also selected.
Use fast menus, when available – enables the use of fast menus for gateways that support them. This significantly decreases the amount of time it takes to download a menu from a module. Note that fast menus, if available, are only available at the supervisor level.
Port Polling – This option is for use with older gateways that do not support connected sessions. It enables the Control Panel to keep module status up to date by the use of periodic polling. It is recommended to only use this feature when necessary because it can generate a lot of additional network traffic.
The Maximum Block Size defines the maximum “file packet length” used in file transfers between the control panel and units on the network. This setting should not be changed unless advised by S&W engineering.
The User Level defines the level of access that a user has in controlling a unit.
Supervisor has the highest level of access, and User has the least, which means that access to some of the unit menu functionality will be bypassed.
Changing the level does not affect any currently connected units.
Client Name – this is the name by which the control panel is seen on the RollCall network. The user can change the client name to a unique identity. The default setting is “ControlPanel”
To change the client name, type the new name in the text box, click Send, then click OK.
To return the control panel to the default setting, click Preset and the client name will be reset to “ControlPanel”.
Note:
RollCall Control Panel
Page 13
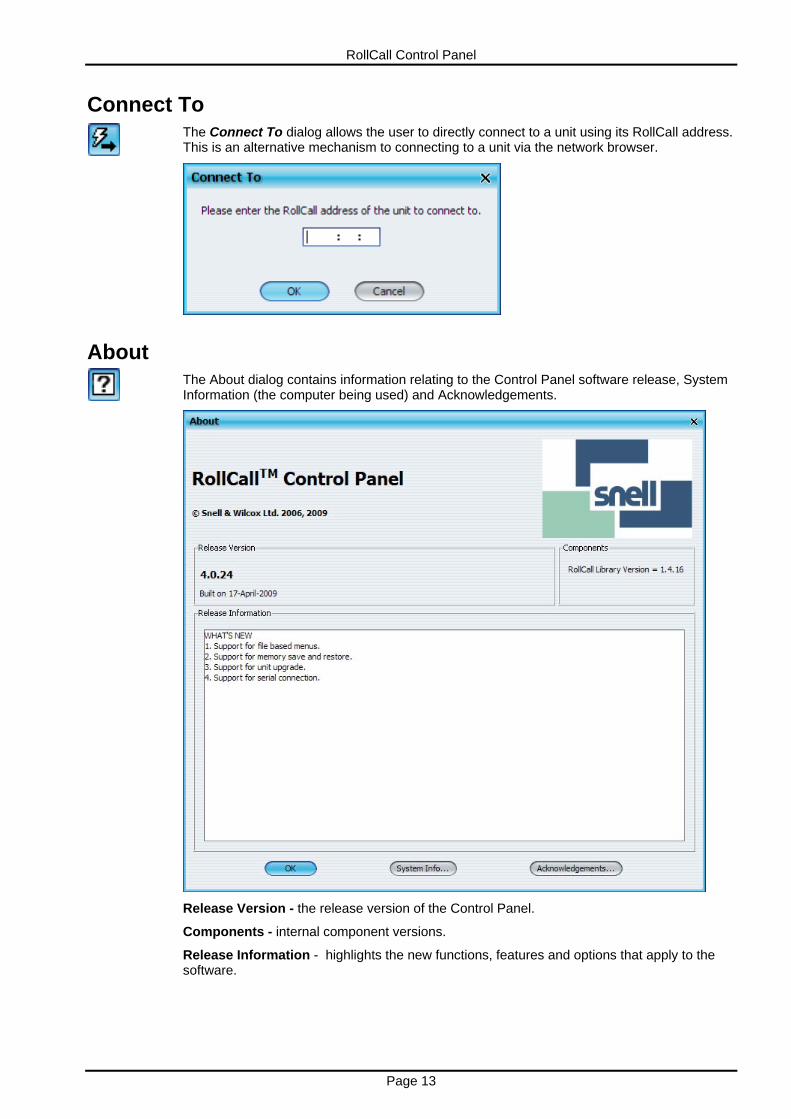
Connect To The Connect To dialog allows the user to directly connect to a unit using its RollCall address. This is an alternative mechanism to connecting to a unit via the network browser.
About The About dialog contains information relating to the Control Panel software release, System Information (the computer being used) and Acknowledgements.
Release Version - the release version of the Control Panel.
Components - internal component versions.
Release Information - highlights the new functions, features and options that apply to the software.
RollCall Control Panel
Page 14
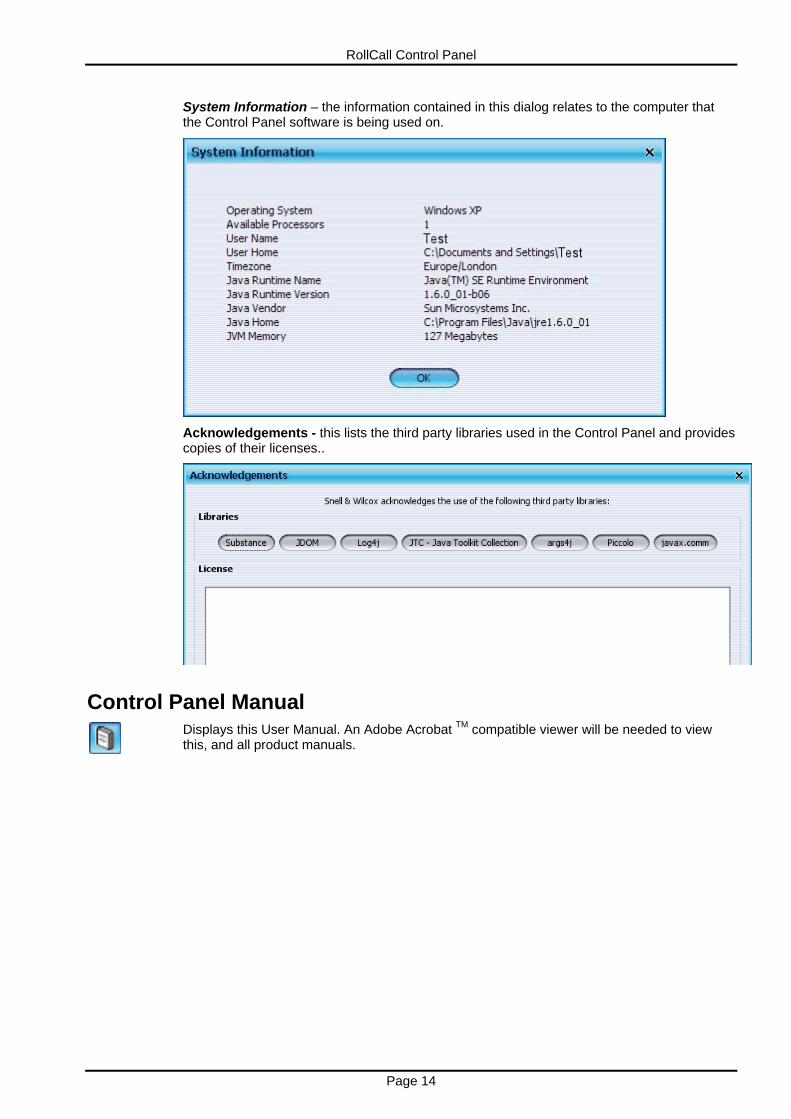
System Information – the information contained in this dialog relates to the computer that the Control Panel software is being used on.
Acknowledgements - this lists the third party libraries used in the Control Panel and provides copies of their licenses..
Control Panel Manual Displays this User Manual. An Adobe Acrobat TM compatible viewer will be needed to view this, and all product manuals.

RollCall Control Panel
Page 15
Software Releases This dialog allows software release files to be imported. After these files have been imported, individual units can be upgraded using the Unit Upgrade contextual menu item.
Click Import Release, select the upgrade package zip file to be imported, and click OK.
The Import Log section displays the log file information generated by the import process.
RollCall Control Panel
Page 16
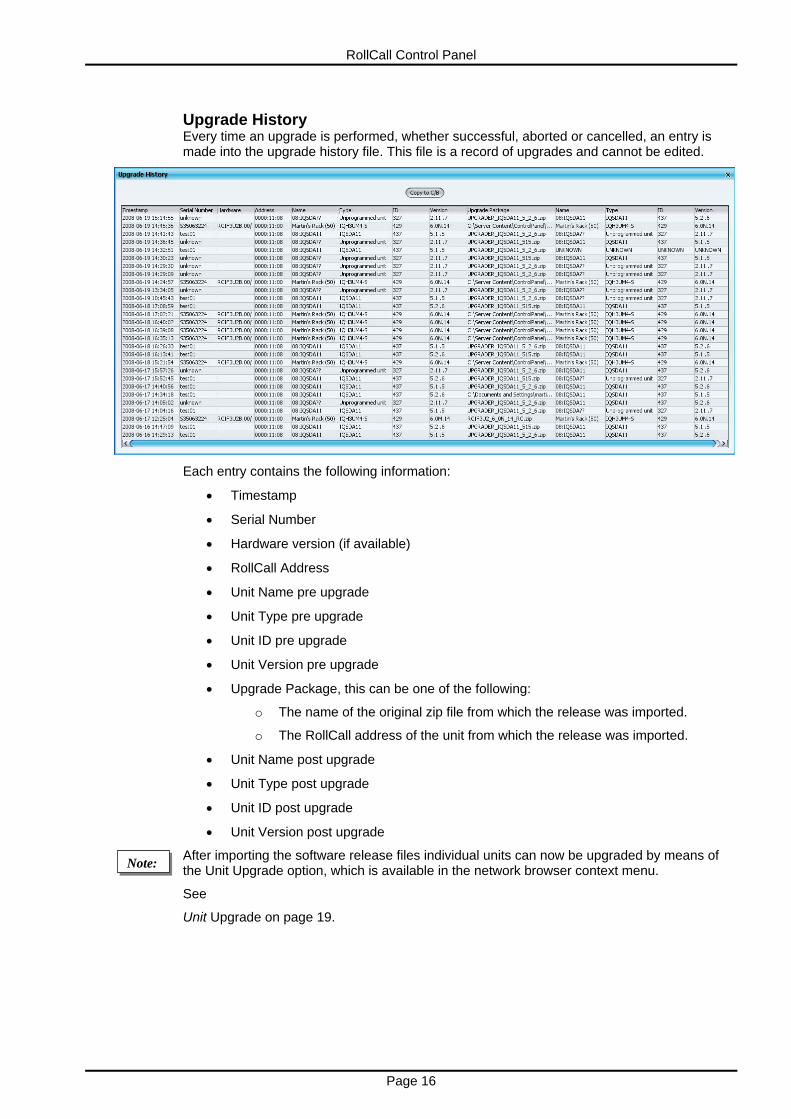
Upgrade History Every time an upgrade is performed, whether successful, aborted or cancelled, an entry is made into the upgrade history file. This file is a record of upgrades and cannot be edited.
Each entry contains the following information:
• Timestamp
• Serial Number
• Hardware version (if available)
• RollCall Address
• Unit Name pre upgrade
• Unit Type pre upgrade
• Unit ID pre upgrade
• Unit Version pre upgrade
• Upgrade Package, this can be one of the following:
o The name of the original zip file from which the release was imported.
o The RollCall address of the unit from which the release was imported.
• Unit Name post upgrade
• Unit Type post upgrade
• Unit ID post upgrade
• Unit Version post upgrade
After importing the software release files individual units can now be upgraded by means of the Unit Upgrade option, which is available in the network browser context menu.
See
Unit Upgrade on page 19.
Note:
RollCall Control Panel
Page 17
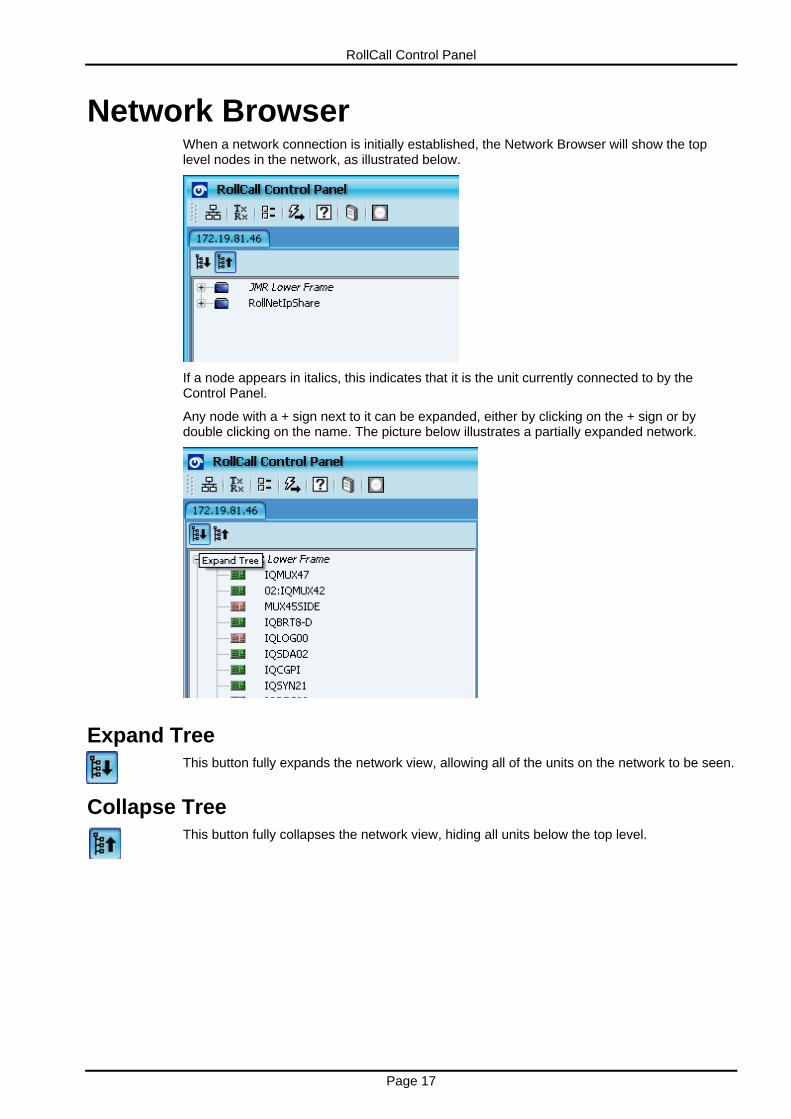
Network Browser When a network connection is initially established, the Network Browser will show the top level nodes in the network, as illustrated below.
If a node appears in italics, this indicates that it is the unit currently connected to by the Control Panel.
Any node with a + sign next to it can be expanded, either by clicking on the + sign or by double clicking on the name. The picture below illustrates a partially expanded network.
Expand Tree This button fully expands the network view, allowing all of the units on the network to be seen.
Collapse Tree This button fully collapses the network view, hiding all units below the top level.
RollCall Control Panel
Page 18
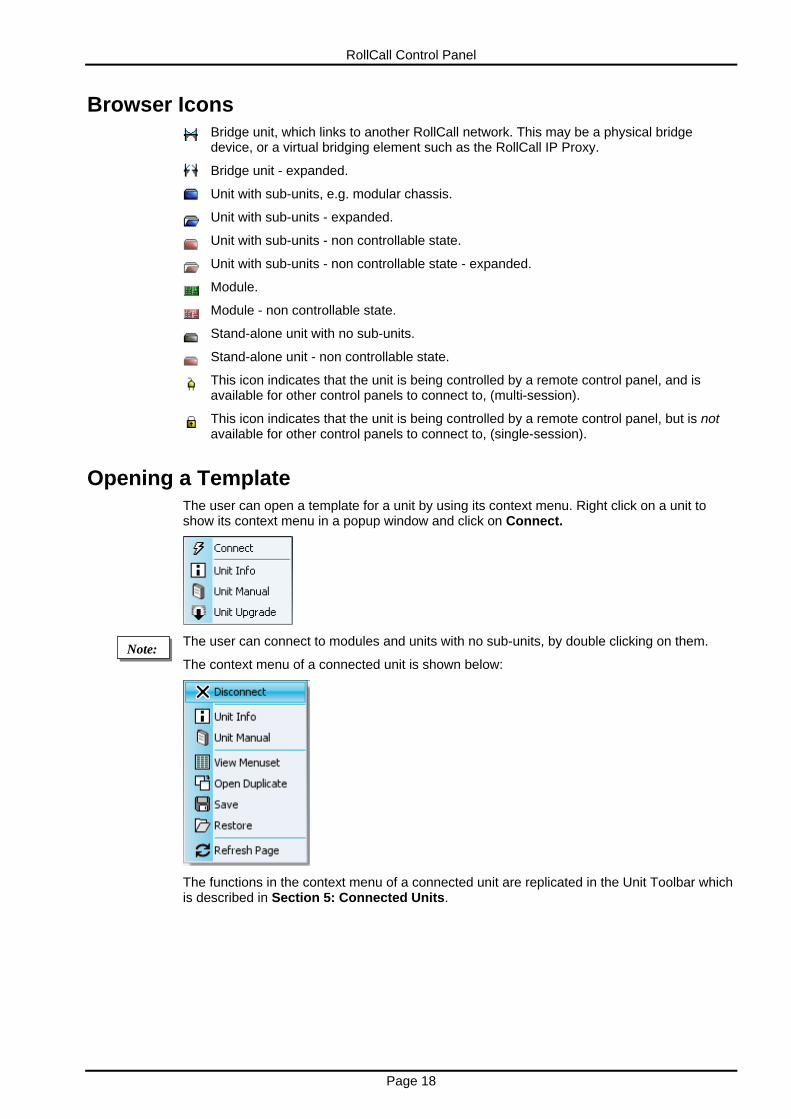
Browser Icons Bridge unit, which links to another RollCall network. This may be a physical bridge device, or a virtual bridging element such as the RollCall IP Proxy.
Bridge unit - expanded.
Unit with sub-units, e.g. modular chassis.
Unit with sub-units - expanded.
Unit with sub-units - non controllable state.
Unit with sub-units - non controllable state - expanded.
Module.
Module - non controllable state.
Stand-alone unit with no sub-units.
Stand-alone unit - non controllable state.
This icon indicates that the unit is being controlled by a remote control panel, and is available for other control panels to connect to, (multi-session).
This icon indicates that the unit is being controlled by a remote control panel, but is not available for other control panels to connect to, (single-session).
Opening a Template The user can open a template for a unit by using its context menu. Right click on a unit to show its context menu in a popup window and click on Connect.
The user can connect to modules and units with no sub-units, by double clicking on them.
The context menu of a connected unit is shown below:
The functions in the context menu of a connected unit are replicated in the Unit Toolbar which is described in Section 5: Connected Units.
Note:
RollCall Control Panel
Page 19
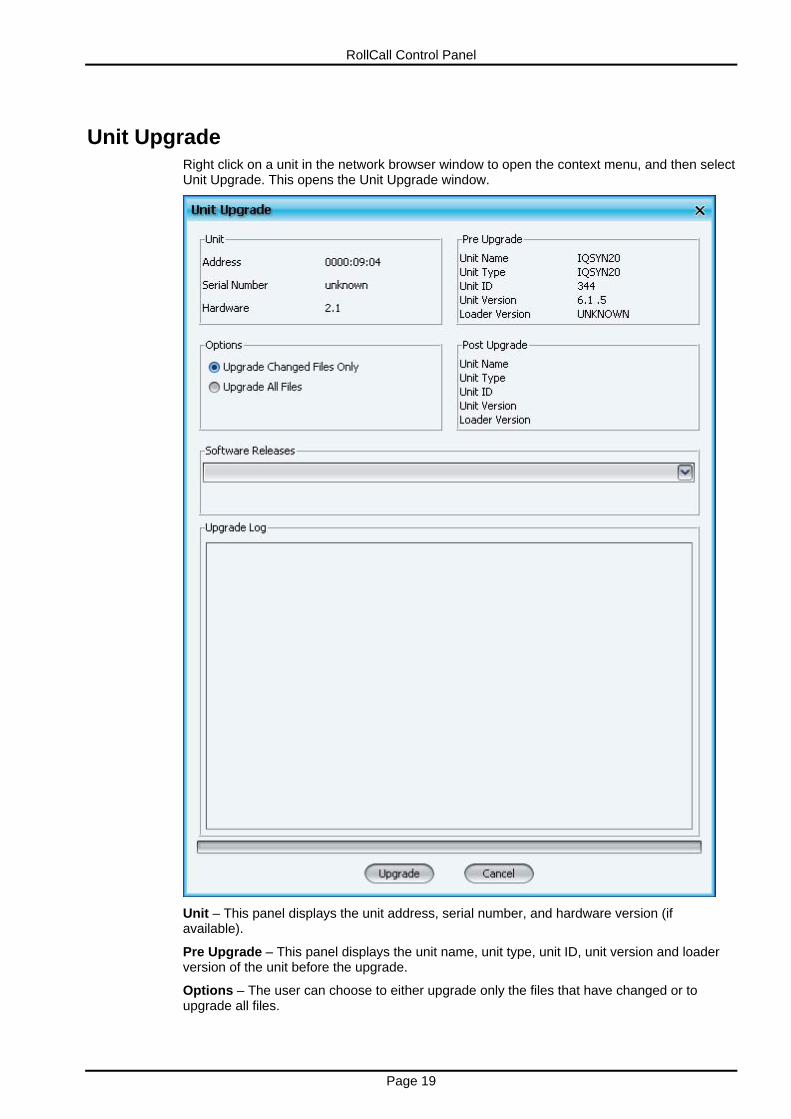
Unit Upgrade Right click on a unit in the network browser window to open the context menu, and then select Unit Upgrade. This opens the Unit Upgrade window.
Unit – This panel displays the unit address, serial number, and hardware version (if available).
Pre Upgrade – This panel displays the unit name, unit type, unit ID, unit version and loader version of the unit before the upgrade.
Options – The user can choose to either upgrade only the files that have changed or to upgrade all files.
RollCall Control Panel
Page 20
Post Upgrade – After completion of the upgrade, this panel displays the new unit name, unit type, unit ID, unit version and loader version.
Software Releases – This drop-down list shows all of the software releases available for the unit type. Note that before any releases can be shown, software releases must be imported using the Software Release function available from the main toolbar.
Release Notes – If release notes are available, clicking this button displays them. If release notes are not available, this button is not displayed.
Upgrade Log – This displays the progress of the upgrade.
Cancel – This closes the Unit Upgrade window. If an upgrade is in progress, the user is asked to confirm this action.
Upgrade – If a software release has been selected, this starts the upgrade process. Prior to the upgrade process beginning, a check is made to see whether the unit's current version is available in the list of software releases. If not, the user is given the opportunity to save the unit’s current software release before upgrading.
During the upgrade process:
• The unit’s template is closed, if it is currently open.
• Any files to be saved are copied to the PC.
• The unit is rebooted into the loader.
• The network connection may be temporarily lost at this point, if the upgrade is for the unit providing the IP connection.
• Any files to be deleted are deleted from the unit.
• Flash memory is either defragmented or formatted.
• The new files, including saved files, are copied to the unit.
• The unit is rebooted into the application.
• If the unit’s template has changed, it is cached locally.
If the upgrade is for the unit providing the IP connection, the network connection is permanently restored when the upgrade dialog is closed.
Import upgrade from unit – This creates a software release from the version currently on the unit. Note that this option is only displayed if the unit’s version is not already in the list of software releases.
RollCall Control Panel
Page 21
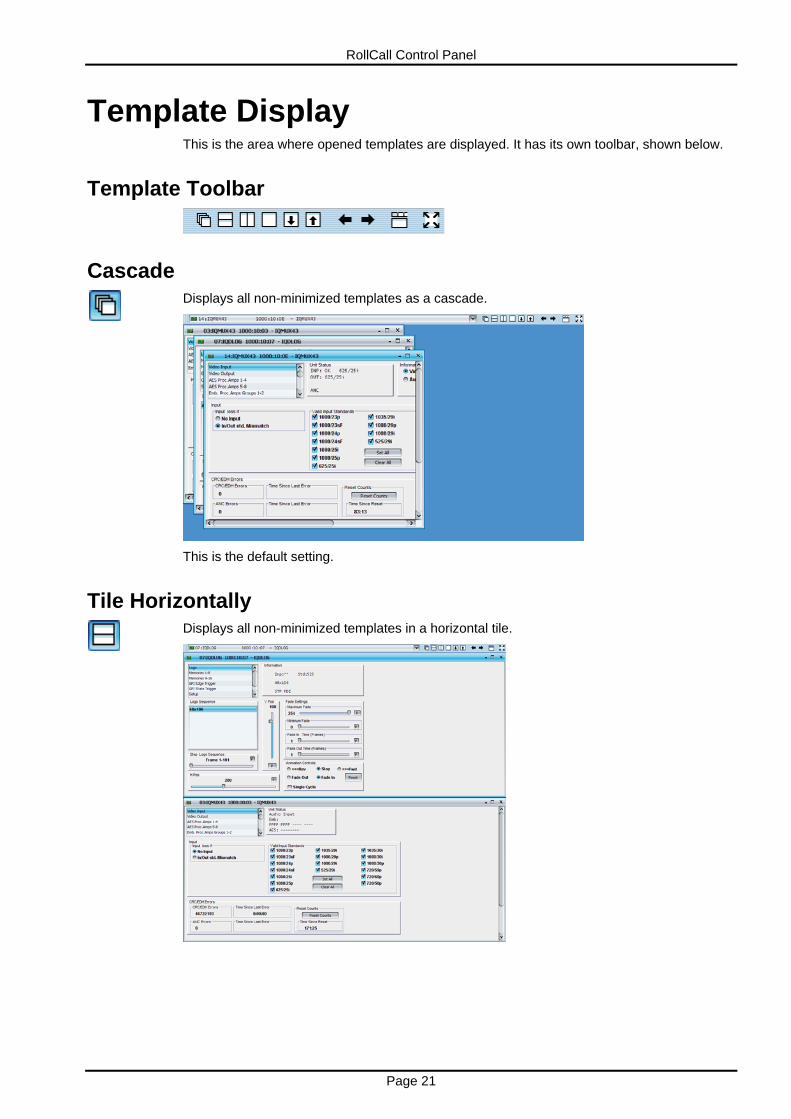
Template Display This is the area where opened templates are displayed. It has its own toolbar, shown below.
Template Toolbar
Cascade Displays all non-minimized templates as a cascade.
This is the default setting.
Tile Horizontally Displays all non-minimized templates in a horizontal tile.
RollCall Control Panel
Page 22
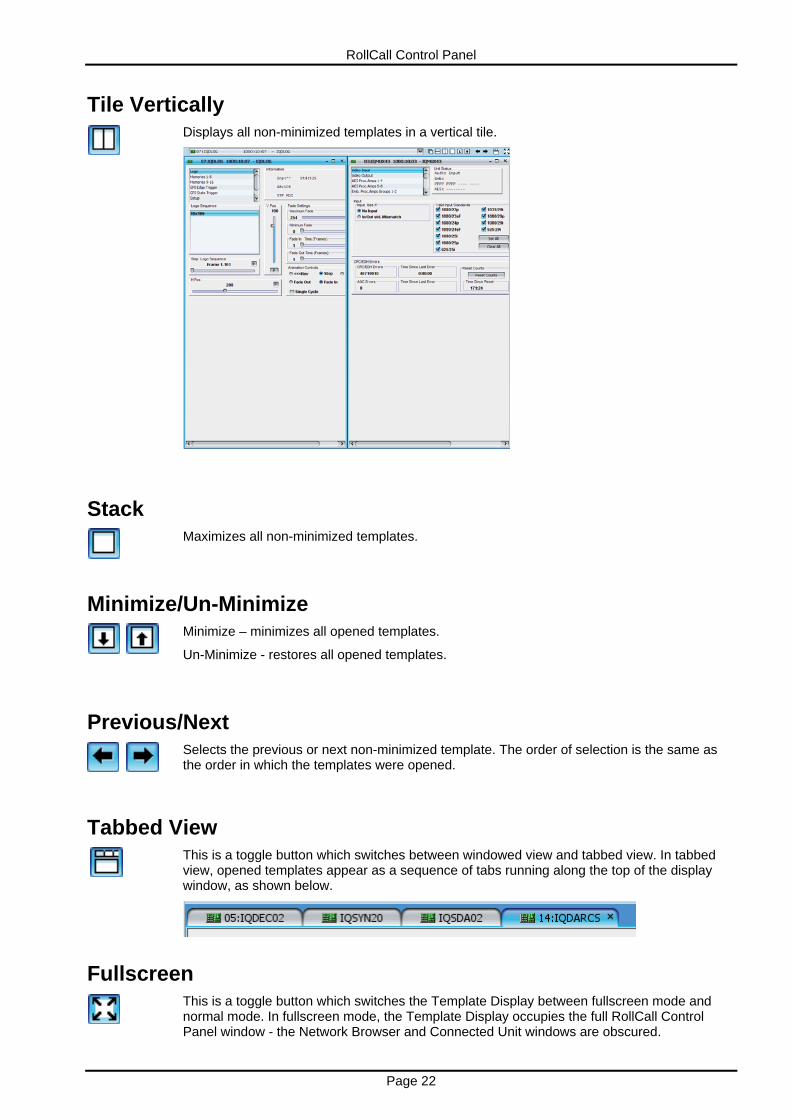
Tile Vertically Displays all non-minimized templates in a vertical tile.
Stack Maximizes all non-minimized templates.
Minimize/Un-Minimize Minimize – minimizes all opened templates.
Un-Minimize - restores all opened templates.
Previous/Next Selects the previous or next non-minimized template. The order of selection is the same as the order in which the templates were opened.
Tabbed View This is a toggle button which switches between windowed view and tabbed view. In tabbed view, opened templates appear as a sequence of tabs running along the top of the display window, as shown below.
Fullscreen This is a toggle button which switches the Template Display between fullscreen mode and normal mode. In fullscreen mode, the Template Display occupies the full RollCall Control Panel window - the Network Browser and Connected Unit windows are obscured.
RollCall Control Panel
Page 23
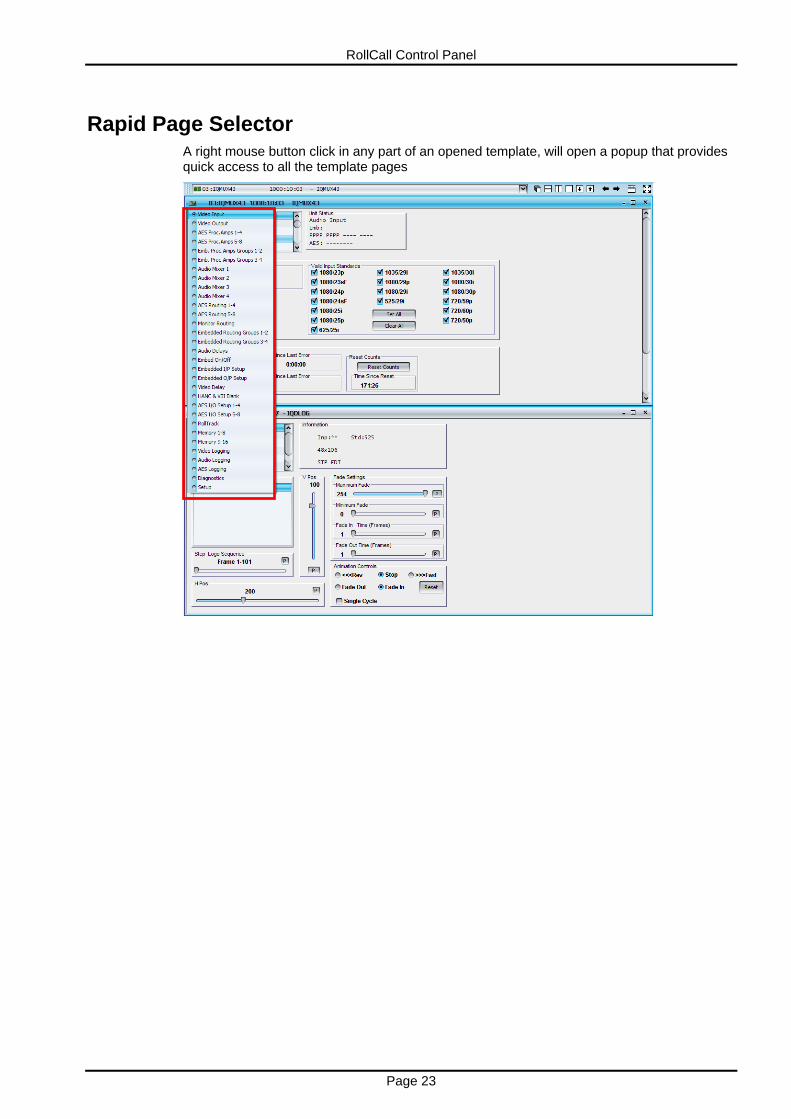
Rapid Page Selector A right mouse button click in any part of an opened template, will open a popup that provides quick access to all the template pages
RollCall Control Panel
Page 24
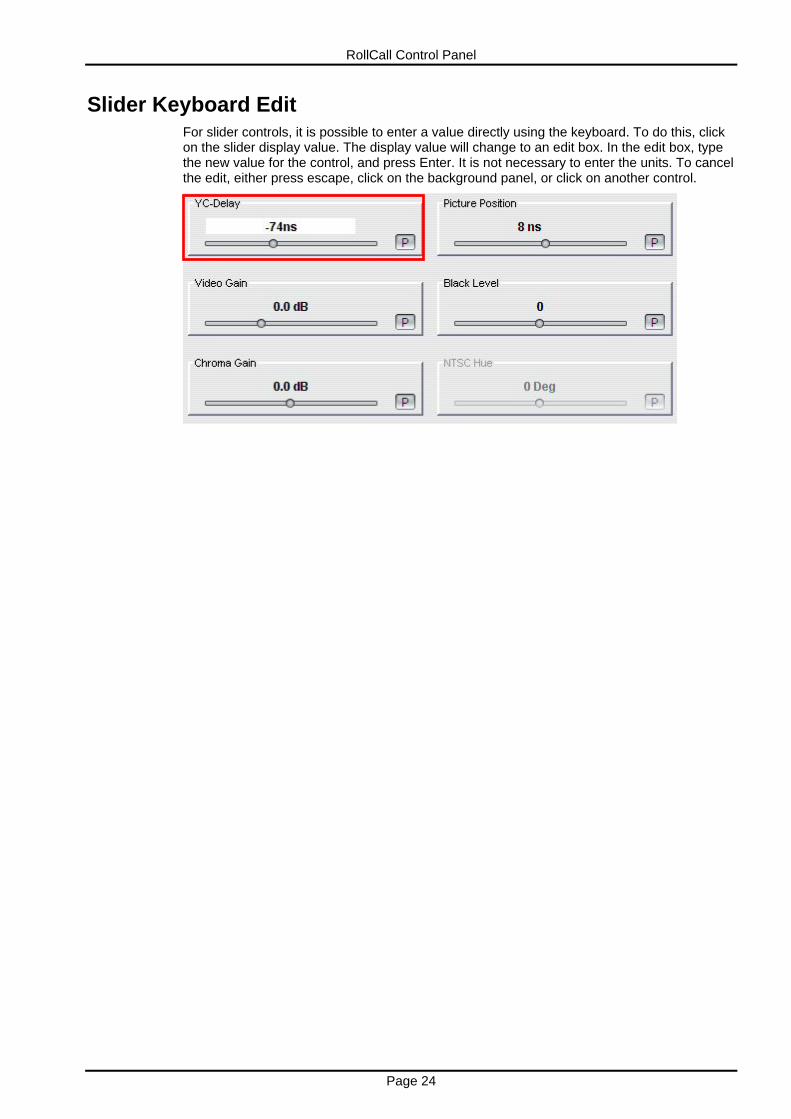
Slider Keyboard Edit For slider controls, it is possible to enter a value directly using the keyboard. To do this, click on the slider display value. The display value will change to an edit box. In the edit box, type the new value for the control, and press Enter. It is not necessary to enter the units. To cancel the edit, either press escape, click on the background panel, or click on another control.
RollCall Control Panel
Page 25
Connected Units
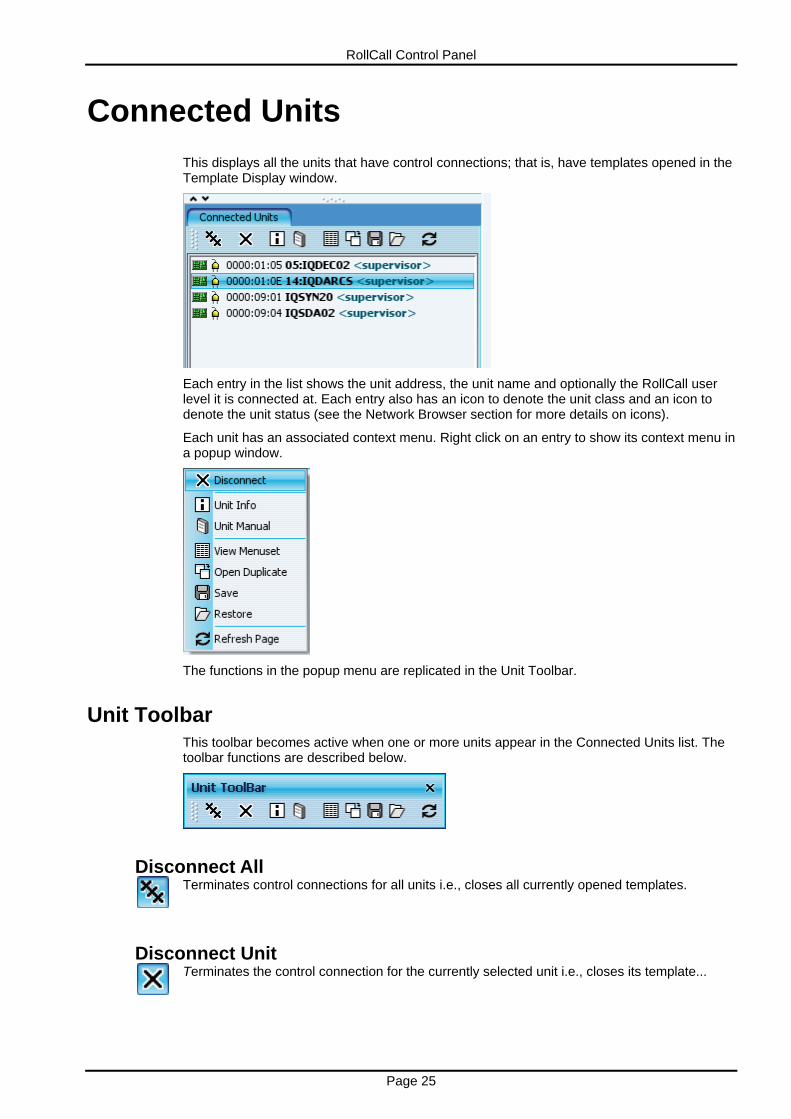
This displays all the units that have control connections; that is, have templates opened in the Template Display window.
Each entry in the list shows the unit address, the unit name and optionally the RollCall user level it is connected at. Each entry also has an icon to denote the unit class and an icon to denote the unit status (see the Network Browser section for more details on icons).
Each unit has an associated context menu. Right click on an entry to show its context menu in a popup window.
The functions in the popup menu are replicated in the Unit Toolbar.
Unit Toolbar This toolbar becomes active when one or more units appear in the Connected Units list. The toolbar functions are described below.
Disconnect All Terminates control connections for all units i.e., closes all currently opened templates.
Disconnect Unit Terminates the control connection for the currently selected unit i.e., closes its template...

RollCall Control Panel
Page 26
Unit Information Displays information related to the currently selected unit.
A + symbol shown next to Menu indicates that the unit supports fast menus.
Unit Manual Displays the manual for the currently selected unit.
Note:
RollCall Control Panel
Page 27
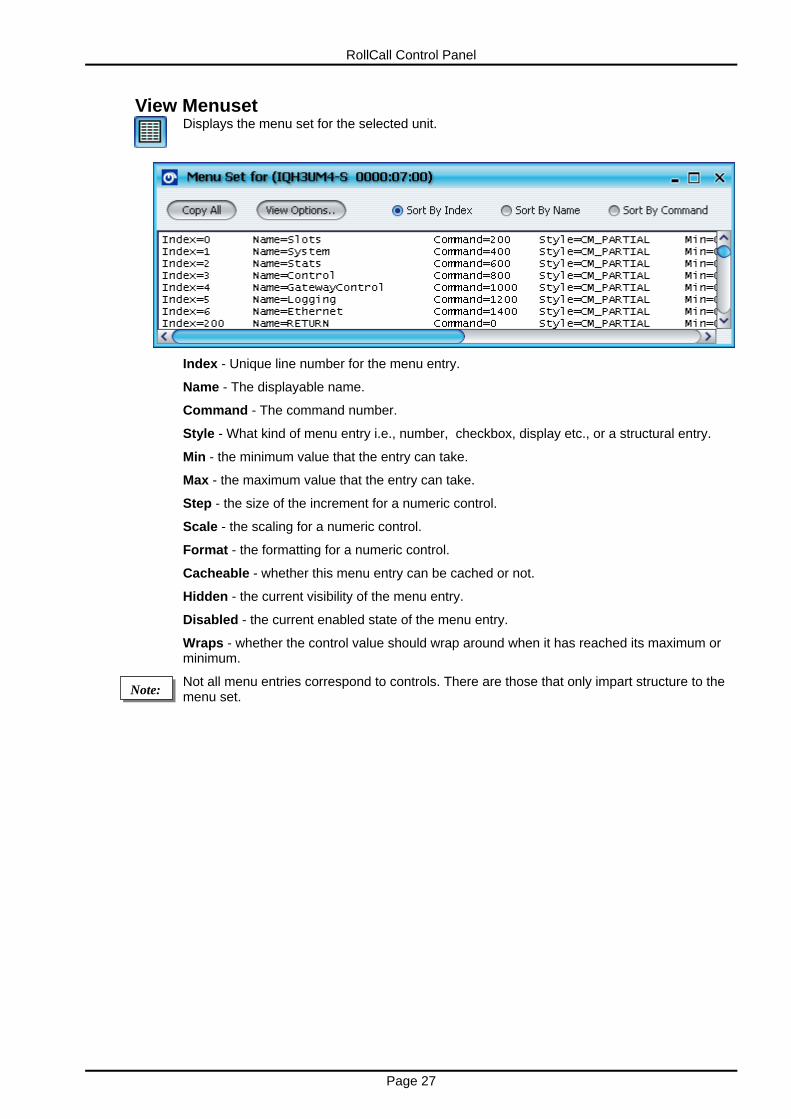
View Menuset Displays the menu set for the selected unit.
Index - Unique line number for the menu entry.
Name - The displayable name.
Command - The command number.
Style - What kind of menu entry i.e., number, checkbox, display etc., or a structural entry.
Min - the minimum value that the entry can take.
Max - the maximum value that the entry can take.
Step - the size of the increment for a numeric control.
Scale - the scaling for a numeric control.
Format - the formatting for a numeric control.
Cacheable - whether this menu entry can be cached or not.
Hidden - the current visibility of the menu entry.
Disabled - the current enabled state of the menu entry.
Wraps - whether the control value should wrap around when it has reached its maximum or minimum.
Not all menu entries correspond to controls. There are those that only impart structure to the menu set. Note:

RollCall Control Panel
Page 28
Open Duplicate This opens a duplicate template for the currently selected unit..
Save Saves the state of the currently selected unit..
Pressing the Save button saves the unit state to the default backup folder.
Alternatively, use the Save To function to save the state of the unit to a named file in a selected directory.
RollCall Control Panel
Page 29
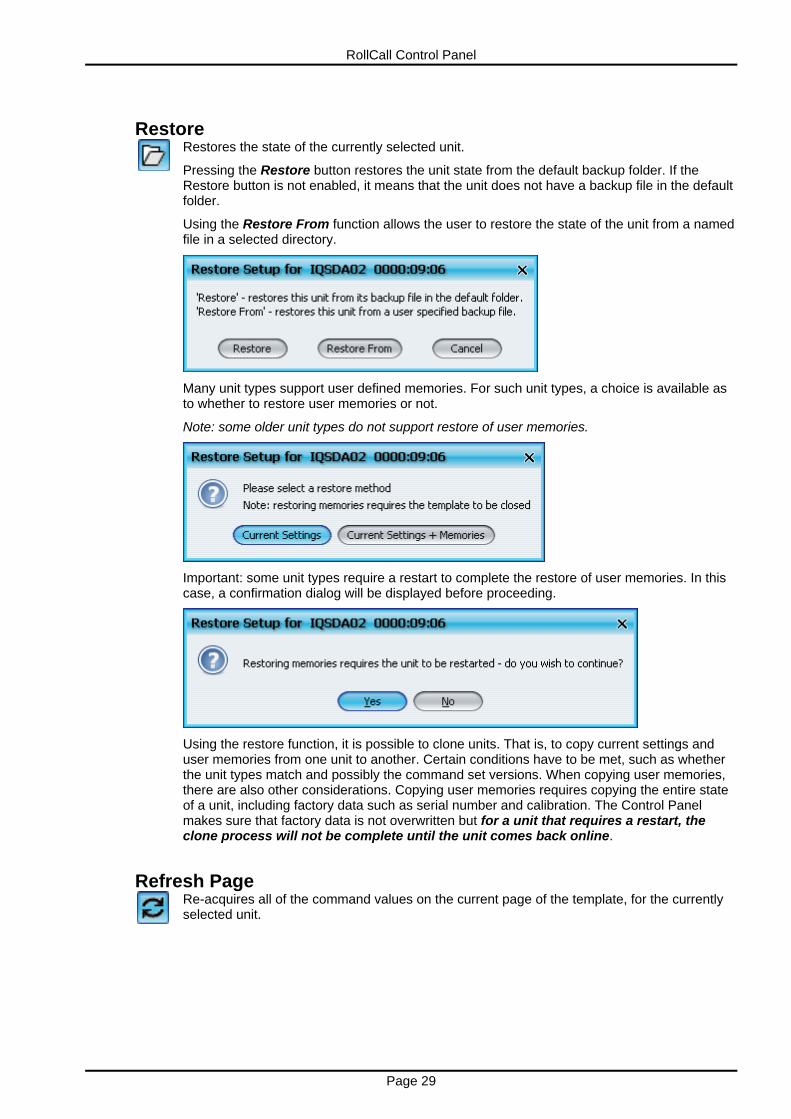
Restore Restores the state of the currently selected unit.
Pressing the Restore button restores the unit state from the default backup folder. If the Restore button is not enabled, it means that the unit does not have a backup file in the default folder.
Using the Restore From function allows the user to restore the state of the unit from a named file in a selected directory.
Many unit types support user defined memories. For such unit types, a choice is available as to whether to restore user memories or not.
Note: some older unit types do not support restore of user memories.
Important: some unit types require a restart to complete the restore of user memories. In this case, a confirmation dialog will be displayed before proceeding.
Using the restore function, it is possible to clone units. That is, to copy current settings and user memories from one unit to another. Certain conditions have to be met, such as whether the unit types match and possibly the command set versions. When copying user memories, there are also other considerations. Copying user memories requires copying the entire state of a unit, including factory data such as serial number and calibration. The Control Panel makes sure that factory data is not overwritten but for a unit that requires a restart, the clone process will not be complete until the unit comes back online.
Refresh Page Re-acquires all of the command values on the current page of the template, for the currently selected unit.