Embed Size (px)
Citation preview
PERFORMANCE DRIVING SCHOOL STUDENT MANUAL
Revised 07/07 Copyright © 2007 RMC BMW CCA
CONTENTS PAGE
PREPARING FOR THE EVENT..........................................................2AT THE TRACK (RULES)....................................................................5EVENT DAY CHECKLIST....................................................................8PERFORMANCE DRIVING PRIMER..................................................9DRIVING SCHOOL INITIAL EXERCISE............................................14CLASSROOM COURSE OUTLINE...................................................15TRACK PRACTICE ON THE STREET..............................................20
Revised 07/07 Copyright © 2007 RMC BMW CCA

Revised 07/07 Copyright © 2007 RMC BMW CCA
If this is your first RMC BMW CCA driving school, there is a lot of information in this manual that will enhance your learning at the driving school. Read it all, but don’t expect to absorb everything. It helps to read it again after the school to reinforce what you experienced at the track. For those students who have been to one of our schools before, it never hurts to review. The manual is periodically revised to include new information.
RMC BMW CCADRIVING SCHOOL STUDENT MANUAL
PREPARING FOR THE EVENT
VEHICLE SAFETY INSPECTION - Included in the driving school packet of information you download from the club website (www.rmcbmwcca.org) is a tech inspection form. It is your responsibility to have your car inspected by a qualified mechanic according to the guidelines on the form. Both you and your inspector must complete the form, sign and date it.Our tech inspection is a comprehensive technical inspection related to the safety and mechanical integrity of your vehicle. Any vehicle deemed unfit for track use will not be permitted to run. The following is a list of items, which will be checked, and a few guidelines that will help you prepare your car.
Participants should be aware that track driving puts stresses on drive line, chassis, and brakes that aren't normally encountered in day-to-day street driving. You do not want one of these parts to break in the middle of a high-speed corner at the track. The results could be disastrous for your car and you.
In most of the areas covered below, a visual inspection is all that is needed, but BE THOROUGH. This is not time-consuming, and is inexpensive insurance for your safety. These guidelines are written for BMW owners but, with few exceptions, will be applicable for owners of all cars. If something seems questionable, talk to your mechanic or a club member about the problem.
There will also be a trackside vehicle spot check of some or all vehicles. If your car is determined to be unfit for the school, you will not be allowed to drive that vehicle. Please bring a clean, safe vehicle to the track.
Regardless of the results of the Vehicle Safety Inspection of your vehicle by a mechanic or the Rocky Mountain Chapter, the final responsibility is the driver’s to be sure the vehicle is in mechanically sound condition and safe to drive on the track.
TIRES AND RIMS - Visually check all tire sidewalls, inside and outside for signs of age, cracking or curb scrubs that have damaged the sidewall integrity. Run your hand over the surface of the tread checking for any bulges or belts popping to the surface. Potholes are notorious for causing this type of damage. Tread depth must be 3/32-inch minimum. Remove the hubcaps and check the wheels for stress cracks. Wheels rarely crack, but it has happened before, so this is a good check. If cracks are going to appear, they usually are at the center of the wheel around the lug nuts or at the seam where the center of the wheel (i.e., the spokes) meets the outer part of the wheel. This rule applies to alloy and steel wheels. While you are checking these, make sure you have cotter pins on the rear brake drum hub nuts. Last but not least, tighten all wheel lug nuts to manufacturer’s recommendation.
If you have any of the above warning signs, remember that your wheels and tires are your only link to the road. Tire pressures should be increased for track driving (with street tires) so it's a good idea to stop at a gas station on the way to the track and inflate all tires to about 40 psi, then adjust pressures at the track. There will usually be a compressor at the track but there can be a long line waiting for its use.
BRAKES - Brakes are of paramount importance at a track event. Check the pads, and if they are worn more than 1/4 from new, replace them. Many people have come to these events with new pads and gone home with pads worn down to the metal backing. This, of course, depends on the driver and the speeds being carried, but replacing a brake pad or shoe is easier and less expensive than replacing a rotor or drum scored by a worn out pad. Check rotors for overall thickness and replace if under-spec.
Revised 07/07 Copyright © 2007 RMC BMW CCA
RMC BMW CCA Driving School Student Manual
IT IS IMPERATIVE THAT YOU BLEED YOUR BRAKES BEFORE COMING TO THE TRACK. This does two things. First, it purges the system of any air, and second, it is an opportunity to change your brake fluid. This is very important because old fluid performs poorly under hard braking (brake fluid is hygroscopic – it absorbs water and becomes more compressible and boils easier). Clear fluid will be black at the end of a track weekend. Use a high quality fluid, DOT 4 rated, and completely bleed old fluid. This, like oil, should be changed before and after a track event. Dirty fluid like dirty oil causes undue wear on your braking system's moving parts. This is a good practice once a year even for those who do not participate in track events. It is amazing how much better the brakes will perform with clean fluid. Aftermarket brake dust shields must be removed, as they do not allow proper brake cooling for track driving.
SEATBELTS/HARNESSES - Those supplied with newer cars are adequate. A minimum of a three-point (the standard in newer cars) belt is required for the school. Weak, frayed, stained or brittle belts must be replaced. Check that the inertia reels lock while braking. Also check to make sure the attachment points aren't so rusted that they might pull out.
If you plan on doing this type of driving frequently, consider buying an approved competition harness set, which includes lap belt, sub belt and shoulder harness belts. If you upgrade your seat belt, you must upgrade the passenger side as well with an equivalent (e.g. if four-point on driver’s side then must have four or higher point on passenger side, if five or higher point on driver’s side then must have at least five-point on passenger side). Four point harnesses that do not have an anti-submarine feature are NOT recommended. Some instructors do not like to use harnesses in a street car, so try to leave your stock 3 point seatbelts available.
It is recommended, but not required, to have at least a rollbar if you use harnesses.
SEATS - Check seats at the attachment points to make sure they are secure. The seat back should feel strong.
If you plan on doing this type of driving frequently, consider installing competition seats with higher side bolsters and possibly a non-reclining seatback. It is recommended, but not required, that you provide an equivalent seat on the passenger side. Some instructors do not like to ride in a stock seat when the driver has a competition seat so this might slow down gridding and getting onto the track.
ENGINE, RADIATOR AND BATTERY - BMW builds its engines well enough that they will run perfectly at track outings without any problems or undue wear if a few simple rules are followed. Change the oil and filter before and after each event. Operating temperatures sometimes run slightly hotter than normal, so the oil breaks down more quickly. Check all hoses, clamps and belts for wear or cracking. It would be a shame to miss track time due to a simple cracked hose. Check return springs on the throttle linkage, working the linkage through its full motion.
If the radiator is questionable or leaking, have it repaired. Track officials are very strict about not letting any slippery liquids drip on the track surface as fluids on the track are a hazard to other cars. Check the water pump by grabbing the impeller shaft and moving it from side to side. If there seems to be excessive play, have it checked. Make sure the fan is tight.
Check the motor mounts. To check these, grab the valve cover and move the engine from side to side. If movement seems excessive, visually inspect the motor mount rubber and metal brackets for cracking. A good tune-up is optional but good insurance for a well running car. Another thing to consider is a valve adjustment. If you can't do it, it is an inexpensive thing to have done at a garage.
Check the battery to be sure it is fastened down properly. It's amazing how many people overlook this point. In a slalom exercise, a loose battery in the engine compartment could easily end up in the fan.
If your car has 50,000 miles or more, you might want to consider changing transmission and differential oil if it has never been changed before. One final point is the gas tank. Spilled fluids are bad for asphalt and traction, so check the gas tank for leaks and make sure the gas cap is tight and has a good gasket.
CHASSIS/SUSPENSION - There are a few suspension and chassis-related problems that appear repeatedly in older cars, especially 2002s. Many have loose front wheel bearings. To check these, be sure the lug nuts are tight, then jack the front of the car up and set it on jack stands so that it is safe to crawl under. Grab the front tire firmly at the top and bottom and pull first the top, then the bottom. If there is play, it needs to be adjusted. If you
Revised 07/07 2
RMC BMW CCA Driving School Student Manual
know how, remove the grease cap and try to tighten the bearing to adjust the play out; if you don't, have someone do it for you. Over tightening can do as much damage as a bearing that is too loose. Another good check is to check the bearings for the amount of grease on them. If the grease looks sparse, have them repacked and adjusted. If the bearings are worn, replace them.
While the car is jacked up, you can also check the steering linkage. To do this, you will need two people. Have someone hold the steering wheel firmly while you grab one tire and move it quickly from left to right. If the movement is transmitted to the steering wheel without any play, everything is fine. If there is play, keep moving the wheel while visually inspecting tie rod ends and idler arms. If any of these parts have play, replace them. If the rack-and-pinion has play, have it checked. If the steering gearbox on non-rack-and-pinion cars has play, take it to your mechanic. In some cases, these can be adjusted to take out some play.
Now you should visually inspect the exhaust system for any loose pieces that might be about to fall off. Check all U-joints and CV joints on the drive shaft and rear axle half shafts by turning the shaft clockwise, then counterclockwise while watching for any play at the joint. These should not have any play in them. While under the car, check the rubber transmission mounts for cracking. Check the drive shaft guibo and center support bearing for cracking.
Check all frame members and rear control arms for structural integrity. While checking for rust, check all four upper shock mounts to make sure rust damage isn't going to pop the shocks loose during hard cornering. Check shocks for wear by bouncing the car at each end. When you stop pushing on the car, if it doesn't stop immediately, the shocks are worn.
INTERIOR AND LIGHTS - Check all lights, especially the brake lights. We don't want another car not to see them under hard braking. Make sure lenses are clean; older cars tend to get road dirt buildup inside the light housings. If those are dirty, take the lenses off and wash them. In the interior, check the rubber pedal pads to make sure they aren't going to fall off or your feet aren't going to slip off them at a bad moment. If they look bad, replace them - they are very inexpensive. Push the accelerator to the floor a few times and let it return. Make sure there is no binding in its action.
Before coming to the track, remove extraneous items from the interior and trunk. When you arrive at the track, remove EVERYTHING from the trunk and EVERYTHING from the interior of the car including the contents of the door pockets, glove box, under the seats, floor mats and anything attached to the visor. The reason for this is very simple. When you are concentrating on driving your car, you don't want something banging around in your trunk distracting you, or worse, something sliding under your feet and possibly tangling up the pedals.
Also make sure your windshield has no major cracks in it.
This may seem like a lot of trouble for a few hours on the track, but at the track is where you don't want these parts to break.
HELMET - Snell approved (M or SA), 2000 or newer. The Snell label is inside the helmet under the pads. To quote a profound advertising slogan, "If you have a ten dollar head, buy a ten dollar helmet." Use a racing or motorcycle helmet in good condition. If you have an extra helmet, put your name on it and bring it along. Extras are always welcomed. The availability of loaner helmets is not guaranteed.
CLOTHING - comfortable, well-fitting garments are recommended. Driving in sandals, bulky or loose fitting footwear or bare feet is prohibited. Long pants are recommended regardless of the temperature. All clothing should be cotton, not nylon or other synthetic materials which would melt to your skin in the event of fire.
DRIVING GLOVES - Driving gloves are optional, however, they are recommended because they may help if your steering wheel is slippery and your palms wet, especially for non-leather steering wheels.
SHOES - Choose a good sneaker or street shoe with a thin, flat rubber or crepe sole.
MISCELLANEOUS THINGS TO BRING - Here are a few things to bring that will help make your day more enjoyable. For the car: glass cleaner, a quart of oil, rags, a battery operated air compressor, a tire gauge, a tarp to put all the stuff you took out on (and cover it up if it rains), and some basic tools. For you: a change of clothes,
Revised 07/07 3
RMC BMW CCA Driving School Student Manual
sunscreen and lip balm, plenty of water to drink, a cooler, folding chairs, a shade canopy, a camera, and friends to enjoy the driving with (ask them to help work corners!). Make sure you arrive with a full tank of gas. Air and water are available at the track, but not fuel. Lunch will be available from the snack bar. Please note that you will not have enough time to go out for lunch.
The school is a lot of fun and very worthwhile. These suggestions will continue to enhance the safety record of the Rocky Mountain Chapter Driving Schools. If you aren't a driving school enthusiast, all these checks are excellent for everyday driving. Complete this routine once a year to catch problems before they happen.
Revised 07/07 4
RMC BMW CCA Driving School Student Manual
AT THE TRACK (RULES)
KNOW THE FLAGSAs you circulate the track, you will notice at strategic points, corner workers and flags (the first time on the track, pay special attention to the location of each flag station – wave at them on the yellow flag outlap). These corner workers are there for your safety and are to be obeyed and treated with respect. After all, they are looking out for YOU. Another way of looking at it is from a street point of view. The corner workers are traffic cops. What they instruct you to do with their flags or otherwise while on the course MUST be obeyed. PAY ATTENTION TO THE FLAGS DISPLAYED THROUGHOUT THIS DRIVING SCHOOL. Repeated failure to obey the flags can be grounds for expulsion from the school at the discretion of event officials. The basic flags that we will be using are green, yellow, red, black and checkered.
GREEN FLAG - The green flag indicates that the track session is in progress and there are no problems on the track. This will be displayed only at the start/finish tower.
YELLOW FLAG - The yellow flag indicates trouble (an unsafe condition on or near the track or debris on the track) in the vicinity of where it is displayed. It will also be displayed during warm-up laps. You should slow down and be ready to stop or avoid the situation. Keep in mind that the car behind you may not have seen the flag yet, so do not slam on the brakes. Check your mirrors and brake safely. If the yellow flag is being waved rapidly, you should expect that there is an obstruction on the track ahead. Passing is prohibited while the yellow flag is displayed.
RED FLAG - A red flag indicates a serious or critical condition on or near the track--the track may be blocked. You may have to stop or drive around the incident, therefore, quickly slow to a safe speed and be alert to the incident, the corner workers or safety crew attending the incident and the other cars on the track. DO NOT STOP AT THE INCIDENT. The trained safety crew will already have been dispatched. Anytime the red flag is used, it will be displayed at all corner stations. It also indicates that the session has been stopped. You should continue to drive around the track at a slow, safe speed and enter the pits to wait while the incident is addressed. Once the incident has been cleared, the session will be restarted if appropriate.
BLACK FLAG - The black flag is a warning to a particular driver. This flag will be pointed at the driver when passing the tower or a designated corner (you will be told which one in the morning meeting). The designated driver should acknowledge with a hand signal or headlight flash. Once acknowledged, proceed around the track and exit into the hot pit area (not the paddock) where you will meet the steward and discuss the problem. Do not stop on the track. The black flag may indicate either mechanical trouble or incorrect driving procedures have been observed. Failure to respond to a black flag may result in expulsion from the event at the discretion of the event officials.
CHECKERED FLAG - At the conclusion of a session, the checkered flag is displayed at the main tower. After receiving the checkered flag, proceed around the track at a reduced rate of speed to allow the car to cool down. Try to drive a perfect Line to further develop this habit. It is customary to wave to the corner workers so they know that you have seen them and appreciate their help. Slow down and signal that you are exiting the track (raise your fist out the window) and enter the pit lane slowly and proceed into the paddock (at some tracks you enter the paddock directly). The pit lane speed limit is 5 mph. Return to your parking place to let the instructor out. If you stop at the paddock entrance, you run the risk of being rear-ended. Also, don’t keep your foot on the brakes, or set your parking brake as it might cause rotor warp (unequal cooling).
Pay careful attention to the flagging instructions you are given. Failure to comply with a flag instruction may result in expulsion from the event at the discretion of event officials.
Revised 07/07 5
RMC BMW CCA Driving School Student Manual
IMPORTANT - Although we do not anticipate any incident during the event, should one occur, the red flag will be displayed at all corners. Remain calm. DO NOT STOP. The trained safety crew will have already been dispatched. Continue at a reduced rate of speed and pull into the pits to wait while the incident is addressed. DO NOT make any sudden moves that might jeopardize you or the drivers following you.
HAND SIGNALSPassing: Slower cars will signal faster cars to pass at designated areas of the track. The passing signal is – Driver’s left arm raised out the window, fingers pointing to the passenger side of the car. The car being passed holds the line and is passed on the right.
Return to Pits: Use this signal when returning to the pits from the track for any reason. The signal is - Driver’s left arm raised out the window, hand making a fist. Avoid slowing down too much before you give the signal to avoid being rear-ended.
Corner Workers: To acknowledge the signals of corner workers the signal is – a wave of the hand. This is your acknowledgement of signals for:
Yes, I see the black flag and will return to the hot pit to talk to the steward. Yes, I see the checkered flag and will return to the pits after the cool-down lap. We are OK, (after going off the course and stalling the car) and will wait for your signal to return to the
track. Thank you to the corner workers, for being there and keeping you safe, as you drive the cool-down lap.
DRIVING RULES AND TIPSSafety is the most important item for the day. Anyone deemed to be driving in an unsafe manner is subject to expulsion. NO RACING! If it starts to rain, slow down to a speed below which you know you can drive safely in the wet. Check the condition of your brakes, tires, and lug nuts frequently. Check oil level before each driving session. You should bring an adequate supply of oil with you. Check your activity schedule and line up on the grid on time - ten minutes before your track time.
The first track session for each run group will be at reduced speeds run under the yellow flag. The yellow flag means NO PASSING. Your objective during the first session is to get comfortable in the car, learn the course and observe the flag stations.
Concentrate on being smooth and taking the right line. Do not try for speed! If you have the right line, your speed will come naturally. If you try for speed first, you will probably find yourself taking a bad line and being a hazard to both yourself and other drivers. Instructors are much more impressed by smoothness and consistency than speed.
If something starts to feel “not quite right”, exit the track and get it checked out.
PASSING RULES Pass only in designated passing zones (these will be identified in the morning driver’s meeting). Be sure you have plenty of time to complete the pass before the next turn. Do not try to pass near the end of the straight. Watch your mirrors! The driver of the car being overtaken must signal when he wants a faster car to pass. If the car being overtaken fails to indicate a passing signal, the faster car may flash its headlights to draw the attention of the slower driver. DO NOT TAILGATE! The obligation for a safe passing maneuver falls primarily on the passing car; however, the car being passed should never do anything unexpected to interfere. Do not block faster cars. The car being passed stays on line and the car passing passes on the right. The car being passed should slow down slightly to let the car pass safely.
Don't group together. If you find yourself running in a group, slow down for a lap or two and let cars pass to disperse the group. In that way, you can concentrate on your own driving and won't have to worry about how close the other driver is all the time.
Revised 07/07 6
RMC BMW CCA Driving School Student Manual
PIT ENTRANCE AND EXITIf you want to enter the track after the start of the session, pull to the end of the pit lane and wait to be signaled onto the track. Stay to the entrance side of the track, the same as you would a highway onramp, as you accelerate up to speed. Use your mirrors to see if you are being overtaken before you move into traffic.
When you want to pull into the pits, signal as soon as you come out of the last corner before the pit entrance. Stay all the way over to the side of the track and pull into the pit lane slowly (at some tracks you enter the paddock directly). A 5-mph speed limit on the pit lane is strictly enforced.
MINORSMinors are not allowed in any of the “hot” parts of the track property. Ensure that they are properly supervised in the paddock when you are on-track or in the classroom. Wheeled toys (e.g. roller skates, skateboard, scooter, ATV) are not allowed in the paddock.
INSTRUCTORSYour instructors are experienced in performance driving. Many of them have obtained competition racing licenses and have driven hundreds of laps around the course at speeds and cornering limits above those which you will experience during your driving sessions. Your instructors will be most impressed by smooth driving and following the proper line. They know that these techniques will result in safe driving. They have been instructed to try to keep you from getting in over your head and may ask you to slow down so that you can better follow the line. LISTEN TO THEM!
Instructors will be available in the grid area. They are to be dropped off and driver changes made only in the pit/paddock area. Instructors are mandatory for everyone driving on the track. They may make recommendations to the Chief Instructor concerning any student whose driving is deemed unsafe. Students are encouraged to contact the Chief Instructor and comment on instructors’ performance. Feel free to ask for a different instructor at anytime - simply pull into the pit area and indicate you'd appreciate another perspective.
You may wish to ask an instructor to drive your car to demonstrate techniques to you. You can learn a lot from this experience but are not required to do this and should not feel any obligation to do so. The instructor will drive smoothly and under control, not abusing your vehicle in any way. Your instructors are given track time during the day, and will be pleased to take you as a passenger in their vehicles. This can be a very informative and exhilarating experience.
Revised 07/07 7
RMC BMW CCA Driving School Student Manual
EVENT DAY CHECKLIST
Sign in: Stop at the entry gate control point to check in and sign the waiver. Everyone in the car must sign the waiver and will get a wristband when this is done. Hand in your tech inspection and medical forms (available for download at the chapter web site: www.rmcbmwcca.org) here and get a sticker on your window. You will get a schedule and run-group assignment list and have your car number/group written on your side windows.
In the Paddock: Find a place to park, empty everything loose from the car and trunk, including loose change in the ashtray and things in the glovebox. Remove any hubcaps or trim rings. A properly secured spare tire may remain in the car if you choose.
If you have street tires and haven’t yet raised the pressure, do it now. There is usually a compressor in the paddock for this use if you haven’t brought your own. Clean your front & back windows with glass cleaner. There will be less glare & you will be able to see your reference points easier. Fasten any unused seatbelts so the buckles don’t fly around.
Be ready for the 8 AM drivers' meeting. This is the most important meeting of the day – don’t be late! There will also be a driver’s meeting immediately after lunch.
Before EACH driving session:1) Check wheel lug nut tightness (but not while hot).2) Check the tire pressure. Note: Tires are expected to heat up and cause the pressure to increase by 4-5 lb.
Adjust the tire pressures before running, not just after.3) Check the oil level. Note: Oil is often foamy just after you have run, and yields incorrect readings.4) Look under the hood for a general check.5) Close your sunroof and open your front windows (mandatory, even when raining).6) Think about what you are going to practice in the upcoming session. Discuss this with your instructor.7) Relax!
GENERAL REMINDERSBe in the staging area (grid) and ready to go 10 minutes before run time. Before your first session, tech inspectors may check your helmet, check your lug nut tightness, and spot-check your car.
Be standing by your car, helmet on, and engine warm 5 minutes before run time.
The first lap of each session will be run under a yellow flag. Take time to warm up your tires, engine and your brain - concentrate on smoothness and driving the Line.
Know the flags and watch the flagging stations. Take their advice; it may save you a lot of grief around the next corner. Acknowledge any flag signal given with a single wave of your hand or an exaggerated nod of the head.
Don't tailgate the car in front of you; you can't concentrate on your own driving if you are worrying about their’s. Conversely, at the first allowed passing zone opportunity, give a point-by signal to a closely following car and slow down a bit to allow them to pass – you should stay on Line.
Drive your own line; don't follow someone else's mistakes. Don’t fixate on the rear of the car in front of you.
Keep your hands and arms inside the vehicle at all times, except when signaling a point-by or your intention to exit the track.
In the event of rain, don’t be concerned – just slow down to at least half your normal speed. The oil and rubber on the track mixes with water and makes things very slippery until the track gets washed off. Speed can be increased as you become comfortable with the track conditions. A wet track will show who is smooth and consistent and who is not. It's a great teacher; respect it and learn from it.
Revised 07/07 8
RMC BMW CCA Driving School Student Manual
When you come off the track after a run, don’t use the parking brake. That will trap the heat resulting in unequal cooling and that could cause your rotors to warp. Keep the engine running for a couple of minutes with the hood up (but watch for wind gusts). This will allow your engine to cool down & help circulate the hot fluids.
Revised 07/07 9

RMC BMW CCA Driving School Student Manual
PERFORMANCE DRIVING PRIMER
There are few thrills in life that rivals that of performance driving. Yet, enjoyable as it may be, the dangers are many and the risks high. The following material is designed to familiarize you with the proper techniques of performance driving. Understanding these fundamentals will make the total driving experience safer and more satisfying.
A GOOD TUNE-UP - During the driving school, you will be placing much more stress on your car than during the typical supermarket run. A well-tuned car will perform better and will definitely result in a more pleasurable experience for the driver. It is recommended that you top off the oil system at the track the day you plan to run to insure an adequate supply during hard cornering. You might want to overfill the oil supply by half a quart if you plan to drive very hard. Oil supplements and racing grade oils will not be necessary. All entrants should bring extra oil to the track.
TIRES AND TIRE PRESSURE - Tires are, in most cases, the single most important factor in determining a car's cornering capabilities. Having good tires, properly balanced and mounted on good rims, will increase your car's handling potential. All steering, cornering and braking forces are transferred to the vehicle through the four contact patches, possibly less than two square feet of rubber. A driving school demands a lot from your tires and you can expect to observe noticeable wear. You can minimize this wear, however, by driving smoothly and sensibly without locking the wheels under braking. If your tires are squealing in turns or you can hear them complaining, you are driving incorrectly. Slow down and get on the proper line.
For the performance driving you will be doing, you should inflate your tire to pressures above those normally used on the highway. With higher pressures, the tires will be able to generate higher cornering forces and will not roll onto their sidewalls during cornering. Recommended cold tire pressures are 38-40 psi in the front and 36-38 psi in the rear. Tighten lug nuts before the first run of the day. The use of a torque wrench is advised, particularly for alloy wheels. Do not tighten lug nuts after a session on the track while they're still hot. This will result in over tightening when they cool.
MALFUNCTIONS - If you feel you may have a malfunction in your car, get some knowledgeable assistance, preferably from the tech inspectors. Don't go out on the track to see if your perceptions were accurate; you may be sorry you didn't investigate first. There will be plenty of very knowledgeable people around who will gladly help you.
CONDITIONING - Performance driving demands total concentration, split second timing, and fully coordinated muscle involvement. If a driver is bothered with muscle aches and pains, is uncomfortable, or overly tired, it is impossible to perform at the maximum. You should make sure you get a good night's sleep, eat a good breakfast and lunch, and drink lots of fluids (e.g. water, Gatorade, etc.) to keep yourself hydrated. Know your limits: if you start to become fatigued, pull in and rest. A tired driver makes mistakes and is a hazard to himself and others. To drive at high speeds in a safe and controlled manner, everything has to be tuned for maximum performance - that includes the driver.
For obvious reasons no alcohol or other drugs (including antihistamines or other drugs that make you drowsy) should be consumed immediately prior to or during the event. Use of these substances will result in immediate ejection from the event. SEATS – You need to be firmly planted in your seat to feel the feedback through the car. Check seats at the attachment points to make sure they are secure. The seat back should feel strong.
If you plan on doing this type of driving frequently, consider installing competition seats with higher side bolsters and possibly a non-reclining seatback. It is recommended, but not required, that you provide an equivalent seat on the passenger side. Some instructors do not like to ride in a stock seat when the driver has a competition seat so this might slow down gridding and getting onto the track. Some instructors do not like to ride in a competition seat in a car without at least a roll bar.
Revised 07/07 10
RMC BMW CCA Driving School Student Manual
SEAT BELTS - Those supplied with newer cars are adequate. A minimum of a three-point (standard in newer cars) belt is required for the school. Weak, frayed, stained or brittle belts must be replaced. If you plan on doing this type of driving frequently, consider buying an approved competition belt (harness set), which includes lap belt and shoulder harness. If you upgrade your seat belt, you must upgrade the passenger side as well with equivalent (e.g. four point on driver’s side, four or higher point on passenger side, five or higher point on driver’s side, at least five point on passenger side). Four point belts are strongly not recommended unless they have a built-in anti-submarine feature. If you install harnesses, try to leave the stock three-point belts in place as some instructors prefer these over harnesses in a car without a roll bar.
VEHICLE CONTROLThe objective of the driving school is to provide you instruction on how to drive your vehicle safely at speeds and acceleration levels above those normally encountered during "normal" highway driving. We expect you will find this instructional session enjoyable and exhilarating. You will learn to control your vehicle and will better understand the capabilities and limitations of your vehicle. In fact, you probably will be amazed at the capabilities of your vehicle if it is driven properly. Most importantly, we hope this training will allow you to get maximum enjoyment from your vehicle and prepare you to cope with emergency situations that may arise while driving on public highways. After participating in this school, you probably will wish that everyone driving on public highways had similar training.
The main theme, which will be stressed during your day at the school, is vehicle control by you, the driver. This will be achieved by smoothness, consistency, and concentration. The driving techniques you learn should be executed smoothly and consistently. To accomplish this, you will have to concentrate totally every second you are driving your vehicle. Hopefully, you will carry this approach away from the school and apply it to your everyday driving. You will be learning new habits and unlearning some old habits and this requires focus and repeated practice until the new habit “sticks” (this usually takes several weeks).
Some of the important concepts and techniques which will be discussed by instructors during the classroom sessions and while they are with you in your vehicle are highlighted in the following paragraphs.
DRIVING POSITIONSit in the seat by pressing into it, don't just sit on it. Adjust the position of the seat (and wheel if possible) so you can freely move your feet between the pedals with clearance under the wheel and so that your arms are bent when your hands are placed at the 3 o'clock and 9 o'clock positions. Check that you can completely reach all positions on the steering wheel and all gears without leaning forward from your seated position (with your shoulders pressed against the seat, your wrist should be able to touch the top of the steering wheel). Make sure you can push all pedals to the floor without difficulty. Adjust your seat belt as tightly as possible and confirm you can still go through the required motions. For optimum vehicle control, a tight belt is essential. (You may wish to recline the back of the seat, lean back, pull the belt tight, lean forward against the belt to keep it tight and then raise the seat back against your back. A product called the “CG-Lock” on your belts can also help with this)
TURNING THE WHEELExcept when shifting, you are expected to keep both hands on the steering wheel at all times. For maximum car control, your hands should be positioned at or near the 3 o'clock and 9 o'clock positions as much as possible, even through a turn. If you are going to travel through a turn which requires more than 1/4 turn of the wheel, you should position your hands before entering a turn so that they will be in these positions during the turn. In no situation should you ever cross your arms. The following sequence describes how you should move your hands to travel through a tight right hand turn which requires about one half turn of the steering wheel.
1) Just before entering the turn, quickly move your right hand from the 3 o'clock position to the 10 o'clock position while firmly holding the wheel with your left hand at the 9 o'clock position. Immediately slide your left hand to the 4 o'clock position. (This whole sequence should take less than a second.) You will always have at least one hand gripping the wheel.
2) Gradually and smoothly turn the wheel clockwise one half turn to execute the right hand turn.
Revised 07/07 11
RMC BMW CCA Driving School Student Manual
3) Hold the wheel through the turn with your right hand at or near the 3 o'clock position and your left hand at or near the 9 o'clock position. With your hands in these positions, you have maximum ability to adjust the position of the wheel in response to disturbances such as bumps or tire slippage.
4) Just before exiting the turn, quickly move your left hand from its current position to its original position on the wheel and then immediately move your right hand to its original position. (Again this should take less than a second.)
5) Gradually and smoothly, turn the wheel counterclockwise back to its original straight-ahead position. (Note: properly exiting the turn requires a deliberate unwinding of the wheel. This is a difficult technique for the novice to learn and one that is very important for a smooth exit from the turn while applying power.)
This procedure can be repeated back-to-back on very tight turns requiring more than 1/2 turn. UNDER NO CIRCUMSTANCES SHOULD YOU EVER LET GO OF THE WHEEL COMPLETELY WITH BOTH HANDS. Practice this procedure several times right now by closing your eyes and visualizing yourself in your vehicle at speed approaching and traveling through a tight right hand turn. Try this also for a tight left hand turn, for which the first hand movement is for you to move the left hand to the 2 o'clock position. Continue to practice in your car before coming to the track.
OVERSTEER AND UNDERSTEEROversteer is the term used to describe the situation in which a vehicle tends to turn more sharply than intended for the amount the steering wheel is turned - the tail gets loose and feels like it wants to come around to the front. This is usually caused by more traction at the front of the vehicle than at the rear, possibly because of spinning or sliding rear tires due to too much throttle or locked rear wheels due to too much braking. Oversteer can be corrected by reducing brake pedal pressure to unlock the rear wheels and/or applying steering input in the direction the rear of the car is sliding (as you would on ice in a skid) and/or by reducing throttle.
Understeer is the term used to describe the situation in which a vehicle tends to turn less sharply than intended, resulting in driving off the outside of the turn. Understeer is often described as "plowing." This situation may be caused by locked front wheels. Understeer can be corrected by reducing brake pedal pressure to unlock the wheels or easing off the throttle to transfer weight to the front tires (or to stop them from spinning on a front-wheel-drive car).
SHIFTINGTreat the gearshift, linkage and transmission with respect, as if they were made of glass. Don't force anything. Move the lever smoothly and deliberately through the shift pattern with your fingers and palm of your hand. Speed shifting, power shifting and slamming the lever from gear to gear are ineffective and can be very expensive.
Downshifting for a turn should be executed before entering the turn. This will preclude upsetting the balance of the car caused by depressing and releasing the clutch for a lower gear in the turn and will allow you to apply power in the lower gear as soon as possible to exit the turn. Unless you have revved the engine while the clutch is depressed, releasing the clutch after shifting to the lower gear will cause the engine to come up to speed abruptly. This may tend to cause the rear wheels to briefly lock up and will have the effect of additional braking from the rear wheels. This can be very upsetting to the balance of the car if it occurs in a turn. The techniques of "double clutching” and "heel and toe" eliminate these problems. They take practice and will not be taught in depth at the school. If you desire to learn these very effective methods for smoothly braking, downshifting and accelerating through a turn, ask an instructor for a special session. You can practice and apply these techniques everyday until they become a habit. Double-clutching is not generally needed in modern cars.
BRAKINGBrakes on a typical street vehicle can decelerate the vehicle much more quickly than the engine can accelerate it. Perhaps the most noticeable difference between what we experience during normal highway driving and the driving you will be doing during the driving school is the level of braking entering a turn and the repetition of this level as you circulate around the track. Your brakes may get hot and begin to fade (more about this later).
Revised 07/07 12
RMC BMW CCA Driving School Student Manual
This situation is referred to as "threshold braking." Locked wheels during braking are to be avoided. Not only is this less effective, but it will flat-spot your tires and potentially ruin them. Proper maximum braking results in just a faint squeal from the tires, not a loud screech. If you have ABS, the system will induce this situation for you. Without ABS, if you do lock a wheel, you should reduce pedal pressure slightly until the wheel unlocks and then reapply pressure.
In a panic situation on the highway, you will probably slam on the brakes in reaction to the situation. (With the front wheels locked, you cannot steer the vehicle because a sliding tire is just a hunk of rubber that has no preference for direction.) In a panic, don't hesitate to stand on the brake pedal. Hopefully, you will be able to slow down enough to eventually back off enough to unlock the wheels and steer if necessary. ABS does this automatically to maintain some steering control.
On the track or highway when approaching a corner, however, you are in a controlled situation. Initiate braking early enough so you DO NOT HAVE TO SLAM ON THE BRAKES. Instead, squeeze the brakes on, gradually building pressure until the wheels are on the threshold or at a lower level at which you feel comfortable. This allows vehicle weight to be transferred to the front tires, providing more down force and therefore allows them to generate more braking force.
Braking should be done as much as possible in a straight line when approaching a turn. If the tires are braking at or near the braking threshold, they cannot be expected to do even more work of turning the car. One objective of performance driving is to provide a smooth transition from braking for the turn and turning into the turn. Ideally, after maximum braking on the straight, the brakes should be gradually released as turning of the steering wheel is initiated. This keeps the loading on the front tire on the outside of the turn constant and avoids rocking of the vehicle on the suspension that would disturb the balance of the vehicle. The term "trail braking" is used to refer to the technique of gradually reducing braking force (trailing off the braking) and perhaps even keeping the brakes on slightly longer than necessary. It will cause the rear end of the car to come around slightly (oversteer) so that power can be applied sooner. Trail braking is particularly effective with front wheel drive cars that inherently understeer with the application of power.
Pay attention to the mark where you start braking. If you feel that you could have braked later, move the braking point incrementally (not dramatically) the next time around.
In performance driving, you should use the brakes hard for as brief a time as possible without locking the wheels. This allows air to cool the brakes as much as possible while the brakes are released. Because you will be braking hard and often, your brakes may get hot and start to fade as evidenced by a spongy or soft pedal that requires more and more pressure. (This is why good pads and fresh fluid are so important.) Be very alert to this situation. Slow down or come into the pits to let your brakes cool. During the last lap, at the end of the session on the track, slow down enough so you don't have to use your brakes allowing them to cool. When you do stop, park the car in gear and do not set your handbrake so the brakes can cool without warping drums and rotors.
THE PROPER LINEA general technique used in performance driving is to take the path of maximum possible radius through every turn. This yields the fastest speed through the turn. However, the high performance driver is interested in not just the maximum speed through a particular turn, but the safest, most comfortable minimum time and maximum speed through a section of highway or around a track. Because of particular characteristics of the track, this path may not simply be the path of maximum radius. Through every turn on a racetrack or a highway, there is an optimum path that yields one or more of the following:
Maximum comfort for occupants for a given vehicle speed, Minimum wear on the tires and suspension, Minimum time and maximum speed through the turn, Greatest margin of safety through the turn and exiting the turn.
This line is a function of the shape of the turn, the banking (camber) of the turn, the characteristics of the section of track or road leading into and out of the turn, and sometimes, the condition of the track surface. Except for racing
Revised 07/07 13
RMC BMW CCA Driving School Student Manual
situations where every fraction of a second may be critical, the correct line is essentially independent of vehicle type and characteristics.
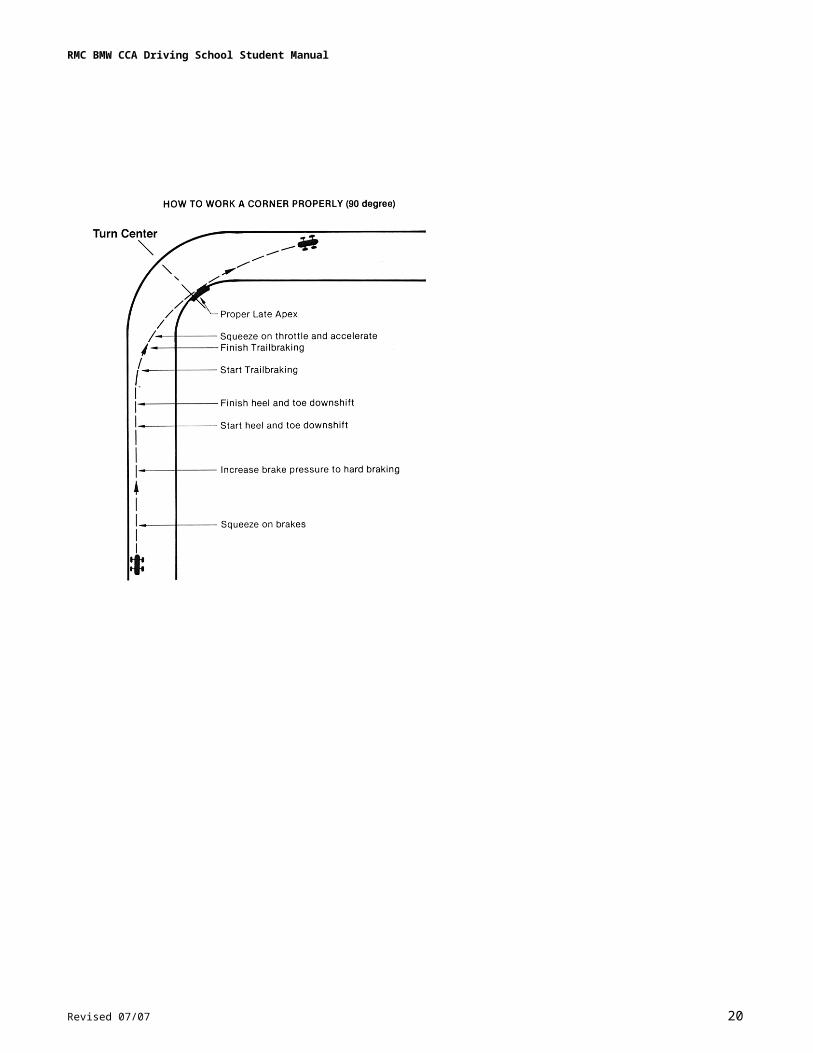
APEX OF A TURNThe theoretical apex of a turn is the point where the largest possible radius through a turn touches the inside of the turn. A vehicle takes an "early apex" if it follows a path that results in the wheels touching the inside of the track upstream or earlier than the theoretical apex. A vehicle takes a "late apex” if it follows a path that results in the wheels touching the inside of the track downstream or later than the theoretical apex.
Except in unusual situations in which a series of tight turns follow a long straight, the late apex is the preferred path. This is the path that you will be encouraged to follow through all turns at your driving school. This is likely the fastest, smoothest and safest path on the course. This path allows you to apply throttle before you reach the late apex and therefore results in maximum exit speed from the turn and down the following straight. It also avoids the problem with an early apex in which you run off the outside edge of the track after passing by the early apex point. These situations can be observed in the attached diagrams (page 13).
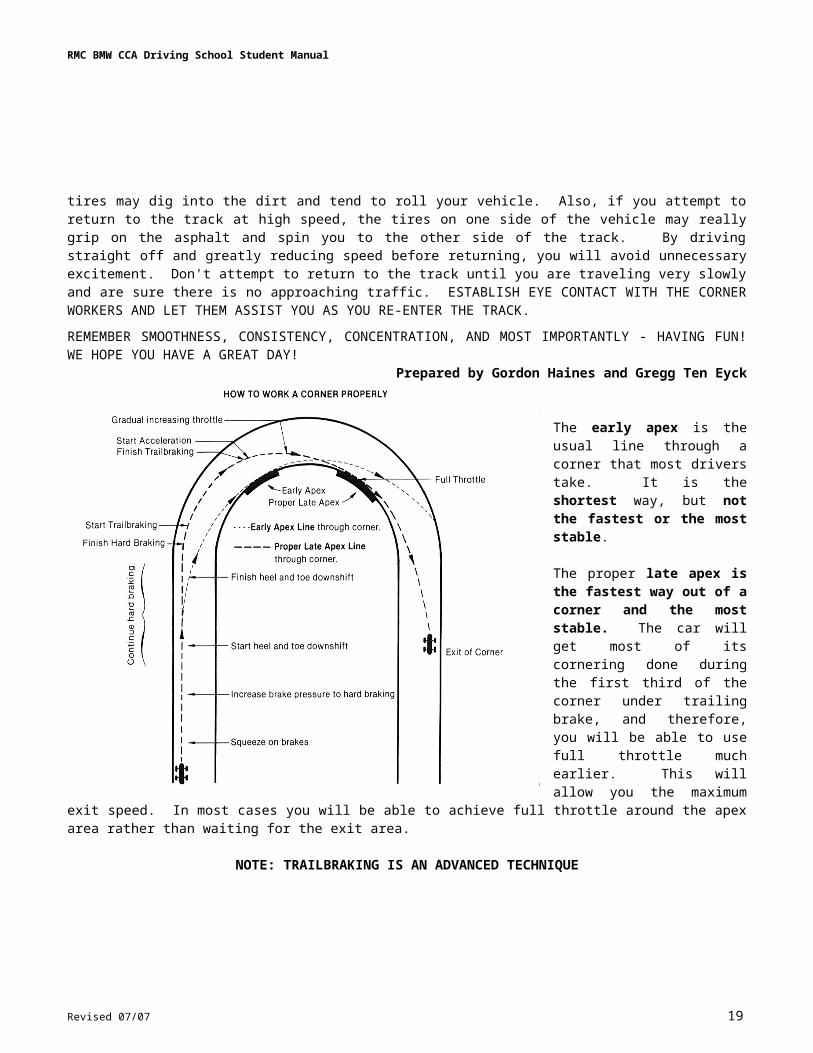
It is important to use all of the available track width to generate the largest possible arcs through every turn. As long as the pavement is in good condition, don't hesitate to "clip" the apex of every turn with your inside wheels. As you approach a turn and initiate braking, you should already be looking ahead for the apex. Well before you pass the apex, you should be looking ahead for the exit. Looking well ahead of your current location on the track is one of the most important and effective techniques of high performance driving.
OFF-TRACK EXCURSIONSYou may find that you cannot stay on the track because you have entered a turn too fast or your brakes have faded. In this situation, you should not panic, but go ahead and drive off the course in a straight line, continuing to apply the brakes to reduce speed. If you slide sideways off the track rather than straight ahead, the tires may dig into the dirt and tend to roll your vehicle. Also, if you attempt to return to the track at high speed, the tires on one side of the vehicle may really grip on the asphalt and spin you to the other side of the track. By driving straight off and greatly reducing speed before returning, you will avoid unnecessary excitement. Don't attempt to return to the track until you are traveling very slowly and are sure there is no approaching traffic. ESTABLISH EYE CONTACT
WITH THE CORNER WORKERS AND LET THEM ASSIST YOU AS YOU RE-ENTER THE TRACK.
REMEMBER SMOOTHNESS, CONSISTENCY, CONCENTRATION, AND MOST IMPORTANTLY - HAVING FUN! WE HOPE YOU HAVE A GREAT DAY!
Prepared by Gordon Haines and Gregg Ten Eyck
The early apex is the usual line through a corner that most drivers take. It is the shortest way, but not the fastest or the most stable.
The proper late apex is the fastest way out of a corner and the most stable. The car
Revised 07/07 14
RMC BMW CCA Driving School Student Manual
will get most of its cornering done during the first third of the corner under trailing brake, and therefore, you will be able to use full throttle much earlier. This will allow you the maximum exit speed. In most cases you will be able to achieve full throttle around the apex area rather than waiting for the exit area.
NOTE: TRAILBRAKING IS AN ADVANCED TECHNIQUE
Revised 07/07 15
RMC BMW CCA Driving School Student Manual
DRIVING SCHOOL INITIAL EXERCISE
Based on student experience and track layout, this exercise may not be conducted at every driving school or given to all students at a school.
LINE ORIENTATION, or "BRUSH THE CONE"This exercise demonstrates where the favored line is on a given track and through precise demonstration (instructor driving) to instill in the student the notion that driving the correct line consistently is a prerequisite to further learning of performance driving techniques. This exercise is preceded by a class session where students are introduced to the concept that speed through corners is a function of grip and radius. Grip factors are covered later in the day. The object of this exercise is that if the student observes how deliberately and consistently the instructor drives “the line,” the student will be inclined to do the same. It is a simple exercise where the instructor first drives the student’s car for a few laps at slow speeds immediately followed by the students driving at the same slow speeds.
Step One: This is a class session. The grip and radius factors of performance driving are introduced along with the principle that, while grip factors can often be somewhat driver enhanced, the radius considerations are truly at the core of one’s ability to drive at higher speeds. Shapes of corners are described as well as the necessity to diligently learn the track’s favored line. Little or no learning occurs unless and until the student is able to consistently (i.e., every lap) navigate the circuit on the right path (line). This path is extremely simple to follow as large, orange construction cones define it.
The cones are positioned to show the fastest way through the corners -- the line. The class session further, and most importantly, emphasizes the notion that patience and discipline are required to adhere to this line as speeds increase throughout the day. If the student does not learn to drive the line every lap of the day, it will be nearly impossible to learn the other exciting and rewarding aspects of performance driving. Students must develop consistency in driving to the points (cones) because these are the points where important inputs such as braking and turning are made. If these inputs are made at different points, different and maybe unwanted results occur. Finally, the notion is introduced that a student who most patiently and deliberately learns the favored line around the track will be in the position to have learned the most and have had the most fun at the end of the day. Patience precedes speed.
Step Two: After class, during the student’s first session on the track, the instructor drives a couple of laps in the student’s car at very slow speeds (almost stopping in the corners for emphasis), to show where the cones are and how close to them one drives. To highlight this proximity, the instructor may show that if the car door were opened on the appropriate side it would, in fact, knock the cone over. That close. The instructor also shows that eyes are high approaching corners and that it is necessary to look through the corner to be smooth. Finally, the instructor shows that, as corners become better known, the first baby steps of speed will be made in accelerating slightly from the middle of the corner to the exit. Throughout this exercise, the instructor underscores the fact that, at either walking speeds now or at near race speeds later in the day, the student should drive this same, very precise line. Every lap.
Step Three: The student drives! During the remainder of this track session, students are trying to mimic the instructor’s wonderfully precise path as defined by the big orange cones. It may not feel like you “need” to go all the way to the cones because of the speed you are driving, but later, as speeds increase it is necessary, so one should always practice being on the Line. The student should hopefully feel the temptation to cheat a little by turning in early as speeds increase at which time the patient instructor will suggest slower speeds and higher eyes until the student learns the track better. By the end of this session, the student should understand that:
Revised 07/07 16
RMC BMW CCA Driving School Student Manual
It will take more laps (there’ll be plenty) to really memorize the track, and,
by driving the same path every time, increased speeds come very easily and naturally.
Successful completion of this exercise really sets the student up for a rewarding day. Impatience here (too much speed too early, not getting close enough to the cones) puts the student at a big disadvantage as far as more learning is concerned.
Revised 07/07 17
RMC BMW CCA Driving School Student Manual
CLASSROOM COURSE OUTLINE
A FEW IMPORTANT WORDS FROM YOUR INSTRUCTORSRelax, and that’s an order! There are rumors of new students who are “anxious”; that maybe they won’t be very good and that everybody will snicker at their slow pace. Please be aware of a few things. First, most of your class/track mates are also first timers who also have some trepidation about driving on a racetrack. Second, anxiety is normal. In fact, if you weren’t at least a little anxious, we’d be concerned. The fact is that we have developed some very sophisticated ways to ensure that all of your nervous energy is quickly transformed into grins of satisfaction from having developed new skills so quickly and so easily. Virtually every new student leaves the school exhausted from having learned so much and having had so much fun. And it’s legal!
As is stated elsewhere, instructors may drive your car during the track sessions with your permission. Many students, of all levels, find this very helpful -- not just to experience your car’s high limits but to study the calmness and precision with which advanced drivers drive. This precision is largely a function of driving the correct line, which is the foundation of good driving. We feel that this concept (driving the correct line) is so vital to your learning that we ask that you allow your instructor to drive your car for several laps. He or she will drive at such a silly slow speed and in such close proximity to our reference cones that you will immediately realize that we are very serious about our expectations of you doing the same when you get behind the wheel.
Speed is the enemy your first time out. It precludes learning. Experience has shown that this early dedication to such an important aspect pays big dividends -- forever. Please trust us that the slowest drivers early will be the quickest to learn the layout of the track and will be the first to drive the correct line consistently. It is only from this platform that all the other elements of performance driving can be learned. We cannot overstate this. It may be well into your second track session that you finally know your way around with precision. But thereafter, with the help of your intrepid instructors, a whole lotta good stuff is going to happen. Don’t miss it by going too fast too soon.
Chris Roth
Groups C and D Curriculum Outline(New and less experienced racetrack drivers)
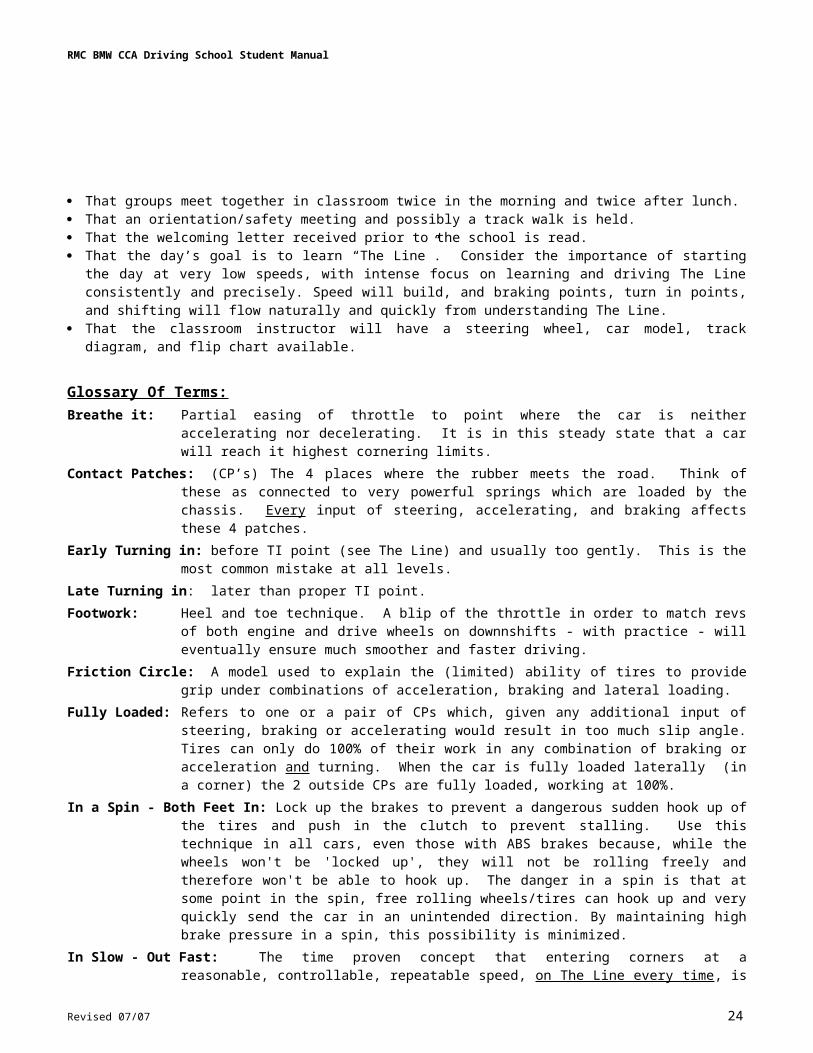
Expectations: That groups meet together in classroom twice in the morning and twice after lunch. That an orientation/safety meeting and possibly a track walk is held. That the welcoming letter received prior to the school is read. That the day’s goal is to learn “The Line”. Consider the importance of starting the day at very low speeds, with
intense focus on learning and driving The Line consistently and precisely. Speed will build, and braking points, turn in points, and shifting will flow naturally and quickly from understanding The Line.
That the classroom instructor will have a steering wheel, car model, track diagram, and flip chart available.
Glossary Of Terms:Breathe it: Partial easing of throttle to point where the car is neither accelerating nor decelerating. It is in
this steady state that a car will reach it highest cornering limits.Contact Patches: (CP’s) The 4 places where the rubber meets the road. Think of these as connected to very
powerful springs which are loaded by the chassis. Every input of steering, accelerating, and braking affects these 4 patches.
Revised 07/07 18
RMC BMW CCA Driving School Student Manual
Early Turning in: before TI point (see The Line) and usually too gently. This is the most common mistake at all levels.
Late Turning in: later than proper TI point.Footwork: Heel and toe technique. A blip of the throttle in order to match revs of both engine and drive
wheels on downnshifts - with practice - will eventually ensure much smoother and faster driving.Friction Circle: A model used to explain the (limited) ability of tires to provide grip under combinations of
acceleration, braking and lateral loading.Fully Loaded: Refers to one or a pair of CPs which, given any additional input of steering, braking or
accelerating would result in too much slip angle. Tires can only do 100% of their work in any combination of braking or acceleration and turning. When the car is fully loaded laterally (in a corner) the 2 outside CPs are fully loaded, working at 100%.
In a Spin - Both Feet In: Lock up the brakes to prevent a dangerous sudden hook up of the tires and push in the clutch to prevent stalling. Use this technique in all cars, even those with ABS brakes because, while the wheels won't be 'locked up', they will not be rolling freely and therefore won't be able to hook up. The danger in a spin is that at some point in the spin, free rolling wheels/tires can hook up and very quickly send the car in an unintended direction. By maintaining high brake pressure in a spin, this possibility is minimized.
In Slow - Out Fast: The time proven concept that entering corners at a reasonable, controllable, repeatable speed, on The Line every time, is the most important first step to becoming consistent and ultimately, fast. Car control, late and hard braking, corner and exit speed can only develop where consistency and comfort exist.
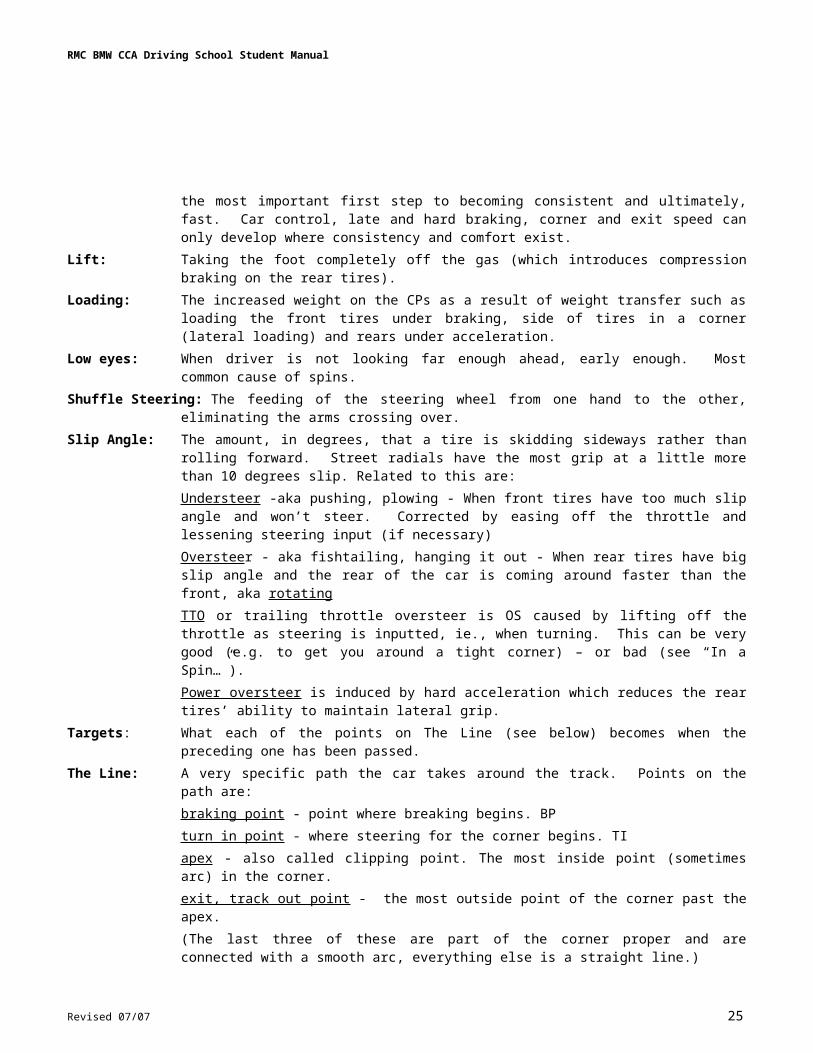
Lift: Taking the foot completely off the gas (which introduces compression braking on the rear tires).Loading: The increased weight on the CPs as a result of weight transfer such as loading the front tires
under braking, side of tires in a corner (lateral loading) and rears under acceleration.Low eyes: When driver is not looking far enough ahead, early enough. Most common cause of spins.Shuffle Steering: The feeding of the steering wheel from one hand to the other, eliminating the arms crossing
over.Slip Angle: The amount, in degrees, that a tire is skidding sideways rather than rolling forward. Street
radials have the most grip at a little more than 10 degrees slip. Related to this are:Understeer -aka pushing, plowing - When front tires have too much slip angle and won’t steer. Corrected by easing off the throttle and lessening steering input (if necessary)Oversteer - aka fishtailing, hanging it out - When rear tires have big slip angle and the rear of the car is coming around faster than the front, aka rotating TTO or trailing throttle oversteer is OS caused by lifting off the throttle as steering is inputted, ie., when turning. This can be very good (e.g. to get you around a tight corner) – or bad (see “In a Spin…”).Power oversteer is induced by hard acceleration which reduces the rear tires’ ability to maintain lateral grip.
Targets: What each of the points on The Line (see below) becomes when the preceding one has been passed.
The Line: A very specific path the car takes around the track. Points on the path are:braking point - point where breaking begins. BPturn in point - where steering for the corner begins. TIapex - also called clipping point. The most inside point (sometimes arc) in the corner.exit, track out point - the most outside point of the corner past the apex.(The last three of these are part of the corner proper and are connected with a smooth arc, everything else is a straight line.)
Revised 07/07 19
RMC BMW CCA Driving School Student Manual
Trail Braking Rotation: Achieved by 1. continuing braking into the early part of a corner and 2. trailing off the brakes as steering is inputted: the car will rotate on its front/rear axis (slightly increased slip angle in the rear tires). This rotation helps turn the car. It is enhanced by more abrupt brake release, later in the corner, combined with more abrupt steering input.
7/10ths: The driving level of most sane club drivers - most of the time. To attempt to drive harder, closer to 10/10ths is to leave less room for learning, and more for surprises.
Class 1This session precedes the first time that group C&D students drive on a track. It is designed to relax them and build their confidence. It is also designed to encourage them to take both the school and their driving one step at a time. “In slow, out fast” is key, as is focusing on learning one easy concept and then moving on to the next. Students are encouraged to pace themselves throughout the day and to learn good habits, which can then be translated to driving on the street.
SUBJECTS COVERED Introduction of the day’s schedule. Relax and inspire. Highlight track instructors’ expertise and dedication.
Driving is done in the following order: with EYES, feet and hands. Fatigue today will result not from wild use of hands and feet but from intense use of eyes and processing visual inputs. Driving is much more mental than physical. Knowledge and anticipation are much more important than reactions. So all day long – KEEP THE EYES HIGH and the speeds low enough (7/10ths) that mental processing, not just reacting, can occur. Learn to shuffle steer properly and shift cleanly. Build good habits and stay hydrated - drink plenty of water to avoid “brain fade”.
Speed is a function of tire grip and radius of the turn. We’ll focus on radius now.
Eyes are used to find and follow THE LINE. Define points (bp, ti, apx, exit) Discuss different shapes of turns i.e. big arc, early and late apex. Radius equals speed BUT there are safety concerns.
Introduce LATE APEX, emphasizing safety (an example is seeing the exit on public roads), higher exit speeds, easier car control and necessity in driving unknown corners, even on racetracks.
What the students are directed to work on in their first track session:Brush the Cone exercise. Instructor drives first to show LINE using a slightly exaggerated late apex. At each reference point show that opening a door would knock over the cone.
This will be done VERY SLOWLY to emphasize importance and precision. Students then drive, SLOWLY. Learn the line. High eyes. This will be a SLOW but critical session. Very likely that the slowest, most deliberate driver in this session will be the most advanced at the end of the day. Braking and downshifting is done early and in a straight line. The student’s is to consistently get to the cones and maybe work on a little exit speed.
WATCH OUT FOR: Nervousness and anxiety, bad lines, low eyes. Going too fast - too soon.
Questions/Comments?
Class 2This session congratulates students for their steadfastness and patience in track session 1 and prepares them for their quick ascension up the ladder of performance driving.
SUBJECTS COVERED Questions/Comments? Is the track flowing? Are you lost? Are you seeing just cones, a general shape of
the track, or a specific (late apex) shape?
Revised 07/07 20
RMC BMW CCA Driving School Student Manual
The concept of grip through CONTACT PATCHES (CP’s) is introduced. All inputs (hands and feet) affect grip. Describe the vertical loading of tires and springs and increased grip.
Contact patches are drawn and discussed at rest, accelerating, braking, and turning. Define slip angles, turn in (TI), oversteer (OS) and understeer (US).
Show the specific differences in CP’s between braking and turning. How to achieve the transition?
Draw Friction Circle (FC) (ball bearing in a salad bowl idea) and introduce concept that braking into the corner enhances grip on the front (turning) wheels and the turn proper is made by smoothly reducing braking level while adding steering. Visualization exercise wherein students (in their seats) imagine themselves easing off the brakes while they gradually add steering.
Drink water.
What the students are directed to work on in their next track session:Big learning and big fun start here, but it’s critical to continue driving the line. No laziness, no cheating. No advancement will happen unless you have developed the confidence that you are consistently where you are supposed to be on the track, especially as speeds increase. Otherwise your time and energy will be spent reacting to your unplanned whereabouts, rather than learning. Keep your eyes high and don’t early apex. Drive at 7/10ths, which leaves 3/10ths for recall and learning. With higher speeds you will still be as close to the cones as you were in the first session.
Brake and downshift early.
The track is still new to most students and speeds will still be relatively slow. Don’t worry.
In slow, out fast.
NEW this session: Carry braking a little ways into the corner and feel how the car wants to corner better as you release the brakes and add steering. This release/add is done especially smoothly in faster corners. The better students should be driving a good line, consistently, use braking to initiate the turn anddrive with some vigor right to the corner exit.
WATCH OUT FOR: early apex, no apex, inconsistencies, over aggression, US at TI.
Class 3Address fatigue, present and pending. Questions: How did it feel braking into the corner? Did you feel the car want to turn? Anyone overdo it? Any uneasiness about when and how to downshift?
SUBJECTS COVERED Use CP’s and FC to review smoothness required in transitions, especially from braking to turning.
Introduce footwork as necessary element to maintain smoothness and balance while downshifting and braking.
Use CP’s to introduce concept of rotation, which can be useful in certain situations. Describe how to maximize or minimize rotation.
Drink water.
What the students are directed to work on in next track session:Still and always: a good and consistent line. 7/10ths, high eyes, go all the way to apex.
By knowing the track well at this point, work on braking/turning balance. Feel the car go to the apex and then drive it out to the exit...good balance turning in and good speed coming out.
Revised 07/07 21
RMC BMW CCA Driving School Student Manual
NEW this session: Discuss and try a 4 to 3 heel and toe down shift after the straight(s) if confident (slow down first, there is no rev limiter on downshifting). Work on heel and toeing during the coming weeks and months until you can do it. Be conscious of how different brake releases and steering inputs help turn in. Work on high exit speeds and somewhat higher turn in speeds. Additional five minutes added to this session for the instructor to drive your car – with your permission. What the instructor says and demonstrates will make more sense to you now.
WATCH OUT FOR: Fatigue, inconsistency, over aggression, bad lines.
Class 4Last class of day. Emphasize dangers and symptoms of fatigue. Questions/Comments?
SUBJECTS COVERED Light review of lines, grip, radius. Define type 1, 2, and 3 corners. Use track map.
Relate what we’ve learned today to driving on public roads, esp. late apex for safety. Where is grip on public roads? Define camber and show why and where it’s a critical factor in safe driving on roads and useful for track speed.
Performance Driving. Show steps (like rungs on a ladder) to becoming a competent performance driver.
1. The Line and good use of eyes.
2. Balance, including footwork.
3. Exit Speed.
4. Turn in speed.
5. Corner speed.
6. Late/hard braking.
7. Consistency.
Drink water.
No one gets all the way there. There’s always something left somewhere. Where are you? Instructor anecdotes about personal barriers.
TIME PERMITTING: in no particular order. Why are BMWs are so good? Discuss: motor, good and safe chassis, good brakes, etc. FWD vs. RWD. Rain and snow considerations. Mirror placement. Tire pressure changes for US and OS. SUV particulars e.g. high cg, big CPs, etc.
Encourage students to do another school. A & B drivers will tell you - the fun’s just begun.
Next (all remaining) track sessions: Beware fatigue – be SMOOTH
7/10ths – follow The Line – try and drive the perfect line – every lap, including the cool down lap.
In slow, out fast. Consistency precedes speed.
NEW: higher exit speeds, attention to footwork, higher turn in speeds, some trail braking rotation in slower corners, higher corner speeds and somewhat later/harder braking. Student goal: be consistent, with a balanced car, and have great fun in the last session.
WATCH OUT FOR: Fatigue leading to inconsistency (big trouble at end of day) evidenced by varying brake points (lack of focus), missed shifts, lack of smoothness, and low eyes. Too much speed. Not getting to apexes. In other words – Not Following THE LINE.
Revised 07/07 22
RMC BMW CCA Driving School Student Manual
AT END OF LAST SESSION: Thanks and Congratulations.
Revised 07/07 23
RMC BMW CCA Driving School Student Manual
TRACK PRACTICE ON THE STREET
DRIVING AUNT TILLYSteve Williams, Rocky Mountain Chapter, BMW CCA
Aunt Tilly is a very special 85-year-old “character” who also happens to be your favorite aunt. She loves to ride – you love to drive – on twisty mountain roads and high passes. Yea! A relationship made in heaven. However, she doesn’t like to be “jerked” around – and you like to drive fast. What to do? Maybe try the performance driving school advertised in the last Motorsport Report. You have often thought it would be fun to drive the M3 on a racetrack; and some instruction at the driving school just might help quiet Aunt Tilly during your next adventure through Left Hand Canyon. So you attend the school which leads to:
Track Practice Translated to the StreetThrottle - DON’T FLUCTUATE – MODULATE.Which means to smoothly roll on and off the throttle vs. suddenly jamming on it or suddenly lifting off of it, because that upsets the car’s balance and Aunt Tilly’s too. This is due to the fact that weight is shifted front to back and vice versa through use of the throttle. For example: the quicker the lift the faster weight is transferred onto the front tires which helps turn at speed on the race track or on twisty roads due to increased traction on the front tires. Simultaneously, lifting also reduces the weight on the rear and therefore helps “rotate” the car when at speed; however lifting may also induce a spin or create a “loose” rear end on ice or when at the limit of adhesion*. This loose rear condition can happen to any car but many front drive ”pilots”, especially, have become acquainted with this important lesson. Because their cars are significantly lighter in the rear compared to the front, it is easier to break the rear loose when abruptly lifting the throttle; this frequently occurs in slick conditions thus causing accidents and creating much embarrassment for the driver.Too much throttle can also cause problems on slick roads. Weight is shifted to the rear when accelerating. An abrupt weight shift coupled with too much power may also upset the car’s balance causing the rear drive wheels break traction, spin, thus causing the rear end to skid – maybe into the curb - or a ditch. Smooth and slow throttle movements on ice is the key.
Self Check: Does the passenger’s head bob, or do stomach twitches become reported when you drive, due to excess throttle movements such as on-off-on-off-the throttle-ad-infinitum? Have you “lost it” in a turn due to a skidding rear end or when starting out on, or climbing a slick hill?
Steering – DON’T TURN THE WHEEL.It upsets the car’s balance and Aunt Tilly’s. Of course you must – so minimize the turning action. Visualize The Line and smooth steering inputs. Practice. Any turning of the steering wheel also slows the car, this is why racers try to find The Line and practice smoothness when driving it.
Self Check: Watch the steering wheel after initial turn-in. Jiggles and corrections of the wheel while in the turn indicate a lack of smoothness. Smoothly initiate your turn, set the steering wheel, and attempt keep it in one position throughout the turn.
Shifting - DON’T SHIFT.Of course you must – so when you do shift, make the transitions so smooth that Aunt Tilly cannot tell when clutch engagement occurs. Down shifting is of special concern because if the engine’s revolutions are not matched to wheel speed then both the car’s and Aunt Tilly’s balance are upset. She then glowers at you and the car may chirp its tires at you or even start to spin if on ice or at the limit of adhesion.
Self Check: Does your passenger’s head nod when you shift? Have your tires ever chirped or the rear end kicked out when you down shifted?
Braking - DON’T BRAKE.Of course you must – so minimize the amount of time you spend on the brakes and use them like you mean it when you do have to; i.e., don’t let up only to immediately reapply the brakes again during a single stop.
Revised 07/07 24
RMC BMW CCA Driving School Student Manual
Self Check: Does Aunt Tilly’s head bob back and forth as you come to a stop because you alternately press and release the brakes? Is she aware of the exact moment that you come to a complete stop?
And - DO LEARN-THE KEYS TO THE GAME: Cues and Clues: the steering wheel jiggles when making corrections in a corner, shifting jerks, wheel squeal,
head nods/bobs, hand grabs, dirty looks, unfavorable comments, screams . . . as well as abnormal tire/brake/clutch wear.
Look Ahead – Anticipate. What is developing ahead (like brake lights ¼ mile ahead) – how are the corners revealing themselves to you?
Look to the next corner while transiting the current one – Think Smooth. Smoothness and Consistency is the major key – Be Smooth. Visualize – The Line (taught at the driving school). And more – for more comprehensive guidance consult performance driving books, attend schools, go racing,
and above all Think about the Process and practice as you learn about heel-and-toeing, trail braking, trailing throttle oversteer, straights and apexes, etc.
PRACTICE: Cornering: Notice the speedometer, “out faster than in” is a major key. Mountain roads: Smoothness = no jerks. Try to not use the brakes when within the speed limit; use a smooth
throttle lift to “set” the car instead; late apex* for safety unless you really know the road; out faster than in, and stay within your lane.
Rush hour: Attempt to negotiate rush hour traffic without once using the brakes in a stop-and-go situation. How? Become butter smooth. Look ahead and anticipate as you drive, watch for brake lights and leave a margin in order to back off the throttle and then get back on it –fluidly- and shift smoothly so that Aunt Tilly is unaware of anything but a velvet ride.
On ice: A great place to feel and learn to control the rear end kicking out, is an empty parking lot during or after a heavy snow storm; or especially at the BMW car clubs annual ice gymkhana on Georgetown Lake.
FINAL COMMENTS: Jerky driving feels fast. It may look fast, is often fun, but it is certain to upset Aunt Tilly. Smooth driving IS FAST, can look slow, yields great satisfaction, and is less likely to upset Aunt Tilly. Tires talk – learn the language. “Silence is Golden” is key. A low moan at a very high speed is to be expected,
but howls, squeals, yowls, yelps and chirps are not. Put it all together and go have fun with Aunt Tilly.
*A succinct discussion of a few terms may be helpful. Front wheel drive cars have more front weight bias, therefore their rear tires sometimes lose traction and skid with throttle lift - when turning in slippery conditions. This is because the lift momentarily shifts even more weight to the front of the car, thus unweighting the rear end whose tires then lose their grip on the road. The car is then described as being “loose” or being in a condition of oversteer.Oversteer means that the rear of the car turns faster than the front because the rear tires lose traction and slide before the front tires do. Sometimes described as the rear end trying to pass the front.Understeer means that the front wheels lose traction when turned, causing the car to continue in a more “straight ahead” condition as it ”plows” forward. The car still turns but the turn is enlarged and the car slows due to scrubbing off a little of the front tire’s rubber. When the car slows enough, the scrubbing stops, and the car turns normally. This slowing effect is safer than an oversteering condition so car manufacturers build understeer into the design. Understeer is especially prevalent in heavy front drive cars. High performance aficionados often spend lots of money attempting to remove this built-in understeer because it is speed limiting. Apex essentially means “the top of the curve” which is where the wheels come closest to the inside edge of the road in a turn.Normal apex is where most cars turn in, come closest to the edge of the road, and then track out of the turn safely. This is where one may see depressions or ruts in old roads. One can usually see the exit before turning.
Revised 07/07 25
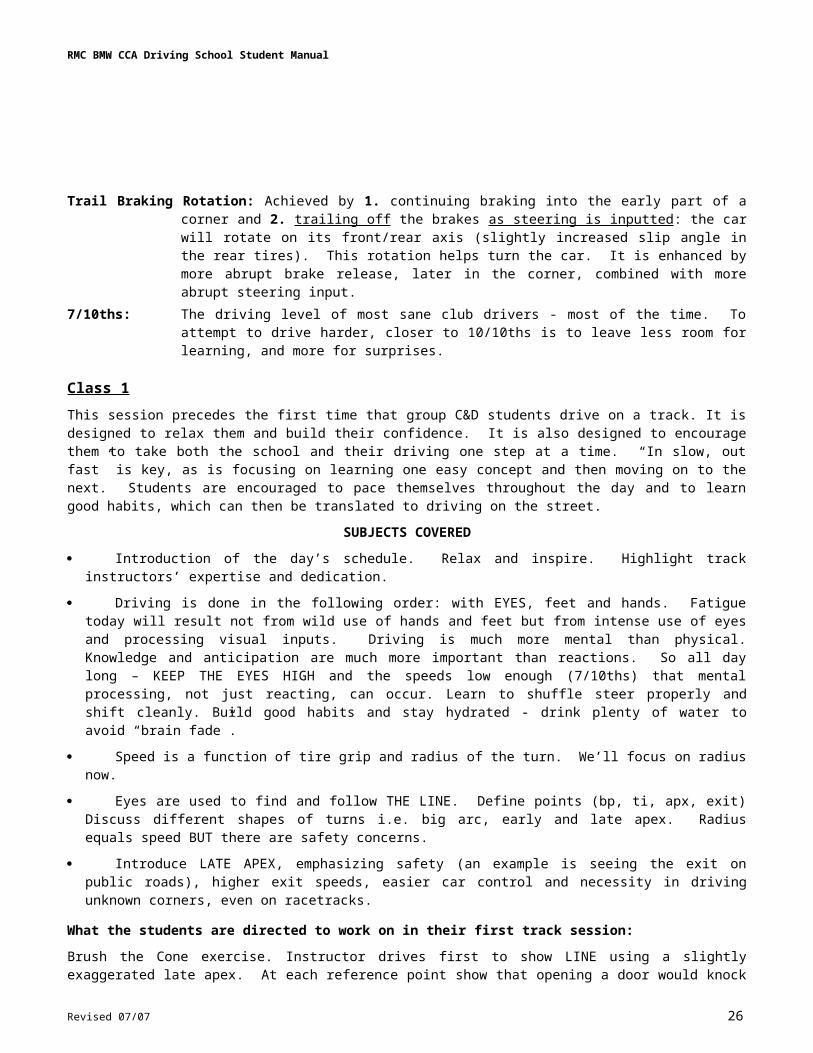
RMC BMW CCA Driving School Student Manual
Early apex: The driver turns in a little sooner than normal. How to tell? You run out of road before completing the turn. This is a less safe condition and why friends don’t let friends early apex. One often does not see the exit before turning.Late apex: The driver waits a little longer before fully committing to the turn. How to tell? There is plenty of road left at the edge after completing the turn, thus there is more “built in” safety. One can usually see the exit before turning.An Apex Clue: A dead giveaway for any apex at the racetrack is finding where cars just brush the edge of the road in a turn and wear away grass or create a rut in the dirt next to the pavement. The worn spot is the apex. This clue is especially valuable when learning a new racetrack with little time to practice before qualifying - or when practice is qualifying. Worn spots help outline The Line, which is normally the fastest way around the track.
Revised 07/07 26


![F] F] IYæ— F] ECO F] @ ) RMC-HP2K RMC-HP3KD/RMC-HP3K RMC-HP3 MITSIBISHI @ (Blffi)](https://img.pdfslide.us/doc/110x75/5ae590b77f8b9a8b2b8c0615/f-f-iy-f-eco-f-rmc-hp2k-rmc-hp3kdrmc-hp3k-rmc-hp3-mitsibishi-blffi.jpg)