Embed Size (px)
Citation preview

RISO GOCCOPRO Printer Driverfor Macintosh
User's Guide
Printer Model GOCCOPRO Series
Operation System
Mac OSv10.4, v10.5, v10.6, v10.7(Lion),v10.8(Mountain Lion), v10.9(Mavericks), v10.10(Yosemite), v10.11(El Capitan),v10.12(Sierra), v10.13(High Sierra),v10.14(Mojave)
Ms6510-08E
1
"RISO GOCCOPRO Printer Driver" is a printer driver exclusively for the RISO Digital Screen Maker. This guide contains instructions for basic operation of the printer driver and use of various functions for each supported OS. It also contains troubleshooting at the back.Read this before using the printer driver and when you have any question during use, and make use of this with the product for many years to come.
ALL SPECIFICATIONS ARE SUBJECT TO CHANGE WITHOUT NOTICE.
Reproduction or copying of this guide or any parts without permission is strictly prohibited.
Although every effort has been made to ensure that the contents of this guide are error-free, please contact us if you notice
any errors or other points which should be brought to the company's attention.
● and RISORINC are trademarks or registered trademarks of RISO KAGAKU CORPORATION in the United States and other countries.
● RISORINC is a registered trademark of RISO KAGAKU CORPORATION in Japan.● Macintosh and Mac OS are trademarks of Apple, Inc., registered in the U.S.A. and
other countries.● Monotype is a trademark of Monotype Imaging Inc. registered in the United States
Patent and Trademark Office and may be registered in certain jurisdictions.● Other corporate names and/or trademarks are either registered trademarks or
trademarks of each company, respectively.● The screens and content appearing in this guide may differ from the actual prod-
uct.
© Copyright 2018 RISO KAGAKU CORPORATION
Introduction
This guide is intended for use by RISO, its authorized dealers and purchasers of the equipment described herein. While
every effort has been made to ensure the accuracy of information contained in this document, RISO, its authorized
dealers and their employees shall not be held responsible for any inaccuracies it may contain.

2
In each section, you can find detailed descriptions about how to install the printer driver into your computer and transmit original data created on your computer.Besides, the troubleshooting tips are provided to help you in case you have any prob-lem in Screen Making operation.Read the section which corresponds to your computer system platform before screen making on your RISO Digital Screen Maker or whenever you have questions in opera-tion.The expressions which are used in the US-ENGLISH printer driver program and dif-ferent from those used in the US-ENGLISH one are given in the brackets.
The following advice signs are given to the descriptions which will help a user to avoid unexpected troubles and obtain the optimum performance of this product.
About this User's Guide
About the Guide Signs
Gives you helpful advice for trouble-free operation.
Gives you tips for more effective use of this product.
Indicates a reference page.
3
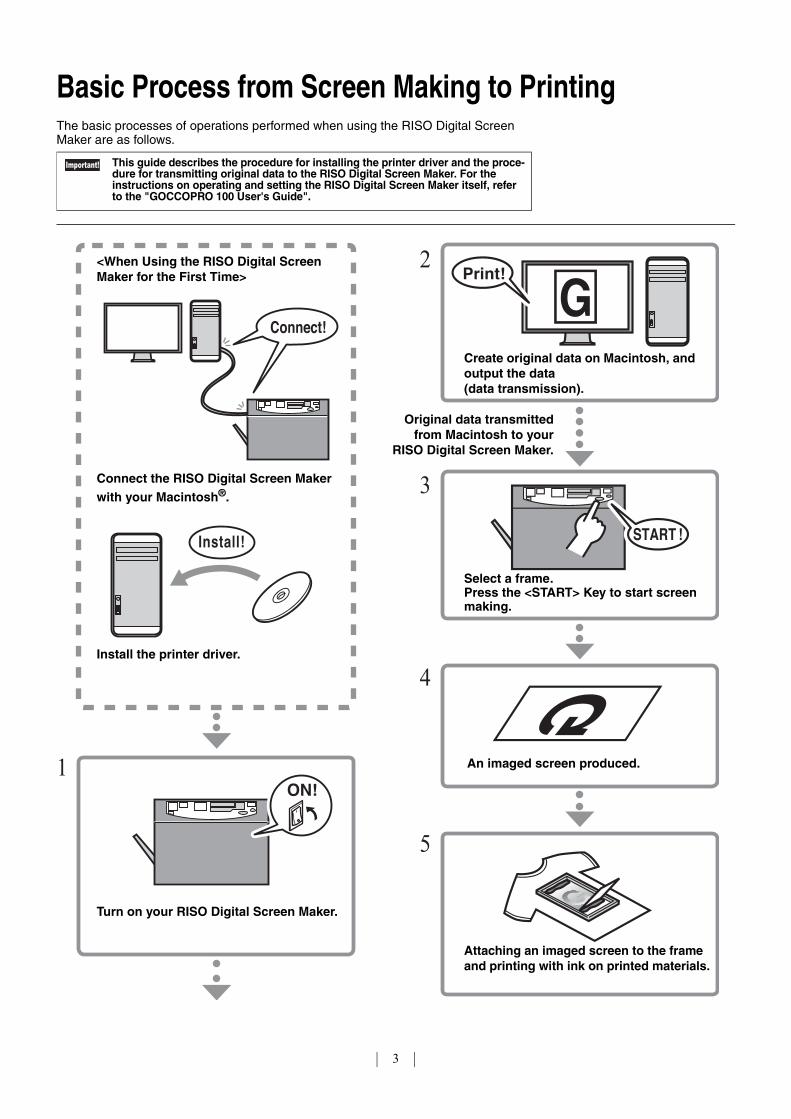
Basic Process from Screen Making to PrintingThe basic processes of operations performed when using the RISO Digital Screen Maker are as follows.
This guide describes the procedure for installing the printer driver and the proce-dure for transmitting original data to the RISO Digital Screen Maker. For the instructions on operating and setting the RISO Digital Screen Maker itself, refer to the "GOCCOPRO 100 User's Guide".
1
2
3
4
5
START !
ON!
Install!
Connect!
Print!
Create original data on Macintosh, and output the data (data transmission).
<When Using the RISO Digital Screen Maker for the First Time>
Connect the RISO Digital Screen Maker with your Macintosh®.
Install the printer driver.
Turn on your RISO Digital Screen Maker.
Select a frame.Press the <START> Key to start screen making.
Original data transmittedfrom Macintosh to your
RISO Digital Screen Maker.
An imaged screen produced.
Attaching an imaged screen to the frame and printing with ink on printed materials.
4
Introduction . . . . . . . . . . . . . . . . . . . . . . . . . . . . . . . . . . . . . . . . . . . . . . . . . . . . . . . 1About this User's Guide . . . . . . . . . . . . . . . . . . . . . . . . . . . . . . . . . . . . . . . . . 2About the Guide Signs . . . . . . . . . . . . . . . . . . . . . . . . . . . . . . . . . . . . . . . . . . 2
Basic Process from Screen Making to Printing . . . . . . . . . . . . . . . . . . . . . . . . . . 3
Installing the Printer Driver
Connecting the RISO Digital Screen Maker with your Macintosh . . . . . . . . . . . . 6When the RISO Digital Screen Maker is Connected with your Macintosh . . . 6
Installing the Printer Driver . . . . . . . . . . . . . . . . . . . . . . . . . . . . . . . . . . . . . . . . . . . 7
Add Your RISO Digital Screen Maker to the Printer List . . . . . . . . . . . . . . . . . . . 8
How to Produce an Imaged Screen
Transmitting Original Data from Macintosh . . . . . . . . . . . . . . . . . . . . . . . . . . . . 10RISO GOCCOPRO Printer Driver Settings . . . . . . . . . . . . . . . . . . . . . . . . . 11
Registering Original Size . . . . . . . . . . . . . . . . . . . . . . . . . . . . . . . . . . . . . . . . . . . . 14
Troubleshooting
When an Error Message Appears on Macintosh . . . . . . . . . . . . . . . . . . . . . . . . . 16
Troubleshooting (Tip) . . . . . . . . . . . . . . . . . . . . . . . . . . . . . . . . . . . . . . . . . . . . . . 17When the Original Data cannot be Transferred onto the Screen. . . . . . . . . . . . . . . . . . . . . . . . . . . . . . . . . . . . . 17When the Image is Not Correctly Produced onto the Screen. . . . . . . . . . . . 18
Table of Contents
Installing the Printer Driver
Connecting the RISO Digital Screen Maker with Macin-tosh, and installing the printer driver.
• Connecting the RISO Digital Screen Maker with your Macintosh page 6
• Installing the Printer Driver page 7• Add Your RISO Digital Screen Maker to the Printer
List page 8
In advance, attach the optional network interface card "RISO Network Card" to the RISO Digital Screen Maker, and configure printer network settings (ex. IP address). For details, refer to RISO Network Card User's Guide (contained in RISO Network Card SOFTWARE CD-ROM).
6
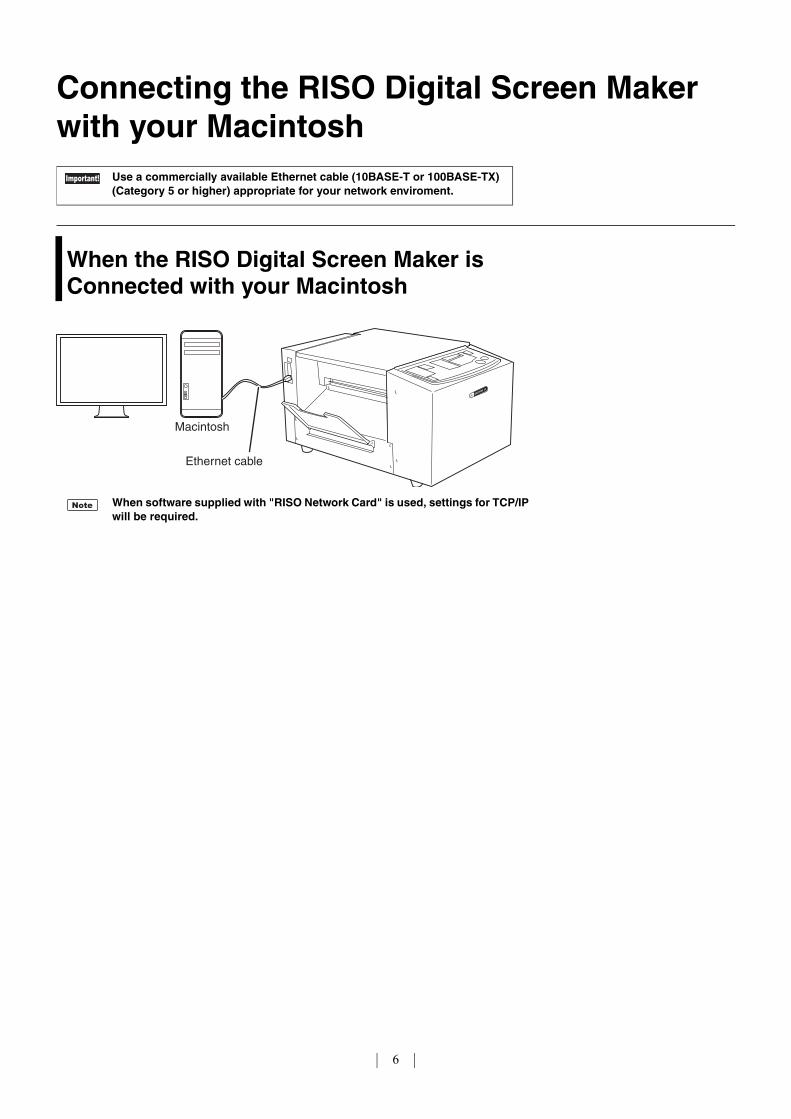
Connecting the RISO Digital Screen Maker with your Macintosh
When the RISO Digital Screen Maker is Connected with your Macintosh
When software supplied with "RISO Network Card" is used, settings for TCP/IP will be required.
Use a commercially available Ethernet cable (10BASE-T or 100BASE-TX) (Category 5 or higher) appropriate for your network enviroment.
Ethernet cable
Macintosh
Installing the Printer Driver
7
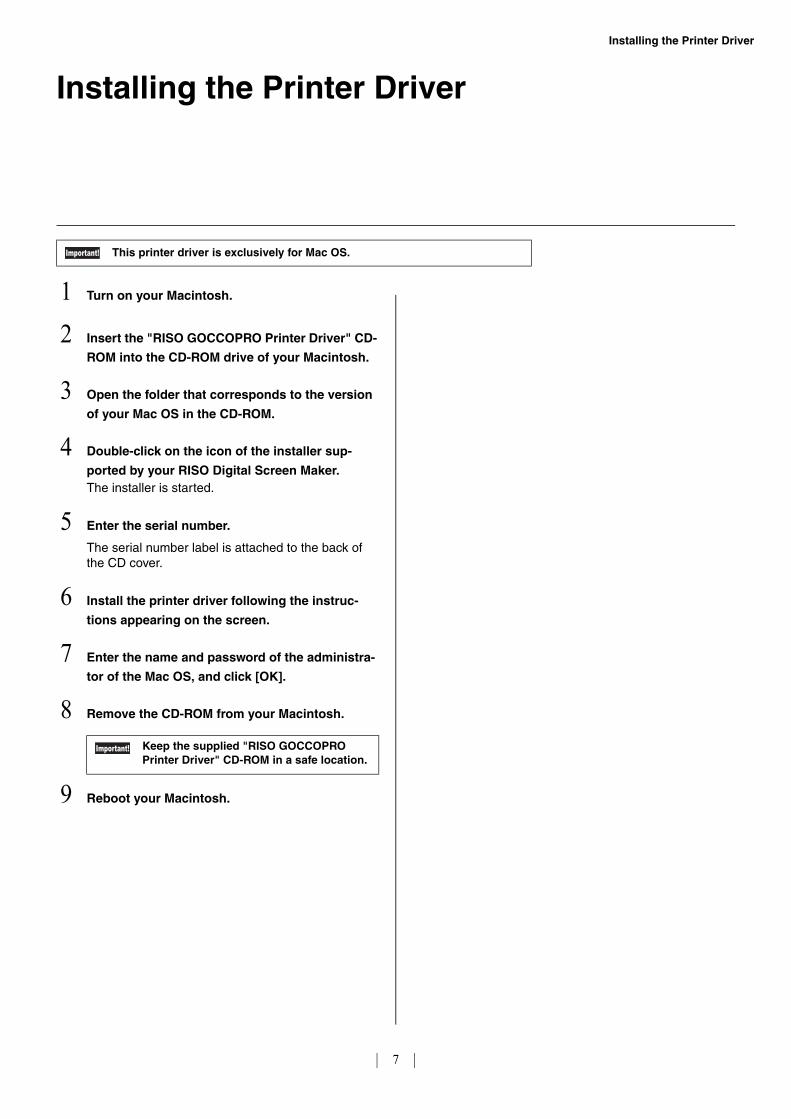
1 Turn on your Macintosh.
2 Insert the "RISO GOCCOPRO Printer Driver" CD-
ROM into the CD-ROM drive of your Macintosh.
3 Open the folder that corresponds to the version
of your Mac OS in the CD-ROM.
4 Double-click on the icon of the installer sup-
ported by your RISO Digital Screen Maker.The installer is started.
5 Enter the serial number.
The serial number label is attached to the back of the CD cover.
6 Install the printer driver following the instruc-
tions appearing on the screen.
7 Enter the name and password of the administra-
tor of the Mac OS, and click [OK].
8 Remove the CD-ROM from your Macintosh.
9 Reboot your Macintosh.
Installing the Printer Driver
This printer driver is exclusively for Mac OS.
Keep the supplied "RISO GOCCOPRO Printer Driver" CD-ROM in a safe location.
8
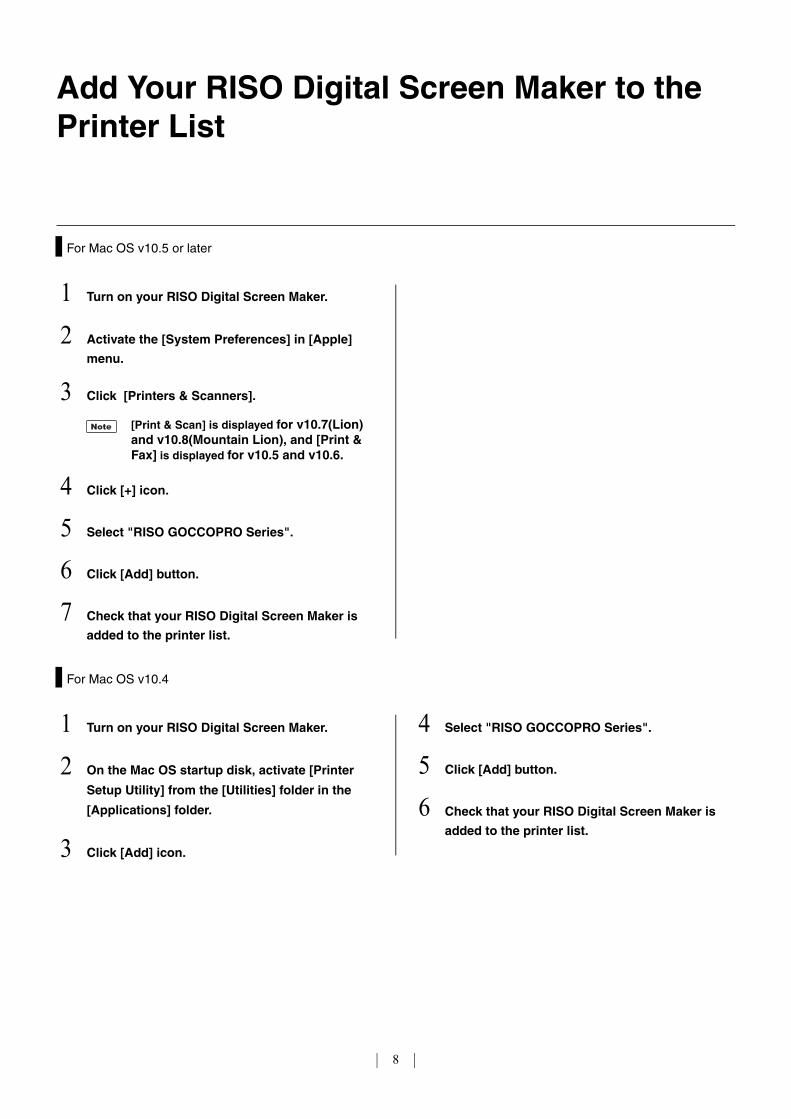
1 Turn on your RISO Digital Screen Maker.
2 On the Mac OS startup disk, activate [Printer
Setup Utility] from the [Utilities] folder in the
[Applications] folder.
3 Click [Add] icon.
4 Select "RISO GOCCOPRO Series".
5 Click [Add] button.
6 Check that your RISO Digital Screen Maker is
added to the printer list.
For Mac OS v10.4
1 Turn on your RISO Digital Screen Maker.
2 Activate the [System Preferences] in [Apple]
menu.
3 Click [Printers & Scanners].
4 Click [+] icon.
5 Select "RISO GOCCOPRO Series".
6 Click [Add] button.
7 Check that your RISO Digital Screen Maker is
added to the printer list.
Add Your RISO Digital Screen Maker to the Printer List
For Mac OS v10.5 or later
[Print & Scan] is displayed for v10.7(Lion) and v10.8(Mountain Lion), and [Print & Fax] is displayed for v10.5 and v10.6.
How to Produce an Imaged Screen
This section describes the procedure for setting the printer driver.• Transmitting Original Data from Macintosh page 10• Registering Original Size page 14
10
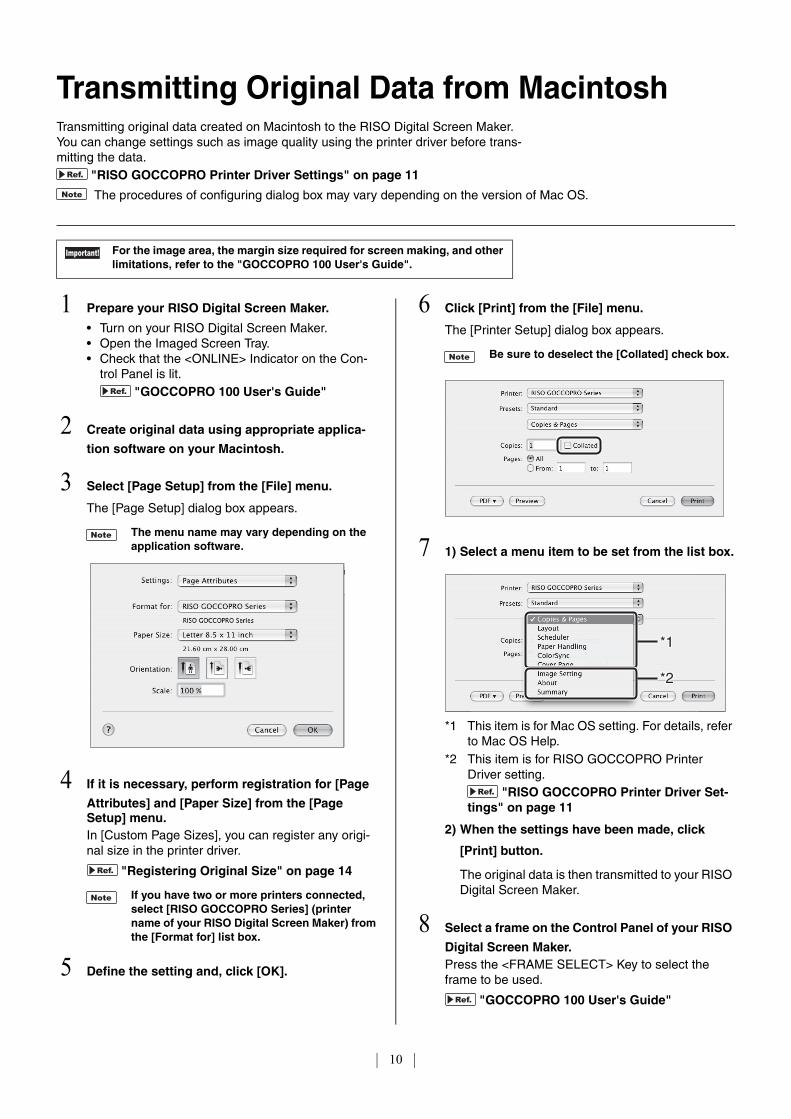
1 Prepare your RISO Digital Screen Maker.
• Turn on your RISO Digital Screen Maker.• Open the Imaged Screen Tray.• Check that the <ONLINE> Indicator on the Con-
trol Panel is lit."GOCCOPRO 100 User's Guide"
2 Create original data using appropriate applica-
tion software on your Macintosh.
3 Select [Page Setup] from the [File] menu.
The [Page Setup] dialog box appears.
4 If it is necessary, perform registration for [Page
Attributes] and [Paper Size] from the [Page Setup] menu.In [Custom Page Sizes], you can register any origi-nal size in the printer driver.
"Registering Original Size" on page 14
5 Define the setting and, click [OK].
6 Click [Print] from the [File] menu.
The [Printer Setup] dialog box appears.
7 1) Select a menu item to be set from the list box.
*1 This item is for Mac OS setting. For details, refer to Mac OS Help.
*2 This item is for RISO GOCCOPRO Printer Driver setting.
"RISO GOCCOPRO Printer Driver Set-tings" on page 11
2) When the settings have been made, click
[Print] button.
The original data is then transmitted to your RISO Digital Screen Maker.
8 Select a frame on the Control Panel of your RISO
Digital Screen Maker.Press the <FRAME SELECT> Key to select the frame to be used.
"GOCCOPRO 100 User's Guide"
Transmitting Original Data from MacintoshTransmitting original data created on Macintosh to the RISO Digital Screen Maker.You can change settings such as image quality using the printer driver before trans-mitting the data.
"RISO GOCCOPRO Printer Driver Settings" on page 11
The procedures of configuring dialog box may vary depending on the version of Mac OS.
For the image area, the margin size required for screen making, and other limitations, refer to the "GOCCOPRO 100 User's Guide".
The menu name may vary depending on the application software.
If you have two or more printers connected, select [RISO GOCCOPRO Series] (printer name of your RISO Digital Screen Maker) from the [Format for] list box.
Be sure to deselect the [Collated] check box.
*1*1
*2*2
*1
*2
How to Produce an Imaged Screen
11
9 Press the <START> Key on the Control Panel of
your RISO Digital Screen Maker.Screen making is started.An imaged screen is ejected from the Imaged Screen Outlet.
"GOCCOPRO 100 User's Guide"
10 After the screen making is completed, turn off
your RISO Digital Screen Maker.
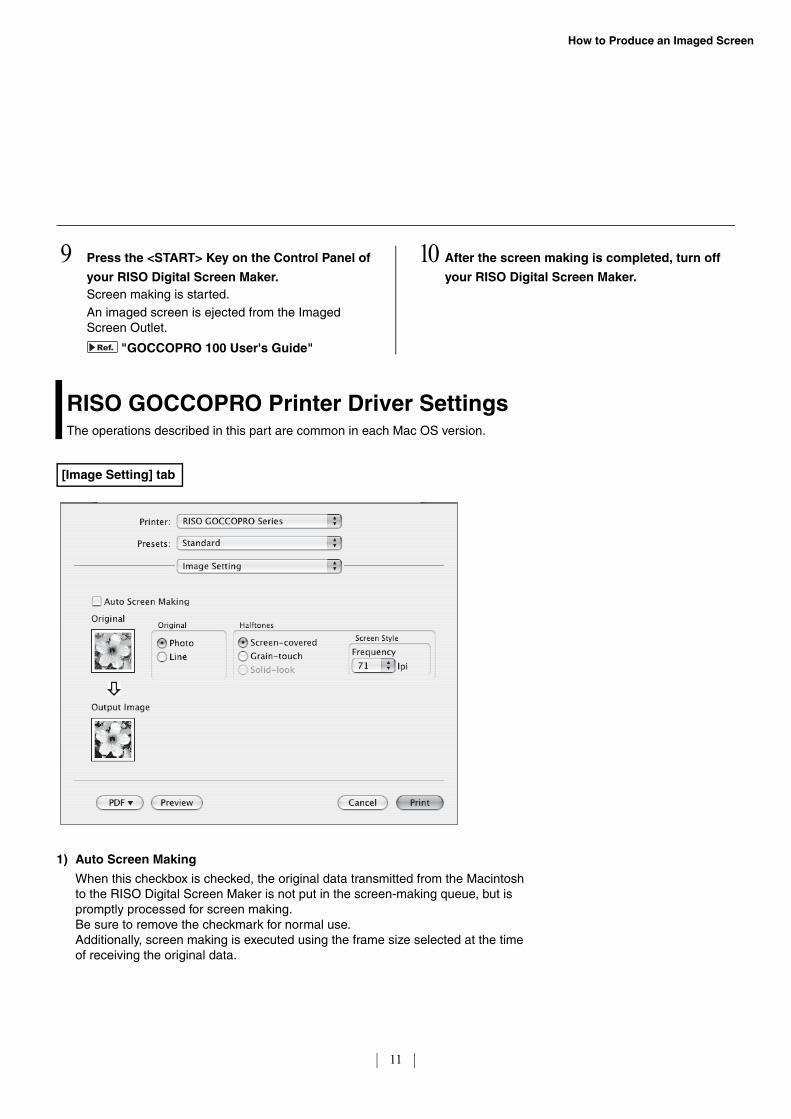
1) Auto Screen Making
When this checkbox is checked, the original data transmitted from the Macintosh to the RISO Digital Screen Maker is not put in the screen-making queue, but is promptly processed for screen making.Be sure to remove the checkmark for normal use.Additionally, screen making is executed using the frame size selected at the time of receiving the original data.
RISO GOCCOPRO Printer Driver SettingsThe operations described in this part are common in each Mac OS version.
[Image Setting] tab
12
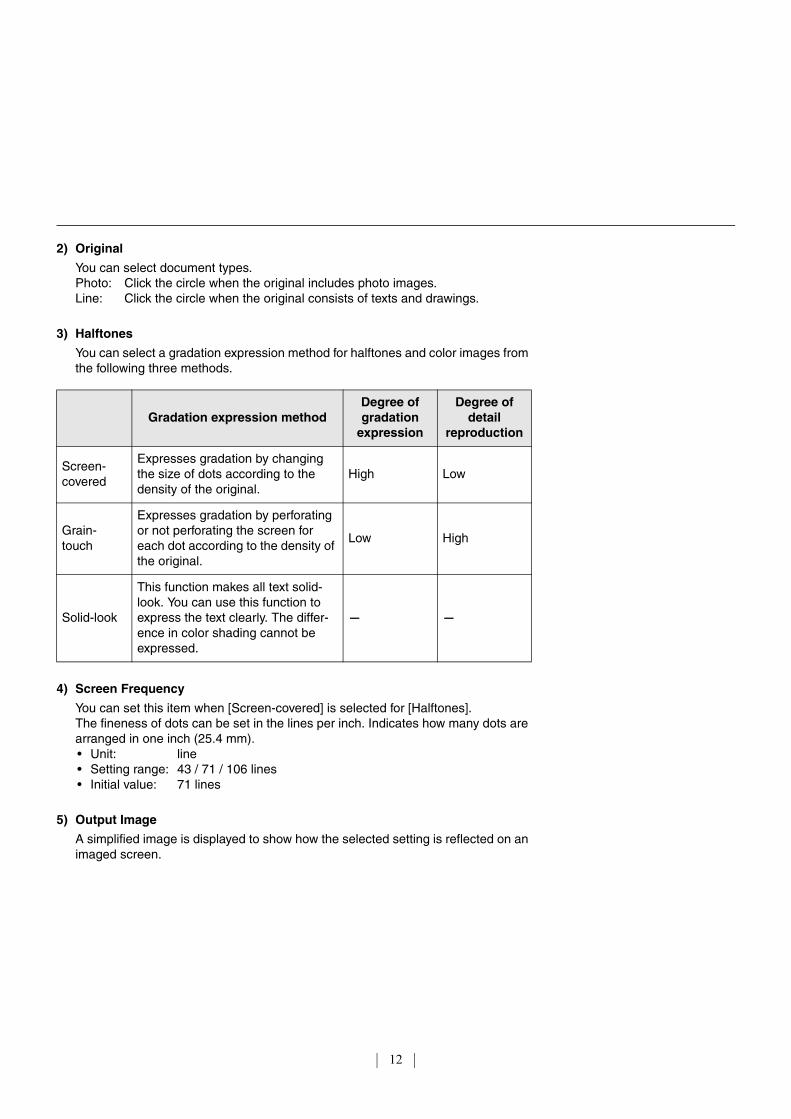
2) Original
You can select document types.Photo: Click the circle when the original includes photo images.Line: Click the circle when the original consists of texts and drawings.
3) Halftones
You can select a gradation expression method for halftones and color images from the following three methods.
4) Screen Frequency
You can set this item when [Screen-covered] is selected for [Halftones].The fineness of dots can be set in the lines per inch. Indicates how many dots are arranged in one inch (25.4 mm).• Unit: line• Setting range: 43 / 71 / 106 lines• Initial value: 71 lines
5) Output Image
A simplified image is displayed to show how the selected setting is reflected on an imaged screen.
Gradation expression methodDegree of gradation
expression
Degree of detail
reproduction
Screen-covered
Expresses gradation by changing the size of dots according to the density of the original.
High Low
Grain-touch
Expresses gradation by perforating or not perforating the screen for each dot according to the density of the original.
Low High
Solid-look
This function makes all text solid-look. You can use this function to express the text clearly. The differ-ence in color shading cannot be expressed.
- -
How to Produce an Imaged Screen
13
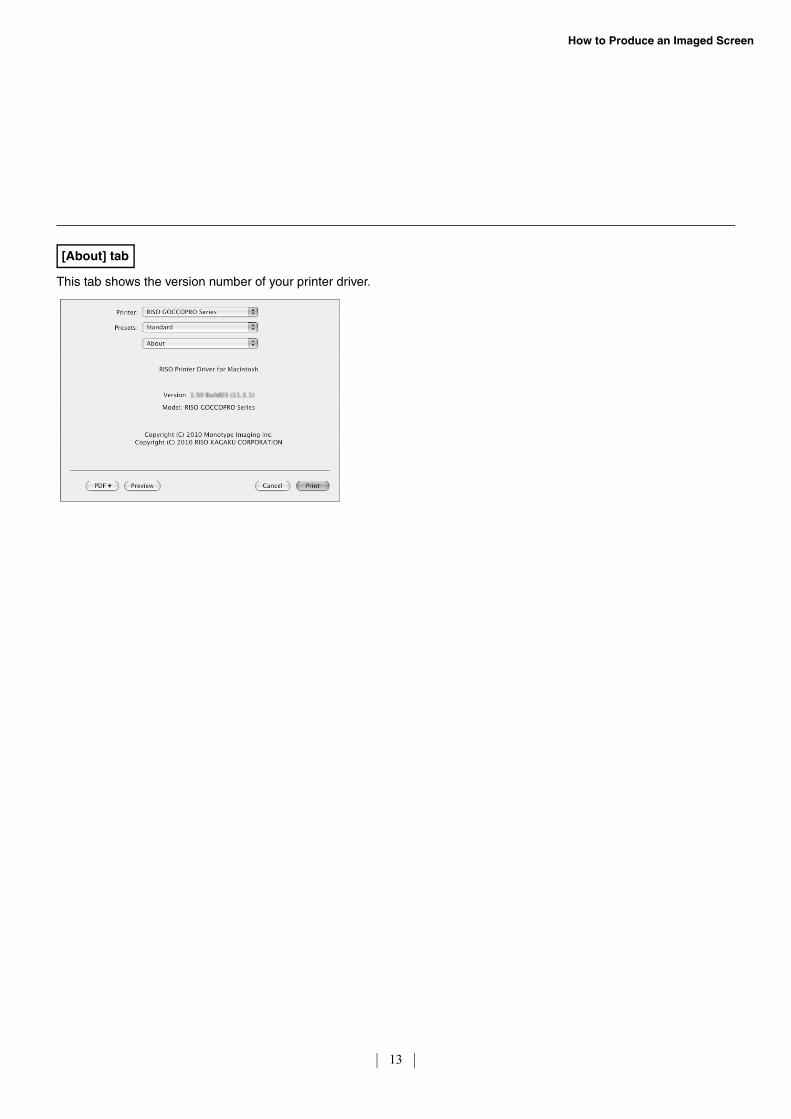
This tab shows the version number of your printer driver.
[About] tab
How to Produce an Imaged Screen
14
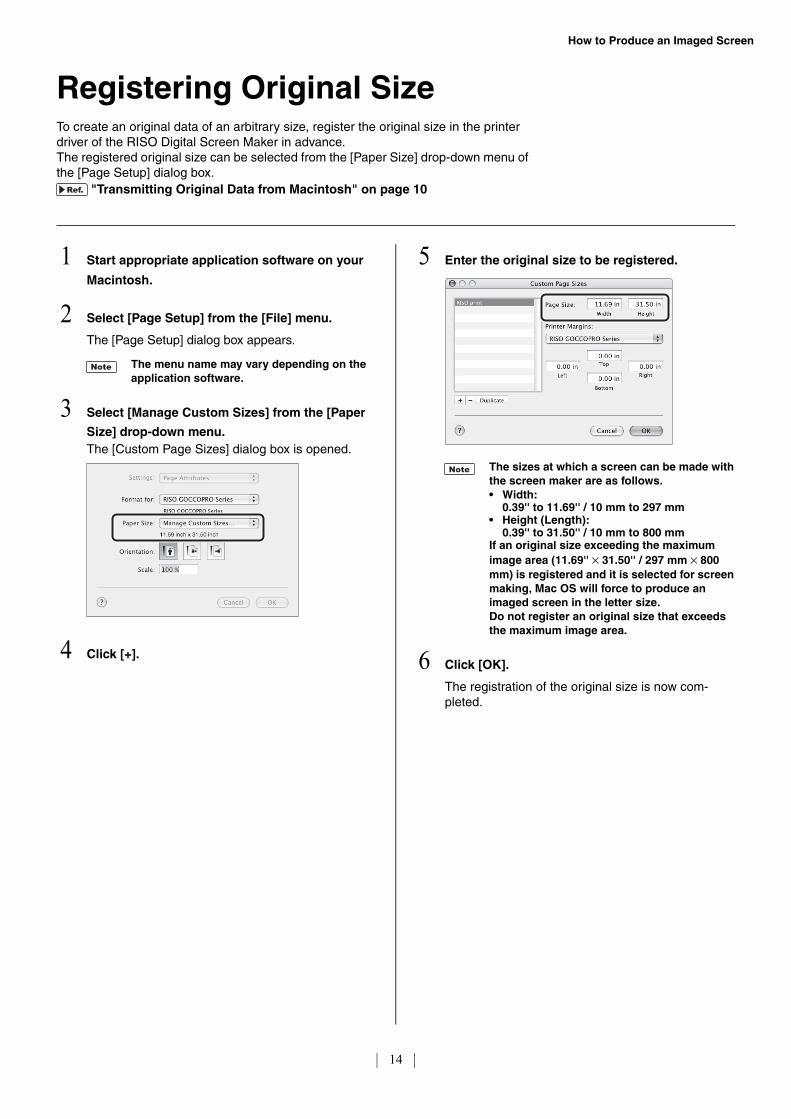
1 Start appropriate application software on your
Macintosh.
2 Select [Page Setup] from the [File] menu.
The [Page Setup] dialog box appears.
3 Select [Manage Custom Sizes] from the [Paper
Size] drop-down menu.The [Custom Page Sizes] dialog box is opened.
4 Click [+].
5 Enter the original size to be registered.
6 Click [OK].
The registration of the original size is now com-pleted.
Registering Original SizeTo create an original data of an arbitrary size, register the original size in the printer driver of the RISO Digital Screen Maker in advance.The registered original size can be selected from the [Paper Size] drop-down menu of the [Page Setup] dialog box.
"Transmitting Original Data from Macintosh" on page 10
The menu name may vary depending on the application software.
The sizes at which a screen can be made with the screen maker are as follows.• Width:
0.39'' to 11.69'' / 10 mm to 297 mm• Height (Length):
0.39'' to 31.50'' / 10 mm to 800 mmIf an original size exceeding the maximum image area (11.69'' × 31.50'' / 297 mm × 800 mm) is registered and it is selected for screen making, Mac OS will force to produce an imaged screen in the letter size.Do not register an original size that exceeds the maximum image area.
Troubleshooting
This section describes points to be checked and actions to be taken in case of error messages on your Macintosh during screen making and malfunction of the RISO Digital Screen Maker.• When an Error Message Appears on Macintosh
page 16• Troubleshooting (Tip) page 17

16
When an Error Message Appears on Macintosh
Message Checkpoint Action
Cannot print because an error is found in the current printer settings.
Do the settings of the application soft-ware (original size, print orientation, printer driver selection, etc.) match the settings of the printer driver?
Match the settings of the application software with the settings of the printer driver.For example, the original size selected in the [Print] dialog box must be the same as the original size specified in the application software.
"Transmitting Original Data from Macintosh" on page 10
Troubleshooting
17
Troubleshooting (Tip)When failure is suspected, check the following points before calling a service repre-sentative.
When the Original Data cannot be Transferred onto the Screen
Problem Checkpoint Action
Screen Making is not started when data is transmitted from Macintosh.
Is the <START> Indicator of your RISO Digital Screen Maker lit?
When the <START> Indicator of your RISO Digital Screen Maker is lit, press the <START> Key to start screen making.
Does the selected printer driver support your RISO Digital Screen Maker?
Select a printer driver that supports your RISO Digital Screen Maker, and then per-form the outputting operation on the appli-cation again.
"Transmitting Original Data from Macintosh" on page 10
18
When the Image is Not Correctly Produced onto the Screen
Problem Checkpoint Action
The data transferred onto the screen is displaced or its edge is missing
Does the size of the original data created on the application software exceed the image area?
Any part outside the image area will not be transferred onto the screen. Refer to the "GOCCOPRO 100 User's Guide" to check the image area.
Characters are not transferred correctly onto the screen (the font of the transferred charac-ters differs from the original).
Is the output of the application software set to "Use Printer Fonts"?
In the application, specify other than [Use Printer Font].
Graphics are not transferred correctly onto the screen.
Does the printer driver support your RISO Digital Screen Maker?
When original data is edited after a printer driver that does not support your RISO Digital Screen Maker is selected, graphics may not be transferred correctly onto the screen.After selecting the printer driver support-ing your RISO Digital Screen Maker, edit the original data and produce the imaged screen again.
Images are deformed/reduced in size.
Does the printer driver support your RISO Digital Screen Maker?
When the name of your RISO Digital Screen Maker is different from the model name of your printer driver, an imaged screen cannot be produced properly. In particular, if transmitting a RISORINC file, check that the printer driver corresponds to your RISO Digital Screen Maker to which to transmit the file.
The original size registered in [Custom Page Sizes] is not same as the size of the pro-duced screen.
Did you use an original size that exceeds the maximum image area (Width 11.69'' / 297 mm × Height (length) 31.50'' / 800 mm)?
If an original that exceeds the maximum image area is selected, Mac OS will force to produce an imaged screen within the range of letter size. Register an original data size with values not exceeding the maximum image area.

2018/12

![Printer Driver Rebootless Update Procedure for …1].1.pdf · Printer Driver Rebootless Update Procedure for ... Printer Driver Rebootless Update Procedure ... (Win2K), Windows XP](https://img.pdfslide.us/doc/110x75/5ac612857f8b9a2b5c8df5fc/printer-driver-rebootless-update-procedure-for-11pdfprinter-driver-rebootless.jpg)