Embed Size (px)
Citation preview
Marjolein www.12bead.com [email protected]
Ring Toppers (Glass tops)
Everything about Tools
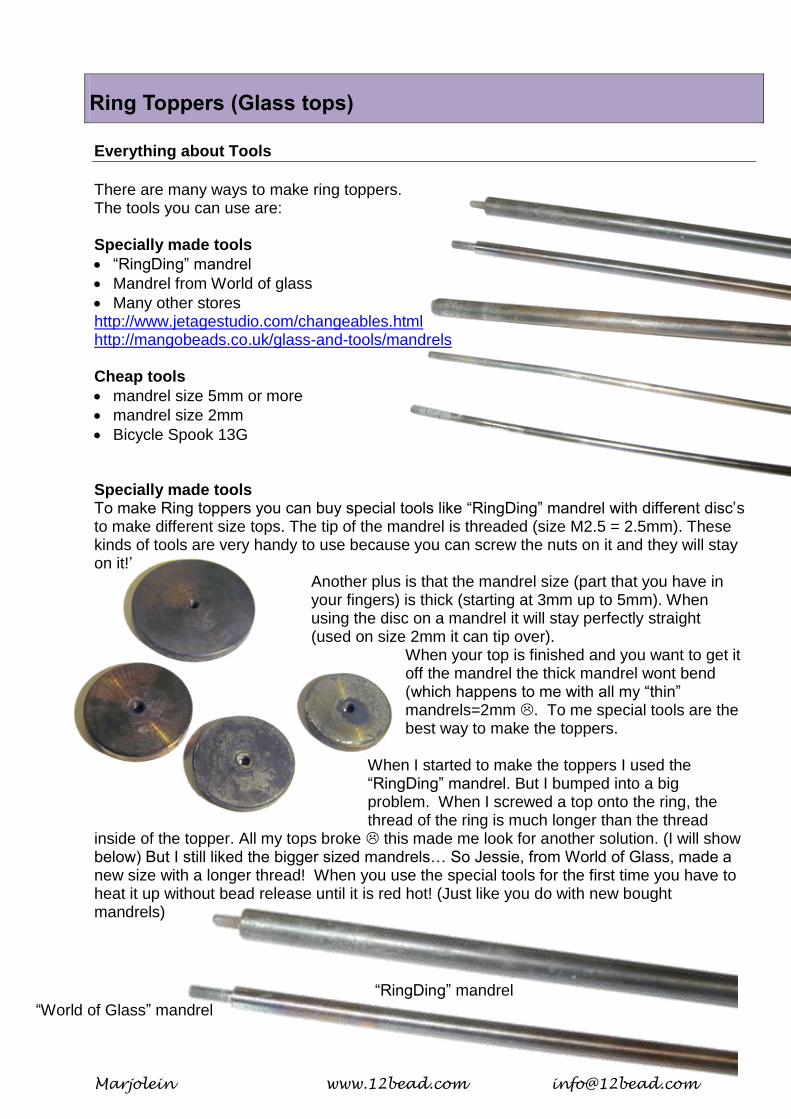
There are many ways to make ring toppers. The tools you can use are: Specially made tools
“RingDing” mandrel
Mandrel from World of glass
Many other stores http://www.jetagestudio.com/changeables.html http://mangobeads.co.uk/glass-and-tools/mandrels
Cheap tools
mandrel size 5mm or more
mandrel size 2mm
Bicycle Spook 13G Specially made tools To make Ring toppers you can buy special tools like “RingDing” mandrel with different disc’s to make different size tops. The tip of the mandrel is threaded (size M2.5 = 2.5mm). These kinds of tools are very handy to use because you can screw the nuts on it and they will stay on it!’
Another plus is that the mandrel size (part that you have in your fingers) is thick (starting at 3mm up to 5mm). When using the disc on a mandrel it will stay perfectly straight (used on size 2mm it can tip over).
When your top is finished and you want to get it off the mandrel the thick mandrel wont bend (which happens to me with all my “thin” mandrels=2mm . To me special tools are the best way to make the toppers.
When I started to make the toppers I used the “RingDing” mandrel. But I bumped into a big problem. When I screwed a top onto the ring, the thread of the ring is much longer than the thread
inside of the topper. All my tops broke this made me look for another solution. (I will show below) But I still liked the bigger sized mandrels… So Jessie, from World of Glass, made a new size with a longer thread! When you use the special tools for the first time you have to heat it up without bead release until it is red hot! (Just like you do with new bought mandrels)
“RingDing” mandrel
“World of Glass” mandrel
Marjolein www.12bead.com [email protected]
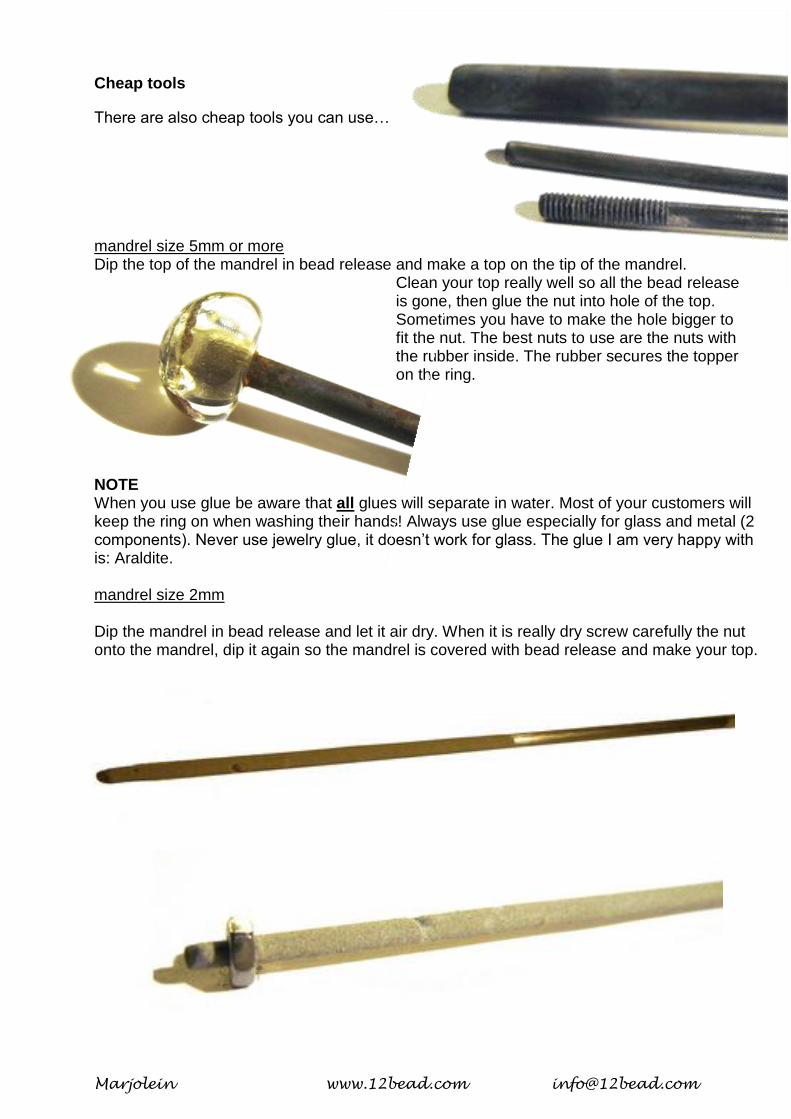
Cheap tools
There are also cheap tools you can use… mandrel size 5mm or more Dip the top of the mandrel in bead release and make a top on the tip of the mandrel.
Clean your top really well so all the bead release is gone, then glue the nut into hole of the top. Sometimes you have to make the hole bigger to fit the nut. The best nuts to use are the nuts with the rubber inside. The rubber secures the topper on the ring.
NOTE When you use glue be aware that all glues will separate in water. Most of your customers will keep the ring on when washing their hands! Always use glue especially for glass and metal (2 components). Never use jewelry glue, it doesn’t work for glass. The glue I am very happy with is: Araldite. mandrel size 2mm Dip the mandrel in bead release and let it air dry. When it is really dry screw carefully the nut onto the mandrel, dip it again so the mandrel is covered with bead release and make your top.
Marjolein www.12bead.com [email protected]
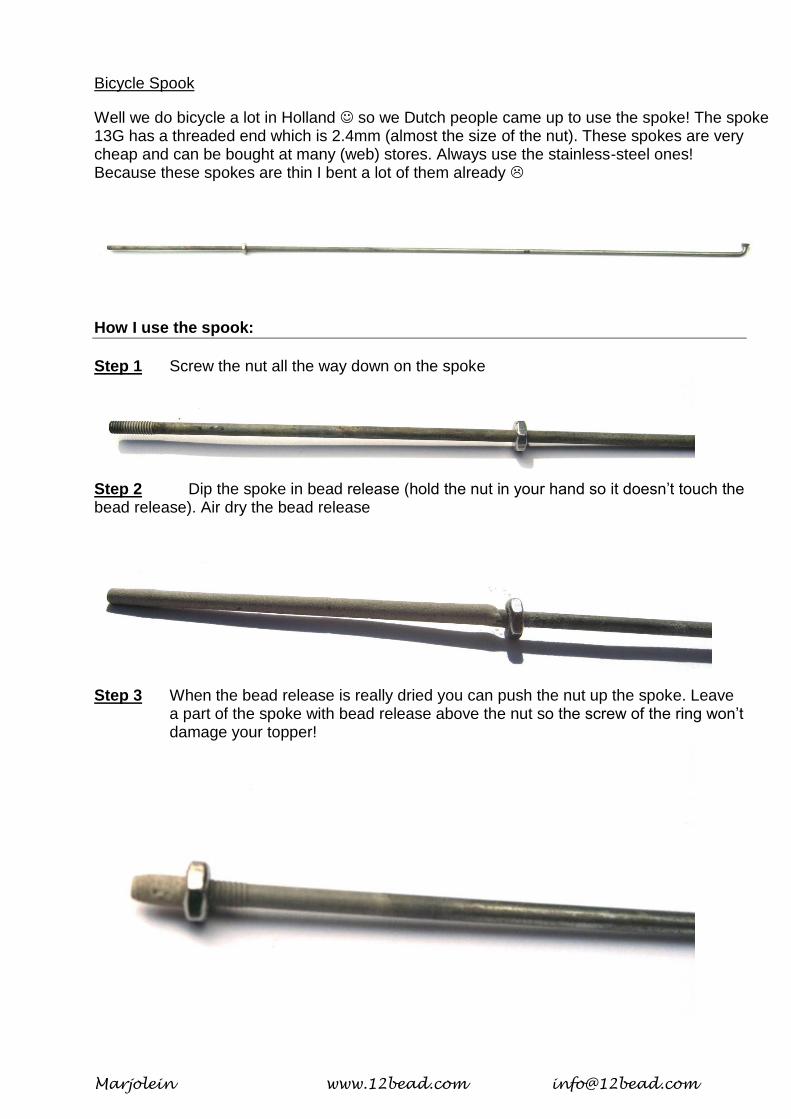
Bicycle Spook
Well we do bicycle a lot in Holland so we Dutch people came up to use the spoke! The spoke 13G has a threaded end which is 2.4mm (almost the size of the nut). These spokes are very cheap and can be bought at many (web) stores. Always use the stainless-steel ones! Because these spokes are thin I bent a lot of them already
How I use the spook:
Step 1 Screw the nut all the way down on the spoke
Step 2 Dip the spoke in bead release (hold the nut in your hand so it doesn’t touch the bead release). Air dry the bead release
Step 3 When the bead release is really dried you can push the nut up the spoke. Leave
a part of the spoke with bead release above the nut so the screw of the ring won’t damage your topper!
Marjolein www.12bead.com [email protected]
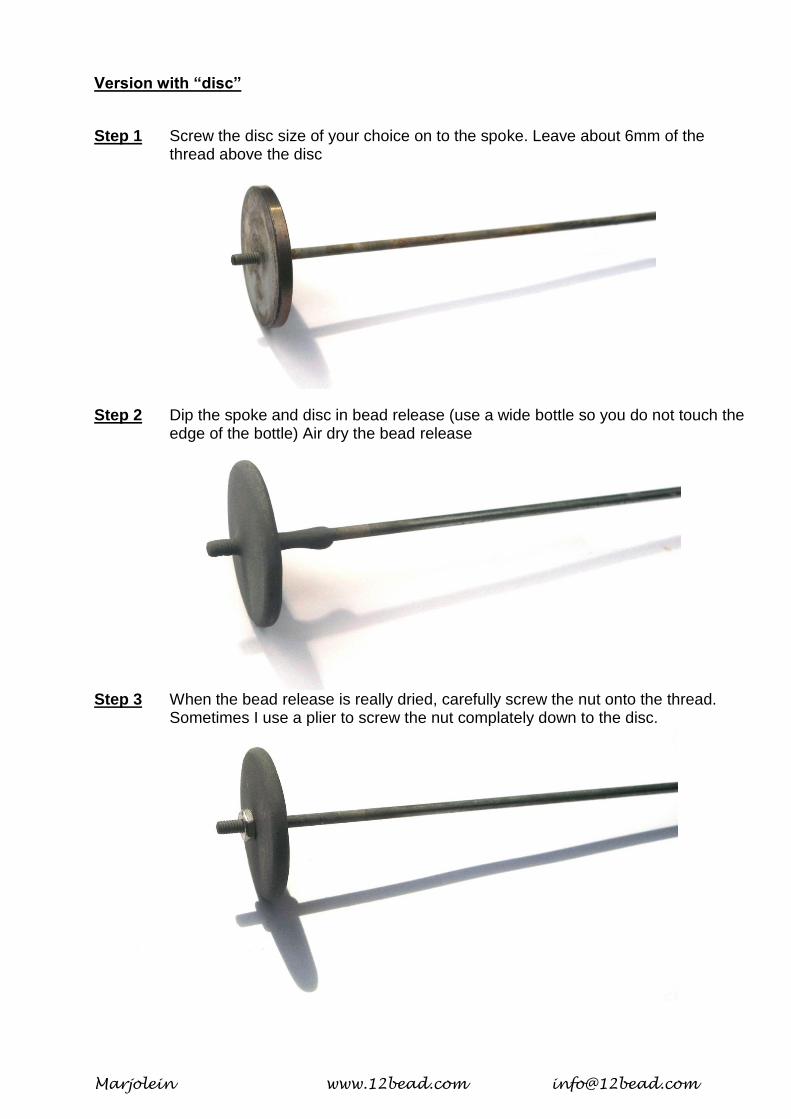
Version with “disc”
Step 1 Screw the disc size of your choice on to the spoke. Leave about 6mm of the
thread above the disc
Step 2 Dip the spoke and disc in bead release (use a wide bottle so you do not touch the edge of the bottle) Air dry the bead release
Step 3 When the bead release is really dried, carefully screw the nut onto the thread.
Sometimes I use a plier to screw the nut complately down to the disc.
Marjolein www.12bead.com [email protected]
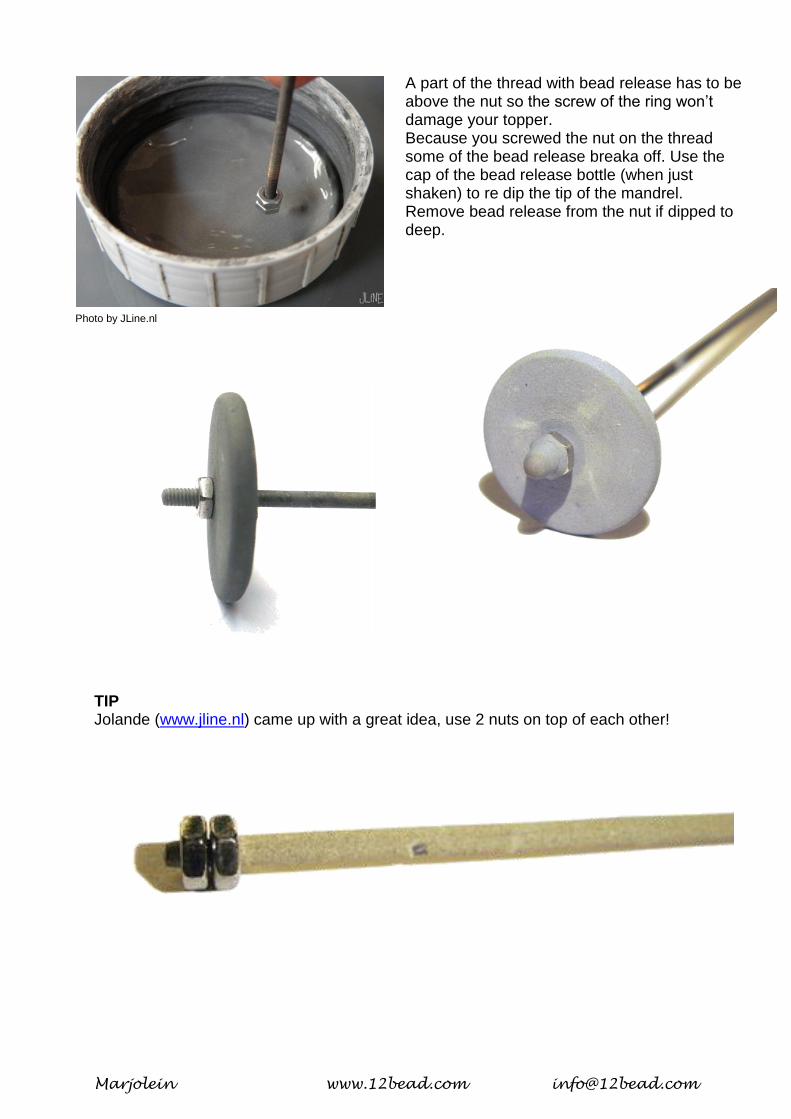
A part of the thread with bead release has to be above the nut so the screw of the ring won’t damage your topper. Because you screwed the nut on the thread some of the bead release breaka off. Use the cap of the bead release bottle (when just shaken) to re dip the tip of the mandrel. Remove bead release from the nut if dipped to deep.
Photo by JLine.nl
TIP Jolande (www.jline.nl) came up with a great idea, use 2 nuts on top of each other!
Marjolein www.12bead.com [email protected]
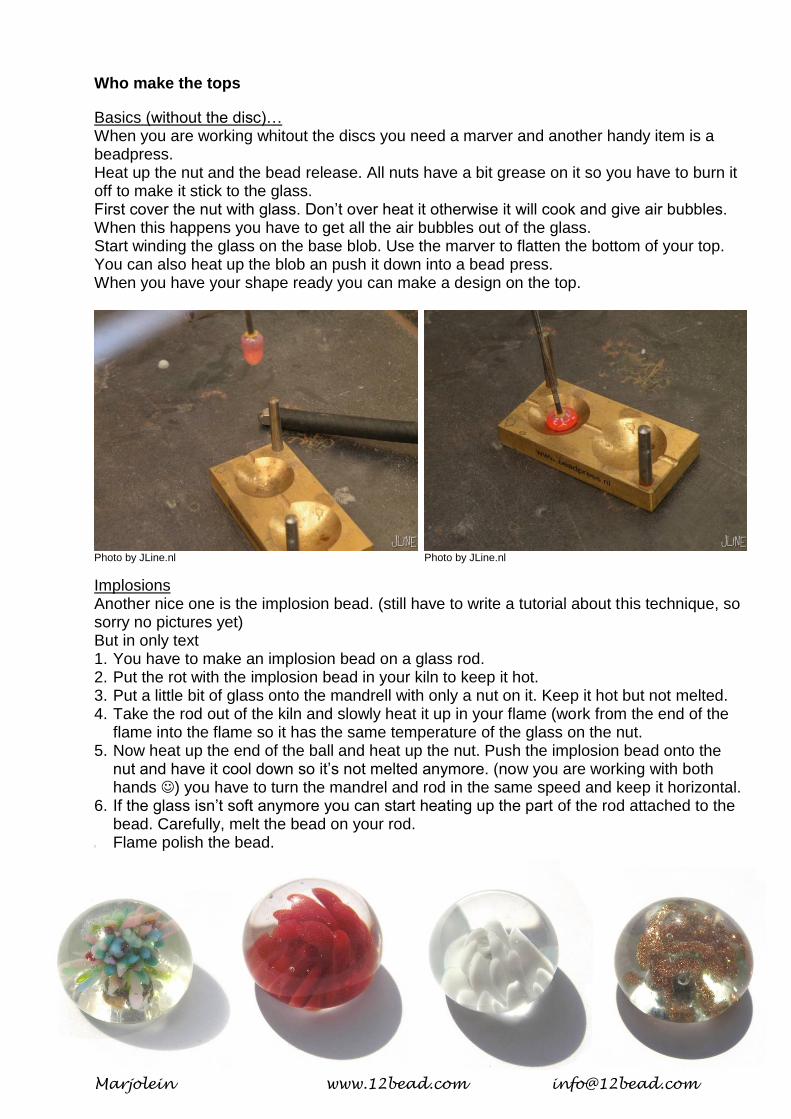
Who make the tops
Basics (without the disc)… When you are working whitout the discs you need a marver and another handy item is a beadpress. Heat up the nut and the bead release. All nuts have a bit grease on it so you have to burn it off to make it stick to the glass. First cover the nut with glass. Don’t over heat it otherwise it will cook and give air bubbles. When this happens you have to get all the air bubbles out of the glass. Start winding the glass on the base blob. Use the marver to flatten the bottom of your top. You can also heat up the blob an push it down into a bead press. When you have your shape ready you can make a design on the top.
Photo by JLine.nl Photo by JLine.nl
Implosions Another nice one is the implosion bead. (still have to write a tutorial about this technique, so sorry no pictures yet) But in only text 1. You have to make an implosion bead on a glass rod. 2. Put the rot with the implosion bead in your kiln to keep it hot. 3. Put a little bit of glass onto the mandrell with only a nut on it. Keep it hot but not melted. 4. Take the rod out of the kiln and slowly heat it up in your flame (work from the end of the
flame into the flame so it has the same temperature of the glass on the nut. 5. Now heat up the end of the ball and heat up the nut. Push the implosion bead onto the
nut and have it cool down so it’s not melted anymore. (now you are working with both hands ) you have to turn the mandrel and rod in the same speed and keep it horizontal.
6. If the glass isn’t soft anymore you can start heating up the part of the rod attached to the bead. Carefully, melt the bead on your rod.
7. Flame polish the bead.
Marjolein www.12bead.com [email protected]
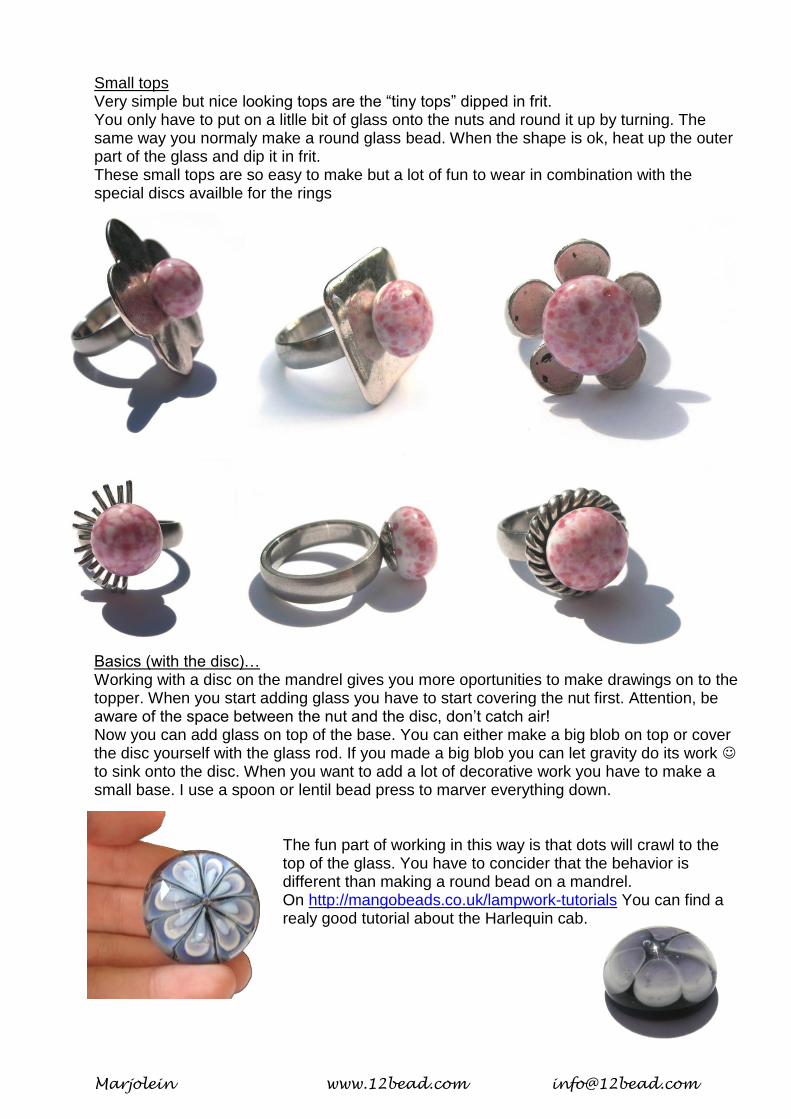
Small tops Very simple but nice looking tops are the “tiny tops” dipped in frit. You only have to put on a litlle bit of glass onto the nuts and round it up by turning. The same way you normaly make a round glass bead. When the shape is ok, heat up the outer part of the glass and dip it in frit. These small tops are so easy to make but a lot of fun to wear in combination with the special discs availble for the rings
Basics (with the disc)… Working with a disc on the mandrel gives you more oportunities to make drawings on to the topper. When you start adding glass you have to start covering the nut first. Attention, be aware of the space between the nut and the disc, don’t catch air! Now you can add glass on top of the base. You can either make a big blob on top or cover the disc yourself with the glass rod. If you made a big blob you can let gravity do its work to sink onto the disc. When you want to add a lot of decorative work you have to make a small base. I use a spoon or lentil bead press to marver everything down.
The fun part of working in this way is that dots will crawl to the top of the glass. You have to concider that the behavior is different than making a round bead on a mandrel. On http://mangobeads.co.uk/lampwork-tutorials You can find a realy good tutorial about the Harlequin cab.
Marjolein www.12bead.com [email protected]
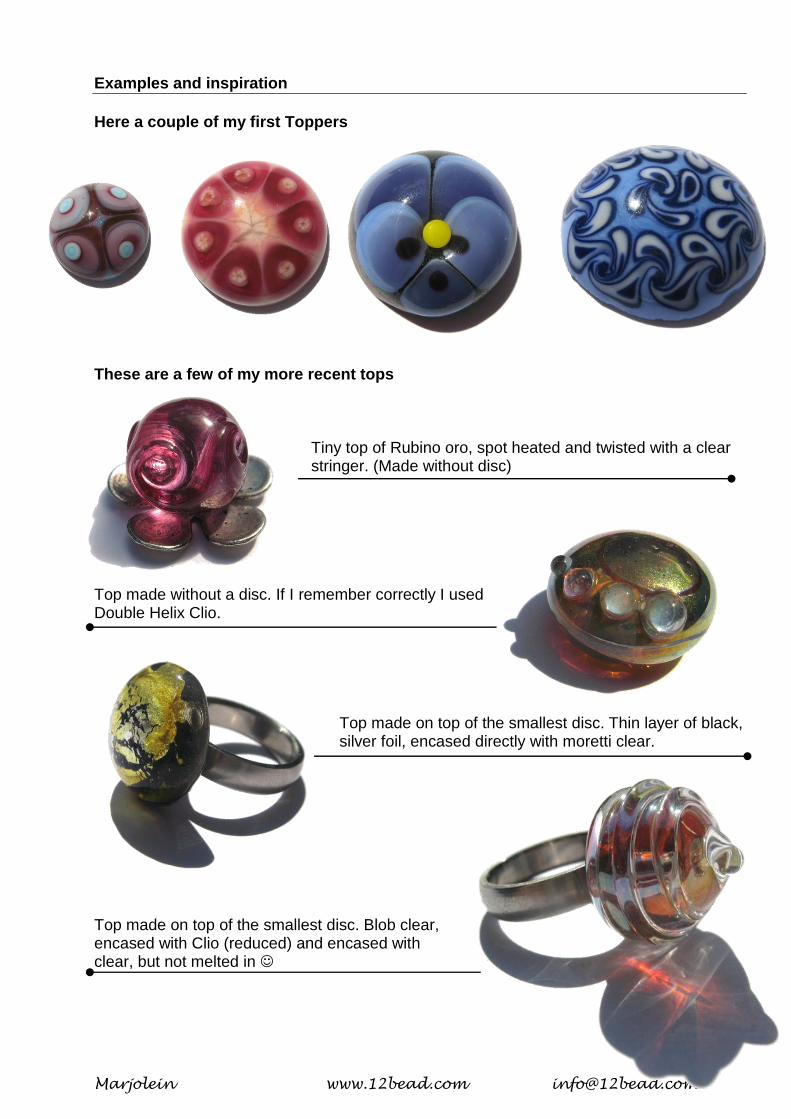
Examples and inspiration
Here a couple of my first Toppers
These are a few of my more recent tops
Tiny top of Rubino oro, spot heated and twisted with a clear stringer. (Made without disc)
Top made without a disc. If I remember correctly I used Double Helix Clio.
Top made on top of the smallest disc. Thin layer of black, silver foil, encased directly with moretti clear.
Top made on top of the smallest disc. Blob clear, encased with Clio (reduced) and encased with clear, but not melted in
Marjolein www.12bead.com [email protected]
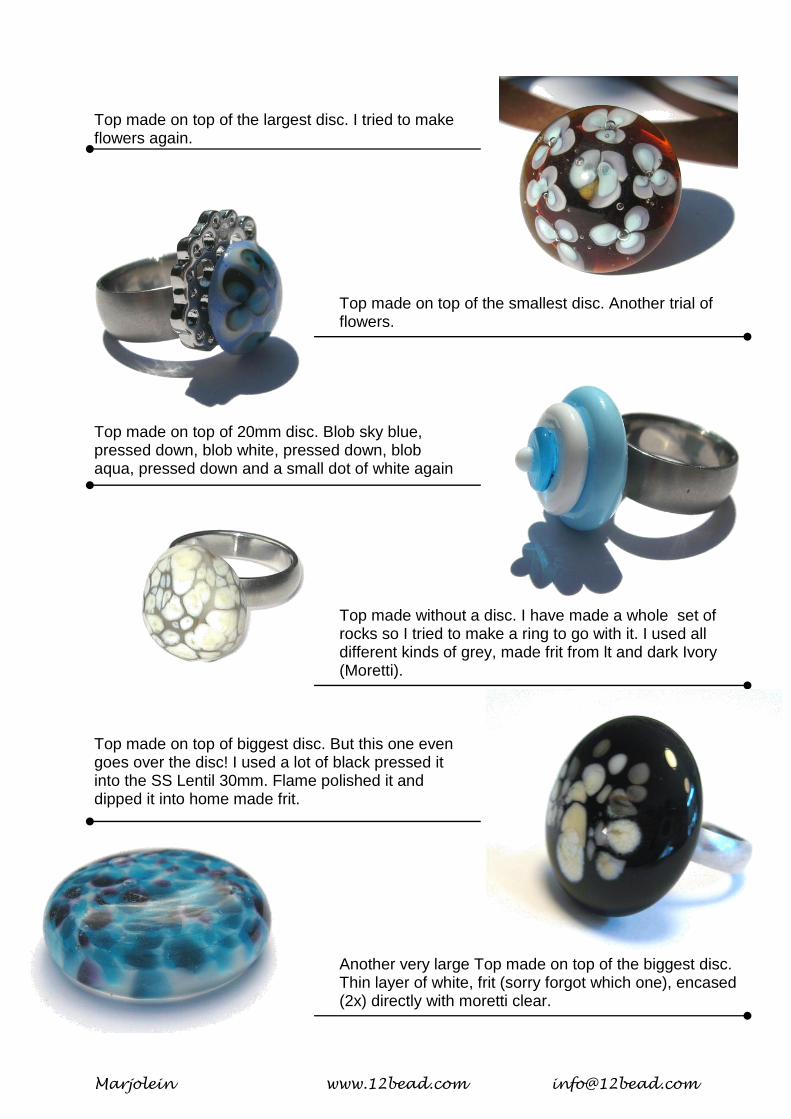
Top made on top of the largest disc. I tried to make flowers again.
Top made on top of the smallest disc. Another trial of flowers.
Top made on top of 20mm disc. Blob sky blue, pressed down, blob white, pressed down, blob aqua, pressed down and a small dot of white again
Top made without a disc. I have made a whole set of rocks so I tried to make a ring to go with it. I used all different kinds of grey, made frit from lt and dark Ivory (Moretti).
Top made on top of biggest disc. But this one even goes over the disc! I used a lot of black pressed it into the SS Lentil 30mm. Flame polished it and dipped it into home made frit.
Another very large Top made on top of the biggest disc. Thin layer of white, frit (sorry forgot which one), encased (2x) directly with moretti clear.
Marjolein www.12bead.com [email protected]
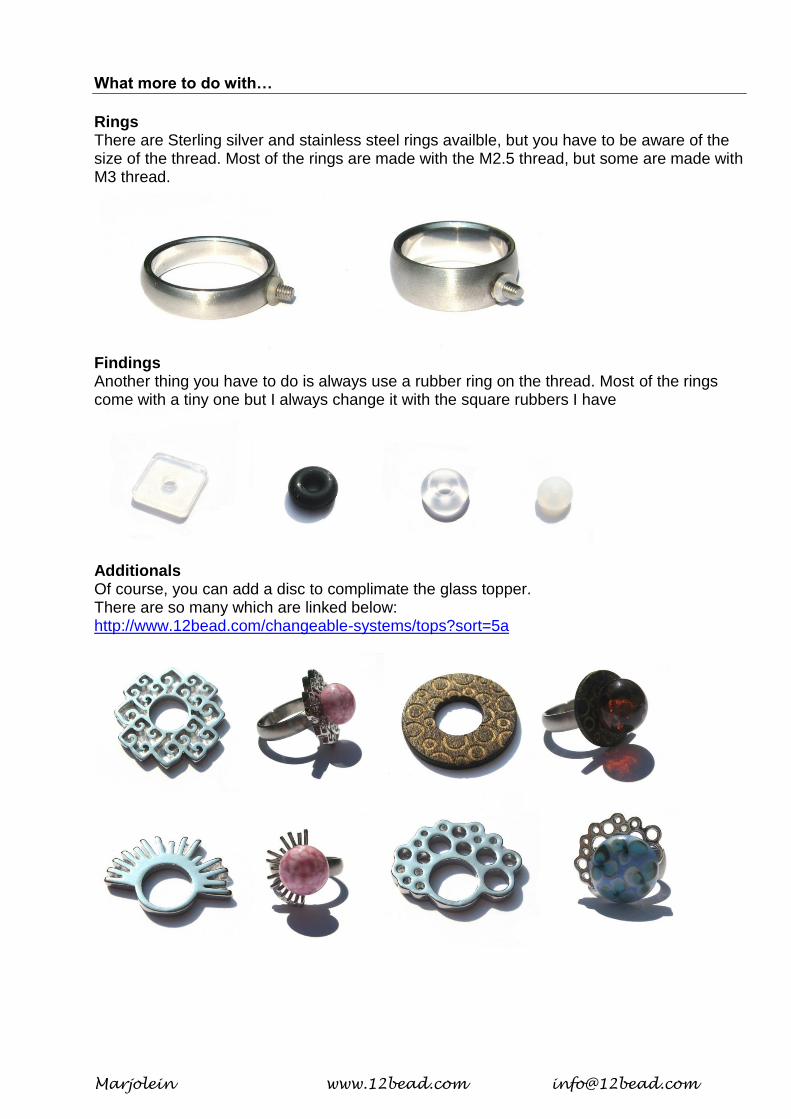
What more to do with…
Rings There are Sterling silver and stainless steel rings availble, but you have to be aware of the size of the thread. Most of the rings are made with the M2.5 thread, but some are made with M3 thread.
Findings Another thing you have to do is always use a rubber ring on the thread. Most of the rings come with a tiny one but I always change it with the square rubbers I have
Additionals Of course, you can add a disc to complimate the glass topper. There are so many which are linked below: http://www.12bead.com/changeable-systems/tops?sort=5a
Marjolein www.12bead.com [email protected]
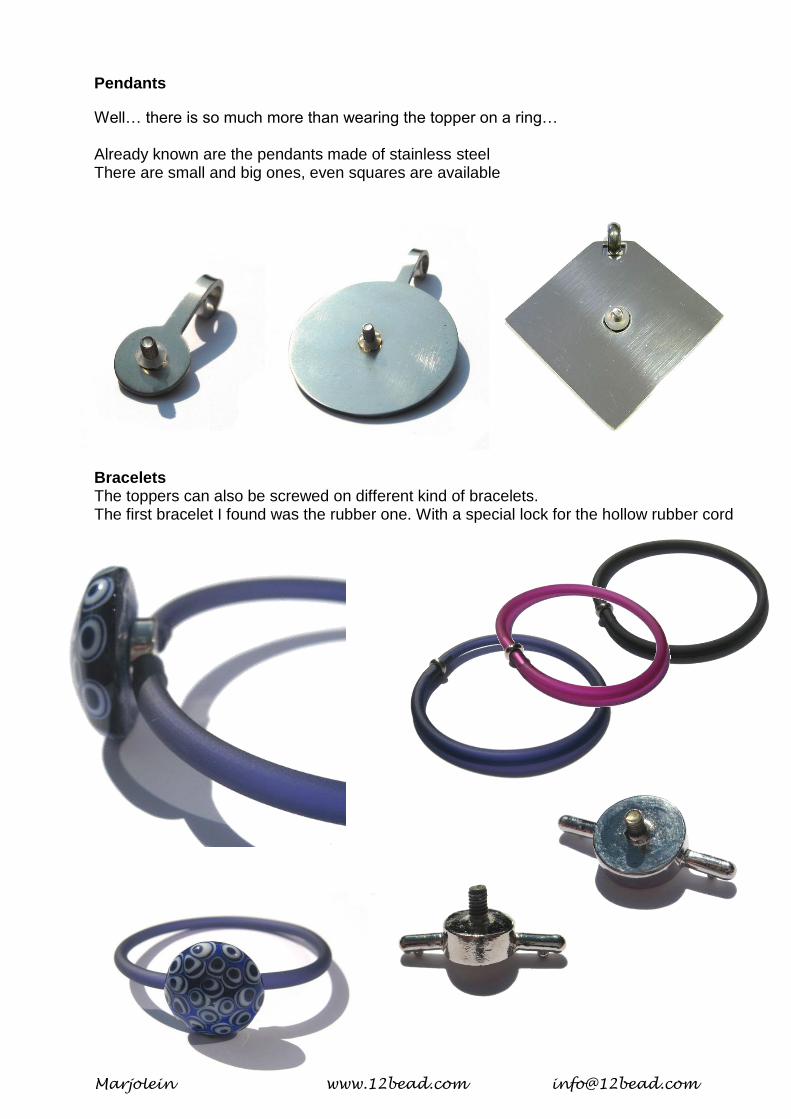
Pendants
Well… there is so much more than wearing the topper on a ring… Already known are the pendants made of stainless steel There are small and big ones, even squares are available
Bracelets The toppers can also be screwed on different kind of bracelets. The first bracelet I found was the rubber one. With a special lock for the hollow rubber cord
Marjolein www.12bead.com [email protected]
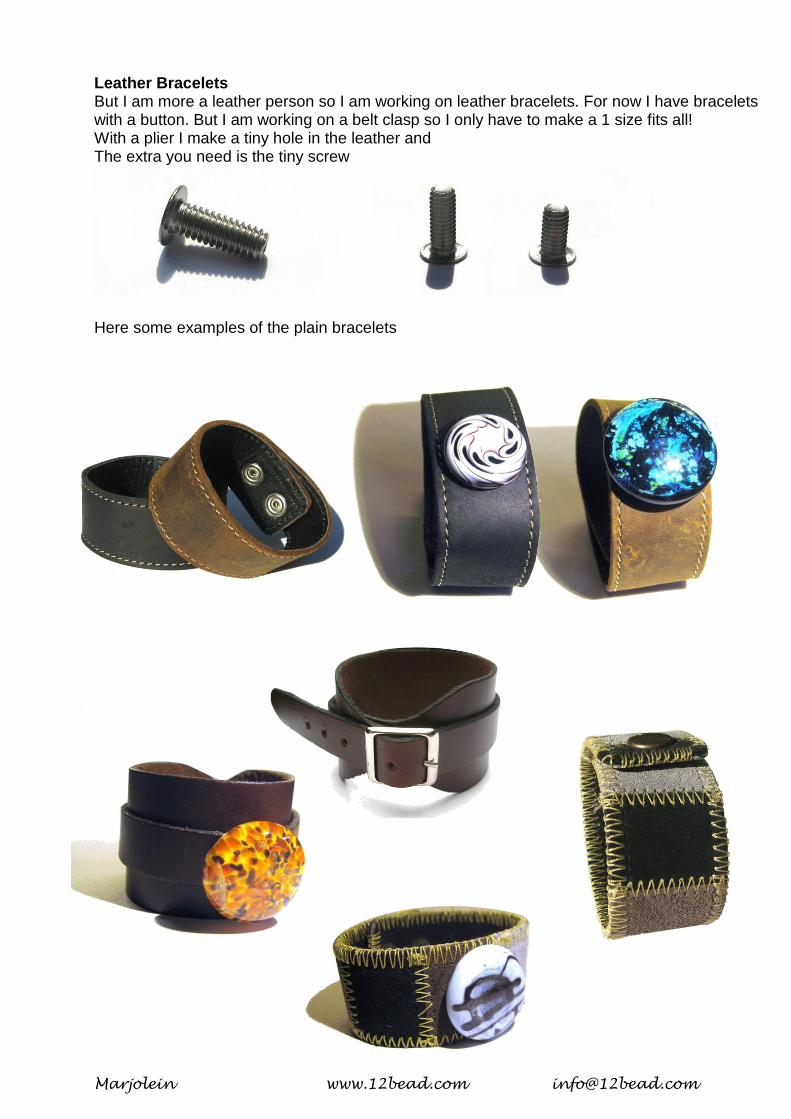
Leather Bracelets But I am more a leather person so I am working on leather bracelets. For now I have bracelets with a button. But I am working on a belt clasp so I only have to make a 1 size fits all! With a plier I make a tiny hole in the leather and The extra you need is the tiny screw
Here some examples of the plain bracelets
Marjolein www.12bead.com [email protected]
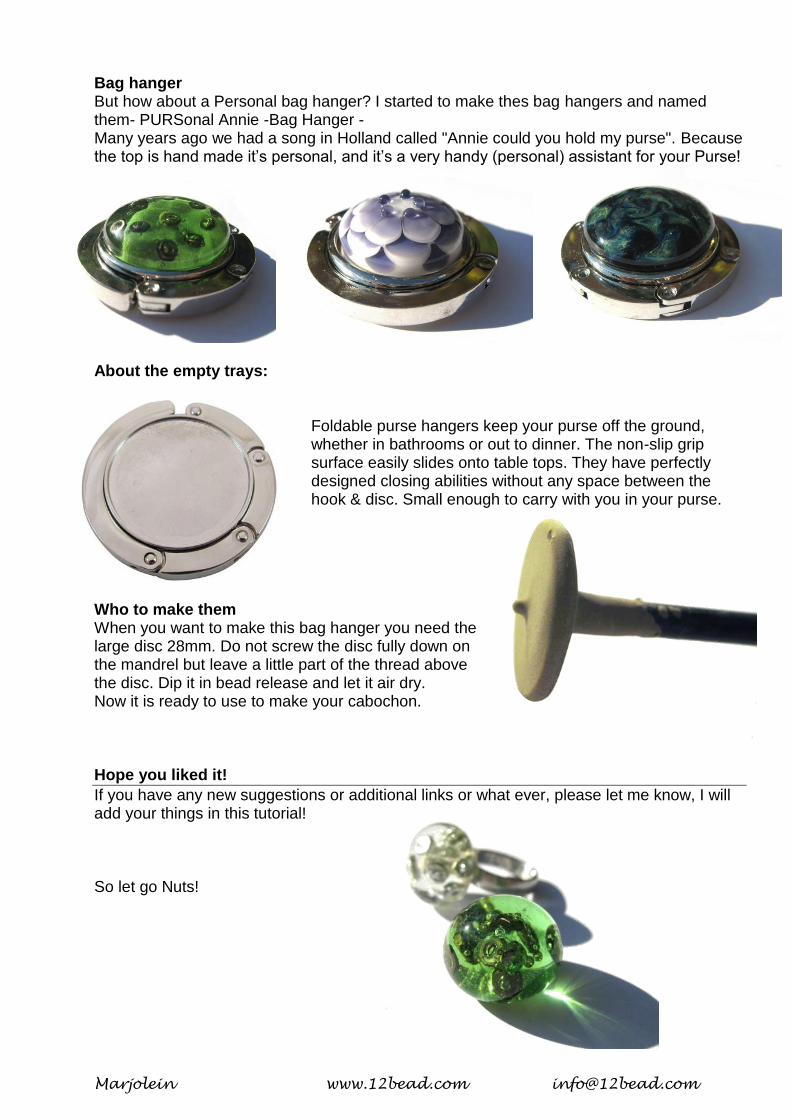
Bag hanger But how about a Personal bag hanger? I started to make thes bag hangers and named them- PURSonal Annie -Bag Hanger - Many years ago we had a song in Holland called "Annie could you hold my purse". Because the top is hand made it’s personal, and it’s a very handy (personal) assistant for your Purse!
About the empty trays:
Foldable purse hangers keep your purse off the ground, whether in bathrooms or out to dinner. The non-slip grip surface easily slides onto table tops. They have perfectly designed closing abilities without any space between the hook & disc. Small enough to carry with you in your purse.
Who to make them When you want to make this bag hanger you need the large disc 28mm. Do not screw the disc fully down on the mandrel but leave a little part of the thread above the disc. Dip it in bead release and let it air dry. Now it is ready to use to make your cabochon. Hope you liked it!
If you have any new suggestions or additional links or what ever, please let me know, I will add your things in this tutorial! So let go Nuts!
Marjolein www.12bead.com [email protected]
Web links
Available at my website: www.12bead.com Findings (http://www.12bead.com/changeable-systems/findings)
Nuts M2,5 (2.5mm) Screws M2,5 (2.5mm) Square (and round) rubber lock with screw Jewelry (http://www.12bead.com/changeable-systems/jewelry)
Stainless steel rings (Sunset blvd) all sizes Stainless steel Pendants Leather bracelets Rubber bracelets and necklaces. Leather bracelets (http://www.12bead.com/accecoires-2/bracelets) Empty bag hanger (http://www.12bead.com/accecoires-2/various) Ring with holes (http://www.monstersteel.com/Unisex-Full-o-Holes-Modern-Stainless-Steel-Ring-nid-701068.html.) Tops (http://www.12bead.com/changeable-systems/tops)
Complementary tops and my glass toppers For specialty tools
www.worldofglass.eu (Mandrel from World of glass, discs and special nuts) www.jetagestudio.com (mandrel, discs and special nuts) www.mangobeads.co.uk (mandrel non changeable) Tutorials:
www.jetagestudio.com (Free, basic instructions) www.Jline.nl (Free tutorial only in Dutch available) http://mangobeads.co.uk/lampwork-tutorials (a realy good tutorial about the Harlequin cab)
Special thanks to Cathy Wetzel www.dcaawdesigns.com.for editing this tutorial
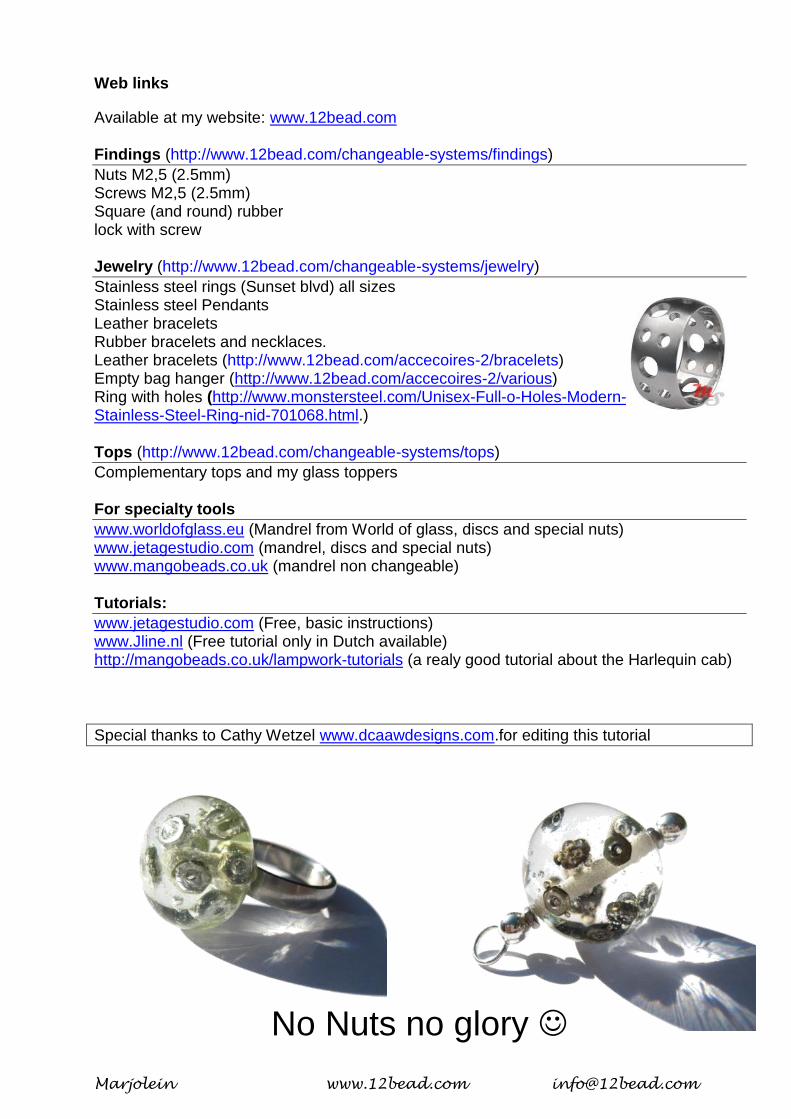
No Nuts no glory