Embed Size (px)
Citation preview

B
IKEO
LOGY
American Alliance forHealth, Physical Education,Recreation and Dance
A middle and
high school bicycle
safety curriculum for
physical education teachers
and recreation specialists
RID
E O
N!
Funding for this project was provided by the National Highway Traffic Safety Administration

Published March 2014 by the American Alliance for Health, Physical Education, Recreation and Dance (AAHPERD), 1900 Association Drive, Reston, VA 20191, www.aahperd.org.
DISCLAIMERThis resource has been published in the interest of information exchange. The opinions, findings and conclusions expressedin this resource are those of the author(s) and are not necessarily those of the U.S. Department of Transportation or theNational Highway Traffic Safety Administration, which provided funding for its publication. The U.S. government assumesno liability for its content or use. If trade or manufacturers’ names or products are mentioned within this resource, it isbecause they are considered essential to purpose of the resource and should not be construed as an endorsement. The U.S.government does not endorse products or manufacturers.
American Alliance forHealth, Physical Education,Recreation and Dance

•3
co
NTe
NTS
cONtENtS
thIS IcON INDIcAtES thAt AN ElEctRONIcASSESSmENt IS AvAIlAblE.
5 SEctION 1: cuRRIculum OvERvIEwPurposeUniqueness of the CurriculumCurriculum DevelopmentHow to Use the CurriculumAcknowledgments
9 SEctION 2: cuRRIculum INtRODuctIONLayoutUnit ComponentsActivity ElementsAssessmentsDifferentiating InstructionParent Involvement
13 SEctION 3: cuRRIculum uNItS15 Unit 1: Getting Ready to Ride93 Unit 2: Bicycle Handling Basics 157 Unit 3: Emergency Bicycle Handling Skills189 Unit 4: Advanced Bicycle Handling Skills239 Unit 5: Rules of the Road for Riding293 Unit 6: Bicycle Maintenance331 Unit 7: Riding for Fitness
355 SEctION 4: AppENDIcESBike-Friendly Community AssessmentWalk-Friendly Community AssessmentBicycle Safety: Tips for YouthBe a “Roll” Model: Wear a HelmetFitting Your Bike HelmetAvoid the Hazards worksheetRight-of-Way worksheets
SEE AlSO thE AffIlIAtED DOcumENt: pARENt SEctION: whAt EvERy pARENt ShOulD kNOw The Bikeology CourseBicycle HelmetsPreventing Bicycle Crashes & Brain InjuriesChoosing the Right BicycleBicycles & Basic Traffic SafetyBe a Bicycle Safety “Roll” ModelLearning to BrakeMotorists & Bicyclists: Share the RoadDistracted Driving, Walking & BicyclingDefensive Walking & BicyclingBicycling on Multi-Use TrailsMaintaining a Bicycle: ABC Quick Check


•5
Sec
Tio
N 1
>c
urr
icu
lum
ove
rvie
w
puRpOSEThis curriculum provides physical education teachers and recreation specialists the knowledgeand resources to implement an on-the-bicycle safety education program for youth grades 6-12. It contains the necessary preparations and minimum-level benchmarks to meet when teaching safe bicycle riding and is suitable for enhancing skill at the recreational biking level.
The Department of Transportation’s National Highway Traffic Safety Administration(NHTSA) funded this curriculum as one of many education and training opportunities toincrease bicycle safety and reduce the risk of injury and fatalities among youth whilebicycling throughout the United States. As recipients of NHTSA’s federal funding, theAmerican Alliance for Health, Physical Education, Recreation and Dance (AAHPERD) iscommitted to furthering the safety of bicyclists while supporting the fight against obesity byincreasing physical activity and teaching youth to enjoy lifelong physical activity.
Physical education teachers and recreation specialists can have a direct impact on the healthand safety of youth by teaching and reinforcing safe bicycling skills and behaviors aroundtraffic. As a result, youth will gain greater confidence and enjoyment when bicycling and bemore likely to use bicycling as a form of activity for a lifetime.
Elementary school children (grades 4-5) may be exposed to bicycle safety via schoolpresentations or a one-time cycling skills clinic or bicycle rodeo. This curriculum, however,focuses on reaching pre-teens and teens to expose, reinforce and apply knowledge to on-the-bicycle skills to enhance control of the bicycle while riding. The focus on bicycle safetywith pre-teens and teens is important because:
• Pre-teens and teens are more likely to be using a bicycle as a means of transportation,encountering motor vehicle traffic while riding their bicycles as a vehicle on the road, and thus increasing their risk of traffic-related injury and death.
• Traffic-related crashes are the result of behaviors of both bicyclists and motorists. Teachingsafe bicycling behaviors (skills) can decrease riding risks and potentially save lives.
• Bicycle safety education, including riding skills, becomes more complex as children mature.As their likelihood of interacting with motorized vehicles increases, children require a betterunderstanding of the rules of the road and their responsibility as a vehicle as a part of traffic.
SEctION 1curriculum Overview

Sec
Tio
N o
Ne
>c
urr
icu
lum
ove
rvie
w
•6
The middle school and high school years are the ideal times to begin teaching traffic safetyconcepts to children before they become licensed drivers at ages 16, 17 or 18. Learning therules of the road and consistently applying them to their own bicycling will pay benefits nowand in the near future. Defensive walking, biking and driving use similar concepts andlearning to anticipate hazards helps walkers, riders and drivers avoid potentially troublesometraffic situations. Equally important are the benefits of establishing regular physical exercisefor children, which bicycling provides. Consider data provided by the Centers for DiseaseControl and Prevention (CDC) warning that childhood obesity has more than tripled in thepast 30 years. While obesity is the result of several factors including the expenditure offewer calories than consumed and is affected by various genetic, behavioral andenvironmental factors,5,6 bicycling is a fun way to increase physical activity toward efforts tocombat obesity.
uNiqueNeSS oF THe curriculum
This curriculum is unique for the following reasons. It was:
1. Written to meet National Standards for K-12 Physical Education, standards used by physical education teachers;
2. Found effective in increasing both bicycle safety knowledge and skills of students; and
3. Developed to address varying bicycle skill levels of students.
curriculum DevelopmeNT
This curriculum is the result of a cooperative agreement between NHTSA and AAHPERD todevelop an evaluated model curriculum for national use by physical education teachers andrecreation specialists, in a school or recreation setting, to teach bicycle safety and relatedskills to middle and high school-aged youth with varying levels of bicycling abilities.
The agreement included the development of the youth bicycling curriculum, trainingteachers to teach the curriculum, teachers pilot testing the curriculum with youth (completedby nine trained teachers from Virginia, Tennessee and Alabama), and conducting a formalevaluation. The evaluation included the instructor’s reaction to curriculum activities, ease inteaching the activities, receptivity of students and changes in student knowledge of bicyclesafety and performance of skills before and after the program. The evaluation of the skill-based activities implemented by these pilots revealed this curriculum effectively increasedboth bicycle safety knowledge and skills for students.
The project included the development and testing of two training workshops. The firstinstructed teachers to use the curriculum effectively and ensured uniformity of teachers’knowledge about bicycling and bicycle safety principles prior to teaching the curriculum tochildren in an effort to promote uniform and consistent instruction. These select teacherstested the curriculum and the efficacy of their training workshop to over 300 students. The second training, a train-the-trainer workshop, prepared a select group of AAHPERDmembers to teach the curriculum-training workshop to teachers and recreation specialists.Twelve trainers completed this workshop, an initial effort to build a cadre of curriculumtrainers across the country.
AAHPERD will continue to offer these workshops, and continue to expand and support the curriculum trainers beyond the life of this funded project. For more information aboutbicycle safety, see the National Highway Traffic Safety Administration (NHTSA) at:www.nhtsa.gov/bicycles.

Sec
Tio
N 1
>c
urr
icu
lum
ove
rvie
w
•7
hOw tO uSE thIS cuRRIculumUse this curriculum in varying settings (school, after-school, clubs and camps) based on yourtimeframe and available resources. Instructors are encouraged to teach as much of thematerials as time will allow. At a minimum, teach the skill-based activities in Units 1, 2 and 3as these activities are the essential skills needed to create the foundation for safe bicycling.Regardless of students’ skill level or previous bicycling knowledge, complete the skill-basedactivities in these units consecutively before proceeding to any of the remaining units.
Within each of the seven units, there are three types of activities: introductions, skill-basedactivities with rubrics and closures. Occasionally, the introduction and closure activities havemore than one option. Instructors should choose the appropriate activities that fit into theavailable class time when developing lesson plans. If class time is too short to allow for allthree types of activities, the lessons should focus on completing the skill-based activities.
Consider using the curriculum’s rubrics to assess student performance for each of the skill-based activities. Each of these activities has a supporting rubric. All of the rubrics wereincluded as part of the curriculum evaluation with the exception of Unit 7, “Riding for Fitness.”
This curriculum recognizes that classes will often be comprised of students with varying skilllevels. To accommodate this reality, there are suggestions for differentiating instruction whennecessary to meet the needs of all skill levels. However, there are several identified activitiesfor students with intermediate or advanced bicycling skills only.
AckNowleDgmeNTS
AAHPERD wishes to thank the team members for their professional expertise in the field ofteaching physical education, bicycling education and injury prevention. The team focused onspecial aspects of this project based on their expertise including curriculum development,assessment, evaluation and teacher training.
CurriCulum Authors And Workshop trAinersViCki miller, lCi,Virginia Commonwealth University heAther Funkhouser, mph, lCi, Board, Injury-Prevention Consultant
CurriCulum design ConsultAntsAmy lutz, m.ed, lCi, Focused Fitness gAy l. timken, ph.d., lCi,Western Oregon University
eVAluAtion ConsultAntssuzAn Ayers, ph.d., Western Michigan University yuAnlong liu, ph.d.,Western Michigan University
Other: Special thanks to those professionals who piloted the curriculum and diligentlyfollowed strict guidelines for pre/post evaluation of their students to enable us to provide afully evaluated model bicycling curriculum for professional physical activity educators andrecreation specialists.
miCAh Artz, Big Spring High School, Newville, PAJill BACurin, Smyrna Middle School, Smyrna, TNtom CoAtes, University of North Alabama, Florence, ALCindy Ferek, Turner Ashby High School, Bridgewater, VAJenniFer “lynne” gilBert, Elizabeth Davis Middle School, Chester, VABiki-rAy mitChell, Holman Middle School, Glen Allen, VAtessA pehAniCk, Henley Middle School, Crozet, VA


Sec
Tio
N 2
>c
urr
icu
lum
iNTr
oD
uc
Tio
N
•9
Bicycling is a fun, healthy activity for both children and adults. A lifelong activity, it can beenjoyed by people of all ages and fitness levels. Riding a bicycle helps improve muscularfitness and blood circulation, lowers stress levels, can be a valuable part of a weight lossprogram and can provide hours of enjoyment.
Despite the numerous health benefits, there are some inherent dangers of riding a bicycle.Every year U.S. emergency rooms treat nearly one million children for bicycle-related injuries.Although often thought of as a toy, bicycles are associated with more childhood injuries thanany other consumer product, except the automobile. For many children, the bicycle is theirfirst form of independent transportation, and while most master the skills needed to ride abicycle, they may not learn the skills required for safe and competent riding, especially intraffic. Providing a safe learning environment - such as a school – where children can makemistakes, might avoid potentially fatal mistakes in an unforgiving setting.
For these reasons and many more, the American Alliance for Health, Physical Education,Recreation and Dance (AAHPERD) developed this bicycle safety curriculum for use in aschool or recreational setting.
curriculum lAyouT
The curriculum consists of seven units and parent handouts. Each unit contains three typesof activities: introductions, skill-based activities with corresponding rubrics and closures.The seven units are:
unit 1: Getting Ready to Rideunit 2: Bicycle Handling Basicsunit 3: Emergency Bicycle Handling Skillsunit 4: Advanced Bicycle Handling Skillsunit 5: Rules of the Road for Bicycling unit 6: Bicycle Maintenanceunit 7: Riding for Fitness and Health
SEctION 2curriculum Introduction

uNiT compoNeNTS
Each unit consists of the following components:
• Objectives with related measurements indicating what students can be expected toaccomplish upon the completion of the unit
• Corresponding National Standards for K-12 Physical Education
• Key vocabulary words
• Activities designed to teach various skills and to meet unit objectives.
• Cross-curricular activities to enhance the comprehension and reinforce what is learned.
AcTiviTy elemeNTS
Each activity contains the following elements to assist with implementation:
• The skill level (beginner, intermediateor advanced) associated with each activity;
• An estimated timeframe for completion;
• Specific equipment needed;
• Teacher overview summarizing the activity;
• Preparations necessary for the activity;
• Directions for conducting the activity;
• Assessments to evaluate if students have met the objectives;
• Important safety rules that must be followed;
• Differentiating instruction to identify options for students with varying skill levels;
• Safety rules that must be followed; and
• Best practice information
Given the variability in the length of class times, instructors can teach activities in multipleclass periods, as necessary. The number of activities taught within one class period dependson a number of variables, including the instructor’s experience in teaching, number ofstudents per class, skill levels of students, number of bicycles and helmets available per classand available space for instruction.
ASSeSSmeNTS
There are a handful of existing bicycle safety curricula across the country. However, what sets this curriculum apart from others is that it has been evaluated for effectiveness.Teachers, who pilot tested the curriculum and assessments, taught the curriculum and usedthe assessment tools to measure that students did experience an increase in bicycle safetyknowledge and bicycle skills toward becoming a safer and more competent rider, inpreparation for riding in a roadway as a vehicle in traffic. The assessments used in theevaluation period are included in curriculum for you to use. They include student or peerassessments and teacher assessments of student’s knowledge and skill level.
Sec
Tio
N 2
>c
urr
icu
lum
iNTr
oD
uc
Tio
N
•10

DiFFereNTiATiNg iNSTrucTioN
Although the primary skill level for each activity is identified, most classes will includestudents of varying skill levels. To address this common situation, examples of differentiatedinstruction are provided. However, for safety reasons, there are some activities that are trulyintended for intermediate or advanced riders only based on the teachers assessment.
pAreNT iNvolvemeNT
Children are part of a family unit and inclusion of the family unit to reinforce the correctinformation is a critical necessity when trying to bring about behavior change. Overall,teachers are encouraged to determine the best means to reach parents, emphasizing thefollowing basic concepts:
• Bicycling is a form of lifelong physical activity; it’s something the family can do togetherand it’s fun!
• Safe bicycling behavior should be the societal norm. This starts within the family unit, withthe expectation that when bicycling, everyone (adults and youth) will: (a) wear a properlyfitted helmet; (b) check equipment for safety before each ride; (c) follow the rules of theroad; and (d) model safe riding behaviors.
• Parents and youth must practice safe bicycling behavior at home and in the community,not just in the instructional setting. “What Every Parent Should Know” parent tip sheetsaddress important aspects of bicycle safety and identify ways in which parents,grandparents and other adults can support what their child is learning, They should serveas “Roll” models when bicycling and driving around bicyclists. Parent tip sheets arespecifically encouraged for elements covered in Units 1, 2 and 5.
• You may choose to use any of the additional parent tip sheets and handouts included toassist you in engaging parents. Use them not only for this class, but as part of your schoolbike to school events or community activities where safety education can be incorporated.
Sec
Tio
N 2
>c
urr
icu
lum
iNTr
oD
uc
Tio
N
•11


Sec
Tio
N 3
>c
urr
icu
lum
uN
iTS
•13
SEctION 3curriculum units
A middle and high school bicyclesafety curriculum for physical education
teachers and recreation specialists
15 Unit 1: Getting Ready to Ride
93 Unit 2: Bicycle Handling Basics
155 Unit 3: Emergency Bicycle Handling Skills
187 Unit 4: Advanced Bicycle Handling Skills
237 Unit 5: Rules of the Road for Riding
297 Unit 6: Bicycle Maintenance
335 Unit 7: Riding for Fitness and Health


Sec
Tio
N 3
• u
NiT
1>
geT
TiN
g r
eAD
y To
riD
e
•15
objecTiveS
At the conclusion of this unit the student will be able to:
1. Describe key concepts of safe riding, as measured by participation in peer discussionabout bicycle safety. (Cognitive)
2. Describe key concepts of safe riding, as measured by completion of the brainstormingactivity. (Cognitive)
3. Describe key concepts of safe riding, as measured by completion of the Safe Ridingworksheet. (Cognitive)
4. Describe how a properly fitted bicycle helmet protects the brain, as measured bysuccessful completion of the Bicycle Helmet Function worksheet. (Cognitive)
5. Demonstrate exceptional or reliable helmet fit as measured by the helmet fit rubric.(Psychomotor)
6. Demonstrate exceptional or reliable bicycle fit, as measured by the bicycle fit rubric.(Psychomotor)
7. Identify the basic parts of a bicycle, as measured by successful completion of the BicycleParts worksheet. (Cognitive)
8. Demonstrate exceptional or reliable performance of the ABC Quick Check, as measuredby the ABC Quick Check rubric. (Psychomotor)
9. Demonstrate exceptional or reliable social behavior as measured by the social behaviorrubric. (Affective)
10. Describe key concepts from Unit 1, bicycle fit, helmet fit and ABC Quick Check, asmeasured by participation in peer discussion about bicycle safety and by providingresponses to questions in journals. (Cognitive)
11. Describe feelings about the ability to ride safely and enjoy bicycling, as measured byproviding responses to questions in journals. (Affective)
uNIt 1Getting Ready to Ride

NATioNAl STANDArDS For k-12 pHySicAl eDucATioN
standard 1The physically literate individual demonstrates competency in a variety of motor skills andmovement patterns.
standard 2 The physically literate individual applies knowledge of concepts, principles, strategies andtactics related to movement and performance.
standard 3The physically literate individual demonstrates the knowledge and skills to achieve andmaintain a health-enhancing level of physical activity and fitness.
standard 4 The physically literate individual exhibits responsible personal and social behavior thatrespects self and others.
standard 5 The physically literate individual recognizes the value of physical activity for health,enjoyment, challenge, self-expression and/or social interaction.
key vocAbulAry/TermS
2-2-2-2 rule: A classroom management and bicycle safety strategy that encouragesstudents to keep: 2 wheels on the ground; 2 feet on the pedals; 2 hands on the handlebars;and 2 fingers on the brake lever(s).
ABC Quick Check: A series of steps to inspect the basic functioning of a bicycle that shouldbe performed before each ride. A= Air; B=Brakes; C=Chain/Crank; Quick=Quick release; andCheck=Check it over
Brake: The bicycle part used to stop a bicycle. Rim brakes and disc brakes are operated bybrake levers, which are mounted on the handlebars. Pedaling backward operates coasterbrakes.
Brake levers: The bicycle parts attached to the handlebars, squeezed by the hands to activatethe brake.
Cassette: A group of stacked gears on the rear wheel of a bicycle.
Chain: The bicycle part that moves the bicycle by transferring power from the pedals to thedrive-wheel.
Chain stay: The tube on the rear of the bicycle frame running from the bottom bracket andparallel to the chain.
Chainring: One of the front gear(s), attached to a crank.
Cog: The tooth on the rim of a gear wheel.
Consumer product safety Commission (CpsC): A federal organization established toprotect the public against unreasonable risks of injury from consumer products.
Crank: A device for transmitting rotary motion, consisting of a handle or arm attached atright angles to a shaft.
Sec
Tio
N 3
• u
NiT
1>
geT
TiN
g r
eAD
y To
riD
e
•16

derailleur: An assembly of levers that moves the chain.
down tube: The tube on a bicycle frame running from the head tube to the bottom bracket.
Fork: Connects the bicycle’s frame to its front wheel and handlebars, allowing steering byvirtue of its head tube.
handlebars: A lever attached to the head tube of the fork, allowing steering. It also provides apoint of attachment for controls and accessories.
handlebar stem: A bracket attaching the handlebars to the head tube of fork.
head tube: The tube on a bicycle frame that contains the headset.
headset: The bearings that form the interface between the frame and fork head tube.
head barrier: Something used to separate the child’s head from the helmet to minimize thetransmission of communicable disease (lice) if helmets are shared among students.
helmet: Personal protective safety equipment worn on the bicyclist’s head to protect thebrain from impact.
pedals: The bicycle parts where the bicyclist’s feet rest; pushed in a forward motion, theypropel the bicycle ahead.
Quick release: A lever for releasing wheels; a lever to adjust seat post.
saddle: The bicycle seat.
seat post: The post that supports the saddle; it slides into the frame’s seat tube and is used to adjust riding height.
seat tube: The bicycle part that runs along the bike frame from the seat to the bottombracket.
seat stay: Connects the top of the seat tube to the rear dropout.
spokes: The bicycle parts that connect the wheel rim to hub. Most bicycles usually have 36 spokes.
straddle: To sit or stand with one leg on each side of bicycle.
Sec
Tio
N 3
• u
NiT
1>
geT
TiN
g r
eAD
y To
riD
e
•17
prestaschrader

top tube: The bicycle part connecting the head tube to the seat tube.
Valve stem: A port for adding or releasing air from the tire’s inner tube. Two types are commonly used: Presta and Schrader. See page 74.
AcTiviTieS
Each unit should include three types of activities: introduction, skill-based with assessmentsand closure. In some cases, more than one activity option is offered for the introduction andclosure. When developing your lesson plans, choose the activities that fit into your allottedclass time. If class time is too short to allow for all three types of activities, focus your lessonon the skill-based activities.
introduction: Choose from the following activities to introduce this unit of learning.
• Bicycle Safety Videos
• Brainstorming
• Walk & Share
skill-Based with Assessments: Each skill-based activity is associated with an assessment tomeasure student knowledge and application of the identified skill. Depending on the amountof class time available and the skill level of students, more than one of the following skill-based activities may be completed during one class. Complete all skill-based activities in thisunit before moving to the next unit. This will ensure that students have the safety knowledgeand basic skills considered necessary to practice safe bicycling behaviors.
• Bicycle Helmet Function
• Bicycle Helmet Fit
• Bicycle Fit
• Bicycle Parts
• ABC Quick Check
Closure: The following activities can be used to conclude this unit of learning. If desired,these activities can be assigned as homework.
• Walk & Share
• Journal Writing
equipmeNT NeeDeD• Helmets
• Head barriers
• Bicycles
• Bicycle pump
• Allen wrench
• Red floor tape
• Cones, domes, polyspots or chalk to mark riding course
• Pencils
• Student worksheets and journals
• Bike Safe Bike Smart (DVD)
• Ride Smart - It’s Time to Start (DVD)
• Audiovisual equipment
Sec
Tio
N 3
• u
NiT
1>
geT
TiN
g r
eAD
y To
riD
e
•18

• Poster board, art paper, rolls of paperor butcher paper
• Markers
• Tape
• Safe Riding worksheet
• Bicycle Helmet Function worksheet
• Bicycle Helmet Fit worksheet
• Bicycle Fit worksheet
• Bicycle Parts worksheet
• ABC Quick Check worksheet
• Bicycle Safety Word Search worksheet
• Bicycle Safety Crossword Puzzle worksheet
• Consumer Product Safety Commission (CPSC) brochure: Which Helmet for Which Activity?
www.google.com/url?sa=t&rct=j&q=CPSC+%2B+What+Helmet+For+What+Activity&source=web&cd=1&ved=0CFoQFjAA&url=http%3A%2F%2Fwww.cpsc.gov%2Fcpscpub%2Fpubs%2F349.pdf&ei=wtKzT4DkA4Gu9ATVva3mBA&usg=AFQjCNGyQ4ivEH_qCOgYQUKuIKR0z1rZ2w
• A bicycle helmet with Consumer Product Safety Commission (CPSC) safety label
• A multi-use helmet with CPSC label (optional)
• Cracked helmet or helmet involved in a prior crash (optional)
• Melon or gelatin mold (optional)
croSS-curriculAr AcTiviTieS
language Arts • Learn the vocabulary for the parts of the bicycle and helmet.
• Journal writing
science• Demonstrate helmet construction and effectiveness and head impact.
• Learn how to locate the Pounds per Square Inch (PSI) range on the tire. Using the air pressure gauge on the tire pump, determine the current PSI of each tire.
history • Explore the development of bicycle helmet safety standards.
social studies• Identify the process to implement a statewide helmet law.
math• Demonstrate how to measure a bicycle frame
Sec
Tio
N 3
• u
NiT
1>
geT
TiN
g r
eAD
y To
riD
e
•19


•21
bicycle Safetyvideos. otherbicycle safety videosare available from a variety of sourcesand may beappropriate as well.However, videosother than the onesrecommendedabove, should bepreviewed beforeusing in class toensure accuracy and consistency with the informationto be presented.
Ac
tIv
Ity
timeframe Beginner: 15 minutesintermediate: 15 minutesAdvanced: 15 minutes
objective At the conclusion of this activity, the student will be able to:1. Describe key concepts of safe riding, as measured by participation in a peer discussion about bicycle safety. (Cognitive)
national standard Standard 2
equipment • Bike Safe Bike Smart (DVD)• Ride Smart - It’s Time to Start (DVD)• Audiovisual equipment
teacher overview This activity prompts students to begin thinking about bicycle safety byasking them questions about what they think are correct bicyclingbehaviors. Videos are used to demonstrate proper behaviors and furtherprompt the students’ thought process.
preparation 1. Preview and download one or both of the National Highway TrafficSafety Administration (NHTSA) videos available at:http://www.nhtsa.gov/bicycles under videos and clips or order a copyat: http://mcs.nhtsa.gov
Bike safe Bike smart. “This entertaining, yet instructional, nine-minutebicycle safety video uses a visually stimulating, peer-to-peer approach toteach elementary and middle school aged audiences how to Bike SafeBike Smart. Viewers will learn about: the rules of the road, signaling, ridingat night, safe riding practices and risky behaviors that they should avoid.There are also tips for purchasing and correctly fitting a bicycle helmet.”
ride smart - it’s time to start. “This funky, fast-paced video useshumor, real-life examples, computer graphics and a peer-to-peerapproach to teach middle and high school youth about how wearing abicycle helmet can protect them from serious injuries (including braininjuries) and death. The approximately nine-minute video features adiverse group of teens and pre-teens modeling the newest, coolest looksin helmets and includes the entertaining yet instructional “raw egg drop”demonstration. The video also explains how to correctly fit and position abicycle helmet and select a helmet that meets Consumer Product SafetyCommission (CPSC) standards. It also discusses key rules of the road.The video’s target audience is middle-school children (grades 5-9) andcan be used by parents, youth groups, medical personnel, traffic safetyorganizations, educators and injury prevention groups.”
2. Set up appropriate audiovisual equipment to show videos in class.
INtRODuctION ActIvItybicycle Safety video
iNTr
oD
uc
Tio
N A
cTi
viTy
>bi
cyc
le S
AFe
Ty v
iDeo

iNTr
oD
uc
Tio
N A
cTi
viTy
>bi
cyc
le S
AFe
Ty v
iDeo
Ac
tIv
Ity
directions 1. Introduce this activity using the following prompt:
Today, we are going to learn how many of you ride bicycles, and we will begin to discuss some bicycle safety skills that everyone should use to stay safe and have fun.
2. Use the following sample questions to prompt students’ thinking aboutthe content in this activity.
Q: how many of you ride your bicycle to school? to a friend’s house?Around the neighborhood?
A: All responses are acceptable
Q: What does safe riding mean to you? Why is it important to ride safely? A: All responses are acceptable
Q: What are some of the rules of the road for bicyclists?A: Any of the following: • Obey traffic signs and signals• Signal turning and stopping• Pass on the left• Ride with the flow (in the same direction) as traffic• Other answers may be accepted.
Q: Are the rules of the road different for drivers?A:When traveling on the road, bicycles are considered vehicles and areexpected to follow the same rules of the road as other vehicles. However,in some locations there may be exceptions enacted by states or localities(e.g. sidewalk riding, bicycles riding two abreast in one lane, etc.).
Examples include urban downtown areas that may have a law thatbicyclists cannot ride on the sidewalk; other areas may have law for theage at which bicyclists may no longer ride on the sidewalk; areas may saythat even if a bike lanes exist, bicyclists are or are not required to ride inthem; or whether or not bicyclists may ride two abreast in one lane. Makesure you search the internet for the latest bicycle laws in your region.
3. Show video of choice.
Assessment 1. Divide students into small groups.
2. Encourage each student to share with their group one thing they learnedabout safe bicycling from the video. If students did not learn anythingnew, then they should share what they thought was most important.
safety None
differentiating All levelsinstruction • Choose appropriate video, according to age and ability of students.
Best practices 1. Although this activity limits class time for the skill-based activity, thevideo is a good method of educating students about safe bicycling in ashort amount of time.
2. Show the video when the weather prevents riding outside. •22

Ac
tIv
Ity
timeframe Beginner: 10-12 minutesintermediate: 10 minutesAdvanced: 8-10 minutes
objective At the conclusion of the activity, the student will be able to:1. Describe key concepts of safe riding, as measured by completion of
the brainstorming activity. (Cognitive)
national standard Standard 2
equipment • Poster board, art paper or butcher paper• Markers• Tape
teacher overview This activity prompts students to begin thinking about bicycle safety byasking questions about what they think are correct bicycling behaviors.By working in groups to respond to the questions, the brainstorming willinitiate peer discussion about safe bicycling behaviors.
preparation Student groups will need paper to write out ideas to post and share withthe whole class.
directions 1. Introduce this activity using the following prompt:
Today, we are going to learn how many of you ride a bicycle, and beginto discuss some bicycle safety skills that everyone should use to staysafe and have fun.
2. Divide students into small groups.
3. Give each group a piece of paper, marker and list of questions to beanswered.
4. Ask each group to brainstorm responses to the questions and writeideas on their paper.
Q: What do you know about safe riding?A: Any of the following: • Bicycles should follow traffic signs and signals• Local laws• Bicyclists should always wear helmets• Other answers may be accepted.
INtRODuctION ActIvItybrainstorming
iNTr
oD
uc
Tio
N A
cTi
viTy
>br
AiN
STo
rmiN
g
•23

Q: What have you seen bicyclists doing that can be dangerous?A: Any of the following: • Not wearing a helmet• Wearing earphones• Not following rules of the road• Not signaling• Riding against traffic• Other answers may be accepted.
Q: What have you seen drivers doing that can be dangerous aroundbicyclists?
A: Any of the following:• Passing a bicyclist too closely• Cutting a bicyclist off• Not sharing the road• Other answers may be accepted.
Q: What would you like to know about safe riding?A: All responses are acceptable
Q: What are some of the health benefits of bicycling?A: All responses are acceptable
Q: What are the barriers to riding your bicycle to school/work/a friend’s house?
A: All responses are acceptable.
5. Have students identify a spokesperson to share their group’sdiscussions with the class.
Assessment Use the brainstorming activity to determine students’ basic knowledge ofsafe riding behaviors.
safety None
differentiating All levelsinstruction • The answers to the above brainstorming sessions will depend
on the age and experience of the students.
Best practices 1. Complete this activity when weather prevents riding outside.
2. Display brainstorming pieces of paper around the gym during thebicycling unit to reinforce learning.
iNTr
oD
uc
Tio
N A
cTi
viTy
>br
AiN
STo
rmiN
g
•24

Ac
tIv
Ity
timeframe Beginner: 5-7 minutesintermediate: 5-7 minutesAdvanced: 5-7 minutes
objective: At the conclusion of the activity, the student will be able to:1. Describe key concepts of safe riding, as measured by completion of
the Safe Riding worksheet. (Cognitive)
national standard Standard 2
equipment • Safe Riding worksheet• Pencils
teacher overview This activity prompts students to begin thinking about bicycle safety byasking questions about what they think are correct bicycling behaviors.Walking while discussing the questions will initiate peer discussion aboutsafe bicycling behaviors and keep students moving.
preparation Make appropriate number of copies of the Safe Riding worksheet.
directions 1. Introduce this activity using the following prompt:
Today, we are going to learn how many of you ride a bicycle, and we’llbegin to discuss some bicycle safety skills that everyone should use tostay safe and have fun.
2. Divide students into groups of two or three.
3. Ask students to walk the perimeter of the gym while answering thequestions on the Safe Riding worksheet. Instruct students they maystop to write a quick answer, but should continue moving as much aspossible. You may opt to have them write the answers when thewalking is completed.
4. Instruct students to stop when the whistle blows and be prepared toshare something they discussed with their partner(s).
Assessment Successful completion of the Safe Riding worksheet
safety Remind students not to run or walk too quickly if carrying pencils.
INtRODuctION ActIvItywalk & Share / Safe Riding
iNTr
oD
uc
Tio
N A
cTi
viTy
>w
Alk
& S
HA
re /
SA
Fe r
iDiN
g
•25

differentiating intermediate and Advancedinstruction • Set up lanes that students need to travel in. • Include stop signs and intersections.
Best practices 1. Complete this activity when weather prevents riding outside.
iNTr
oD
uc
Tio
N A
cTi
viTy
>w
Alk
& S
HA
re /
SA
Fe r
iDiN
g
•26

wO
Rk
ShEE
t
1. What does safe riding mean to you?
2. Why is it important to ride safely?
3. What are some of the rules of the road for bicyclists?
4. What are some of the rules of the road for drivers when driving near bicyclists?
Student Date
SAfE RIDING wORkShEEt
wo
rkSH
eeT
>w
Alk
& S
HA
re /
SA
Fe r
iDiN
g
•27
directions: Please answer the questions below.

SAFE RIDING WORKSHEETANSWER KEY
1. What does safe riding mean to you?
Answers may vary. Use responses to facilitate discussion.
2. Why is it important to ride safely?
To prevent injury and/or death
3. What are some of the rules of the road for bicyclists?
Any of the following: Obey traffic signs and signalsSignal turning and stoppingPass on the leftRide with the flow of trafficOther answers may be accepted.
4. What are some “don’ts” for bicyclists?
Any of the following: Not wearing a bicycle helmetWearing earphonesNot following rules of the roadNot signalingRiding against trafficOther answers may be accepted.
WO
RKSH
EET
>W
ALK
& S
HA
RE /
SA
FE R
IDIN
G
•28

Ac
tIv
Ity
timeframe Beginner: up to 15 minutesintermediate: up to 10 minutesAdvanced: up to 10 minutes
objective At the conclusion of the activity, the student will be able to: 1. Accurately describe how a properly fitted bicycle helmet protects the
brain, as measured by successful completion of the Bicycle HelmetFunction worksheet. (Cognitive)
national standards Standard 2Standard 4
equipment • A cracked helmet from a previous crash (optional)• Consumer Product Safety Commission (CPSC) brochure:
Which Helmet for Which Activity?
• http://www.cpsc.gov//PageFiles/122399/349.pdf
• A bicycle helmet with Consumer Product Safety Commission (CPSC) safety label
• A multi-use helmet with CPSC label (optional)• Pencils• Bicycle Helmet Function worksheet
teacher overview This activity helps students understand what happens to the brain when it is injured and how bicycle helmets are constructed to help preventinjuries. A visual demonstration of the effectiveness of a bicycle helmet inprotecting the brain from injury can be performed as part of this activityto reinforce discussion points.
preparation 1. Determine if there is a state or local bicycle helmetlaw/regulation/ordinance that affects students and include in thelesson. For state laws see: http://www.bhsi.org/mandator.htm; for local laws, search for bicycle laws and your county or contact local law enforcement.
2. Make appropriate number of copies of Bicycle Helmet Functionworksheet.
SkIll-bASED ActIvItybicycle helmet function
Skil
l-bA
SeD
Ac
Tivi
Ty>
bic
ycle
Hel
meT
Fu
Nc
Tio
N
•29

directions 1. Introduce this activity using the following prompt:
Today, we will be learning how a helmet works and how it helps protectyour brain. To better understand why it is so important to protect yourbrain from injury, we are also going to learn what can happen if your brainis injured.
2. Use the following sample questions to prompt students’ thinking aboutthe content in this activity.
Q: What is the purpose of a bicycle helmet? A: Any of the following:• A bicycle helmet reduces the risk of a brain injury.• Other answers may be accepted.
Q: how does a helmet protect your head if you crash? A: Any of the following:• The helmet absorbs the crash forces instead of your brain.• Other answers may be accepted.
Q: Why should you wear a helmet every time you ride? A: Any of the following:• A crash can happen at any time regardless of rider skill or length
of a trip.• Other answers may be accepted.• Discuss brain injuries and the importance of prevention. The information
provided supports this discussion; adjust as needed based on the age/developmental level of the students. The point to emphasize to students is for them to tell an adult or have a friend tell an adult, if they hit their head. Additional information about brain injuries and how to prevent them can be obtained from the Centers for Disease Control and Prevention at: http://www.cdc.gov/TraumaticBrainInjury/index.html.
how does the brain get hurt?Most brain injuries in children occur because of falls, car crashes andbicycle/sports injuries. Sometimes a child hits his head hard enough to hurtthe brain inside. The brain can be damaged if it bounces against the insideof the skull. When this happens a person can have trouble doing things theywere able to do before.
What happens if your brain is hurt?Anytime your brain is hurt, your ability to do things you normally do will beaffected. If a brain injury is suspected, you need to go to the emergency roomso a medical professional can assess you. You might need special picturestaken like a CT (computed tomography) scan or an MRI (magnetic resonanceimaging) to make certain you do not have a serious injury like a fracture orbleeding in your brain. Brain injuries can be very serious and may result indeath if not treated. Even if you do not have a serious brain injury, you mayhave a concussion. A concussion is also an injury to the brain, but to a lesserdegree and often there is no visible sign of injury to the head. Loss ofconsciousness may or may not happen. The best treatment for a concussionif rest. The brain can be hurt so seriously that you could be unconscious forseveral hours, days or permanently. This is a called a coma.
Skil
l-bA
SeD
Ac
Tivi
Ty>
bic
ycle
Hel
meT
Fu
Nc
Tio
N
•30

What happens after a brain injury?Since your brain controls everything you think and do, a brain injury maycause your brain to “forget” how to do some things, like talk, walk, eat,remember things, understand other people’s conversations or dophysical activities – like riding a bicycle. Your brain sends messages tothe rest of your body to allow it to carry out these skills; sometimes theseskills have to be relearned following a brain injury. Most people fullyrecover from a “mild” brain injury like a concussion. Recovery frommoderate to severe brain injuries can take many months to years. Withvery severe brain injury, a person can die. Most people who die fromhead injuries resulting from bicycle crashes were not wearing a helmet atall or were wearing it incorrectly. The best way to protect your brain is towear a properly fitted helmet every ride.
SympTomS oF coNcuSSioN uSuAlly FAll iNTo Four cATegorieS:
Some of these symptoms may appear right away, while others may not be noticed for days ormonths after the injury or until the person starts resuming their everyday life and moredemands are placed upon them.
thinking/remembering physical emotional/
mood sleep
Difficulty thinkingclearly
Headache
Fuzzy or blurry vision
Irritability Sleeping more than usual
Feeling slowed down Nausea or vomiting(early on)
Dizziness
Sadness Sleep less than usual
Difficulty concentrating
Sensitivity to noise or light
Balance problems
More emotional Trouble fallingasleep
Difficulty rememberingnew information
Feeling tired, having no energy
Nervousness or anxiety
Skil
l-bA
SeD
Ac
Tivi
Ty>
bic
ycle
Hel
meT
Fu
Nc
Tio
N
•31
Is It a concussion?www.cdc.gov/concussion/signs_symptoms.html

helmet Effectiveness Demonstration. performing a demonstration of the effectiveness of a bicyclehelmet in protecting the brain from injury can be included in this activity to visually reinforce theinformation that has been provided to students. Several examples of projects to accomplish this can be found in the NHTSA Demonstrating Helmet effectiveness–A How-to guide at:www.nhtsa.gov/DoT/NHTSA/Traffic%20injury%20control/Articles/Associated%20Files/811110.pdf.
What to do if a concussion is suspected:
• Stop the activity
• See a medical provider for evaluation
• In rare cases, a dangerous blood clot may form on the brain in a personwith a concussion and crowd the brain against the skull. Seek immediatehelp from a health care professional or emergency department if any ofthe following danger signs appear after a bump, blow or jolt to the head or body.
• Serious symptoms requiring immediate medical attention (contact amedical professional) include:
• Headache that gets worse and does not go away.• Weakness, numbness or decreased coordination.• Repeated vomiting or nausea.• Slurred speech.• Looks very drowsy or cannot be awakened.• One pupil (the black part in the middle of the eye) larger than the other.• Convulsions or seizures.• Cannot recognize people or places.• Getting more and more confused, restless or agitated.• Unusual behavior.• Loss of consciousness (a brief loss of consciousness should be taken
seriously and the person should be carefully monitored).
3. Discuss the different types of helmets.
The following information is meant to support this discussion. Adjust whatis shared as needed for the age /developmental level of the students.
• helmets for different Activities: There are different types of helmets fordifferent types of activities. Helmets are specifically designed to protectthe brain from injuries associated with specific sports. It is important touse the right helmet for the right sport to protect the brain appropriatelyfrom injury. You would never wear a football helmet to go bicycling. Somemulti-use helmets are suitable for use with bicycling. The manufacturer’slabel will state this specifically.
• For additional information see the Consumer Product Safety Commission(CPSC) brochure: Which Helmet for Which Activity at:www.cpsc.gov//PageFiles/122399/349.pdf
Skil
l-bA
SeD
Ac
Tivi
Ty>
bic
ycle
Hel
meT
Fu
Nc
Tio
N
•32

Reminder: crash and Trashor one and Done.
Skil
l-bA
SeD
Ac
Tivi
Ty>
bic
ycle
Hel
meT
Fu
Nc
Tio
N
•33
4. Discuss safety certifications used for bicycle helmets.
Share age/developmentally appropriate information regarding bicyclehelmet safety standards, including the minimum safety standardestablished by the Consumer Product Safety Commission (CPSC). Foradditional information about bicycle helmet safety standards, see theBicycle Helmet Safety Institute (BHSI) at: http://www.bhsi.org/.
Beginning in March 1999, all bicycle helmets sold and manufactured in the U.S. have tomeet the Consumer Product Safety Commission (CPSC) bicycle helmet safety standard, toensure a minimum level of protection against head injury. This safety standard addresses:
• Head impact protection in a crash: G-forces must be below 300g.
• Instruct students to always look for the sticker that says the helmet meets CPSC safety standards.
• Show students a helmet with the sticker and have students find the sticker on their helmet.
• Children’s helmets and head coverage: CPSC standard has two categories of helmets:helmets intended for persons older than one year and helmets intended for personsolder than five years. The first category applies to young children and the second toolder children and adults. The only difference in the requirements for these twocategories is in head coverage. The helmets intended for young children are subject toimpact testing over a greater area of their surface.
• Chin strap strength
• Helmet stability
• Peripheral vision
consumer product Safety commission (cpSc) Safety Standard:
5. Discuss replacing helmets.
• Bicycle helmets are designed to be replaced after a crash, even if youcan’t see the damage.
• If a helmet has even slight damage and is not replaced, it will notprotect the brain from injury if the user is in a crash.
• Slight damage or small cracks may not be noticeable to the naked eye.If you fall and hit your head, replace the helmet.
6. Discuss how helmets are constructed to protect the brain from injury.
The information below is meant to support this discussion. Adjust what isshared as needed for the age/developmental level of the students. Toreinforce the construction of the bicycle helmet, an option is to showstudents a bicycle helmet that has been involved in a crash, if one is available.
• Front and back of helmet: The front and back of the helmet protect thevarious parts of the brain (the frontal lobe, occipital lobe and thecerebellum) from impact. Make sure the helmet is level on the head andlow on the forehead, no more than two finger widths above the eyebrow,to fully protect the frontal lobe.

Skil
l-bA
SeD
Ac
Tivi
Ty>
bic
ycle
Hel
meT
Fu
Nc
Tio
N
•34
American society for testing materials (Astm): Prior to the CPSC standard, theASTM1447 standard was the most widely used bicycle helmet safety standard in the U.S.Both standards are basically identical except that the ASTM standard is voluntary.Manufacturers can label the helmet as meeting the ASTM1447 standard without having toverify with independent testing. Bicycle helmets are often still labeled as meeting theASTM1447 standard in addition to having the CPSC label. The ASTM standard for bikingand recreational inline skating are identical. Aggressive skating and skateboard helmetshave their own ASTM standard designed for multiple hits with lesser impact severity.ASTM has other standards that are currently used for helmets for other activities such asskating, skiing and downhill bicycle racing.
American national standards institute (Ansi): The ANSI standard for bicycle helmetswas a common standard in the mid-1980s through the early 1990s. However as of 1995,the ANSI standard was considered to no longer be a valid certification standard. Somehelmets may continue to be labeled as meeting the ANSI standard, however it is bestpractice to ignore these labels and look for one of the currently recognized standards.
snell memorial Foundation (snell): Snell helmet safety standards have stricter headimpact levels higher than other standards for helmets for a variety of different activitiessuch as motorcycle, bicycle, equestrian, ski and others. Snell also collects helmets fromthe retail setting for additional follow-up testing to ensure the standard is being followedas a manner to ensure quality control. Manufacturers pay additional money for Snelltesting, which is then passed on to the consumer. The Snell standard is usually found onhigher-end helmets and generally considered to be a stricter standard. However, there isdebate over the types of impact best suited for those helmets with the Snell standard. Inorder to perform at higher head impact levels the foam needs to be quite stiff resulting inless protection at lower impact levels where the stiffer foam may not crush at all.Ultimately, the type of bicycle riding that will occur should be a good indicator of thenecessary standard. There are three basic Snell bicycle helmet standards.
1. Snell B90: This standard is very similar to the CPSC standard.
2. Snell B95: This standard resulted from a revision to the B90 standard in that it requiresmore head coverage and has slightly higher head impact drop heights.
3. Snell B94: This standard is a true multi-sport standard for non-motorized activities thatinvolve speed, balance and agility. A helmet certified for only bicycling will not providethe necessary protection for activities such as aggressive in-line skating andskateboarding. The opposite is true as well because of the different types of potentialinjuries with each of these activities. However, the N-94 standard requires that thehelmet pass multiple impact tests to the back of the helmet as well.
Other helmet Safety Standards

For specifics to yourstate laws, use asearch engine forbicycle helmet lawsplus your state.
Reminder: crash and Trashor one and Done.
• shell: The outer shell of a helmet should be smooth, hard and slick to limitsliding resistance with the road. This will help to decrease the risk of spinalcord injury that may occur if the helmet does not slide smoothly on theroad surface.
• Foam: The foam reduces the peak energy of a sharp impact to the head andbrain by crushing in on itself. As the foam crushes, it converts a small partof the crash energy to heat and, most importantly, slows the stoppingprocess. When the foam is crushed to its limit, the rest of the impactenergy is passed on to the head and brain. The foam does not bounce backbecause this would make the impact worse. Crushing the cell wallsdestroys the impact management ability for most stiff foams, so the helmethas to be replaced after a single impact, even if there isn’t visible damage.The foam can also recover some of its thickness over a period of hours, butnot its ability to manage impact. Helmets should always be disposed ofafter a single impact.
• straps, adjuster and chin buckle: The bicycle helmet straps, adjuster andchin buckle keep the helmet from moving during a crash and exposing thehead to impact. If the straps and adjuster are not positioned properly, thebicycle helmet will not stay in the correct position on the head.
• pads and universal fit mechanism: The pads and/or universal fitmechanism are used to ensure that the helmet fits on the head snugly.
• Vents: The bicycle helmet vents encourage air flow, to help preventoverheating.
7. Explain helmet laws. Use the information below supplemented with information about theexistence/non-existence of bicycle helmet laws specific to the location in which the lesson will be taught. Adjust what is shared as needed for theage/developmental level of the students.
• state law: Bicycle helmet laws vary among states and cities. A state may have a statewide helmet law for certain ages; or cities mayhave local ordinances with stricter laws. Know your law. For the mostupdated list of laws, see: http://www.helmets.org/mandator.htm
• local law: Discuss with students if there is/is not a law/regulation/ordinancethat requires people of a certain age to wear a bicycle helmet. Note: Locallaws can be enacted in the absence of a state law or can be stricter than thestate law. Schools can also require students bicycling to school to wearhelmets. Discuss with students, in the absence of helmet laws for adults,why adults should also wear a helmet every ride.
Skil
l-bA
SeD
Ac
Tivi
Ty>
bic
ycle
Hel
meT
Fu
Nc
Tio
N
•35

Assessment Divide students into groups of two to three. Instruct students to work in groups of two or three to complete the
Bicycle Helmet Function worksheet.
safety None
differentiating Adaptedinstruction • Discussion should be sensitive to students who may have a brain injury.
Beginner• The visual demonstration may help younger or visual learners and
beginner bicyclists better appreciate the need to properly wear a bicycle helmet.
intermediate and Advanced• Incorporate information on how bicycle safety standards are tested.
Best practices 1. Teach this activity during health to provide more time for on-the-bikeinstruction in the physical education classroom/gym.
2. Discuss the importance of always removing helmets prior to play onplayground equipment to prevent serious injury.
3. For additional information, see:• Consumer product safety Commission warning
www.cpsc.gov/CPSCPUB/PREREL/PRHTML99/99065.html
• Which helmet for Which Activitywww.cpsc.gov/PageFiles/117293/349.pdf
• CpsC safety Alert about Bicycle helmets and playgroundswww.cpsc.gov/en/Newsroom/News-Releases/1999/After-Recent-Death-CPSC-Warns-Against-Wearing-Bike-Helmets-on-Playgrounds
Skil
l-bA
SeD
Ac
Tivi
Ty>
bic
ycle
Hel
meT
Fu
Nc
Tio
N
•36
Bicycles are associated with more injuries and deaths than any other consumer productother than the automobile. This suggests the important role that safety plays when riding a bicycle. You can play a pivotal role in reducing injuries and deaths associated with bicyclecrashes, by reinforcing the use of a bicycle helmet by everyone, every ride. Bicycle helmetlaws predominantly address children under 16 years of age. States and localities oftenenact child-specific laws because they tend to pass easier and adults are more likely tosupport laws designed to protect children. Unfortunately, this often gives the falseimpression that only young children are at risk for a bicycle-related injury. This continues tobe reinforced as helmet usage tends to decrease with age. Everyone regardless of age andskill level should always wear a bicycle helmet on every ride. You may wish to initiate a be a “Roll” Model campaign to encourage youth to engage their peers and their parents/adults to be “roll” models when bicycling and driving around bicyclists.
helmet law limitations
For more information on this campaign see nhtsA’s site:www.nhtsa.gov/driving+safety/Bicycles/Be+a+roll+model.

wO
Rk
ShEE
t
directions: Please correctly label the bicycle helmet parts by matching the letter on thehelmet with the part listed on this worksheet. After labeling, please explain the functionof each part of the helmet.
Student Date
bIcyclE hElmEt fuNctION wORkShEEt
wo
rkSH
eeT
>bi
cyc
le H
elm
eT F
uN
cTi
oN
•37
•e
d•
i•
•A
•BF•
g•
h•
•C
Front of helmet
Back of helmet
Shell
Foam
Universal-fit mechanism
Straps
Adjuster
Chin buckle
Vents

bIcyclE hElmEt fuNctION wORkShEEt ANSwER kEy
A Foam
B Universal-fit mechanism
C Vents
d Front of helmet
e Back of helmet
F Straps
g Adjuster
h Chin buckle
i Shell
wo
rkSH
eeT
>bi
cyc
le H
elm
eT F
uN
cTi
oN
•38
•e
d•
i•
•A
•BF•
g•
h•
•C

Ac
tIv
Ity
timeframe Beginner: 20 minutesintermediate: 15 minutesAdvanced: 15 minutes
objective At the conclusion of the activity, the student will be able to:1. Demonstrate exceptional or reliable bicycle helmet fit as measured by
the helmet fit rubric. (Psychomotor)
national standards Standard 2 Standard 4
equipment • Helmets• Head barriers• Pencils• Bicycle Helmet Fit worksheet
teacher overview This activity teaches students how to properly fit a bicycle helmet. This isa critical activity to help prevent brain injuries anytime students will beriding bicycles including during class time.
preparation 1. Send home information about the bicycle unit of instruction severaldays in advance of the beginning of the unit to encourage students toarrive with bicycle helmet “friendly” hairstyles.
2. If helmets have not yet been ordered, request that they be color-codedfor each size. Example: Red helmets are small, silver helmets aremedium and blue helmets are large. If helmets are already present andare not color-coded, organize the helmets by numbering them fromsmallest to largest. Record the range of each size. Example: Smallhelmets are numbered 1-15; medium helmets are numbered 16-28.
3. Provide head barriers if using a classroom set of helmets that areshared among students. Proper head barriers could be bandannas,bouffant caps, painter’s caps, book socks, etc. Do not use plastic headbarriers. Plastic materials do not allow for air circulation, which cancause overheating.
4. Determine the adjustment mechanism of the helmets. If only usinghelmet pads to adjust the helmet fit, ensure there are ample pads ofvarious sizes for students to use. If helmets have a universal fitmechanism, become familiar with how to adjust the mechanism.
Make appropriate number of copies of Bicycle Helmet Fit worksheet.
SkIll-bASED ActIvItybicycle helmet fit
Skil
l-bA
SeD
Ac
Tivi
Ty>
bic
ycle
Hel
meT
FiT
•39

directions 1. Introduce this activity using the following prompt:
Today, we will be learning how to properly fit a bicycle helmet. This isone of the most important skills you will learn. In order for a helmet toprotect the head, it has to be properly fitted. A helmet won’t do anygood in a crash if the straps are loose or the helmet is sitting too farback on your head. A bicycle helmet is easy to fit when you know thesteps to take. You should always check the fit of your helmet beforeeach bicycle ride.
2. Use the following sample questions to prompt students’ thinking aboutthe content in this activity.
Q: What is the correct way to wear a helmet? A: Any of the following:• Level on the head, approximately 2 finger widths above the eyebrow• Straps snug and in a “V” under each ear• The chin strap snug allowing only about 2 fingers between the chin
and the chin strap• The helmet should not easily move around on the head• Other responses may be accepted
Q: What are some different, unsafe ways you have seen people wear helmets?
A: All responses are acceptable
Q: Why doesn’t a helmet protect the head when it’s worn incorrectly?A: Any of the following:• Crash forces may be directed to the brain as opposed to the helmet• Helmet could fall off• Other responses may be accepted
3. Identify the following parts of the bicycle helmet for students: front ofhelmet, back of helmet, shell, pads, foam, universal fit mechanism,straps, adjuster, chin buckle and air vents.
4. Discuss with students that there is a right way and a wrong way towear a helmet. If the helmet is worn incorrectly, it cannot effectivelyprotect the brain from injury. The most common mistakes made are:• Not wearing a helmet at all• Helmet too far off the forehead• Helmet straps not buckled • Helmet not fitted properly (example: straps too loose, straps twisted)
Skil
l-bA
SeD
Ac
Tivi
Ty>
bic
ycle
Hel
meT
FiT
•40
common mistakes with helmet use
• Not wearing a helmet at all
• Helmet too far off the forehead
• Helmet straps not buckled
• Helmet not fitted properly (example: straps too loose, straps twisted)

See: bicycleHelmet Fitworksheet.page 45.
Skil
l-bA
SeD
Ac
Tivi
Ty>
bic
ycle
Hel
meT
FiT
•41
5. Use the following steps to properly fit a bicycle helmet. Go over each stepwith students demonstrating what will be required of students beforethey complete the activity themselves. Verifying that the helmet is fittedproperly according to these steps will be referred to as the BicycleHelmet Check from this point forward. This should be performed at thebeginning of any lesson that involves on-the-bike activity.
• Choose a helmet that fits snugly on the head. If the helmet is too bigor too small, try another helmet. Newer helmets have a universal-fitmechanism in the back of the helmet, which can be used to makeadjustments to fit.
• Sit helmet level on your head approximately two finger widths abovethe eyebrow.
• Slide each adjuster so the straps form a “V” under each ear. Theadjuster should be positioned under and slightly in front of the ear lobe.
• Adjust the chin strap so that approximately two fingers fit betweenthe chin and strap when buckled.
• Explain the 2-2-2 rule to students to ensure safety:- 2 fingers width between eyebrow and helmet- 2 straps make the “V” under and slightly in front of each ear lobe- 2 fingers between the chin and strap
• Helmets should not “rock-n-roll.”- If the helmet rocks back more than two fingers above the
eyebrows, unbuckle, shorten the front strap, buckle and test again- If the helmet rocks forward over eyes, unbuckle, shorten the back
strap, buckle and test again.
6. Pair students with partners or put into small groups to complete thehelmet fit activity using the Bicycle Helmet Fit worksheet.
7. One student should complete the activity while the other completesthe Bicycle Helmet Fit worksheet.
8. The peer assessor should ask each question on the Bicycle Helmet Fitworksheet and observe the student completing the activity and fill inthe worksheet.
• Insert a yes on the worksheet if the activity is completed correctly.
• Insert a no on the worksheet if the activity is completed incorrectly.
• If the activity is completed incorrectly, the peer assessor shouldidentify what was incorrect and provide feedback to his peer abouthow to correctly perform the activity. The student should repeat theactivity until it is completed correctly. If having problems, studentsshould seek guidance from the teacher.
9. Encourage peers to assist each other in ensuring the helmet is thecorrect size and fitted properly.

10. Prepare and provide NHTSA handout(s) for take home (optional). Makecopies from the parent section or print directly from the following links: www.nhtsa.gov/staticfiles/nti/bicycles/pdf/8010-wear_a_helmet.pdfwww.nhtsa.gov/staticfiles/nti/bicycles/pdf/8019_Fitting-A-Helmet.pdf
Assessment 1. Assess helmet fit of each student using the following rubric:
perFormANce rubric: HelmeT FiT
exceptional reliable inconsistent struggling/survival
Student is able to fit helmet correctlyon his own,demonstrating the followingcharacteristics ofhelmet fit (all must be correct): Is snug on head (no rock-n-roll sideto side); Sits level on head;Straps form a Vunder ears; Strap is no more than two fingerwidths from chin; Does not rock-n-rollon head (forward orbackward).
Student can fithelmet correctly,possibly with a little help froma teacher/aide,demonstrating thefollowingcharacteristics ofhelmet fit (all must be correct): Is snug on head (no rock-n-roll sideto side); Sits level on head; Straps form a V under ears;Strap is no more than two fingerwidths from chin; Does not rock-n-rollon head (forward orbackward).
Student has difficultyfitting helmetcorrectly, requiringhelp from teacher/aide, and more thanone of the followingare not completedcorrectly: Is snug on head (no rock-n-roll sideto side); Sits level on head; Straps form a Vunder; Strap is no more thantwo finger widthsfrom chin; Does not rock-n-rollon head (forward orbackward).
Student hasdifficulty fittinghelmet correctly,needing asignificant amountof help in theprocess. The student cannotfit a helmet onhis/her own.
Skil
l-bA
SeD
Ac
Tivi
Ty>
bic
ycle
Hel
meT
FiT
•42
refer to optionaltake-home handouts.

2. Assess the performance of social behavior for each student using the following rubric.
perFormANce rubric: SociAl beHAvior
exceptional reliable inconsistent struggling/survival
Student is respectfultoward classmates,teacher, andequipment; Student receives anduses feedback fromteacher and peers ina courteous manner;Student participatesfully, without teacherprompting orsupervision; Student is able towork cooperativelyand productivelywith classmates,including duringpeer assessments;Student perseveres,even through difficultskills/activities, andmaintains a positiveattitude;Student is committedto learning; Student is committedto engaging incycling in a safemanner, and keepingall classmates safeduring the cyclingunit.
Student is respectfultoward classmates,teacher, andequipment; Student receives anduses feedback fromteacher and peers ina courteous manner;Student participatesfully, but needs someteacher promptingand/or supervision; Participates in mostclass activities at anappropriate andproductive level; Student is most oftenable to workcooperatively andproductively withclassmates,including duringpeer assessments; Student is able towork hard and notget frustrated withsetbacks; Student is committedto learning; Student is committedto engaging in cyclingin a safe manner, andkeeping allclassmates safeduring the cyclingunit.
Student may notalways be respectfultoward classmates,teacher, andequipment; Student may listen to feedback fromteacher or peers, butmay not attemptand/or have difficultyapplying it; Student requiressome teachersupervision, but doesexhibit some self-control at times;Student demonstratesthe ability to workcooperatively andproductively withclassmates, but mayneed teacherdirection orsupervision;Student participatesin most classactivities; Student is willing totry, but may getfrustrated withsetbacks, and poutand/or verbalizefrustration; Student mayfluctuate betweenriding safely andunsafely at times.
Student maystruggle with beingrespectful towardclassmates,teacher, andequipment and/orshow anger and/orblame others forcycling mishaps;Student does notlisten to feedbackfrom teacher orpeers, and does notattempt to apply it; Student requiresongoing supervisionand does not ridesafely; Student may beunprepared andshow very littleinterest in learningor the activity;Student becomesfrustrated easilyand may quitparticipating.
Skil
l-bA
SeD
Ac
Tivi
Ty>
bic
ycle
Hel
meT
FiT
•43

safety None
differentiating Adaptedinstruction • Depending on the student’s skill level, a teacher or aide may have to
complete this activity for the student. • At no time should a student be allowed to ride without a helmet. This
may mean additional time should be allotted to fit students who may have additional challenges.
Best practices 1. The teacher should perform a quick visual inspection of proper helmet fitat the beginning of every class when on-the-bike activities are involved.
2. Use peers/partners to practice, inspect and correct helmet fit for eachother. In addition to this being a way to reinforce proper fit, it will alsomake the most efficient use of class time. This should not replaceteacher assessment.
3. Assign students a numbered helmet or helmet color, once proper fit isdetermined. This will be the helmet number or color of helmet that thestudent will use in every class. Log this number or color on the student roll.
4. Teach bicycle helmet instruction in the health classroom, if possible, toallow more time for on-the-bike instruction in the physical educationclassroom/gym.
5. Purchase and use bicycle helmets with the universal fit mechanisms, asopposed to helmets with only straps, if possible. They are easier forstudents to adjust and less likely to loosen, therefore saving class timeand ensuring the helmet stays properly fit.
6. If students are sharing helmets, use head barriers to prevent head lice.
7. Ensure safety precautions if students opt to use their own helmets: • Check for the presence of CPSC label • Visually assess for the presence of obvious damage to the helmet• Request students to verify that helmets have not been associated with
a previous crash. Teachers should have extra helmets on hand forthose students who are unsure of their helmet’s crash history
Skil
l-bA
SeD
Ac
Tivi
Ty>
bic
ycle
Hel
meT
FiT
•44
diagram: Correct helmet Fit
Wrong Wrong right!� � �

wO
Rk
ShEE
t
directions: Peer assessor should ask each question and observe the student completing the helmetfit. Place a checkmark in the yes column if the fit is completed correctly. Place a checkmark in theno column if the helmet fit is completed incorrectly. If the activity is completed incorrectly, the peerassessor should identify what was incorrect and write down on the form what corrections need to bemade. The student should repeat the helmet fit until it is completed correctly.
date: date: date:
observation 1 observation 2 observation 3
Activity yes no yes no yes no
Does the helmet fit snugly on your head? Is there rock-n-roll side to side?Check the universal fit mechanisms / padsinside helmet
Does the helmet fit level on your head?Check for 2 finger widths between eyebrows and helmet.
Do the straps form a “V” on both sides of the ears (under the ear and slightly in front of the ear lobes?Check the straps and adjuster to create a “V” on both sides.
Do more than two fingers fit between your chin and chinstrap?Readjust the straps so there is no more than 2 finger widths between. This may change the angle of the “V” at the ears, so make sure to keep the “V”.
Does your helmet rock-n-roll when you move your head forward/ backward or side to side?Readjust the straps and possibly the internal fit mechanism, for a better fit.
Explain any NO checkmarks.
Student Date
bIcyclE hElmEt fIt wORkShEEt
wo
rkSH
eeT
>bi
cyc
le H
elm
eT F
iT
•45


Ac
tIv
Ity
timeframe Beginner: 20 minutesintermediate: 15 minutesAdvanced: 15 minutes
objectives At the conclusion of the activity, the student will be able to:1. Demonstrate exceptional or reliable bicycle fit, as measured by the
bicycle fit rubric. (Psychomotor)2. Demonstrate exceptional or reliable social behavior as measured
by the social behavior rubric. (Affective)
national standards Standard 2Standard 4
equipment • Bicycles• Allen wrench, if needed for seat height adjustment • Pencils• Bicycle Fit worksheet
teacher overview This activity teaches students how to properly fit a bicycle to the rider.This is an important activity to help ensure the safety and comfort of the bicyclist.
preparation 1. Label bicycles with numbers from the smallest to the largest bicycle.
2. Determine the mechanism on the bicycle to adjust the seat height.Bicycles that have seat quick releases will enable the seat height to beeasily adjusted without the use of any tools. If the bicycle does nothave a seat quick release, an Allen wrench will be needed to makethese adjustments and will require more classroom time.
3. Make appropriate number of copies of Bicycle Fit worksheet.
directions 1. Introduce this activity using the following prompt:
Today, we will be learning how a properly fit a bicycle to a rider. Thereare some easy steps to take to make sure a bicycle fits. These shouldbe done every time you are getting on a new bicycle or a bicycle thathas been adjusted for another rider. Making sure a bicycle fits the riderwill be safer for the rider as well as making it more comfortable to ride.
2. Use the following sample questions to prompt students’ thinking aboutthe content in this activity.
SkIll-bASED ActIvItybicycle fit
Skil
l-bA
SeD
Ac
Tivi
Ty>
bic
ycle
FiT
•47

Q: have you ever ridden a bike that was too big? A: All responses are acceptable
Q: What did that feel like?A: All responses are acceptable
Q: did your legs hurt? A: All responses are acceptable
Q: What advantages would there be to a properly fitted bicycle? A: Any of the following:
• Safety• Comfort• Other responses may be accepted
3. Demonstrate what is requested of students before allowing students tocomplete the activity.
4. Instruct students to straddle the bicycle with feet flat on the groundand to squat over the top tube.
• Each student should be able to squat about three inches for mountain bikes - from a standing position with feet flat on the ground to sitting on the top tube. If there is too much or not enough clearance, then assist students in finding a bike that is a better fit.
• The fit may vary depending on the type of bike.
5. Explain the relationship of seat height to comfort and safety.
• Seat heights that are too high or too low will result in uncomfortable and inefficient riding.
• Riders will often complain that their legs are tired or “burning” if seat height is too low.
• If a seat height is too high, the bicycle may be difficult to control.
6. Divide students in groups of three (3) to complete the Bicycle Fitworksheet for each student. One person is the cyclist, one assessesand one holds the bike steady.
Skil
l-bA
SeD
Ac
Tivi
Ty>
bic
ycle
FiT
•48

7. Instruct peers to assess each other by asking the questions on the peerassessment, checking all aspects of bicycle fit and placing acheckmark in the most appropriate box on the worksheet.
• Instruct the cyclist to sit on the saddle and place the ball of one foot on the pedal in the down stroke or 6 o’clock position.
• If the down stroke leg is too straight or too bent, the seat height can be adjusted up or down to achieve the correct position.
• Open the quick release lever on the seat tube. The correct way to use the seat quick release is to swing the lever from the fully closed position to the fully open position. Most levers will have the word “open” and “closed” on each side.
- To loosen or tighten the quick release, use the knob to adjust the clamping force.
- Not securing the quick release tightly enough can result in the seat height moving during riding.
- Securing the quick release too tightly can damage the seat tube.
• Slide the seat post up or down. Ensure the seat post is inserted beyond the minimum insertion (or maximum extension) point of the post.
• To close the quick release, swing the lever from full open to full closed; you should just start to feel some resistance when the lever is perpendicular to the seat post. If you do not feel resistance at this point, tighten the clamping force. If you feel resistance before this point, loosen the clamping force. Not securing the quick release tight enough can result in the seat height moving during riding. Securing the quick release too tightly can damage the seat tube.
• Ensure the lever is tight and the seat cannot be moved before sitting on it.
8. Rotate positions so each student takes a turn fitting, assessing and holding. Skil
l-bA
SeD
Ac
Tivi
Ty>
bic
ycle
FiT
•49
The down stroke legshould be almost fullyextended, with a slightbend at the knee.
proper positioning. if the down stroke leg istoo straight or too bent, adjust the seat heightup or down to achieve the correct position.

Assessment 1. Assess bicycle fit of each student using the following rubric:
perFormANce rubric: bike FiT
exceptional reliable inconsistent struggling/survival
Student is able to fit a bike correctlyon her own,demonstrating the followingcharacteristics ofthe bike fit (all mustbe correct):Student can straddlethe bike with �3” ofclearance betweenthe rider and the top tube;Student can adjustthe saddle height sothat her knee has aslight bend when thefoot/pedal is at the 6o’clock position;Student’s knees arenot bent so muchthat pedaling isinefficient;Student does notrock side to sidewhen pedaling;Seat post has atleast 3” (7.6cm) inthe seat tube or isnot higher than themark on the post;Nose of saddle islined up with toptube;Saddle is level or thenose is slightlyhigher;Quick release onseat post is closedand tight.
Student is able to fit a bike correctly,possibly with a little help from a teacher/aide,demonstrating the followingcharacteristics of the bike fit (all arecorrect): Student can straddlethe bike with �3” ofclearance;Student can adjustthe saddle heightsuch that her kneehas a slight bendwhen the foot/pedalis at the 6 o’clockposition;Student’s knees arenot bent too much sothat pedaling isinefficient;Student does notrock side to sidewhen pedaling;Seat post has at least3” (7.6cm) in the seattube or is not higherthan the mark on thepost;Nose of saddle islined up with toptube.Saddle is levelor the nose is slightlyhigher;Quick release onseat post is closedand tight.
Student has difficultyfitting bike correctly,requiring help froma teacher/aide, andthe majority of thefollowing is notcompleted correctly:Student can straddlethe bike with �3” ofclearance;Student can adjustthe saddle height sothat her knee has aslight bend when thefoot/pedal is at the 6o’clock position;Student’s knees arenot bent so muchthat pedaling isinefficient;Student does notrock side to sidewhen pedaling;Seat post has at least3” (7.6cm) in the seattube or is not higherthan the mark on thepost;Nose of saddle islined up with toptube;Saddle is level or thenose is slightlyhigher;Quick release onseat post is closedand tight.
Student hasdifficulty fittingbike correctly,needing asignificant amountof help in theprocess; The student fails tounderstand theprocess of fitting abike.Assess theperformance ofsocial behavior foreach student usingthe followingrubric.
Skil
l-bA
SeD
Ac
Tivi
Ty>
bic
ycle
FiT
•50

perFormANce rubric: SociAl beHAvior
exceptional reliable inconsistent struggling/survival
Student is respectfultoward classmates,teacher, andequipment; Student receivesand uses feedbackfrom teacher andpeers in a courteousmanner;Student participatesfully, without teacherprompting orsupervision; Student is able towork cooperativelyand productivelywith classmates,including duringpeer assessments;Student perseveres,even throughdifficultskills/activities, andmaintains a positiveattitude;Student is committedto learning; Student is committedto engaging in cyclingin a safe manner,and keeping allclassmates safeduring the cyclingunit.
Student is respectfultoward classmates,teacher, andequipment; Student receives anduses feedback fromteacher and peers ina courteous manner;Student participatesfully, but needs someteacher promptingand/or supervision; Participates in mostclass activities at anappropriate andproductive level; Student is mostoften able to workcooperatively andproductively withclassmates,including duringpeer assessments; Student is able towork hard and notget frustrated withsetbacks; Student is committedto learning; Student is committedto engaging incycling in a safemanner, and keepingall classmates safeduring the cyclingunit.
Student may notalways be respectfultoward classmates,teacher, andequipment; Student may listento feedback fromteacher or peers, butmay not attemptand/or havedifficulty applying it; Student requiressome teachersupervision, butdoes exhibit someself-control at times;Studentdemonstrates theability to workcooperatively andproductively withclassmates, but mayneed teacherdirection orsupervision;Student participatesin most classactivities; Student is willing totry, but may getfrustrated withsetbacks, and poutand/or verbalizefrustration; Student mayfluctuate betweenriding safely andunsafely at times.
Student maystruggle with beingrespectful towardclassmates,teacher, andequipment and/orshow anger and/orblame others forcycling mishaps;Student does notlisten to feedbackfrom teacher orpeers, and does notattempt to apply it; Student requiresongoingsupervision anddoes not ridesafely; Student may beunprepared andshow very littleinterest in learningor the activity;Student becomesfrustrated easilyand may quitparticipating.
Skil
l-bA
SeD
Ac
Tivi
Ty>
bic
ycle
FiT
•51

safety 1. Ensure all seat posts are inserted beyond the minimum insertion (or maximum extension) point of the post.
differentiating Adapted and Beginnerinstruction • Set up less skilled students with both feet flat on the ground, while
seated on the saddle, until skill level advances. • Use adult tricycles, bicycles with training wheels, etc. for students
that may be uncomfortable.
intermediate and Advanced • Discuss the different types of bicycle and fit needed for different types
of bicycles (see parent handout)• Road bikes should have about 1-2 inches of clearance between the
rider and the top tube.• Mountain bikes should have about 3-4 inches of clearance between
the rider and the top tube since these bicycles are typically used to ride on bumpy terrain trails the rider will move up and down more.
Best practices 1. Assign students a numbered bicycle, once proper fit is determined.This will be the bicycle that the student will ride in every class. Thisnumber should be logged on the student roll.
2. Use a bicycle that is too small, rather than one that is too big, if thereare not enough properly sized bicycles for all students.
Skil
l-bA
SeD
Ac
Tivi
Ty>
bic
ycle
FiT
•52

wO
Rk
ShEE
t
directions1. Complete the bicycle fit in groups of three. One person is the cyclist, one assesses and one
holds the bicycle steady. Each student takes a turn fitting, assessing and holding.2. Assess the peers in your group by asking the questions on the peer assessment, checking all
aspects of bicycle fit and placing a checkmark in the most appropriate box. 3. Do not proceed to riding without successfully completing the bicycle fit.
date: date: date:
observation 1 observation 2 observation 3
Activity yes no yes no yes no
Can the bicyclist straddle the top tube and have about 3” of clearance?Make sure the cyclist is standing on flat feet, not on toes.
When seated, is the bicyclist starting with one foot at 12 o’clock and the other at 6 o’clock?Check to make sure the foot at the 6 o’clock position is at the very bottom of the pedal stroke, not slightly forward or backward.
With one foot at 6 o’clock, does the knee have a slight bend?
When the seat height has been determined, is there at least 3” of seat post in the tube or is the line on the seat post not visible?There must be 3” of seat post in the tube for safety reasons.
Is the nose of the saddle lined up with the top tube?The nose and top tube should be aligned for comfort.
Is the saddle level or the nose of the saddle slightly higher?The saddle should be level, to keep riderfrom sliding off the saddle.
Is the quick release lever of the saddle closed tightly?
Explain all “NO” responses.
Student Date
bIcyclE fIt wORkShEEt
wo
rkSH
eeT
>bi
cyc
le F
iT
•53


Ac
tIv
Ity
timeframe Beginner: 10-12 minutesintermediate: 10 minutesAdvanced: 8-10 minutes
objective At the conclusion of the unit, the student will be able to:1. Identify the basic parts of the bicycle, as measured by successful
completion of the Bicycle Parts worksheet. (Cognitive)
national standards Standard 2 Standard 4
equipment • Bicycles • Bicycle part labels• Tape• Pencils• Scissors• Bicycle Parts worksheet
teacher overview This activity teaches students the proper names for various parts of the bicycle.
preparation Make appropriate number of copies of Bicycle Parts worksheet.Cut out each bicycle part to be taped onto bicycle, using bicycle parts labels.
directions 1. Introduce this activity using the following prompt:
Today, we will be learning the proper names for various parts of thebicycle.
2. Use the following sample questions to prompt students’ thinking aboutthe content in this activity.
Q: Why is it important to know the right names for the parts on a bicycle?A: Any of the following:
• Be more knowledgeable about bicycles• Can get the correct part fixed if it is broken• Other responses may be accepted
Q: how many parts can you name? A: All responses are acceptable
• Identify the parts of the bicycle for the students by taping the bicycle parts to a bicycle in front of the class.
3. Divide class into small groups of 3-4 students. Students should worktogether to complete the worksheet.
SkIll-bASED ActIvItybicycle parts
Skil
l-bA
SeD
Ac
Tivi
Ty>
bic
ycle
pA
rTS
•55

Bike parts diagram
Assessment Use worksheet based on student level: beginner, intermediate or advanced.
safety None
differentiating Beginnerinstruction • Instruct students to identify the frame, saddle, wheels, pedal,
handlebars, chain and brakes.
intermediate• Instruct students to identify the frame, saddle, wheels, pedal,
handlebars, chain and brakes.• Instruct students to identify the top tube, seat tube, down tube, head
tube, seat stays, chain stays, cranks, chainrings, cassette, rear derailleur, front derailleur, seat post, handlebar stem, headset, brake levers, brake cables, shifters and fork.
Advanced• Identify bicycle parts and which parts are grouped as the frame and
the drive train. • Complete activity as a timed event.
Best practices 1. Use peers/partners to practice, inspect and correct each other.
2. Provide options for doing this activity, such as provide student with acompleted picture and ask them to tape names of parts to their bike.They could begin doing what they know and use the picture tocomplete the ones they do not know.
saddle
Chain stays
Brake Cable
Front derailleur
Brake lever
Chainrings
seat stays
down tube
Wheels
seat tubeBrake
headset
handlebar stem
top tube
Cranks
Fork
gear shifter
reflector
pedal
headtubeseat post
rear derailleur
Cassette
Chain
Skil
l-bA
SeD
Ac
Tivi
Ty>
bic
ycle
pA
rTS
•56

wO
Rk
ShEE
t
A. Frame B. Wheels C. Handlebars D. Brake
E. Saddle F. Pedal G. Chain
Student Date
bIkE pARtS wORkShEEtbEGINNER
wo
rkSH
eeT
>bi
cyc
le p
ArT
S •
beg
iNN
er
•57
directions: With your partner/group, please correctly label the bike parts by matching theletters in the picture with the parts listed below.

wo
rkSH
eeT
>bi
cyc
le p
ArT
S •
beg
iNN
er
•58
bIkE pARtS wORkShEEt ANSwER kEy • bEGINNER
A. Frame B. Wheels C. Handlebars D. Brake
E. Saddle F. Pedal G. Chain
e
B
d
C
A
gF
g

wO
Rk
ShEE
tw
ork
SHee
T>
bic
ycle
pA
rTS
• iN
Term
eDiA
Te
•59
directions: With your partner/group, please correctly identify the bike parts by matchingthe letters in the picture with the parts listed below.
A. Wheels B. Handlebar Stem C. Brake D. Saddle
E. Pedal F. Chain G. Fork H. Top Tube
I. Seat Tube J. Down Tube K. Gear Shifter L. Head Tube
M. Seat Stays N. Chain Stays O. Cranks P. Chainrings
Q. Cassette R. Front Derailleur S. Headset T. Seat Post
U. Brake Lever V. Brake Cable W. Reflector X. Rear Derailleur
Student Date
bIkE pARtS wORkShEEt INtERmEDIAtE

wo
rkSH
eeT
>bi
cyc
le p
ArT
S •
iNTe
rmeD
iATe
•60
Each part of the bike listed above belongs in one of three categories: frame, drive train or other.Please write the parts under the correct category. One example has been filled in for you.
Frame drive train other
chain
bIkE pARtS wORkShEEt INtERmEDIAtE

wO
Rk
ShEE
tw
ork
SHee
T>
bic
ycle
pA
rTS
• iN
Term
eDiA
Te
•61
bIkE pARtS wORkShEEt ANSwER kEy • INtERmEDIAtE
A. Wheels B. Handlebar Stem C. Brake D. Saddle
E. Pedal F. Chain G. Fork H. Top Tube
I. Seat Tube J. Down Tube K. Gear Shifter L. Head Tube
M. Seat Stays N. Chain Stays O. Cranks P. Chainrings
Q. Cassette R. Front Derailleur S. Headset T. Seat Post
U. Brake Lever V. Brake Cable W. Reflector X. Rear Derailleur
d
n
V
r
u
p
m
J
A
iC
s
B
h
o
g
k
W
e
lt
X
Q
F

wo
rkSH
eeT
>bi
cyc
le p
ArT
S •
iNTe
rmeD
iATe
•62
Each part of the bike listed above belongs in one of three categories: frame, drive train or other.Please write the parts under the correct category. One example has been filled in for you.
Frame drive train other
bIkE pARtS wORkShEEt ANSwER kEy • INtERmEDIAtE
Chainrings
Cassette
Crank
Saddle
Seat Tube
Brake Cable
Wheels
Pedal
Handlebar Stem
Reflector
Handlebars
Front Derailleur
Brake Lever
Brake
Shifters
Kickstand
Top Tube
Head Tube
Seat Tube
Seat Stays
Down Tube
Fork
Headset

wo
rkSH
eeT
>bi
cyc
le p
ArT
S •
AD
vAN
ceD
•63
Student Date
bIkE pARtS wORkShEEt ADvANcED
directions: With your partner/group, please correctly identify the bike parts by matchingthe letters in the picture with the parts listed below.
A. Frame B. Wheels C. Handlebars D. Brake
E. Saddle F. Pedal G. Chain H. Fork
I. Top Tube J. Seat Tube K. Down Tube L. Shifters
M. Head Tube N. Seat Stays O. Chain Stays P. Cranks
Q. Chainrings R. Cassette S. Front Derailleur T. Headset
U. Seat Tube V. Handlebar Stem W. Brake Lever X. Kickstand
Y. Brake Cable Z. Reflector

wo
rkSH
eeT
>bi
cyc
le p
ArT
S •
AD
vAN
ceD
•64
Each part of the bike listed above belongs in one of three categories: frame, drive train or other.Please write the parts under the correct category. One example has been filled in for you.
Frame drive train other
bIkE pARtS wORkShEEt ADvANcED

wo
rkSH
eeT
>bi
cyc
le p
ArT
S •
AD
vAN
ceD
•65
bIkE pARtS wORkShEEt ANSwER kEy • ADvANcED
A. Frame B. Wheels C. Handlebars D. Brake
E. Saddle F. Pedal G. Chain H. Fork
I. Top Tube J. Seat Tube K. Down Tube L. Shifters
M. Head Tube N. Seat Stays O. Chain Stays P. Cranks
Q. Chainrings R. Cassette S. Front Derailleur T. Headset
U. Seat Post V. Handlebar Stem W. Brake Lever X. Kickstand
Y. Brake Cable Z. Reflector
e
o
y
s
W
Q
n
k
B
ud
t
V
i
p
h
l
z
F
mJ
r
gX
A
C

wo
rkSH
eeT
>bi
cyc
le p
ArT
S •
AD
vAN
ceD
•66
Each part of the bike listed above belongs in one of three categories: frame, drive train or other.Please write the parts under the correct category. One example has been filled in for you.
Frame drive train other
Chainrings
Cassette
Crank
Saddle
Seat Tube
Brake Cable
Wheels
Pedal
Handlebar Stem
Reflector
Handlebars
Front Derailleur
Brake Lever
Brake
Shifters
Kickstand
Brake Cable
Reflector
Top Tube
Head Tube
Seat Tube
Seat Stays
Down Tube
Fork
Headset
bIkE pARtS wORkShEEt ANSwER kEy • ADvANcED

Ac
tIv
Ity
timeframe Beginner: 20 minutesintermediate: 15 minutesAdvanced: 10 minutes
objectives At the conclusion of the activity, the student will be able to:
1. Demonstrate exceptional or reliable performance of the ABC QuickCheck, as measured by the ABC Quick Check rubric. (Psychomotor)
2. Demonstrate exceptional or reliable social behavior as measured bythe social behavior rubric. (Affective)
national standards Standard 1 Standard 2
Standard 4
equipment • Bicycles • Helmets• Head barriers• Tire pump with air pressure gauge• Cones• Red floor tape• Pencils• ABC Quick Check worksheet
teacher overview This activity teaches students an important safety check to ensure thatthe bicycle is in good working condition before riding. This is the firstactivity in this module that will involve students riding bicycles.
preparation 1. Ensure the tire pumps are compatible with the types of valve stems onthe tire tubes.
2. Identify the type of brakes on the bicycle to be able to instructstudents how to check for proper function.
3. Designate a riding course.
4. If bicycles have both front and rear brakes, wrap the left handle of thebicycle with red floor tape to discourage students from using the frontbrake, until proper braking skill is taught.
SkIll-bASED ActIvItyAbc Quick check
Skil
l-bA
SeD
Ac
Tivi
Ty>
Abc
qu
ick
cH
eck
•67

5. Check all quick releases to make sure they are correctly tightened andin the correct direction. Use the correct technique when opening thewheel quick release by swinging the lever from the closed position tothe open position. Most levers will have the word “open” and “closed”on each side.
• To loosen or tighten the quick release, use the knob to adjust theclamping force. To close the quick release, swing the lever from fullopen to full closed; you should just start to feel some resistancewhen the lever is parallel to the ground.
• If you do not feel resistance at this point, tighten the clamping force.If you feel resistance before this point, loosen the clamping force.Not securing the quick release can result in the wheel falling off thebicycle.
6. Make appropriate number of copies of ABC Quick Check worksheet
directions 1. Introduce this activity using the following prompt:
Before going out on a bicycle ride, it’s important to check your bicycleto make sure it is safe. There is an easy way to remember this. It’scalled the ABC Quick Check. A stands for Air; B stands for Brakes; Cstands for Chain and Crank; Quick means check all Quick Releases;and Check means for check everything with a slow, short ride.
2. Use the following sample questions to prompt students’ thinking aboutthe content in this activity.
Q: how do you know your bicycle is safe to ride? A: Any of the following:
• All the parts are working properly• By testing it out• Other responses may be accepted
Q: What parts do you think are important to check? A: Any of the following:
• Tires• Brakes• Chain• Quick Releases• Other responses may be accepted
Q: What can happen if you ride a bicycle that is not safe or that has aproblem?
A: Any of the following: • The rider could get hurt• More likely to have a bicycle crash• Won’t enjoy the bicycle ride• Other responses may be accepted
3. Arrange students in a “U” shape to facilitate all students being able towatch your instruction.
Skil
l-bA
SeD
Ac
Tivi
Ty>
Abc
qu
ick
cH
eck
•68

4. Demonstrate the ABC Quick Check for the whole group, going througheach step and describing the use of the mnemonic as an easy way toremind them of the steps.
4A. Discuss the letter A stands for Air
• Explain that maintaining proper air pressure in the tires makes ridingmore comfortable and increases the life of the tires.
• Check the front and rear tires for air pressure by squeezing the tires.Tires should be hard, not soft. (Cue) If tires need air, students shouldpump up tires.
• Demonstrate how to use a tire pump.
4B. Discuss the letter B stands for Brakes
• There are three different types of braking systems: coaster brakes, rimbrakes and disc brakes.
• Discuss use of brakes based on the type of brake. If a bicycle has coasterbrakes, the rider will stop the bicycle by pedaling backward. If thebicycle has rim or disc brakes, the rider will stop the bicycle bysqueezing the brake levers on the handlebar.
• To use the brake lever, always use the index and middle fingers to theapply brakes. The right brake lever stops the rear wheel and the left brakelever stops the front wheel.
• Care should be taken when using the front brake. If the front brake isapplied too hard or too quickly, the rider could be propelled over thehandlebars.
• Until proper braking skill is taught, only the rear brake should be used.Cover the left-hand brake with red tape and remind students not to use thethat brake. Some bicycles, such as BMX bikes, may only have a rear brake.
• Demonstrate proper brake use for students before they try it themselves:
- Squeeze brake lever to ensure the distance between the brake leverand handlebar is a minimum of 1 inch (from knuckle to knuckle). (Cue)
- Apply brakes while pushing the bicycle forward and backward toensure that the bicycle stops.
4C. Discuss the letter C stands for Chain and Crank
• Explain to students: It is very rare to have a crank that is loose. If this occurs,however, do not use bicycle until it has been repaired by a professional.
• Demonstrate the following to students before they try it themselves.
- Check the cranks by grasping the crank and trying to move ithorizontally toward and away from the frame of the bicycle, to ensurecrank is securely attached to the frame.
- Explain to students that the chain should be completely on a gear tohelp prevent the chain from falling off.
- Check the chain by placing a hand under the saddle to lift rear wheel offthe ground; using the other hand, grasp the pedal and spin, moving thewheel to ensure the chain is properly set on the gears.
Tires should behard, not soft. cue: Hard as a rock.
ensure the distancebetween the brakelever and handlebaris a minimum of 1 inch.cue: 1 inch = fromknuckle to knuckle.
Skil
l-bA
SeD
Ac
Tivi
Ty>
Abc
qu
ick
cH
eck
•69

Allow enoughspace for allstudents to beriding at the sametime, three-bicycles-length betweeneach rider.
cue: Three-bicycles-lengthsbetween each rider.
4d. Discuss the words Quick Check: Quick-check quick releases and Check - check everything with a slow, short ride. Use the bulleted steps if bicycles have quick release levers or skip to step #5.
• Point to lever behind seat and explain to close the quick release leverso it does not catch on clothing or potentially open.
• Instruct students to inspect the seat quick release.
• Explain the front wheel quick release should be closed and pointingin an upward direction, parallel to the fork, so it does not catch onanything on the ground and potentially open.
• Instruct students to inspect the front wheel quick release.
• Explain the rear wheel quick release should be closed and pointingtoward the front tire, in between the chain and seat stays, so it doesnot catch on anything on the ground and potentially open.
• Instruct students to inspect the rear wheel quick release.
5. Explain they will be completing a short, slow ride on the designatedcourse to check for safety and comfort. This is an opportunity forstudents to evaluate the comfort and efficiency of the bicycle. Theyneed to allow enough space for all students to be riding at the sametime. (Cue)
• Remind students of the following safety rules while riding:
• Explain the 2-2-2-2 rule to students to ensure safety and classroommanagement:- 2 wheels on the ground- 2 feet on the pedals- 2 hands on the handlebars- 2 fingers on the brake levers
• If bicycles have both a front and rear brake, explain to students not to use the brake on the red taped, left handlebar (front brake) during the ride.
6. Explain the ABC Quick Check should be performed before every ride.
7. Divide students into small groups of two to three.
8. Have each group of students complete the ABC Quick Checkworksheet for each member of the group.
9. Distribute the NHTSA ABC Quick Check handout at the end of the class.
Skil
l-bA
SeD
Ac
Tivi
Ty>
Abc
qu
ick
cH
eck
•70
Handout reinforces the information taught in class. See:www.nhtsa.gov/DoT/NHTSA/NTi/SrTS/7505-06-Abcquickcheck.pdf

Assessments 1. Assess performance of the ABC Quick Check of each student using thefollowing rubric:
perFormANce rubric: Abc quick cHeck
exceptional reliable inconsistent struggling/survival
Student is able toconduct the ABCQuick Checkcorrectly on his own,demonstrating thefollowingcharacteristics (allmust be correct): Checks both tires for air; Checks both frontand rear brakes(knuckle to knuckle)by spinning each tireand squeezing eachbrake;Checks the frontchainring (gears) bygrabbing the crankset and jiggling it; Checks the chain byturning the pedalswith the rear wheeloff the ground; Checks all quickreleases (seat post,front, and rearwheel) for security;Takes a short ridefor overall check.
Student is able toconduct the ABCQuick Checkcorrectly, possiblywith help from apeer (peerassessment processmay serve to guidespecific details ofprocess),demonstrating thefollowingcharacteristics (allmust be correct): Checks both tires for air;Checks both frontand rear brakes(knuckle to knuckle)by spinning each tireand squeezing eachbrake;Checks the frontchainring (gears) bygrabbing the crankset and jiggling it; Checks the chain byturning the pedalswith the rear wheeloff the ground;Checks all quickreleases (seat post,front, and rearwheel) for security; Takes a short ride foroverall check.
Student hasdifficulty conductingthe ABC QuickCheck correctly,requiring help from ateacher/aide, andmore several of thefollowing are notcompleted correctly:Checks both tires for air; Checks both frontand rear brakes(knuckle to knuckle)by spinning each tireand squeezing eachbrake;Checks the frontchainring (gears) bygrabbing the crankset and jiggling it; Checks the chain byturning the pedalswith the rear wheeloff the ground; Checks all quickreleases (seat post,front, and rearwheel) for security;Takes a short ride foroverall check.
Student hasdifficultyconducting theABC Quick Checkcorrectly, needinga significantamount of help inthe process. Thestudent fails tounderstand theprocess of the ABCQuick Check.
Skil
l-bA
SeD
Ac
Tivi
Ty>
Abc
qu
ick
cH
eck
•71

2. Assess the performance of social behavior for each student using the following rubric.
perFormANce rubric: SociAl beHAvior
exceptional reliable inconsistent struggling/survival
Student is respectfultoward classmates,teacher, andequipment; Student receivesand uses feedbackfrom teacher andpeers in a courteousmanner;Student participatesfully, without teacherprompting orsupervision; Student is able towork cooperativelyand productivelywith classmates,including duringpeer assessments;Student perseveres,even throughdifficultskills/activities, andmaintains a positiveattitude;Student iscommitted tolearning; Student iscommitted toengaging in cyclingin a safe manner,and keeping allclassmates safeduring the cyclingunit.
Student is respectfultoward classmates,teacher, andequipment; Student receives anduses feedback fromteacher and peers ina courteous manner;Student participatesfully, but needs someteacher promptingand/or supervision; Participates in mostclass activities at anappropriate andproductive level; Student is mostoften able to workcooperatively andproductively withclassmates,including duringpeer assessments; Student is able towork hard and notget frustrated withsetbacks; Student iscommitted tolearning; Student iscommitted toengaging in cyclingin a safe manner,and keeping allclassmates safeduring the cyclingunit.
Student may notalways be respectfultoward classmates,teacher, andequipment; Student may listento feedback fromteacher or peers, butmay not attemptand/or havedifficulty applying it; Student requiressome teachersupervision, butdoes exhibit someself-control at times;Studentdemonstrates theability to workcooperatively andproductively withclassmates, but mayneed teacherdirection orsupervision;Student participatesin most classactivities; Student is willing totry, but may getfrustrated withsetbacks, and poutand/or verbalizefrustration; Student mayfluctuate betweenriding safely andunsafely at times.
Student maystruggle with beingrespectful towardclassmates,teacher, andequipment and/orshow anger and/orblame others forcycling mishaps;Student does notlisten to feedbackfrom teacher orpeers, and does notattempt to apply it; Student requiresongoingsupervision anddoes not ridesafely; Student may beunprepared andshow very littleinterest in learningor the activity;Student becomesfrustrated easilyand may quitparticipating.
Skil
l-bA
SeD
Ac
Tivi
Ty>
Abc
qu
ick
cH
eck
•72

safety 1. Remind students they should only use the rear brake to stop thebicycle, until their skill level advances to be able to safely use the frontbrake.
2. Students should only be visually inspecting the quick releases.Advanced students would only practice properly opening/closing andtightening/loosening the wheel quick release after proper instructionand constant supervision by the teacher.
differentiating Adaptedinstruction • Depending on skill level, teacher or aide may have to perform
this activity with the student.
Beginner • Students should only use the rear brake to stop the bicycle. • Instruct students not to use the brake lever on the red side of
the handlebar. • This should be done until their skill level advances to be able to
safely use the front brake. Student should only visually inspect the quick releases.
• Perform this activity as a group.
intermediate • Locate the Pounds per Square Inch (PSI) range on the tire. • Identify the type of brakes on the bicycle. • Locate the “Open” and “Closed” labels on the seat quick release;
practice tightening and loosening the quick releases, as they are • opened and closed.• Perform as a group and then individually.
Advanced • Determine the current PSI of each tire by using an air pressure gauge
on the tire pump and add or remove air as needed. • Discuss the two types of tube valves: Presta, Schrader. • Locate the “Open” and “Closed” labels on both wheel quick release;
practice tightening and loosening the quick releases, as they are opened and closed.
• After initial group performance of skill, students can perform this skill individually, in small groups or with partners at the beginning of each class.
Skil
l-bA
SeD
Ac
Tivi
Ty>
Abc
qu
ick
cH
eck
•73
prestaschrader

Best practices 1. Complete the Helmet Check and ABC Quick Check at the beginning ofevery class in which the students will be riding.
2. Use peers/partners to practice, inspect and correct each other to makethe most efficient use of class time and reinforce bicycle safety skills.This should not replace teacher assessment.
3. Attach the tube valve, then raise and lower the tire pump handle. The needle on the air pressure gauge will stop at the current air pressure level. Based on the PSI range on the tire, one can determine if more or less air is needed.
4. Refer to the picture above to see the difference between a Presta and a Schrader valve.
5. Refer to the picture below to see the difference between rim brakesand disc brakes.
6. Check for the following if the brake lever touches the handlebars:• Check to see that the brake quick release is not open.• The handlebars of BMX bikes can turn to face the wrong direction
and affect the braking capability.
7. Make minor adjustments to the brake cables.
8. If brake lever still touches the handlebar, the brakes will not work andthe bicycle should not be used.
9. Assess the riding skills, bike fit and seat height during this activity.
Skil
l-bA
SeD
Ac
Tivi
Ty>
Abc
qu
ick
cH
eck
•74
rim Brakes disc Brakes

wO
Rk
ShEE
t
directions: Ask your peer each question and observe your peer completing the ABC Quick Check.Place a checkmark in the yes column if it is completed correctly. Place a checkmark in the nocolumn if the ABC Quick Check is completed incorrectly. If the activity is completed incorrectly,the peer assessor should identify what was incorrect and write down what corrections need to bemade on the form. Repeat the process until it is completed correctly.
date: date: date:
observation 1 observation 2 observation 3
Activity yes no yes no yes no
Did the bicyclist check the air in the tires? Are the tires “hard as a rock”?Use the air pump if needed.
Did the bicyclist check the brakes by squeezing both the front and rear brakes and getting knuckle to knuckle?There should be no less than 1” between brake lever and handlebars. If there is morethan 1”, please see the teacher! The bike should not be ridden!
Did the bicyclist check the brakes by squeezing the brakes and pushing the bike forward & backward? The bike tires should not move when the brakes are squeezed fully. If they do, please see the teacher! The bike should not be ridden!
Did the bicyclist check the cranks (front gears) for tightness? Did the cyclist grasp the crank and try to move it horizontally toward and away from the frame?If the crank set is loose, please see the teacher! The bike should not be ridden!
Did the bicyclist check the chain by turning the pedals with the rear wheel off the ground? Reset the chain if it is not working correctly or see the teacher for help.
Student Date
Abc QuIck chEck bEGINNER
wo
rkSH
eeT
>A
bc q
uic
k c
Hec
k •
beg
iNN
er
•75
Continued >

date: date: date:
observation 1 observation 2 observation 3
Activity yes no yes no yes no
Did the bicyclist check the saddle quick release to make sure it is closed and in the right direction?The quick release should be pointing to the rear of the bicycle so it does not interfere with clothing.
Did the bicyclist check the front wheel quick release to make sure it is closed and in the right direction? The quick release should be pointing up and aligned with front fork.
Did the bicyclist check the rear wheel quick release to make sure it is closed and in the right direction? The quick release should be pointing toward the front wheel in between the chain and seat stays.
Did the bicyclist take a short slow ride to check for comfort and safety? This allows the rider to notice other problems with the bike they may not have seen in the ABC quick check.
Please explain any NO checkmarks.
wo
rkSH
eeT
>A
bc q
uic
k c
Hec
k •
beg
iNN
er
•76

wO
Rk
ShEE
t
directions: Place a checkmark in the yes column if the check is completed correctly. Place a checkmark in the no column if the ABC Quick Check is completed incorrectly. Pleasedescribe what is being checked for each segment of the ABC Quick Check and describe howthe check should be conducted. Please see the teacher if you have questions. Fill in the blanksbelow the check.
successful Check What is being checked? how should it be checked?
yes no
A
B
C
Quick
Check
psi range of tires
type of brake system
Student Date
Abc QuIck chEckINtERmEDIAtE
wo
rkSH
eeT
>A
bc q
uic
k c
Hec
k •
iNTe
rmeD
iATe
•77


wO
Rk
ShEE
tw
ork
SHee
T>
Abc
qu
ick
cH
eck
• A
DvA
Nc
eD
•79
directions: Place a checkmark in the yes column if the check is completed correctly. Place a checkmark in the no column if the ABC Quick Check is completed incorrectly. Pleasedescribe what is being checked for each segment of the ABC Quick Check and describe howthe check should be conducted. Please see the teacher if you have questions. Fill in the blanksbelow the check.
successful Check What is being checked? how should it be checked?
yes no
A
B
C
Quick
Check
psi range of tires
psi of front tire
type of brake system
psi of back tire
type of tube valve
Student Date
Abc QuIck chEckADvANcED


Ac
tIv
Ity
timeframe Beginner: 3-5 minutesintermediate: 3-5 minutesAdvanced: 3-5 minutes
objective At the conclusion of the activity, the student will be able to:1. Describe key concepts from Unit 1, bicycle fit, helmet fit and ABC
Quick Check, as measured by participation in peer discussion aboutbicycle safety. (Cognitive)
national standards Standard 2Standard 4
equipment • Bicycle Safety Word Search worksheet (optional)• Bicycle Safety Crossword Puzzle worksheet (optional)
teacher overview This activity prompts students to think about what they have learnedduring the first unit by asking questions about correct bicyclingbehaviors. By working in groups to respond to the questions, thebrainstorming will initiate peer discussion about safe bicycling behaviors.
preparation 1. Make appropriate number of copies of Bicycle Safety Word Searchworksheet and/or Bicycle Safety Crossword Puzzle worksheet(optional)
directions 1. Introduce this activity using the following prompt:
We have now completed Unit 1 – “Getting Ready to Ride.” All of the skillslearned in this unit will help you be safe when you are out riding. Helmetfit, bike fit and ABC Quick Check should be completed every time you geton a bike, whether at school or home.
2. Divide students into pairs.
3. Ask partners to walk the perimeter of the gym. Explain that they will begiven questions that they need to discuss with their partner when walking.
4. Instruct students to stop when the whistle blows and be prepared toshare something that they discussed with their partner.
5. Use the following sample questions to prompt students’ thinking aboutthe content presented in this unit.
Q: Why should you wear a helmet every time you ride your bicycle?A: To protect your brain from injury
clOSuRE ActIvItywalk & Share
clo
Sure
Ac
Tivi
Ty>
wA
lk &
SH
Are
•81

Q: What are the three most important things to do when fitting yourhelmet?
A: • Level on your head• Snug straps so it doesn’t rock back and forth• Snug chin strap
Q: Why is it important to have a bicycle that fits properly?A: Any of the following:
• A bicycle that is too big is more likely to result in a crash.• A properly fitted bicycle will result in a safer more comfortable ride
Q: how can you test to see how well a bike fits you?A: Complete the bicycle fit steps
Q: What does ABC Quick Check stand for?A: Air, Brakes, Chain/Crank, Quick Releases and a check everything out
with a slow, short ride for safety and comfort
Q: Why is it important to do pre-ride safety checks?A: Any of the following:
• To make sure everything is working properly on the bicycle; this could prevent a crash.
• There may be a problem that you otherwise would not know about.
Q: What was the most important new thing you learned in this module? A: All responses are acceptable
6. If desired, use the Bicycle Safety Word Search worksheet provided orcreate a similar one, using a free online word search tool. You maywant to simplify the word search for younger students, and possiblynot have students answer the questions provided.
7. If desired, use Bicycle Safety Crossword Puzzle worksheet provided as asummative form of assessing student understanding. Modify thecrossword puzzle by simplifying it as appropriate for younger students.Simplify the puzzle as needed for younger students. Older beginnerstudents, could complete a more difficult crossword puzzle or wordsearch if the information was covered in class and/or students wereprovided some reading material.
Assessments Check for understanding by asking students to share responses withwhole group.
safety None
differentiating All levelsinstruction • Vary the type of activity students are performing including
such things as galloping, sideways sliding, easy jogging, etc.
intermediate and Advanced• Set up lanes that students need to travel in. Include stop signs
and intersections.
clo
Sure
Ac
Tivi
Ty>
wA
lk &
SH
Are
•82

wO
Rk
ShEE
t
Student Date
Classroom teacher File Color #
directionsFind each of the words listed below and circle them in the word search. Then answer the questionsby filling in the blanks to each question. A word may be used more than once.
terms to be found in the word searchABC quick checkairrear brakebrain injurybrakesbright clothingcassettechainchainringcrankderailleurframefront brakegearshandlebarshand signalsheadlighthelmethelmet strapshelmet ventsquick release leversride rightrock n rollsaddleshifterstop tubetwo fingersvisibilitywheels
bIcyclE SAfEty wORD SEARch
wo
rkSH
eeT
>bi
cyc
le S
AFe
Ty w
orD
SeA
rcH
•83
s f d y y f e v p h o n c x j e h m r t q w w m s h m s m k m s r i l u y n e e u o h w r d n i h m g m u r q e q b z iw p w i b v d l h m y e t n m b j g z n s e e l t l r t e vm z p d d k m h g l l g n i r n i a h c y v s e r m r m l kn s w v t e u r m m m o r x n l r v l c e p j c p e e r d iv c m k t h s n e t b e e t d i p p w l t g w n f t e o d hk l p w u z c t l i d s l a t q g h e k o m f t b s p b a fz h q p w f v q c a s s e t t e t s v x p s m n p t f m s fg z t t s e v v u e n h e r z d a v m r t r l k g r r d b pp p m k n h s k t q k u a q s e k a r b u e v d p a a y j qg q m t z o w l n z a a b b l n l g z a b g i e l p m i o ic c s g k q p q e e z y r e c t c a b a e n s t z s e h b uq j e r p b r u k e q w r b s q o m z c m i i z s c z c v uy l f j f u y a k s h k t x r l u c l p o f b r b p e k q yi k g s s f r f v k c w m u a a a i b b n o i v c g k t w ys g e z f b c u n i w q z z x v e n c v h w l p g z s h w qc f c r t r h a u r b x h a l y t r g k a t i c n e q g r py a a n e n r q p q l m l a w u v p d i c z t g t y a i c mi n o a t c d e w z r h n d n d i l s r s h y t x o q r b se r b m w w u x x b p t z j h d b e o p h d e b f t n e s uf f i d b y r u j n i n i a r b l c b z c s n c t n g d m cc t j o w l s q n c c h a i n u k e d y l q h a k r p i u rh r v y m c w i i x t y y y a n z i b t g t b i h q l r x ue z z l t v d d l q f y j j r x e s h a l x s w f e p j e sz p l b l s z j i x l s a o i j w h c s r i s r p t a x q lm u m w p g r j w m i i l z w d k m d j c s r a m p e z d jp g s v w l h w z n r l v b r i g h t c l o t h i n g r e iu t s m w n k s o d e r a i l l e u r o g r k d j v n g s yn o e h o n h e k p j l l j v v g j n x t s l s w z a b a ol j n b i x j x o c k l m y g a i y f p q f t e n t q c m d

directionsAnswer the questions by filling in the blanks to each question. A word may be used more than once.
1. is what a cyclist should do every day before riding.
2. A = , which is the first thing we check as part of the quick check.
3. help riders stop slowly or quickly.
4. Keeping the and clean makes a
bike ride go more smoothly.
5. The should be used more often than
the when cycling, unless both are used in conjunction
to stop, particularly in emergencies.
6. The is used to change gears, when
the are clicked.
7. Circulation is improved if the has
8. Q = , which need to be checked prior to a ride.
9. The structure of the bike is also known as the
10. A cue to remind cyclists how to ride in traffic is to .
11. C = and need to be checked prior to each ride.
12. To stop the front wheel from turning, engage the .
13. After stopping the bike, it is best to stand over the prior to
starting again.
14. Using the appropriate at the most appropriate time is helpful when climbing hills.
15. Wearing a helmet helps protect us from a .
wo
rkSH
eeT
>bi
cyc
le S
AFe
Ty w
orD
SeA
rcH
•84
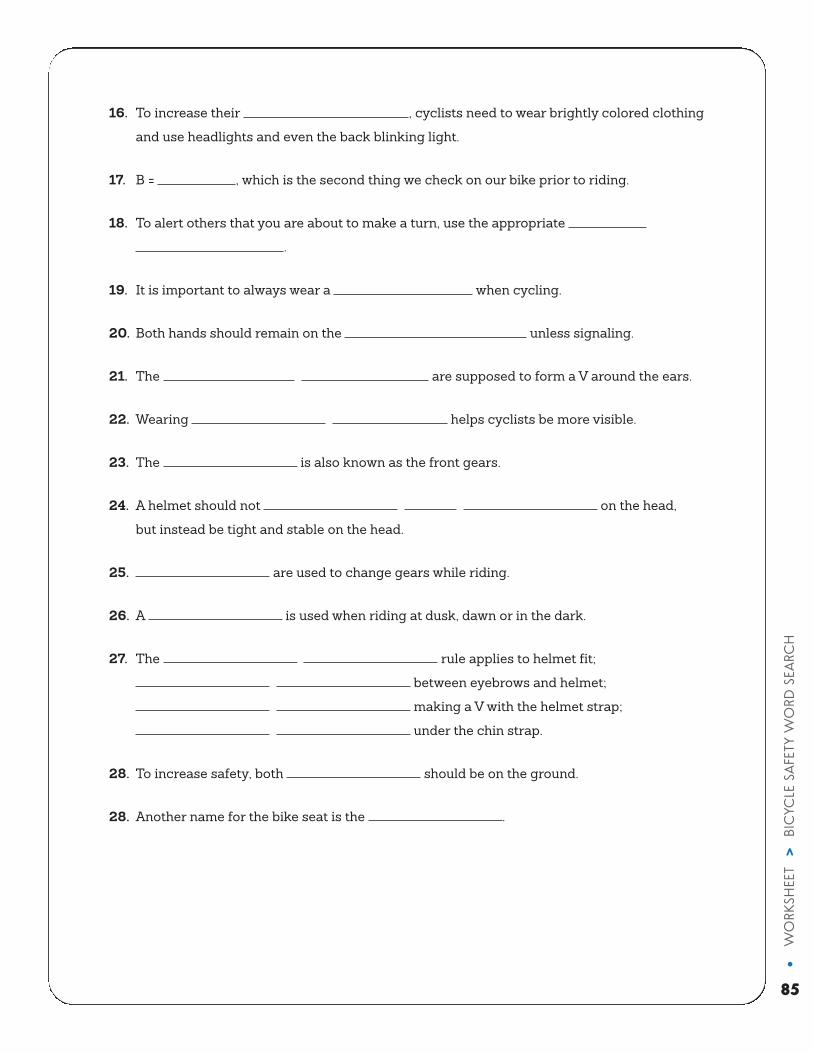
16. To increase their , cyclists need to wear brightly colored clothing
and use headlights and even the back blinking light.
17. B = , which is the second thing we check on our bike prior to riding.
18. To alert others that you are about to make a turn, use the appropriate
.
19. It is important to always wear a when cycling.
20. Both hands should remain on the unless signaling.
21. The are supposed to form a V around the ears.
22. Wearing helps cyclists be more visible.
23. The is also known as the front gears.
24. A helmet should not on the head,
but instead be tight and stable on the head.
25. are used to change gears while riding.
26. A is used when riding at dusk, dawn or in the dark.
27. The rule applies to helmet fit;
between eyebrows and helmet;
making a V with the helmet strap;
under the chin strap.
28. To increase safety, both should be on the ground.
28. Another name for the bike seat is the .
wo
rkSH
eeT
>bi
cyc
le S
AFe
Ty w
orD
SeA
rcH
•85


bIcyclE SAfEty wORD SEARchANSwER kEy1. ABC Quick Check is what a bicyclist should do every day before riding.
2. A = Air, which is the first thing we check as part of the quick check.
3. Brakes help riders stop slowly or quickly.
4. Keeping the chain and cassette clean makes a bike ride go more smoothly.
5. The rear brake should be used more often than the front brake when cycling, unless bothare used in conjunction to stop, particularly in emergencies.
6. The derailleur is used to change gears, when the shifters are clicked.
7. Circulation is improved if the helmet has helmet vents.
8. Q = Quick release levers which need to be checked prior to a ride.
9. The structure of the bike is also known as the frame.
10. A cue to remind cyclists how to ride in traffic is to ride right.
11. C = chain and crank need to be checked prior to each ride.
12. To stop the front wheel from turning, engage the front brake.
13. After stopping the bike, it is best to stand over the top tube prior to starting again.
14. Using the appropriate gears at the most appropriate time is helpful when climbing hills.
15. Wearing a helmet helps protect us from a brain injury.
16. To increase their visibility, cyclists need to wear brightly colored clothing and useheadlights and even the back blinking light.
17. B = Brakes, which is the second thing we check on our bike prior to riding.
18. To alert others that you are about to make a turn, use the appropriate hand signals.
19. It is important to always wear a helmet when cycling.
20. Both hands should remain on the handlebars unless signaling.
21. The helmet straps supposed to form a V around the ears.
22. Wearing bright clothing helps cyclists be more visible.
23. The chain ring is also known as the front gears.
24. A helmet should not rock ‘n roll on the head, but instead be tight and stable on the head.
25. shifters are used to change gears while riding.
25. A headlight is used when riding at dusk, dawn or in the dark.
26. The two finger rule applies to helmet fit; two fingers between eyebrows and helmet; twofingers making a V with the helmet strap; two fingers under the chin strap.
27. To increase safety, both wheels should be on the ground.
28. Another name for the bike seat is the saddle.
wo
rkSH
eeT
>bi
cyc
le S
AFe
Ty w
orD
SeA
rcH
•87


wO
Rk
ShEE
t
ACross 2. Use these to change gears while riding.
6. The C in the ABC Quick Check.
7. Another name for the front gears.
8. A cyclist should ride on what side of the road?
10. The A in the ABC Quick Check.
11. The B in the ABC Quick Check.
12. What a cyclist should do every time prior to riding.
16. What a cyclist should use to communicate to othercyclists and motorists.
17. Shifting through these can really help when climbing hills.
18. This rule applies to fitting a helmet correctly.
doWn 1. The Q in ABC Quick Check.
3. The best way to protect your brain is to wear one of these.
4. Use this to stop the front wheel.
5. A cyclist needs one of these when riding in the darkor at dusk/dawn.
9. Brightly colored clothing enhances a cyclist’s _______.
13. This is used more often when trying to stop, exceptin emergencies.
14. Another name for the seat of the bike.
15. The structure of the bike is also known as the _____.
Student Date
Classroom teacher File Color #
bIcyclE SAfEty cROSSwORD puzzlE
wo
rkSH
eeT
>bi
cyc
le S
AFe
Ty c
roSS
wo
rD p
uzz
le
•89
directions: Please complete the crossword puzzle below.

wo
rkSH
eeT
>bi
cyc
le S
AFe
Ty c
roSS
wo
rD p
uzz
le
•90
bIcyclE SAfEty cROSSwORD puzzlEANwER kEy

Ac
tIv
Ity
timeframe Beginner: 10-15 minutesintermediate: 10 minutesAdvanced: 10 minutes
objectives At the conclusion of this activity, the student will be able to:1. Describe key concepts from Unit 1, bicycle fit, helmet fit and ABC
Quick Check, as measured by providing responses to questions injournals. (Cognitive)
2. Describe how they feel about their ability to ride safely and their levelof enjoyment of bicycling, as measured by providing responses toquestions in journals. (Affective)
national standards Standard 2Standard 5
equipment • Journals or portfolios for each student.
teacher overview This activity prompts students to think about what they have learnedduring the first unit by asking questions about correct bicycling behaviorsand providing written responses in journals.
preparation Determine method for distributing, collecting and storing journals orportfolios before beginning this activity.
directions 1. Introduce this activity using the following prompt:
We have now completed Unit 1 – “Getting Ready to Ride.” All of theskills learned in this unit will help you be safe when you are out riding.Helmet fit, bike fit and ABC Quick Check should be completed everytime you get on a bike, whether at school or home.
2. Provide portfolios or journals for students to write in.
3. Choose a location where students can sit comfortably and completeassessment, if completing journal writing activity in class.
4 Use the following sample questions to prompt students’ thinking aboutthe content presented in this unit.
Q: Why should you wear a helmet every time you ride your bicycle?A: To protect your brain from injury
clOSuRE ActIvItyJournal writing
clo
Sure
Ac
Tivi
Ty>
jou
rNA
l w
riTi
Ng
•91

Q: What are the three most important things to do when fitting yourhelmet?
A: Make sure: (1) the helmet is level on the head (not too far off the foreheador too low on the forehead; (2) the straps are snug (enough so the helmetdoesn’t rock back and forth); and (3) the chin strap is buckled.
Q: Why is it important to have a bicycle that fits properly?A: Any of the following:
• Maintaining control of the bicyclist is one key skill in preventing a bicycle crash.
• A bicycle that is too big increases the likelihood of loss of control of the bicycle and thus increased risk of a crash.
• A properly fitted bicycle will result in a safer more comfortable ride.
Q: how can you test to see how well a bike fits you?A: Complete the bicycle fit steps
Q: What does ABC Quick Check stand for?A: Air, Brakes, Chain/Crank, Quick Releases and a check of everything
out with a slow, short ride for safety and comfort.
Q: Why is it important to do pre-ride safety checks?A: Any of the following:
• To make sure everything is working properly on the bicycle.• There may be a problem that you otherwise would not know about.
Q: What was the most important new thing you learned in this unit? A: All responses are acceptable
Assessment 1. Be thoughtful about assessing journal writing, particularly when askingopen ended “opinion-type” questions. Not all students may enjoycycling and should be allowed to voice their opinions. To encouragehonest answers, refrain from grading thoughts and opinions.However, this should not be an excuse for not learning the material.
2. Consider assessing writing skills and integrate literacy (spelling, use ofcorrect grammar and complete sentences, etc.) in journal writing. Someteachers may want to specify length of answers for specific questions.
safety None
differentiating All levelsinstruction • Choose questions that are appropriate for the age and ability
level of students. • Some students may need to share their answers verbally with a
teacher if they have difficulty writing. • Some students may need the teacher or an aide to read the questions.
Best practices 1. Complete this activity in classroom settings, health classes scienceclasses if cross-curricular units are planned or to maximize ridingtime in physical education class.
2. Assign the journal writing for Unit 1 as homework to maximize ridingtime in physical education class.
clo
Sure
Ac
Tivi
Ty>
jou
rNA
l w
riTi
Ng
•92

Sec
Tio
N 3
• u
NiT
2>
bic
ycle
HA
ND
liN
g b
ASi
cS
•93
objecTiveS
At the conclusion of this unit the student will be able to:
1. Describe bicycle handling basics as measured by completion of the Bicycle HandlingBasics worksheet (Cognitive)
2. Demonstrate exceptional or reliable bicycle helmet fit as measured by the helmet fitrubric. (Psychomotor)
3. Demonstrate exceptional or reliable performance of the ABC Quick Check, as measuredby the ABC Quick Check rubric. (Psychomotor)
4. Demonstrate exceptional or reliable performance of the balance skill as measured by thebalance rubric. (Psychomotor)
5. Demonstrate exceptional or reliable performance of controlled braking as measured bythe controlled braking rubric. (Psychomotor)
6. Demonstrate exceptional or reliable performance of straight line riding as measured bythe straight-line rubric. (Psychomotor)
7. Demonstrate exceptional or reliable performance of the Power Start skill as measured bythe Power Start rubric. (Psychomotor)
8. Demonstrate exceptional or reliable performance of the Ready Position skill as measuredby the Ready Position rubric. (Psychomotor)
9. Demonstrate exceptional or reliable performance of scanning as measured by thescanning rubric. (Psychomotor)
10. Demonstrate exceptional or reliable performance of signaling as measured by thesignaling rubric. (Psychomotor)
11. Demonstrate exceptional or reliable social behavior as measured by the social behaviorrubric. (Affective)
12. Describe key concepts from Unit 2, Power Start, Ready Position, Scanning and Signaling,as measured by completion of the Bicycle Handling Skills worksheet. (Cognitive)
uNIt 2bicycle handling basics

13. List and describe three key concepts from Unit 2 that illustrate a clear understanding ofthe need to have safe bicycle handling skills as measured by providing responses toquestions in journals. (Cognitive)
14. Describe feelings about the ability to ride safely and their level of enjoyment of bicycling,as measured by providing responses to questions in journals. (Affective)
NATioNAl STANDArDS For k-12 pHySicAl eDucATioN
standard 1The physically literate individual demonstrates competency in a variety of motor skills andmovement patterns.
standard 2 The physically literate individual applies knowledge of concepts, principles, strategies andtactics related to movement and performance.
standard 3The physically literate individual demonstrates the knowledge and skills to achieve andmaintain a health-enhancing level of physical activity and fitness.
standard 4 The physically literate individual exhibits responsible personal and social behavior thatrespects self and others.
standard 5 The physically literate individual recognizes the value of physical activity for health,enjoyment, challenge, self-expression and/or social interaction.
key vocAbulAry/TermS
Bicycle driver: In all states, bicycles are considered vehicles or bicyclists are the driver of a vehicle. Bicyclists ‘drive-- their vehicles much like drivers of motorized vehicles. Bothbicyclists and motorists have the same rights and the same responsibilities to follow the samerules-of-the-road when in traffic. To emphasize this concept, some teachers of bicycle safetywill refer to this as “acting like a bicycle driver” or “driving your bicycle.”
Braking: The act of stopping the bicycle using one of a variety of methods. Some bicycles usehand brake levers. The right brake lever stops the rear wheel; the left brake lever stops the frontwheel. Some bicycles have coaster brakes where the bicyclist pedals backward to engage thebrakes on the rear wheel.
power start/power takeoff: A fast and efficient way to get bicycle moving from a stoppedposition. The rider straddles the bicycle and places one foot on the ground, the other foot on thepedal between the 12 and 2 o’clock position. The rider should be standing, not sitting on thesaddle. The rider pushes down on the pedal moving it to the 6 o’clock position and pushes off theground with the other foot at the same time. The rider should be standing above the saddle, coastand count to three before placing the other foot onto the other pedal and sitting on the saddle.
ready position: A particular way to position the body on a bicycle enabling the rider to havecontrol over the bicycle and to be prepared for most maneuvers. The rider is standing overthe saddle with most of his/her weight over the rear tire; pedals are parallel to the ground; andthe index and middle fingers are lightly resting on the brake lever.
scanning: The act of looking over one’s shoulder to observe if it is clear to change directionor to be aware of one’s surroundings.
Sec
Tio
N 3
• u
NiT
2>
bic
ycle
HA
ND
liN
g b
ASi
cS
•94

signaling: A form of communication using the bicyclist’s hands to indicate changes indirection and speed.
track stand: A rider attempts to balance on the bicycle with both feet on the pedals in astationary position. The goal is to keep the wheels from moving forward or backward.
AcTiviTieS
Each unit should include three types of activities: introduction, skill-based with assessmentsand closure. In some cases, more than one activity option is offered for the introduction andclosure; choose the appropriate activities that fit into your allotted class time whendeveloping your lesson plans. If class time is too short to allow for all three types of activities,focus your lesson on the skill-based activities.
introduction: The following activity can be used to introduce this unit of learning.
• Walk & Share
skill-Based with Assessments: Each skill-based activity is associated with an assessment tomeasure student knowledge and application of the identified skill. Depending on the amountof class time available and the skill level of students, more than one of the following skill-based activities may be completed during one class. All of the skill-based activities areconsidered essential in creating the foundation for safe bicycling. Regardless of skill leveland/or if students have learned this material in previous years, all skill-based activities in thisunit should be completed before moving to the next unit. This will ensure that students havethe safety knowledge and basic skills necessary to practice safe bicycling behaviors.
• Helmet Fit and ABC Quick Check
• Balance
• Controlled Braking
• Straight-Line Riding
• Power Start
• Ready Position
• Scanning
• Signaling
Sec
Tio
N 3
• u
NiT
2>
bic
ycle
HA
ND
liN
g b
ASi
cS
•95

Closure: The following activities can be used to conclude this unit of learning. If desired,these activities can be assigned as homework. Choose the activity which best fits the needs ofyour students and class.
• Walk & Share
• Journal writing
equipmeNT NeeDeD
• Helmets
• Head barriers
• Bicycles
• Bicycle pump
• Allen wrench
• Red floor tape
• Cones, domes, polyspots or chalk to mark riding course
• Pencils
• Bicycle Handling Basics worksheet
• Bicycle Handling Skills worksheet
• Helmet Fit handout (optional) http://www.nhtsa.gov/staticfiles/nti/bicycles/pdf/8010-wear_a_helmet.pdf
• ABC Quick Check handout (optional) http://www.nhtsa.gov/DOT/NHTSA/NTI/SRTS/7505-06-ABCQuickCheck.pdf
• Student Journals
• Jump ropes (optional)
croSS-curriculAr AcTiviTieS
language Arts• Journal writing
Sec
Tio
N 3
• u
NiT
2>
bic
ycle
HA
ND
liN
g b
ASi
cS
•96

Ac
tIv
Ity
timeframe Beginner: 5-7 minutesintermediate: 5-7 minutesAdvanced: 5-7 minutes
objective At the conclusion of the activity the student will be able to:1. Describe bicycle handling basics as measured by completion of the
Bicycle Handling Basics worksheet (Cognitive)
national standards Standard 2Standard 4
equipment • Bicycle Handling Basics worksheet• Pencils
teacher overview This activity prompts students to think about basic bicycle riding skills.Questions for student pairs will initiate peer discussion as they walk andkeep moving.
preparation Make appropriate number of copies of Bicycle Handling Basics worksheet.
directions 1. Introduce this activity using the following prompt:
Today, we will be learning about some basic bicycle riding skills. Theseskills are the foundation for being a safe bicycle driver.
2. Divide students into groups of two or three.
3. Ask students to walk the perimeter of the gym while answering theBicycle Handling Basics worksheet questions. Students may stop towrite a quick answer, but should continue moving as much as possible.
4. Instruct students to stop when the whistle blows and be prepared toshare something they discussed with their partner(s).
Assessment Successful completion of the Bicycle Handling Basics worksheet.
safety 1. Do not let students run or walk too quickly if carrying pencils.
differentiating intermediate and Advancedinstruction • Set up lanes that students need to travel in.
• Include stop signs and intersections.
Best practices 1. Complete this activity when weather prevents riding.
INtRODuctION ActIvItywalk & Share / bicycle
handling basics
iNTr
oD
uc
Tio
iN A
cTi
viTy
>w
Alk
& S
HA
re /
bic
ycle
HA
ND
liN
g b
ASi
cS
•97


wO
Rk
ShEE
t
directions: Please answer the questions below.
1. What are some basic skills needed to ride a bicycle?
2. How do the brakes work on your bicycle?
3. Which brake controls the front wheel and which controls the rear wheel?
4. What should be completed before riding your bike every time?
5. What does ABC Quick Check stand for?
6. How do you know your helmet fits properly?
7. How do you know your bicycle fits properly?
Student Date
bIcyclE hANDlING bASIcSwORkShEEt
wo
rkSH
eeT
>bi
cyc
le H
AN
Dli
Ng
bA
Sic
S
•99

bIcyclE hANDlING bASIcSwORkShEEtANSwER kEy1. What are some basic skills needed to ride a bicycle?
responses include: BalanceBrakingriding in a straight lineother answers may be accepted.
2. How do the brakes work on your bicycle? Brakes stop the wheels from turning which will stop the bicycle
3. Which brake controls the front wheel and which controls the rear wheel?the left brake controls the front wheel and the right brake controls the rear wheel.
4. What should be completed before riding your bike every time?ABC Quick Check
5. What does ABC Quick Check stand for?responses should include all of the following:A = AirB = BrakesC = Crank and chainQuick = Quick releases on wheels and seat postCheck = go for a short, slow ride to check for safety and comfort (e.g., brakefunctioning, rubbing of tires)
6. How do you know your helmet fits properly? At a minimum, the student should respond with the ruleFollow the 2, 2, 2 rulehelmet sits flat/level on head; 2 fingers between eyebrows and helmet.straps form a V (2 straps) on either side of earsno more than 2 fingers between strap and chinsnug fit; no movement when shaking head around (no rocking and rolling)
7. How do you know your bicycle fits properly?Both responses are necessary: the rider should be able to squat about three inches for mountain bicycles from astanding position with feet flat on the ground to sitting on the top tube. When the rider’s foot is at down stroke or 6 o’clock position, the leg should be almostfully extended with only a slight bend at the knee. w
ork
SHee
T>
bic
ycle
HA
ND
liN
g b
ASi
cS
•100

Ac
tIv
Ity
timeframe Beginner: 10-12 minutesintermediate: 10 minutesAdvanced: 8-10 minutes
objectives At the conclusion of this activity the student will be able to:1. Demonstrate exceptional or reliable bicycle helmet fit as measured by
the helmet fit rubric. (Psychomotor)
2. Demonstrate exceptional or reliable performance of the ABC QuickCheck, as measured by the ABC Quick Check rubric. (Psychomotor)
3. Demonstrate exceptional or reliable social behavior as measured bythe social behavior rubric. (Affective)
national standards Standard 1Standard 2Standard 3Standard 4
equipment • Bicycles• Helmets• Head barriers• Cones, domes, polyspots or chalk to mark riding course• Helmet Fit handout (optional) www.nhtsa.gov/staticfiles/nti/bicycles/pdf/8010-wear_a_helmet.pdf
• ABC Quick Check handout (optional) www.nhtsa.gov/DOT/NHTSA/NTI/SRTS/7505-06-ABCQuickCheck.pdf
teacher overview Complete this activity each time students will be riding a bicycle. Thiswill ensure that each student has a properly fitted bicycle helmet and aproperly functioning bicycle. Eventually, this activity can be completedand checked by peer assessment to reduce the amount of class time required.
SkIll-bASED ActIvItyhelmet fit & Abc Quick check
Skil
l-bA
SeD
Ac
Tivi
Ty>
Hel
meT
FiT
& A
bc q
uic
k c
Hec
k
•101
Helmet fit and ABC Quick check should be done at the teaching station.
teaching station

Skil
l-bA
SeD
Ac
Tivi
Ty>
Hel
meT
FiT
& A
bc q
uic
k c
Hec
k
•102
preparation 1. Designate a riding course that enables the teacher to see the students atall times. This will enable students to ride throughout the class period,even when they are not performing skills.
2. Set up a “chute” using cones, to indicate where the student will performthe skill and the teacher will conduct the assessment. This area shouldalso serve as a teaching station in which the skill will be demonstrated forthe students, and where students will return when instructed.
3. If bicycles have both front and rear brakes: Wrap the left handle of thebicycle with red floor tape to discourage students from using the frontbrake, until proper braking skill is taught.
directions 1. Introduce this activity using the following prompt:
Today, we will be practicing the two activities that you should always dobefore riding a bicycle—fitting your bicycle helmet and making sure yourbicycle is in good working order. We have already learned howimportant it is to protect your brain from injury by wearing a bicyclehelmet; how to properly fit a bicycle helmet and how to make sure yourbicycle is in good working order using the ABC Quick Check. These aretwo things that we will do at the beginning of every class if we are goingto be riding.
2. Use the following sample questions to prompt students’ thinking aboutthe content in this activity.
Q: you are asked to fit a helmet for your friend. What guideline do youfollow as you help your friend?
A: 2, 2, 2 = helmet level & 2 fingers between eyebrows and helmet; 2 strapsmake a V around ears; no more than 2 fingers between strap and chin.
Q: you need to explain to your family or friends why they need to wear ahelmet. What do you tell them?
A: Any of the following are acceptable:• Protect your brain from injury• Other answers may be accepted.
Q: What are some of the biggest errors people make in terms of helmet use?A: Any of the following:
• Not wearing a helmet. • Wearing a helmet that is not fitted properly. • Wearing a helmet that is not buckled, or not buckled tightly enough
to provide protection.• Other answers may be accepted.
The Helmet Fit and Abc quick check should be performed beforeevery ride or, in this case, at the beginning of every lesson.

Q: you notice your friend or family member starting to ride theirbicycle without doing a safety check. Can someone explain thesafety check for a bicycle?
A: A = Air; B = Brakes; C = Chain and cranks; Quick = Quick releases; Check = Go for a short, slow ride.
Q: Why should it be performed before every ride? A: So you know you’re riding a bicycle that is safe. Some bicycle crashes
are due to failure of the bicycle itself.
3. Divide students into groups of two or three.
4. Instruct students to fit helmets and have partner(s) check if the helmetis fitted correctly.
5. Instruct students to retrieve bicycles according to number assigned.
6. Instruct one student to complete the ABC Quick Check while thepartner observes to ensure that the check was completed properly,and to provide prompts if an item was missed. Switch roles.
7. Instruct pairs to proceed to riding area to meet teacher after studentshave successfully completed the helmet fit and ABC Quick Check.
Assessment 1. Assess helmet fit of each student using the following rubric.
perFormANce rubric: HelmeT FiT
exceptional reliable inconsistent struggling/survival
Student is able to fithelmet correctly onhis own,demonstrating thefollowingcharacteristics ofhelmet fit (all mustbe correct):
Is snug on head (norock-n-roll side toside);
Sits level on head;
Straps form a Vunder ears;
Strap is no morethan 2 finger widthsfrom chin;
Does not rock-n-rollon head (forward orbackward).
Student can fithelmet correctly,possibly with a littlehelp from ateacher/aide,demonstrating thefollowingcharacteristics ofhelmet fit (all mustbe correct):
Is snug on head (norock-n-roll side toside);
Sits level on head;
Straps form a Vunder ears;
Strap is no more than2 finger widths fromchin;
Does not rock-n-rollon head (forward orbackward).
Student has difficultyfitting helmetcorrectly, requiringhelp fromteacher/aide, andmore than one of thefollowing are notcompleted correctly:
Is snug on head (norock-n-roll side toside);
Sits level on head;
Straps form a Vunder ears;
Strap is no morethan 2 finger widthsfrom chin;
Does not rock-n-rollon head (forward orbackward).
Student hasdifficulty fittinghelmet correctly,needing asignificant amountof help in theprocess.
The student cannotfit a helmet onhis/her own.
Skil
l-bA
SeD
Ac
Tivi
Ty>
Hel
meT
FiT
& A
bc q
uic
k c
Hec
k
•103

2. Assess performance of the ABC Quick Check of each student using the following rubric.
perFormANce rubric: Abc quick cHeck
exceptional reliable inconsistent struggling/survival
Student is able toconduct the ABCQuick Checkcorrectly on his own,demonstrating thefollowingcharacteristics (allmust be correct):
Checks both tires forair;
Checks both frontand rear brakes(knuckle to knuckle)by spinning each tireand squeezing eachbrake;
Checks the frontchainring (gears) bygrabbing the crankset and jiggling it;
Checks the chain byturning the pedalswith the rear wheeloff the ground;
Checks all quickreleases (seat post,front, and rearwheel) for security;
Takes a short ride foroverall check.
Student is able toconduct the ABCQuick Checkcorrectly, possiblywith help from apeer (peerassessment processmay serve to guidespecific details ofprocess),demonstrating thefollowingcharacteristics (allmust be correct):
Checks both tires forair;
Checks both frontand rear brakes(knuckle to knuckle)by spinning each tireand squeezing eachbrake;
Checks the frontchainring (gears) bygrabbing the crankset and jiggling it;
Checks the chain byturning the pedalswith the rear wheeloff the ground;
Checks all quickreleases (seat post,front, and rear wheel)for security;
Takes a short ride foroverall check.
Student has difficultyconducting the ABCQuick Checkcorrectly, requiringhelp from a teacheror aide, and moreseveral of thefollowing are notcompleted correctly:
Checks both tires forair;
Checks both frontand rear brakes(knuckle to knuckle)by spinning each tireand squeezing eachbrake;
Checks the frontchainring (gears) bygrabbing the crankset and jiggling it;
Checks the chain byturning the pedalswith the rear wheeloff the ground;
Checks all quickreleases (seat post,front, and rearwheel) for security;
Takes a short ride foroverall check.
Student hasdifficultyconducting theABC Quick Checkcorrectly, needing asignificant amountof help in theprocess. Thestudent fails tounderstand theprocess of the ABCQuick Check.
Skil
l-bA
SeD
Ac
Tivi
Ty>
Hel
meT
FiT
& A
bc q
uic
k c
Hec
k
•104

3. Assess the performance of social behavior for each student using the following rubric.
perFormANce rubric: SociAl beHAvior
exceptional reliable inconsistent struggling/survival
Student is respectfultoward classmates,teacher, &equipment;
Student receives anduses feedback fromteacher and peers ina courteous manner;
Student participatesfully, without teacherprompting orsupervision;
Student is able towork cooperativelyand productivelywith classmates,including duringpeer assessments;
Student perseveres,even throughdifficultskills/activities, andmaintains a positiveattitude;
Student iscommitted tolearning;
Student iscommitted toengaging in cyclingin a safe manner, andkeeping allclassmates safeduring the cyclingunit.
Student is respectfultoward classmates,teacher, &equipment;
Student receives anduses feedback fromteacher and peers ina courteous manner;
Student participatesfully, but needs someteacher promptingand/or supervision;
Participates in mostclass activities at anappropriate andproductive level;
Student is most oftenable to workcooperatively andproductively withclassmates,including during peerassessments;
Student is able towork hard and notget frustrated withsetbacks;
Student is committedto learning;
Student is committedto engaging incycling in a safemanner, and keepingall classmates safeduring the cyclingunit.
Student may notalways be respectfultoward classmates,teacher, &equipment;
Student may listen tofeedback fromteacher or peers, butmay not attemptand/or have difficultyapplying it;
Student requiressome teachersupervision, but doesexhibit some self-control at times;
Studentdemonstrates theability to workcooperatively andproductively withclassmates, but mayneed teacherdirection orsupervision;
Student participatesin most classactivities;
Student is willing totry, but may getfrustrated withsetbacks, and poutand/or verbalizefrustration;
Student mayfluctuate betweenriding safely andunsafely at times.
Student maystruggle with beingrespectful towardclassmates,teacher, &equipment and/orshow anger and/orblame others forcycling mishaps;
Student does notlisten to feedbackfrom teacher orpeers, and does notattempt to apply it;
Student requiresongoingsupervision anddoes not ridesafely;
Student may beunprepared andshow very littleinterest in learningor the activity;
Student becomesfrustrated easilyand may quitparticipating.
Skil
l-bA
SeD
Ac
Tivi
Ty>
Hel
meT
FiT
& A
bc q
uic
k c
Hec
k
•105

safety 1. Remind students they should only use the rear brake to stop the bicycle,until their skill level advances to be able to safely use the front brake.
2. Students should only be visually inspecting the quick releases. Advancedstudents would only practice properly opening/closing andtightening/loosening the wheel quick release after proper instruction andconstant supervision by the teacher.
differentiating Adaptedinstruction • Depending on the student’s skill level, a teacher or aide may have to
complete this activity for the student. • At no time should a student be allowed to ride without a helmet. This may
mean additional time should be allotted to fit students who may have additional challenges.
Beginner• Students should only use the rear brake to stop the bicycle. • Instruct students not to use the brake lever on the red side of the handlebar. • This should be done until their skill level advances to be able to safely use
the front brake. Student should only visually inspect the quick releases.• Perform this activity as a group.
intermediate and Advanced• Students should be able to complete this activity independently. • Intermediate and Advanced students can be paired with less skilled
students to assist them in completing this activity.
Best practices 1. The teacher should perform a quick visual inspection of proper helmet fit at the beginning of every class when on-the-bike activities are involved.
2. Use peers/partners to practice, inspect and correct helmet fit for each other.In addition to this being a way to reinforce proper fit, it will also make the mostefficient use of class time. This should not replace teacher assessment.
3. Use head barriers if students are sharing helmets, because it is importantfor the prevention of head lice.
4 Ensure safety precautions if you or students opt to use their own helmets: • Check for the presence of CPSC label • Visually assess for the presence of obvious damage to the helmet• Request students to verify that helmets have not been associated with a
previous crash. Teachers should have extra helmets for those students who are unsure or for any student the teacher opts to provide a helmet for class use.
5. Provide a discreet opportunity and safe environment for students to shareinformation pertaining to their ability and comfort level for riding a bicycle.
6. Complete the ABC Quick Check at the beginning of every lesson.
7. Check the bicycle for proper fit every class. It is essential for students tocheck their bikes every day, particularly if bikes are shared with otherstudents/classes.
Skil
l-bA
SeD
Ac
Tivi
Ty>
Hel
meT
FiT
& A
bc q
uic
k c
Hec
k
•106

Ac
tIv
Ity
timeframe Beginners: 10-12 minutesintermediate: 8-10 minutes Advanced: 5 minutes
objectives At the conclusion of this activity, the student will be able to:1. Demonstrate exceptional or reliable performance of the balance skill
as measured by the balance rubric. (Psychomotor) 2. Demonstrate exceptional or reliable social behavior as measured by
the social behavior rubric. (Affective)
national standards Standard 1 Standard 2 Standard 3Standard 4
equipment • Bicycles• Helmets• Head barriers• Allen wrench• Cones, domes, polyspots or chalk to mark riding course • Red floor tape
teacher overview This activity teaches and/or strengthens the key skill of balance. Studentswill be riding the bicycle with and without pedaling. Students with moreadvanced riding skills can be challenged by focusing on balance whileriding very slowly.
preparation 1. Designate a riding course that enables the teacher to see the studentsat all times. This will enable students to ride throughout the classperiod, even when they are not performing skills.
2. Set up a “chute” using cones, to indicate where the student willperform the skill and the teacher will conduct the assessment. Thisarea should also serve as a teaching station in which the skill will bedemonstrated for the students, and where students will return wheninstructed.
3. If bicycles have both front and rear brakes: Wrap the left handle of thebicycle with red floor tape to discourage students from using the frontbrake, until proper braking skill is taught.
4. Practice the balance skill before demonstrating to students.
SkIll-bASED ActIvItybalance
Skil
l-bA
SeD
Ac
Tivi
Ty>
bAlA
Nc
e
•107

directions 1. Introduce this activity using the following prompt:
Having good balance is a crucial component of controlling a bicycle.Today, we are going to practice balancing on a bicycle.
2. Use the following sample questions to prompt students’ thinking aboutthe content in this activity.
Q: What is the most important skill to know to ride a bicycle and why? A: Any of the following:
• Balance is the most important skill to know because without balance we cannot ride a bicycle.
• Balancing on a bike is the first step to riding.• Other responses may be accepted
Q: What muscles are used to help us maintain balance? A: Any of the following:
• Core muscles:- Abdominals- Back muscles - Gluteal muscles
Q: is there any other part of the body that helps us with balance? A: Your inner ear.
Skil
l-bA
SeD
Ac
Tivi
Ty>
bAlA
Nc
e
•108
diagram: Balance Course
Riding space for intermediate and advanced courseare more narrow to increase the challenge for the
rider to control the bicycle between the lines.
teaching station

The pedals can beremoved, but moststudents can performthis exercise withoutany problems withthe pedals attached.
3. Explain and demonstrate the balance skill without pedaling (coasting)to students in the teaching station, reinforcing the following points.Riders should:
• Lower the bicycle seat so seated with both feet flat on the ground.
• Use both feet to push forward, lift feet about an inch off the groundand coast.
• Practice coasting to get a feel for balancing on the bicycle. Becausethe bicycle will coast slowly, riders can put their feet down if thebicycle begins to wobble too much.
• Keep knees and feet close to the bicycle; this will enable betterbalance and allow for greater control to ride in a straight line.
• Push and coast around the designated course, trying to increase theamount of time balancing between pushes.
• Squeeze the saddle with both thighs to help with balance.
4. Instruct students to ride the designated course again and when ridingthrough the chute, each rider should remain seated, pedal and try toremain within the boundaries of the chute without hitting the (cone,polyspot, etc.).
Assessment 1. Assess performance of the balance skill of each student using thefollowing rubric.
perFormANce rubric: bAlANce Skill
exceptional reliable inconsistent struggling/survival
Student hasexcellent balancewhen pedaling andcoasting, even whenriding very slowly;
Student canmaintain balanceriding in tight turnsat a slower speed;
Student may be ableto attempt a trackstand for up to a fewseconds.
Student is able tobalance in nearly allsituations whenpedaling andcoasting;
Student is able tobalance at slowerspeeds, but may havedifficulty maintainingbalance during tightturns at slow speeds.
Student can pedaland maintainbalance, but may attimes be wobbly orweave some, as heloses and regainsbalance withoutputting down a foot;
Student may not beable to ride slowlyand maintainbalance.
Student is unableto balance on 2wheels for anylength of time whenpedaling;
Student canbalance whenpushing on theground with feetand/or may still beusing trainingwheels.
Skil
l-bA
SeD
Ac
Tivi
Ty>
bAlA
Nc
e
•109

2. Assess the performance of social behavior for each student using the following rubric.
perFormANce rubric: SociAl beHAvior
exceptional reliable inconsistent struggling/survival
Student is respectfultoward classmates,teacher, andequipment;
Student receives anduses feedback fromteacher and peers ina courteous manner;
Student participatesfully, without teacherprompting orsupervision;
Student is able towork cooperativelyand productivelywith classmates,including duringpeer assessments;
Student perseveres,even throughdifficultskills/activities, andmaintains a positiveattitude;
Student iscommitted tolearning;
Student iscommitted toengaging in cyclingin a safe manner, andkeeping allclassmates safeduring the cyclingunit.
Student is respectfultoward classmates,teacher, andequipment;
Student receives anduses feedback fromteacher and peers ina courteous manner;
Student participatesfully, but needs someteacher promptingand/or supervision;
Participates in mostclass activities at anappropriate andproductive level;
Student is most oftenable to workcooperatively andproductively withclassmates,including during peerassessments;
Student is able towork hard and notget frustrated withsetbacks;
Student is committedto learning;
Student is committedto engaging incycling in a safemanner, and keepingall classmates safeduring the cyclingunit.
Student may notalways be respectfultoward classmates,teacher, andequipment;
Student may listen tofeedback fromteacher or peers, butmay not attemptand/or have difficultyapplying it;
Student requiressome teachersupervision, but doesexhibit some self-control at times;
Studentdemonstrates theability to workcooperatively andproductively withclassmates, but mayneed teacherdirection orsupervision;
Student participatesin most classactivities;
Student is willing totry, but may getfrustrated withsetbacks, and poutand/or verbalizefrustration;
Student mayfluctuate betweenriding safely andunsafely at times.
Student maystruggle with beingrespectful towardclassmates,teacher, &equipment and/orshow anger and/orblame others forcycling mishaps;
Student does notlisten to feedbackfrom teacher orpeers, and does notattempt to apply it;
Student requiresongoingsupervision anddoes not ridesafely;
Student may beunprepared andshow very littleinterest in learningor the activity;
Student becomesfrustrated easilyand may quitparticipating.
Skil
l-bA
SeD
Ac
Tivi
Ty>
bAlA
Nc
e
•110

safety 1. Follow the 2-2-2-2 Rule (2 wheels on the ground; 2 feet on the pedals;2 hands on the handlebars; 2 fingers on the brake levers) while ridingthe bicycle.
2. Use the rear brake only to stop the bicycle, until the skill leveladvances to be able to safely use the front brake.
3. Instruct students to ride the bicycles on the designated course anddemonstrate the skill components in the “chute.”
4. Instruct students to keep at least three-bikes-lenghts between eachrider.
differentiating Adapted and Beginnerinstruction • Remove the pedals from some of the bicycles to help students
successfully complete this activity.• Allow students to practice balancing while using a bicycle that is on a
stationary bicycle trainer.
intermediate• Instruct students that the slower a bicycle moves, the harder it is to
maintain one’s balance. • Have students take one pedal stroke to start riding.• Students should see how long and slowly they can coast without
pedaling or touching the ground.• Students will have more success if they quickly, but subtly, move the
handlebars back and forth as they are coasting.
Advanced• Attempt a “track stand” to perfect balance. A track stand is when a
rider attempts to balance on the bicycle with both feet on the pedals in a stationary position. The goal is to keep the wheels from moving forward or backward. The student may be in a sitting or standing position to perform this skill.
Best practices 1. Provide a discreet opportunity and safe environment for students toshare information pertaining to their ability and comfort level forriding a bicycle.
2. Always complete the Helmet Fit and ABC Quick Check at thebeginning of every class in which the students will be riding. The useof peers/partners to practice, inspect, and correct each other willmake the most efficient use of class time and reinforce bicycle safetyskills. This should not replace teacher assessment.
3. Review the three-bikes-length rule to promote safe riding. The three-bicycles-length rule is a reminder of keeping a safe distance betweencyclists while riding single-file. To help maintain proper spacing, havea marker on the course that allows students to see when it is their turnto go: when the person in front of them gets to the marker, the nextstudent may start riding.
Skil
l-bA
SeD
Ac
Tivi
Ty>
bAlA
Nc
e
•111


Ac
tIv
Ity
timeframe Beginners: 10-12 minutesintermediate: 8-10 minutesAdvanced: 3-4 minutes
objectives At the conclusion of this activity the student will be able to:1. Demonstrate exceptional or reliable performance of controlled
braking as measured by the controlled braking rubric. (Psychomotor)
2. Demonstrate exceptional or reliable social behavior as measured bythe social behavior rubric. (Affective)
national standards Standard 1Standard 2
Standard 3Standard 4
equipment • Bicycles• Helmets• Head barriers• Allen wrench• Cones, domes, polyspots or chalk to mark riding course• Red floor tape
teacher overview This activity helps students understand the important difference in howthe rear and front brakes each stop the bicycle. Students will first learn touse the rear brake to accomplish a controlled stop. The rear brake allowsfor a much more gradual braking result. Although not as efficient as usingthe front brake, it is a much safer manner in which to learn braking.
preparation 1. Designate a riding course that enables the teacher to see the studentsat all times. This will enable students to ride throughout the classperiod, even when they are not performing skills.
2. Set up a “chute” using cones, to indicate where the student willperform the skill and the teacher will conduct the assessment. Thisarea should also serve as a teaching station in which the skill will bedemonstrated for the students, and where students will return wheninstructed.
3. If bicycles have both front and rear brakes: Wrap the left handle of thebicycle with red floor tape to discourage students from using the frontbrake, until proper braking skill is taught.
4. Practice the controlled braking skill before demonstrating to students.
SkIll-bASED ActIvItycontrolled braking
Skil
l-bA
SeD
Ac
Tivi
Ty>
co
NTr
oll
eD b
rAk
iNg
•113

directions 1. Introduce this activity using the following prompt:Almost as important as being able to balance, is being able to safelystop a bicycle. In this activity, you will learn the difference in how therear and front brakes each stop the bicycle. You will also practicestopping the bicycle in a controlled manner using the rear brake.
2. Use the following sample questions to prompt students thinking aboutthe content in this activity.
Q: What are some reasons for braking on a bicycle? A: Any of the following:
• You may need to slow or stop for various reasons • Other answers may be accepted.
Q: Which brake controls which tire? A: Left brake = front wheel; right brake = rear wheel.
Q: Why should braking happen in a controlled manner?A: Any of the following:
• It is safer• Uncontrolled braking can send a bicyclist over the handlebars
or out of control.• Explain and demonstrate the difference in how the front and
rear brakes each stop the bicycle. Riders should:• Jog slowly forward next to the bicycle; apply just the rear brake
and observe how the bicycle stops. Remember right is rear. • Jog slowly forward next to the bicycle; apply just the front brake
and observe how the bicycle stops. Explain that this activity is focused on only using the rear brake. Using both the front and rear brakes will be taught in a future activity.
3. After this demonstration, use the following sample questions to furtherprompt students’ thinking about the content in this activity.
Skil
l-bA
SeD
Ac
Tivi
Ty>
co
NTr
oll
eD b
rAk
iNg
•114
Riding space for intermediate and advanced courseare more narrow to increase the challenge for the
rider to control the bicycle between the lines.
teaching station
diagram: Controlled Braking Course

Q: What is the difference between using the front and rear brakes? A: Any of the following:
• The front brake stops the bicycle quicker• The rear brake stops the bicycle slower• A bicyclist has to be careful if just using the front brake• Other responses may be accepted
Q: When would be a more appropriate time to use the rear brake? A: On most occasions, the rear brake is used by itself. When you know
you’re going to stop you can slow down with the rear brake and thenstop, not even needing to touch the front brake.
Q: When would you use the front brake, in combination with the rearbrake, be necessary?
A: In an emergency situation when you need to stop suddenly, or comingdown a steep hill.
4. Instruct students to begin riding on the designated course and remainin the seated position. Upon entering the chute, remain in the seated position, apply the rearbrake, come to a stop and place both feet on the ground.
5. Instruct students to begin riding on the designated course again andremain in the seated position.Upon entering the chute, enter into the standing position, apply therear brake, come to a stop and place both feet on the ground.
Assessment 1. Assess controlled braking of each student using the following rubric.
perFormANce rubric: coNTrolleD brAkiNg
exceptional reliable inconsistent struggling/survival
Studentdemonstrates theability to control herbraking, and come toa complete stopsafely andeffectively;
Student is able tocontrol which brakeshe uses;
Student will use herrear brake to stopand does not use herfront brake, except inemergencysituations.
Studentdemonstrates theability to control herbraking, and come toa stop in the majorityof cases;
Student uses her rearbrake to stop in mostcases, but may wantto rely on her frontbrake more thannecessary.
Student sometimesuses her brake, butmay use her feet onoccasion to stop;
Student is able to useher rear brake but, ifavailable, willintermittently useher front brake;
Student has somedifficulty stoppingsafely andeffectively.
Student is not ableto use the handbrake correctlyand/or safely, andmay want to useher feet to stop,instead of herbrake;
Student does notunderstand how touse her brake tocontrol stopping.
Student is unableto stop safely andeffectively.
Skil
l-bA
SeD
Ac
Tivi
Ty>
co
NTr
oll
eD b
rAk
iNg
•115

2. Assess the performance of social behavior for each student using the following rubric.
perFormANce rubric: SociAl beHAvior
exceptional reliable inconsistent struggling/survival
Student is respectfultoward classmates,teacher, andequipment;
Student receives anduses feedback fromteacher and peers ina courteous manner;
Student participatesfully, without teacherprompting orsupervision;
Student is able towork cooperativelyand productivelywith classmates,including duringpeer assessments;
Student perseveres,even throughdifficultskills/activities, andmaintains a positiveattitude;
Student iscommitted tolearning;
Student iscommitted toengaging in cyclingin a safe manner, andkeeping allclassmates safeduring the cyclingunit.
Student is respectfultoward classmates,teacher, andequipment;
Student receives anduses feedback fromteacher and peers ina courteous manner;
Student participatesfully, but needs someteacher promptingand/or supervision;
Participates in mostclass activities at anappropriate andproductive level;
Student is most oftenable to workcooperatively andproductively withclassmates,including during peerassessments;
Student is able towork hard and notget frustrated withsetbacks;
Student is committedto learning;
Student is committedto engaging incycling in a safemanner, and keepingall classmates safeduring the cyclingunit.
Student may notalways be respectfultoward classmates,teacher, andequipment;
Student may listen tofeedback fromteacher or peers, butmay not attemptand/or have difficultyapplying it;
Student requiressome teachersupervision, but doesexhibit some self-control at times;
Studentdemonstrates theability to workcooperatively andproductively withclassmates, but mayneed teacherdirection orsupervision;
Student participatesin most classactivities;
Student is willing totry, but may getfrustrated withsetbacks, and poutand/or verbalizefrustration;
Student mayfluctuate betweenriding safely andunsafely at times.
Student maystruggle with beingrespectful towardclassmates,teacher, andequipment and/orshow anger and/orblame others forcycling mishaps;
Student does notlisten to feedbackfrom teacher orpeers, and does notattempt to apply it;
Student requiresongoingsupervision anddoes not ridesafely;
Student may beunprepared andshow very littleinterest in learningor the activity;
Student becomesfrustrated easilyand may quitparticipating.
Skil
l-bA
SeD
Ac
Tivi
Ty>
co
NTr
oll
eD b
rAk
iNg
•116

safety 1. Follow the 2-2-2-2 Rule (2 wheels on the ground; 2 feet on the pedals; 2hands on the handlebars; 2 fingers on the brake levers) while riding thebicycle.
2. Use the rear brake only to stop the bicycle, until the skill level advancesto be able to safely use the front brake.
3. Instruct students to ride the bicycles on the designated course anddemonstrate the skill components in the “chute.”
4. Instruct students to keep at least three-bikes-lenghts between eachrider.
differentiating Adapted and Beginnerinstruction • Encourage slower riding at first. • Make sure the course used is safe and flat.
• Check that there is considerable space for students to safely ride, without obstacles or other rider interference. It may be necessary for an aide to work with adapted students and/or students who are truly beginners, to help them remember to use the brake instead of their feet to stop.
intermediate and Advanced• Students can progress to the Quick Stop found in Unit 3.
Best practices 1. Provide a discreet opportunity and safe environment for students to share information pertaining to their ability and comfort level for riding a bicycle.
2. Always complete the Helmet Fit and ABC Quick Check at the beginningof every class in which the students will be riding. The use ofpeers/partners to practice, inspect, and correct each other will make themost efficient use of class time and reinforce bicycle safety skills. Thisshould not replace teacher assessment.
3. Review the three-bicycles-length rule to promote safe riding. The three-bicycles-length rule is a reminder of keeping a safe distance betweencyclists while riding single-file. To help maintain proper spacing, have amarker on the course that allows students to see when it is their turn togo: when the person in front of them gets to the marker, the next studentmay start riding.
Skil
l-bA
SeD
Ac
Tivi
Ty>
co
NTr
oll
eD b
rAk
iNg
•117


Ac
tIv
Ity
timeframe Beginners: 5-7 minutesintermediate: 5 minutesAdvanced: 5 minutes
objectives At the conclusion of this activity the student will be able to:1. Demonstrate exceptional or reliable performance of straight line
riding as measured by the straight line rubric. (Psychomotor) 2. Demonstrate exceptional or reliable social behavior as measured by
the social behavior rubric. (Affective)
national standards Standard 1Standard 2 Standard 3Standard 4
equipment • Bicycles• Helmets• Head barriers• Allen wrench• Cones, domes, polyspots or chalk to mark riding course • Red floor tape
teacher overview This activity reinforces the skill of riding a bicycle in a straight line. Thisactivity can be conducted in a relatively short timeframe.
preparation 1. Designate a riding course that enables the teacher to see the studentsat all times. This will enable students to ride throughout the classperiod, even when they are not performing skills.
2. Set up a “chute” using cones, to indicate where the student willperform the skill and the teacher will conduct the assessment. Thisarea should also serve as a teaching station in which the skill will bedemonstrated for the students, and where students will return wheninstructed.
3. If bicycles have both front and rear brakes: Wrap the left handle of thebicycle with red floor tape to discourage students from using the frontbrake, until proper braking skill is taught.
4. Practice the straight line riding skill before demonstrating to students.
SkIll-bASED ActIvItyStraight-line Riding
Skil
l-bA
SeD
Ac
Tivi
Ty>
STrA
igH
T li
Ne
riD
iNg
•119

directions 1. Introduce this activity using the following prompt:
Straight line riding is a skill that is necessary to ride safely in a numberof situations. Riding in a straight line allows bicyclists to ride on bikepaths, and to ride next to friends and family, without causing a crash.Riding in a straight line also helps motorists, pedestrians and otherbicyclists better able to predict a bicyclist’s movements.
2. Use the following sample questions to prompt students’ thinking aboutthe content in this activity.
Q: Why would it be good to know how to ride in a straight line? A: Any of the following:
• There might be times when riding in a straight line would be more appropriate.
• It is also safer to ride straight than to zigzag all over the road or bike path.
Q: When might you need to ride in a straight line?A: Any of the following:
• If you were riding with a friend on a bike path and someone wanted to pass or someone was coming toward you.
• Bicyclists typically ride in single-file, instead of side by side, when riding on a street.
• Other responses may be accepted.
Skil
l-bA
SeD
Ac
Tivi
Ty>
STrA
igH
T li
Ne
riD
iNg
•120
Riding space for intermediate and advanced courseare more narrow to increase the challenge for the
rider to control the bicycle between the lines.
teaching station
diagram: straight-line riding Course

3. Discuss expected bicycle positioning while riding the course: • Aim to ride three-bicycles-lengths apart on riding course. • As students progress in skill level and control, they can ride as close
as one bike length, but not until directed to do so by the teacher.• Ride at a controlled pace without passing other riders.• Ride on the course or between the lines.
4. Blow the whistle to stop students. Students should stop in a controlledmanner, without tire skidding or getting too close to the rider in frontof them.
5. Repeat activity step #4 to practice riding and stopping in a controlledmanner. This will serve as the basis for classroom management duringthe bike unit.
Assessment 1. Assess performance of straight line riding for each student using thefollowing rubric.
perFormANce rubric: STrAigHT-liNe riDiNg
exceptional reliable inconsistent struggling/survival
Student is able tomaintain a straightline while ridingalone and in a line ofriders, withoutpassing oroverlapping wheels(maintainingappropriate safedistance);
Student can stop andmaintain a safedistance from thecyclist in front.
Student is able tomaintain a straightline while ridingalone and in a line ofriders, butsometimes hasdifficulty in notoverlapping wheelswith the rider infront;
Student can stopsafely withouttouching wheels, butmay overlap wheelswith the rider infront.
Student canmaintain a straightline for a shortdistance beforeweaving;
Student has difficultyriding in a straightline with other ridersand often overlapswheels;
Student has difficultystopping withoutrunning into (ornearly running into)other riders.
Student is unableto maintain astraight line whileriding, and isunable to safelyride in a straightline with otherriders.
Skil
l-bA
SeD
Ac
Tivi
Ty>
STrA
igH
T li
Ne
riD
iNg
•121

2. Assess the performance of social behavior for each student using the following rubric.
perFormANce rubric: SociAl beHAvior
exceptional reliable inconsistent struggling/survival
Student is respectfultoward classmates,teacher, andequipment;
Student receives anduses feedback fromteacher and peers ina courteous manner;
Student participatesfully, without teacherprompting orsupervision;
Student is able towork cooperativelyand productivelywith classmates,including duringpeer assessments;
Student perseveres,even throughdifficultskills/activities, andmaintains a positiveattitude;
Student iscommitted tolearning;
Student iscommitted toengaging in cyclingin a safe manner, andkeeping allclassmates safeduring the cyclingunit.
Student is respectfultoward classmates,teacher, andequipment;
Student receives anduses feedback fromteacher and peers ina courteous manner;
Student participatesfully, but needs someteacher promptingand/or supervision;
Participates in mostclass activities at anappropriate andproductive level;
Student is most oftenable to workcooperatively andproductively withclassmates,including during peerassessments;
Student is able towork hard and notget frustrated withsetbacks;
Student is committedto learning;
Student is committedto engaging incycling in a safemanner, and keepingall classmates safeduring the cyclingunit.
Student may notalways be respectfultoward classmates,teacher, andequipment;
Student may listen tofeedback fromteacher or peers, butmay not attemptand/or have difficultyapplying it;
Student requiressome teachersupervision, but doesexhibit some self-control at times;
Studentdemonstrates theability to workcooperatively andproductively withclassmates, but mayneed teacherdirection orsupervision;
Student participatesin most classactivities;
Student is willing totry, but may getfrustrated withsetbacks, and poutand/or verbalizefrustration;
Student mayfluctuate betweenriding safely andunsafely at times.
Student maystruggle with beingrespectful towardclassmates,teacher, andequipment and/orshow anger and/orblame others forcycling mishaps;
Student does notlisten to feedbackfrom teacher orpeers, and does notattempt to apply it;
Student requiresongoingsupervision anddoes not ridesafely;
Student may beunprepared andshow very littleinterest in learningor the activity;
Student becomesfrustrated easilyand may quitparticipating.
Skil
l-bA
SeD
Ac
Tivi
Ty>
STrA
igH
T li
Ne
riD
iNg
•122

safety 1. Follow the 2-2-2-2 Rule (2 wheels on the ground; 2 feet on the pedals;2 hands on the handlebars; 2 fingers on the brake levers) while ridingthe bicycle.
2. Use the rear brake only to stop the bicycle, until the skill leveladvances to be able to safely use the front brake.
3. Instruct students to keep at least three-bikes-lenghts between eachrider.
differentiating Adapted and Beginnerinstruction • Beginning riders will often be more wobbly and have less ability to
ride in a straight line; hence the need for a course that is wider. It is also very difficult for beginners to ride at a faster pace and riding slower makes maintaining balance and riding in a straight line more difficult – given the need for advanced balancing skills.
• Beginning riders will need space, time and a wider course, where they cannot hurt themselves or other students. Lower the seat so that beginning riders can touch the ground with their feet.
intermediate and Advanced• Challenge more advanced riders, as appropriate, to ride more slowly
and/or ride within one bicycle length, while riding single-file.
Best practices 1. Provide a discreet opportunity and safe environment for students toshare information pertaining to their ability and comfort level forriding a bicycle.
2. Always complete the Helmet Fit and ABC Quick Check at thebeginning of every class in which the students will be riding. The useof peers/partners to practice, inspect, and correct each other willmake the most efficient use of class time and reinforce bicycle safetyskills. This should not replace teacher assessment.
3. Review the three-bikes-lenghts rule to promote safe riding. This is areminder of keeping a safe distance between cyclists while ridingsingle-file. To help maintain proper spacing, have a marker on thecourse that allows students to see when it is their turn to go: when the person in front of them gets to the marker, the next student maystart riding.
Skil
l-bA
SeD
Ac
Tivi
Ty>
STrA
igH
T li
Ne
riD
iNg
•123


Ac
tIv
Ity
timeframe Beginners: 5-7 minutesintermediate: 5 minutesAdvanced: 5 minutes
objectives At the conclusion of this activity the student will be able to:1. Demonstrate exceptional or reliable performance of the Power Start
skill as measured by the Power Start rubric. (Psychomotor) 2. Demonstrate exceptional or reliable social behavior as measured by the
social behavior rubric. (Affective)
national standards Standard 1Standard 2Standard 3 Standard 4
equipment • Bicycles• Helmets• Head barriers• Allen wrench• Cones, domes, polyspots or chalk to mark riding course • Red floor tape
teacher overview This activity enables the rider to begin riding in a strong, controlledmanner. Although a basic skill, this can be challenging for beginningriders who are not comfortable standing on the pedals.
preparation 1. Designate a riding course that enables the teacher to see the studentsat all times. This will enable students to ride throughout the classperiod, even when they are not performing skills.
2. Set up a “chute” using cones, to indicate where the student willperform the skill and the teacher will conduct the assessment. Thisarea should also serve as a teaching station in which the skill will bedemonstrated for the students, and where students will return wheninstructed.
3. If bicycles have both front and rear brakes: Wrap the left handle of thebicycle with red floor tape to discourage students from using the frontbrake, until proper braking skill is taught.
4. Practice the Power Start skill before demonstrating to students.
SkIll-bASED ActIvItypower Start
Skil
l-bA
SeD
Ac
Tivi
Ty>
pow
er S
TArT
•125

directions 1. Introduce this activity using the following prompt:
Now we are going to learn how to start riding a bicycle in a strong, controlledmanner and prevent hesitation and wobbling.
2. Use the following sample questions to prompt students’ thinking about thecontent in this activity.
Q: does it matter how you start riding? A: Yes, there is a way to start to be more efficient.
Q: What might you gain if you started out standing?A: Either of the following:
• Power• Stability
3. Explain and demonstrate skills to students in the teaching station reinforcingthe following points. Power Start, riders should:
• Straddle the bicycle and place one foot on the ground, the other foot on the pedal between the 12 and 2 o’clock position. The rider should be standing, not sitting on the saddle.
• Push down on the pedal moving it to the 6 o’clock position and push off the ground with the other foot at the same time. The rider should be standing above the saddle, coast, and count to three before placing the other foot onto the other pedal.
• Then sit on the saddle.
Skil
l-bA
SeD
Ac
Tivi
Ty>
pow
er S
TArT
•126
Riding space for intermediate and advanced courseare more narrow to increase the challenge for the
rider to control the bicycle between the lines.
teaching station
diagram: power start Course

Skil
l-bA
SeD
Ac
Tivi
Ty>
pow
er S
TArT
•127
4. Instruct students to begin the Power Start.
5. Instruct students to repeat the Power Start, using the other foot on thepedal to start.
Assessment 1. Assess performance of the Power Start for each student using the following rubric.
perFormANce rubric: power STArT
exceptional reliable inconsistent struggling/survival
Student can startimmediately, is ableto get pedal into thecorrect position (near12 o’clock) and startfrom a standingposition, and push offwith the ground foot;
Student is able topedal and coast forup to 3 secondsbefore sitting on thesaddle;
Student has power to his start.
Student can startimmediately, is able toget the pedal into thecorrect position (near12 o’clock) and startfrom a standingposition, but may notpush off with theground foot;
Student starts with apedal, but may sit onthe saddle immediatelyinstead of coasting;
Student may at timesnot have enough powerto get going.
Student can getstarted more quickly,but may be unable tostand, and insteadwant to remainseated to start;
Student is able tomove the pedal intothe correct position(near 12 o’clock) inorder to beginpedaling whenstarting.
Student hasdifficulty startingfrom a Power Startposition and oftentakes a great deal oftime gettingstarted;
Student is unable tostand and start, andmay not understandhow to place thepedal (near 12o’clock position) inorder gain power tostart riding.

2. Assess the performance of social behavior for each student using the following rubric.
perFormANce rubric: SociAl beHAvior
exceptional reliable inconsistent struggling/survival
Student is respectfultoward classmates,teacher, andequipment;
Student receives anduses feedback fromteacher and peers ina courteous manner;
Student participatesfully, without teacherprompting orsupervision;
Student is able towork cooperativelyand productively withclassmates, includingduring peerassessments;
Student perseveres,even through difficultskills/activities, andmaintains a positiveattitude;
Student is committedto learning;
Student is committedto engaging inbicycling in a safemanner, and keepingall classmates safeduring the bicyclingunit.
Student is respectfultoward classmates,teacher, andequipment;
Student receives anduses feedback fromteacher and peers in acourteous manner;
Student participatesfully, but needs someteacher promptingand/or supervision;
Participates in mostclass activities at anappropriate andproductive level;
Student is most oftenable to workcooperatively andproductively withclassmates, includingduring peerassessments;
Student is able towork hard and not getfrustrated withsetbacks;
Student is committedto learning;
Student is committedto engaging inbicycling in a safemanner, and keepingall classmates safeduring the bicyclingunit.
Student may notalways be respectfultoward classmates,teacher, andequipment;
Student may listen tofeedback fromteacher or peers, butmay not attemptand/or have difficultyapplying it;
Student requiressome teachersupervision, but doesexhibit some self-control at times;
Student demonstratesthe ability to workcooperatively andproductively withclassmates, but mayneed teacher directionor supervision;
Student participatesin most classactivities;
Student is willing totry, but may getfrustrated withsetbacks, and poutand/or verbalizefrustration;
Student may fluctuatebetween riding safelyand unsafely at times.
Student maystruggle with beingrespectful towardclassmates, teacher,and equipmentand/or show angerand/or blame othersfor cycling mishaps;
Student does notlisten to feedbackfrom teacher orpeers, and does notattempt to apply it;
Student requiresongoing supervisionand does not ridesafely;
Student may beunprepared andshow very littleinterest in learningor the activity;
Student becomesfrustrated easilyand may quitparticipating.
Skil
l-bA
SeD
Ac
Tivi
Ty>
pow
er S
TArT
•128

safety 1. Follow the 2-2-2-2 Rule (2 wheels on the ground; 2 feet on the pedals; 2 hands on the handlebars; 2 fingers on the brake levers) while ridingthe bicycle.
2. Use the rear brake only to stop the bicycle, until the skill leveladvances to be able to safely use the front brake.
3. Instruct students to ride the bicycles on the designated course anddemonstrate the skill components in the “chute.”
4. Instruct students to keep at least three-bikes-lenghts between eachrider.
differentiating Adapted and Beginnerinstruction • Beginning riders will often want to start seated.
• An aide or volunteer may be needed to help beginners as they try a Power Start.
• Pairing more experienced peers with those less familiar with riding could also be useful.
intermediate and Advanced• Challenge these riders to start on an uphill, or in a single-file line
while maintaining a safe distance.
Best practices 1. Provide a discreet opportunity and safe environment for students toshare information pertaining to their ability and comfort level for riding abicycle.
2. Always complete the Helmet Fit and ABC Quick Check at thebeginning of every class in which the students will be riding. The use of peers/partners to practice, inspectand correct each other will make the most efficient use of class time and reinforce bicyclesafety skills. This should not replace teacher assessment.
3. Review the three-bikes-length rule to promote safe riding. This is areminder of keeping a safe distance between cyclists while ridingsingle-file. To help maintain proper spacing, have a marker on thecourse that allows students to see when it is their turn to go: when the person in front of them gets to the marker, the next student may start riding.
Skil
l-bA
SeD
Ac
Tivi
Ty>
pow
er S
TArT
•129


Ac
tIv
Ity
timeframe Beginners: 5-7 minutesintermediate: 5 minutesAdvanced: 5 minutes
objectives At the conclusion of this activity the student will be able to:1. Demonstrate exceptional or reliable performance of the Ready Position
skill as measured by the Ready Position rubric. (Psychomotor) 2. Demonstrate exceptional or reliable social behavior as measured by
the social behavior rubric. (Affective)
national standards Standard 1Standard 2Standard 3Standard 4
equipment • Bicycles• Helmets• Head barriers• Allen wrench• Cones, domes, polyspots or chalk to mark riding course• Jump ropes • Red floor tape
teacher overview This activity teaches a body position that enables a rider to be in controlof the bicycle and be prepared to absorb bumps, ride over uneven terrainand be ready to make quick stops and turns.
preparation 1. Designate a riding course that enables the teacher to see the studentsat all times. This will enable students to ride throughout the classperiod, even when they are not performing skills.
2. Set up the riding course so that it varies in difficulty using chalk lines forless experienced riders and jump ropes for more experienced bicyclists.
3. Set up a “chute” using cones, to indicate where the student willperform the skill and the teacher will conduct the assessment. Thisarea should also serve as a teaching station in which the skill will bedemonstrated for the students, and where students will return wheninstructed.
4. If bicycles have both front and rear brakes: Wrap the left handle of thebicycle with red floor tape to discourage students from using the frontbrake, until proper braking skill is taught.
5. Practice the Ready Position skill before demonstrating to students.
SkIll-bASED ActIvItyReady position
Skil
l-bA
SeD
Ac
Tivi
Ty>
reA
Dy
poSi
Tio
N
•131

directions 1. Introduce this activity using the following prompt:
Now we are going to learn how to perform the Ready Position. TheReady Position is a body position that helps keep you alert and readyto maneuver the bicycle. It will enable you to quickly control yourbicycle if you ride over a bump or uneven terrain. It will also set you up to be able to quickly turn or stop if needed.
2. Use the following sample questions to prompt students’ thinking aboutthe content in this activity.
Q: how might you be prepared to run over something with your bicycle?A: Any of the following:
• Ready Position• Standing over saddle• Fingers on the brake levers
Skil
l-bA
SeD
Ac
Tivi
Ty>
reA
Dy
poSi
Tio
N
•132
ready position
teaching station
Chalk line Chalk lineC
halk
line
Cha
lk li
ne
diagram: ready position Course

cue: two fingerscue: weight backcue: pedals parallel
3. Explain and demonstrate skills to students in the teaching stationreinforcing the following points. Riders should:• Extend arms with two fingers resting on brake levers without
squeezing the levers. (Cue)• Stand over the saddle, with the majority of weight over the back tire.
(Cue)• Position pedals parallel to the ground, in the 9 o’clock and 3 o’clock
position. (Cue)
4. Instruct students to perform the Ready Position while coasting through the chute.
5. Ride the designated course and perform the Ready Position when ridingover chalk lines or jump ropes representing bumps on the course.
6. Provide more practice opportunities by instructing students to ridemultiple laps around the designated course. While students are riding,the teacher should blow a whistle signaling the students to perform theready position skill for five seconds and then continue riding.
Assessment 1. Assess performance of the Ready Position skill of each student usingthe following rubric:
perFormANce rubric: reADy poSiTioN
exceptional reliable inconsistent struggling/survival
Student has herfingers ready tobrake;
Student is standingwith pedals incorrect position (9o’clock & 3 o’clock)and has her bodyweight distributedover the back of thebike;
Student is able tomaintain someflexibility as sherides in this position,so as to give with theterrain /bump in theroad (e.g., railroadtracks).
Student has herfingers ready tobrake, is standing inthe correct position(9 o’clock & 3o’clock), but may beunable to positionweight over the backtire;
Student may still ridein a rigid position,instead of beingmore flexible.
Student may nothave her fingersready to brake;
Student can moveher pedals into thecorrect position (9o’clock & 3 o’clock),but may be unable tostand;
If student doesstand, she may beunable to positionweight over the rearwheel;
Student does haveher fingers ready tobrake.
Student doesn’thave her fingers (ifapplicable) readyto brake; Studentdoes notunderstand theReady Position;
Student cannotmove the pedals tothe correct position(9 o’clock & 3o’clock);
Student’s weight isnot positionedtoward the back ofthe bike, and she isunable to stand.
Skil
l-bA
SeD
Ac
Tivi
Ty>
reA
Dy
poSi
Tio
N
•133

2. Assess the performance of social behavior for each student using the following rubric.
perFormANce rubric: SociAl beHAvior
exceptional reliable inconsistent struggling/survival
Student is respectfultoward classmates,teacher, &equipment;
Student receives anduses feedback fromteacher and peers ina courteous manner;
Student participatesfully, without teacherprompting orsupervision;
Student is able towork cooperativelyand productivelywith classmates,including duringpeer assessments;
Student perseveres,even throughdifficultskills/activities, andmaintains a positiveattitude;
Student iscommitted tolearning;
Student iscommitted toengaging in cyclingin a safe manner, andkeeping allclassmates safeduring the cyclingunit.
Student is respectfultoward classmates,teacher, &equipment;
Student receives anduses feedback fromteacher and peers ina courteous manner;
Student participatesfully, but needs someteacher promptingand/or supervision;
Participates in mostclass activities at anappropriate andproductive level;
Student is most oftenable to workcooperatively andproductively withclassmates,including during peerassessments;
Student is able towork hard and notget frustrated withsetbacks;
Student is committedto learning;
Student is committedto engaging incycling in a safemanner, and keepingall classmates safeduring the cyclingunit.
Student may notalways be respectfultoward classmates,teacher, &equipment;
Student may listen tofeedback fromteacher or peers, butmay not attemptand/or have difficultyapplying it;
Student requiressome teachersupervision, but doesexhibit some self-control at times;
Studentdemonstrates theability to workcooperatively andproductively withclassmates, but mayneed teacherdirection orsupervision;
Student participatesin most classactivities;
Student is willing totry, but may getfrustrated withsetbacks, and poutand/or verbalizefrustration;
Student mayfluctuate betweenriding safely andunsafely at times.
Student maystruggle with beingrespectful towardclassmates,teacher, &equipment and/orshow anger and/orblame others forcycling mishaps;
Student does notlisten to feedbackfrom teacher orpeers, and does notattempt to apply it;
Student requiresongoingsupervision anddoes not ridesafely;
Student may beunprepared andshow very littleinterest in learningor the activity;
Student becomesfrustrated easilyand may quitparticipating.
Skil
l-bA
SeD
Ac
Tivi
Ty>
reA
Dy
poSi
Tio
N
•134

Skil
l-bA
SeD
Ac
Tivi
Ty>
reA
Dy
poSi
Tio
N
•135
safety 1. Follow the 2-2-2-2 Rule (2 wheels on the ground; 2 feet on the pedals; 2 hands on the handlebars; 2 fingers on the brake levers) while ridingthe bicycle.
2. Use the rear brake only to stop the bicycle, until the skill level advancesto be able to safely use the front brake.
3. Instruct students to ride the bicycles on the designated course anddemonstrate the skill components in the “chute.”
4. Instruct students to keep at least three-bikes-lenghts between eachrider.
differentiating Adapted instruction • Divide students into separate courses, as needed, based on skill level.
This will ensure a safe riding environment as students ride at a pace and through a course appropriate for their level.
• Beginners may not be able to stand on their bike, but can assume the pedal position (3 o’clock and 9 o’clock) while seated.
intermediate and Advanced• To challenge more advanced riders, use small tree limbs, several jump
ropes in a row (to resemble a grate), and other small objects. • Take care to ensure objects will not roll or move and present a safety issue.
Best practices 1. Provide a discreet opportunity and safe environment for students to shareinformation pertaining to their ability and comfort level for riding a bicycle.
2. Always complete the Helmet Fit and ABC Quick Check at the beginningof every class in which the students will be riding. The use ofpeers/partners to practice, inspectand correct each other will make themost efficient use of class time and reinforce bicycle safety skills. Thisshould not replace teacher assessment.
3. Review the three-bikes-lenghts rule to promote safe riding. This is areminder of keeping a safe distance between cyclists while ridingsingle-file. To help maintain proper spacing, have a marker on thecourse that allows students to see when it is their turn to go: when theperson in front of them gets to the marker, the next student may startriding.


Ac
tIv
Ity
timeframe Beginner: 5-7 minutesintermediate: 5 minutes Advanced: 5 minutes
objectives At the conclusion of this activity the student will be able to:1. Demonstrate exceptional or reliable performance of scanning as
measured by the scanning rubric. (Psychomotor)2. Demonstrate exceptional or reliable social behavior as measured by
the social behavior rubric. (Affective)
national standards Standard 1 Standard 2Standard 3Standard 4
equipment • Bicycles• Helmets• Head barriers• Allen wrench• Cones, domes, polyspots or chalk to mark riding course• Red floor tape
teacher overview This activity teaches students how to scan behind them as they ride.When riding in traffic, bicyclists need to scan left and right for traffic andobstacles in the roadway on an ongoing basis. When preparing to turn orchange lane positions, however, bicyclists like drivers, must not only scanleft and right, but also scan for any traffic behind them. This skill involveslooking over one’s shoulder, identifying an object while looking (car,numbers of fingers, other object), all while maintaining a straight line onthe bicycle. This is something that takes practice. Many will find thatscanning over either the right or left shoulder is easier than the other.This activity is designed to give students practice scanning over bothshoulders. This will require students to be able to balance while riding a bicycle.
preparation 1. Designate a riding course that enables the teacher to see the studentsat all times. This will enable students to ride throughout the classperiod, even when they are not performing skills.
2. Set up a “chute” using cones, to indicate where the student willperform the skill and the teacher will conduct the assessment. Thisarea should also serve as a teaching station in which the skill will bedemonstrated for the students, and where students will return wheninstructed.
SkIll-bASED ActIvItyScanning
Skil
l-bA
SeD
Ac
Tivi
Ty>
ScA
NN
iNg
•137

cue: chin to shoulder.
3. If bicycles have both front and rear brakes: Wrap the left handle of thebicycle with red floor tape to discourage students from using the frontbrake, until proper braking skill is taught.
4. Practice the scanning skill before demonstrating to students.
directions 1. Introduce this activity using the following prompt:
Today, we are going to practice looking to the rear while you are riding.This skill is called scanning. Because a bicyclist’s surroundings arealways changing, it is important to scan repeatedly during a ride. Thismakes scanning an essential bicycle safety skill. Bicyclists willsometimes find that scanning on one side is easier than the other.However it is important to be able to safely perform this skill from bothsides. Therefore this skill will be practiced using both shoulders.
2. Use the following sample questions to prompt students’ thinking aboutthe content in this activity.
Q: how do riders know when it is safe to change lanes? A: Riders must look around to see if cars are coming up behind them.
Q: What steps are necessary to scan? A: Remain in the seated position, glance over the shoulder and continue
riding in a straight line.
3. Explain and demonstrate skills to students in the teaching stationreinforcing the following points. Riders should: • Stay seated upon entering the chute.• Glance over the shoulder - touching the chin to the shoulder - and
continue riding in a straight line within the lines of the chute. (cue)
Skil
l-bA
SeD
Ac
Tivi
Ty>
ScA
NN
iNg
•138
teaching station
diagram: scanning Course

• Maintain a straight line of travel. This is one of the biggestchallenges with scanning. To assist those students who continue toturn the handlebars of the bicycle when they scan, instruct thosestudents to release the hand on the same side that the rider isscanning from the handlebar and drop it to the thigh while scanning.
4. Instruct students to begin riding the designated course with a Power Start.
5. Position yourself along the side of the chute with polyspots, someother type of colored objects or large pictures of objects or signs. It isimportant for students not just to glance quickly, but to actually focuson surroundings behind the rider. The student will need to be able toidentify what is being held up.
6. Instruct student to look over their left shoulder upon entering thechute and identify the color of the object being held up by the teacher,while remaining within the boundaries of the chute.
7. Repeat activity steps #4-6 using the right shoulder.
8. Provide more practice opportunities, for students by instructing themto ride multiple laps around the designated course. While students areriding, the teacher should blow a whistle signaling for the students toscan over either shoulder for five seconds and then continue riding.
Assessment 1. Assess performance of scanning for each student using the followingrubric:
perFormANce rubric: ScANNiNg
exceptional reliable inconsistent struggling/survival
Student is able toscan over hisshoulder for a longerperiod of time,enabling him toclearly see what isbehind him;
Student can scanwithout weaving orlosing control of thebike.
Student is able toscan over hisshoulder, but thescan may too brief tosee much;
Student mayoccasionally weaveas a result ofscanning, but is ableto get the bike undercontrol quickly.
Student is able tobriefly glance overhis shoulder (right orleft), but typicallythen weaves/losescontrol as a result ofturning his bodyand/or handlebarswhile scanning;
Student doesunderstand theimportance ofscanning whileriding.
Student is unableto scan whileriding, so he muststop first and thenlook over hisshoulder (right orleft) to scan, thenbegin riding again;
Because studenthas difficulty withbalance andstraight line riding,scanning is difficultand not safe to dowhile riding;
Student may alsonot understand theimportance ofscanning. Sk
ill-
bASe
D A
cTi
viTy
>Sc
AN
NiN
g
•139

2. Assess the performance of social behavior for each student using the following rubric.
perFormANce rubric: SociAl beHAvior
exceptional reliable inconsistent struggling/survival
Student is respectfultoward classmates,teacher, andequipment;
Student receives anduses feedback fromteacher and peers ina courteous manner;
Student participatesfully, without teacherprompting orsupervision;
Student is able towork cooperativelyand productivelywith classmates,including duringpeer assessments;
Student perseveres,even throughdifficultskills/activities, andmaintains a positiveattitude;
Student iscommitted tolearning;
Student iscommitted toengaging in cyclingin a safe manner, andkeeping allclassmates safeduring the cyclingunit.
Student is respectfultoward classmates,teacher, andequipment;
Student receives anduses feedback fromteacher and peers ina courteous manner;
Student participatesfully, but needs someteacher promptingand/or supervision;
Participates in mostclass activities at anappropriate andproductive level;
Student is most oftenable to workcooperatively andproductively withclassmates,including during peerassessments;
Student is able towork hard and notget frustrated withsetbacks;
Student is committedto learning;
Student is committedto engaging incycling in a safemanner, and keepingall classmates safeduring the cyclingunit.
Student may notalways be respectfultoward classmates,teacher, andequipment;
Student may listen tofeedback fromteacher or peers, butmay not attemptand/or have difficultyapplying it;
Student requiressome teachersupervision, but doesexhibit some self-control at times;
Studentdemonstrates theability to workcooperatively andproductively withclassmates, but mayneed teacherdirection orsupervision;
Student participatesin most classactivities;
Student is willing totry, but may getfrustrated withsetbacks, and poutand/or verbalizefrustration;
Student mayfluctuate betweenriding safely andunsafely at times.
Student maystruggle with beingrespectful towardclassmates,teacher, andequipment and/orshow anger and/orblame others forcycling mishaps;
Student does notlisten to feedbackfrom teacher orpeers, and does notattempt to apply it;
Student requiresongoingsupervision anddoes not ridesafely;
Student may beunprepared andshow very littleinterest in learningor the activity;
Student becomesfrustrated easilyand may quitparticipating.
Skil
l-bA
SeD
Ac
Tivi
Ty>
ScA
NN
iNg
•140

safety 1. Follow the 2-2-2-2 Rule (2 wheels on the ground; 2 feet on the pedals; 2hands on the handlebars; 2 fingers on the brake levers) while riding thebicycle.
2. Use the rear brake only to stop the bicycle, until the skill level advances tobe able to safely use the front brake.
3. Instruct students to ride the bicycles on the designated course anddemonstrate the skill components in the “chute.”
4. Instruct students to keep at least three-bikes-lenghts between each rider.
5. Instruct students that when they scan over the right shoulder, they willneed to keep both hands on the handlebar to ensure that if braking isneeded, it is done with the rear brake.
differentiating Adapted and Beginnerinstruction • Beginning students who have difficulty with straight line riding will
likely have difficulty scanning while riding. • Beginners may need to ride, stop and scan and then ride again, slowly
moving to the point of not stopping. • Having a wider course/chute for beginners is necessary.
intermediate and Advanced • Set up a more difficult course for more experienced bicyclists. • Have students scan and call out what they see. • Make objects more difficult to see while scanning.
Best practices 1. Provide a discreet opportunity and safe environment for students to shareinformation pertaining to their ability and comfort level for riding a bicycle.
2. Complete the Helmet Fit and ABC Quick Check at the beginning of everyclass when students will be riding. The use of peers/partners to practice,inspect, and correct each other will make the most efficient use of classtime and reinforce bicycle safety skills. This should not replace teacherassessment.
3. Review the three-bikes-lenghts rule to promote safe riding. This is areminder for students to keep a safe distance between each other whileriding single-file. To help maintain proper spacing, use a marker on thecourse so students can see when it is their turn to go: when the person infront of them gets to the marker, the next student may start.
Skil
l-bA
SeD
Ac
Tivi
Ty>
ScA
NN
iNg
•141


Ac
tIv
Ity
timeframe Beginners: 5-7 minutesintermediate: 5 minutesAdvanced: 5 minutes
objectives At the conclusion of this activity the student will be able to:1. Demonstrate exceptional or reliable performance of signaling as
measured by the signaling rubric. (Psychomotor) 2. Demonstrate exceptional or reliable social behavior as measured by
the social behavior rubric. (Affective)
national standards Standard 1 Standard 2Standard 3Standard 4
equipment • Bicycles• Helmets• Head barriers• Allen wrench• Cones, domes, polyspots or chalk to mark riding course• Red floor tape• Hand Signals handout
teacher overview This activity has students practicing hand signals while riding a bicycle.This skill will require students to ride with one hand while signaling andtherefore will require a good deal of balance.
preparation 1. Designate a riding course that enables the teacher to see the studentsat all times. This will enable students to ride throughout the classperiod, even when they are not performing skills.
2. Set up a “chute” using cones, to indicate where the student willperform the skill and the teacher will conduct the assessment. Thisarea should also serve as a teaching station in which the skill will bedemonstrated for the students, and where students will return wheninstructed.
3. If bicycles have both front and rear brakes: Wrap the left handle of thebicycle with red floor tape to discourage students from using the frontbrake, until proper braking skill is taught.
4. Practice signaling before demonstrating to students.
SkIll-bASED ActIvItySignaling
Skil
l-bA
SeD
Ac
Tivi
Ty>
Sig
NA
liN
g
•143

hand signals
directions 1. Introduce this activity using the following prompt:
Now we are going to learn how to signal turning and stopping whileriding a bicycle. Signals help other road users (drivers, riders andpedestrians) know your intentions when riding. Using hand signals toindicate turning requires being able to ride the bicycle with one hand –it takes skill and practice. As a vehicle on the road, bicyclists arerequired by law to signal to other bicycle riders or motor vehicles. Likescanning, using hand signals and maintaining a straight line whilebicycling, takes practice. It is also important to verbalize signals,when riding with other bicyclists, so when signaling a stop, the cyclistsshould also call out “stopping.”
2. Use the following sample questions to prompt students’ thinking aboutthe content in this activity.
Q: how do drivers of cars signal other drivers of their intentions? A: With blinkers
Q: early cars did not have blinkers, so how did drivers signal back then?
A: With hand signals, out the driver’s side window
Skil
l-bA
SeD
Ac
Tivi
Ty>
Sig
NA
liN
g
•144
Right Turn Alternative Right Turn
Stopping or SlowingLeft Turn
F B F B F B F B
F Front View B Back View
Exit
Enter12 ft12 ft
5 ft
15 ft 15 ft
3 ft
3 ft
signaling Course

in some states it is legal to signal a right turn by using the right hand to point to the right, similarto the left turn signal. However, this practice is questionable among many safe bicycle advocatesfor several reasons. The driver of a motor vehicle is more likely to notice the signal made on theleft side because it is being made on the driver’s side of the vehicle. many advocates feel bicyclistsshould use the same signals that are taught in their states driver’s education courses and in theirmotor vehicle operator’s manual. most importantly for children and other inexperienced riders,making the signal with the left hand enables the rider to brake with the rear brake, using theirright hand and therefore less likely to flip over the front of the handlebars if the left hand uses thefront brake.
Q: What if a modern-day car’s blinker lights are broken? how should thedriver signal?
A: The driver should use hand signals
Q: What is the signal for a left turn? A: Left arm out and parallel to ground, pointing left
Q: What is the signal for right turn? A: Left arm out, parallel to the ground, elbow bent and hand pointing up
Q: What is the signal for stopping? A: Left arm out, parallel to the ground, elbow bent and hand pointing down
Q: Why should signals be used when bicycling?A: Responses can include:
• Bicycles are considered vehicles and must abide by traffic laws • Signals let others know what a bicyclist intends to do
3. Practice hand signals with students, with them standing next to theirbicycles as a group.
4. Instruct students to begin riding the designated course with a Power Start.
5. Instruct students to remain seated upon entering the chute, use their left hand to perform the three hand signals one right after another - right,left and stop - while staying within the boundaries of the chute.
6. Provide Hand Signal handout for take home (optional)
Skil
l-bA
SeD
Ac
Tivi
Ty>
Sig
NA
liN
g
•145

Skil
l-bA
SeD
Ac
Tivi
Ty>
Sig
NA
liN
g
•146
Assessment 1. Assess performance of signaling for each student using the following rubric:
perFormANce rubric: SigNAliNg
exceptional reliable inconsistent struggling/survival
Student has nodifficulty signalingand uses the correctsignalsappropriately;
Student signals priorto a turn, and thenreplaces his hand tomake the turn.
Student is able tosignal appropriatelyand replace his handfor turning;
Student may weavejust slightly whensignaling, but regainscontrol of the bikequickly, even withone hand.
Student may havedifficultyremembering whichsignal to use at theappropriate time;
Student may beuncomfortable ridingwith one hand whensignaling, and mayweave whensignaling.
Student is unableto ride with onehand and signal, sohe must stop,signal, then restart;
Student may notunderstand theneed to signaland/or be able todifferentiatesignals.
because a bicycle is a vehicle, bicyclists must signal intention to turn or stop by usinghand signals. The left hand is safest to perform these signals for a number of reasons:
• The right hand controls the rear brake and would allow a rider to signal and applythe brakes without the danger of being thrown over the handlebars.
• motorists may not recognize or expect to see turn signals being made with the righthand. (we recommend you teach what is provided in your state driver’s manual).
Signaling

2. Assess the performance of social behavior for each student using the following rubric.
perFormANce rubric: SociAl beHAvior
exceptional reliable inconsistent struggling/survival
Student is respectfultoward classmates,teacher, andequipment;
Student receives anduses feedback fromteacher and peers ina courteous manner;
Student participatesfully, without teacherprompting orsupervision;
Student is able towork cooperativelyand productivelywith classmates,including duringpeer assessments;
Student perseveres,even throughdifficultskills/activities, andmaintains a positiveattitude;
Student iscommitted tolearning;
Student is committedto engaging incycling in a safemanner, and keepingall classmates safeduring the cyclingunit.
Student is respectfultoward classmates,teacher, andequipment;
Student receives anduses feedback fromteacher and peers ina courteous manner;
Student participatesfully, but needs someteacher promptingand/or supervision;
Participates in mostclass activities at anappropriate andproductive level;
Student is most often able to workcooperatively andproductively withclassmates,including during peer assessments;
Student is able towork hard and notget frustrated withsetbacks;
Student is committedto learning;
Student is committedto engaging in cyclingin a safe manner, andkeeping all classmatessafe during thecycling unit.
Student may notalways be respectfultoward classmates,teacher, andequipment;
Student may listen tofeedback fromteacher or peers, butmay not attemptand/or have difficultyapplying it;
Student requiressome teachersupervision, but doesexhibit some self-control at times;
Student demonstratesthe ability to workcooperatively andproductively withclassmates, but mayneed teacher directionor supervision;
Student participates inmost class activities;
Student is willing totry, but may getfrustrated withsetbacks, and poutand/or verbalizefrustration;
Student mayfluctuate betweenriding safely andunsafely at times.
Student maystruggle with beingrespectful towardclassmates,teacher, andequipment and/orshow anger and/orblame others forcycling mishaps;
Student does notlisten to feedbackfrom teacher orpeers, and does notattempt to apply it;
Student requiresongoingsupervision anddoes not ridesafely;
Student may beunprepared andshow very littleinterest in learningor the activity;
Student becomesfrustrated easilyand may quitparticipating.
Skil
l-bA
SeD
Ac
Tivi
Ty>
Soc
iAl
beH
Avio
r
•147

Sec
Tio
N 1
>c
urr
icu
lum
ove
rvie
w
•148
safety 1. Follow the 2-2-2-2 Rule (2 wheels on the ground; 2 feet on the pedals;2 hands on the handlebars; 2 fingers on the brake levers) while ridingthe bicycle.
2. Use the rear brake only to stop the bicycle, until the skill level advancesto be able to safely use the front brake.
3. Instruct students to ride the bicycles on the designated course anddemonstrate the skill components in the “chute.”
4. Instruct students to keep at least three-bikes-lenghts between each rider.
differentiating Adapted instruction • Students may need to practice riding with one hand only, prior to using
hand signals. This will require balance; so beginning riders will need space where they will not run into other. This process will take time and gradual “letting go”’
• Beginning riders may also need to stop, signal and start again. Safety and control of the bike are first and foremost; signaling with the hand may be a necessary step, but it in no way replaces the need for arm signals.
intermediate and Advanced• Use field paint or chalk to draw a large figure eight somewhere along
the designated course. • Instruct students to circle the field and, when they reach the figure eight, to
ride on the lines of the figure eight with the left hand signaling a right turn. This will help increase the student’s comfort level with riding with one hand.
Best practices 1. Provide a discreet opportunity and safe environment for students to shareinformation pertaining to their ability and comfort level for riding a bicycle.
2. Always complete the Helmet Fit and ABC Quick Check at the beginningof every class in which the students will be riding. The use ofpeers/partners to practice, inspect, and correct each other will make themost efficient use of class time and reinforce bicycle safety skills. Thisshould not replace teacher assessment.
3. Review the three-bikes-lenghts rule to promote safe riding. This is a
reminder of keeping a safe distance between cyclists while ridingsingle-file. To help maintain proper spacing, have a marker on thecourse that allows students to see when it is their turn to go: when theperson in front of them gets to the marker, the next student may startriding.

Ac
tIv
Ity
timeframe Beginner: 3-5 minutesintermediate: 3-5 minutesAdvanced: 3-5 minutes
objective At the conclusion of this activity the student will be able to:1. Describe key concepts from Unit 2 including: Power Start, Ready
Position, Scanning and Signaling as measured by completion of theBicycle Handling Skills worksheet. (Cognitive)
national standards Standard 2Standard 4
equipment • Bicycle Handling Skills worksheet • Pencils
teacher overview This activity prompts the students to think about what they have learnedduring Unit 2, by asking questions about basic bicycle handling skills. Byworking in groups to respond to the questions, the brainstorming willinitiate peer discussion about safe bicycling behaviors.
preparation Make appropriate number of copies of Bicycle Handling Skillsworksheets
directions 1. Introduce this activity using the following prompt:
We have now completed Unit 2 – “Bicycle Handling Basics.” All of theskills learned in this module to help you better controlof your bicycleand communicate with other road users. Balance, controlled braking,scanning and signaling are essential skills to master and periodicallypractice.
2. Divide students into pairs.
3. Ask students to walk the perimeter of the gym. Explain that they willbe given questions that they need to discuss with their partner whenwalking.
4. Instruct students to stop when the whistle blows, and be prepared toshare something that they discussed with their partner.
5. Use the following sample questions to prompt students’ thinkingabout the content presented in this unit.
Q: What is the key to being able to ride a bicycle? A: Balance.
clOSuRE ActIvItywalk & Share
clo
Sure
Ac
Tivi
Ty>
wA
lk &
SH
Are
•149

cue: two fingerscue: weight backcue: pedals parallel
Q: Why is controlled braking a necessary skill to master? A: Controlled braking enables a bicyclist to safety stop a bicycle.
Q: Why should hand signals be used when riding?A: Responses can include:
• Because a bicycle is a vehicle and by law needs to signal to other road users
• So other bicyclists and drivers are aware of what you are preparing to do
Q: What are the hand signals for left turn, right turn, stopping? A: Left arm out straight; left arm out, elbow bent with hand up; left arm
out, elbow bent with hand down
Q: What is the power start position? A: While straddling the bicycle, place one foot on the ground, the other
foot on the pedal in the 12 o’clock position. The rider should bestanding, not sitting on the saddle. Push down on the pedal moving itto the 6 o’clock position. Push off the ground with the other foot;similar to how one would ride a scooter. The rider should be standingabove the saddle, coast and count to three before placing the otherfoot onto the other pedal. Then sit on the saddle.
Q: Why is the power start a useful skill to know? When should it beused?
A: The Power Start helps the bicyclist begin riding in a strong andcontrolled manner. The Power Start can be used any time a ridermoves from a stopped position.
Q: Why is the ready position important to practice? A: This position allows the rider to be prepared for obstacles and to make
sudden moves more safely because of the balanced position on thebicycle
Q: What is the ready position?A: Arms are extended with two fingers over brake levers. The rider is
standing over the saddle, with the majority of weight over the back tire.The pedals are parallel to the ground, in the 9 o’clock and 3 o’clockposition.(cue)
Assessments 1. Successful completion of the Bicycle Handling Skills worksheet
safety 1. Do not let students run or walk too quickly if carrying pencils
differentiating All levelsinstruction • Choose appropriate questions based on skill and ability level of students.
intermediate and Advanced• Set up lanes that students need to travel in. Include stop signs
and intersections.
clo
Sure
Ac
Tivi
Ty>
wA
lk &
SH
Are
•150

wO
Rk
ShEE
t
directions: Please answer the following questions.
1. When preparing to stop, it is important to maintain control of your bicycle. To do so requiresusing brakes. Please describe which brake controls which wheel.
2. The helps bicyclists ride over bumps and train tracks more safelybecause their seat is off the saddle and their feet are at and position.
3. Riders when they look over their shoulder to see what is behind them,prior to changing lanes. Why is this skill important to master?
4. Please explain the Power Start and why a Power Start is important to bicyclists.
5. When preparing to turn right or left, or to stop, a bicyclists uses hand .
6. Please draw a picture below of a bicyclist signaling a left hand turn.
7. Please draw a picture below of a bicyclist signaling a right hand turn.
8. Please draw a picture below of a bicyclist signaling stop.
9. Why should bicyclists ride in a straight line?
10. One of the basic skills of a bicyclist is . Without , it isdifficult to ride on two wheels.
11. Before taking off on a ride, a bicyclist should always wear a that fitsproperly; make sure the and fit, and conduct an tomake sure the bicycle is safe.
Student Date
bIcyclE hANDlING SkIllSwORkShEEt
wo
rkSH
eeT
>bi
cyc
le H
AN
Dli
Ng
Sk
illS
•151

bIcyclE hANDlING SkIllS wORkShEEtANSwER kEy1. When preparing to stop, it is important to maintain control of your bicycle. To do so requires
using brakes. Please describe which brake controls which wheel.
the left brake controls the front wheel. the right brake controls the rear wheel.
2. The helps bicyclists ride over bumps and train tracks more safely becausetheir seat is off the saddle and their feet are at and position.
ready position; pedals at 3 o’clock and 9 o’clock position.
3. Riders when they look over their shoulder to see what is behind them priorto changing lanes. Why is this skill important to master?
scan. scanning allows the rider to see who/what is coming from behind.
4. Please explain the Power Start and why a Power Start is important to bicyclists.
While straddling the bicycle, place one foot on the ground, the other foot on the pedal inthe 12 o’clock position. the rider should be standing, not sitting on the saddle. pushdown on the pedal, moving it to the 6 o’clock position and push off the ground with theother foot at the same time. the rider should be standing above the saddle, coast andcount to three before placing the other foot onto the other pedal. then sit on the saddle. the power start helps the rider begin riding in a strong and controlled manner. thepower start can be used anytime a rider moves from a stopped position.
5 When preparing to turn right or left, or to stop, a bicyclist uses hand .
signals
6. Please draw a picture below of a bicyclist signaling a left hand turn.
7. Please draw a picture below of a bicyclist signaling a right hand turn.
8. Please draw a picture below of a bicyclist signaling stop.
9. Why should bicyclists ride in a straight line?
there are many situations where straight line riding is important, such as on a bikepath or on a street where other people, bicyclists or cars are coming from behind ortoward you.
10. One of the basic skills of a bicyclist is . Without , it isdifficult to ride on two wheels.
Balance, Balance
11. Before taking off on a ride, a bicyclist should always wear a that fitsproperly, make sure the and fit, and conduct an tomake sure the bicycle is safe.
helmet, helmet and Bicycle, ABC Quick Check
wo
rkSH
eeT
>bi
cyc
le H
AN
Dli
Ng
Sk
illS
•152

Ac
tIv
Ity
timeframe Beginner: 10-15 minutesintermediate: 10 minutesAdvanced: 10 minutes
objectives At the conclusion of this activity the student will be able to: 1. List and describe key concepts from Unit 2 that illustrate a clear
understanding of the need to have safe bicycle handling skills asmeasured by providing responses to questions in journals. (Cognitive)
2. Describe how they feel about their ability to ride safely and their levelof enjoyment of bicycling, as measured by providing responses toquestions in journals. (Affective)
national standards Standard 2Standard 5
equipment • Journals or portfolios for each student
teacher overview This activity prompts the students to think about what they have learnedduring the second unit by asking questions about basic bicycle handlingskills and providing written responses in journals.
preparation Determine method for distributing, collecting and storing portfolios orjournals before beginning this activity.
directions 1. Introduce this activity using the following prompt:
We have now completed Unit 2 – “Bicycle Handling Basics.” All of theskills learned in this unit to help you better controlof your bicycle andcommunicate with other road users. Balance, controlled braking,scanning and signaling are essential skills to master through periodicpractice.
2. Provide portfolios or journals for students to write in.
3. Choose a location where students can sit comfortably and completeassessment if completing journal writing activity in class.
4. Use the following sample questions to prompt students’ thinking aboutthe content presented in this unit.
Q. What is the key to being able to ride a bicycle? A: Balance
Q: Why is controlled braking a necessary skill to master? A: Controlled braking enables a bicyclist to safety stop a bicycle.
clOSuRE ActIvItyJournal writing
clo
Sure
Ac
Tivi
Ty>
jou
rNA
l w
riTi
Ng
•153

cue: two fingerscue: weight backcue: pedals parallel
Q: Why should hand signals be used when riding?A: Responses can include:
• Because a bicycle is a vehicle and by law needs to signal to other road users.
• So other bicyclists and drivers are aware of what you are preparing to do.
Q: What are the hand signals for left turn, right turn, stopping? A: Left arm out straight; left arm out, elbow bent with hand up; left arm
out, elbow bent with hand down.
Q: What is the power start position? A: While straddling the bicycle, place one foot on the ground, the other
foot on the pedal in the 12 o’clock position. The rider should bestanding, not sitting on the saddle. Push down on the pedal moving it tothe 6 o’clock position. Push off the ground with the other foot; similarto how one would ride a scooter. The rider should be standing abovethe saddle, coast and count to three before placing the other foot ontothe other pedal. Then sit on the saddle.
Q: Why is the power start a useful skill to know? When should it beused?
A: The Power Start helps the riders begin riding in a strong and controlledmanner. The Power Start can be used any time a rider moves from astopped position.
Q: Why is the ready position important to practice? A: This position allows the rider to be prepared for obstacles and to make
sudden moves more safely because of the balanced position on thebicycle.
Q: What is the ready position?A: Arms are extended with two fingers over brake levers. The rider
is standing over the saddle, with the majority of weight over the back tire. The pedals are parallel to the ground, in the 9 o’clock and 3 o’clock position. (cue)
Assessment 1. Be thoughtful about assessing journal writing, particularly when askingopen ended “opinion-type” questions. Not all students may enjoybicycling and should be allowed to voice their opinions. To encouragehonest answers, refrain from grading thoughts and opinions. However,this should not be an excuse for not learning the material.
2. Consider assessing writing skills and integrate literacy (spelling, use ofcorrect grammar and complete sentences, etc.) in journal writing.Some teachers may want to specify length of answers for specificquestions (e.g., answer must be at least two sentences).
safety None
clo
Sure
Ac
Tivi
Ty>
jou
rNA
l w
riTi
Ng
•154

differentiating All levelsinstruction • Choose questions that are appropriate for the age and ability level
of students. • Some students may need to share their answers verbally with a
teacher if they have difficulty writing. • Some students may need the teacher or an aide to read the questions.
Best practices 1. Complete this activity in classroom settings, health classes or scienceclasses if cross-curricular units are planned or to maximize ridingtime in physical education class.
2. Assign the journal writing for Unit 2 as homework to maximize ridingtime in physical education class.
clo
Sure
Ac
Tivi
Ty>
jou
rNA
l w
riTi
Ng
•155


Sec
Tio
N 3
• u
NiT
3>
emer
geN
cy
bic
ycle
HA
ND
liN
g S
kil
lS
•157
objecTiveS
At the conclusion of this unit the student will be able to:
1. Describe emergency bicycle handling as measured by completion of the EmergencyBicycle Handling worksheet. (Cognitive)
2. Demonstrate exceptional or reliable hazard-avoidance as measured by the hazard-avoidance rubric. (Psychomotor)
3. Demonstrate exceptional or reliable Quick Stop as measured by the quick stop rubric.(Psychomotor)
4. Demonstrate an exceptional or reliable Instant Turn as measured by the Instant Turnrubric. (Psychomotor)
5. Demonstrate exceptional or reliable social behavior as measured by the social behaviorrubric. (Affective)
6. Describe key concepts from Unit 3, hazard-avoidance, Quick Stop and Instant Turn, asmeasured by completion of the Emergency Skills worksheet. (Cognitive)
7. List and describe key concepts from Unit 3 that illustrate a clear understanding of the needto have emergency bicycle handling skills as measured by providing responses toquestions in journals. (Cognitive)
uNIt 3Emergency bicycle
handling Skills

cue:Stop on a dime
NATioNAl STANDArDS For k-12 pHySicAl eDucATioN
standard 1The physically literate individual demonstrates competency in a variety of motorskills and movement patterns.
standard 2 The physically literate individual applies knowledge of concepts, principles,strategies and tactics related to movement and performance.
standard 3The physically literate individual demonstrates the knowledge and skills toachieve and maintain a health-enhancing level of physical activity and fitness.
standard 4 The physically literate individual exhibits responsible personal and socialbehavior that respects self and others.
standard 5 The physically literate individual recognizes the value of physical activity forhealth, enjoyment, challenge, self-expression and/or social interaction.
key vocAbulAry/TermS
hazardAvoidance: Also referred to as Rock Dodge, Serpentine or Slalom is askill to teach the bicyclist how to avoid roadway hazards without swerving wildlyperhaps into traffic.
instant turn: Is a skill that enables the bicyclist to make a very quick turn whenthere is neither time nor the room for a normal turn.
Quick stop/emergency stop: Is a skill that enables the bicyclist to stop veryquickly in a short distance. The bicyclist applies both brakes while movinghis/her body back and low over the rear tire. This position lower’s the rider’scenter of gravity and puts more weight over the rear wheel, both of which helpkeep the rider from flying over the handlebars. (cue)
AcTiviTieS
Each unit should include three types of activities: introduction, skill-based withassessments and closure. In some cases, more than one activity option isoffered for the introduction and closure; choose the appropriate activities thatfit into your allotted class time when developing your lesson plans. If class timeis too short to allow for all three types of activities, focus your lesson on theskill-based activities.
introduction: The following activity can be used to introduce this unit oflearning.
• Walk & Share
Sec
Tio
N 3
• u
NiT
3>
emer
geN
cy
bic
ycle
HA
ND
liN
g S
kil
lS
•158

skill-Based with Assessments: Each skill-based activity is associated with an assessmentto measure student knowledge and application of the identified skill. Depending on theamount of class time available and the skill level of students, more than one of thefollowing skill-based activities may be completed during one class. All of the skill-basedactivities are considered essential in creating the foundation for safe bicycling. Regardlessof skill level and/or if students have learned this material in previous years, all skill-basedactivities in this unit should be completed before moving to the next unit. This will ensurethat students have the safety knowledge and basic skills necessary to practice safebicycling behaviors.
• Hazard-Avoidance
• Quick Stop
• Instant Turn
Closure: The following activities can be used to conclude this unit of learning. If desired,these activities can be assigned as homework. Choose which best fits the needs of yourstudents and class.
• Walk & Share
• Journal writing
equipmeNT NeeDeD
• Helmets
• Head barriers
• Bicycles
• Bicycle pump
• Allen wrench
• Red floor tape
• Cones, domes, polyspots or chalk to mark riding course
• Pencils
• Emergency Bicycle Handling worksheet
• Emergency Skills worksheet
• Student journals
• Stop signs
croSS-curriculAr AcTiviTieS
language Arts• Journal writing
Sec
Tio
N 3
• u
NiT
3>
emer
geN
cy
bic
ycle
HA
ND
liN
g S
kil
lS
•159


Ac
tIv
Itytimeframe Beginner: 5-7 minutes
intermediate: 5-7 minutesAdvanced: 5-7 minutes
objective At the conclusion of the activity the student will be able to:1. Describe emergency bicycle handling as measured by completion of
the Emergency Bicycle Handling worksheet (Cognitive)
national standards Standard 2Standard 4
equipment • Emergency Bicycle Handling worksheet• Pencils
teacher overview This activity prompts students to begin thinking about emergency bicycleriding skills by asking questions about what they think are emergencyriding skills. Walking while discussing the questions, will initiate peerdiscussion about emergency bicycle riding skills and keep studentsmoving.
preparation Make appropriate number of copies of Emergency Bicycle Handlingworksheet.
directions 1. Introduce this activity using the following prompt:
Today, we will be learning about some emergency bicycle handlingskills. These skills are important to be able to quickly perform in anemergency situation.
2. Divide students into groups of two or three.
3. Ask students to walk the perimeter of the gym while answering thequestions on the Emergency Bicycle Handling worksheet. Instructstudents they may need to stop to write a quick answer, but shouldcontinue moving as much as possible or have them write the answerswhen the walking is completed.
4. Instruct students to stop when the whistle blows and be prepared toshare something they discussed with their partner(s).
INtRODuctION ActIvItywalk & Share / Emergency
bicycle handling
iNTr
oD
uc
Tio
N A
cTi
viTy
>w
Alk
& S
HAr
e /
emer
geN
cy
bic
ycle
HAN
Dli
Ng
•161

Assessment 1. Successful completion of the Emergency Bicycle Handling worksheet.
safety 1. Do not let students run or walk too quickly if carrying pencils.
differentiating intermediate and Advancedinstruction • Set up lanes that students need to travel in. Include stop signs
and intersections.
Best practice 1. Complete this activity when weather prevents riding outdoors.
iNTr
oD
uc
Tio
N A
cTi
viTy
>w
Alk
& S
HAr
e /
emer
geN
cy
bic
ycle
HAN
Dli
Ng
•162

wO
Rk
ShEE
t
directions: Please answer the questions below.
1. What kinds of emergencies might you encounter on a bicycle?
2. What types of things should you know how to do on your bicycle in case there is anemergency?
3. Why is it important to practice emergency bicycle handling skills?
4. What should you do before each ride to protect your head in case you crash?
Student Date
EmERGENcy bIcyclE hANDlING wORkShEEt
wo
rkSH
eeT
>em
erg
eNc
y bi
cyc
le H
AN
Dli
Ng
•163

EmERGENcy bIcyclE hANDlING wORkShEEtANSwER kEy
1. What kinds of emergencies might you encounter on a bicycle? responses include:
Car turning in front of yourock, hole, etc. in the riding path that should be avoidedCar door opening in front of youdog running into the street directly in front of youother answers may be accepted.
2. What types of things should you know how to do on your bicycle in case there is anemergency?
responses include: turn left or right quicklystop quicklymaneuver the bicycle around an obstacle or hazard
3. Why is it important to practice emergency bicycle handling skills?you need to know what to do and be able to do it without much time for thinking.
4. If you are in an emergency situation, what is the most important thing that you could do toprevent a brain injury?
Wear a bicycle helmet
wo
rkSH
eeT
>em
erg
eNc
y bi
cyc
le H
AN
Dli
Ng
•164

Ac
tIv
Ity
timeframe Beginner: 10 -15 minutesintermediate: 10 minutesAdvanced: 5-7 minutes
objectives At the conclusion of this activity the student will be able to: 1. Demonstrate exceptional or reliable hazard-avoidance as measured by
the hazard-avoidance rubric. (Psychomotor) 2. Demonstrate exceptional or reliable social behavior as measured by
the social behavior rubric. (Affective)
national standards Standard 1 Standard 2Standard 3Standard 4
equipment • Helmets• Head barriers• Bicycles• Bicycle pump• Allen wrench • Cones, domes, polyspots or chalk to mark riding course• Red floor tape
teacher overview This activity teaches and/or strengthens the emergency bicycle handlingskill of hazard-avoidance in a limited space. The most important aspectof this skill is to avoid the obstacle with the front tire. If the front tire hitsan object, a fall or loss of control of the bicycle is very common. This skillhelps students strengthen balance and bicycle handling. This activity caneasily be adapted to challenge students with more advanced riding skillsby moving the objects closer together.
preparation 1. Designate a riding course that enables the teacher to see the studentsat all times. This will enable students to ride throughout the classperiod, even when they are not performing skills.
2. Set up a “chute” using cones, to indicate where the student willperform the skill and the teacher will conduct the assessment. Thisarea should also serve as a teaching station in which the skill will bedemonstrated for the students and where students will return wheninstructed.
3. Within the chute, place 8-10 cones, domes or polyspots about onebicycle length apart in a straight line. Refer to DifferentiatingInstruction for suggestions on set up for varying skill levels.
SkIll-bASED ActIvItyhazard Avoidance
Skil
l-bA
SeD
Ac
Tivi
Ty>
HA
zArD
-Avo
iDA
Nc
e
•165

diagram: hazard-Avoidance Course
4. If bicycles have both front and rear brakes: Wrap the left handle of thebicycle with red floor tape to discourage students from using the frontbrake, until proper braking skill is taught.
5. Practice the hazard-avoidance skill before demonstrating to students.
directions 1. Introduce this activity using the following prompt:You can encounter many different types of hazards when you are riding abicycle such as a rock, a hole, a pile of glass etc. If you were to ride up toone of these hazards you would ride around them. But what if you hadvery little space in which to ride around the obstacle? Knowing how toavoid a hazard in a limited space is an important emergency bicyclehandling skill. The most important aspect of this skill is to avoid theobstacle with the front tire. If the front tire were to hit something, a fall orloss of control of the bicycle is very common. So today, we will bepracticing hazard-avoidance.
2. Use the following sample questions to prompt students’ thinking aboutthe content in this activity.
Q: What types of obstacles do you encounter when you ride your bicycle? A: Any of the following:
• Railroad tracks• Potholes• Storm drains• Gravel• Wet leaves• Other responses may be accepted
Q: What do you do when you come across a rock or a pothole in the road?A: Turn and avoid hitting it with your front wheel
Skil
l-bA
SeD
Ac
Tivi
Ty>
HA
zArD
-Avo
iDA
Nc
e
•166
polyspots

Q: What could be dangerous about not avoiding obstacles in the road? A: Any of the following:
• Lose control and fall• Fly over the handlebars• Get a flat tire• Other responses may be accepted
Q: What could be dangerous about avoiding obstacles in the road? A: You could veer the bicycle too far and enter another lane where there
may be traffic.
3. Complete the following steps #4-10 if Helmet Fit and ABC QuickCheck have not been completed as part of the current day’s lesson;otherwise proceed to step #11.
4. Divide students into groups of two or three.
5. Instruct students to fit helmets and have partner(s) check if the helmetis fitted correctly.
6. Instruct students to retrieve bicycles according to number assigned.
7. Instruct one student to complete the ABC Quick Check while the otherstudent observes to ensure that the check was completed properly,and to provide prompts if an item was missed.
8. Switch roles so the other partner(s) completes the ABC Quick Check.
9. Instruct pairs to proceed to the riding area to meet teacher afterstudents have successfully completed the helmet fit and ABC QuickCheck.
10. Inspect helmets and instruct students to proceed on the riding coursefor the ‘Check’ of the ABC Quick Check and when finished return tothe teaching station.
11. Explain and demonstrate the hazard-avoidance skill to students inthe teaching station, reinforcing the following points. Riders should:• Ride in a straight line until they are very close to the obstacle (rock,
hole, etc.).• Turn the handlebars quickly just before the bicyclist gets to the
obstacle, so the wheel goes around the obstacle. • Steer the bicycle to the other direction quickly.
12. Inform students that the turning of the bicycle should NOT result in alarge, sweeping turn; their bodies should not lean; and only thehandlebar and front tire should turn.
13. Remind students that the entire maneuver takes just a split second.
14. Instruct students to begin riding the designated course with a power start.
Skil
l-bA
SeD
Ac
Tivi
Ty>
HA
zArD
-Avo
iDA
Nc
e
•167

15. Instruct students to perform the Rock Dodge in the ready position and at a moderate speed, only upon entering the chute.
16. Provide feedback to students so they can improve their performance.
17. Instruct students to repeat activity steps #14 & 15 at a slow speed.
18. Instruct students should repeat activity steps #14 & 15 at a fast speed.
Assessment 1. Assess hazard-avoidance of each student using the following rubric.
perFormANce rubric: HAzArD AvoiDANce
exceptional reliable inconsistent struggling/survival
Student is able toquickly and safelymaneuver the frontwheel around theobstacle, by turninghandlebars quicklyone direction andthen the other,without creating alarge sweeping turn;
Only the fronthandlebar turns(small arc) and theback tire may goover the obstacle oron the other side(either isappropriate);
Student is able tostay seated andmaintain balancethroughout thismaneuver.
Student is able toquickly and safelymaneuver the frontwheel around theobstacle, by turninghandlebars quicklyone direction andthen the other;
Student may createtoo large of a turn inthe process, resultingfrom overturning;
The back tire may goover the obstacle oron the other side(either isappropriate);
Student is able tostay seated, but mayhave some troublewith balance duringthis maneuver.
Student is able tododge the obstacle,but does so slowlyand/or less safely;
There is a large,sweeping turn duringthe maneuver due tooverturning the frontwheel;
The front and backtire may go over theobstacle; Student hasdifficulty withbalance during thismaneuver (may needto put feet down) andmay or may notremain seated.
Student is unableto control the bikewell enough toperform a RockDodge and ridesover the obstacle;
Student may needmore space inorder to performthis maneuver, andmakes very widesweeping turns.
Skil
l-bA
SeD
Ac
Tivi
Ty>
HA
zArD
-Avo
iDA
Nc
e
•168

2. Assess the performance of social behavior for each student using the following rubric.
perFormANce rubric: SociAl beHAvior
exceptional reliable inconsistent struggling/survival
Student is respectfultoward classmates,teacher, &equipment;
Student receives anduses feedback fromteacher and peers ina courteous manner;
Student participatesfully, without teacherprompting orsupervision;
Student is able towork cooperativelyand productivelywith classmates,including duringpeer assessments;
Student perseveres,even throughdifficultskills/activities, andmaintains a positiveattitude;
Student iscommitted tolearning;
Student iscommitted toengaging in cyclingin a safe manner, andkeeping allclassmates safeduring the cyclingunit.
Student is respectfultoward classmates,teacher, &equipment;
Student receives anduses feedback fromteacher and peers ina courteous manner;
Student participatesfully, but needs someteacher promptingand/or supervision;
Participates in mostclass activities at anappropriate andproductive level;
Student is most oftenable to workcooperatively andproductively withclassmates,including during peerassessments;
Student is able towork hard and notget frustrated withsetbacks;
Student is committedto learning;
Student is committedto engaging in cyclingin a safe manner, andkeeping all classmatessafe during thecycling unit.
Student may notalways be respectfultoward classmates,teacher, &equipment;
Student may listen tofeedback fromteacher or peers, butmay not attemptand/or have difficultyapplying it;
Student requiressome teachersupervision, but doesexhibit some self-control at times;
Student demonstratesthe ability to workcooperatively andproductively withclassmates, but mayneed teacherdirection orsupervision;
Student participatesin most classactivities;
Student is willing totry, but may getfrustrated withsetbacks, and poutand/or verbalizefrustration;
Student mayfluctuate betweenriding safely andunsafely at times.
Student maystruggle with beingrespectful towardclassmates,teacher, &equipment and/orshow anger and/orblame others forcycling mishaps;
Student does notlisten to feedbackfrom teacher orpeers, and does notattempt to apply it;
Student requiresongoingsupervision anddoes not ridesafely;
Student may beunprepared andshow very littleinterest in learningor the activity;
Student becomesfrustrated easilyand may quitparticipating.
Skil
l-bA
SeD
Ac
Tivi
Ty>
HA
zArD
-Avo
iDA
Nc
e
•169

safety 1. Follow the 2-2-2-2 Rule (2 wheels on the ground; 2 feet on the pedals;2 hands on the handlebars; 2 fingers on the brake levers) while ridingthe bicycle.
2. Use the rear brake only to stop the bicycle, until the skill leveladvances to be able to safely use the front brake also.
3. Instruct students to ride the bicycles on the designated course anddemonstrate the skill components in the “chute.”
4. Instruct students to keep at least three-bikes-lenghts between eachrider.
differentiating Beginnerinstruction • Make the distance between the cones/domes/polyspots stations from
one bicycle length to at least two bicycle lengths or more, if necessary.
intermediate• Decrease the distance between the cones/domes/polyspots stations
from one bicycle length to one-half a bicycle length.
Advanced• Increase the difficulty by instructing students to avoid the obstacle
with front tire passing on one side of the object and the rear tire passing on the other side.
Best practices 1. Provide a discreet opportunity and safe environment for students toshare information pertaining to their ability and comfort level forriding a bicycle.
2. Always complete the Helmet Fit and ABC Quick Check at thebeginning of every class in which the students will be riding. The useof peers/partners to practice, inspect, and correct each other willmake the most efficient use of class time and reinforce bicycle safetyskills. This should not replace teacher assessment.
3. Review the three-bicycles-length rule to promote safe riding. Thethree-bicycles-length rule is a reminder of keeping a safe distancebetween bicyclists while riding single-file. To help maintain properspacing, have a marker on the course that allows students to see whenit is their turn to go: when the person in front of them gets to themarker, the next student may start riding.
Skil
l-bA
SeD
Ac
Tivi
Ty>
HA
zArD
-Avo
iDA
Nc
e
•170

Ac
tIv
Ity
timeframe Beginner: N/Aintermediate: 20 minutesAdvanced: 15 minutes
objectives At the conclusion of this activity the student will be able to:1. Demonstrate an exceptional or reliable Quick Stop as measured by the
hazard-avoidance rubric. (Psychomotor) 2. Demonstrate exceptional or reliable social behavior as measured by
the social behavior rubric. (Affective)
national standards Standard 1 Standard 2Standard 3Standard 4
equipment • Helmets• Head barriers• Bicycles• Bicycle pump• Allen wrench • Cones, domes, polyspots or chalk to mark riding course• Red floor tape
teacher overview This activity teaches and/or strengthens the emergency bicycle handlingskill of stopping quickly in a limited space. Learning to stop a bicycle in acontrolled manner is one of the most important safety maneuvers that canbe learned. A typical braking maneuver tends to use more rear brakingpower, often resulting in a skid. The drawback to this type of braking isthat it requires a greater braking distance to stop and the rider does nothave as much control over the bicycle. The quick stop enables the rider tomake an immediate stop, by using both the front and rear brakes andrequires a much shorter braking distance.
preparation 1. Designate a riding course that enables the teacher to see the studentsat all times. This will enable students to ride throughout the classperiod, even when they are not performing skills.
2. Set up a “chute” using cones, to indicate where the student willperform the skill and the teacher will conduct the assessment. Thisarea should also serve as a teaching station in which the skill will bedemonstrated for the students and where students will return wheninstructed.
3. Within the chute, place 4 cones, domes or polyspots creating a squarethat is the length of about one bicycle.
4. Practice the Quick Stop skill before demonstrating to students.
SkIll-bASED ActIvItyQuick Stop
Skil
l-bA
SeD
Ac
Tivi
Ty>
qu
ick
STo
p
•171

directions 1. Introduce this activity using the following prompt:
Learning to stop a bicycle in a controlled manner is one of the mostimportant safety maneuvers that can be learned. A typical brakingmaneuver tends to use more rear braking power, often resulting in a skid.The drawback is that it requires a greater braking distance to stop andthe rider does not have as much control over the bicycle. This type ofbraking would not work well if you had to stop in an emergency without alot of room. So today, we will be learning about the Quick Stop. TheQuick Stop enables the rider to make an immediate stop, by using boththe front and rear brakes and requires a much shorter braking distance.
2. Use the following sample questions to prompt students’ thinking aboutthe content in this activity.
Q: Why might you have to stop suddenly on a bicycle?A: Any of the following:
• A vehicle turns in front of you • A child or dog runs out in front of you • Other responses may be accepted
Q: if you have ever stopped suddenly, what did it feel like?A: Any of the following:
• Like I might fly over the handlebars• Out of control• Like I might fall• Other responses may be accepted
3. Complete the following steps #4-10 if Helmet Fit and ABC QuickCheck have not been completed as part of the current day’s lesson;otherwise proceed to step #11.
Skil
l-bA
SeD
Ac
Tivi
Ty>
qu
ick
STo
p
•172
diagram: Quick stop Course

4. Divide students into groups of two or three.
5. Instruct students to fit helmets and have partner(s) check if the helmetis fitted correctly.
6. Instruct students to retrieve bicycles according to number assigned.
7. Instruct one student to complete the ABC Quick Check while the otherstudent observes to ensure that the check was completed properly andto provide prompts if an item was missed.
8. Switch roles so the other partner(s) completes the ABC Quick Check.
9. Instruct pairs to proceed to the riding area to meet teacher after students havesuccessfully completed the helmet fit and ABC Quick Check.
10. Inspect helmets and instruct students to proceed on the riding coursefor the ‘Check’ of the ABC Quick Check and when finished return tothe teaching station.
11. Explain and demonstrate the Quick Stop skill to students in theteaching station, reinforcing the following points. Riders should:• Position body weight over the rear tire. The position is similar to the
ready position, but more body weight should be over the rear tire.This is critical, so the bicyclist will not flip over the handlebars.
• Apply equal pressure to both brakes.• Decrease the pressure on the rear brake if
the rear wheel begins to skid.• Decrease the pressure on the front brake if the
rear wheel begins to come off the ground.
12. Instruct students to jog, next to the bicycle and apply just the rearbrake. Observe how the bicycle stops.
13. Instruct students to jog next to the bicycle, apply just the front brake.Observe how the bicycle stops.
14. Instruct students to jog next to the bicycle, and equally apply both thefront and rear brakes. Observe how the bicycle stops. (Red floor tapeis taken off of front brake to teach this skill.)
Skil
l-bA
SeD
Ac
Tivi
Ty>
qu
ick
STo
p
•173
emergency Quick stop

cue:Stop on a dime
15. Instruct students to begin riding the designated course with a power start.
16. Instruct students to perform the Quick Stop and stop within thesquare in the chute. (cue)
17. Provide more practice opportunities by instructing students to ridemultiple laps around the designated riding course. While students areriding, blow a whistle to signal students to perform the Quick Stopand then continue riding.
Assessment 1. Assess Quick Stop of each student using the following rubric.
perFormANce rubric: quick STop
exceptional reliable inconsistent struggling/survival
Student is able tostop quickly andmaintain balance(body back over reartire) so that she canthen continue ridingwithout placing herfeet on the ground;
Student uses equalpressure on bothfront and rearbrakes;
Student is able tojudge when to applymore or lesspressure to onebrake, given thesituation (rear wheelskidding or rearwheel leaving theground).
Student is able to stopquickly and maintainbalance (body backover rear tire) on mostattempts;
Student may not be able to maintainbalance well enoughafter stopping thatshe can then continueriding, withoutplacing her feet on the ground;
Student is able to useequal pressure onboth front and rearbrakes;
Student may havedifficulty judgingwhen to apply moreor less pressure onone brake, given thesituation (rear wheelskidding or rearwheel leaving theground).
Student is able tostop, but not quicklyenough for anemergency situation;
Student has difficultymaintaining balanceand needs to put herfeet on the ground;
Student may not beable to keep bodyweight over backtire.
Student does notfully understand howto apply equalpressure on bothbrakes, and typicallyhas more pressureon one brake,causing the bike toskid or the rearwheel to leave theground.
Student is unableto perform a QuickStop and mustcontinue to workon controlledbraking;
Student may notunderstand when itis appropriate touse the front brake,and does so in anunsafe manner.
Skil
l-bA
SeD
Ac
Tivi
Ty>
qu
ick
STo
p
•174

2. Assess the performance of social behavior for each student using the following rubric.
perFormANce rubric: SociAl beHAvior
exceptional reliable inconsistent struggling/survival
Student is respectfultoward classmates,teacher, andequipment;
Student receives anduses feedback fromteacher and peers ina courteous manner;
Student participatesfully, without teacherprompting orsupervision;
Student is able towork cooperativelyand productivelywith classmates,including duringpeer assessments;
Student perseveres,even throughdifficultskills/activities, andmaintains a positiveattitude;
Student iscommitted tolearning;
Student iscommitted toengaging inbicycling in a safemanner, and keepingall classmates safeduring the bicyclingunit.
Student is respectfultoward classmates,teacher, andequipment;
Student receives anduses feedback fromteacher and peers ina courteous manner;
Student participatesfully, but needs someteacher promptingand/or supervision;
Participates in mostclass activities at anappropriate andproductive level;
Student is most oftenable to workcooperatively andproductively withclassmates,including during peerassessments;
Student is able towork hard and notget frustrated withsetbacks;
Student is committedto learning;
Student is committedto engaging inbicycling in a safemanner, and keepingall classmates safeduring the bicyclingunit.
Student may notalways be respectfultoward classmates,teacher, andequipment;
Student may listen tofeedback fromteacher or peers, butmay not attemptand/or have difficultyapplying it;
Student requiressome teachersupervision, but doesexhibit some self-control at times;
Studentdemonstrates theability to workcooperatively andproductively withclassmates, but mayneed teacherdirection orsupervision;
Student participatesin most classactivities;
Student is willing totry, but may getfrustrated withsetbacks, and poutand/or verbalizefrustration;
Student mayfluctuate betweenriding safely andunsafely at times.
Student maystruggle with beingrespectful towardclassmates,teacher, andequipment and/orshow anger and/orblame others forcycling mishaps;
Student does notlisten to feedbackfrom teacher orpeers, and does notattempt to apply it;
Student requiresongoingsupervision anddoes not ridesafely;
Student may beunprepared andshow very littleinterest in learningor the activity;
Student becomesfrustrated easilyand may quitparticipating.
Skil
l-bA
SeD
Ac
Tivi
Ty>
qu
ick
STo
p
•175

safety 1. Follow the 2-2-2-2 Rule (2 wheels on the ground; 2 feet on the pedals;2 hands on the handlebars; 2 fingers on the brake levers) while ridingthe bicycle.
2. Instruct students to ride the bicycles on the designated course anddemonstrate the skill components in the “chute.”
3. Instruct students to keep at least three-bikes-lenghts between eachrider.
differentiating Adapted and Beginnerinstruction • This skill is difficult to perform. It should be taught only to
intermediate/advanced level riders.• Continue to practice controlled braking.
intermediate• When performing the quick stop, students can place one or both feet
on the ground after stopping and then continue riding.
Advanced• When performing the quick stop, students should be able to stop
without placing feet on the ground and then continue riding.
Best practices 1. Provide a discreet opportunity and safe environment for students toshare information pertaining to their ability and comfort level forriding a bicycle.
2. Always complete the Helmet Fit and ABC Quick Check at thebeginning of every class in which the students will be riding. The useof peers/partners to practice, inspect, and correct each other willmake the most efficient use of class time and reinforce bicycle safetyskills. This should not replace teacher assessment.
3. Review the three-bicycles-length rule to promote safe riding. Thethree-bicycles-length rule is a reminder of keeping a safe distancebetween bicyclists while riding single-file. To help maintain properspacing, have a marker on the course that allows students to see whenit is their turn to go: when the person in front of them gets to themarker, the next student may start riding.
Skil
l-bA
SeD
Ac
Tivi
Ty>
qu
ick
STo
p
•176

Ac
tIv
Ity
timeframe Beginner: N/Aintermediate: 20 minutesAdvanced: 15 minutes
objectives At the conclusion of this activity the student will be able to:1. Demonstrate an exceptional or reliable Instant Turn as measured by
the hazard-avoidance rubric. (Psychomotor)2. Demonstrate exceptional or reliable social behavior as measured by
the social behavior rubric. (Affective)
national standards Standard 1 Standard 2Standard 3Standard 4
equipment • Helmets• Head barriers• Bicycles• Bicycle pump• Allen wrench • Cones, domes, polyspots or chalk to mark riding course• Red floor tape
teacher overview This activity teaches and/or strengthens the emergency bicycle handlingskill of turning quickly in a limited space. This skill can be difficult tolearn. The instant turn is a very subtle movement. When done correctlythe rider may briefly feel a loss of balance into the turn.
preparation 1. Designate a riding course that enables the teacher to see the studentsat all times. This will enable students to ride throughout the classperiod, even when they are not performing skills.
2. Set up a “chute” using cones, to indicate where the student willperform the skill and the teacher will conduct the assessment. Thisarea should also serve as a teaching station in which the skill will bedemonstrated for the students, and where students will return wheninstructed.
3. At the end of the chute, ensure that students can safely turn right or left.
4. If bicycles have both front and rear brakes: Wrap the left handle of thebicycle with red floor tape to discourage students from using the frontbrake, until proper braking skill is taught.
5. Practice the Instant Turn skill before demonstrating to students.
SkIll-bASED ActIvItyInstant turn
Skil
l-bA
SeD
Ac
Tivi
Ty>
iNST
AN
T Tu
rN
•177

directions 1. Introduce this activity using the following prompt:
Learning to turn a bicycle very quickly, in a small space can be a veryimportant skill to use in an emergency, such as a car turning in front ofyou, when you would be unable to perform a normal turn. This skill canbe difficult to learn. The Instant Turn is a very subtle movement. Whendone correctly you may briefly feel a loss of balance into the turn.
2. Use the following sample questions to prompt students’ thinking aboutthe content in this activity.
Q: Can you think of a time when you might need to turn very quickly toavoid a crash?
A: Any of the following: • A vehicle turns in front of you • A car door opens in front of you• Other responses may be accepted
Q: What would you do if a car turned in front of you at an intersection?A: Either response
• Instant Turn• Quick Stop
3. Complete steps #4-10 that follow, if Helmet Fit and ABC Quick Checkhave not been completed as part of the current day’s lesson, otherwiseproceed to step #11.
4. Divide students into groups of two or three.
5. Instruct students to fit helmets and have partner(s) check if the helmet isfitted correctly.
6. Instruct students to retrieve bicycles according to number assigned.
Skil
l-bA
SeD
Ac
Tivi
Ty>
iNST
AN
T Tu
rN
•178
right turn left turn
diagram: instant turn Course

7. Instruct one student to complete the ABC Quick Check while thepartner observes to ensure that the check was completed properly, andto provide prompts if an item was missed. Switch roles.
8. Instruct pairs to proceed to the riding area to meet teacher after studentshave successfully completed the helmet fit and ABC Quick Check.
9. Inspect helmets and instruct students to proceed on the riding coursefor the ‘Check’ of the ABC Quick Check and when finished return to theteaching station.
10. Explain and demonstrate the Instant Turn skill to students in theteaching station, reinforcing the following points. Riders should:• Turn the front wheel the opposite way that you want to turn. This will
cause the rider and the bicycle to automatically lean in the directionthe rider wants to turn (this is a bit counterintuitive).
• Then quickly turn the wheel in the direction that you want to go. This will be the direction that your body and bicycle are already leaning.
11. Instruct students to begin riding the designated course with a power start.
12. Instruct students to turn right, using the technique for a typical rightturn, at the end of the chute and continue riding the designated ridingcourse.
13. Instruct students to turn left, using the technique for an Instant Turn,at the end of the chute and continue riding the designated ridingcourse and return to the teaching station.
14. Ask students to comment on how each turn felt different.
15. Instruct students to reverse the direction that they have been ridingthe course and repeat steps #12-15.
Skil
l-bA
SeD
Ac
Tivi
Ty>
iNST
AN
T Tu
rN
•179

Assessment 1. Assess Instant Turn of each student using the following rubric.
perFormANce rubric: iNSTANT TurN
exceptional reliable inconsistent struggling/survival
Student is able tocorrectly and safelyperform the InstantTurn, and can do soin a quick manner;
Student first turnsfront wheel in theopposite direction,before turning in thedirection he wants totravel, and he can dothis at anappropriate speed;
Student is able tomaintain balanceafter the turn, andcan continue ridingwithout problems.
Student is able tocorrectly and safelyperform the InstantTurn, but mayperform thismaneuver moreslowly;
Student first turnsfront wheel in theopposite direction,before turning in thedirection he wants totravel;
Student is able tomaintain balanceafter the turn, andcan continue ridingwithout problems.
Student has difficultyperforming theInstant Turn, andcannot turn thewheel in the oppositedirection of the turnunless riding veryslowly;
Student may havedifficultymaintaining balanceafter the turn, andmay not be able tocontinue riding outof the turn.
Student is unableto perform anInstant Turn, andshould continueworking on makingnormal speed rightand left hand turns;
Student may notunderstand when itis appropriate tomake an InstantTurn, and does soin an unsafemanner.
Skil
l-bA
SeD
Ac
Tivi
Ty>
iNST
AN
T Tu
rN
•180

2. Assess the performance of social behavior for each student using the following rubric.
perFormANce rubric: SociAl beHAvior
exceptional reliable inconsistent struggling/survival
Student is respectfultoward classmates,teacher, andequipment;
Student receives anduses feedback fromteacher and peers ina courteous manner;
Student participatesfully, without teacherprompting orsupervision;
Student is able towork cooperativelyand productivelywith classmates,including duringpeer assessments;
Student perseveres,even throughdifficultskills/activities, andmaintains a positiveattitude;
Student iscommitted tolearning;
Student iscommitted toengaging inbicycling in a safemanner, and keepingall classmates safeduring the bicyclingunit.
Student is respectfultoward classmates,teacher, andequipment;
Student receives anduses feedback fromteacher and peers ina courteous manner;
Student participatesfully, but needs someteacher promptingand/or supervision;
Participates in mostclass activities at anappropriate andproductive level;
Student is most oftenable to workcooperatively andproductively withclassmates,including during peerassessments;
Student is able towork hard and notget frustrated withsetbacks;
Student is committedto learning;
Student is committedto engaging inbicycling in a safemanner, and keepingall classmates safeduring the bicyclingunit.
Student may notalways be respectfultoward classmates,teacher, andequipment;
Student may listen tofeedback fromteacher or peers, butmay not attemptand/or have difficultyapplying it;
Student requiressome teachersupervision, but doesexhibit some self-control at times;
Studentdemonstrates theability to workcooperatively andproductively withclassmates, but mayneed teacherdirection orsupervision;
Student participatesin most classactivities;
Student is willing totry, but may getfrustrated withsetbacks, and poutand/or verbalizefrustration;
Student mayfluctuate betweenriding safely andunsafely at times.
Student maystruggle with beingrespectful towardclassmates,teacher, andequipment and/orshow anger and/orblame others forbicycling mishaps;
Student does notlisten to feedbackfrom teacher orpeers, and does notattempt to apply it;
Student requiresongoingsupervision anddoes not ridesafely;
Student may beunprepared andshow very littleinterest in learningor the activity;
Student becomesfrustrated easilyand may quitparticipating.
Skil
l-bA
SeD
Ac
Tivi
Ty>
iNST
AN
T Tu
rN
•181

safety 1. Follow the 2-2-2-2 Rule (2 wheels on the ground; 2 feet on the pedals;2 hands on the handlebars; 2 fingers on the brake levers) while ridingthe bicycle.
2. Instruct students to ride the bicycles on the designated course anddemonstrate the skill components in the “chute.”
3. Instruct students to keep at least three-bicycles-lengths between eachrider.
differentiating Adapted and Beginnerinstruction • This skill is difficult to perform. It should be taught only to
intermediate/advanced level riders.• Continue to practice left/right turning.
intermediate and Advanced• As students are about to exit the chute, call out left or right for
students to perform an Instant Turn in that direction.
Best practices 1. Provide a discreet opportunity and safe environment for students toshare information, pertaining to their ability and comfort level forriding a bicycle.
2. Always complete the Helmet Fit and ABC Quick Check at thebeginning of every class if the students will be riding. The use ofpeers/partners to practice, inspect, and correct each other will makethe most efficient use of class time and reinforce bicycle safety skills.This should not replace teacher assessment.
3. Review the three-bicycles-length rule to promote safe riding. Thethree-bicycles-length rule is a reminder of keeping a safe distancebetween bicyclists while riding single-file. To help maintain properspacing, have a marker on the course that allows students to see whenit is their turn to go: when the person in front of them gets to themarker, the next student may start riding.
Sec
Tio
N 1
>c
urr
icu
lum
ove
rvie
w
•182

Ac
tIv
Ity
clOSuRE ActIvItywalk & Share
clo
Sure
Ac
Tivi
Ty>
wA
lk &
SH
Are
•183
timeframe Beginner: 3-5 minutesintermediate: 3-5 minutesAdvanced: 3-5 minutes
objective At the conclusion of the activity, the student will be able to:1. Describe key concepts from Unit 3, hazard-avoidance, Quick Stop
and Instant Turn, as measured by completion of the Emergency Skillsworksheet. (Cognitive)
national standards Standard 2Standard 4
equipment • Emergency Bicycle Skills worksheet• Pencils
teacher overview This activity prompts the students to think about what they have learned duringUnit 3, by asking questions about emergency bicycle handling skills. By workingin groups to respond to the questions, the brainstorming will initiate peerdiscussion about emergency bicycle handling skills.
preparation Make appropriate number of copies of Emergency Skills worksheet
directions 1. Introduce this activity using the following prompt:
We have now completed Unit 3 – “Emergency Bicycle Handling.” All of theskills learned in this module will help you better control your bicycle in anemergency situation. hazard-avoidance, Quick Stop and Instant Turn can bechallenging skills to master and should be periodically practiced.
2. Divide students into pairs.
3. Ask students to walk the perimeter of the gym. Explain that they will beneed to answer the questions on the Emergency Bicycle Skills worksheet bydiscussing responses with their partner when walking.
4. Instruct students to stop when the whistle blows, and be prepared to share something that they discussed with their partner.
Assessments 1. Successful completion of the Emergency Bicycle Skills worksheet.
safety 1. Do not let students run or walk too quickly if carrying pencils.
differentiating All levelsinstruction • Choose appropriate questions based on skill and ability level of students.
intermediate and Advanced• Set up lanes that students need to travel in. Include stop signs and
intersections.


wO
Rk
ShEE
t
directions: Please answer the following questions to the best of your ability.
1. is used to avoid an obstacle in the path.
2. Please explain two critical elements of (from question 1).
3. Sometimes, it may be necessary to perform a . Both
may be applied equally during a , but if a tire
skids or the front wheel comes off the ground, the bicyclist may need to release pressure
on one .
4. Please explain two critical elements of the Quick Stop.
5. Please provide two examples of when a bicyclist might need to perform an Instant Turn.
6. Please explain two critical elements of the Instant Turn.
Student Date
EmERGENcy bIcyclE SkIllSwORkShEEt
wo
rkSH
eeT
>em
erg
eNc
y bi
cyc
le S
kil
lS
•185

EmERGENcy bIcyclE SkIllSwORkShEEtANSwER kEy
1. hazard Avoidance is used to avoid an obstacle in the path.
2. Please explain two critical elements of hazard Avoidance (from question 1).
Front tire avoids obstacle (rear tire can hit the obstacle) small handlebar movements
3. Sometimes, it may be necessary to perform a Quick stop. Both brakes may be appliedequally during a Quick stop, but if a tire skids or the front wheel comes off the ground, thebicyclist may need to release pressure on one brake.
4. Please explain two critical elements of the Quick Stop.
Body position is similar to the ready position, but more body weight should be over the rear tire.
Apply equal pressure to both brakes.
5. Please provide two examples of when a bicyclist might need to perform an Instant Turn.
A car turns in front of them.
A dog runs out in front of them.
6. Please explain two critical elements of the Instant Turn.
turn the front wheel the opposite way that you want to turn.
Quickly turn the wheel in the direction that you want to go.
wo
rkSH
eeT
>em
erg
eNc
y bi
cyc
le S
kil
lS
•186

Ac
tIv
Ity
timeframe Beginner: 10-15 minutesintermediate: 10 minutesAdvanced: 10 minutes
objective At the conclusion of this activity the student will be able to:1. List and describe key concepts from Unit 3 that illustrate a clear
understanding of the need to have emergency bicycle handling skillsas measured by providing responses to questions in journals.(Cognitive)
national standard Standard 2
equipment • Journals or portfolios for each student
teacher overview This activity prompts the students to think about what they have learnedduring the Unit 3 by asking questions about emergency bicycle handlingskills and providing written responses in journals.
preparation 1. Determine method for distributing, collecting and storing portfolios or journals before beginning this activity.
directions 1. Introduce this activity using the following prompt:
We have now completed Unit 3 – “Emergency Bicycle Handling.” All ofthe skills learned in this module to help you better controlof yourbicycle in an emergency situation. Hazard-avoidance, Quick Stop andInstant Turn can be challenging skills to master and should beperiodically practiced.
2. Provide portfolios or journals for students to write in.
3. Choose a location where students can sit comfortably and completethe assessment if completing the journal writing activity in class.
4. Use the following sample questions to prompt students’ thinking aboutthe content presented in this unit.
Q: What are the three emergency bicycle handling skills you learned inunit 3?
A: Hazard-avoidance, Quick Stop and Instant Turn
Q: Why are these three skills important?A: Sometimes there are situations where typical stopping or turning
techniques are not possible because of time or space.
clOSuRE ActIvItyJournal writing
clo
Sure
Ac
Tivi
Ty>
jou
rNA
l w
riTi
Ng
•187

Q: What are some situations where you would use these emergencyskills?
A: Responses can include:• A car turns quickly in front of you• You are riding with traffic to your left and there is a large rock in
front of you• A dog runs out in front of you• Other responses may be accepted
Q: describe the instant turn technique A: Turn the front wheel the opposite way that you want to turn. This will
cause you and the bicycle to automatically lean in the direction youwant to turn. Then quickly turn the wheel in the direction that youwant to go. This will be the direction that your body and bicycle arealready leaning. You will perform the turn quickly in a very limitedspace.
Assessment 1. Be thoughtful about assessing journal writing, particularly whenasking open-ended “opinion-type” questions. Not all students mayenjoy bicycling and should be allowed to voice their opinions. Toencourage honest answers, refrain from grading thoughts andopinions. However, this should not be an excuse for not learning the material.
2. Consider assessing writing skills and integrate literacy (spelling, useof correct grammar and complete sentences, etc.) in journal writing.Some teachers may want to specify length of answers for specificquestions.
differentiating All levelsinstruction • Choose questions that are appropriate for the age and ability level
of students. • Some students may need to share their answers verbally with a
teacher if they have difficulty writing. • Some students may need the teacher or an aide to read the questions.
Best practices 1. Complete this activity in classroom settings, health classes or scienceclasses if cross-curricular units are planned or to maximize ridingtime in physical education class.
2. Assign the journal writing for Unit 3 as homework to maximize ridingtime in physical education class.
clo
Sure
Ac
Tivi
Ty>
jou
rNA
l w
riTi
Ng
•188
![Traffic Regulation based Congestion Control Algorithm in ...jihmsp/2014/vol5/JIH-MSP-2014-02-007.pdf · control, for example, traffic control [3], dynamic routing [4], active queue](https://img.pdfslide.us/doc/110x75/5fe0a5020938eb5fdb6fa549/traifc-regulation-based-congestion-control-algorithm-in-jihmsp2014vol5jih-msp-2014-02-007pdf.jpg)