Embed Size (px)
Citation preview
1
RHIC
100_
IB_F
A_W
EB_2
1061
3
2 YEAR WARRANTYRHIC100
InstructIons & Warranty
CuliNARY CollECTioN iCE CREAm & YoghuRT mAkER
2
Spectrum Brands Australia Pty LtdLocked Bag 3004 BraesideVictoria 3195 Australia
Customer Service in AustraliaTollFree: 1800 623 118Email: [email protected]: www.spectrumbrands.com.au
Spectrum Brands New Zealand LtdPO Box 9817 NewmarketAuckland 1149 New Zealand
Customer Service in New ZealandTollFree: 0800 736 776Email: [email protected]: www.spectrumbrands.co.nz
Spectrum Brands Australia Pty Ltd and Spectrum Brands New Zealand LtdWarranty Against Defects
In this warranty:Australian Consumer Law means the Australian consumer law set out in Schedule 2 to the Competition and Consumer Act 2010;
CGA means the New Zealand Consumer Guarantees Act 1993;Goods means the product or equipment which was accompanied by this warranty and purchased in Australia or New Zealand, as the case may be;Manufacturer, We or us means:
1. for Goods purchased in Australia, Spectrum Brands Australia Pty Ltd ABN, 78 007 070 573; or2. for Goods purchased in New Zealand, Spectrum Brands New Zealand Ltd, as the case may be,
contact details as set out at the end of this warranty;
Supplier means the authorised distributor or retailer of the Goods that sold you the Goods in Australia or in New Zealand; andYou means you, the original end-user purchaser of the Goods.1. Our goods come with guarantees that cannot be excluded under the Australian Consumer Law, or
the CGA. You are entitled to a replacement or refund for a major failure and compensation for any other reasonably foreseeable loss or damage. You are also entitled to have the goods repaired or replaced if the goods fail to be of acceptable quality and the failure does not amount to a major failure.
2. The bene�ts provided by this Warranty are in addition to all other rights and remedies in respect of the Goods which the consumer has under either the Australian Consumer Law or the CGA. The original purchaser of the Goods is provided with the following Warranty subject to the Warranty Conditions:
3. We warrant the Goods for all parts defective in workmanship or materials from the date of purchase (Warranty Period), for the period of:-(a) Two (2) years for Russell Hobbs products (see product packaging for details)(b) Two (2) years with �ve (5) year motor warranty for Russell Hobbs products (see product
packaging for details)(c) Limited Lifetime, Ten (10) years for Russell Hobbs cookware.(d) One (1) year for George Foreman.
If the Goods prove defective within the Warranty Period by reason of improper workmanship or material, we may, at our own discretion, repair or replace the Goods without charge.
Warranty Conditions
4. The Goods must be used in accordance with the manufacturer’s instructions. This Warranty does not apply should the defect in or failure of the Goods be attributable to misuse, abuse, accident or non-observance of manufacturer’s instructions on the part of the user. As far as the law permits, the manufacturer does not accept liability for any direct or consequential loss, damage or other expense caused by or arising out of any failure to use the Goods in accordance with the manufacturer’s instructions.
5. Exhaustible components (such as batteries, �lters and brushes) of the Goods are included under this Warranty only where there is a defect in workmanship or materials used.
6. The warranty granted under clause 3 is limited to repair or replacement only.
7. Any parts of the Goods replaced during repairs or any product replaced remain the property of the manufacturer. In the event of the Goods being replaced during the Warranty Period, the warranty on the replacement Goods will expire on the same date as for the Warranty Period on the original Goods which are replaced.
8. In order to claim under the warranty granted under clause 3 you must:(a) Retain this warranty with your receipt/proof of purchase; and(b) Return the Goods to us at the relevant address or to the Supplier by prepaid freight
within the Warranty Period accompanied with (i) the legible and unmodi�ed original proof of purchase, which clearly indicates the name and address of the Supplier, the date and place of purchase, the product name or other product serial number and (ii) this warranty.
9. This warranty is immediately void if:(a) Any serial number or appliance plate is removed or defaced;(b) The Goods have been serviced or otherwise repaired by a person not authorised to do so
by us or where non approved replaced parts are used.
10. The Goods are designed for domestic use only. A limited 90-day Warranty applies to any industrial or commercial use of the Goods. The Goods must be connected to the electrical voltage requirements as speci�ed in the ratings label located on the Goods.
11. This warranty does not cover the cost of claiming under the warranty or transport of the Goods to and from the Supplier or us.
12. This warranty is only valid and enforceable in Australia against Spectrum Brands Australia Pty Ltd and in New Zealand against Spectrum Brands New Zealand Ltd.
Contact us or the Supplier for further details.
Register your product online
If you live in Australia please visit: www.spectrumbrands.com.au/warrantyIf you live in New Zealand Please visit: www.spectrumbrands.co.nz/warrantyRegistration of your warranty is not compulsory, it gives us a record of your purchase AND entitles you to receive these bene�ts: Product information; Hints and tips; Recipes and news; Information on special price o�ers and promotions.
Any questions? Please contact Customer Service for advice.
3
Spectrum Brands Australia Pty LtdLocked Bag 3004 BraesideVictoria 3195 Australia
Customer Service in AustraliaTollFree: 1800 623 118Email: [email protected]: www.spectrumbrands.com.au
Spectrum Brands New Zealand LtdPO Box 9817 NewmarketAuckland 1149 New Zealand
Customer Service in New ZealandTollFree: 0800 736 776Email: [email protected]: www.spectrumbrands.co.nz
Spectrum Brands Australia Pty Ltd and Spectrum Brands New Zealand LtdWarranty Against Defects
In this warranty:Australian Consumer Law means the Australian consumer law set out in Schedule 2 to the Competition and Consumer Act 2010;
CGA means the New Zealand Consumer Guarantees Act 1993;Goods means the product or equipment which was accompanied by this warranty and purchased in Australia or New Zealand, as the case may be;Manufacturer, We or us means:
1. for Goods purchased in Australia, Spectrum Brands Australia Pty Ltd ABN, 78 007 070 573; or2. for Goods purchased in New Zealand, Spectrum Brands New Zealand Ltd, as the case may be,
contact details as set out at the end of this warranty;
Supplier means the authorised distributor or retailer of the Goods that sold you the Goods in Australia or in New Zealand; andYou means you, the original end-user purchaser of the Goods.1. Our goods come with guarantees that cannot be excluded under the Australian Consumer Law, or
the CGA. You are entitled to a replacement or refund for a major failure and compensation for any other reasonably foreseeable loss or damage. You are also entitled to have the goods repaired or replaced if the goods fail to be of acceptable quality and the failure does not amount to a major failure.
2. The bene�ts provided by this Warranty are in addition to all other rights and remedies in respect of the Goods which the consumer has under either the Australian Consumer Law or the CGA. The original purchaser of the Goods is provided with the following Warranty subject to the Warranty Conditions:
3. We warrant the Goods for all parts defective in workmanship or materials from the date of purchase (Warranty Period), for the period of:-(a) Two (2) years for Russell Hobbs products (see product packaging for details)(b) Two (2) years with �ve (5) year motor warranty for Russell Hobbs products (see product
packaging for details)(c) Limited Lifetime, Ten (10) years for Russell Hobbs cookware.(d) One (1) year for George Foreman.
If the Goods prove defective within the Warranty Period by reason of improper workmanship or material, we may, at our own discretion, repair or replace the Goods without charge.
Warranty Conditions
4. The Goods must be used in accordance with the manufacturer’s instructions. This Warranty does not apply should the defect in or failure of the Goods be attributable to misuse, abuse, accident or non-observance of manufacturer’s instructions on the part of the user. As far as the law permits, the manufacturer does not accept liability for any direct or consequential loss, damage or other expense caused by or arising out of any failure to use the Goods in accordance with the manufacturer’s instructions.
5. Exhaustible components (such as batteries, �lters and brushes) of the Goods are included under this Warranty only where there is a defect in workmanship or materials used.
6. The warranty granted under clause 3 is limited to repair or replacement only.
7. Any parts of the Goods replaced during repairs or any product replaced remain the property of the manufacturer. In the event of the Goods being replaced during the Warranty Period, the warranty on the replacement Goods will expire on the same date as for the Warranty Period on the original Goods which are replaced.
8. In order to claim under the warranty granted under clause 3 you must:(a) Retain this warranty with your receipt/proof of purchase; and(b) Return the Goods to us at the relevant address or to the Supplier by prepaid freight
within the Warranty Period accompanied with (i) the legible and unmodi�ed original proof of purchase, which clearly indicates the name and address of the Supplier, the date and place of purchase, the product name or other product serial number and (ii) this warranty.
9. This warranty is immediately void if:(a) Any serial number or appliance plate is removed or defaced;(b) The Goods have been serviced or otherwise repaired by a person not authorised to do so
by us or where non approved replaced parts are used.
10. The Goods are designed for domestic use only. A limited 90-day Warranty applies to any industrial or commercial use of the Goods. The Goods must be connected to the electrical voltage requirements as speci�ed in the ratings label located on the Goods.
11. This warranty does not cover the cost of claiming under the warranty or transport of the Goods to and from the Supplier or us.
12. This warranty is only valid and enforceable in Australia against Spectrum Brands Australia Pty Ltd and in New Zealand against Spectrum Brands New Zealand Ltd.
Contact us or the Supplier for further details.
Register your product online
If you live in Australia please visit: www.spectrumbrands.com.au/warrantyIf you live in New Zealand Please visit: www.spectrumbrands.co.nz/warrantyRegistration of your warranty is not compulsory, it gives us a record of your purchase AND entitles you to receive these bene�ts: Product information; Hints and tips; Recipes and news; Information on special price o�ers and promotions.
Any questions? Please contact Customer Service for advice.
4
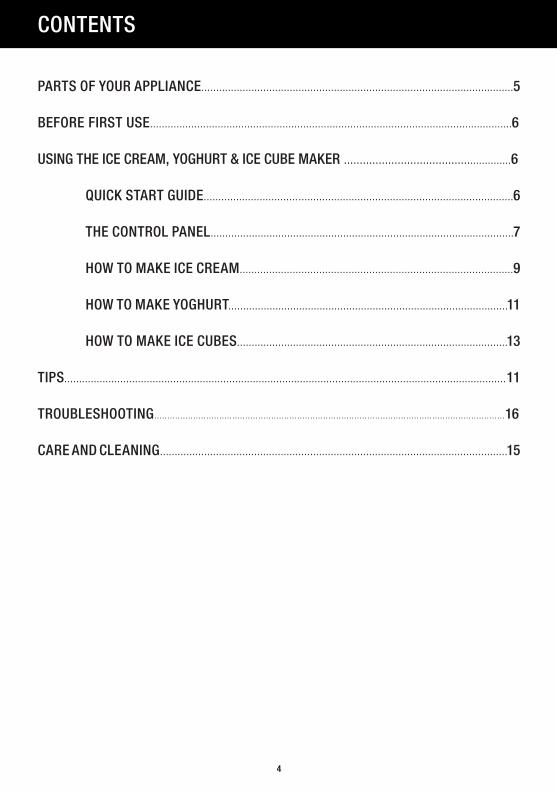
PARTS OF YOUR APPLIANCE..........................................................................................................5
BEFORE FIRST USE...........................................................................................................................6
USING THE ICE CREAM, YOGHURT & ICE CUBE MAKER ......................................................6
QUICK START GUIdE.........................................................................................................6
THE CONTROL PANEL.......................................................................................................7
HOW TO MAKE ICE CREAM.............................................................................................9
HOW TO MAKE YOGHURT...............................................................................................11
HOW TO MAKE ICE CUBES............................................................................................13
TIPS......................................................................................................................................................11
TROUBLESHOOTING.......................................................................................................................................16
CARE ANd CLEANING......................................................................................................................15
CONTENTS
5
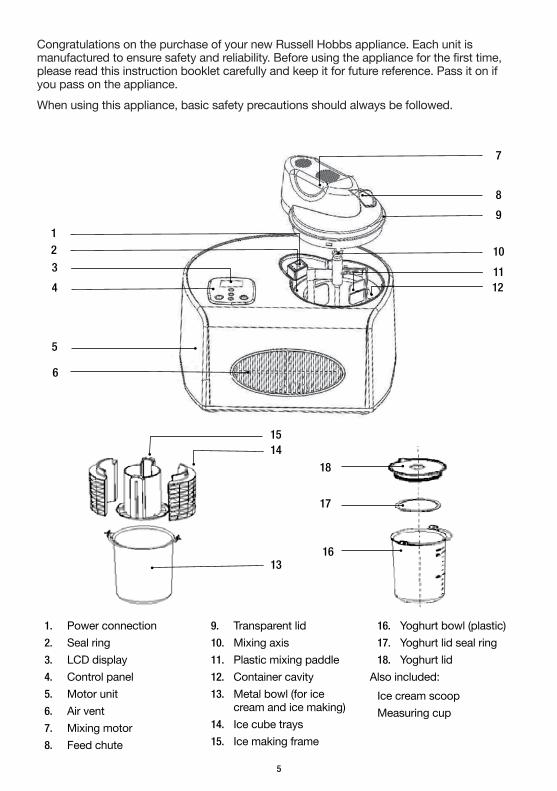
1. Power connection2. Seal ring 3. LCD display4. Control panel 5. Motor unit 6. Air vent 7. Mixing motor 8. Feed chute
9. Transparent lid10. Mixing axis 11. Plastic mixing paddle12. Container cavity13. Metal bowl (for ice
cream and ice making) 14. Ice cube trays15. Ice making frame
16. Yoghurt bowl (plastic)17. Yoghurt lid seal ring18. Yoghurt lid
Also included:Ice cream scoopMeasuring cup
15
18
1
7
8
9
10
1112
14
17
2
6
5
4
3
1316
Congratulations on the purchase of your new Russell Hobbs appliance. Each unit is manufactured to ensure safety and reliability. Before using the appliance for the first time, please read this instruction booklet carefully and keep it for future reference. Pass it on if you pass on the appliance.When using this appliance, basic safety precautions should always be followed.
6
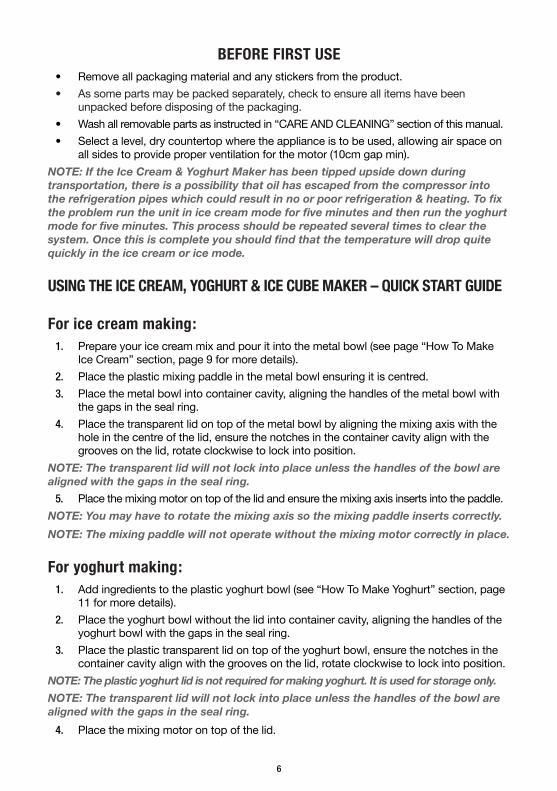
BEFORE FIRST USE• Removeallpackagingmaterialandanystickersfromtheproduct.• Assomepartsmaybepackedseparately,checktoensureallitemshavebeen
unpacked before disposing of the packaging.• Washallremovablepartsasinstructedin“CAREANDCLEANING”sectionofthismanual.• Selectalevel,drycountertopwheretheapplianceistobeused,allowingairspaceon
all sides to provide proper ventilation for the motor (10cm gap min).NOTE: If the Ice Cream & Yoghurt Maker has been tipped upside down during transportation, there is a possibility that oil has escaped from the compressor into the refrigeration pipes which could result in no or poor refrigeration & heating. To fix the problem run the unit in ice cream mode for five minutes and then run the yoghurt mode for five minutes. This process should be repeated several times to clear the system. Once this is complete you should find that the temperature will drop quite quickly in the ice cream or ice mode.
USING THE ICE CREAM, YOGHURT & ICE CUBE MAKER – QUICK START GUIDE
For ice cream making:1. Prepareyouricecreammixandpouritintothemetalbowl(seepage“HowToMake
IceCream”section,page9formoredetails).2. Place the plastic mixing paddle in the metal bowl ensuring it is centred.3. Place the metal bowl into container cavity, aligning the handles of the metal bowl with
the gaps in the seal ring.4. Place the transparent lid on top of the metal bowl by aligning the mixing axis with the
hole in the centre of the lid, ensure the notches in the container cavity align with the grooves on the lid, rotate clockwise to lock into position.
NOTE: The transparent lid will not lock into place unless the handles of the bowl are aligned with the gaps in the seal ring.
5. Place the mixing motor on top of the lid and ensure the mixing axis inserts into the paddle.NOTE: You may have to rotate the mixing axis so the mixing paddle inserts correctly.
NOTE: The mixing paddle will not operate without the mixing motor correctly in place.
For yoghurt making:1. Addingredientstotheplasticyoghurtbowl(see“HowToMakeYoghurt”section,page
11 for more details).2. Place the yoghurt bowl without the lid into container cavity, aligning the handles of the
yoghurt bowl with the gaps in the seal ring.3. Place the plastic transparent lid on top of the yoghurt bowl, ensure the notches in the
container cavity align with the grooves on the lid, rotate clockwise to lock into position.NOTE: The plastic yoghurt lid is not required for making yoghurt. It is used for storage only.
NOTE: The transparent lid will not lock into place unless the handles of the bowl are aligned with the gaps in the seal ring.
4. Place the mixing motor on top of the lid.
7
For Ice cube making:1. Pour 280ml of water into the metal bowl, then slowly push the ice making frame (with
icecubetraysinplace)allthewayintometalbowl(see“HowtomakeIceCubes”section, page 13 for more details).
2. Place the metal bowl into container cavity, aligning the handles of the metal bowl with the gaps in the seal ring.
3. Place the transparent lid on top of the metal bowl, ensure the notches in the container cavity align with the grooves on the lid, rotate clockwise to lock into position.
NOTE: The transparent lid will not lock into place unless the handles of the bowl are aligned with the gaps in the seal ring.
4. Place the mixing motor on top of the lid.
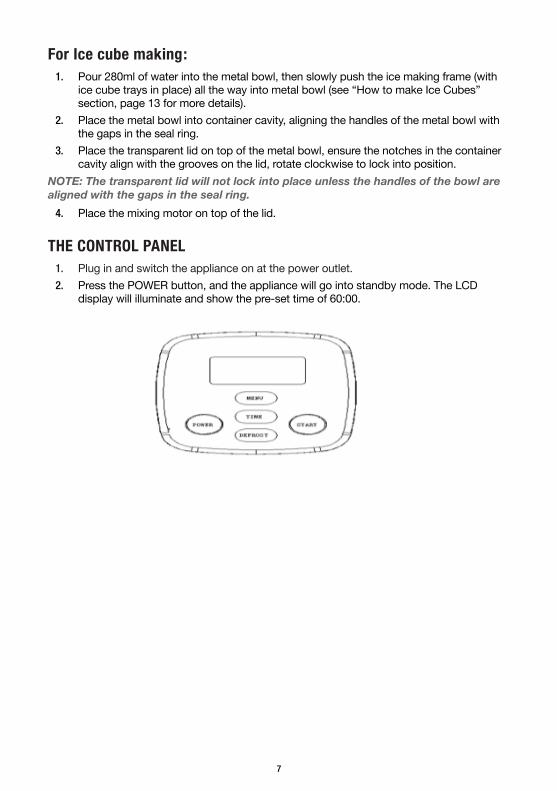
THE CONTROL PANEL1. Plug in and switch the appliance on at the power outlet.2. Press the POWER button, and the appliance will go into standby mode. The LCD
display will illuminate and show the pre-set time of 60:00.
8
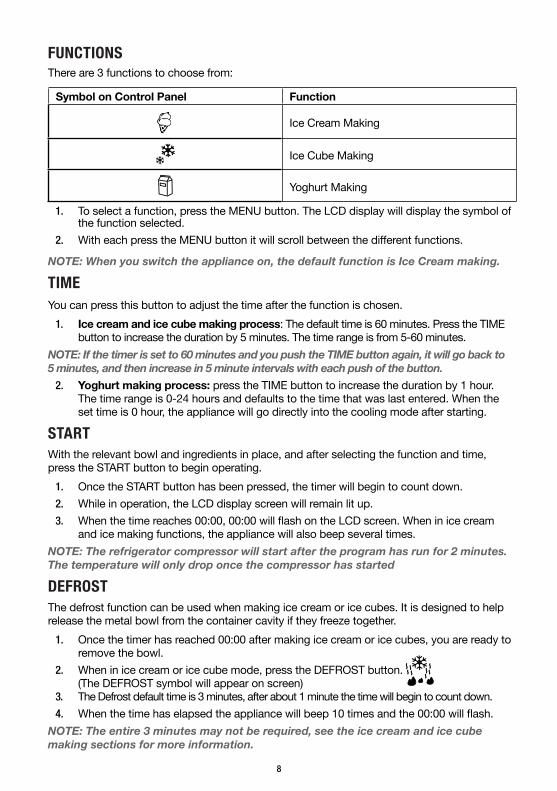
FUNCTIONSThere are 3 functions to choose from:
Symbol on Control Panel Function
Ice Cream Making
Ice Cube Making
Yoghurt Making
1. Toselectafunction,presstheMENUbutton.TheLCDdisplaywilldisplaythesymbolofthe function selected.
2. WitheachpresstheMENUbuttonitwillscrollbetweenthedifferentfunctions.
NOTE: When you switch the appliance on, the default function is Ice Cream making.
TIMEYou can press this button to adjust the time after the function is chosen.
1. Ice cream and ice cube making process: The default time is 60 minutes. Press the TIME button to increase the duration by 5 minutes. The time range is from 5-60 minutes.
NOTE: If the timer is set to 60 minutes and you push the TIME button again, it will go back to 5 minutes, and then increase in 5 minute intervals with each push of the button.
2. Yoghurt making process: press the TIME button to increase the duration by 1 hour. The time range is 0-24 hours and defaults to the time that was last entered. When the set time is 0 hour, the appliance will go directly into the cooling mode after starting.
STARTWith the relevant bowl and ingredients in place, and after selecting the function and time, press the START button to begin operating.
1. Once the START button has been pressed, the timer will begin to count down.2. While in operation, the LCD display screen will remain lit up.3. Whenthetimereaches00:00,00:00willflashontheLCDscreen.Wheninicecream
and ice making functions, the appliance will also beep several times.NOTE: The refrigerator compressor will start after the program has run for 2 minutes. The temperature will only drop once the compressor has started
DEFROST The defrost function can be used when making ice cream or ice cubes. It is designed to help release the metal bowl from the container cavity if they freeze together.
1. Once the timer has reached 00:00 after making ice cream or ice cubes, you are ready to remove the bowl.
2. When in ice cream or ice cube mode, press the DEFROST button. (The DEFROST symbol will appear on screen)3. The Defrost default time is 3 minutes, after about 1 minute the time will begin to count down.4. Whenthetimehaselapsedtheappliancewillbeep10timesandthe00:00willflash.
NOTE: The entire 3 minutes may not be required, see the ice cream and ice cube making sections for more information.
9
HOW TO MAKE ICE CREAMNOTE: Ensure all attachments are clean prior to use as per the CARE AND CLEANING section.
1. Remove the metal bowl from the container cavity.2. Pour the ice cream mixture into the metal bowl (refer to recipe section for suggestions).
NOTE: Only fill the container up to 80%, to avoid spillage during mixing.
3. Insert the plastic mixing paddle into the metal bowl.4. Place the metal bowl into container cavity, aligning the handles of the metal bowl with
the gaps in the seal ring.CAUTION: Do not place ingredients directly into the container cavity. Insert ingredients into the bowl prior to adding the bowl into the container cavity.
5. Place the transparent lid on top of the metal bowl by aligning the mixing axis with the hole in the centre of the lid; ensure the notches in the container cavity align with the grooves on the lid. Rotate clockwise to lock into position.
NOTE: The transparent lid will not lock into place unless the handles of the bowl are aligned with the gaps in the seal ring.
6. Place the mixing motor on top of the lid.NOTE: You may have to rotate the mixing axis so the mixing paddle inserts correctly.
NOTE: The mixing paddle will not operate without the mixing motor correctly in place.
7. Plug the appliance into a power socket and switch it on.8. Press the POWER button.
NOTE: The ice cream making function is the default mode after the POWER button is pressed. Otherwise press the MENU button until the ice cream symbol appears on the LCD screen.
9. Then press the TIME button to set the time. NOTE: The automatic default and maximum time for Ice cream making is 60 minutes. To adjust this press the TIME button to increase by 5 minute intervals. Refer to the ‘Table of Time Recommendations’ for time indications.
10. Press the START button to begin ice cream making. The timer will begin to countdown.NOTE: The refrigerator compressor will start after the program has run for 2 minutes. The temperature will only drop once the compressor has started
11. Throughouttheicecreammakingcycle,thetemperaturewilldroptowardto0°Cinthefirst10 minutes and then drop to below -10°C where it will stay until the end of the cycle.
NOTE: While in operation you can increase the duration by pressing the TIME button. It will increase in 5 minute intervals to a maximum of 60 minutes.
NOTE: As the ice cream becomes thicker, the load on the mixing paddle increases. If the density of the ice cream becomes too thick, the paddle will stop mixing automatically but freezing will continue.
12. Additional stir through ingredients can be added while the ice cream maker is in operation. Add these ingredients via the feed chute toward the end of the ice cream making cycle, or as the mix is just beginning to freeze.
13. When the time on the LCD screen has elapsed, the appliance will beep 10 times and the00:00willflash.PressthePOWERbuttontoswitchtheapplianceoff.
NOTE: If the appliance is not manually switched off after it beeps, it will continue to remain cool for 1 hour before it switches itself off.
10
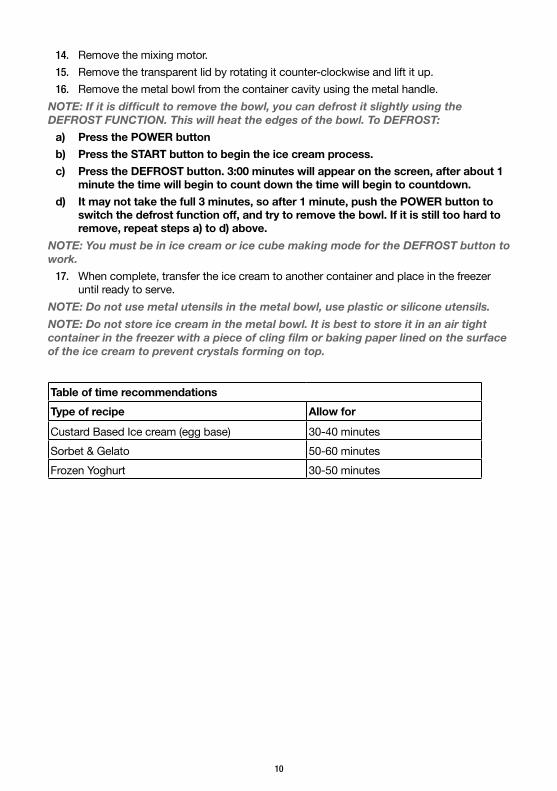
14. Remove the mixing motor.15. Remove the transparent lid by rotating it counter-clockwise and lift it up.16. Remove the metal bowl from the container cavity using the metal handle.
NOTE: If it is difficult to remove the bowl, you can defrost it slightly using the DEFROST FUNCTION. This will heat the edges of the bowl. To DEFROST:
a) Press the POWER button
b) Press the START button to begin the ice cream process.
c) Press the DEFROST button. 3:00 minutes will appear on the screen, after about 1 minute the time will begin to count down the time will begin to countdown.
d) It may not take the full 3 minutes, so after 1 minute, push the POWER button to switch the defrost function off, and try to remove the bowl. If it is still too hard to remove, repeat steps a) to d) above.
NOTE: You must be in ice cream or ice cube making mode for the DEFROST button to work.
17. When complete, transfer the ice cream to another container and place in the freezer until ready to serve.
NOTE: Do not use metal utensils in the metal bowl, use plastic or silicone utensils.
NOTE: Do not store ice cream in the metal bowl. It is best to store it in an air tight container in the freezer with a piece of cling film or baking paper lined on the surface of the ice cream to prevent crystals forming on top.
Table of time recommendations
Type of recipe Allow for
Custard Based Ice cream (egg base) 30-40 minutesSorbet&Gelato 50-60 minutesFrozen Yoghurt 30-50 minutes
11
HOW TO MAKE YOGHURT
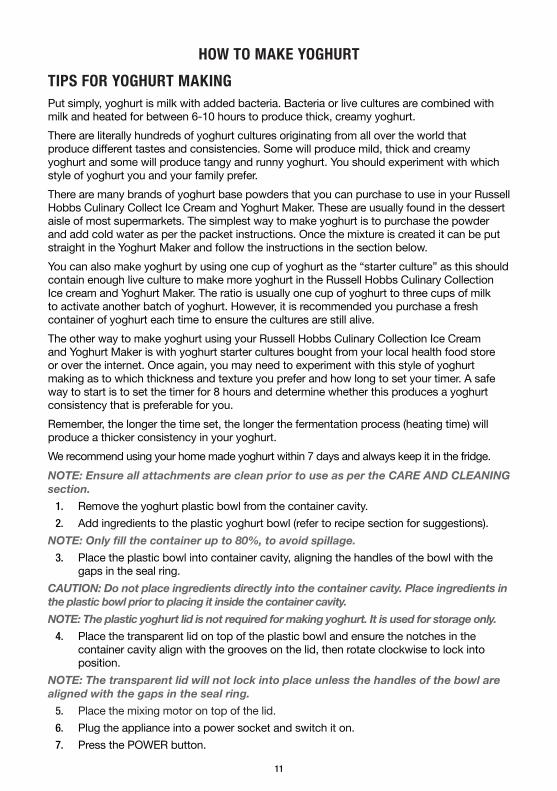
TIPS FOR YOGHURT MAKINGPut simply, yoghurt is milk with added bacteria. Bacteria or live cultures are combined with milk and heated for between 6-10 hours to produce thick, creamy yoghurt.There are literally hundreds of yoghurt cultures originating from all over the world that produce different tastes and consistencies. Some will produce mild, thick and creamy yoghurt and some will produce tangy and runny yoghurt. You should experiment with which style of yoghurt you and your family prefer.There are many brands of yoghurt base powders that you can purchase to use in your Russell Hobbs Culinary Collect Ice Cream and Yoghurt Maker. These are usually found in the dessert aisle of most supermarkets. The simplest way to make yoghurt is to purchase the powder and add cold water as per the packet instructions. Once the mixture is created it can be put straight in the Yoghurt Maker and follow the instructions in the section below.Youcanalsomakeyoghurtbyusingonecupofyoghurtasthe“starterculture”asthisshouldcontain enough live culture to make more yoghurt in the Russell Hobbs Culinary Collection Ice cream and Yoghurt Maker. The ratio is usually one cup of yoghurt to three cups of milk to activate another batch of yoghurt. However, it is recommended you purchase a fresh container of yoghurt each time to ensure the cultures are still alive. The other way to make yoghurt using your Russell Hobbs Culinary Collection Ice Cream and Yoghurt Maker is with yoghurt starter cultures bought from your local health food store or over the internet. Once again, you may need to experiment with this style of yoghurt making as to which thickness and texture you prefer and how long to set your timer. A safe way to start is to set the timer for 8 hours and determine whether this produces a yoghurt consistency that is preferable for you.Remember, the longer the time set, the longer the fermentation process (heating time) will produce a thicker consistency in your yoghurt. We recommend using your home made yoghurt within 7 days and always keep it in the fridge.NOTE: Ensure all attachments are clean prior to use as per the CARE AND CLEANING section.
1. Remove the yoghurt plastic bowl from the container cavity.2. Add ingredients to the plastic yoghurt bowl (refer to recipe section for suggestions).
NOTE: Only fill the container up to 80%, to avoid spillage.
3. Place the plastic bowl into container cavity, aligning the handles of the bowl with the gaps in the seal ring.
CAUTION: Do not place ingredients directly into the container cavity. Place ingredients in the plastic bowl prior to placing it inside the container cavity.
NOTE: The plastic yoghurt lid is not required for making yoghurt. It is used for storage only.
4. Place the transparent lid on top of the plastic bowl and ensure the notches in the container cavity align with the grooves on the lid, then rotate clockwise to lock into position.
NOTE: The transparent lid will not lock into place unless the handles of the bowl are aligned with the gaps in the seal ring.
5. Place the mixing motor on top of the lid. 6. Plug the appliance into a power socket and switch it on.7. Press the POWER button.
12
8. PresstheMENUbuttontochoosetheyoghurtmakingfunction,amilkcartonsymbolshould appear on the LCD screen.
9. Then press the TIME button to set the time. NOTE: The suggested time for yoghurt making is 8 hours. To adjust this press the TIME button to increase by 1 hour intervals. Refer to the recipe section for “Tips for Yoghurt Making”.
10. Press the START button to begin yoghurt making. The yoghurt making process will cycle the temperature up to 40°C where it will cycle between 40°C and 46°C for the entire time you have chosen. This is called the ‘fermentation cycle’.
NOTE: While in operation you can increase the duration by pressing the TIME button. It will increase in 1 hour intervals to a maximum of 24 hours.
11. When the time has elapsed, the appliance will start to cool down to 2°C and then 00:00 willflashontheLCDscreen.Thisiscalledthe‘coolingcycle’.Youshouldnowplacethe yoghurt in your refrigerator with the yoghurt bowl lid on. Press the POWER button toswitchtheapplianceoff.
NOTE: If the appliance is not manually switched off after it finishes the yoghurt cycle, it will refrigerate between 2°C and 8°C and maintain this temperature for 1 hour. After 1 hour it will switch itself off.
12. Remove the mixing motor.13. Remove the transparent lid by rotating it counter-clockwise and lift it up.14. Remove the plastic bowl from the container cavity using the metal handle. You can
storetheyoghurtinthiscontainer,withtheyoghurtlidsealedfirmlyinplace,andstorein the refrigerator for up to 14 days.
NOTE: Add ingredients such as fruit to your yoghurt after the yoghurt has been made and removed from the appliance.
13
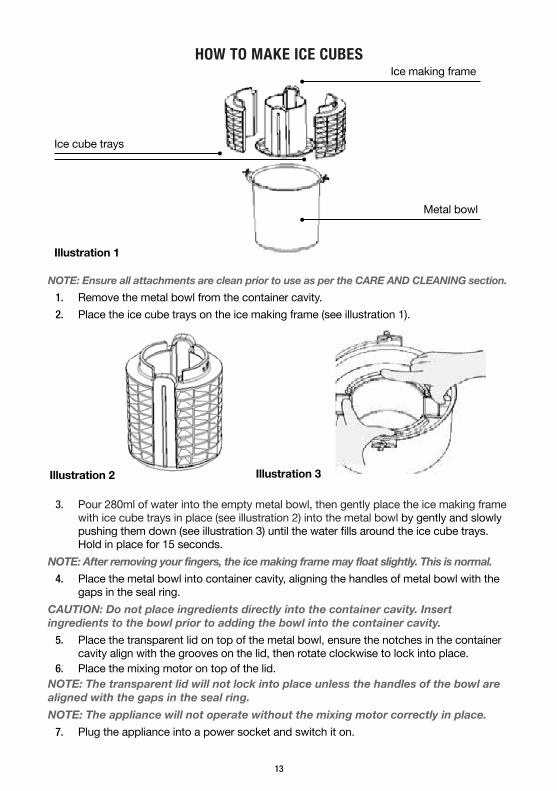
HOW TO MAKE ICE CUBES
NOTE: Ensure all attachments are clean prior to use as per the CARE AND CLEANING section.
1. Remove the metal bowl from the container cavity.2. Place the ice cube trays on the ice making frame (see illustration 1).
3. Pour 280ml of water into the empty metal bowl, then gently place the ice making frame with ice cube trays in place (see illustration 2) into the metal bowl by gently and slowly pushingthemdown(seeillustration3)untilthewaterfillsaroundtheicecubetrays.Hold in place for 15 seconds.
NOTE: After removing your fingers, the ice making frame may float slightly. This is normal.
4. Place the metal bowl into container cavity, aligning the handles of metal bowl with the gaps in the seal ring.
CAUTION: Do not place ingredients directly into the container cavity. Insert ingredients to the bowl prior to adding the bowl into the container cavity.
5. Place the transparent lid on top of the metal bowl, ensure the notches in the container cavity align with the grooves on the lid, then rotate clockwise to lock into place.
6. Place the mixing motor on top of the lid. NOTE: The transparent lid will not lock into place unless the handles of the bowl are aligned with the gaps in the seal ring.
NOTE: The appliance will not operate without the mixing motor correctly in place.
7. Plug the appliance into a power socket and switch it on.
Illustration 2 Illustration 3
Illustration 1
Ice making frame
Ice cube trays
Metal bowl
14
8. Press the POWER button.9. PresstheMENUbuttontochoosetheicecubemakingfunction,theice(snowflake)
symbol should appear on the LCD screen.10 Then press the TIME button to set the time.
NOTE: The automatic defaulted and maximum time for Ice cubes is 60 minutes. To adjust this press the TIME button to increase by 5 minute intervals.
11. Press the START button to begin the ice cube making process. The timer will begin to countdown.
NOTE: The refrigerator compressor will start after the program has run for 2 minutes. The temperature will only drop once the compressor has started
NOTE: While in operation you can increase the duration by pressing the TIME button. It will increase in 5 minute intervals to a maximum of 60 minutes.
12. When the time has elapsed, the display will show 00:00 and the appliance will beep 10 times.PressthePOWERbuttontoswitchtheapplianceoff.
NOTE: If the appliance is not switched off after it beeps, it will continue to remain cool for 1 hour before it switches itself off.
13. Remove the transparent lid by rotating it counter-clockwise and lift it up.14. Remove the metal bowl from the container cavity.
NOTE: If it is difficult to remove the bowl, you can defrost it slightly using the DEFROST FUNCTION. This will heat the edges of the bowl. To DEFROST:
a) Press the POWER buttonb) Press the START button to begin the ice cream process, c) Press the DEFROST button. 3:00 minutes will appear on the screen, after about 1
minute the time will begin to count down the time will begin to countdown. d) It may not take the full 3 minutes, so after 1 minute, push the POWER button to
switch the defrost function off, and try to remove the bowl. If it is still too hard to remove, repeat steps a) to d) above.
NOTE: You must be in ice cream or ice cube making mode for the DEFROST button to work.
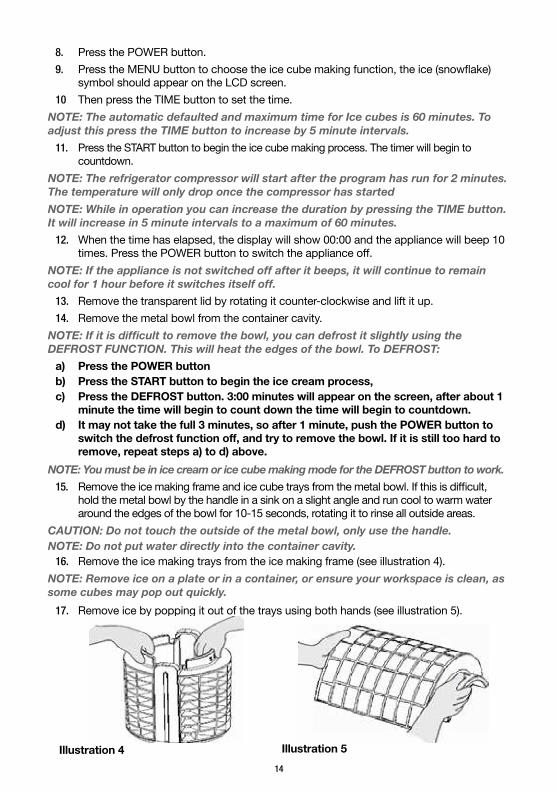
15. Removetheicemakingframeandicecubetraysfromthemetalbowl.Ifthisisdifficult,hold the metal bowl by the handle in a sink on a slight angle and run cool to warm water around the edges of the bowl for 10-15 seconds, rotating it to rinse all outside areas.
CAUTION: Do not touch the outside of the metal bowl, only use the handle.NOTE: Do not put water directly into the container cavity.
16. Remove the ice making trays from the ice making frame (see illustration 4).NOTE: Remove ice on a plate or in a container, or ensure your workspace is clean, as some cubes may pop out quickly.
17. Remove ice by popping it out of the trays using both hands (see illustration 5).
Illustration 4 Illustration 5
15
CARE AND CLEANINGIMPORTANT: Before cleaning, be sure unit is turned off and cord is unplugged.
• Completelyemptyanddisassembleremovablepartsbeforewashing.• Rinsepartsimmediatelyafteruseforeasycleaning.• Ensureallfoodremainsarerinsedoutofhardtoreachareasbeforedryingandstoring.• Donotusemetalutensilsinthemetalbowl,useplasticorsiliconeutensils.• Wipethemotorunitandmixingmotorwithadampclothanddrythoroughly.• Wipethecontainercavitywithadampclothanddrythoroughly.Ensurethecontainer
cavity is completely clean and dry before inserting bowls.• Donotimmersemotorunitormixingmotorinliquid.• Themixingpaddle,plasticyoghurtbowlandlid,transparentlid,icecubetraysandice
making frames can be washed by hand or in dishwasher. • Themetalbowlmustonlybewashedbyhand.Donotplacethemetalbowlinthe
dishwasher.• Ifwashingbyhand,washwithwarmtohotsoapywateranduseasoftcloth.• Ifwashinginadishwasher,placeremovablepartsonthetoprackonly—notinornear
utensil basket.• Donotusealkalinecleaningagentsorharshabrasiveswhencleaningthisappliance.
• Donotuseroughscouringpadsorcleansersonanyplasticormetalparts.
16
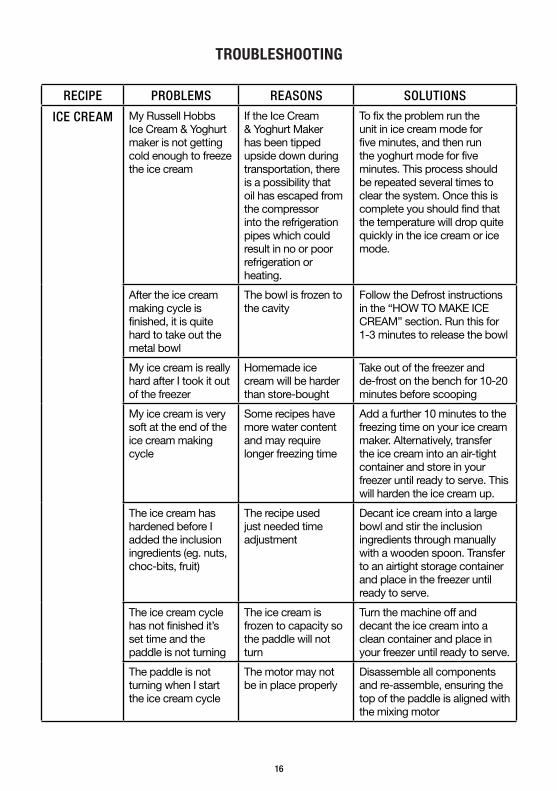
TROUBLESHOOTING
RECIPE PROBLEMS REASONS SOLUTIONS
ICE CREAM My Russell Hobbs Ice Cream & Yoghurt maker is not getting cold enough to freeze the ice cream
If the Ice Cream & Yoghurt Maker has been tipped upside down during transportation, there is a possibility that oil has escaped from the compressor into the refrigeration pipes which could result in no or poor refrigeration or heating.
To fix the problem run the unit in ice cream mode for five minutes, and then run the yoghurt mode for five minutes. This process should be repeated several times to clear the system. Once this is complete you should find that the temperature will drop quite quickly in the ice cream or ice mode.
After the ice cream making cycle is finished, it is quite hard to take out the metal bowl
The bowl is frozen to the cavity
Follow the Defrost instructions in the “HOW TO MAKE ICE CREAM” section. Run this for 1-3 minutes to release the bowl
My ice cream is really hard after I took it out of the freezer
Homemade ice cream will be harder than store-bought
Take out of the freezer and de-frost on the bench for 10-20 minutes before scooping
My ice cream is very soft at the end of the ice cream making cycle
Some recipes have more water content and may require longer freezing time
Add a further 10 minutes to the freezing time on your ice cream maker. Alternatively, transfer the ice cream into an air-tight container and store in your freezer until ready to serve. This will harden the ice cream up.
The ice cream has hardened before I added the inclusion ingredients (eg. nuts, choc-bits, fruit)
The recipe used just needed time adjustment
Decant ice cream into a large bowl and stir the inclusion ingredients through manually with a wooden spoon. Transfer to an airtight storage container and place in the freezer until ready to serve.
The ice cream cycle has not finished it’s set time and the paddle is not turning
The ice cream is frozen to capacity so the paddle will not turn
Turn the machine off and decant the ice cream into a clean container and place in your freezer until ready to serve.
The paddle is not turning when I start the ice cream cycle
The motor may not be in place properly
Disassemble all components and re-assemble, ensuring the top of the paddle is aligned with the mixing motor
17
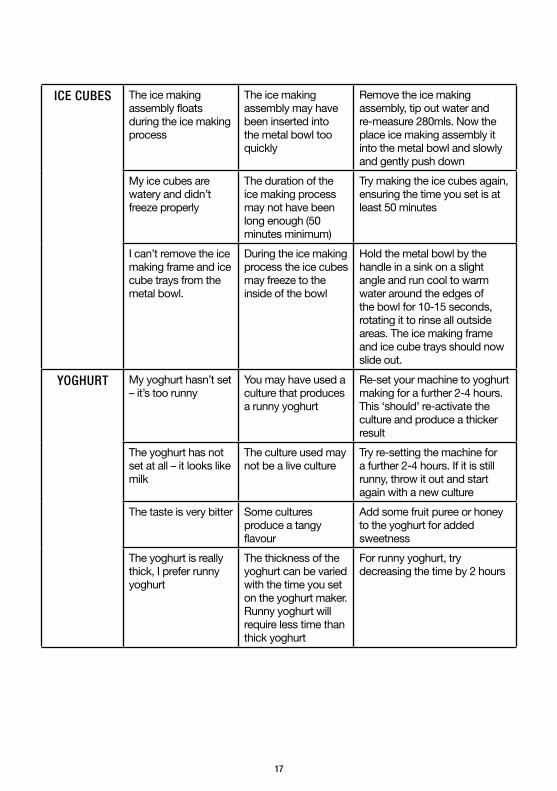
ICE CUBES The ice making assembly floats during the ice making process
The ice making assembly may have been inserted into the metal bowl too quickly
Remove the ice making assembly, tip out water and re-measure 280mls. Now the place ice making assembly it into the metal bowl and slowly and gently push down
My ice cubes are watery and didn’t freeze properly
The duration of the ice making process may not have been long enough (50 minutes minimum)
Try making the ice cubes again, ensuring the time you set is at least 50 minutes
I can’t remove the ice making frame and ice cube trays from the metal bowl.
During the ice making process the ice cubes may freeze to the inside of the bowl
Hold the metal bowl by the handle in a sink on a slight angle and run cool to warm water around the edges of the bowl for 10-15 seconds, rotating it to rinse all outside areas. The ice making frame and ice cube trays should now slide out.
YOGHURT My yoghurt hasn’t set – it’s too runny
You may have used a culture that produces a runny yoghurt
Re-set your machine to yoghurt making for a further 2-4 hours. This ‘should’ re-activate the culture and produce a thicker result
The yoghurt has not set at all – it looks like milk
The culture used may not be a live culture
Try re-setting the machine for a further 2-4 hours. If it is still runny, throw it out and start again with a new culture
The taste is very bitter Some cultures produce a tangy flavour
Add some fruit puree or honey to the yoghurt for added sweetness
The yoghurt is really thick, I prefer runny yoghurt
The thickness of the yoghurt can be varied with the time you set on the yoghurt maker. Runny yoghurt will require less time than thick yoghurt
For runny yoghurt, try decreasing the time by 2 hours
18
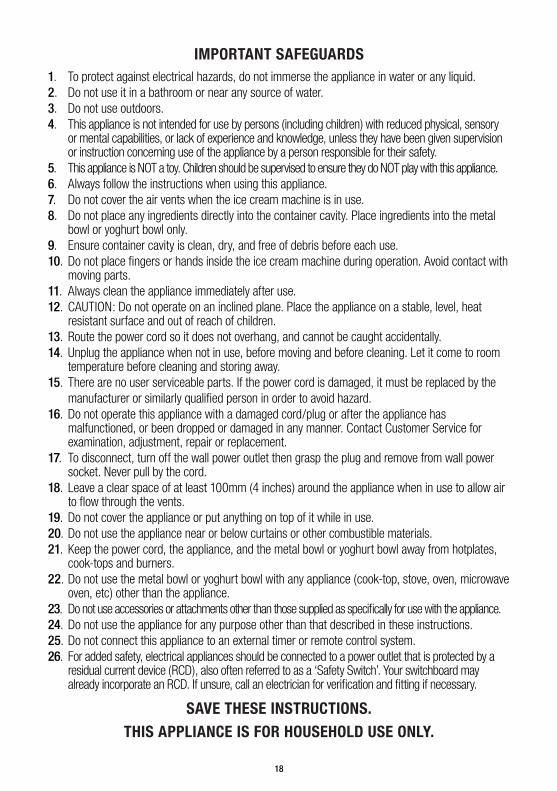
IMPORTANT SAFEGUARDS1. To protect against electrical hazards, do not immerse the appliance in water or any liquid.2. Do not use it in a bathroom or near any source of water.3. Do not use outdoors.4. This appliance is not intended for use by persons (including children) with reduced physical, sensory
or mental capabilities, or lack of experience and knowledge, unless they have been given supervision or instruction concerning use of the appliance by a person responsible for their safety.
5. This appliance is NOT a toy. Children should be supervised to ensure they do NOT play with this appliance.6. Always follow the instructions when using this appliance.7. Do not cover the air vents when the ice cream machine is in use.8. Do not place any ingredients directly into the container cavity. Place ingredients into the metal
bowl or yoghurt bowl only.9. Ensure container cavity is clean, dry, and free of debris before each use.10. Do not place fingers or hands inside the ice cream machine during operation. Avoid contact with
moving parts.11. Always clean the appliance immediately after use.12. CAUTION: Do not operate on an inclined plane. Place the appliance on a stable, level, heat
resistant surface and out of reach of children.13. Route the power cord so it does not overhang, and cannot be caught accidentally.14. Unplug the appliance when not in use, before moving and before cleaning. Let it come to room
temperature before cleaning and storing away.15. There are no user serviceable parts. If the power cord is damaged, it must be replaced by the manufacturer or similarly qualified person in order to avoid hazard.16. Do not operate this appliance with a damaged cord/plug or after the appliance has
malfunctioned, or been dropped or damaged in any manner. Contact Customer Service for examination, adjustment, repair or replacement.
17. To disconnect, turn off the wall power outlet then grasp the plug and remove from wall power socket. Never pull by the cord.
18. Leave a clear space of at least 100mm (4 inches) around the appliance when in use to allow air to flow through the vents.
19. Do not cover the appliance or put anything on top of it while in use.20. Do not use the appliance near or below curtains or other combustible materials.21. Keep the power cord, the appliance, and the metal bowl or yoghurt bowl away from hotplates,
cook-tops and burners.22. Do not use the metal bowl or yoghurt bowl with any appliance (cook-top, stove, oven, microwave
oven, etc) other than the appliance.23. Do not use accessories or attachments other than those supplied as specifically for use with the appliance.24. Do not use the appliance for any purpose other than that described in these instructions.25. Do not connect this appliance to an external timer or remote control system.26. For added safety, electrical appliances should be connected to a power outlet that is protected by a
residual current device (RCD), also often referred to as a ‘Safety Switch’. Your switchboard may already incorporate an RCD. If unsure, call an electrician for verification and fitting if necessary.
SAVE THESE INSTRUCTIONS. THIS APPLIANCE IS FOR HOUSEHOLD USE ONLY.
23
recIPes
RHIC100
InstructIons & Warranty
CuliNARY CollECTioN iCE CREAm & YoghuRT mAkER
19
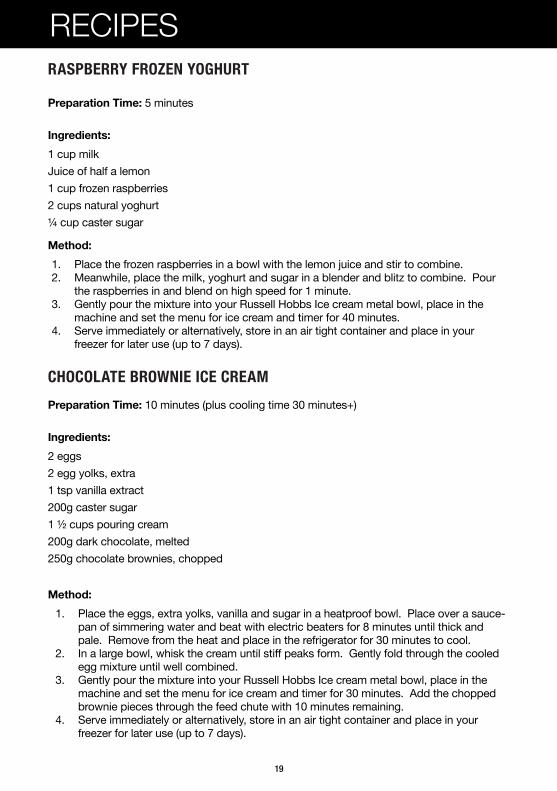
RASPBERRY FROZEN YOGHURT
Preparation Time: 5 minutes
Ingredients:
1 cup milkJuice of half a lemon1 cup frozen raspberries2 cups natural yoghurt¼ cup caster sugar
Method:
1. Place the frozen raspberries in a bowl with the lemon juice and stir to combine.2. Meanwhile, place the milk, yoghurt and sugar in a blender and blitz to combine. Pour
the raspberries in and blend on high speed for 1 minute.3. GentlypourthemixtureintoyourRussellHobbsIcecreammetalbowl,placeinthe
machine and set the menu for ice cream and timer for 40 minutes.4. Serve immediately or alternatively, store in an air tight container and place in your
freezer for later use (up to 7 days).
CHOCOLATE BROWNIE ICE CREAM
Preparation Time: 10 minutes (plus cooling time 30 minutes+)
Ingredients:
2 eggs2 egg yolks, extra1 tsp vanilla extract200g caster sugar1 ½ cups pouring cream200g dark chocolate, melted250g chocolate brownies, chopped
Method:
1. Place the eggs, extra yolks, vanilla and sugar in a heatproof bowl. Place over a sauce-pan of simmering water and beat with electric beaters for 8 minutes until thick and pale. Remove from the heat and place in the refrigerator for 30 minutes to cool.
2. Inalargebowl,whiskthecreamuntilstiffpeaksform.Gentlyfoldthroughthecooledegg mixture until well combined.
3. GentlypourthemixtureintoyourRussellHobbsIcecreammetalbowl,placeinthemachine and set the menu for ice cream and timer for 30 minutes. Add the chopped brownie pieces through the feed chute with 10 minutes remaining.
4. Serve immediately or alternatively, store in an air tight container and place in your freezer for later use (up to 7 days).
Recipes
20
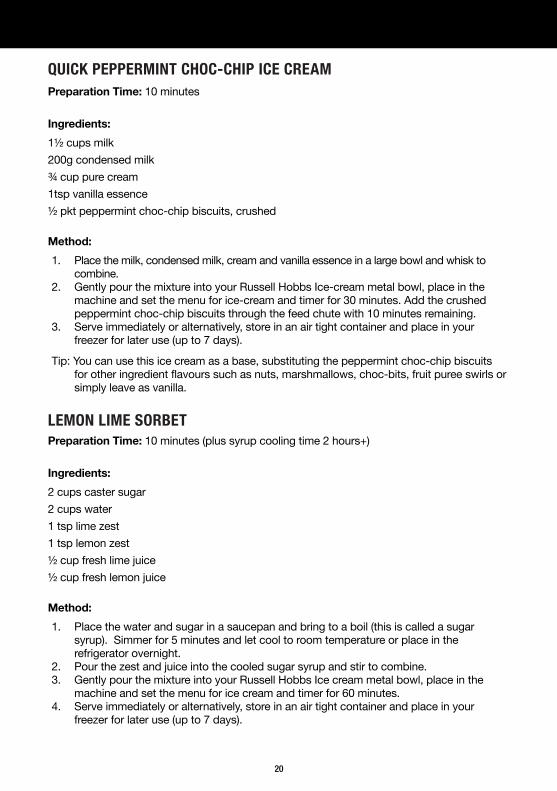
QUICK PEPPERMINT CHOC-CHIP ICE CREAMPreparation Time: 10 minutes
Ingredients:
1½ cups milk200g condensed milk¾ cup pure cream1tsp vanilla essence½ pkt peppermint choc-chip biscuits, crushed
Method:
1. Place the milk, condensed milk, cream and vanilla essence in a large bowl and whisk to combine.
2. GentlypourthemixtureintoyourRussellHobbsIce-creammetalbowl,placeinthemachine and set the menu for ice-cream and timer for 30 minutes. Add the crushed peppermint choc-chip biscuits through the feed chute with 10 minutes remaining.
3. Serve immediately or alternatively, store in an air tight container and place in your freezer for later use (up to 7 days).
Tip: You can use this ice cream as a base, substituting the peppermint choc-chip biscuits for other ingredient flavours such as nuts, marshmallows, choc-bits, fruit puree swirls or simply leave as vanilla.
LEMON LIME SORBETPreparation Time: 10 minutes (plus syrup cooling time 2 hours+)
Ingredients:
2 cups caster sugar2 cups water1 tsp lime zest1 tsp lemon zest½ cup fresh lime juice½ cup fresh lemon juice
Method:
1. Place the water and sugar in a saucepan and bring to a boil (this is called a sugar syrup). Simmer for 5 minutes and let cool to room temperature or place in the refrigerator overnight.
2. Pour the zest and juice into the cooled sugar syrup and stir to combine.3. GentlypourthemixtureintoyourRussellHobbsIcecreammetalbowl,placeinthe
machine and set the menu for ice cream and timer for 60 minutes.4. Serve immediately or alternatively, store in an air tight container and place in your
freezer for later use (up to 7 days).

21
FRENCH VANILLA ICE CREAMPreparation Time: 15 minutes (plus cooling time 2 hours+)
Ingredients:
1¼ cup pure or double cream1¼ cup milk6 vanilla beans, split, seeds scraped8 egg yolks2/3 cup caster sugar
Method:
1. Place the cream, milk and vanilla seeds in a large saucepan and bring to the boil. Reduce heat and simmer gently for 5 minutes.
2. Meanwhile, whisk together the egg yolks and sugar in a large bowl for 2 minutes or until paleandcreamy.Graduallyaddathirdofthehotliquid,mixingslowlytocombineasyou pour.
3. Returnthismixturebacktothesaucepancontainingtheremaininghotliquid.Cookover low heat for 5 minutes, stirring continuously until the mixture thickens and coats the back of a spoon (do not boil or it will curdle and turn into scrambled eggs!). Strain the custard through a fine sieve into a bowl and cool to room temperature (or place in the refrigerator overnight).
4. GentlypourthemixtureintoyourRussellHobbsIcecreammetalbowl,placeinthemachine and set the menu for ice cream and timer for 30 minutes.
5. Serve immediately or alternatively, store in an air tight container and place in your freezer for later use (up to 7 days).
CREAMY COCONUT-MANGO ICE CREAMPreparation Time: 15 minutes
Ingredients:
½ cup milk1 cup coconut milk200g condensed milk¾ cup pure or double cream1 tsp vanilla essence1 tbs desiccated coconut2 frozen mango cheeks, diced
Method:
1. Whisk all ingredients (except mango) together in a bowl.2. GentlypourthemixtureintoyourRussellHobbsIcecreammetalbowl,placeinthe
machine and set the menu for ice cream and timer for 30 minutes.3. When the machine has 10 minutes to go in the cycle, drop the mango pieces into the
mixture through the feed chute. 4. Serve immediately or alternatively, store in an air tight container and place in your
freezer for later use (up to 7 days).
Recipes
22
RUSSELL HOBBS and logo are Trade Marks of Spectrum Brands, Inc., or one of its subsidiaries. ©2013 Spectrum Brands, Inc.Recipes are to be used in conjunction with the Culinary Collection Ice Cream & Yoghurt Maker by Russell Hobbs. All rights reserved. No part of this publication may be reproduced, stored in a retrieval system or transmitted in any form or by any means, electronic, mechanical, photocopying, recording or otherwise, without prior permission of the copyright owner.
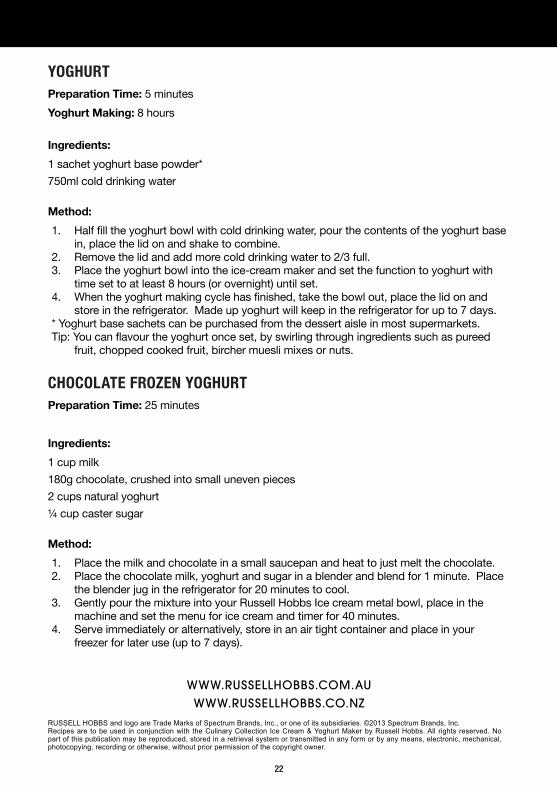
YOGHURT Preparation Time: 5 minutes Yoghurt Making: 8 hours
Ingredients:
1 sachet yoghurt base powder*750ml cold drinking water
Method:
1. Half fill the yoghurt bowl with cold drinking water, pour the contents of the yoghurt base in, place the lid on and shake to combine.
2. Remove the lid and add more cold drinking water to 2/3 full.3. Place the yoghurt bowl into the ice-cream maker and set the function to yoghurt with
time set to at least 8 hours (or overnight) until set.4. When the yoghurt making cycle has finished, take the bowl out, place the lid on and
store in the refrigerator. Made up yoghurt will keep in the refrigerator for up to 7 days.* Yoghurt base sachets can be purchased from the dessert aisle in most supermarkets. Tip: You can flavour the yoghurt once set, by swirling through ingredients such as pureed
fruit, chopped cooked fruit, bircher muesli mixes or nuts.
CHOCOLATE FROZEN YOGHURTPreparation Time: 25 minutes
Ingredients:
1 cup milk180g chocolate, crushed into small uneven pieces2 cups natural yoghurt¼ cup caster sugar
Method:
1. Place the milk and chocolate in a small saucepan and heat to just melt the chocolate.2. Place the chocolate milk, yoghurt and sugar in a blender and blend for 1 minute. Place
the blender jug in the refrigerator for 20 minutes to cool. 3. GentlypourthemixtureintoyourRussellHobbsIcecreammetalbowl,placeinthe
machine and set the menu for ice cream and timer for 40 minutes.4. Serve immediately or alternatively, store in an air tight container and place in your
freezer for later use (up to 7 days).
WWW.russellhobbs.com.auWWW.russellhobbs.co.nz