Embed Size (px)
Citation preview

Revitalize Portraits with FaceFilter StudioFaceFilter Studio is part of the Roxio Creator suite. With FaceFilter Studio, you can transform, rejuvenate, and revitalize your portraits. Turn frowns into smiles with the expression editor, vanish wrinkles with the skin !lter, create fake tans, erase skin blemishes with the smoothing brush and much more. Let’s try it.
Getting Started: 1. Open your photo. First, launch FaceFilter from the Roxio folder in the Programs menu.
Then open a photo portrait by clicking the Folder icon at the top of the toolbar at left.
2. De!ne the face. The next thing to do with any photo in FaceFilter is to de!ne the facial area. This helps to separate out one face from multiple faces in a photo, and also allows you to rotate and zoom it for easier editing. Select the Face button (second from top in the toolbar at left) and then draw a box around the face. Her head is tilted, so we'll rotate the box a bit by dragging the corner handle. You can also resize the box with the handles (hover over them and they will change from rotation to resizing) and move it around by dragging in the middle. You want to end up with a box that !ts tightly around the face, as below. Before we move on, take a look at the other tools on the left. You can adjust color, balance and exposure, and !x red-eye. You can also zoom in to see more detail.
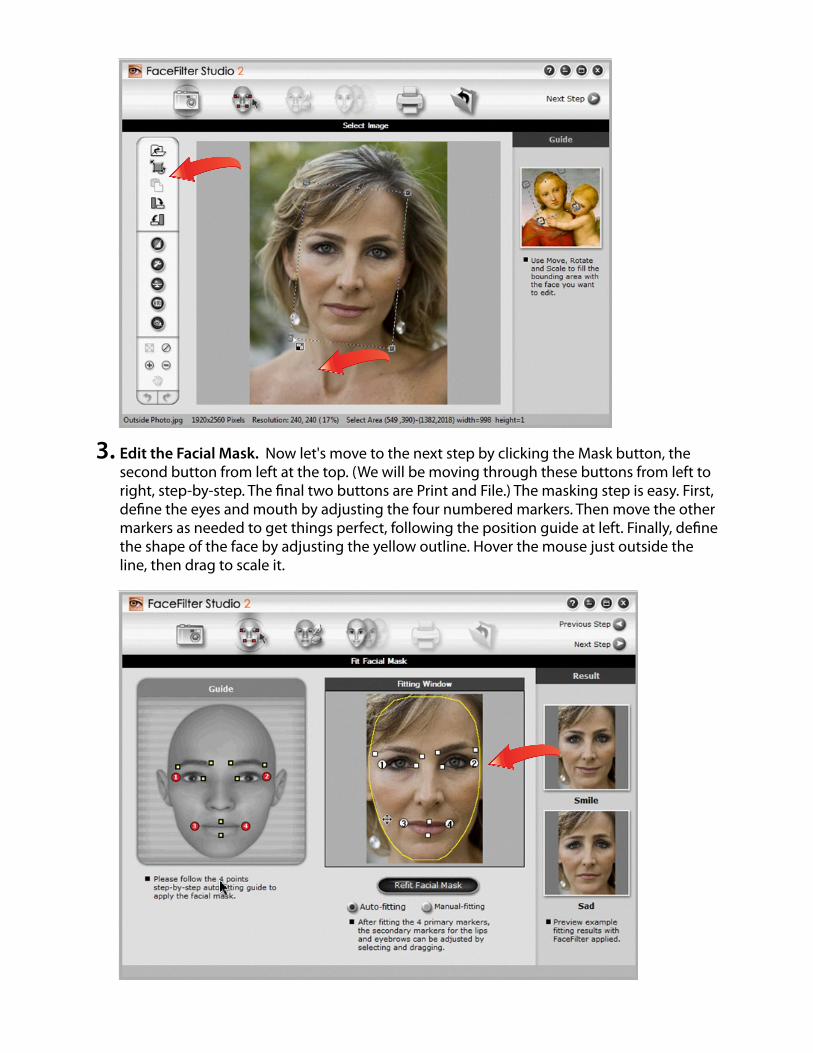
3. Edit the Facial Mask. Now let's move to the next step by clicking the Mask button, the second button from left at the top. (We will be moving through these buttons from left to right, step-by-step. The !nal two buttons are Print and File.) The masking step is easy. First, de!ne the eyes and mouth by adjusting the four numbered markers. Then move the other markers as needed to get things perfect, following the position guide at left. Finally, de!ne the shape of the face by adjusting the yellow outline. Hover the mouse just outside the line, then drag to scale it.
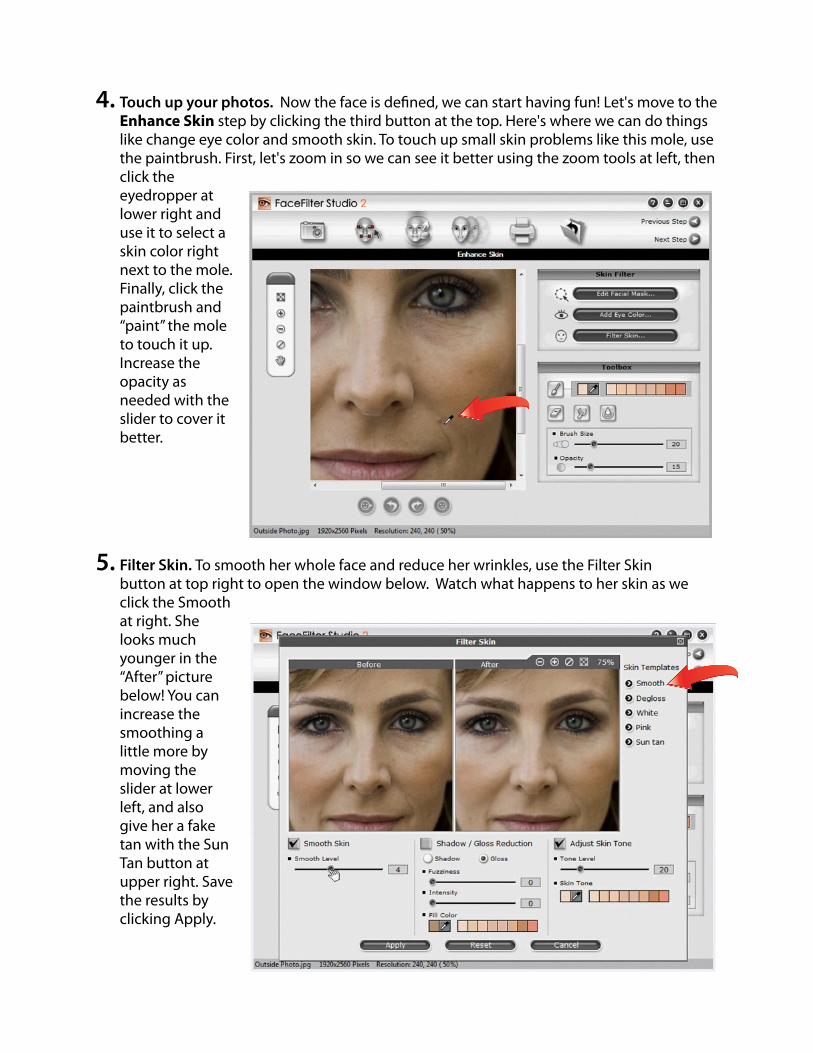
4. Touch up your photos. Now the face is de!ned, we can start having fun! Let's move to the Enhance Skin step by clicking the third button at the top. Here's where we can do things like change eye color and smooth skin. To touch up small skin problems like this mole, use the paintbrush. First, let's zoom in so we can see it better using the zoom tools at left, then click the eyedropper at lower right and use it to select a skin color right next to the mole. Finally, click the paintbrush and “paint” the mole to touch it up. Increase the opacity as needed with the slider to cover it better.
5. Filter Skin. To smooth her whole face and reduce her wrinkles, use the Filter Skin button at top right to open the window below. Watch what happens to her skin as we click the Smooth at right. She looks much younger in the “After” picture below! You can increase the smoothing a little more by moving the slider at lower left, and also give her a fake tan with the Sun Tan button at upper right. Save the results by clicking Apply.
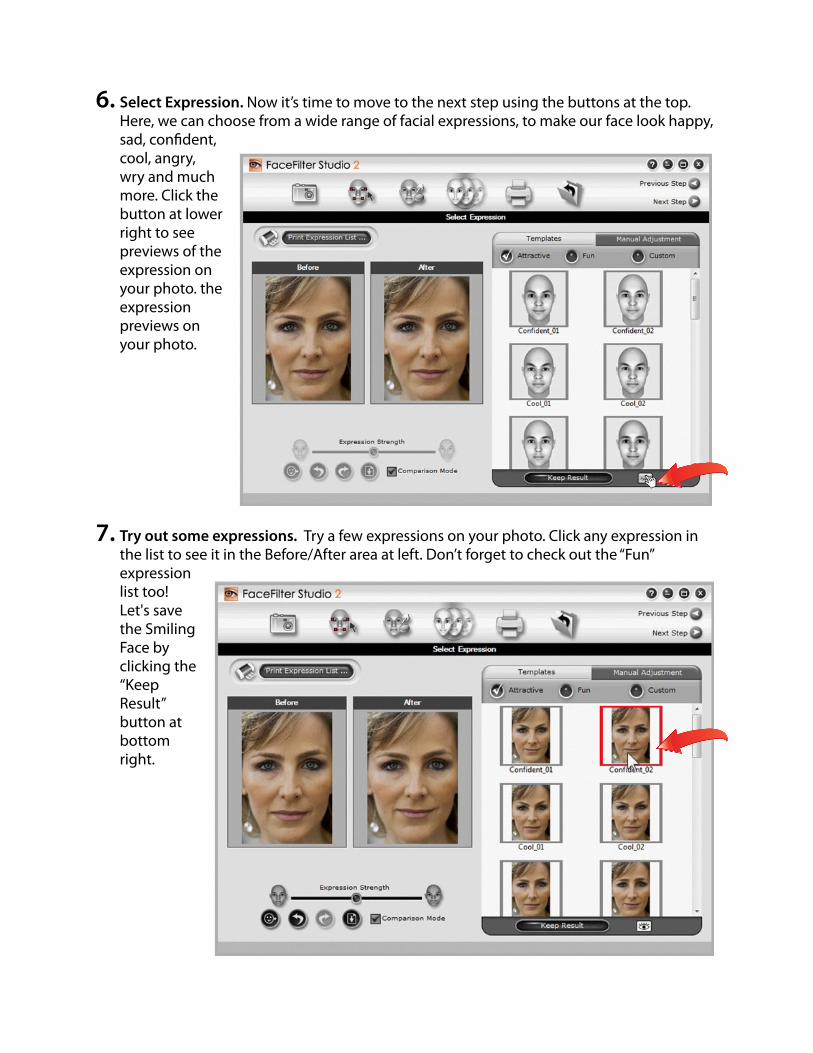
6. Select Expression. Now it’s time to move to the next step using the buttons at the top. Here, we can choose from a wide range of facial expressions, to make our face look happy, sad, con!dent, cool, angry, wry and much more. Click the button at lower right to see previews of the expression on your photo. the expression previews on your photo.
7. Try out some expressions. Try a few expressions on your photo. Click any expression in the list to see it in the Before/After area at left. Don’t forget to check out the “Fun” expression list too! Let's save the Smiling Face by clicking the “Keep Result” button at bottom right.
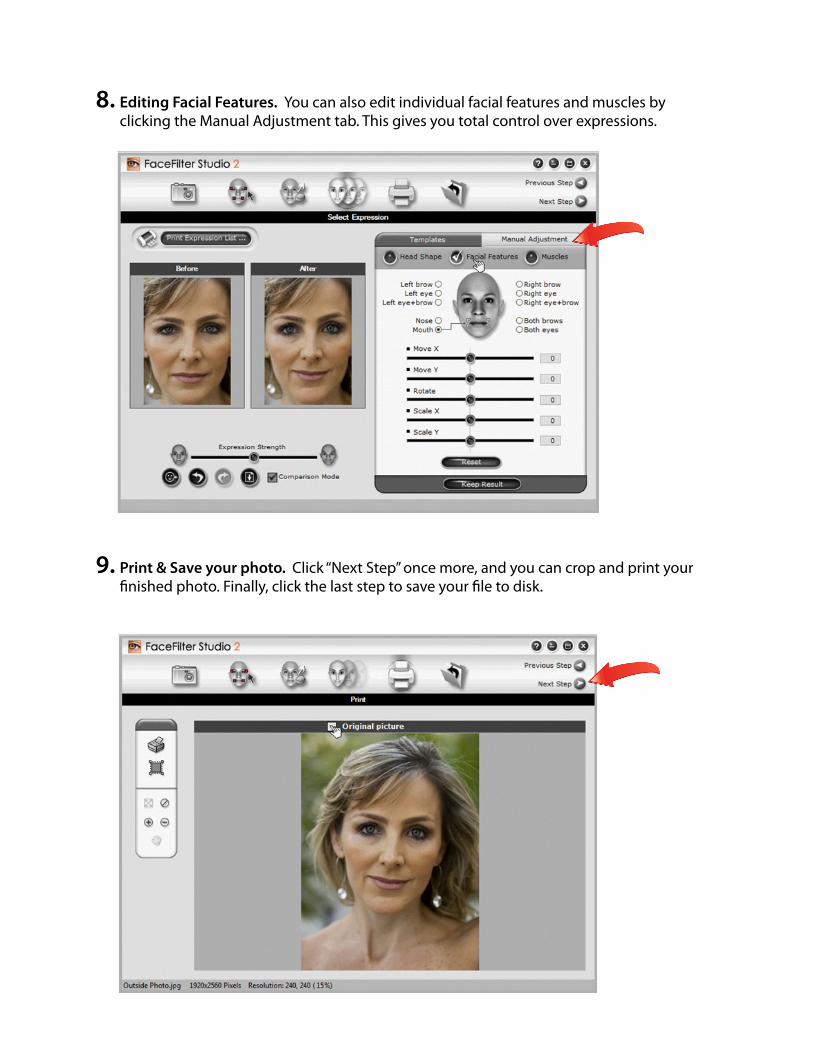
8. Editing Facial Features. You can also edit individual facial features and muscles by clicking the Manual Adjustment tab. This gives you total control over expressions.
9. Print & Save your photo. Click “Next Step” once more, and you can crop and print your !nished photo. Finally, click the last step to save your !le to disk.
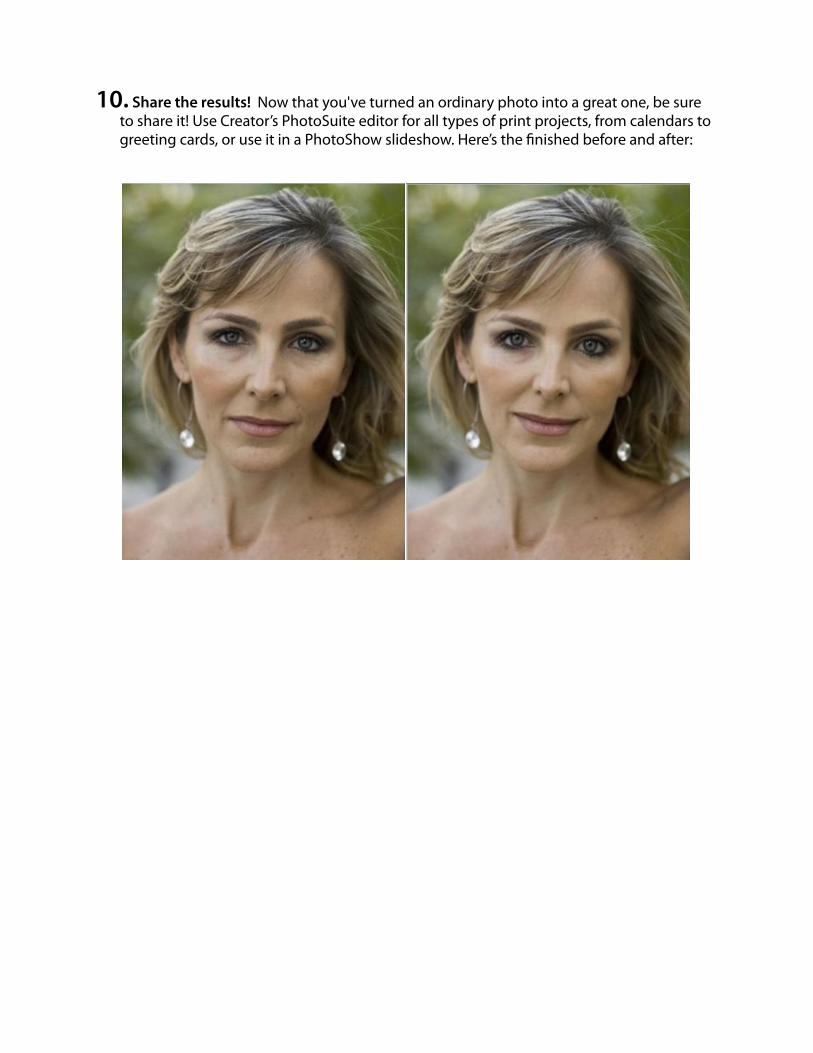
10. Share the results! Now that you've turned an ordinary photo into a great one, be sure to share it! Use Creator’s PhotoSuite editor for all types of print projects, from calendars to greeting cards, or use it in a PhotoShow slideshow. Here’s the !nished before and after: